Vegan Chocolate Bourbon Pecan Pie Cake

Vegan Chocolate Bourbon Pecan Pie Cake

Ever find yourself in a situation where you are torn between eating or baking a pie or cake.? Like you want a flakey, buttery pie, with a gooey center, but you also are craving a delicious, moist, fluffy cake? Well it may not be the answer to world peace, but we have certainly solved the cake or pie conundrum.

You see, we simply baked a pie, then nestled it inside of a cake. On the outside this just looks like your run of the mill, homemade cake, but once you cut into it, you quickly realize there is a delicious and expected hidden surprise. Inside of this perfect vegan chocolate cake, is an even more perfect chocolate bourbon pecan pie! Don’t pass out! I know how amazing this is! I truly do!

Once upon a time when we were not vegan, and watched a lot of Food Network late at night, my husband and I saw a guy dropping pies into all kinds of cakes. MULTI TIERED PIE FILLED CAKES. Y’all, I don’t have that kind of time on my hands but I can 100% pull off one single layer of pie cake. After watching this magic go down on TV we went right to the kitchen and baked our first pie cake for a pot luck for my husband’s work. It was a hit!

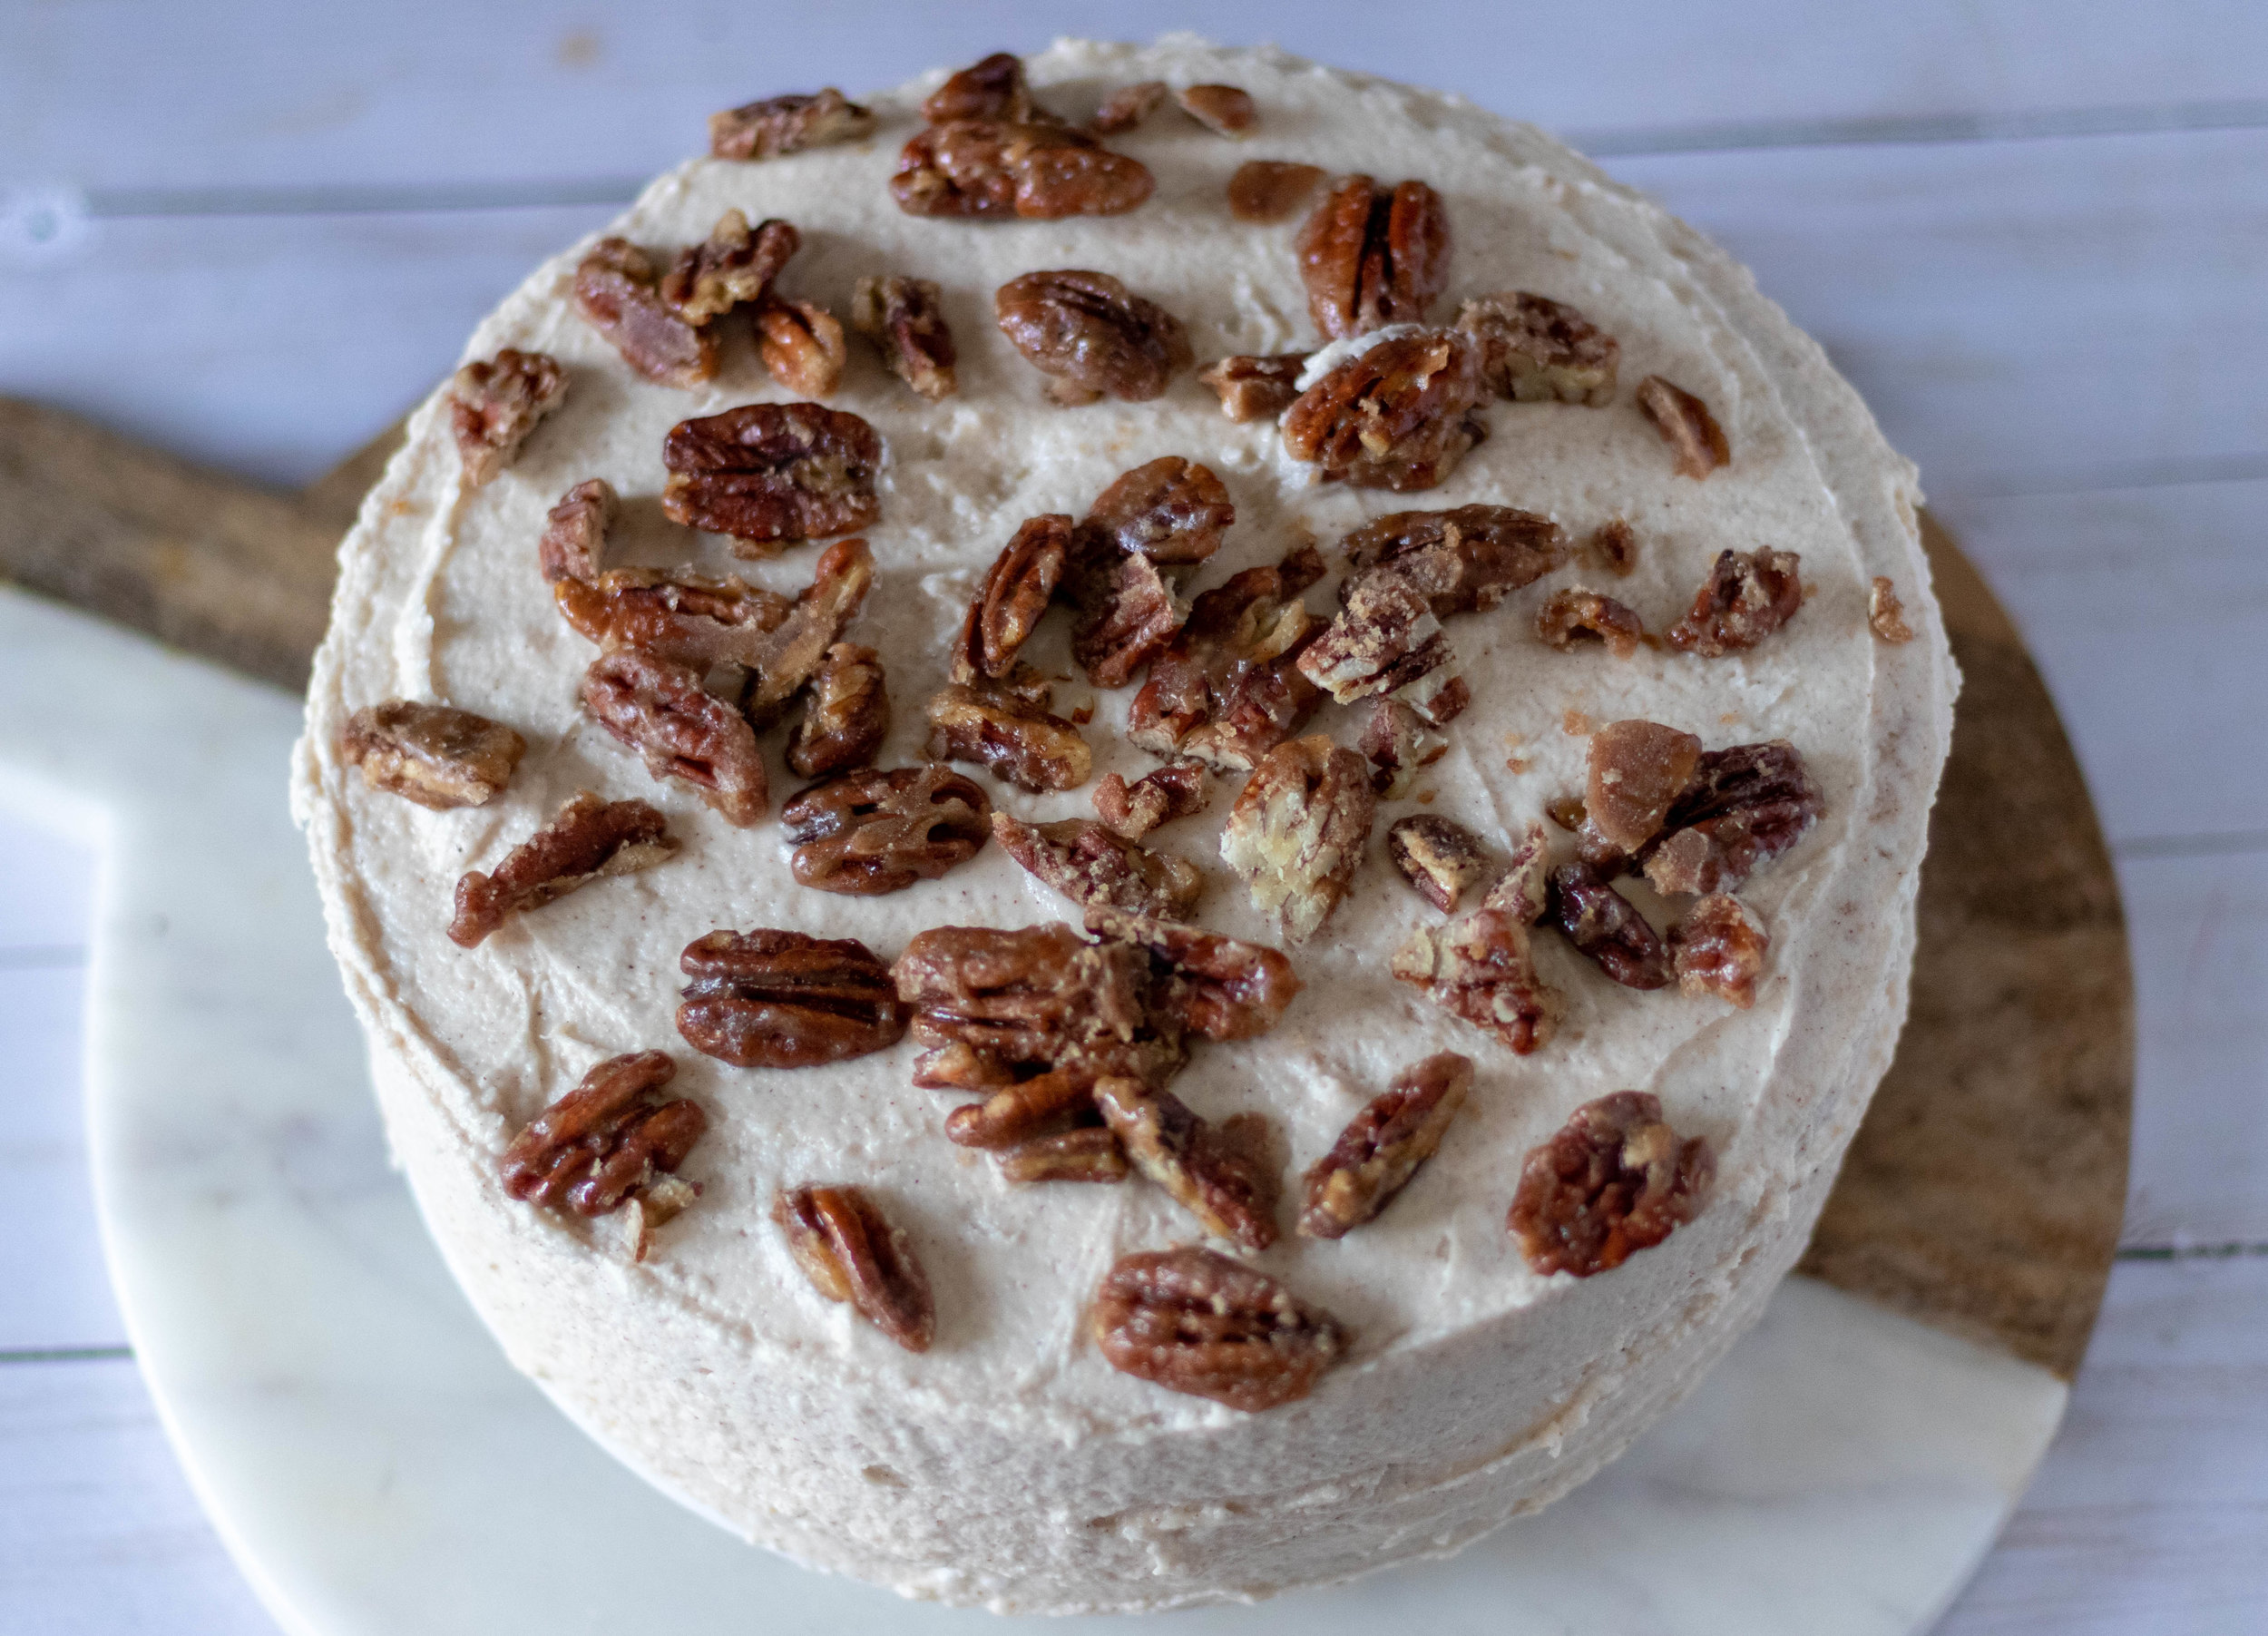
Then like most things, I forgot all about it. Until the other day when I remembered, like 10 years later, but thank the good lord I did. The first time we just bought a pecan pie from the grocery store. Sadly vegan pies are not a dime dozen at most local grocery stores, so our amazing pie baking daughter baked up a delicious mini chocolate bourbon pecan pie. It is seriously one of the best things ever all by itself, but its mind blowing inside of my favorite chocolate cake recipe, iced with vegan vanilla bourbon butter cream!!

I guarantee if you roll into a holiday party, or any party for that matter with this cake, you will be everyone’s favorite person, at least for the day!! Now you never have to toil over whether to bake a cake or pie, because now, you can just bake them both all rolled into one.

Lets all take a moment to reflect on this reality, and to give a big round of applause to whoever that dude was on the Food network that originally created the amazing madness! And get ready for like a million hugs and high fives once everyone realized there is a pie in that cake!


INGREDIENTS:

You will need an 8 inch diameter, deep cake pan, and a 6 inch pie pan

CHOCOLATE BOURBON PECAN PIE:

  • 1 store bought vegan pie dough

  • 1 1/4 cups chopped pecans

  • 3 tablespoons coconut oil

  • 1/2 cup plus 2 tablespoons maple syrup

  • 1/3 cup brown sugar

  • 3 tablespoons all purpose flour

  • 1 tablespoon dark cocoa powder

  • 2 tablespoons bourbon

  • 1/4 teaspoon salt

  • 1/3 cup water

  • 1 teaspoon vanilla extract

CHOCOLATE CAKE:

  • 2 cups all purpose flour

  • 2 cups granulated sugar

  • 3/4 cup dark cocoa powder

  • 1 1/2 cups whipped aquafaba (chickpea liquid that has been whipped with cream of tarter resembling whipped egg whites)

  • 1 teaspoon baking soda

  • 3 teaspoons baking powder

  • 1 teaspoons salt

  • 1/2 cup neutral oil (I use Grape seed oil)

  • 1 cup brewed coffee

  • 1 cup plant based milk (I like oat milk for baking) plus 1 teaspoon apple cider vinegar

  • 1 teaspoon vanilla extract

BOURBON BUTTERCREAM:

  • 1/4 cup vegan butter

  • 1/4 cup vegan shortening

  • 1 teaspoons vanilla extract

  • 2 tablespoons bourbon

  • 3ish cups powdered sugar

  • pinch of salt

vegan-chocolate-bourbon-pie-cake-filling.jpg
vegan-chocolate-bourbon-pecan-pie-cake.jpg

INSTRUCTIONS:

  1. Preheat oven to 275 degrees. Allow pie dough to come to room temperature. Roll the dough out to about 1/4 inch thick and place inside the pie pan. Cut off the excess dough. You don’t need the crust to be pretty since it’s just going into a cake. Pop the pie crust into the oven and let bake.for about 10 minutes. * not all pie dough is vegan. You just have to read the ingredients. I have found several brands that are. You can also buy a frozen pie crust and just let it thaw then remove it from its pan. Sometimes I have more luck finding vegan crust in the freezer section than the refrigerator section.

  2. In a large sauce pan, heat oil over medium heat. Whisk in the flour and cocoa and cook for about 2 minutes, whisking the whole time. Continue whisking while adding the maple syrup, sugar, water, and salt. Cook until the sugar has dissolved. Bring mixture to a boil then lower the heat to low, stirring occasionally for about 5 minutes until thickened. Remove from heat and stir in pecans, vanilla, and bourbon.

  3. Pour mixture into the crust. You can add extra pecans around the edge it you like.

  4. Bake the pie for 45 - 55 minutes. If the edge seems to be getting too brown, cover the edge with aluminum foil for the remainder of the bake time.

  5. Place the pie on a wire cooling rack and allow it to cool completely. Once the pie is totally cool, place a plate over the top of the pie and flip it over. The pie should come out onto the plate. Put another plate on the bottom of the pie and flip again. Now you should have the pie upright on a plate!

  6. To make the cake: Preheat oven to 350 degrees. In a large bowl, mix together flour, sugar, cocoa powder, baking powder, baking soda, and salt.

  7. In the bowl of your stand mixer, or another large bowl if using a hand mixer, add the milk, oil, brewed coffee, and vanilla. Slowly pour in the dry ingredients and mix until well combined. Once the batter is all mixed up, slowly fold in the whipped aquafaba using a rubber spatula, just until incorporated. Do not over mix, this deflates the aquafaba, resulting in a less fluffy cake.

  8. Grease and lightly flour one 8 inch cake pan that is rather deep. It needs to be deep enough to hold all of the cake batter.

  9. Pour about 1/3 of the batter into the bottom of the pan, then nestle the pie carefully into the center of the cake batter. Pour the remaining batter over the top.

  10. Place the pan on the top rack of your oven and bake for 45 minutes to 1 hour, or until a tooth pick comes out clean when poked into the cake. You might have to poke away from the center a bit because the pie is gooey and will trick you into thinking the cake is not done!

  11. Once cake is finished baking, place it on a cooling rack to cool completely before turning over onto a serving plate or cake board and frosting.

  12. To prepare the frosting, beat the butter, and shortening together in a stand mixer, or in a large bowl, using your electric hand mixer. Once the mixture is completely creamy, beat in the vanilla and bourbon. Slowly begin to beat in the powdered sugar, and mix until there are no more lumps. If the frosting seems too thick, you can add a few more drops of bourbon to thin it back out. Nobody is gonna be mad about it.

  13. Cover the cake with the frosting and decorate with some pecan halves if you like. Slice pie cake to serve. Store leftovers in the fridge or at room temperature in an airtight container.

If you like this recipe, try these:

Vegan Chocolate Bourbon Pecan Pie Cake

Vegan Turkey Style Roast with Crispy Skin

Vegan Turkey Style Roast with Crispy Skin

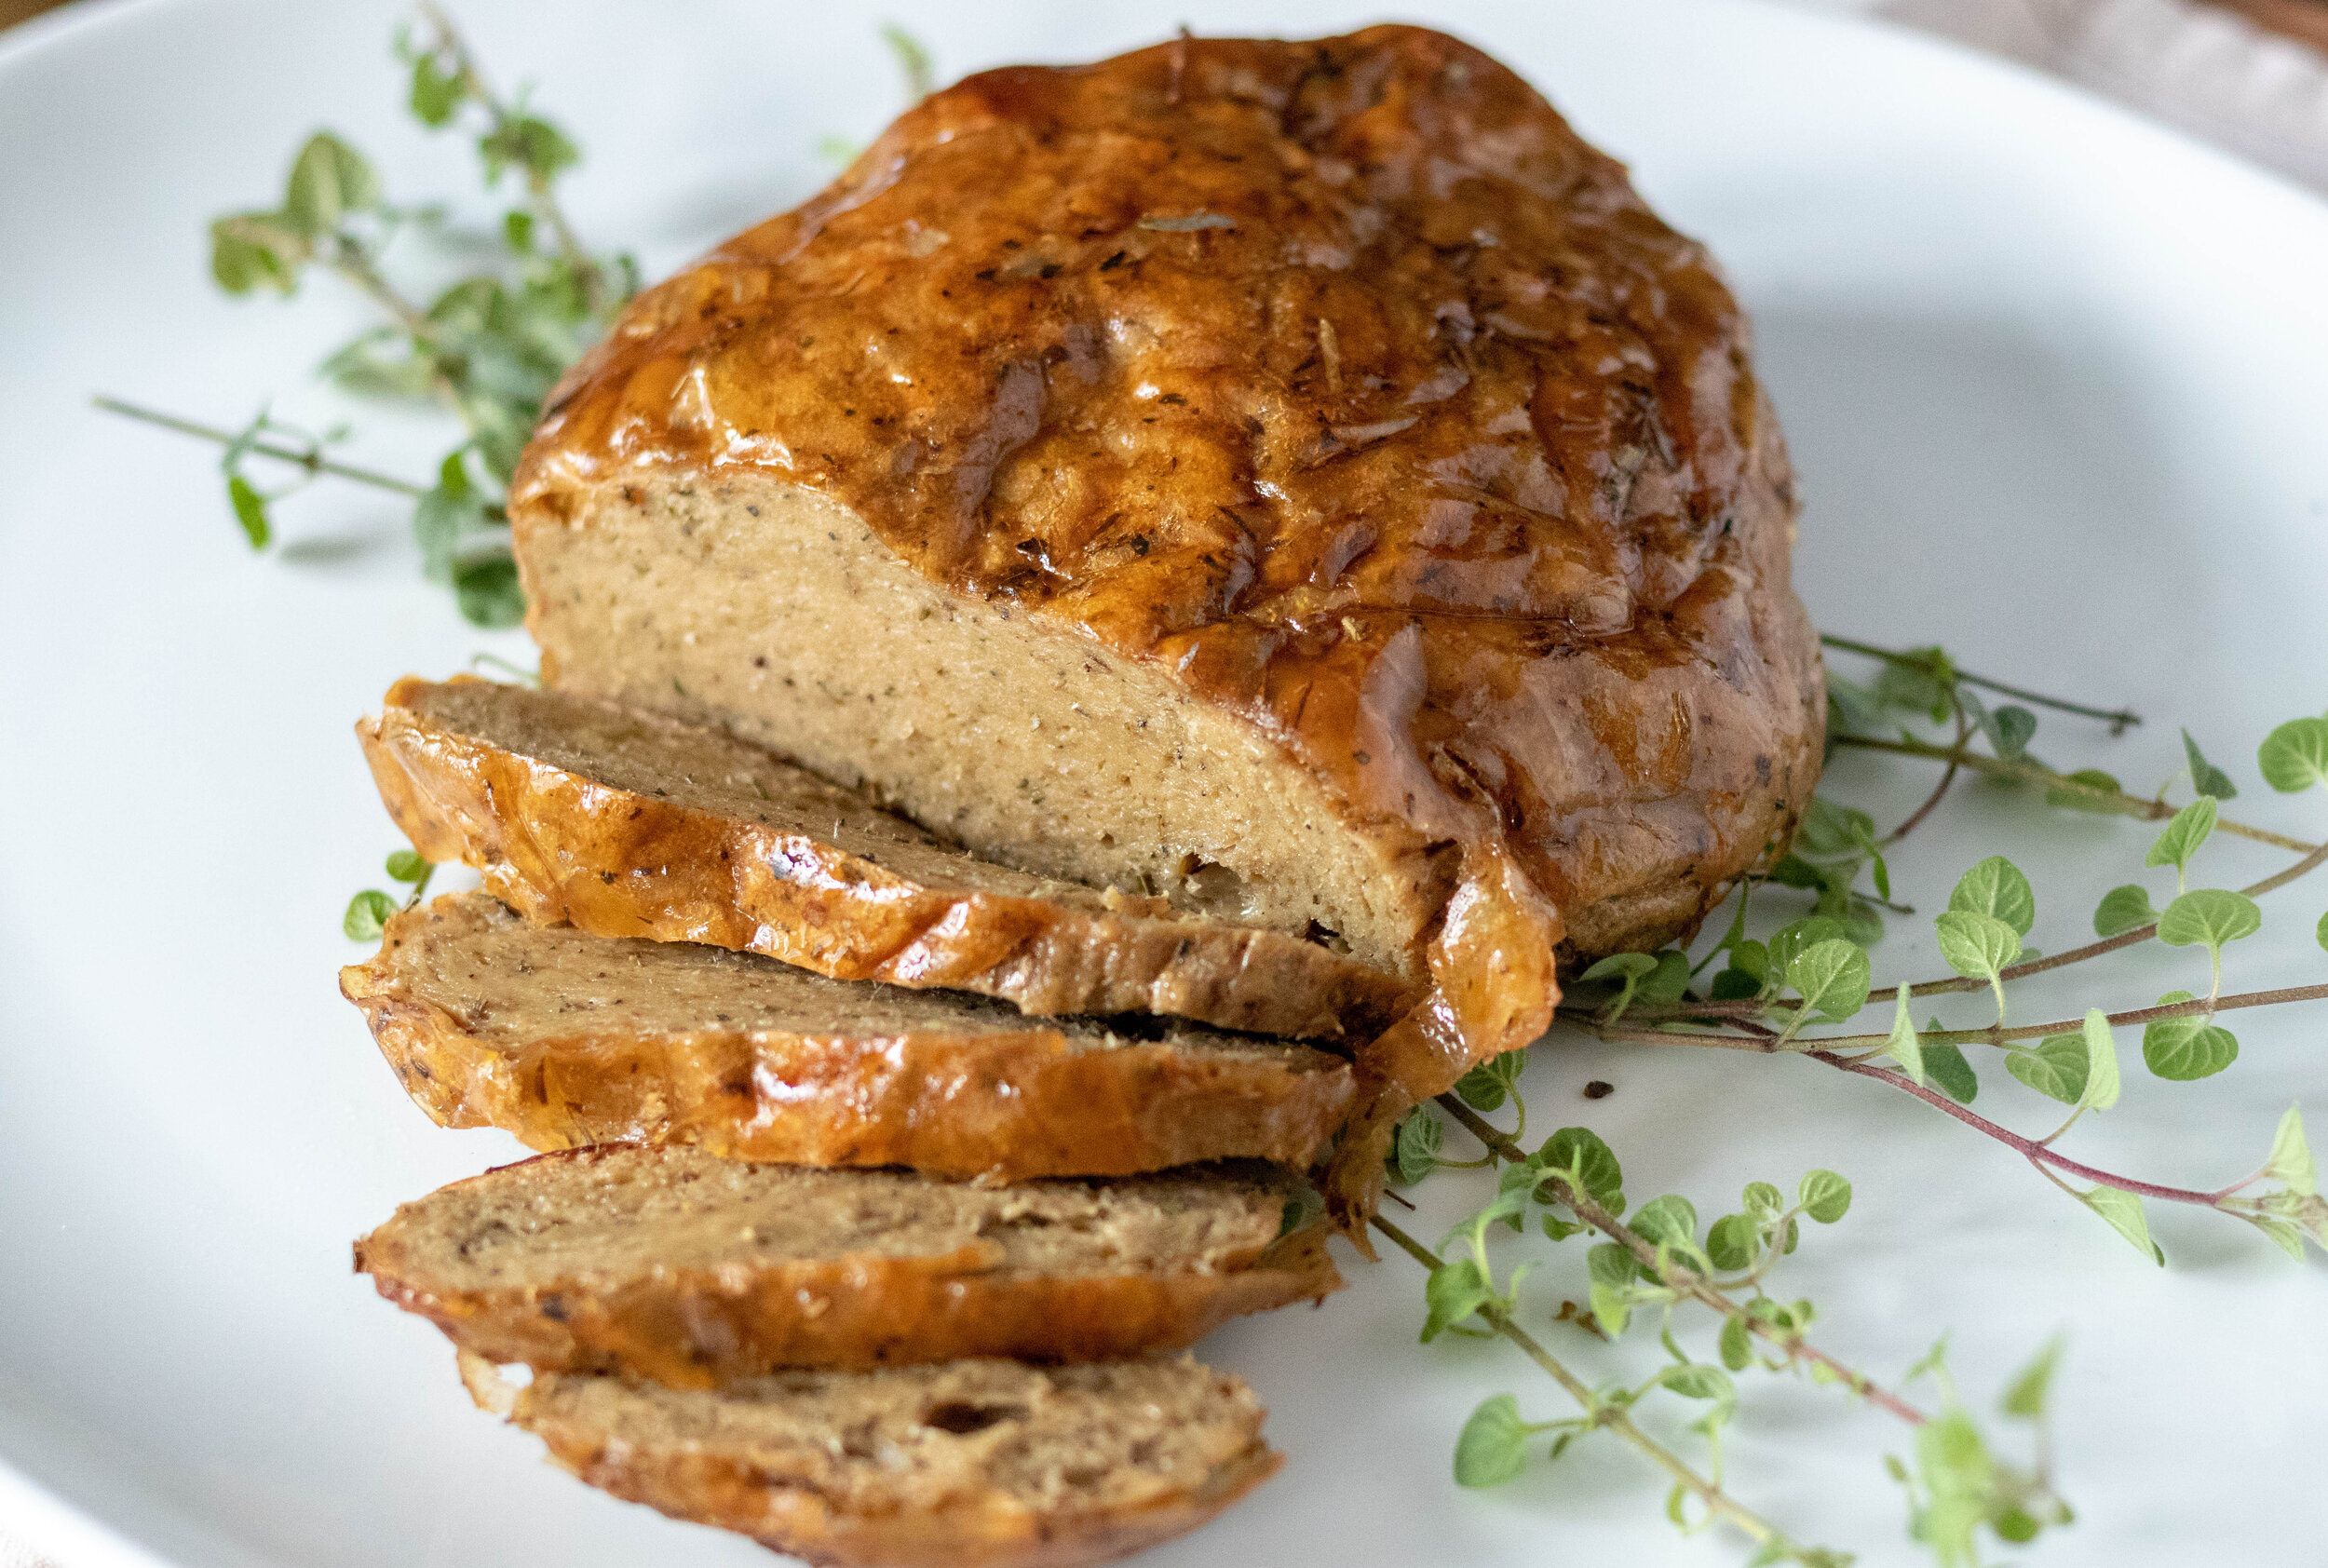
I have made many a vital wheat gluten roast in my time, yet they have always been more in the faux beef or pork family. This year for the holidays, I tried experimenting with more of a turkey style roast, and was pretty happy with the outcome.

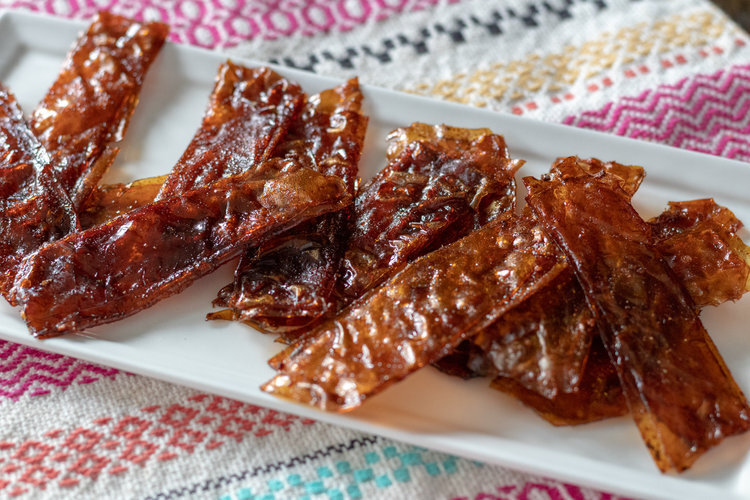
This time I used rice paper to help create a crispy “skin” on the roast and I tell ya, that’s my favorite part! You can serve this roast right out of the oven, or let it rest in the fridge for a day to firm up some. I totally sliced and ate some when we are taking pics right out of the oven, and it was delicious! It would have been even more delicious on a pile of mashed potatoes covered in gravy, and that is my Thanksgiving plan!

If you let the roast rest in the fridge to firm up, the skin will lose its crispness, and you have to reheat it to get the skin to crisp back up, not unlike real meat. So, you can allow it to rest and pop it back in the oven to allow the skin to get crispy again, or slice the roast and reheat it in a pan, which is what I like to do for sandwiches.

In this recipe we use Herbs de Provence. This is a French herb blend that is pretty similar to poultry seasoning but with a few additional herbs. I LOVE it and use it in all kinds of recipes. I have added a link to amazon so you can give a look if you haven’t seen it before, but you can find it pretty easily in the spice section of most grocery stores now, and even Trader Joe’s now sells it.

If you do not have a food processor, you can still make this recipe. You would at least need to blend the onion and jackfruit in a blender to get it very broken down, then add it along with the other ingredients to a large bowl and knead by hand for about 5 minutes

Even if the ingredients are new and seem intimidating, making seitan (vegan meats from vital wheat gluten) is really as easy as making a simple dough. I promise!!! And if you have a food processor it’s really ridiculously easy. Here’s a video that explains the entire process.

Making your own vegan meat is also really affordable, which is another bonus! Try this recipe to use for lunch meat slices or as a holiday main dish, either way you will likely be surprise just how easy and delicious making you own vegan meat can be!

Vegan Turkey Style Roast with Crispy Skin

INGREDIENTS:

You will need aluminum foil, and a baking sheet for this recipe

  • 1 can jackfruit in brine

  • 1/2 small yellow onion

  • 1 1/3 cup vital wheat gluten

  • 1/3 cup tapioca starch

  • 1/4 cup nutritional yeast

  • 1 teaspoon liquid smoke

  • 1 teaspoon dried sage

  • 1 teaspoon onion powder

  • 2 teaspoons Herbs de Provence, or Poultry spice

  • 1 teaspoon minced garlic

  • 1 teaspoon salt

  • 1/2 teaspoon pepper

  • 2-3 teaspoons water if needed

RICE PAPER SKIN:

  • 2 tablespoons white wine

  • 3 tablespoons water

  • 2 teaspoons Herbs de Provence

  • 1 teaspoon Vegetable Better than Bouillon

  • 3 sheets rice paper

Vegan Turkey Style Roast with Crispy Skin

INSTRUCTIONS:

preheat oven to 350 degrees.

  1. In a food processor, add the drained and rinsed jackfruit, and the 1/2 onion. Process for a few minutes until the onion and jackfruit are finely minced, almost mushy.

  2. Add in the remaining ingredients except the water. Process for several minutes. You want the mixture to come together into a dough you can handle. Allow the food processor to run for a full minute or two to knead the dough. If it seems too dry and is crumbly, add in some water until it comes together.

  3. After the dough has hung out in the food processor for several minutes, remove and place onto a clean dry surface. Continue to knead the dough while forming it into a smooth oval shape.

  4. Spray a large piece of aluminum foil with spray oil, or brush the foil with some oil. This step is important because the oil is going to prevent the roast from sticking to the foil.

  5. Add all of the ingredients for the rice paper skin, except the rice paper, to a shallow dish or pie pan and whisk. Place one sheet of rice paper into the liquid and let it sit there until it becomes completely soft. This takes several minutes. Gently lift the rice paper from the dish and place it in the middle of the foil. Place the “turkey” roast on top of the paper and fold the edges of the rice paper up around the roast. Continue with the other 2 pieces of rice paper just the same as the first, draping each one over the top of the roast and tucking or pressing the edges of the paper around the roast. The paper should be very soft and sticky, and cling well to the roast.

  6. Fold up the sides of the foil making a pouch, pinching the foil together well along the top to form a tight seal, and twisting the ends of the foil. Place the pouch on a baking sheet in the oven on the top rack. Allow the roast to bake in the sealed pouch for half and hour. After half an hour, carefully remove the roast from the oven and open the pouch, making sure the tops and sides of the roast are exposed. If you sprayed the foil well the rice paper should not be sticking too badly to the foil. If it is, gently pull it away form the foil and push torn rice paper back into the roast. Give the top of the roast a spray of oil or light brushing and return it to the oven for another 40 minutes.

  7. I suggest letting the roast cool and firm up at least over night in the refrigerator wrapped back up in the foil pouch or in an airtight container. When ready to serve the roast just pop it back in the oven on a baking sheet at 350 for 15 minutes or so to warm and crisp the skin back up. You can also slice the cold roast and reheat the slices in the pan. You can serve the roast immediately after cooking it, but I will not be as firm as it would be if you allow it to rest.

If you like this recipe, try these:

Vegan Turkey Style Roast with Crispy Skin

Vegan Potato Leek Soup

Vegan Potato Leek Soup

Maybe you have noticed if you have ever scanned our soup category that I lean more towards thick creamy soups or stews.

I have nothing against a brothy soups, I just like my soup to have a little more bite. I need it to fill me up and not have me looking for a second dinner 30 minutes later!

I have loved potato soup for as long as I can remember! It wasn’t until I was a teenager that a family friend taught me how to easily clean leeks. Up until that point I just didn’t add them to potato soup or anything else because they were a sandy, dirty, hassle. Soak them in cold water and all the dirt and sand falls to the bottom of the bowl!! GENIUS!

Now I wouldn’t dream of making potato soup without leeks.

A lot of people only use the white part of the leek in soup recipes, but I use the WHOLE thing! Even though it gives my soup a green tent, who cares! Leeks have so many health benefits, so I say, use the whole dang thing!

This vegan Potato Leek Soup is one of my all time favorite soups, and it so easy to make! This soup is super healthy and very filling, making it the perfect easy comfort food any time you have a carving!


INGREDIENTS:

  • 6 medium russet potatoes, peeled and diced

  • 3 medium leeks

  • 8 cups water, divided

  • 1 teaspoon Vegetable Better Than Bouillon

  • 2 teaspoons minced garlic

  • 1/4 cup nutritional yeast

  • 1/2 cup unsalted cashews

  • 2 teaspoons dreid thyme

  • 1-2 teaspoons salt

  • 1/2 teaspoon black pepper

  • 2 bay leaves

Vegan Potato Leek Soup on a spoon

DIRECTIONS:

  1. Place cashews in a microwave safe container, covered with water. Microwave for 3 minutes. If you do not have microwave you soak the cashews in hot water for a few hours or even bring them to a boil in a small pot for a few minutes. Drain cashews once soft and set aside.

  2. Leeks are pretty hard to get clean, but I have a trick to help you clean them! Fill a large bowl with cold water. Dice the dirty leeks into rings, greens included, and drop them in the bowl of cold water . Let them float in the cold water for a few minutes, swooshing them around with your hands a few times, and the dirt and sand will fall to the bottom of the bowl. And just like that, you have clean leeks!

  3. Heat a large pot over medium heat, adding a few teaspoons of oil or vegan butter to the bottom of the pan ( you can omit the oil if you are oil free) along with a teaspoon of Better than Bouillon. Add the leeks to pot and let them cook until they become soft. Leave the leeks in the pot and fill it with 6 cups of water. Allow the water to come to a boil then add the potatoes. Let the potatoes cook unit they are soft and can be pierced with a fork. Turn the heat off on the stove.

  4. Once the potatoes are soft, use a slotted spoon to scoop out the potatoes and leeks from the pot and transfer them to a blender or food processor, along with a few cups of the boiling liquid. Blend unit the potatoes and leeks are fairly smooth, I often just pulse mine because I still like some chucks of potatoes in my soup. Just blend until you reach your desired consistency. Return the mixture back to the pot with the remaining boiling liquid.

  5. Add the soaked cashews along with 2 cups of water, garlic, thyme, salt, pepper, and nutritional yeast to a blender or food processor. Blend unit completely smooth. Pour the mixture into the pot with the potatoes and stir well. Turn the stove back on to medium/ low heat and add in the bay leaves. Let the soup simmer, stirring occasionally for 20-20 minutes.Remove the bay leaves before serving.

  6. Garnish with basil or more thyme and serve.

If you like this recipe, try these:

Vegan Potato Leek Soup

Vegan Maple Pecan Blondies

Vegan Maple Pecan Blondies

If given the option of a brownie or a blondie, I think I would choose a blondie every time. Especially a maple pecan blondie.

Maybe its all the butter, and the gooey, chewy center? I don’t know, I just love them.

Don’t get me wrong, I love brownies too, I just think that blondies don’t get enough attention!

Our daughter, Peyton, is the best blondie baker which works out well for my stomach! These Vegan Maple Pecan blondies are perfect for the fall holidays, and work well for potlucks and bake sales.

We baked these in an 8x8 pan and got some nice big blondies. You can just was easily bake them in a 9x13 pan, they just won’t be as thick, but you would certainly end up with more if you planned on sharing them!

If you are in the camp that always bakes brownies and never blondies, tis the season to show these underrated treats some love! I can't imagine you would be sad you did! And if for some reason you don’t love these blondies, just go ahead and mail them to me!


INGREDIENTS:

  • 1 1/2 cup vegan butter, softened

  • 1 3/4 cups granulated sugar

  • 2 flax eggs (2 tablespoons ground flax, 6 tablespoons water)

  • 2 starch eggs (2 tablespoons starch, like tapioca, 6 tablespoons water)

  • 3 cups all purpose flour

  • 1 teaspoon baking powder

  • 1 teaspoon salt

  • 1/2 cup maple syrup

  • 1 teaspoon vanilla extract, or vanilla bean paste

  • 1 1/4 cups chopped pecans, divided

INSTRUCTIONS:

Preheat oven to 350 degrees

  1. In a stand mixer, or large bowl if using a hand mixer, beat flax eggs, starch eggs, and sugar for a a few minutes.

  2. Whisk flour, salt and baking powder together in a separate bowl.

  3. Beat the butter into the sugar and “egg” mixture, then add the flour mix a little at a time while beating each addition in.

  4. Slowly beat in the maple syrup and vanilla, mixing just until combined.

  5. Fold in 1 cup of the pecans.

  6. Line an 8x8 baking pan with parchment paper, or coat in vegan butter and a little flour. Shake the excess flour from the pan. Pour batter into the pan and top with the remaining 1/4 cup of pecans.

  7. Bake on the middle oven rack for 35-40 minutes ( bake time will depend on pan size) or until a tooth pick or skewer inserted in the middle comes out clean. Transfer to a wire cooling rack and allow the blondies to cool completely before cutting.

If you like this recipe, try these:

Vegan Maple Pecan Blondies

Vegan Meatloaf Stuffed Peppers with Beyond Meat

Vegan Beyond Meatloaf Stuffed Peppers

The other day I was sitting, staring off into space, when one of my kids started talking to me about meatloaf. I was actually deep in thought, thinking about the lasagna stuffed peppers I love so much, and when the kid said meatloaf, it came to me like a bolt of lightening; stuff the peppers with Beyond Meatloaf! What!?!?!?

It was one of those serendipitous moments in life. I ran right outt to the store to grab peppers. I had those babies stuffed and topped with creamy, delicious, mashed potatoes before anyone even knew what was happening.

Now I can officially announce that THESE Beyond Meatloaf Stuffed Peppers, topped with the perfect mashed potatoes, are my new favorite stuffed pepper! T

hey are so pretty, and a whole meal in one colorful little edible cup. What’s not to love here, y’all? You can use any ground “meat” you like, Beyond, Impossible, Lightlife, or whatever is your favorite, you just need a pound. You could even do half vegan ground and half vegan sausage! In case you like things a little spicy.

These peppers come together so fast, and so easily, which is an added bonus. You could even prep them the night before and pop them in the fridge until you are ready to cook them for dinner! I also think if you were having a pretty chill holiday meal, these would be lovely on a table! No matter when you serve them, I think you are going to love them!! I know they are going to be a constant at our house, now!


INGREDIENTS:

  • 6 bell peppers, any color

  • 1 lb Beyond ground or 4 Beyond Patties

  • 3/4 cup bread crumbs

  • 1 tablespoons tapioca starch, plus 3 tablespoons water

  • 1/2 small yellow onion, finely diced

  • 1 teaspoons minced garlic

  • 2 tablespoons tomato paste

  • 2 teaspoons vegan Worcestershire sauce

  • 1/2 teaspoon salt

  • 1 teaspoons dried thyme

  • 1 teaspoon all purpose greek seasoning

  • 1/2 teaspoon black pepper

  • 1/4 cup ketchup

  • dried parsley for garnish

MASHED POTATOES:

  • 4 large russet potatoes, peeled and diced

  • 2 tablespoons vegan butter

  • 2 tablespoons vegan cream cheese or plain vegan yogurt

  • salt and pepper to taste

  • a few splashes of plant based milk

Vegan Beyond Meatloaf Stuffed Peppers cut on a plate.

INSTRUCTIONS:

  1. Bring a large pot of water to a boil. Add the potatoes and let them cook until they are soft and you can easily poke a fork through them. Drain the potatoes in a colander and return them to the pot you cooked them in. Add the butter, cream cheese or yogurt, salt and pepper. Mash using a hand masher or an electric mixer. If the potatoes seem too thick you can add a splash of plant milk, or more yogurt, or cream cheese. Set aside.

  2. For the meatloaf, add the ground meatless “meat” to a large bowl. If you are using thawed burgers, break them up with a spoon.

  3. Mix in the diced onion, garlic, tomato paste, and seasonings.

  4. Next, mix in bread crumbs, starch mixed with water, and Worcestershire sauce.

  5. Mix until well combined.

  6. Cut the tops off of the peppers and clean them out, removing all seeds and the white rib parts. If the pepper will not sit upright and wants to fall over, you can cut the bottom and turn it over. It’s just a little harder to clean them out that way.

  7. Place pepper on a baking sheet and fill 2/3 of the way full with the meatloaf mixture, packing it down well. Spread a little ketchup over the meatloaf mixture in each pepper. Next, divide the mashed potatoes evenly and top each pepper with a big scoop.

  8. Take a large sheet of aluminum foil and gently place it on top of the peppers. Place the pan in the oven on the middle rack and let the peppers bake for 35 - 40 minutes, removing the foil for the last 15 minutes. You can run a skewer though the side of one pepper. If it comes out clean, the meatloaf is done.

  9. Allow peppers to cool just a bit before serving.

Vegan Beyond Meatloaf Stuffed Peppers

If you like this recipe, try these:

Vegan Beyond Meatloaf Stuffed Peppers

Vegan Chocolate Orange Cake

Vegan Chocolate Orange Cake

When I was a kid, I loved getting those foil wrapped chocolate orange shaped candies. The ones you throw down to get the chocolate “orange slices” to break apart like magic, and then eat so many pieces you feel sick. Yeah, those! They were my favorite holiday candy before going vegan.

I adore chocolate and orange together! So once again I had set out to veganize a cake I saw in a magazine and it seemed to be a failure. The cakes baked up beautifully but the frosting just would not come together. So I needed to switch gears and find a new flavor for the frosting. That’s when I looked over at my fruit basket and knew!

I have talked to y’all about kitchen failures before, and being ready and able to adapt and roll with the punches. If the cakes bake up and the frosting won’t work, move on to something else, some other flavor combo you love! Its not a failure unless you give you give up, and I refuse to toss out a perfectly good cake just because the frosting is a pile of weird unusable goo!!

So I whipped up a quick orange frosting for the middle, and an easy chocolate frosting for the outside and that was that. But when I cut the cake and realized it was a bit delicate and crumbly, not the texture of any other cake I have baked. I managed to get it all frosted and it turned out pretty in the end, but I deiced I would not post this recipe because I was sure I would get comments about the texture. It was not “perfect” or my idea of a perfectly textured cake, or what I was used to. But when I took my first bite I quickly changed my mind. It was so delicious and the texture actually worked so well once frosted, that I didn’t want to change the recipe on bit for fear of messing it up.

If the cake seems to be giving you issues once you cut it, just squish the crumbs back on and keep moving. That could be a metaphor for life, am I right? I shared this cake with a handful of non vegans and they adored it as well. That was the seal of approval I needed to go ahead and post the recipe.

This cake makes me think of the chocolate oranges I can no longer eat, and its makes me smile with every bite. My son claimed it was the best cake I have ever made, and I have made a LOT OF CAKES. So, my kids may never have the memory of cracking open a big chocolate orange, but they will have the memory of me baking them this cake every year around the holidays and maybe thats even better!


INGREDIENTS:

You will need 2 round 8 or 9 inch cake pans for this recipe

  • 1 1/2 cups hot coffee

  • 1/2 cup cocoa powder

  • 1/2 bag or 4 oz vegan chocolate chips or chopped chocolate

  • 3 cups all purpose flour

  • 1 tablespoon baking powder

  • 1/2 teaspoon salt

  • 1 cup vegan butter

  • 1 cup brown sugar

  • 1 cup white sugar

  • 1/2 cup vegan plain yogurt or sour cream

  • 1 teaspoon vanilla extract or vanilla bean paste

  • 2 flax eggs

  • 1 cup whipped aquafaba

VEGAN ORANGE FROSTING:

  • 1/4 cup vegan butter

  • zest from one large navel orange

  • 3 cups powdered sugar

  • 1 teaspoon vanilla extract or vanilla bean paste

  • 2-3 teaspoons fresh orange juice

VEGAN CHOCOLATE FROSTING:

  • 1/2 cup vegan butter

  • 1/2 cup shortening

  • 4 cups powdered sugar

  • 1/4 cup cocoa powder

  • pinch of salt

  • a few teaspoons plant based milk

Vegan Chocolate Orange Cake

INSTRUCTIONS:

Preheat oven to 350 degrees

  1. Place chocolate chips, or finely chopped chocolate along with the cocoa powder in a large bowl. Pour the hot coffee over the chocolate and let the mixture sit for 2 minutes. This will melt the chocolate.

  2. Whisk the flour, baking powder, and salt in a separate bowl and set aside.

  3. In the bowl of a stand mixer, or a large bowl if using an electric hand mixer, add the butter and both sugars. Beat the butter and sugar on medium speed for a few minutes until the mixture is light and fluffy.

  4. Beat in the flax eggs, then the vegan sour cream, or yogurt, and the vanilla.

  5. Alternate adding some of the flour mix, then the chocolate mixture to the mixing bowl, back and forth, begining and ending with the flour. Mix on medium speed until the mixture is well incorporated and smooth.

  6. Add the 1 cup of whipped aquafaba to the cake batter and carefully fold it in with a rubber spatula until well incorporated but careful not to over mix.

  7. Prepare the cake pans by coating them with a thin coating of butter or spraying them with some cooking oil. Lightly dust the pan with flour and shake them out. Divide the batter between both pans and place on the middle oven rack. Bake cakes for 30-40 minutes. Cakes are done when a tooth pick inserted into the center comes out clean. Place cakes on a wire cooling rack and allow to cool completely before removing from pans.

  8. Prepare the orange frosting by beating the butter, vanilla, and organ zest on medium speed of you stand mixer or hand mixer. Beat in the powdered sugar and 2 or 3 teaspoon of juice from the orange until creamy and well incorporated. If it seems too thin you can add a little more powdered sugar.

  9. Prepare the chocolate frosting by beating the shortening, vanilla, and butter together on medium speed. Add the cocoa powder and powdered sugar and continue mixing unit smooth and everything is incorporated. Add a few drops of plant based milk if the frosting is too thick to get the desired, spreadable, consistency.

  10. Once cakes have cooled completely, turn them out onto the cooling rack and pop them in the fridge for about 30 minutes. The texture of this cake is a bit crumbly, so having it cold will help. CAREFULLY cut each chilled cake in half horizontally. I suggest leaving the cake on a flat surface and using a large knife cut through the center. Carefully lift the top layer and place it on a cake board or whatever plate you wish to serve the cake on. Take 1/3 of the orange icing and spread it on the first layer of cake Again it may seem extra crumbly just get the icing spread as evenly as you can. Repeat with remaining layers until all layers are frosted and stacked.

  11. Take 1/3 of the chocolate frosting and crumb coat the cake. This simply means you are spreading a thin layer of frosting on the cake, and are not worried that some crumbles are mixing in. Once again, this cake is a bit crummy, so crumb coating it is an important step. Pop the cake into the fridge until the frosting hardens, then evenly frost the cake with the remaining frosting.

  12. Store cake in an airtight container at room temp or I personally like to store this cake in the fridge. Slice to serve.B

If you like this recipe, try these:

Vegan Lime Mojito Cupcakes

Vegan Lime Mojito Cupcakes

TYPE META DESCRIPTION HERE

Vegan Smoked Gouda Grilled Cheese

Vegan Smoked Gouda Grilled Cheese

I love grilled cheese sandwiches. Like to the point that I would eat one everyday if I thought I could get away with it. Especially dipped in homemade tomato soup! But heres the thing, I almost always burn them.

I cook all day, I cook for a blog, I can make cheese from a coconut, and roast “beef” from a jackfruit….but for some reason, I can not cook a grilled cheese without burning the bread before the cheese has melted. I feel like it is a test in patience that I ALWASY fail.

When making a grilled cheese I also want it to be a super gooey, oozing out the sides of the bread, stretchy, extra cheesy, grilled cheese. So imagine me waiting for all of that cheese to melt with my lack of patience and tendency to burn the bread.

SO, enter the most magical, extra gooey, oozy, extra cheesy, cheese sauce that makes the most perfect grilled cheese with like zero risk of burning the bread! This smoky perfect cheese is already melty, gooey perfection when you add it to the bread! My world has been changed, and no more crispy blackened grilled cheese will find their way to the trash, ever again!

Ok, that’s probably a lie, because I am sure I could still find a way to burn a sandwich (look over there, something shiny, oh crap, I did it again) but the odds are far less. I also wanted a perfect smoky vegan gouda for my sandwich so I married the flavors from our sliceable coconut gouda, with our all purpose cheese sauce to make this gooey smoky gouda cheese! I could probably just eat it with a spoon and be just as happy, but bread is my love language, so bring on the sandwiches and soup!


INGREDIENTS:

  • 1 cup unsalted cashews

  • 2 cups water

  • 1/4 cup Sauerkraut (not the juice, just the cabbage)

  • 4 tablespoons nutritional yeast

  • 4 tablespoons tapioca or corn starch

  • 1 teaspoon salt

  • 1 teaspoon liquid smoke

  • 1 tablespoon apple cider vinegar

  • 2 teaspoons light miso paste

Vegan Smoked Gouda Grilled Cheese

INSTRUCTIONS:

  1. Place cashews in a microwave safe container and cover in water (this water is separate from that listed in the ingredients) Microwave for 3 minutes. Drain water and rinse. If you do not have a microwave, you can boil them in a pot of water for 5 minutes or you can soak them for a few hours in hot water.

  2. Add drained cashews and remaining ingredients, including 2 cups of water, to a high speed blender and process until the mixture is totally and completely smooth. This may take a minute or two of blending.

  3. Transfer mixture to a medium sized pot over medium heat. Heat the mixture, stirring continuously with a whisk until the mixture begins to thicken. You want the cheese sauce to become the consistency of peanut butter. It will be pretty thick and stretchy the longer you cook it.

  4. Let the cheese sauce cool completely. It will thicken more as it cools and be pretty gooey. Once the sauce has cooled, spread a desired amount on some bread. I like to spread butter on the outside of both slices of bread before placing in the pan. Heat a medium skillet over medium heat and cook the sandwich on each side until golden brown and crispy.

  5. You can add vegan bacon, avocado, tomato, just about anything you like to your grilled cheese.

  6. Store leftover cheese in the fridge in an airtight container for up to a week.

If you like this recipe, try these:

Vegan Smoked Gouda Grilled Cheese

TYPE META DESCRIPTION HERE

Vegan Bacon Butter Brown Sugar Bites

Vegan Bacon Butter Crackers

Ok, ok, ok….hear me out if you think this is a weird idea. Also try and say Vegan Bacon Butter Brown Sugar Bites threes times fast!

These are basically crunchy candied vegan bacon crackers. They are sweet, smoky, salty and perfectly crunchy.

They are SO easy to make and really kind of addictive.

My sister in law’s sister, Heather, who is as good as family to me, posted a non vegan version of this the other day. It popped up in my Face Book feed and I literally JUMPED out of my seat and had these babies in my oven within 10 minutes.

It’s the holiday season so I am always looking for new, EASY, recipes for taking to parties, or dinners, or whatever. These are them!

The recipe you needed when you are too busy ( that would be all of us, am I right) to do much else. These vegan bacon butter bites are just the recipe we all needed! You could use whatever vegan bacon you prefer. I like Lightlife smart bacon and it worked very well for this recipe and oddly enough Ritz cracker are actually vegan.

Hooray who would have thought?!?!. So go ahead and bake yourself up a batch of these first, just so you can, you know “quality control” taste test them, then bake up a batch the next time you need a super quick and easy party snack to share.


INGREDIENTS:

  • 1 sleeve vegan butter crackers. You can use round or rectangle crackers

  • 1 package vegan bacon, we used Lightlife

  • Brown sugar, 1 teaspoon per cracker

  • A pinch of salt

INSTRUCTIONS:

preheat oven to 350 degrees.

  1. Line a baking sheet with parchment paper. Place the cracker on the sheep spaced out so they are not crowded.

  2. Cut uncooked bacon slices to fit whatever size cracker you are using. I cut my bacon into thirds for the round crackers and the pieces fit nicely. Place one piece of bacon on each cracker.

  3. Spread 1 teaspoon of brown sugar over each cracker. Sprinkle a little salt over the tops of all the crackers.

  4. Bake for 20-25 minutes, or until all of the brown sugar has melted and is bubbly. Allow crackers to cool completely before serving. Store in an airtight container at room temperature.

If you like this recipe, try these:

Vegan Bacon Butter Crackers

Super easy vegan bacon butter brown sugar crakers

Vegan Clam Strips (Soy Curls)

Vegan Clam Strips (Soy Curls)

I used to love fried seafood. Again, I was raised in Georgia by parents from Alabama so I was born eating fried chicken and drinking sweet tea, no questions asked.

I don’t even know the first time I ate a non fried seafood item, or even knew that it was an option! So after giving up all other meats, and even dairy, the one animal food I still found myself really missing and craving was fried seafood!

Recently my friend Lane accidentally bought 6 bags of soy curls, thinking she had just ordered one. So she asked me if I had any recipes on the site using them. I did not. I have had soy curls in various preparations here and there but had not made them myself. I also recently had the most delicious vegan clam strips from a food truck that is not in town very often and had been craving more ever since. They used mushrooms in theirs, but I decided after Lane dropped off a bag of curls, there was no reason not to try and make a clam strip out of them!

They had the basic shape, and a chewy enough texture, and logic said it would work. And work it did! These vegan clam strip are crispy, chewy, and delicious! The best part is how darn easy they are to make. Just soak, coat, fry and eat!

So If you have a bag of soy curls laying around and have never fried some up, I can not suggest it enough. Lane was super happy with the outcome and I will now be making soy curls a pantry staple in my house! I have also added an air fryer option at the bottom of the page if you are into that kind of thing!


INGREDIENTS:

  • 8 oz bag soy curls

  • 3 cups hot water

  • 1 teaspoon Vegetable Better Than Bouillon

  • 1 cup all purpose flour (or you favorite gluten free flour)

  • 2/3 cups tapioca starch

  • 1/3 cup corn meal

  • 1 1/2 teaspoon salt

  • 1 teaspoon onion powder

  • 1/2 teaspoon black pepper

  • 2 teaspoons Old Bay Seasoning

  • 1/4 teaspoon cayenne pepper

  • oil for frying (I use grapeseed or canola)

Vegan Extra Dilly Tatar Sauce:

  • 1 cup vegan mayo

  • 2 tablespoons finely diced dill pickles

  • juice from one small lemon

  • 1/2 teaspoon salt

  • 1/2 teaspoon black pepper

  • 1 teaspoon dried dill

  • 1/2-1 teaspoon vegan Worcestershire sauce

INSTRUCTIONS:

  1. Pour hot water along with Better than Bouillon into a large bowl, whisking in the bouillon until it has dissolved. Add the soy curls and let them soak for 10 minutes.

  2. While the curls are soaking, whisk together the flour, starch, corn meal, and seasoning in a large bowl.

  3. Drain the soy curls in a colander over the sink, return the curls to the bowl they were soaking in.

  4. Begin adding a handful of curls at a time to the flour mixture, making sure to fully coat the curls. Place coated curls on a baking sheet pan, and repeat with remaining curls.

  5. Line another baking sheet pan with paper towels and place a wire cooling rack on top.

  6. Heat a large deep skillet or dutch oven with a few inches of oil, over medium heat. You can poke a chop stick or wooden skewer into the pan, if small bubbles form around the stick the oil is ready. Once the oil is nice and hot begin adding batches of curls to the pan, making sure not to over crowd them. Using a pair of metal tongs, keep the curls moving around in the pan so they cook evenly. Allow the curls to fry for several minutes until golden brown and crispy. Place finished curls on the wire rack and repeat with remaining curls. I like to sprinkle a little extra salt and old bay on the finished curls.

  7. To make the tartar sauce, whisk all ingredients together in a medium sized bowl. Adjust seasoning to taste.

  8. Server “clam” strips while still hot with homemade tarter sauce.

* To air fry clam strips; lightly spray with oil, set the air fryer to 375 degrees and fry for about 10 minutes, checking halfway through and giving the basket a shake. My fryer is pretty small and it seems to take longer for things to cook. So cooking times may vary depending on fryer size and amount of strips being fried.

If you like this recipe, try these:

Vegan Clam Strips (Soy Curls)

Crispy vegan fried clam strips using soy curls

Vegan Pastrami

IMG_5189.jpg

I am always experimenting with making new vegan meats using vital wheat gluten. Mostly because I never hated the taste of meat, so after going vegan found myself looking for a replacement.

Sure, you can buy plenty of vegan faux meats in the grocery store now, but making them at home is much cheaper and actually really easy! Vital wheat gluten is pretty inexpensive and is a great source of plant based protein!

Making seitan (wheat meat) is just as easy as making dough, and can be done right in your food processor. Just dump in the ingredients, mix, form, and bake!

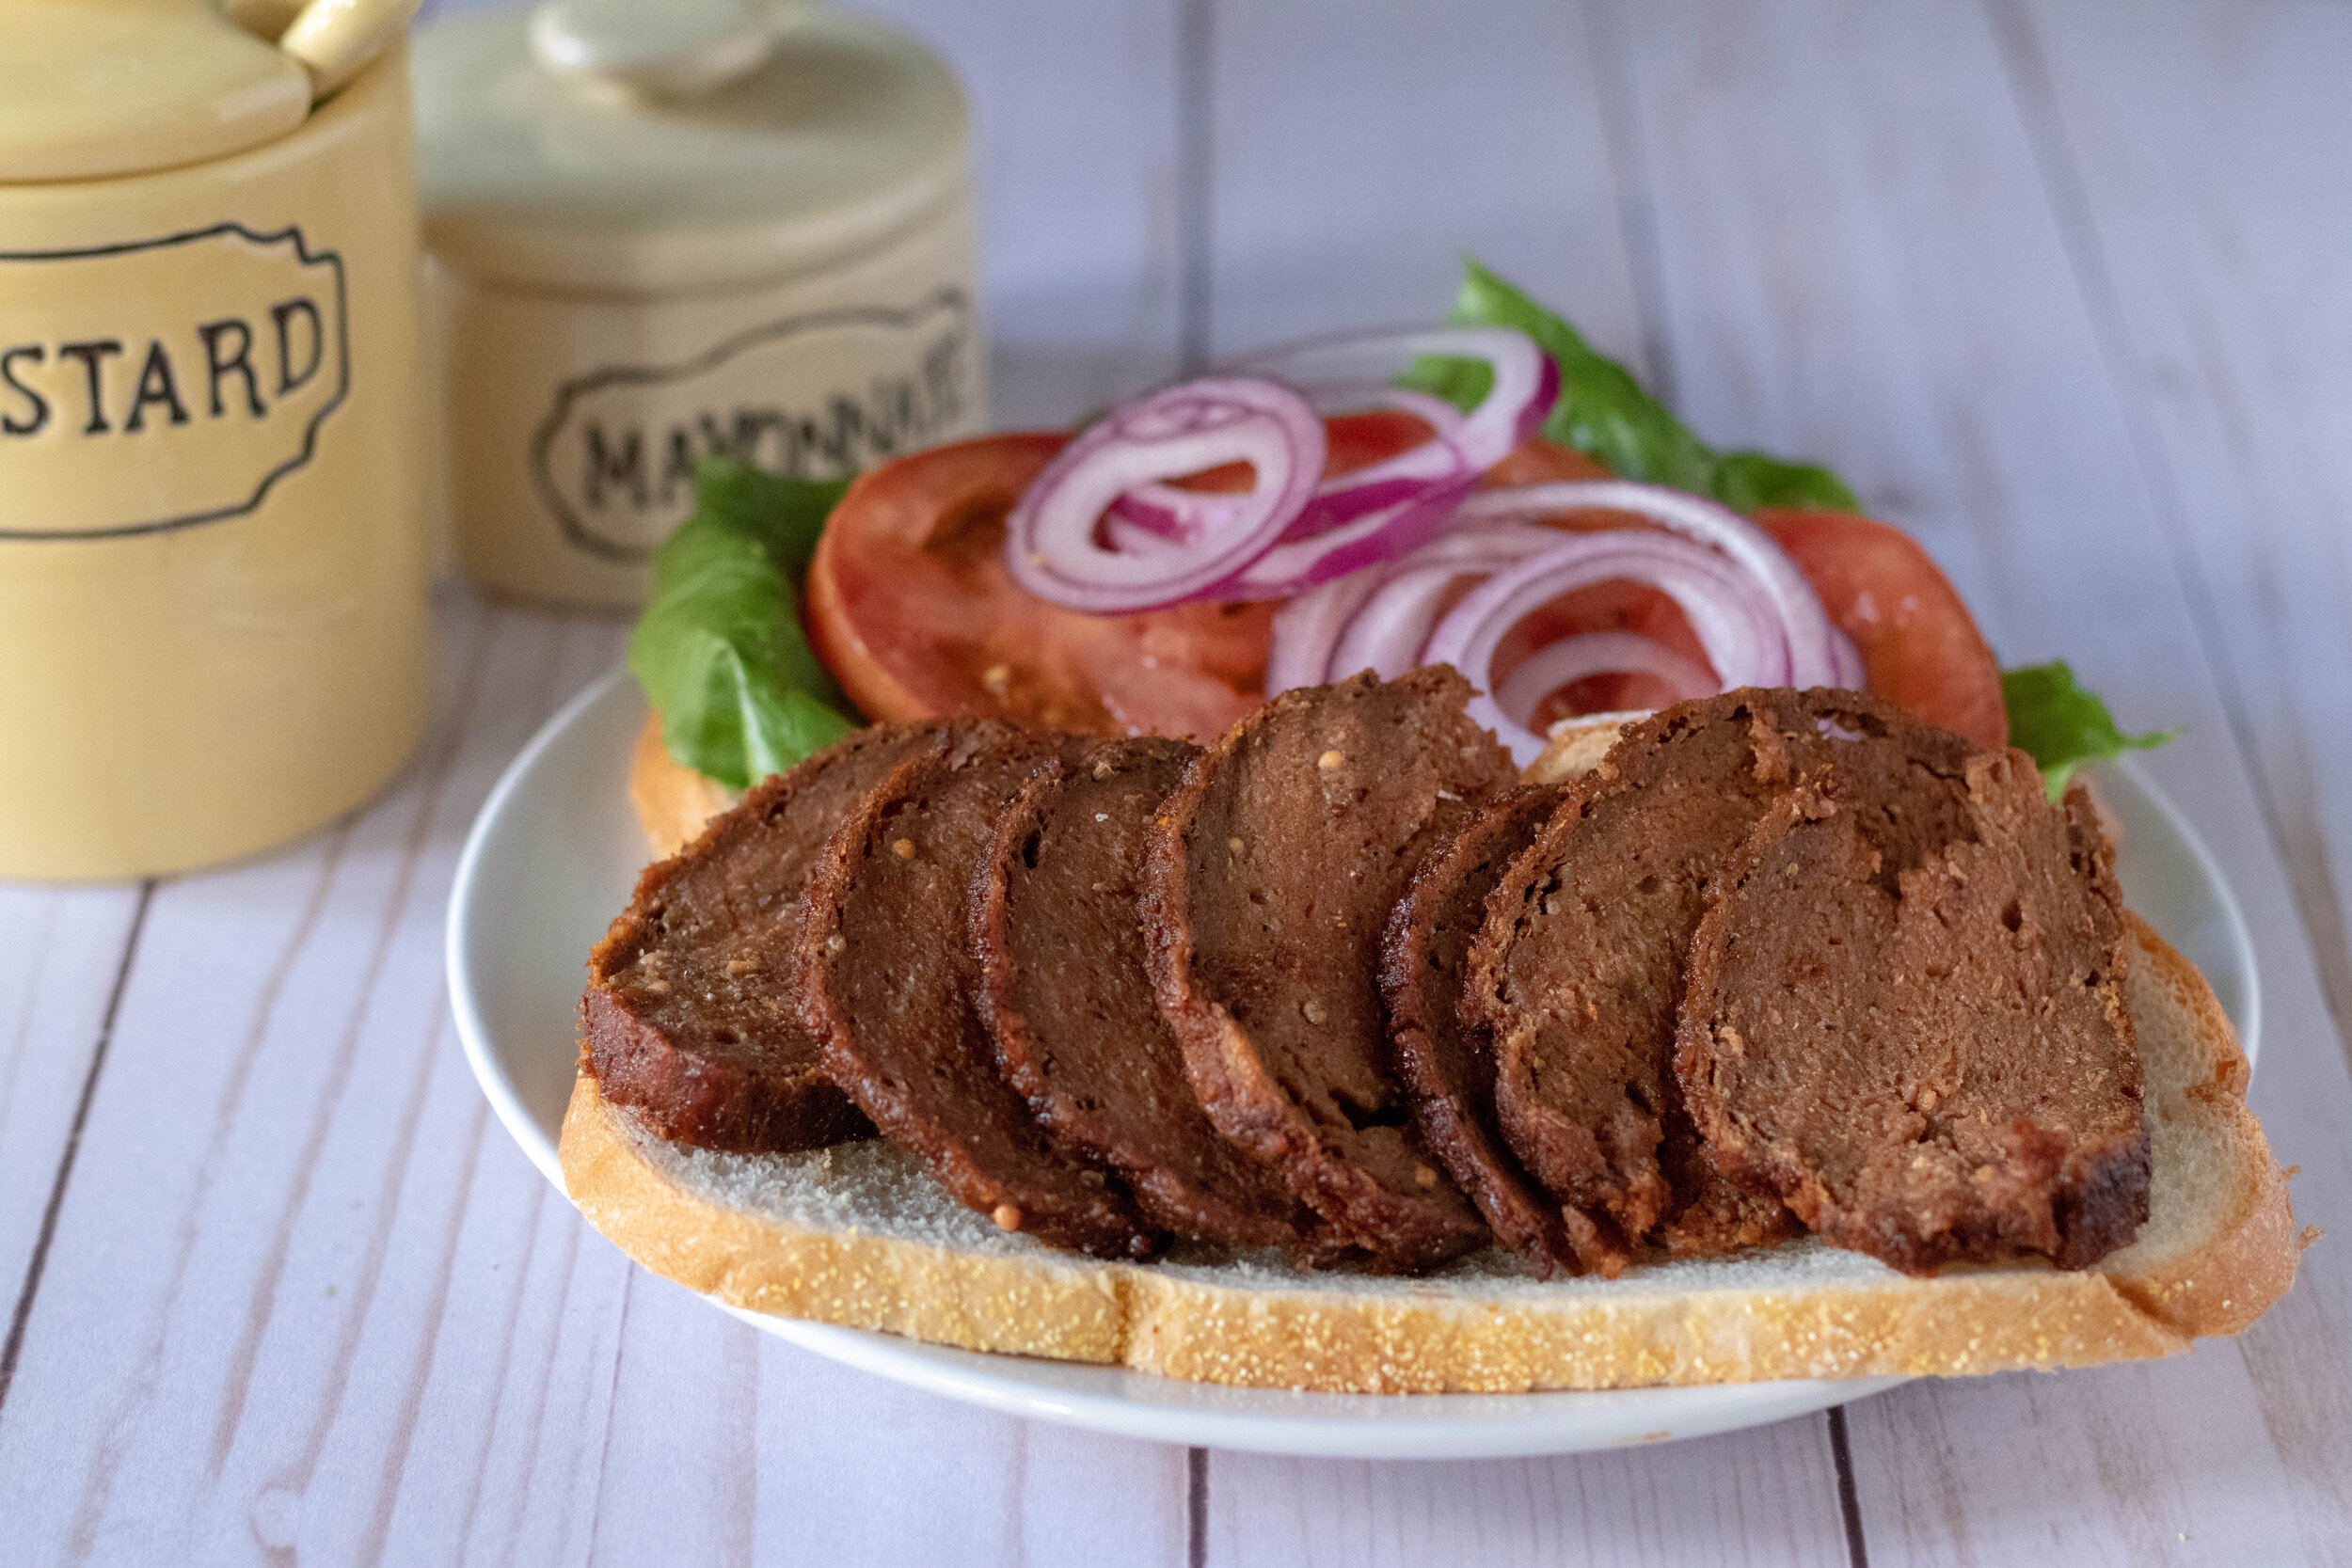
Seriously, not hard at all. So recently when I was chatting with my rabbi about food and the subject of pastrami came up, I instantly knew I needed to adapt our vegan brisket recipe and try for a vegan pastrami. Since pastrami is often made from brisket anyways, I just changed up the spices and added some beet for color.

It turned out delicious. Does it taste like pastrami?!? Well, if being totally honest I don’t think I am an excellent judge of that since I have not eaten any animal product in a really long time, but my omnivore neighbors didn’t hate it when I made them a sandwich, and when I asked how it tasted, the answer was “ It just tasted good!” I’ll take it!

IMG_5188.jpg

INGREDIENTS:

You will need aluminum foil, and a 9x13 baking dish for this recipe

  • 1 can jackfruit in brine

  • 1 1/4 cup vital wheat gluten

  • 1/3 cup diced raw beet, peeled

  • 1/4 cup tapioca starch

  • 1/4 cup nutritional yeast

  • 1 teaspoon Vegetable Better than Bouillon

  • 2 tablespoons water

  • 2 teaspoons dijon mustard

  • 2 tablespoons soy sauce or coconut aminos

  • 1 tablespoon oil ( I used grape seed)

  • 2 teaspoons liquid smoke

  • 2 teaspoon vegan Worcestershire sauce

  • 2 teaspoons minced garlic

  • 2 teaspoons onion powder

  • 2 teaspoons ground coriander

  • 1 teaspoon paprika

  • 1 tablespoon brown sugar

  • 2 teaspoons powdered mustard

  • 1 teaspoon mustard seed, toasted (optional)

  • 1 teaspoon each salt and black pepper

DRY RUB:

  • 3 tablespoons brown sugar

  • 1 teaspoon ground coriander

  • 1 teaspoons mustard powder

  • 1 teaspoons salt

  • 1 teaspoon black pepper

  • 1 teaspoon onion powder

IMG_5177.jpg

INSTRUCTIONS:

preheat oven to 350 degrees.

  1. Drain and rinse the jackfruit. Peel the beet and dice it into small pieces. Break down the jackfruit and beet in your food processor until it is finely minced.

  2. Add the remaining ingredients to the food processor and mix for a minute, until a sort of dough forms. If you are adding mustard seeds, just toss it in a skillet and let it toast for a few minutes before adding it to the mix.

  3. If you do not have a food processor you can break down the beet and jackfruit in a blender. In a medium bowl add the jackfruit/beet mixture, and remaining ingredients. Using your hands, (I promise it’s just easier, but your hands may be stained for a day or so) mix all of the ingredients together until a dough forms. Knead the dough by hand for a few minutes.

  4. Form the dough into about an 8 inch log shape. Tear off a piece of foil that is about 3 times the size of the dough.

  5. Mix up the ingredients for the dry rub in a bowl.

  6. Pour dry rub into the middle of the foil. Take the dough and roll it in the rub to cover all sides.

  7. Spray the dough and the foil with some cooking spray and wrap the dough in the foil, sealing it up. Just make sure it is going to be easy to open.

  8. Place the foil covered pastrami into a 9x13 pan and place in the oven on the top rack. Bake sealed for 30 minutes. After 30 minutes open up the foil pouch and continue baking for another 30-40 minutes.

  9. Allow the pastrami to coo then refrigerate over night. It will slice easily once cooled. It should even be firm enough to thinly slice on a mandolin.

If you like this recipe, try these:

IMG_5192.jpg

Easy vegan pastrami with vital wheat gluten and jackfruit.

Vegan Triple Coconut Cheesecake

Vegan Triple Coconut Cheese Cake

I have tried a lot of vegan cheesecake recipes over the years and have had some hits and some misses.

What I have learned from all the different recipes I have tried, is that I do prefer to use cream cheese instead of cashews and that I really love the addition of chickpeas.

I also decided when I was creating this recipe to try and use some of the liquid left from the chickpeas and whip some fluffy aquafaba and fold that in. Partly because it was there and I didn’t want it to go to waste, and partly because I thought it would add a little lightness and lift to the recipe.

I also decided to use up the remaining whipped aquafaba to use as the topping for this vegan cheesecake. You can just as easily use a store-bought coconut whip if you prefer and save the extra aquafaba for a future recipe. It freezes really well!

I personally think this cheesecake recipe is really simple and super tasty. Its creamy and light, and full of coconut flavor! If you are feeling extra, you could top this cake with our vegan caramel or fudge sauce and skip the whip all together. No matter how you top it, I think you will love it!


INGREDIENTS:

You will need for this recipe:

  • a blender or food processor

  • 8 or 9 inch springform pan

  • aluminum foil

The Crust:

  • 1 1/4 cup graham crackers ( one full sleeve)

  • 3 tablespoons vegan butter, melted

  • 1/2 cup unsweetened coconut flakes or shredded coconut

  • 5 tablespoons white sugar

The Filling:

  • 2 (8 oz) containers vegan cream cheese ( we used Miyoko’s)

  • 1 (15 oz) can chickpeas ( drained but liquid reserved)

  • 1 cup white sugar

  • 1/4 cup tapioca starch

  • 7 (oz) or about half a can of full fat coconut milk or cream

  • 2 teaspoons vanilla extract

  • 1/2 teaspoon coconut extract (optional)

  • pinch of salt

  • 1 cup whipped aquafaba (made from reserved chickpea liquid)

*the cream cheese brand we used is pretty tangy. If using a milder cream cheese like Tofutti, then I suggest adding a few teaspoons of lemon juice to the recipe.

Toppings:

  • Leftover aquafaba plus 1/2 cup sugar (you could also used ready made coconut whipped topping)

  • 1/4 cup unsweetened coconut flakes or shredded coconut, toasted

Vegan Triple Coconut Cheese Cake

INSTRUCTIONS:

preheat oven to 350 degrees

  1. Begin preparing the crust by adding the graham crackers and coconut to a food processor or blender. Blend until the crackers and coconut are broken down to sandy consistency. I always do this in my food processor because it seems to work a little better. Add the butter and sugar to mixture and blend until well combined.

  2. Prepare a springform pan by wrapping the outside in a few sheets of aluminum foil. The cake will bake in a water bath so the goal is to make sure no water will seep through the cracks. Or you will be left with a sad, soggy cheesecake. Nobody wants that!

  3. Press the crust mixture evenly into the bottom of the pan. Pop the pan in the oven for about 10 minutes. Remove and allow the crust to cool. Reduce oven temp to 325 degrees.

  4. To prepare the aquafaba, add the liquid from the chickpeas to a stand mixer, or a large bowl if using an electric hand mixer. Add 1/4 teaspoon of cream of tarter or salt. Beat on high until the mixture resembles whipped egg whites and has formed stiff peaks.

  5. To prepare the filling, add the chickpeas, along with the coconut milk to your blender or food processor. Process until the mixture is completely smooth! Next add the remaining ingredients EXCEPT the whipped aquafaba and blend. Once the filling is completely mixed and creamy smooth, transfer to a large bowl. Take 1 cup of the whipped aquafaba and gently fold it into the mixture using a rubber spatula until it is fully incorporated.

  6. You can place the remaining aquafaba in the fridge and rewhip it later for the topping. If not using it for the topping it will keep in the fridge for a up to a week, or you can freeze it for later use.

  7. Pour the filling into the springform pan over the cooled crust. Place the spring form pan into a roasting pan or any other pan that you may have that is larger than the springform. I use a 12 inch cake pan. Fill the larger pan halfway with hot water. Carefully place the cake into the oven in the center rack. Allow cake to bake for 60-70 minutes.

  8. Allow the cake to cool on the counter, on top of a cooling rack, for 15 minutes before placing the inside the fridge for at least 5 hours to set.

  9. If using aquafaba as your whipped topping, remove from fridge. Add 1/2 cup of sugar and rewhip the mixture until stiff peaks form.

  10. Add the coconut to a small skillet over medium heat. Keep moving the coconut around the pan to avoid burning it. It will toast up golden brown in just a few minutes. Allow to cool.

  11. Top the cheesecake, still in the pan, with whipped topping and toasted coconut when ready to serve. Remove the ring from the pan and slice the cake to serve. Store leftovers covered in the fridge.

    If you like this recipe, try these:

Vegan Hummingbird Cake

Vegan Hummingbird Cake

Vegan Maple Spice Cake

Vegan Maple Spice Cake

Vegan Lemon Cupcakes with Cream Cheese Frosting

Vegan Lemon Cupcakes with Cream Cheese Frosting

vegan triple coconut cheesecake

Southern Vegan Cornbread Dressing with Jackfruit or Seitan

Southern Cornbread Dressing with Jackfruit

In the south we grew up eating dressing at Thanksgiving, NOT stuffing. I don’t think I even had stuffing until I was a teenager at a friends house, and I am pretty sure it was Stovetop. Dressing is normally made of cornbread, shredded chicken (sometime oysters, but that was too fancy for my family) onion, celery, and spices.

I promise you I could live off of cornbread dressing. If cornbread dressing and stuffing got into a fist fight, all of my money would be on the dressing. It reigns supreme in our house, hands down.

So once we were vegan I didn’t know what to do. I actually ended up making stuffing (gasp) the fist few holidays because I was a new vegan and at a loss. So when I deiced to create our Fall and Winter Holiday Recipe E-Book, I knew I had to do my family proud (mostly my husband because this is favorite thing) and finally veganize this southern family classic.

I actually adapted my husbands MawMaws recipe and made it vegan by using jackfruit in place of the chicken and starch to bind it. Otherwise it is pretty much the same and it tuned out sooooooo delicious!

I actually managed to recreate every favorite holiday recipe we ever enjoyed before we went vegan and put them in our Fall and Winter Holiday Recipe book. A main dish, sides, desserts, and even cocktails. This recipe is in the e-book along with 17 more to create a full classic holiday vegan menu!

So if you are looking for more classic holiday recipes for you next Thanksgiving, Hanukkah, Christmas, or New Years, check it out!! And if you want to fight me over which is better, dressing or stuffing, make this recipe first, then decide. I just might convert you!


INGREDIENTS:

  • 1 pan vegan cornbread

  • 2 cups vegetable broth

  • 2 cups plant based milk

  • 2 tbsp corn starch

  • 1/4 cup vegan mayo

  • 2 tsp dried sage

  • 1 tsp dried thyme

  • 5 vegan biscuits (day old)

  • 4 - 5 stalks of celery

  • 1 large onion

  • 1 can jackfruit in brine (you can also use 4 easy vegan chicken breast, chopped into very small pieces)

  • 2 tsp Vegetable Better Than Bouillon

  • 1 tbsp vegan butter

  • 1 tsp salt

  • 1/2 tsp black pepper

86eats-fall-winter-vegan-holiday-menu.jpeg

Our Fall & Winter Holiday E-BOOK contains 18 familiar and comforting recipes that will serve as a guide to plant-based/vegan menu planning during Thanksgiving, Christmas, Hanukkah, or whatever you celebrate this time of year. This menu includes a main dish, sides, desserts, and cocktails that you can use as a complete dinner menu, or you can pick and choose recipes to take along to a pot-luck or cocktail party. In addition to the downloadable ebook, you will get access to more than 20 minutes of complimentary video content that will walk you through some of the trickier parts of a few of the recipes.

INSTRUCTIONS

  1. Bake cornbread and biscuits according to instructions. You can do this a day or two ahead of time. The biscuits work better if they are a day or two old.

  2. Crumble biscuits and cornbread into a large bowl. You can use a fork to break up the corn bread in the pan you baked it in. You want both the cornbread and biscuits to be a pretty fine crumble.

  3. Drain and rinse the jackfruit. Shred between your fingers, or chop it up.

  4. Finely dice the onions and celery. Heat a medium skillet on medium heat and melt the butter. Add the jackfruit, onions, celery, and Better Than Bouillon, and cook until the onions are translucent.

  5. In a large bowl, add all of the dry ingredients, mix well, then add in the wet ingredients and continue mixing until well incorporated.

  6. Transfer the mixture to a prepared 9x13 baking dish and bake on a middle oven rack for about 35 - 40 minutes. You’ll want a tooth pick to come out clean when poked in the center.

  7. Allow it to cool a bit before serving. Add fresh or dried parsley to garnish if desired.

If you like this recipe, try these:

Vegan Eggnog Cake

Savory Cranberry Meatballs with Mashed Potatoes

Vegan Brie with Cranberries and Candied Pecans

Southern Cornbread Dressing with Jackfruit

Classic southern cornbread dressing with jackfruit, perfect for vegan thanksgiving

Crispy Bang Bang Tofu

Vegan Crispy Bang Bang Shrimp

So my friend Lane had been asking me for a while to make a vegan version on Bang Bang shrimp. It has probably been 10 or more years since I have eaten any and had no idea what the sauce was made of.

So imagine my surprise when I googled it and realized it was actually only 3 little ingredients that I always have in my pantry.

I have been playing around with a vegan shrimp recipe after having the best vegan fried shrimp from a local food truck recently, but still haven’t totally figured it out. But then it dawned on me!! I should just use our popcorn tofu recipe!

The trick to making something like crispy bang bang “shrimp” is keeping the “shrimp” really ,really crispy so it doest go super soggy super quickly once it is coated in sauce.

Well our popcorn tofu is REALLY CRISPY and actually made the perfect “shrimp” for this recipe! This recipe is perfect on its own as kind of a snack or appetizer, but would also be delicious served with a side of rice and quick and easy pickled veggies ( I will eat a pickled veggie on the side of almost any meal!)

This Bang Bang tofu is crispy, sweet, creamy, and spicy. It’s perfect really, and we can all thank Lane for the idea! I promise I would have never thought to make this if she would not have asked! So thanks Lane, keep the request coming and I’ll keep knocking on your door with plates of food :)


Ingredients:

  • 1 block extra firm tofu

  • 3/4 cups corn or tapioca starch

  • 2 cups bread crumbs

  • 1/2 cup vegan plain yogurt (I use Kite Hill)

  • 1/2 cup non dairy milk

  • 1 teaspoons salt

  • 1 1/2 teaspoons each, smoked paprika, and all purpose seasoning (we use a greek seasoning)

  • 1/2 teaspoon each chili powder, black pepper, salt

  • 2 teaspoons minced garlic

  • oil for frying

  • garnish: 2 green onions, finely chopped (the green ends only)

Bang Bang Sauce:

  • 3/4 cup vegan mayo

  • 2-3 teaspoons sriracha

  • 1/4 cup sweet chili sauce

  • 1/2 teaspoon minced garlic

Vegan Crispy Bang Bang Shrimp

Instructions:

  1. Remove tofu from package and drain. Wrap the tofu in a clean kitchen towel or some paper towels and place a few books, or a heavy pan on top. Let the tofu sit for 15 minutes to press out any extra water.

  2. Cut the tofu block in half, then cut halves into 1/2 inch strips. Using your hands, break off pieces of the strips to form little tofu nuggets.

  3. In a medium bowl, whisk together the yogurt, minced garlic, and milk.

  4. In another, bowl whisk 1/2 cups of the starch and all of the seasonings.

  5. In another bowl, add the bread crumbs.

  6. First toss the tofu into the starch and seasoning mixture

  7. Next add the tofu to the milk and yogurt and stir. All of the liquid should be absorbed by the tofu, although it will be a sticky mess. Now sprinkle the remaining 1/4 cup of starch over the tofu and toss.

  8. Using your hands (I promise, it’s just easier) pick up a small handful of tofu and toss it around in the breadcrumbs until fully coated. You can use your hands to separate any tofu that got clumped together, sifting it though your fingers. Place coated tofu into a dish, and repeat until all of the tofu is coated.

  9. Heat a few inches of oil in a high sided skillet. I use my cast iron for this. While the oil is heating, place a wire cooling rack on top of a paper towel lined baking sheet. This is where you will place the finished tofu to cool.

  10. Once the oil is nice and hot, carefully add the tofu in small batches to the pan (you can poke a chopstick into the oil, and if tiny bubbles form around the stick, the oil is ready). Using a slotted spoon, keep the tofu moving around for a few minutes to make sure all of the sides get Nice and CRISPY. Once tofu is browned and crispy, remove and place on a wire cooling rack. Repeat with remaining tofu.

  11. Mix all the ingredients together for the bang bang sauce. In large bowl toss finished tofu with all of the sauce. Sprinkle with finely chopped green onions and serve immediately.

If you like this recipe, try these:

Vegan Po-Boy with Popcorn Tofu

Crispy Coconut Tofu with Tropical Rice

Tofu Banh Mi Rice Cups

Vegan Crispy Bang Bang Shrimp

Vegan Chorizo Empanadas

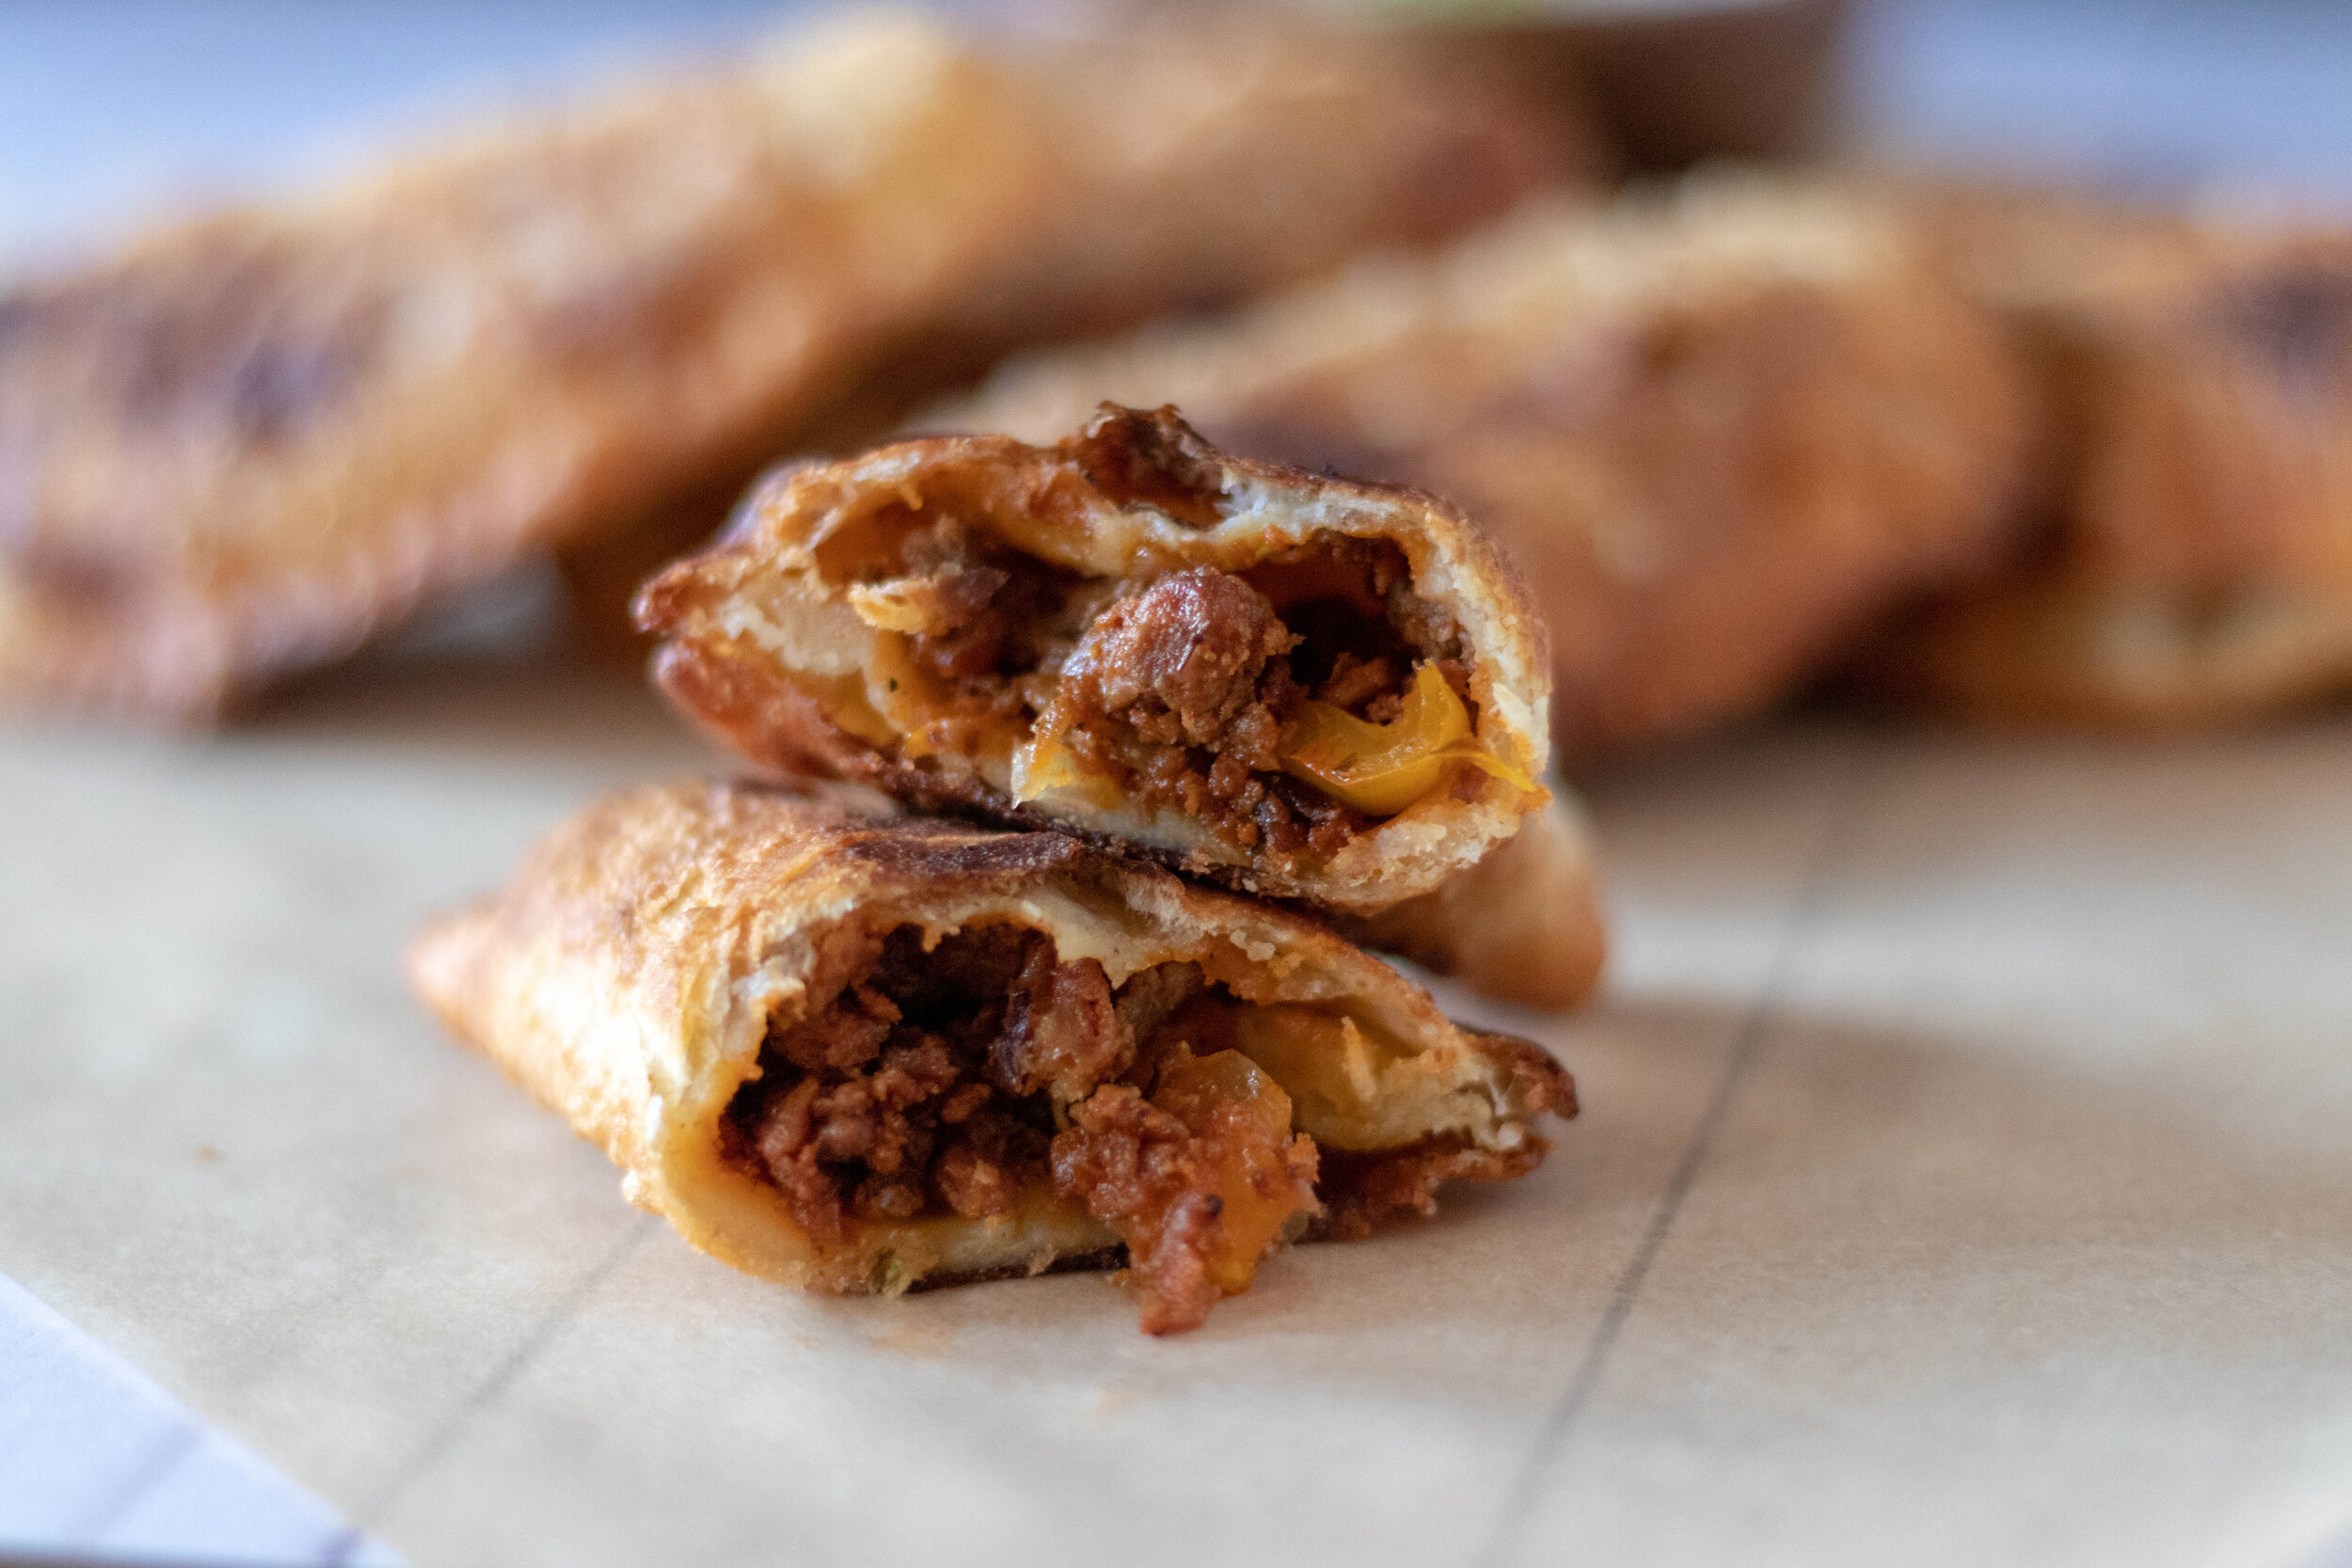
Vegan Chorizo Empinadas

So I don’t even pretend not to love all Beyond Meat products, along with a lot of other faux meats. I loved the taste of meat before going vegan, so I personally have been more than excited with all the progress these products have been making over the years.

So when my neighbor asked if I had posted a recipe for empanadas yet, I knew I needed to create one, and I knew the needed to be filled with vegan ground meat and chorizo!

I am also a super fan of Trader Joe’s vegan chorizo. It is SO GOOD!

I actually had never made an empanada before this recipe, but had eaten a plenty. I mean it’s a total meal in the palm of my hand. I am a big supporter of delicious food I can eat on the go, because I am ALWAYS on the go.

I was torn between using just chorizo or just vegan ground beef so decided to split the difference and use an equal amount of both. You could just use one or the other if you want, but I like them just they way they are.

I also prefer a fried empanada to a baked one because the south runs deep in my veins and we are born loving all fried foods.

These vegan empanadas are a little spicy but the cool, tangy, yogurt based dip helps to cut the spice. My only regret is not making a double batch…because thanks to the teenagers, these were gone before I even knew what happened. At least I know they liked them.


INGREDIENTS:

  • Oil for frying, I use grapeseed oil

The Filling:

  • 1/2 lb vegan ground chuck like Beyond Brand or Impossible “meat” (you can also thaw 2 beyond burgers and if you can’t find vegan ground chuck")

  • 1/2 pound vegan chorizo, we used Trader Joe’s brand

  • 1 red or yellow bell pepper, finely diced

  • 1 small yellow onion, finely diced

  • 1 teaspoon minced garlic

  • 2 teaspoons cumin

  • 2 teaspoons dried oregano

  • 1 teaspoon chili powder

  • salt and pepper to taste

The Dough:

  • 3 cups all purpose flour

  • 1 teaspoon salt

  • 1 teaspoon apple cider vinegar

  • 1/2 cup cold vegan butter

  • 1 tablespoon tapioca starch plus 3 tablespoons water (a starch egg)

  • 3/4 cups ice water

Dipping Sauce:

  • 1/2 cup plain unsweetened vegan yogurt or sour cream

  • 2 tablespoons salsa verde

  • 1 teaspoon chili lime seasoning or just chili powder

  • 1/2 teaspoon minced garlic

  • salt and pepper to taste

Vegan Chorizo Empinadas

INSTRUCTIONS:

  1. Prepare the dough by first mixing the starch and water together. Next add the flour and salt to a food processor. Pulse a few times, then add the cold vegan butter. Pulse again to break up the butter into the flour. Add the vinegar, and starch egg mixture, then begin streaming in the water a little at a time until the dough has formed. We used all of the water for our dough, but just add a little at a time until the dough has formed. It will not be crumbly, but a solid dough that you can easily handle. If you do not have a food processor, follow the same instructions but using a bowl and mixing by hand. Wrap the finished dough in some plastic wrap and place in the fridge for at least and hour.

  2. While the dough is chilling, begin preparing the filling. In a large skillet over medium heat, add a few teaspoons of oil along with the diced onions, garlic, and peppers. Cook unit the onions are translucent. Add the vegan ground beef, and chorizo, using a spatula to crumble it up in the pan. Add the remaining ingredients and cook until the vegan “meat” has cooked though. Set the filling aside and allow it to cool.

  3. Once the dough has chilled, remove it from the fridge. Divide the dough in half. Place half back in the fridge. Roll out half of the dough to about 1/4 inch thick on a clean floured surface. Using a small bowl cut 3 inch circles from the dough. I use a soufflé cup tuned upside down and a sharp knife to trace around the edge. Use whatever you have that is about that size.

  4. Place about 2 tablespoons of filling into the center of the circles. Fold the dough over forming a half moon shape. Press the edges of the dough to seal them up, then use a fork to crimp around the edges. Place finished empanadas into the fridge and repeat with remaining dough.

  5. Fill a deep cast iron, or other skillet with serval inches of oil and heat over medium/ high heat on the stove top. You will know the oil is ready if you poke a chop stick or wooden skewer into the oil and small bubbles form around it. Once oil is ready, reduce heat to medium.

  6. Line a cookie sheet with some paper towels and place a wire cooling rack on top.

  7. Begin frying empanadas in batches, a few minutes per side, carefully turning them with some metal kitchen tongs until they are golden brown on both sides. Place finished empanadas on the wire cooling rack while you repeat with the remaining process with remaining empanadas.

  8. Prepare dipping sauce by mixing all of the ingredients in a small bowl.

  9. Sever empanadas with dipping sauce or sauce of your choice.

  10. Leftovers can be stored in the fridge and reheated in the oven or air fryer. They can also be reheated in the microwave but will not remain crispy.

    If you like this recipe, try these:

    Vegan Buffalo Chicken Bites

    Vegan Meaty Cheddar Queso

    Vegan Po’Boy with Popcorn Tofu

Vegan Chorizo Empinadas

vegan chorizo empanadas wtih vegan chorizo and beyond ground meat

Vegan Cranberry Orange Sweet Rolls

Vegan Cranberry Orange Sweet Rolls

One of my favorite fall and winter flavor combos is cranberry and orange. It is actually my favorite anytime of year, but it always seems I crave it around the holidays, and it so happens that is when both are in season.

So while I was dreaming about all things cranberry orange the other day, it occurred to me that I should fill a cinnamon roll with cranberry and sweet cream cheese and drizzle them in an orange glaze.

And, well, I did just that!

Canned cranberry sauce works just fine for this recipe, because sadly it was not quite cranberry season when I made them, so fresh was not even an option. If you are feeling extra, and like to make homemade cranberry sauce when it is season, by all means, knock yourself out!

Either way, these sweet rolls are DELICIOUS! Like a cream cheese and fruit danish married a cinnamon roll and had this perfect baby!

I would even say I love these more than cinnamon rolls, and I LOVE cinnamon rolls. The tangy cranberry, sweet cream cheese filling, and hint of fresh orange are perfection together. So if you are looking to change up you cinnamon roll or danish game, or just need the perfect holiday breakfast to serve, this is probably the recipe for you!


INGREDIENTS:

  • 5 cups all purpose flour, divided

  • 1 teaspoon baking powder

  • 2 1/4 teaspoons active dry yeast

  • 1 teaspoon salt

  • 1/2 cup melted vegan butter

  • 2 cups almond or oat milk

  • 1/2 cup sugar

  • zest from 1/2 a large orange

THE FILLING:

  • 1 can whole cranberry sauce

  • 1/2 cup sugar

  • 8 oz container vegan cream cheese, plus 1 tablespoon sugar

  • juice from 1/2 orange

THE ICING:

  • 2 cups powdered sugar

  • zest from 1/2 orange

  • Juice from 1/2 orange

Vegan Cranberry Orange Sweet Rolls

INSTRUCTIONS:

  1. Heat milk in a microwave safe container to about 100-110 degrees. Any warmer and It will kill the yeast. It should feel warm but not scalding hot.

  2. In a large bowl mix the heated milk, butter and sugar. Sprinkle the yeast over the mixture and let it sit for a few minutes. (don’t stir it in, just sprinkle)

  3. Add 4 cups of the flour to the wet mixture, and mix until well combined. Cover the bowl in plastic wrap and allow the dough to double in size. This should take about an hour.

  4. While the dough is is rising prepare the cranberry filling by adding 1 can whole cranberry sauce and 1/2 cup sugar to a medium size pot. Heat the mixture on the stovetop over med/low heat, stirring often, for about 30 minutes. You just want the mixture to reduce. You should be left with a thicker, sticky cranberry “jam.” Set aside and allow to cool.

  5. Once the dough has doubled in size, add the last cup of flour, baking powder, orange zest, and salt. Mix well until a soft dough has formed. Turn the dough out onto a clean, lightly floured surface. Lightly knead the dough, adding extra flour as needed until the dough is no longer sticky. The dough should be soft, but you should be able to handle it without it sticking to your hands.

  6. Roll the dough out into a rectangle that is about 18 inches by 12 inches, and 1/2 inch thick, give or take.

  7. Mix the cream cheese, 1 tablespoon sugar, and juice from half an orange together. Depending on the brand of cream cheese you may not need as much juice. You are just using it to help thin the cream cheese enough to make it spread easily over the dough. Kite Hill brand for example is already pretty thin and might not need all of the juice, Tofutti brand is very firm and would need more juice. Spread the cream cheese mixture evenly over the surface of the dough, leaving 1/2 inch around the edges free from mixture. Next spread the cranberry mixture on top of the cream cheese.

  8. Roll the dough tightly starting at the 18 inch edge, forming a log. Cut log into 12- 14 equal pieces with a nice sharp knife. It helps if you flour the knife to cut through the sticky dough. This filing is more gooey than a cinnamon roll and will want to kinda squish out if you are not carful with the cutting. Place the rolls into 2 buttered pie pans or round cake pans. Cover each pan in plastic wrap and allow the rolls to rise for another half hour.

  9. Preheat oven to 350 degrees.

  10. Once the rolls have risen, place the pans on the middle oven rack and bake for 30-35 minutes. Let Rolls cool a bit before adding the icing.

  11. To make the icing, mix powdered sugar, zest and orange juice together. Mix just enough juice to thin out the mixture. If you get it too thin, just add a little more powdered sugar. Drizzle the icing over the rolls still in the pan and serve.

  12. Store left over rolls in an airtight container at room temperature.

If you like this recipe, try these:

Vegan Angel Biscuits

Vegan Cinnamon Rolls with Cream Cheese Icing

Easy Homemade Vegan Bagels

Vegan Cranberry Orange Sweet Rolls

vegan cranberry orange sweet rollls using vegan cinnamon roll dough

Vegan Candied Pecan Maple Spice Cake

Vegan Candied Pecan Maple Spice Cake

I want to tell you a short story about how this cake is the product of a couple epic fails. One of those happy accidents, or maybe one of those Hail Mary passes in baking where you think you are done but give it one last shot, fingers crossed.

Why am I telling you this? Well in hopes of encouraging you. To let you know that even food bloggers have their fare share of kitchen disasters just like everyone else. And even though I bake all the time, and like to toot my own horn at veganizing just about any recipe I find that I want to try, sometimes I fail and fail hard.

I found a beautiful fall cake in a magazine that I could not wait to turn vegan. It never even crossed mind that it could go south the way it did.

Whenever adding fruit to a baked good you add moisture, and it does not always work in your favor. Long story short I ended up with three super dense, 9 inch pancakes instead of cakes.

I then came to the conclusion that I would not waist any more of my time on that cake and would just make a fall inspired spice cake for the delicious looking frosting in the original cake. It called for cool whip but I was convinced I could make a butter cream that was close. I was SO wrong.

Once again, certain fruits and butter cream only end in disaster. Thus the candied pecans stepped in, along with a maple butter cream, and I am not lying when I say this is now hands down my favorite cake on the website.

Its fluffy with the right amount of spice, the butter cream has a hint of maple and the candied pecans are the perfect sweet and salty crunch the cake needed. This cake would work beautifully for Thanksgiving or any fall gathering.

And remember, when a recipe seems like a failure, its not the end of the story. Just shake it off and keep baking. Something delicious may just come out of all the mess. Happy fall y'all !


Ingredients:

  • 2 1/2 cups all purpose white flour

  • 1 1/2 cups sugar

  • 1 tablespoon baking powder

  • 2 teaspoons ground cinnamon

  • 1/2 teaspoon nutmeg

  • 1/2 teaspoon ground ginger

  • 1 teaspoon salt

  • 1 1/4 cup aquafaba (whipped chickpea liquid, you are measuring out the WHIPPED aquafaba - not the liquid)

  • 1 cup oat or almond milk

  • 2 teaspoons vanilla extract

  • 1 1/4 cup vegan butter

Spiced Maple Buttercream:

  • 1/2 cup vegan butter

  • 1/2 cup shortening

  • 3 cups powdered sugar

  • 2 tablespoons maple syrup

  • 1-2 teaspoons cinnamon

  • 1 teaspoon ground nutmeg

  • 1 teaspoons vanilla extract

Candied Pecans:

  • 1 cup pecan halves

  • 2 teaspoons vegan butter

  • 2 tablespoon brown sugar

  • 1/2 teaspoon cinnamon

  • 2 teaspoons maple syrup

  • pinch of salt

Vegan Candied Pecan Maple Spice Cake

Instructions:

preheat oven to 350 degrees

  1. Prepare (2) 8 inch cake pans by first coating with a thin layer of vegan butter, then lightly dusting pans with flour.

  2. Prepare the aquafaba according to instructions. (follow link to recipe and instructions)

  3. In the bowl of your stand mixer, or a large bowl if using a hand mixer, whisk together all of your dry cake ingredients.

  4. Add the butter, and all of the milk into the dry ingredients. Cream on medium speed for a few minutes until completely smooth. Add vanilla and mix for a few more seconds.

  5. Next, with a spatula, gently fold in the aquafaba, careful not to over mix. You do not want to deflate the aquafaba. If you do, your cake will not be as fluffy.

  6. Evenly divide batter between the 2 prepared pans and bake cakes for 40 -45 minutes, or until a toothpick inserted in the center comes out clean.

  7. While the cakes are cooking, prepare the candied pecans by heating a small skillet on medium heat. Melt the butter, next adding the pecans, brown sugar, maple syrup, cinnamon, and salt. Lower the heat a bit and continue moving the pecans around the pan with a spoon while the sugar melts, and begins to get sticky. The nuts and sugar can burn quickly, so be sure to keep the pecans moving until the sugar becomes fully melted and looks like caramel. This can take between 5 and 10 minutes depending on the pan. Once pecans are done, pour them out onto a plastic cutting board or a piece of wax paper allowing them to cool, and the sugar to harden. Once they have cooled you can break them apart and into pieces. Set the pecans aside.

  8. Allow cakes to cool in the pans on a wire cooling rack for about 20 minutes.

  9. While cakes are cooling, prepare the frosting by mixing together the butter and shortening in your stand mixer or using an electric hand mixer. Add in the vanilla, spices, and maple syrup. Continue mixing until well incorporated. Slowly begin beating in the powdered sugar. If the frosting seems too stiff, add a few teaspoons of milk at a time until it has reached a spreadable constancy.

  10. Once cakes have cooled for 20 minutes, turn them out onto the cooling rack to cool completely. Once cakes are completely cooled, begin frosting by adding a layer of buttercream on one cake layer, and spreading evenly to the edges. Sprinkle half of the candied pecans evenly on the first layer. Place second cake layer on top and cover the cake with remaining buttercream and sprinkle with remaining candied pecans.

  11. Slice to serve. Store cake in an airtight container.

If you like this recipe, try these:

Vegan Coca-Cola Cake

Vegan Chocolate Peanut Butter Dream Cake

Vegan Lime Mojito Cupcakes

Vegan Candied Pecan Maple Spice Cake

Vegan Candied Pecan Maple Spice Cake

Vegan spice cake with maple frosting and candied pecans

Easy Vegan Quiche Bread Boats

Easy Vegan Quiche Bread Boats

I love using tofu to mimic eggs. It works so well and is extra convincing when using in quiche. I think I was super skeptical when first learning you could make tofu into “eggs,” But honestly, it really really works, in a tofu scramble, when making quiche, even when making vegan deviled eggs.

You can also add a sprinkle of black salt, Kala Namak. This black salt smells and taste of eggs because it is sulfurous! So now all of you faux egg dishes will become convincingly more egg like!

You can use any veggies you like or have on hand in this recipe. Just dice them up, give them a sauté and toss them in the quiche mix. I love these quiche boats because they transport easily and are handheld so easy to eat on the go.

They are perfect for a rushed morning breakfast on your commute, on road trips, or they even make a perfect brunch or dinner. No matter when or where you eat them, I promise you they are delicious. I mean after all, they are in a boat of bread, and if you know me at all, you know that carbs are forever my love language!


INGREDIENTS:

  • 1 package extra firm tofu

  • 4 hoggie rolls or French bread stick divided into quarters

  • 1/4 cup plant based milk

  • 2 tablespoons nutritional yeast

  • 1 teaspoon turmeric

  • 1 teaspoon powder garlic

  • 1 teaspoon salt

  • 1/2 teaspoon pepper

  • 1/4 yellow onion, diced

  • 1 cup mushrooms, diced

  • 1/2 cup diced tomatoes

  • 1 avocado diced

  • Fresh chopped basil

  • Vegan parm or any other vegan cheese you may like (optional)

  • 1/4 teaspoon black salt (Kala namak) if you have it. The sulphur in the salt makes it smell of eggs. This salt is amazing when making any vegan egg product.

easy-vegan-quiche-bread-boats-2.jpg

COOKING INSTRUCTIONS:

  1. Preheat oven to 350 degrees.

  2. In a medium sized skillet, spray a little cooking oil and add the veggies, except the avocado. Sauté until the onions become translucent, then remove from heat.

  3. Add the remaining ingredients to a food processor, or a high speed blender, and blend until the mixture is completely smooth.

  4. Dump the veggies (except avocado) into the tofu mix, and pulse just a few times to mix them up. If adding avocado just fold it into the mix with a spoon to avoid mashing it up. If you want to add cheese to the mix you can or you can top the quiche with cheese, or just garnish them with cheese if you want.

  5. Cut the tops off of the rolls and scoop out some of the middle making it like a bowl. Place rolls on a cookie sheet and evenly divide the tofu mixture between the rolls.

  6. Bake the quiche boats for about 40 - 45 minutes on the middle rack of your oven. You can test them by inserting a skewer or cake tester into the center to the boat. It it comes out clean they are done.

  7. Garnish with fresh chopped basil and store any leftovers in the fridge.

If you like this recipe, try these:

Layered Vegan Breakfast Pie

Vegan Sausage Egg and Cheese Breakfast Pizza

The Jax Biscuit Sandwich


ADD A DESCRIPTION!

Minestrone Soup With Vegan Meatballs

Minestrone Soup With Vegan Meatballs

Add a vegan meatball to just about any recipe and I am ALL in.

If I am being totally honest, until recently I was not a huge fan of minestrone soup. I am actually not a big noodle soup eater. BUT, when it dawned on me that we could add vegan meatballs to minestrone, suddenly I was far more interested in the idea.

My whole family loves soup, especially in the fall and winter months, so I try really hard to make sure any soup or stew I make is going to be filling and satisfying. Nobody wants to hear their family complaining about still being hungry an hour after you just slaved over dinner. Am I right?!?!?

Well, no worries with this easy and delicious recipe. It’s full of healthy veggies, filling pasta, and delicious vegan meatballs. Serve this vegan minestrone up with a side or crusty bread or a nice salad and everyone should leave the table full and happy!

You can also feel free to swap out the veggies for whatever you have on hand, whatever is in season, or whatever veggies your family will happily eat, if thats how you roll. In my house, you get what you get and you don’t pitch a fit. That is not to say that my son does not always eat around any bean or or piece of zucchini in his bowl, but we can’t win them all, try as we might!


INGREDIENTS:

  • 1 zucchini, diced

  • 3 carrots, sliced

  • 3 ribs of celery, chopped

  • 1 medium yellow onion, diced

  • 3 cups chopped Swiss chard, kale, or spinach

  • 2 teaspoons mined garlic

  • 2 tablespoons chopped fresh basil

  • 1 teaspoon oregano

  • 2 teaspoons Italian seasoning

  • 3 teaspoons Vegetable Better than Bouillon

  • 6-7 cups water

  • 1 (15 oz) can tomato sauce

  • 1 (15 oz) can diced tomatoes

  • 1(15 oz) can cannellini beans, drained and rinsed

  • 1 1/2 cups dry ditalini pasta or small macaroni pasta

  • a pinch of red pepper flakes (optional)

  • salt and pepper to taste

  • 2 teaspoons of olive or grapeseed oil

  • vegan parmesan cheese for garnish (optional)

  • additional fresh basil for garnish (optional)

VEGAN MEATBALLS:

  • 1 lb vegan ground chuck, I use Beyond Beef brand, or 4 thawed beyond burgers

  • 1/4 cup bread crumbs

  • 1 flax egg

  • 1 teaspoon minced garlic

  • 1 teaspoon Italian seasoning


INSTRUCTIONS:

  1. Begin by heating oil in a large pot or dutch oven over medium heat. Add the onions, celery, carrots, and garlic. Allow the veggies to cook until the onions are translucent.

  2. Add the cans of tomatoes, Better than Bouillon, water, beans, herbs, and seasoning. Reduce heat to low and allow the soup to simmer while you prepare and cook the meatballs.

  3. Preheat oven to 350 degrees. Prepare the meatballs by mixing all of the ingredients in a large bowl. Scoop out tablespoon sized scoops of the mixture and form into small meatballs. Place meat balls on a parchment lined baking sheet (just makes for easier cleanup) and bake for about 20-25 minutes.

  4. Add the cooked meatballs, chopped greens, and noodles to the soup. Allow the soup to continue cooking until the noodles are cooked through.

  5. Serve as is, or with a side of crusty artisan bread and garnish with vegan parmesan cheese.

If you like this recipe, try these:

Hearty Vegan Vegetable Beef Stew

Jackfruit and Orzo Soup

Loaded Vegan Baked Potato Soup

Minestrone Soup With Vegan Meatballs

vegan minestrone soup with vegan meatballs

Sun-dried Tomato and Garlic Cheese with Coconut Milk

IMG_4944.jpg

If you have yet to dive into vegan cheese making, let me urge you to start right now! Seriously! It is not hard at all, errrr maybe I should say difficult because these agar cheeses are actually hard or firm enough to slice, or shred!! They also only take like 10 minutes to mix up and only a few hours to firm up in the fridge!

We use agar agar powder to solidify these cheeses. Agar agar is just a vegan gelatin made from a type of seaweed. Noting too weird, and it can be easily found online on Amazon or even in you local Asian food market. Don’t let an ingredient you may not be familiar with scare you off! Just get some, and keep some on hand. I promise once you make your first batch of vegan cheese, it wont be your last!

I love experimenting with different vegan cheese flavors and bases. I really love using coconut milk because it’s easy and affordable. Unlike nut cheeses were you have to soak nuts and own a pretty powerful blender or food processor to break them down, with coconut milk cheeses you simply have to open the can! And of course a can of coconut milk is way cheaper than cashews! Not to mention these cheeses are more allergy friendly.

Don’t get me wrong, I love a cashew based vegan cheese and have plenty of those recipes on the site as well, but most of the time I opt for for a coconut base because of how easy and affordable they are!

This cheese recipe will yield about 3 “wheels” of cheese depending on the size mold you use. So you can’t beat the price compared to store bought cheeses. You will often pay over $5 for a vegan store-bought cheese, where here you may spend $5 and end up with 3Xs what you would get for the same price at the store!

Making you own cheese at home also means you can make any flavor you can dream up. We have dozens upon dozens on the site if you are stumped for ideas. But really, there are soooo many options!

I am often asked if these cheeses have a strong coconut flavor and the answer is, not really. I always used refined coconut oil which has little to no coconut flavor at all, and all of the spices and other ingredients in the cheese mask the flavor of the milk very well.

I love this particular cheese because sun-dried tomatoes and garlic together are a favorite of mine. This vegan cheese will slice, shred, and even melt, making it perfect for serving with cracker, on sandwiches, salads, or just snacking! This is a quick set cheese and is so simple to make, there is no reason to keep overpaying for store bought vegan cheese! You can have delicious vegan cheese, start to finish in about 2 hours, and for a quarter of the grocery store price!


INGREDIENTS:

  • 1 can of full fat coconut milk or cream

  • 2 tablespoon of apple cider vinegar or lemon juice

  • 2 teaspoons miso paste

  • 1 teaspoons of salt

  • 1/4 cup nutritional yeast

  • 1/4 melted cup refined coconut oil

  • 2 tablespoons agar powder

  • 1/4 cup sun-dried tomatoes

  • 2 teaspoons minced garlic


COOKING INSTRUCTIONS:

  1. In a food processor or high speed blender, add all of the ingredients EXCEPT the milk, and agar.

  2. Pulse a few times to mix it all up.

  3. Now add the milk, and agar to a medium sauce pan and bring to a boil. Reduce heat and simmer until mixture thickens to the constancy of a thin pudding.

  4. Add the milk mixture to the ingredients in the food processor, and mix for about a minute. The mixture will quickly begin to thicken as agar begins to solidify at room temperature.

  5. Transfer to the mixture to a few ramekins or small bowls. You should be able to fill 2 or 3 small bowls.

  6. Allow the cheese to harden in the refrigerator uncovered for about several hours.

  7. Once the cheese is set, store in an airtight container in the fridge for about a week.

IMG_4940.jpg
IMG_4942.jpg

easy vegan coconut milk cheese with sun-dried tomatoes and garlic using agar agar

Hearty Vegan Vegetable "Beef" Stew

Vegan Hearty “Beef” Stew

Our oldest daughter was the biggest meat eater in our family before we went vegan. I would venture to say the transition to vegetarian and then vegan might have been hardest for her. She loved LOVED beef stew and I could always assume if asking her what she would like for dinner she was going to request beef stew or meatballs.

So once we went vegan I knew beef stew was one of the meals she missed the most. I have tried this recipe without a meat substitute, and like it just fine myself, but she still prefers a fake meat.

You can make your own vegan beef tips by following the instructions in my Vegan Beef Bourguignon but that is a little extra work (yet totally worth it if you have the time) , or use store bought vegan “beef” tips, if you are looking for quick and easy. The last brand I bought was so convincing that I was a little freaked out at how “beefy” it was.

I could have fooled just about anyone with our last batch. I actually dug the package out of the trash just to double check that I wasn’t losing my mind and to make sure I had not grabbed the wrong thing at the store.

So if beef stew was a pre-vegan favorite of yours, then you gotta try this recipe. If you don’t care for fake meats, then go ahead and leave it out. I promise it is just as good. I happen to prefer it that way as well. Either way, this stew deliciously satisfying vegan comfort food and perfect for warming you up in the fall and winter months.


INGREDIENTS:

  • 1 red onion, diced

  • 4 stalks celery, diced

  • 2 cups carrots, diced

  • 2 cups red potatoes, diced

  • 1 cup frozen green peas

  • 1 cup button mushrooms, diced

  • 1 bag frozen vegan “beef” tips or, homemade vegan beef tips

  • 5 cups vegetable or mushroom broth

  • 1 cup red wine, like merlot

  • 2 teaspoons Vegetable Better Than Bouillon

  • 2 teaspoons minced garlic

  • 2 teaspoons dried thyme

  • 1/2 teaspoon black pepper

  • 1 teaspoon all purpose seasoning, I like Trader Joe’s 21 season salute

  • 1 tablespoon tomato paste

  • Salt to taste ( the Better than Bouillon and all purpose seasoning are pretty salty, so add salt to your liking)


INSTRUCTIONS:

  1. You will need a large dutch oven or a pot that is oven safe.

  2. Heat 2 teaspoons of oil in the pot over medium heat on the stove top. Add the onions, celery, mushrooms, carrots, and garlic and sauté until the onions are translucent. Add the potatoes, better than bouillon, tomato paste and wine. Stir well and let the wine simmer for a few minutes.

  3. preheat oven to 350 degrees, moving the top rack to the middle. You will need enough room for the pot to fit in oven

  4. Add the remaining ingredients to the pot, stirring well. Bring the stew to a boil. Once the stew has come to a boil, place the lid on the pot and transfer the soup carefully to the preheated oven.

  5. Allow the stew to cook in the oven for about half an hour. After half an hour remove the lid and give it a stir. Replace the lid but scoot it to the side a bit, where it is still on the pot but not fully covering it. Let stew cook for another 30 minutes.

  6. Carefully remove the stew from the oven and place back on the stove top or onto a heat safe trivet. Remove the lid fully and allow the stew to cool just a bit before serving.

If you like this recipe, try these:

Vegan “Chicken” Southwestern Soup

The Best Vegan Chili

Loaded Vegan Baked Potato Soup

Vegan Hearty “Beef” Stew

Hearty vegan beef stew