cake

Vegan Milk Bar Birthday Cake

So here is the truth. I have never in my life eaten a Milk Bar anything. BUT, I have always wanted to.

I have seen countless friends post pics of delicious looking Milk Bar cakes and cookies. I have seen the mixes in the grocery store, and every part of me has dreamed of a vegan version of their sprinkle filled original birthday cake.

I mean I love sprinkles, and funfetti was my go to box cake pre vegan.

And here is another thing, I LOVED BOXED CAKE AND CANNED ICING before going vegan. I can bake from scratch and am pretty good at it. My daughter is a crazy amazing baker. But sometimes I just crave artificial tasting, buttery, boxed cake.

So this year for my mother-in-laws birthday we sent her a Milk Bar cake. She is not vegan and she has not had a birthday cake in like 20 years or something crazy like that. So we sent her one because Milk Bar delivers their famous cakes all over, with just a couple days notice, even to the middle of nowhere mountain towns with no local bakery to order from.

My oldest daughter was like “hey why cant we get a cake” and I was like “umm they are nowhere close to vegan, or allergy friendly, but why don’t I just try to make one.” At which point I had committed to this venture and also expect it to be a total failure. I have veganized a lot of recipes with success but when I dug into this one I got scared!

For starters I used the Boston Girl Bakes recipe for reference. She explains EVERYTHING so well and with great detail. I strongly suggest you read through what she has to say about this famous cake. I obviously had to make several changes since I am making the vegan version. But I followed her advice as closely as I could while making the necessary vegan changes.

I had to test several ideas to get this Milk Bar Vegan Cake right. Now remember, I have not had an original Milk Bar Cake to compare it to, so I had to rely mostly on pictures and descriptions online to see that mine was close, and then I shared samples with friends who HAVE EATEN the famous sprinkle cake, and got their feedback. Even my “failed” attempts were so delicious. The tricky part for me was getting the crumb right and I think the combo of starch eggs and aquafaba did the trick and also making sure you use CAKE FLOUR. I used a high protein flour in my first attempt because I didn’t have any cake flour and thought I might not really matter, IT MATTERS, A LOT!!!

If you have never heard of Milk Bar or seen this or any of their other desserts then let me help educate you at least on this particular cake. You NEED this cake in your life. I PROMISE!

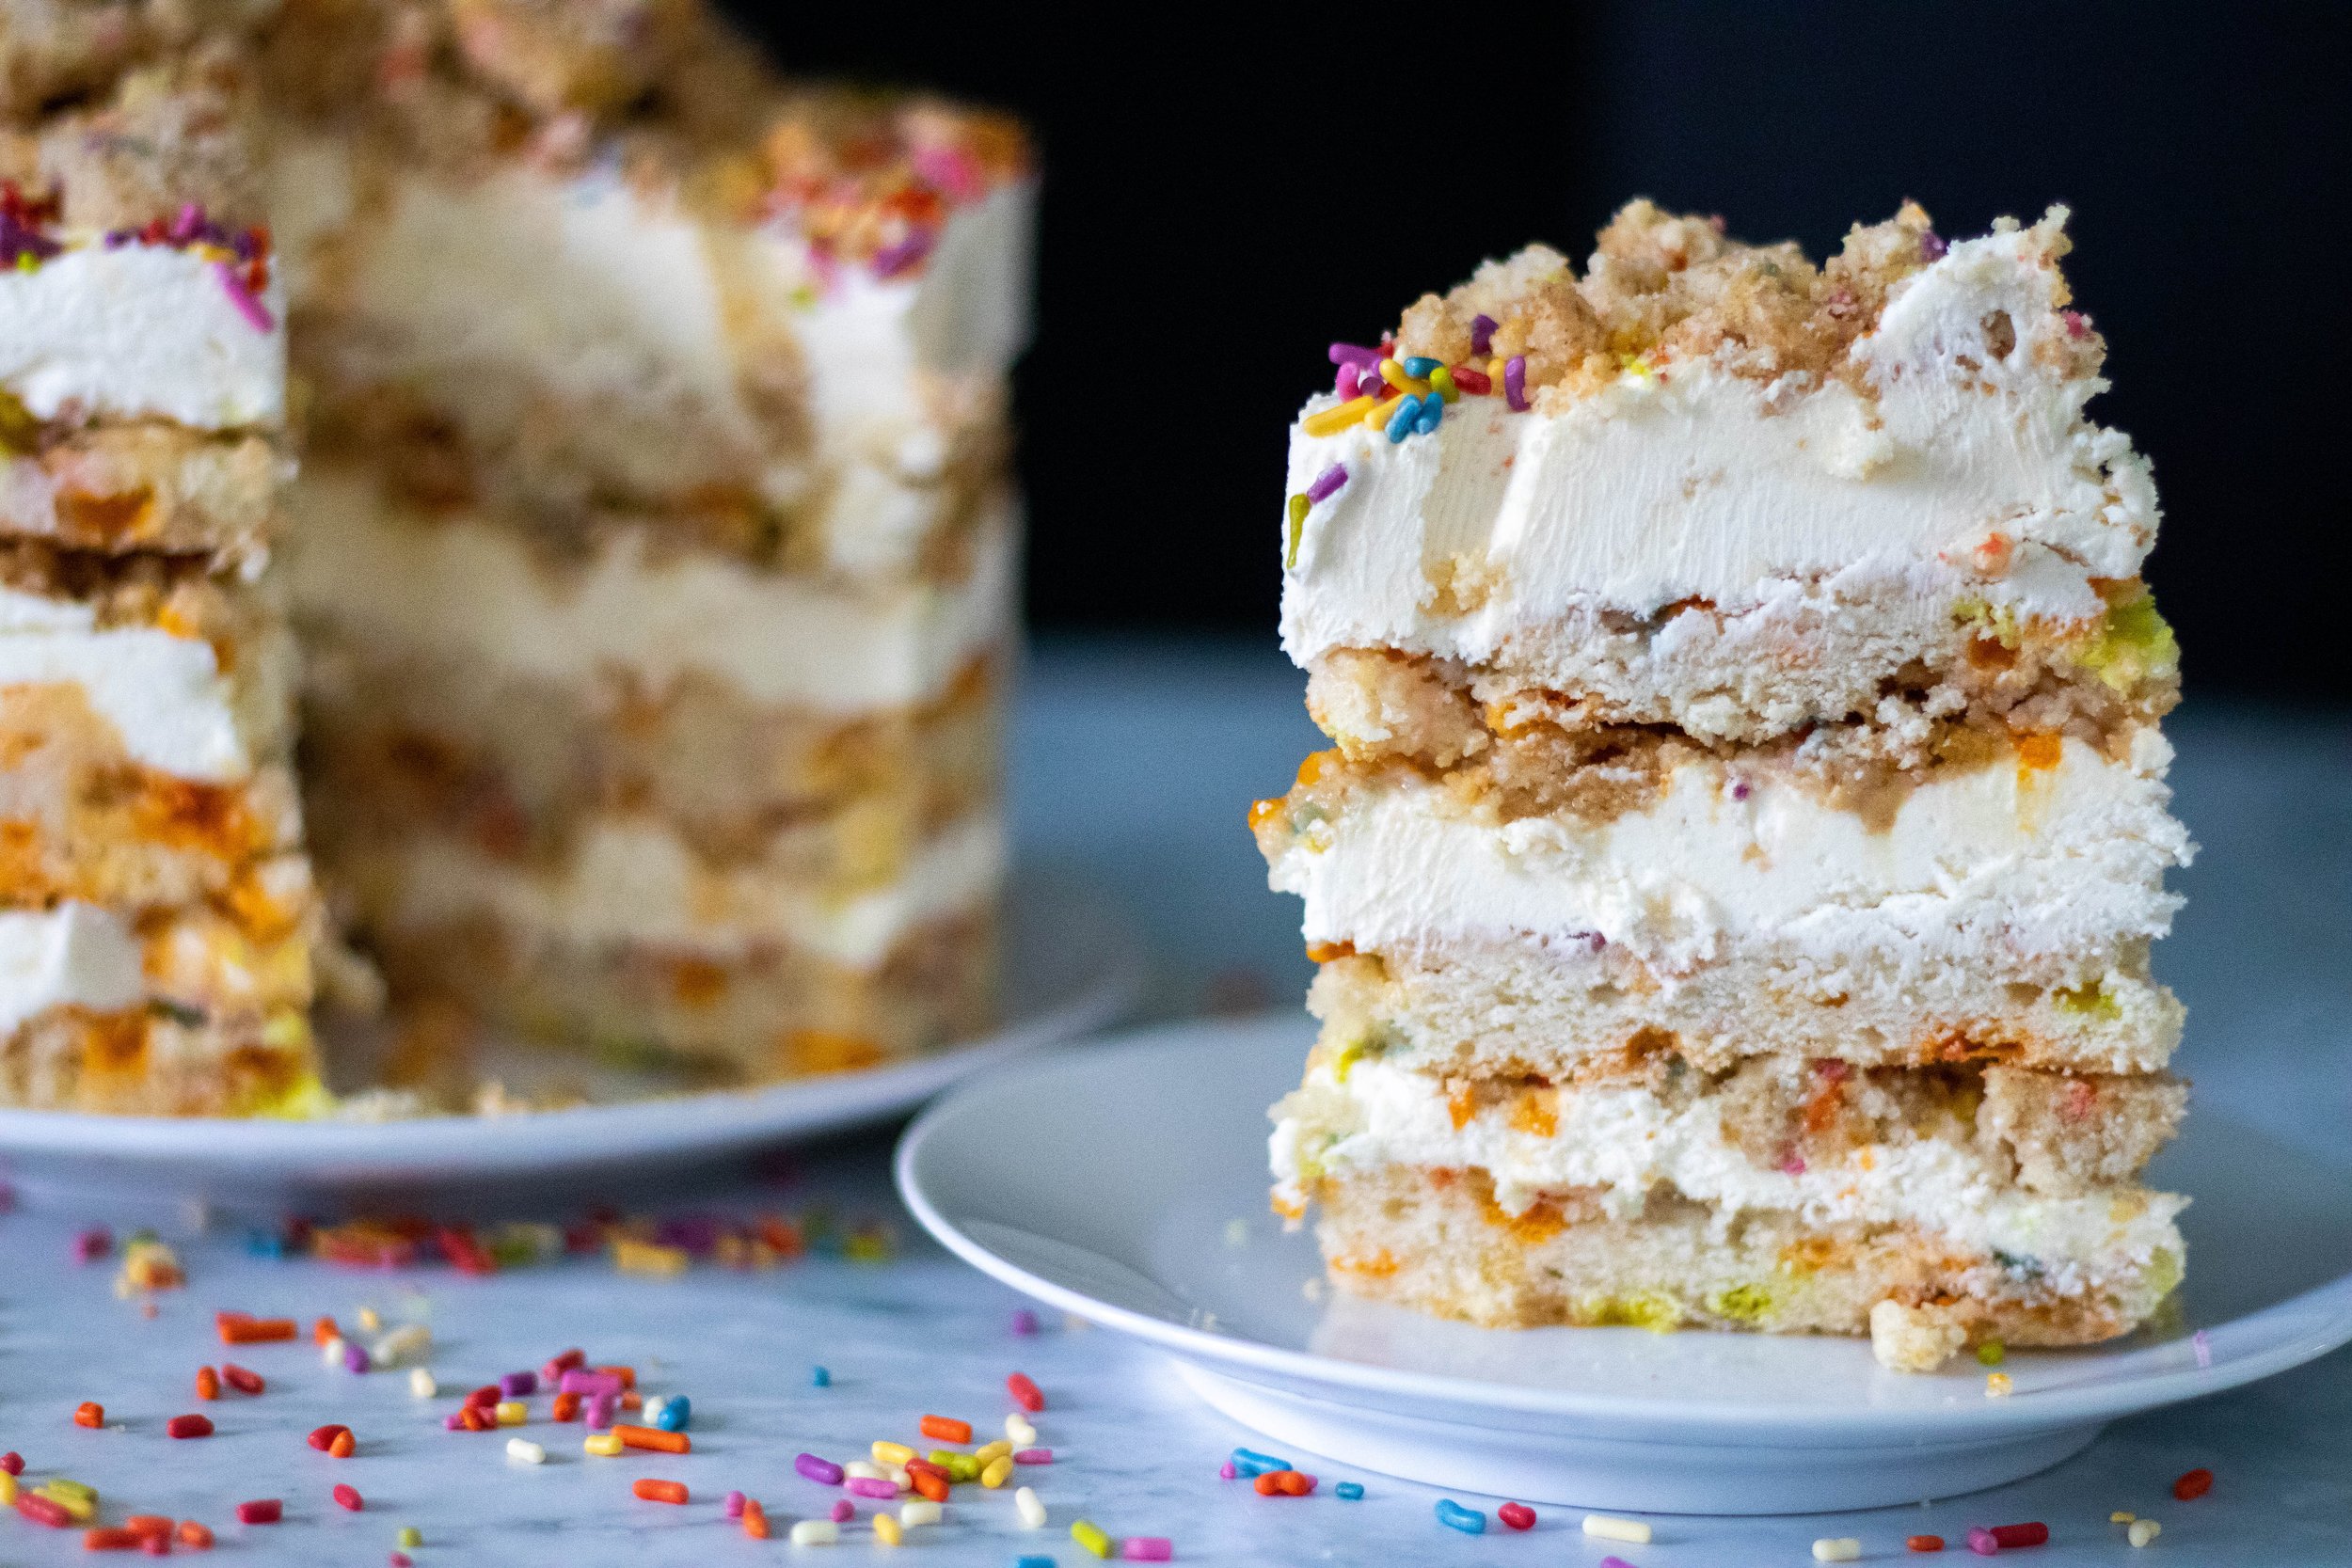
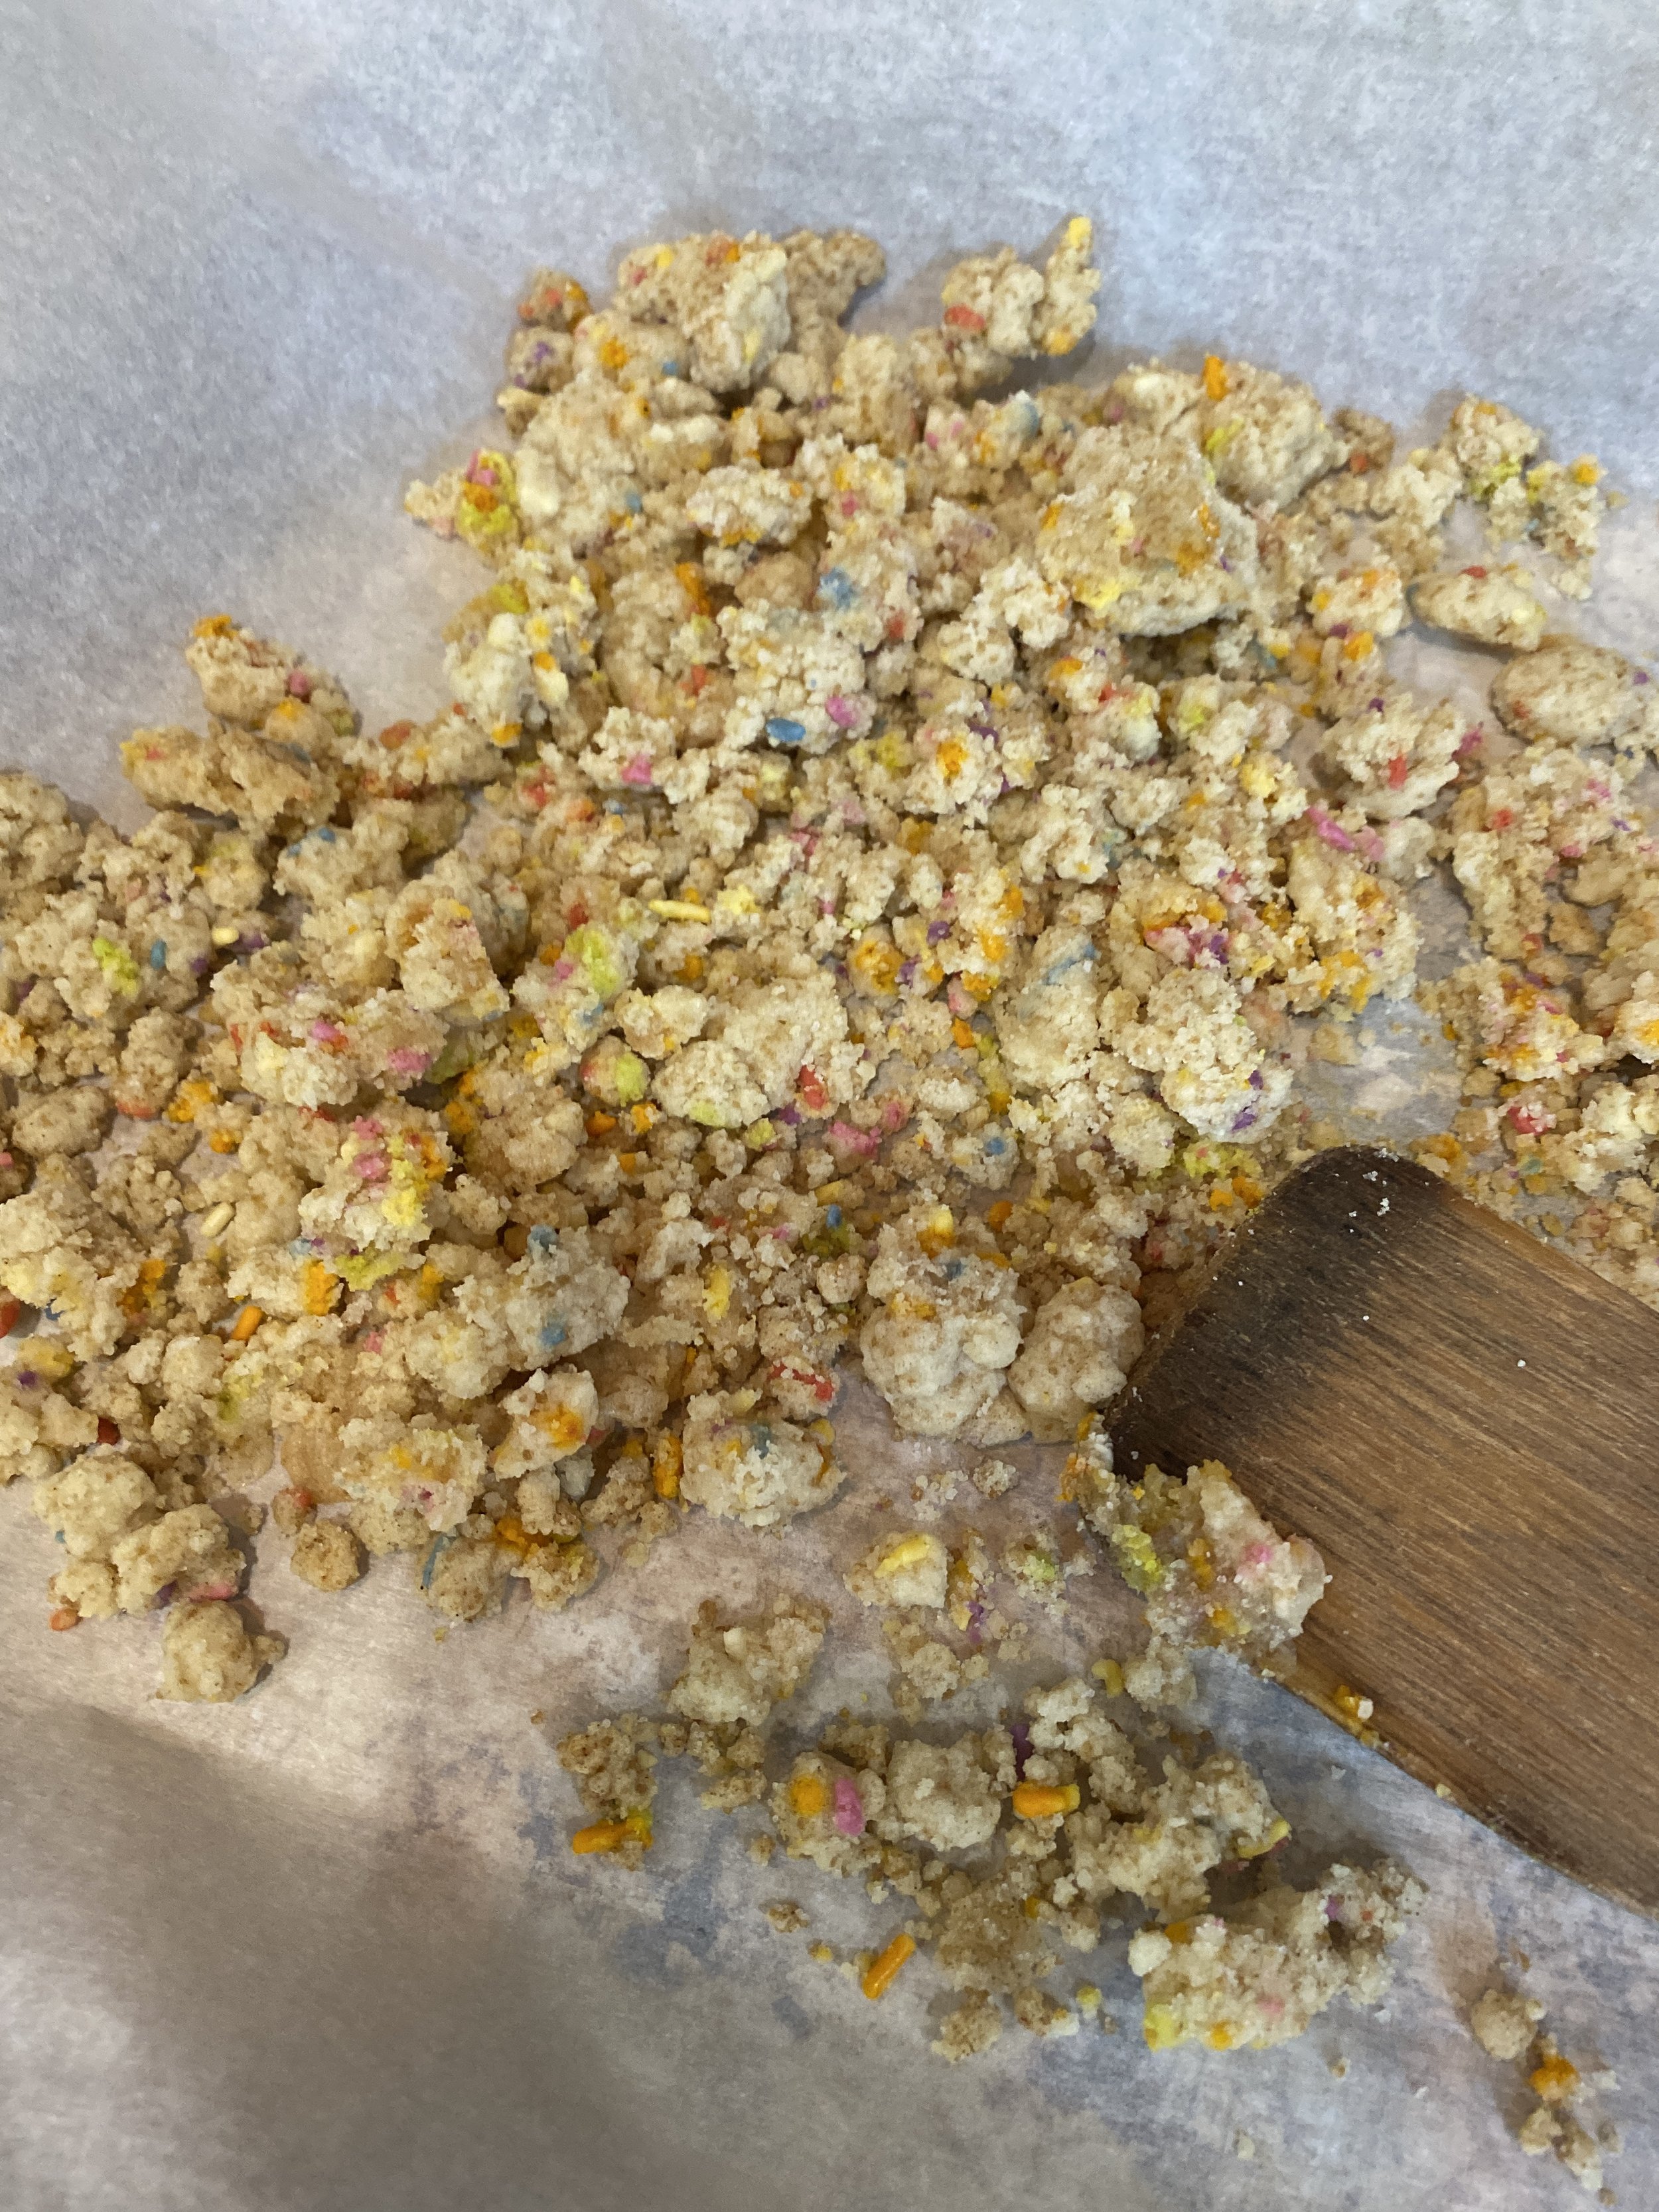
The Milk Bar is a bakery that started in New York. There are locations all over now and you can order online. You can also buy their mixes in Target stores. Their Sprinkle Birthday Cake is like a boxed funfetti cake on steroids. The cake is light and fluffy and buttery and packed full of sprinkles. The frosting is my new favorite buttercream. Seriously I will be using this as the base of all my future butter creams. And then there are the CRUMBS. The perfect little crunchy cake crumble crumbs you bake separately, and put between every layer of cake. I could make a double batch of just the crumbs to snack on and be one happy lady.

The cake calls for clear vanilla extract…so artificial vanilla flavor, and this is the magic of this cake. You NEED TO GET THE CLEAR VANILLA!! It’s important not to skip this part. This is what gives you that boxed vanilla flavor!! The cake originally calls for glucose syrup but I just doubled my corn syrup and believe that works just fine.

You also have to have a cake ring and some acetate to form the cake. I ordered mine together on amazon. I feel like now that I am not intimidated anymore about using a cake ring, I will be using it a lot. It is so much fun to use!! Stacked cakes for everyone from here on out!!

And there you have it, my best effort a veganizing the classic Milk Bar Sprinkle Birthday Cake.

So if you are like me and dreamed of a day this cake was vegan, or you have never heard of Milk Bar and this cake, trust me when I say I think you will love this vegan milk bar sprinkle birthday cake. And really, no need to wait for a birthday to make it. Everyday is worth celebrating with sprinkles!


INGREDIENTS:

You will need the following for this recipe:

For the Cake Crumbs:

  • 1/2 cup granulated sugar

  • 1 1/2 tablespoons brown sugar

  • 3/4 cup cake flour ( cake flour is a must for this recipe)

  • 1/2 teaspoon baking powder

  • 1/4 teaspoon salt

  • 2 tablespoons vegan rainbow sprinkles

  • 1/4 cup grapeseed or canola oil

  • 1 tablespoon clear vanilla extract ( this is an important ingredient, don’t substitute with real vanilla extract)

For the Cake:

  • 4 tablespoons vegan butter. (I used Trader Joes block of butter. I recommend a vegan butter block or Follow your heart. Not all vegan butters are created equal)

  • 1/3 cup vegetable shortening ( I use Spectrum)

  • 1 1/4 cup granulated sugar

  • 3 tablespoons brown sugar

  • 2 tablespoons tapioca starch mixed with 6 tablespoons water

  • 2 tablespoons aquafaba ( liquid from a can of chickpeas or white beans. We are not using the whipped version, rather just the liquid this time)

  • 1/2 cup oat or almond milk

  • 1 teaspoon apple cider vinegar

  • 1/3 cup grapeseed or canola oil

  • 2 teaspoons clear vanilla extract

  • 2 cups cake flour (I used Swans Down)

  • 2 teaspoons baking powder

  • 1/4 teaspoon salt

  • 1/4 cup plus 2 tablespoons rainbow sprinkles, divided

For the Frosting:

  • 16 tablespoons vegan butter

  • 1/2 cup vegetable shortening

  • 4 oz vegan cream cheese (I used Trader Joes brand)

  • 4 tablespoons corn syrup

  • 2 tablespoons clear vanilla extract

  • 3 cups powdered sugar

  • 1/4 teaspoon salt

  • 1/8 teaspoon baking powder

  • 1/8 teaspoon lemon juice

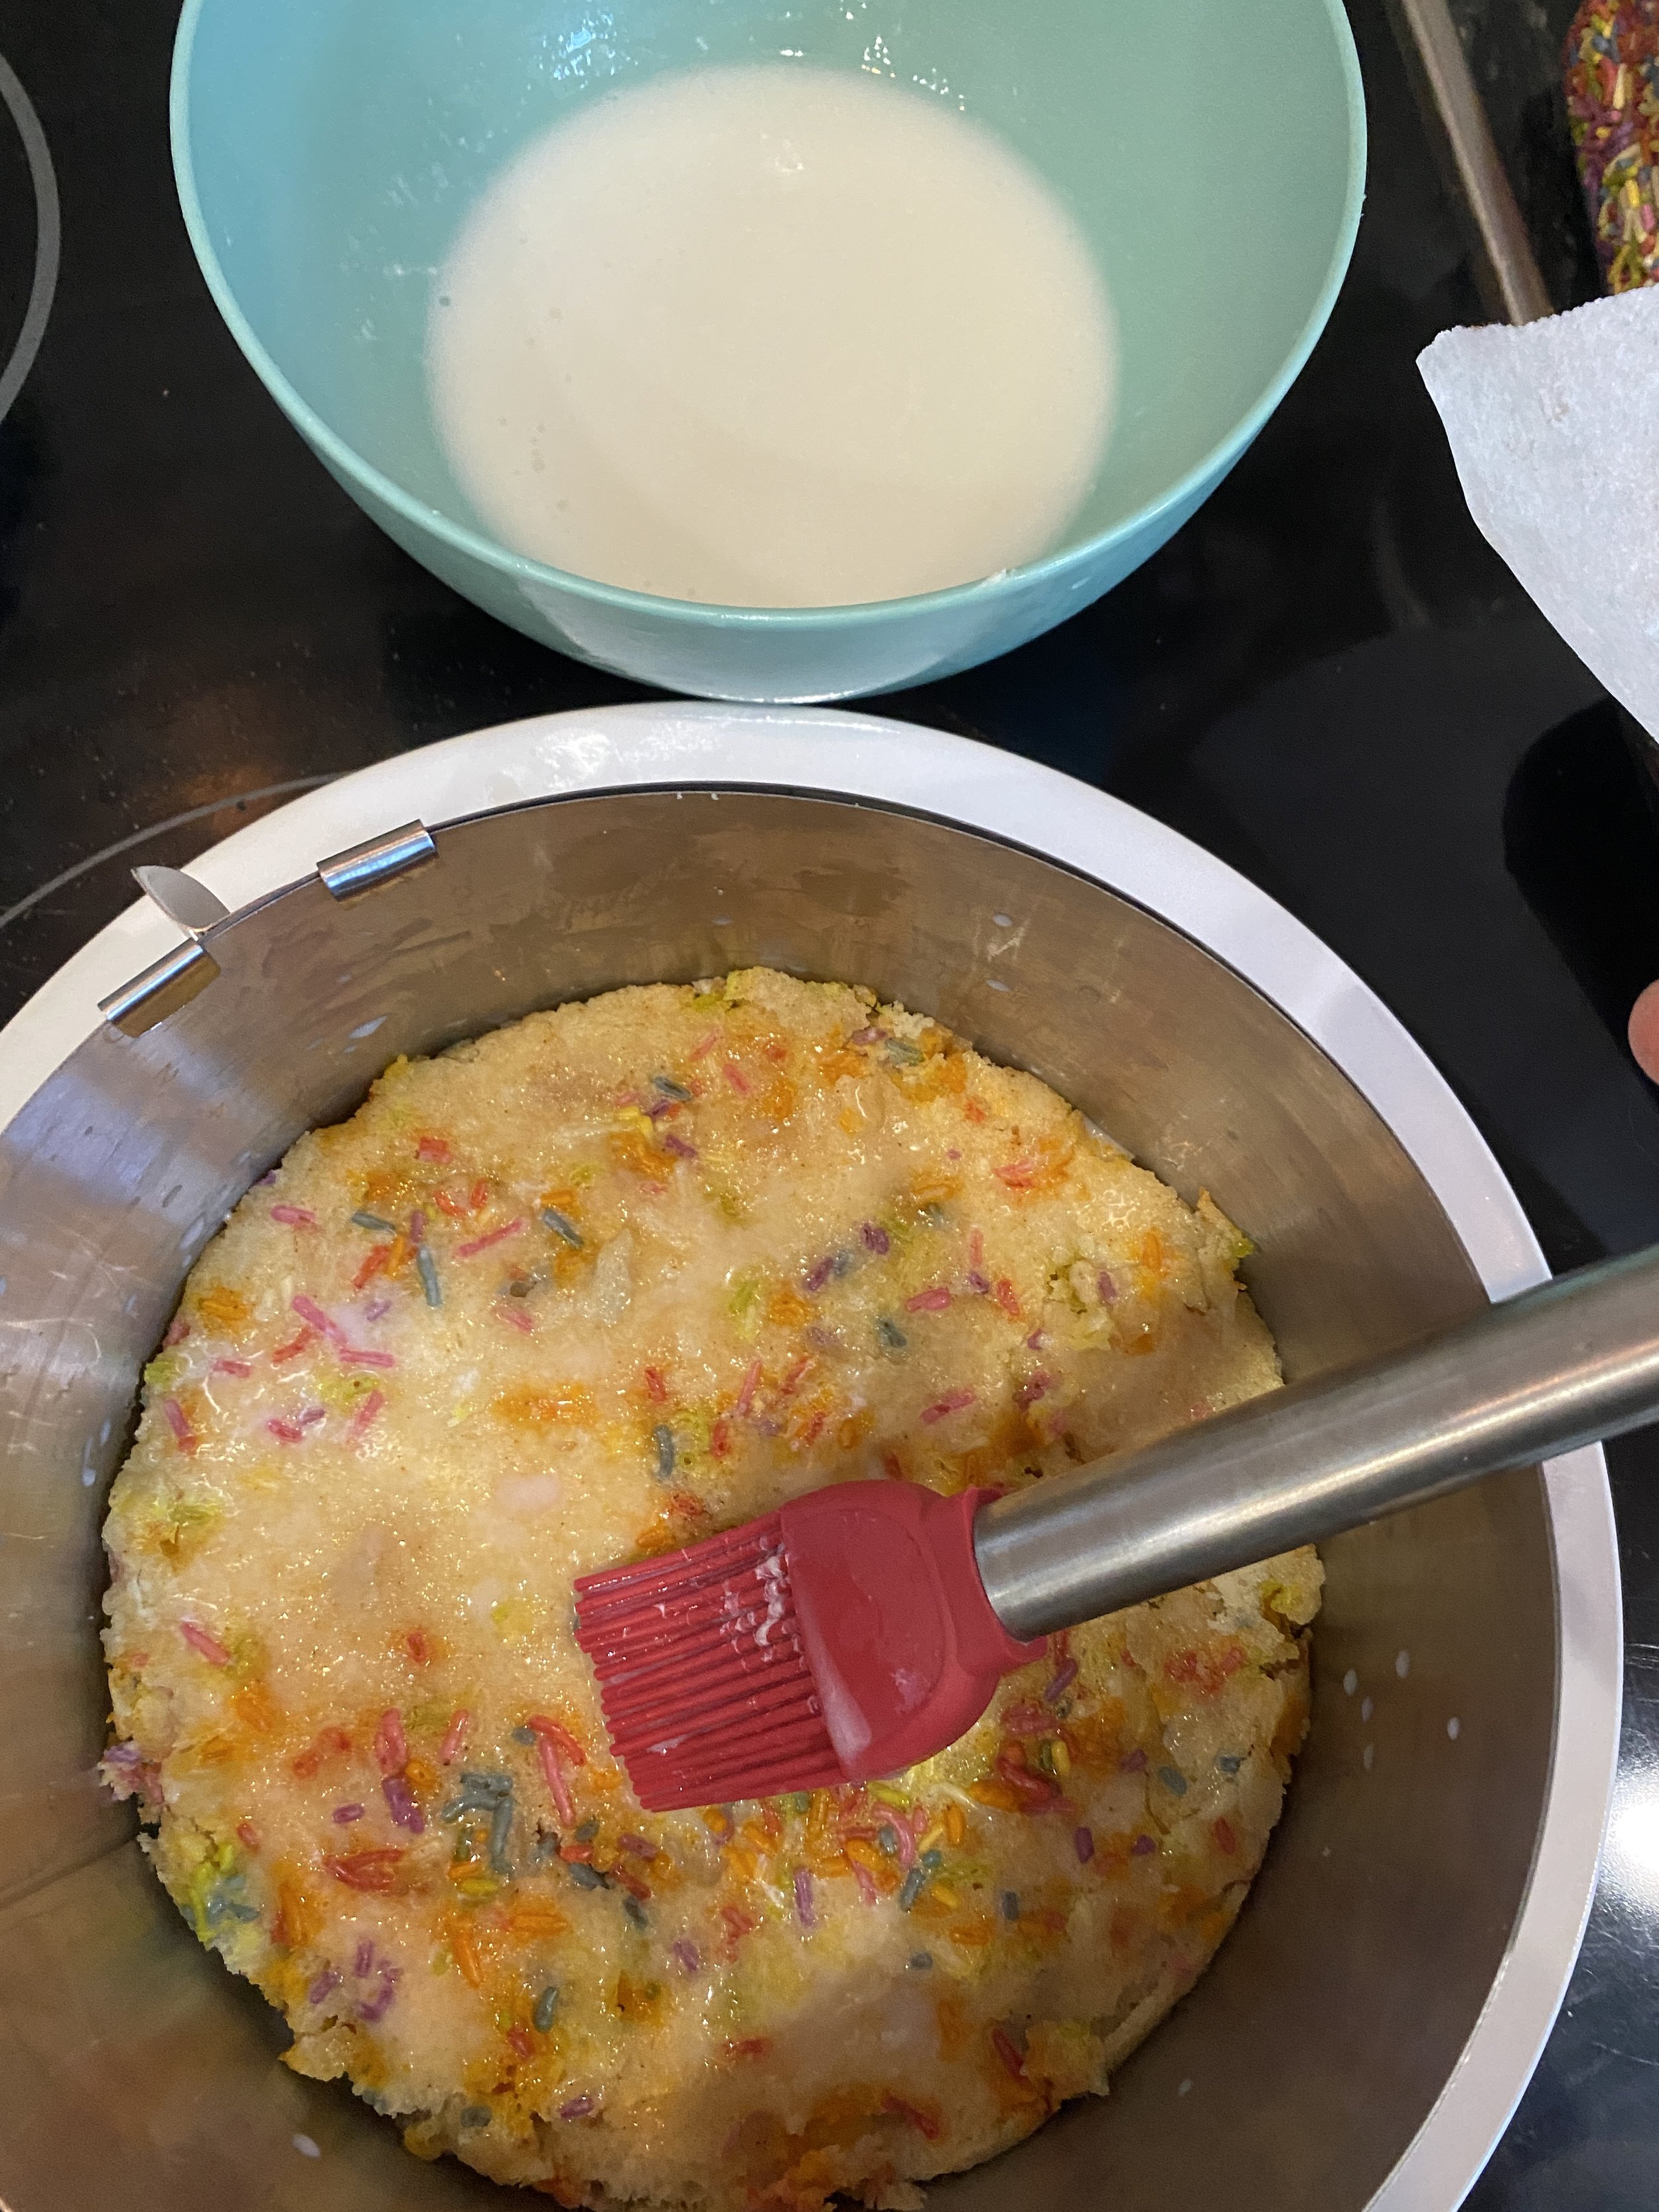
For the Cake Soak:

  • 1/4 cup almond or oak milk

  • 1 teaspoon clear vanilla extract


INSTRUCTIONS:

For the Cake Crumbs:

preheat oven to 300 degrees

  1. Add all of the dry ingredients to a bowl of a stand mixer ( I have been using a Hauswirt for the last year and am in love after having my one year old kitchen aid break and not being able to get a replacement in the pandemic) and mix until combined. Add the wet ingredients and mix just until clusters form.

  2. Line a cake sheet with parchment paper. Pour the cake crumb clusters onto the pan and spread them out.

  3. Bake for 20 minutes. Halfway through the bake, use a wooden spoon to break up the chunks a bit.

  4. The crumbs will still seem a little soft when you take them out of the oven but they will harden more as you allow them to cool. You can make these ahead of time if you like, just store them in an airtight container at room temp. And try not to eat them all before you get around to using them (I had to bake a second batch for snacking)

For the Cake:

preheat oven to 350 degrees

  1. In a small bowl combine milk, vinegar, oil, and vanilla.

  2. In a medium bowl whisk the flour, baking powder, salt, and 1/4 cup of sprinkles.

  3. In the bowl of your stand mixer, combine the butter, shortening, and both sugars. Using the paddle attachment, mix on medium high for 2 to 3 minutes until the butters and sugars are creamed together. Scrape down the sides of the bowl and add the tapioca starch mixed with water, and the 2 tablespoons of aquafaba. Mix on high for 3 minutes. Scape down the sides of the bowl again.

  4. On low speed, slowly pour in the milk mixture. Once the mixture is all in the bowl, increase the speed to high and allow to beat for 5 minutes. This step is important so make sure you let it mix that entire 5 minutes. Scrape down the sides of the bowl again.

  5. On low speed once again, slowly add in the flour mixture and mix only unit the batter has come together. Do not overmix!! Use a rubber spatula to scrape the sides and make sure the flour on the very bottom got mixed in.

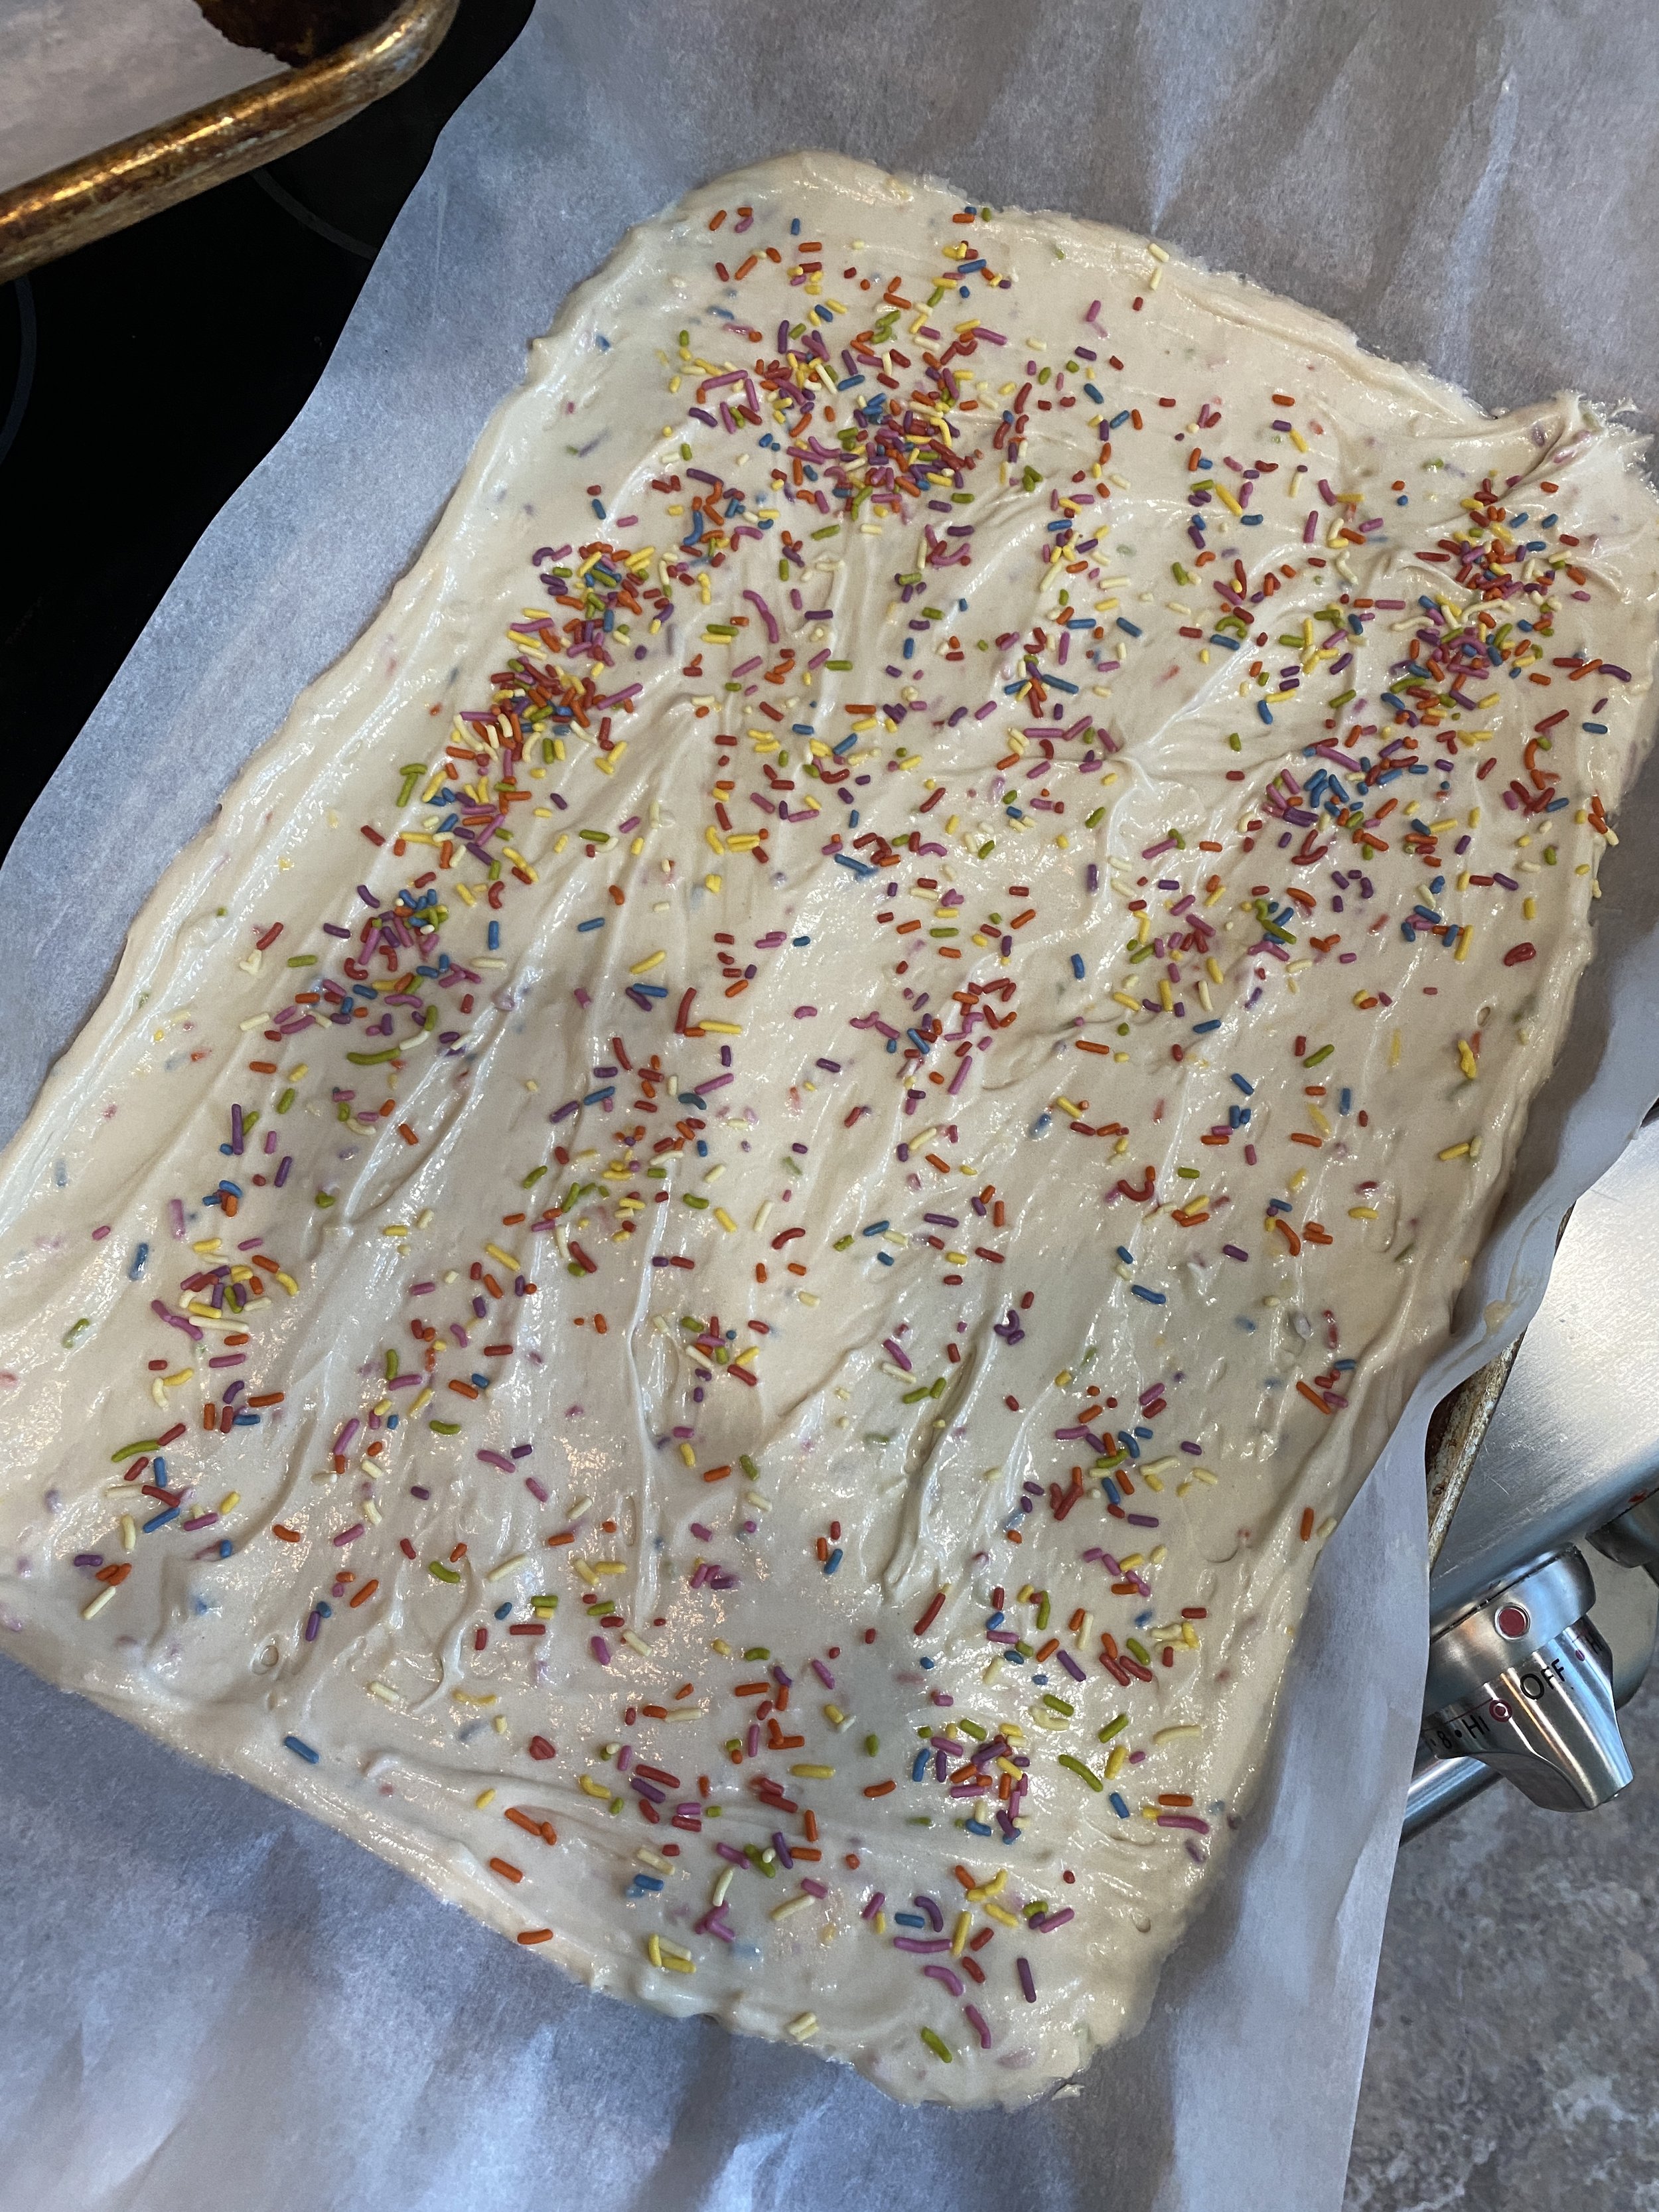
  6. Cover your 10x15 jelly roll pan in parchment paper and evenly pour the cake batter over the pan. You may need to use a spatula to even out the batter. Cover the top of the batter with the remaining 2 tablespoons of sprinkles and kind of press them in.

  7. Bake for about 30 minute or until a cake tester or tooth pick inserted in the middle comes out clean.

  8. Remove cake from oven and place the pan on a wire cooling rack.

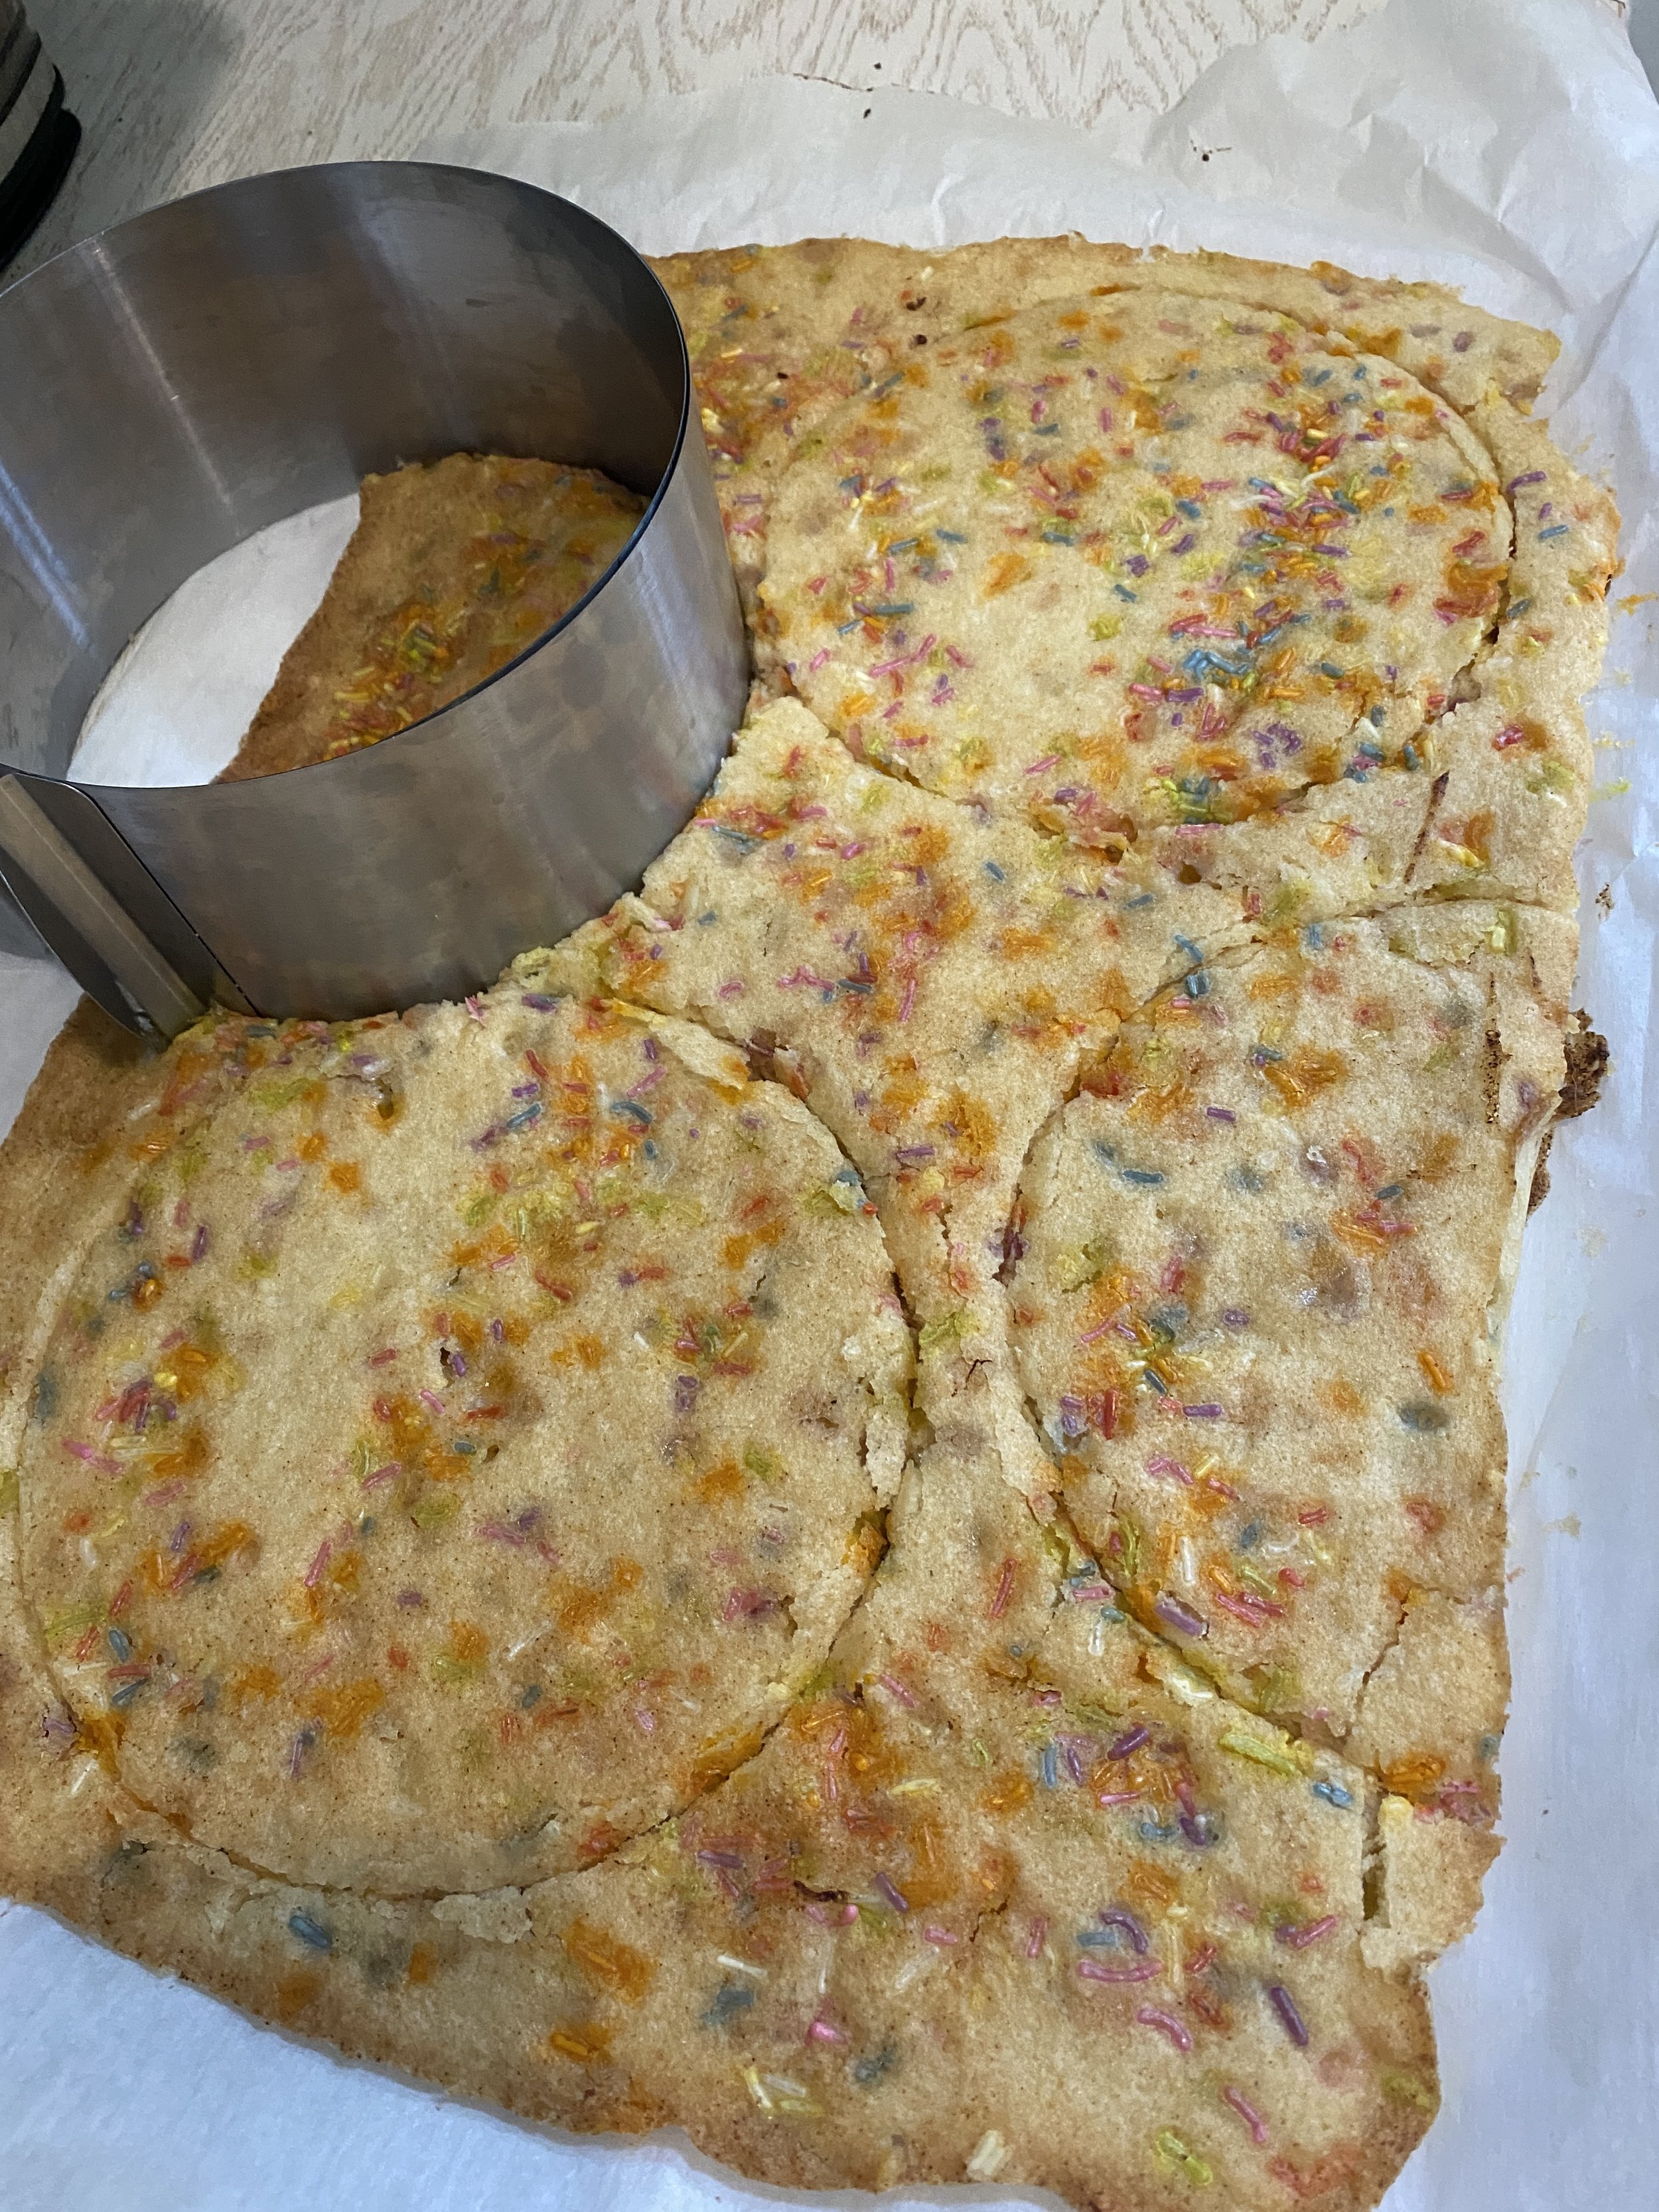
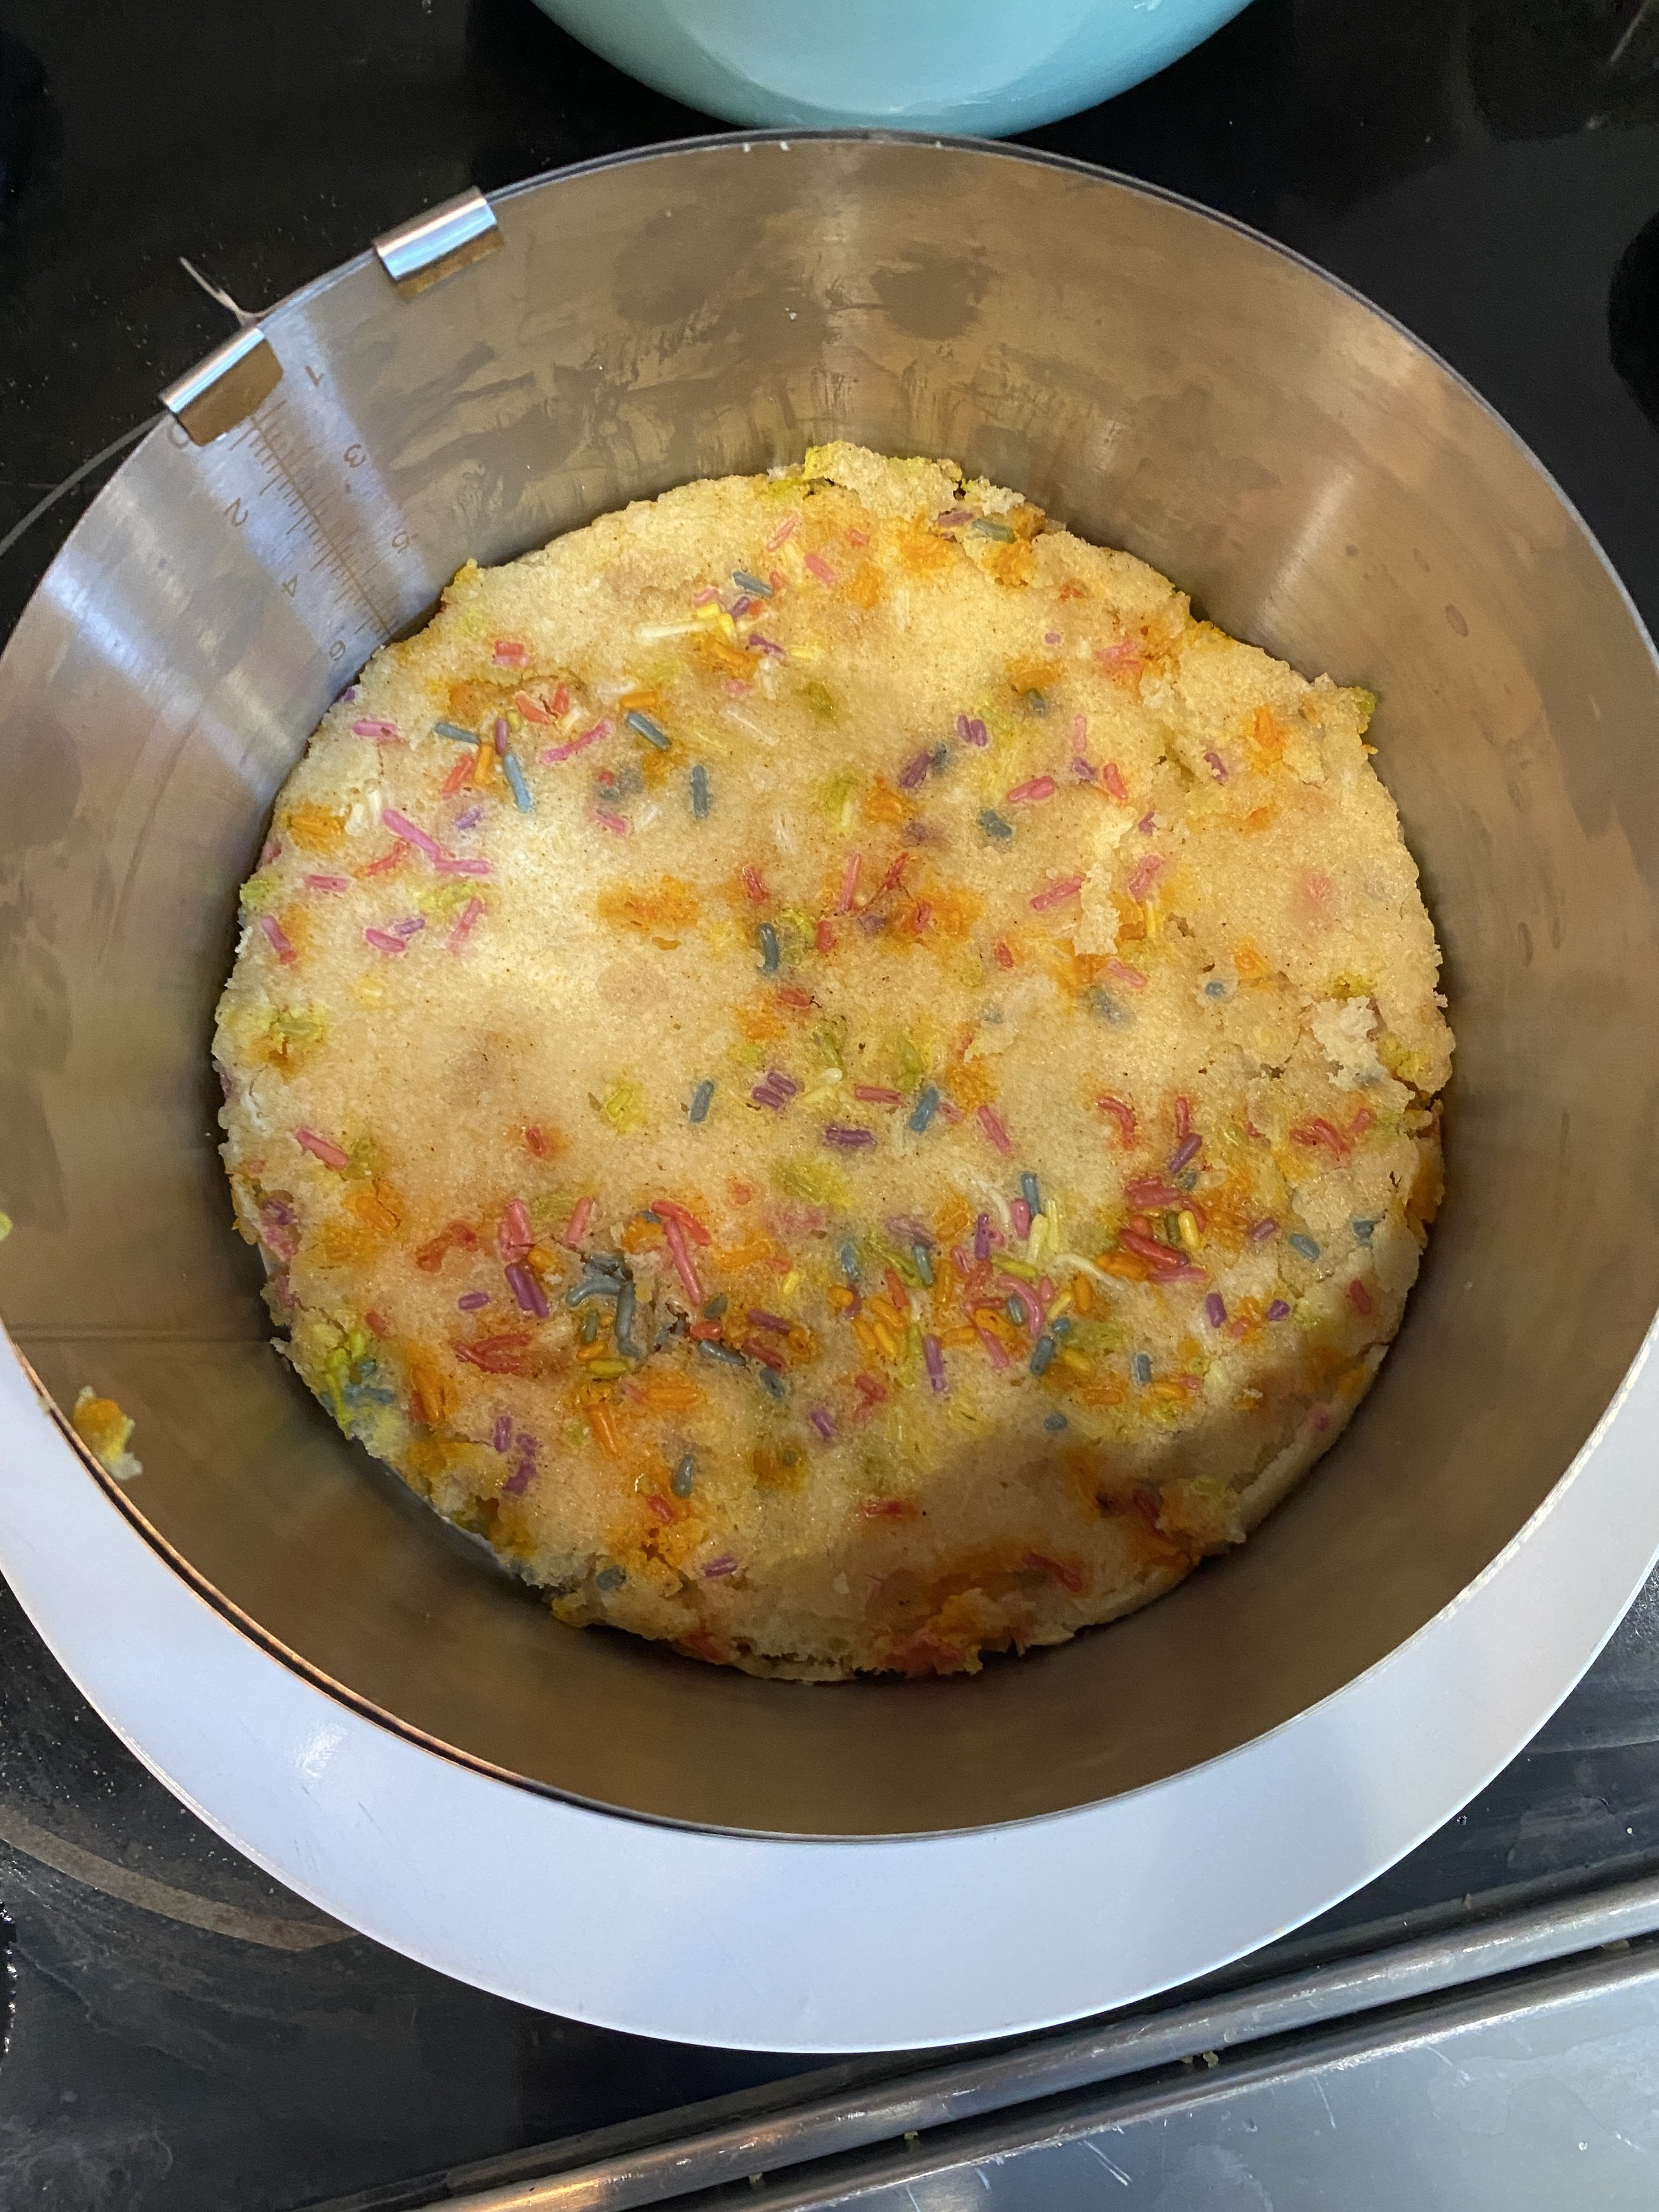
  9. Once the cake has completely cooled, use your cake ring to press 2 full circles, and 2 half circles from the sheet cake. (look at pictures above to see how to do this) There will be plenty of cake scraps leftover. Seriously y’all, these are “snacking scraps” not waste. Not one crumb of this cake was “wasted” in my house.

For the Frosting:

  1. In the bowl of your stand mixer add the butter, cream cheese, and shortening. Beat for a few minutes until creamy, fluffy, and smooth. No lumps. Scrape down the sides of the bowl.

  2. Add the corn syrup and mix another minute or 2, until the mixture is silky and kind of shiny.

  3. In a bowl, whisk the powdered sugar with the salt, and baking powder. I do this to help if there are any clumps in the sugar. Just put it all in a bowl and whisk it good to mix it all up and break up any sugar clumps.

  4. Add the mixute to the mixer along with the lemon juice and mix on medium speed a few minutes until the frosting is creamy and smooth.

Build the Cake:

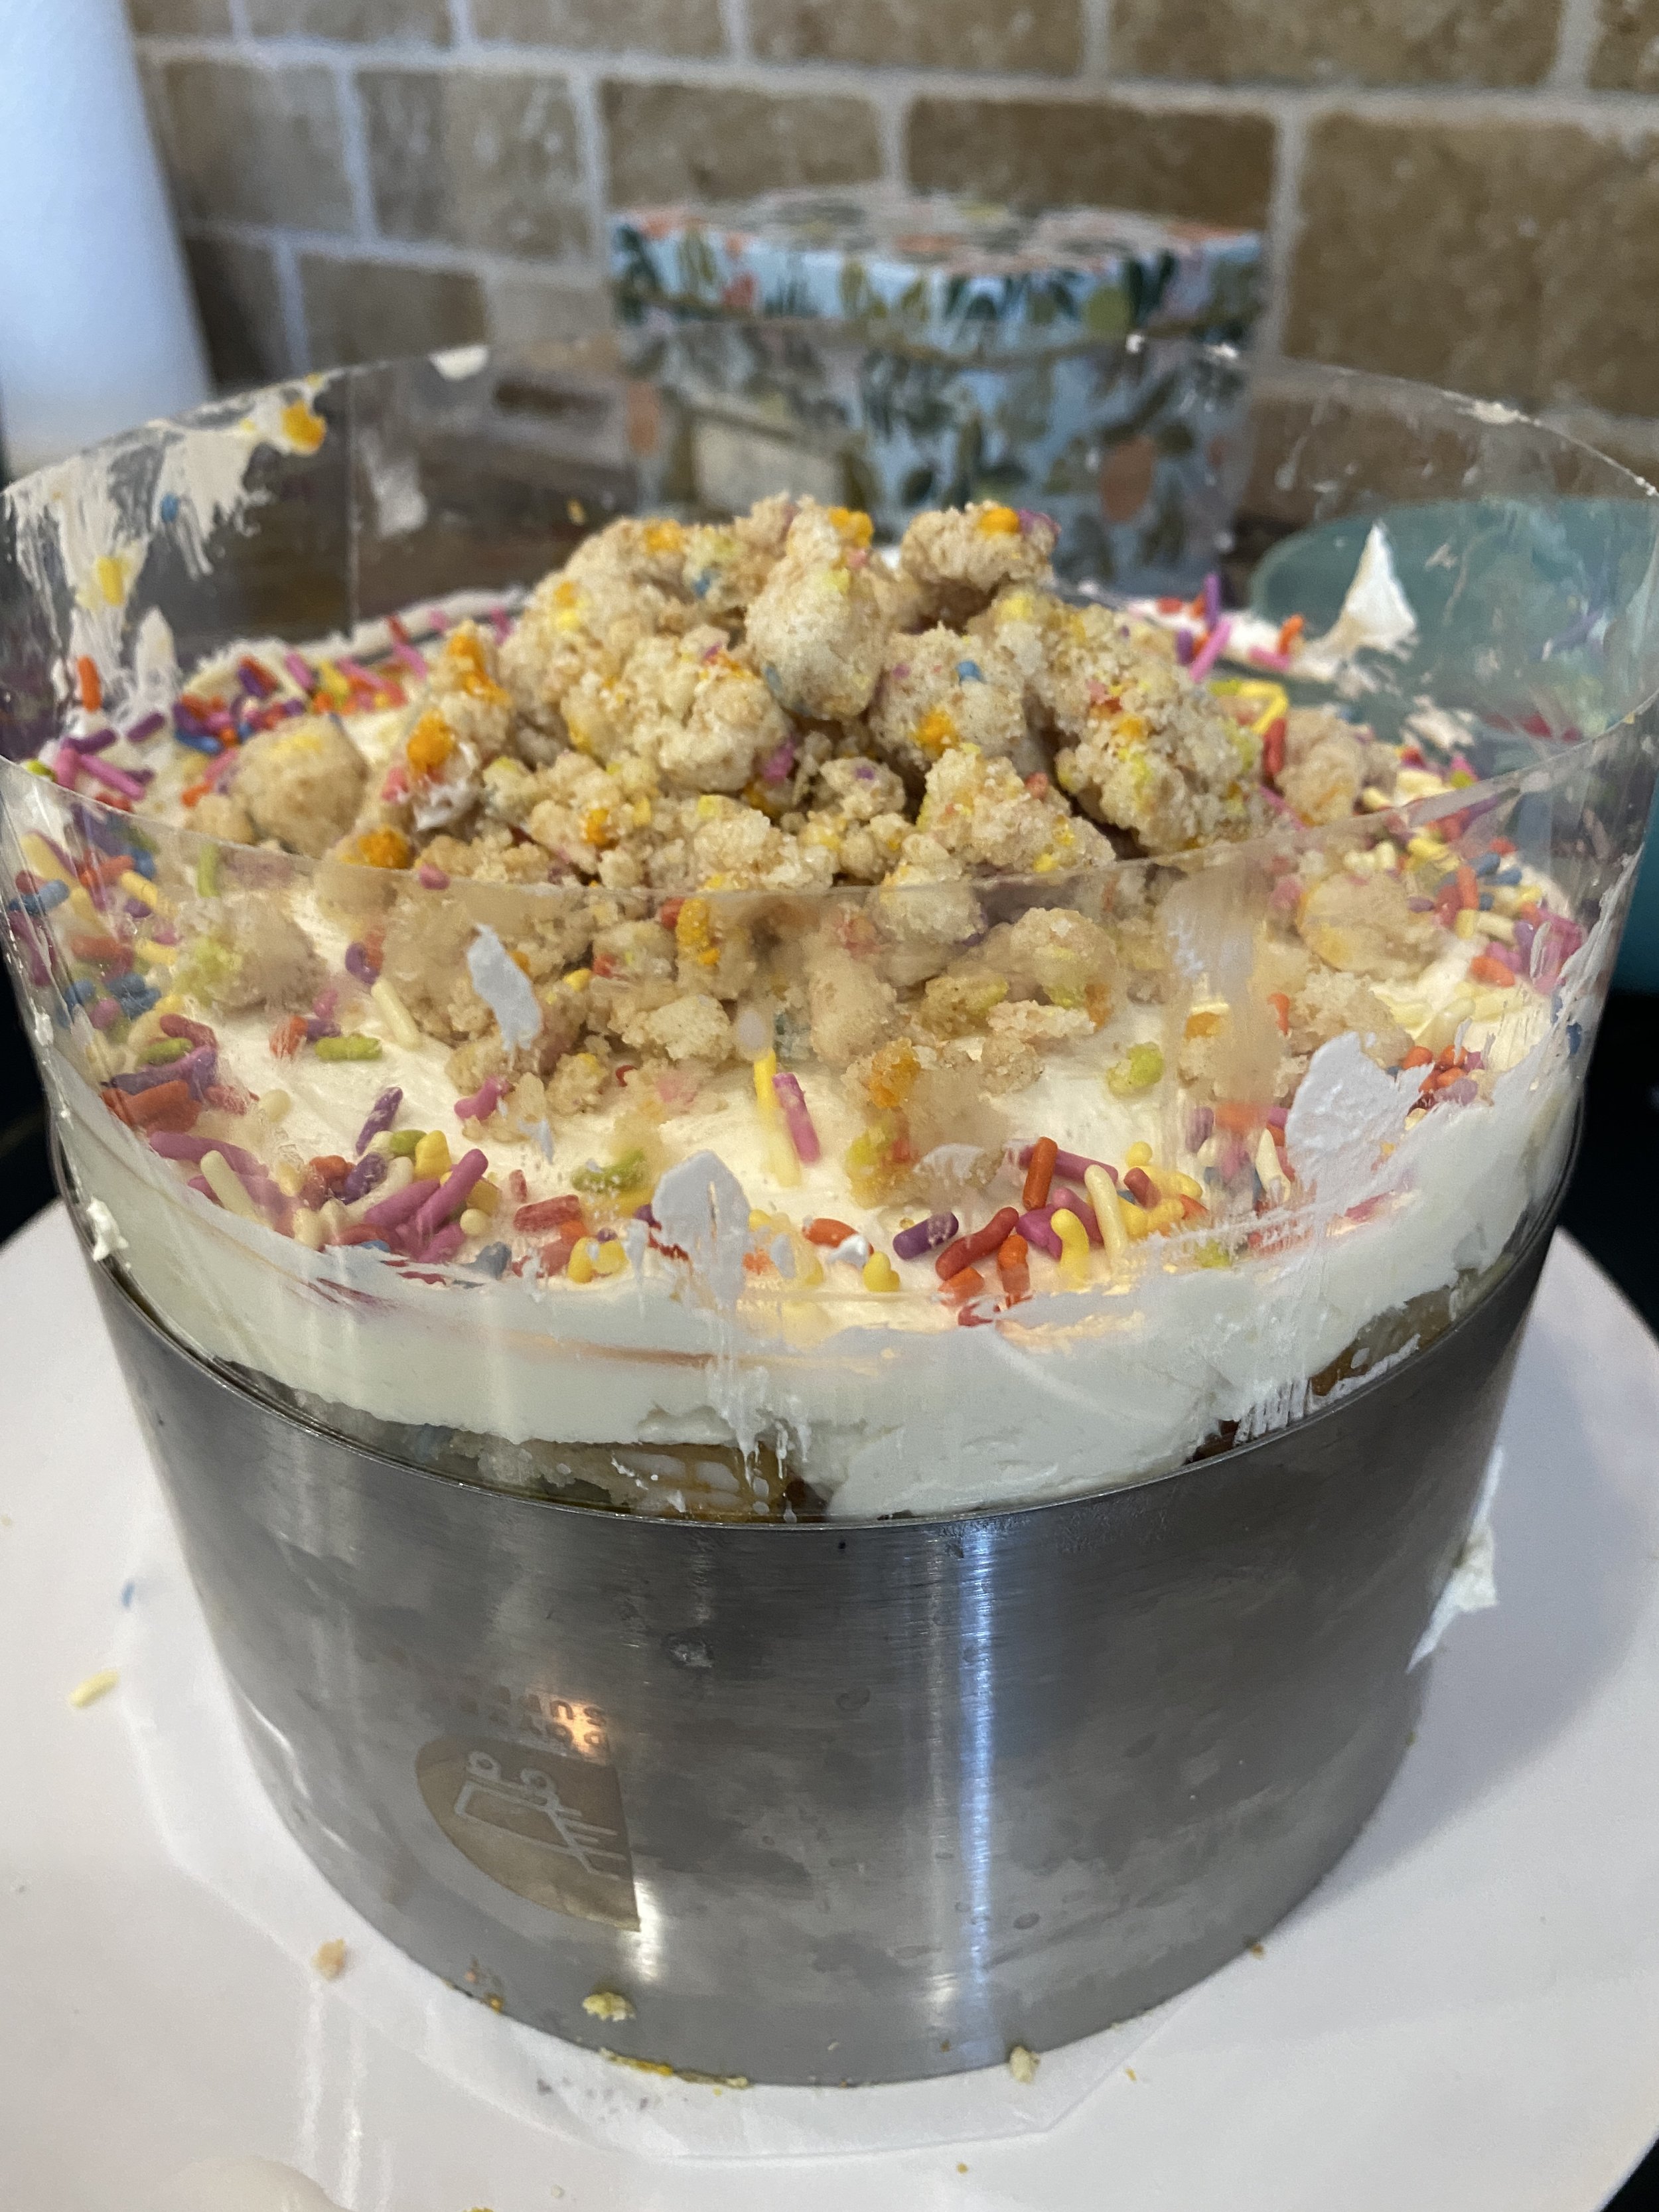
  1. Set your cake ring set to six inches if it is one that adjust. Some are adjustable so if yours is, get it to the right size. Cut a circe or parchment the same size as you cake ring. Place the parchment on a cake board or plate and place the ring in the center. Unroll and cut a piece of acetate cake collar big enough to wrap around the ring. Fit the acetate inside the ring. It should stick up higher than the cake ring!

  2. Place one of your full circles of cake in the bottom of the ring. Brush the cake with 1/3 of your milk soak.

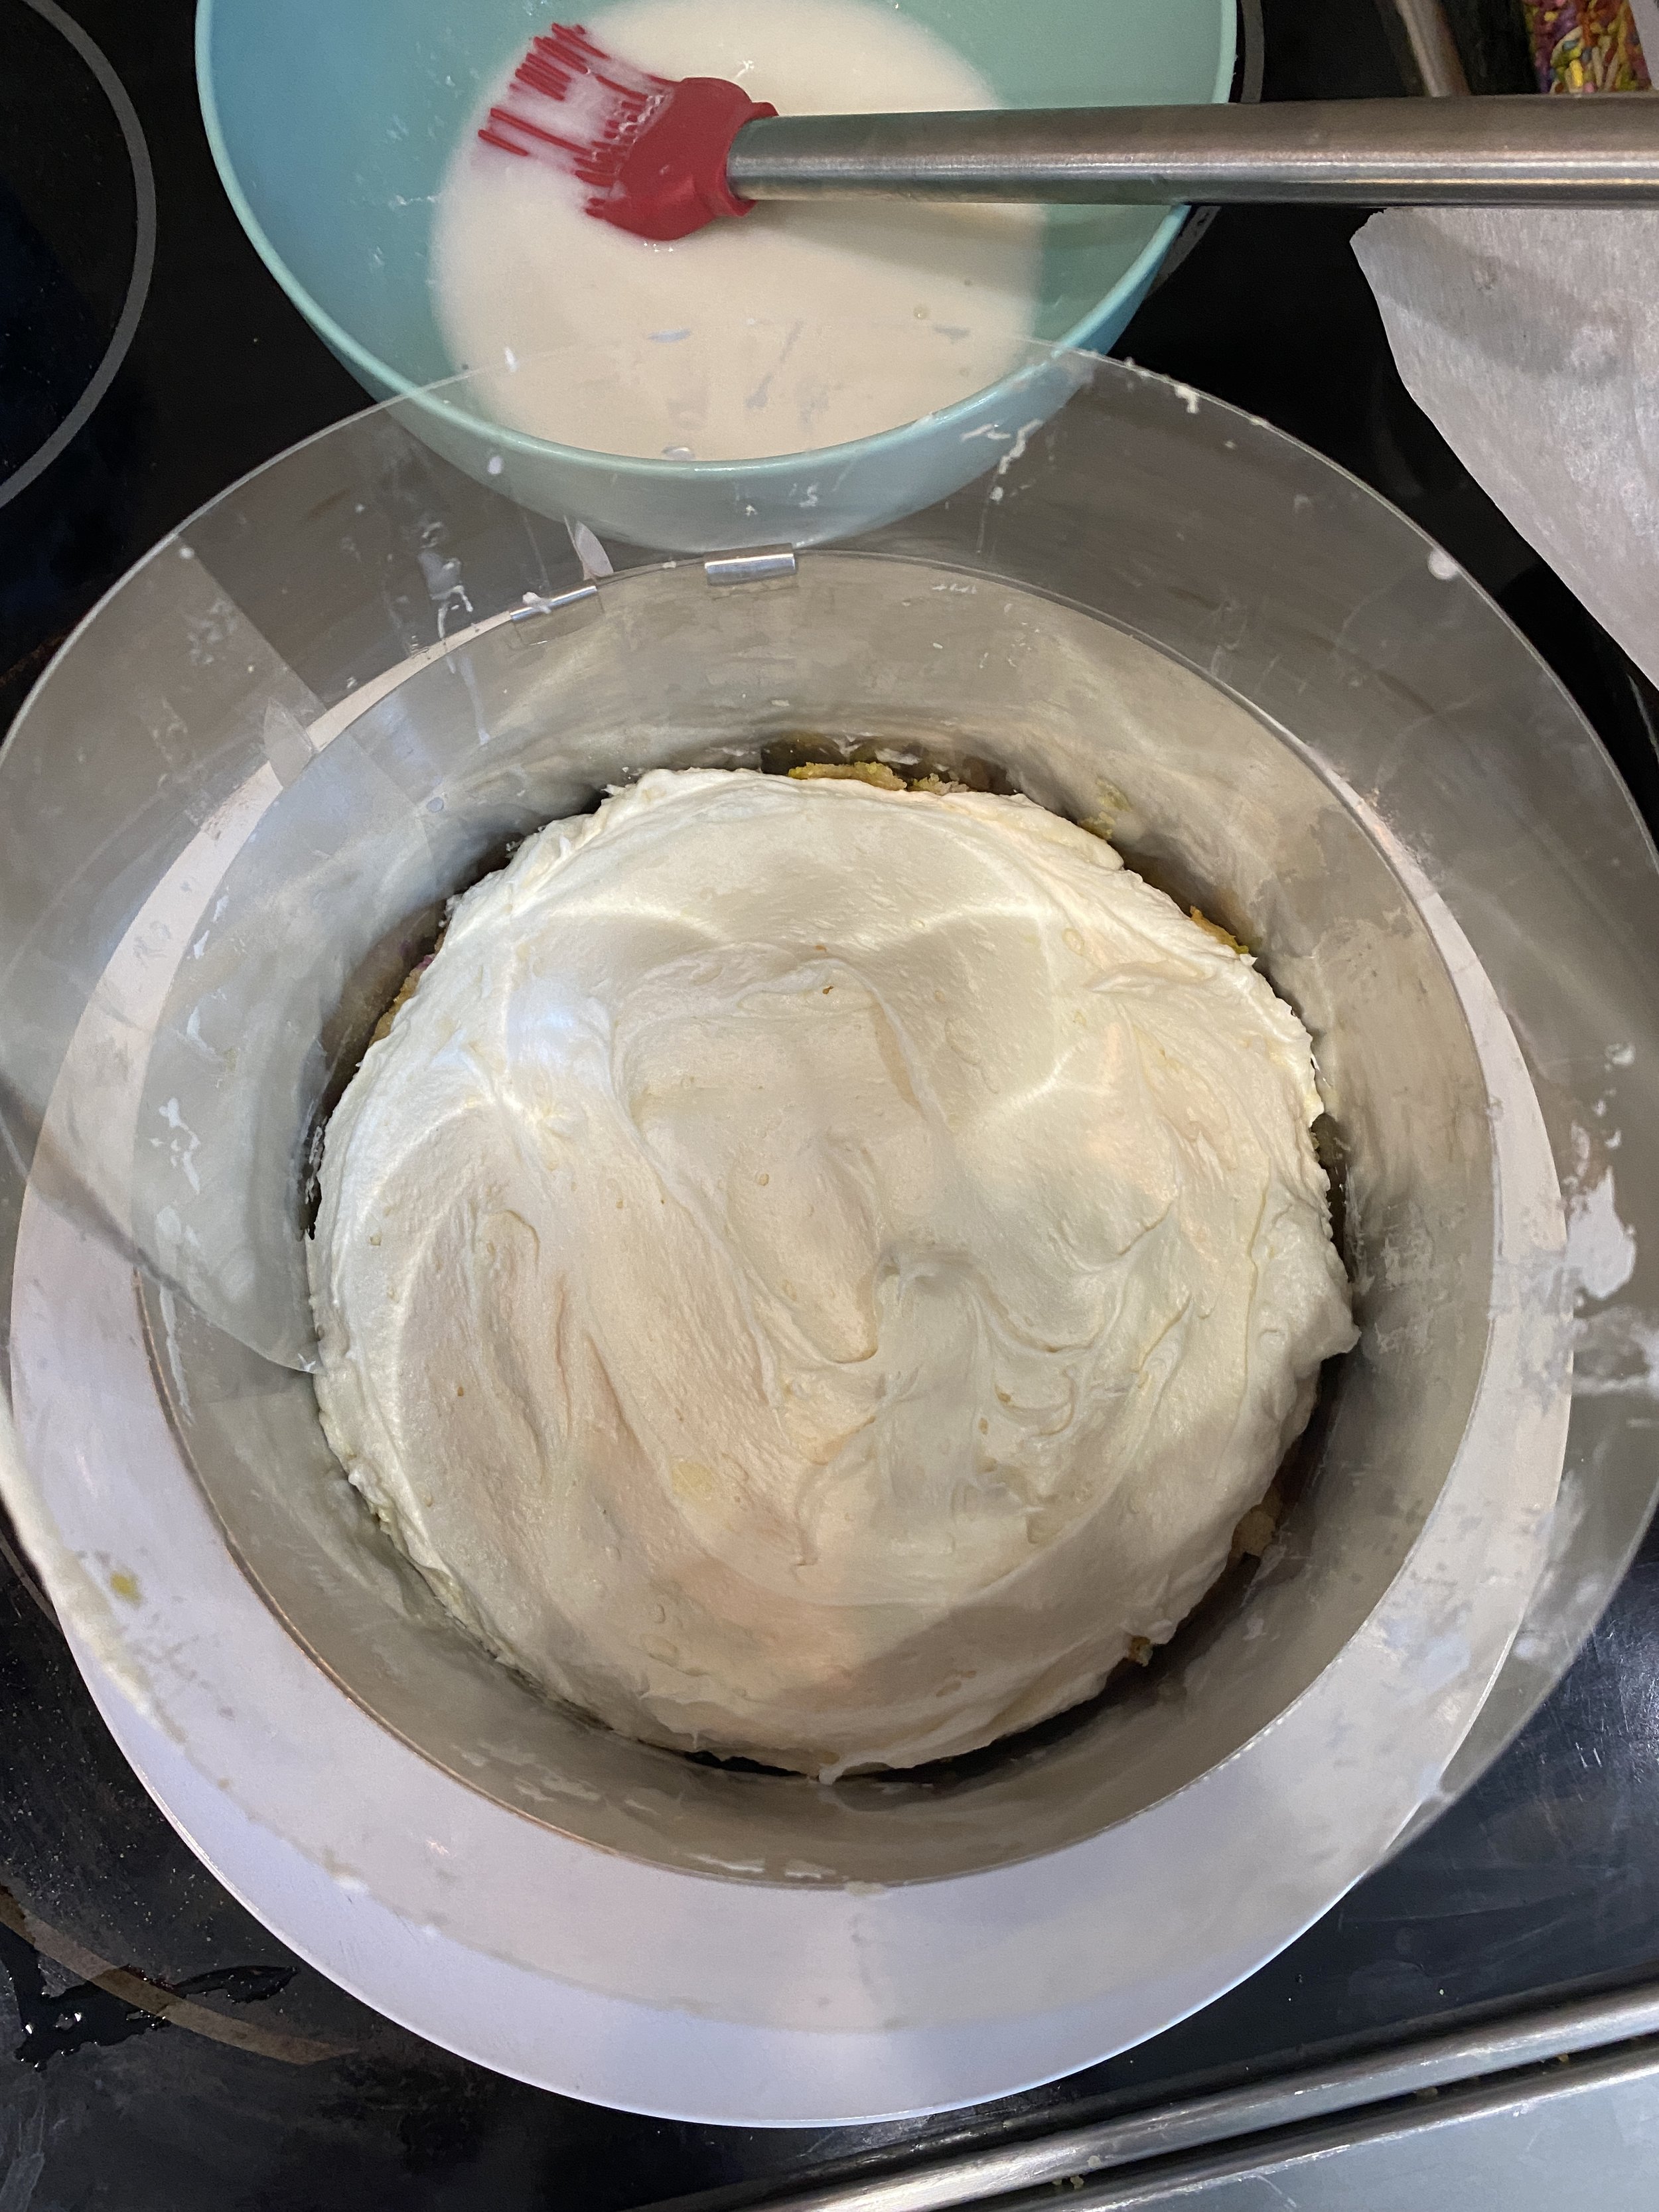
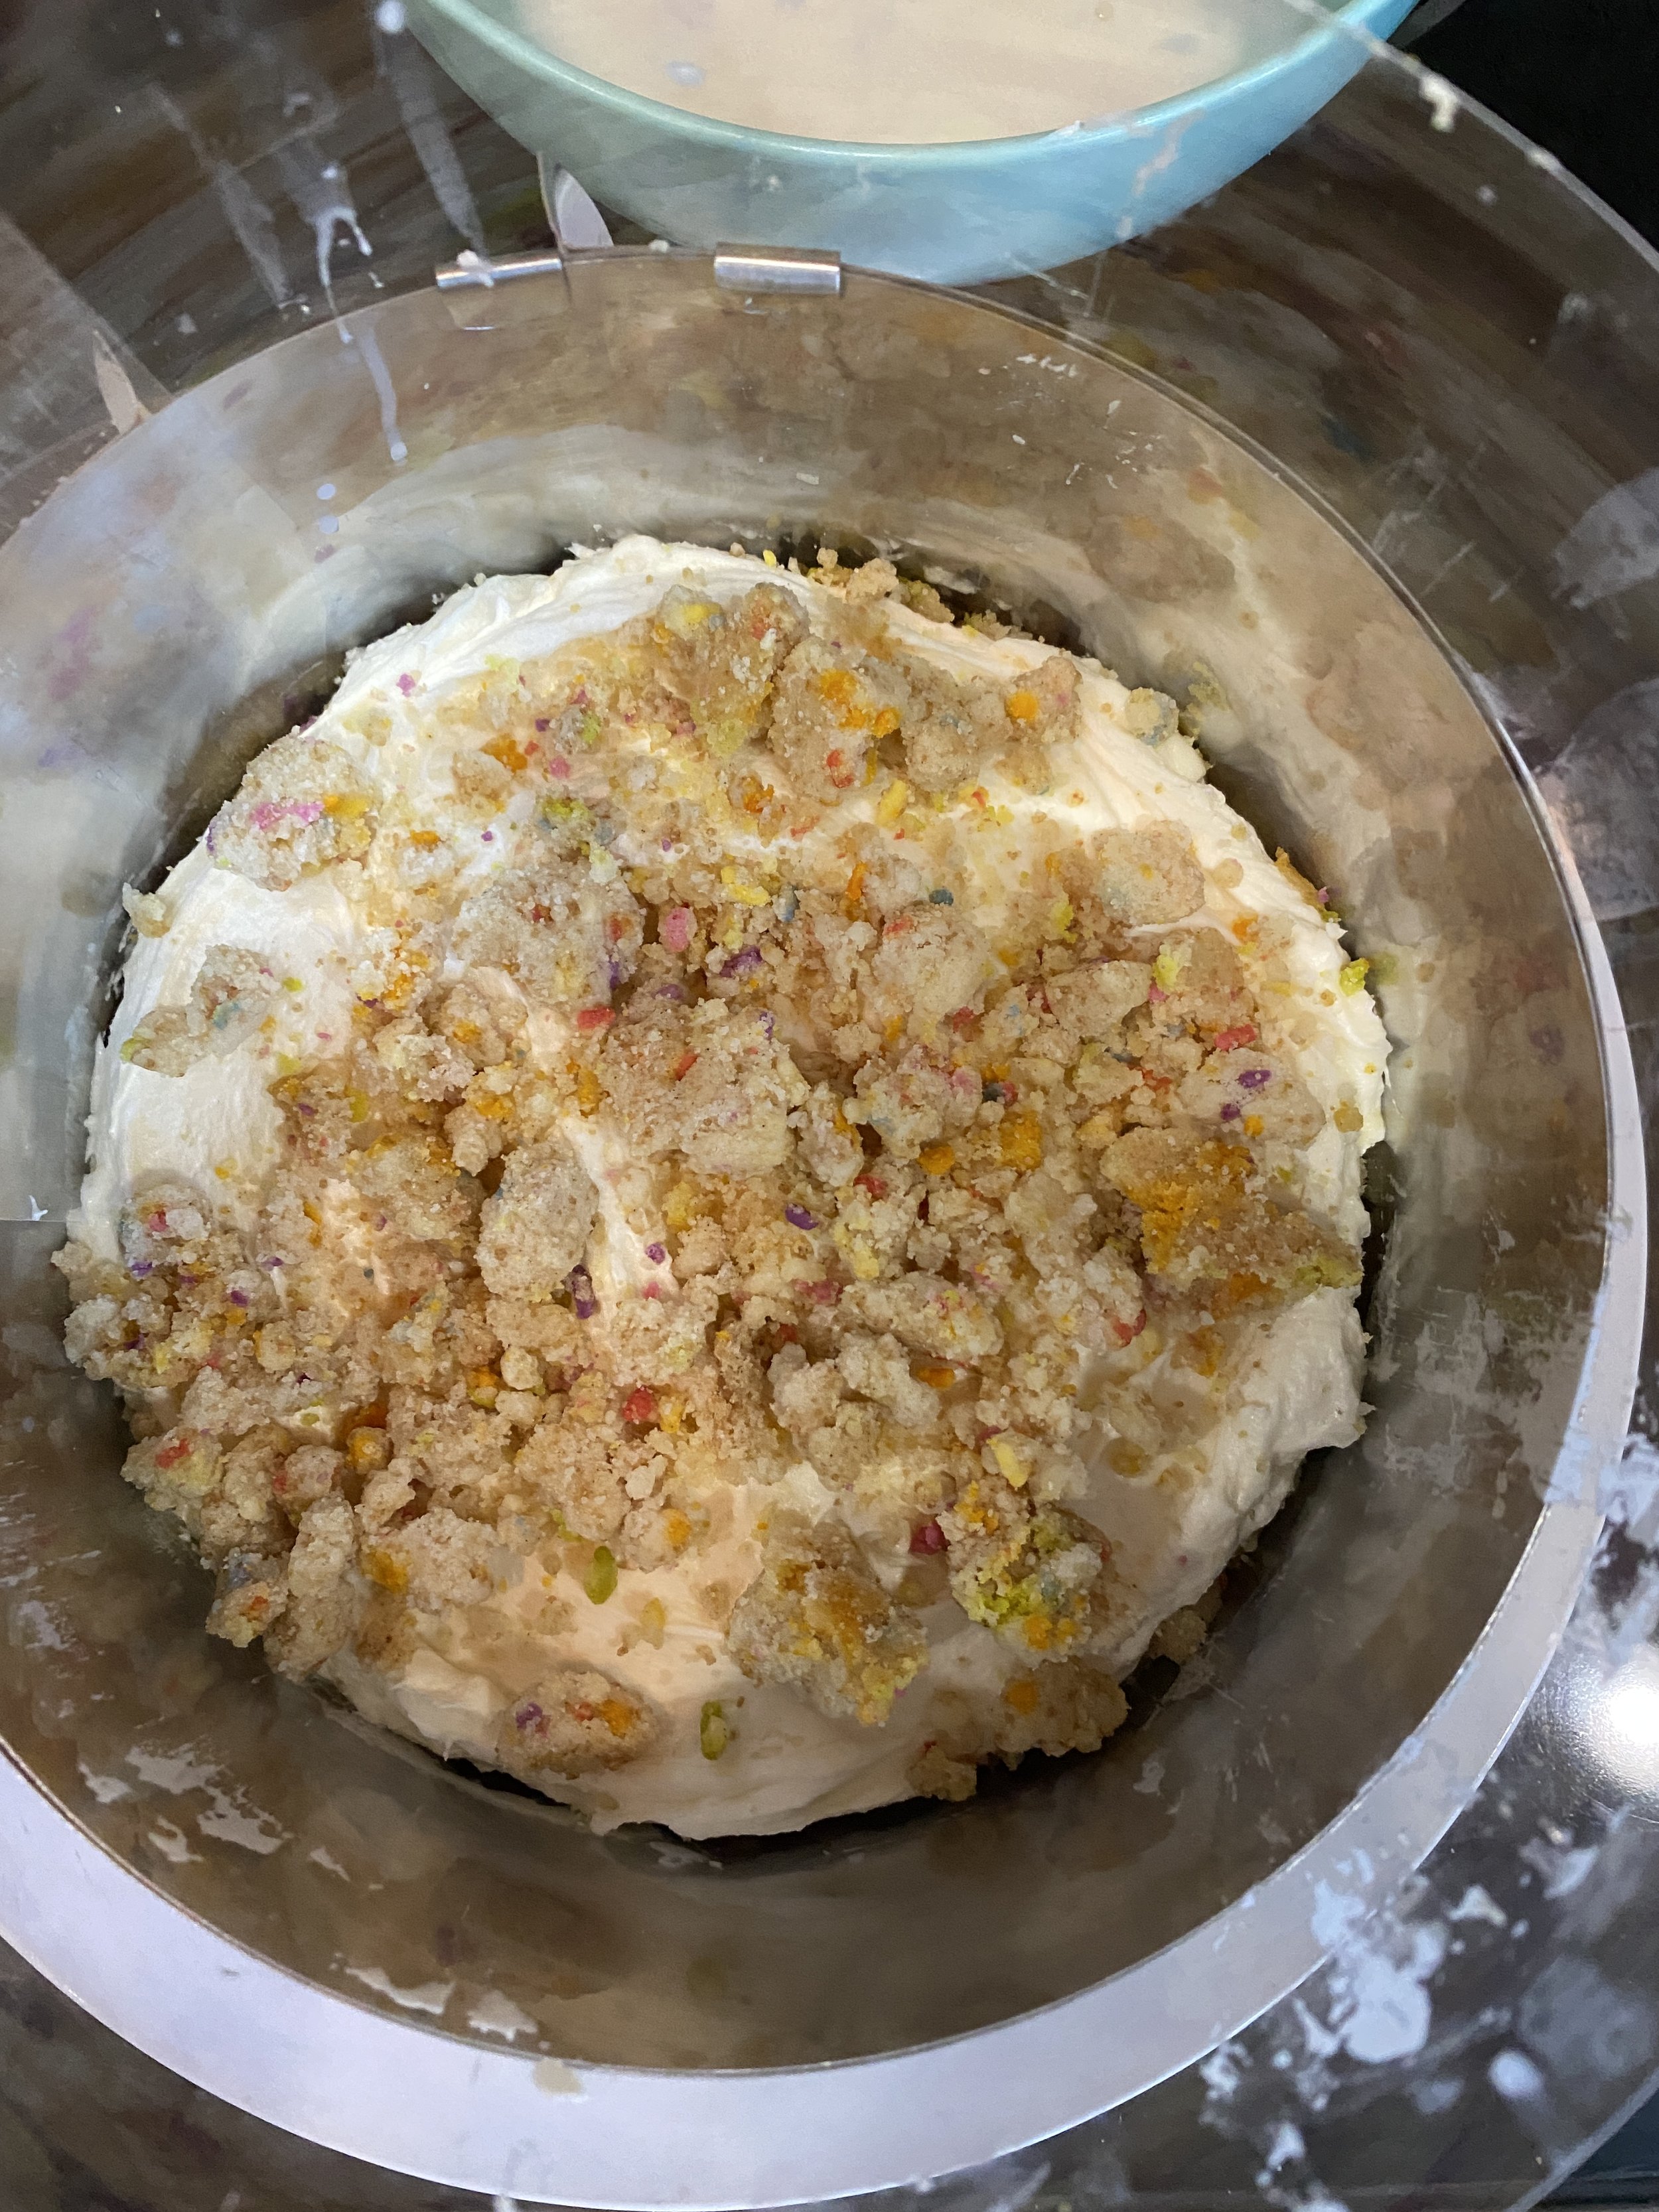
  3. Divide up the frosting into thirds. I just kind of eyeball it in bowl and cut through it with my rubber spatula to give me an idea of how much to scoop up. Put 1/3 of the frosting onto of the cake. Use an offset spatula to evenly spread the frosting over the cake. Add 1/3 of the cake crumbs evenly over the frosting and kind of press them down into it a bit!. Repeat this process this time using the two cake halves to make a whole circle for you middle layer. Then repeat with the last layer, this time instead of spreading the cake crumbs out, I like to pile them up in the middle and sprinkle more rainbow sprinkles around the edge.

  4. Place the cake in the freezer for at least 12 hours (these are instructions I read on the original recipe) This is going to help everything set up and stay put. When you are ready to serve, thaw the cake in the fridge for 3 hours. Remove the cake ring and gently peal off the acetate. Slice and serve. Store cake in the fridge covered in plastic wrap or in a cake carrier for up to 5 days. You can keep the cake frozen for up to 2 weeks.

** Again, I have just tried to turn the original recipe into a vegan version. I have researched why for example you would add baking powder to the frosting and can not find a good answer (I predict some of y’all will ask the same question) But I could not find anything to really clarify that would have been done. If you have any insight on this I would love it! I have never seen a recipe use baking powder in a frosting so it is definitely a new concept to me.

If you like this recipe, then try these:

Vegan Chocolate Orange Cake

Vegan Chocolate Orange Cake

When I was a kid, I loved getting those foil wrapped chocolate orange shaped candies. The ones you throw down to get the chocolate “orange slices” to break apart like magic, and then eat so many pieces you feel sick. Yeah, those! They were my favorite holiday candy before going vegan.

I adore chocolate and orange together! So once again I had set out to veganize a cake I saw in a magazine and it seemed to be a failure. The cakes baked up beautifully but the frosting just would not come together. So I needed to switch gears and find a new flavor for the frosting. That’s when I looked over at my fruit basket and knew!

I have talked to y’all about kitchen failures before, and being ready and able to adapt and roll with the punches. If the cakes bake up and the frosting won’t work, move on to something else, some other flavor combo you love! Its not a failure unless you give you give up, and I refuse to toss out a perfectly good cake just because the frosting is a pile of weird unusable goo!!

So I whipped up a quick orange frosting for the middle, and an easy chocolate frosting for the outside and that was that. But when I cut the cake and realized it was a bit delicate and crumbly, not the texture of any other cake I have baked. I managed to get it all frosted and it turned out pretty in the end, but I deiced I would not post this recipe because I was sure I would get comments about the texture. It was not “perfect” or my idea of a perfectly textured cake, or what I was used to. But when I took my first bite I quickly changed my mind. It was so delicious and the texture actually worked so well once frosted, that I didn’t want to change the recipe on bit for fear of messing it up.

If the cake seems to be giving you issues once you cut it, just squish the crumbs back on and keep moving. That could be a metaphor for life, am I right? I shared this cake with a handful of non vegans and they adored it as well. That was the seal of approval I needed to go ahead and post the recipe.

This cake makes me think of the chocolate oranges I can no longer eat, and its makes me smile with every bite. My son claimed it was the best cake I have ever made, and I have made a LOT OF CAKES. So, my kids may never have the memory of cracking open a big chocolate orange, but they will have the memory of me baking them this cake every year around the holidays and maybe thats even better!


INGREDIENTS:

You will need 2 round 8 or 9 inch cake pans for this recipe

  • 1 1/2 cups hot coffee

  • 1/2 cup cocoa powder

  • 1/2 bag or 4 oz vegan chocolate chips or chopped chocolate

  • 3 cups all purpose flour

  • 1 tablespoon baking powder

  • 1/2 teaspoon salt

  • 1 cup vegan butter

  • 1 cup brown sugar

  • 1 cup white sugar

  • 1/2 cup vegan plain yogurt or sour cream

  • 1 teaspoon vanilla extract or vanilla bean paste

  • 2 flax eggs

  • 1 cup whipped aquafaba

VEGAN ORANGE FROSTING:

  • 1/4 cup vegan butter

  • zest from one large navel orange

  • 3 cups powdered sugar

  • 1 teaspoon vanilla extract or vanilla bean paste

  • 2-3 teaspoons fresh orange juice

VEGAN CHOCOLATE FROSTING:

  • 1/2 cup vegan butter

  • 1/2 cup shortening

  • 4 cups powdered sugar

  • 1/4 cup cocoa powder

  • pinch of salt

  • a few teaspoons plant based milk

Vegan Chocolate Orange Cake

INSTRUCTIONS:

Preheat oven to 350 degrees

  1. Place chocolate chips, or finely chopped chocolate along with the cocoa powder in a large bowl. Pour the hot coffee over the chocolate and let the mixture sit for 2 minutes. This will melt the chocolate.

  2. Whisk the flour, baking powder, and salt in a separate bowl and set aside.

  3. In the bowl of a stand mixer, or a large bowl if using an electric hand mixer, add the butter and both sugars. Beat the butter and sugar on medium speed for a few minutes until the mixture is light and fluffy.

  4. Beat in the flax eggs, then the vegan sour cream, or yogurt, and the vanilla.

  5. Alternate adding some of the flour mix, then the chocolate mixture to the mixing bowl, back and forth, begining and ending with the flour. Mix on medium speed until the mixture is well incorporated and smooth.

  6. Add the 1 cup of whipped aquafaba to the cake batter and carefully fold it in with a rubber spatula until well incorporated but careful not to over mix.

  7. Prepare the cake pans by coating them with a thin coating of butter or spraying them with some cooking oil. Lightly dust the pan with flour and shake them out. Divide the batter between both pans and place on the middle oven rack. Bake cakes for 30-40 minutes. Cakes are done when a tooth pick inserted into the center comes out clean. Place cakes on a wire cooling rack and allow to cool completely before removing from pans.

  8. Prepare the orange frosting by beating the butter, vanilla, and organ zest on medium speed of you stand mixer or hand mixer. Beat in the powdered sugar and 2 or 3 teaspoon of juice from the orange until creamy and well incorporated. If it seems too thin you can add a little more powdered sugar.

  9. Prepare the chocolate frosting by beating the shortening, vanilla, and butter together on medium speed. Add the cocoa powder and powdered sugar and continue mixing unit smooth and everything is incorporated. Add a few drops of plant based milk if the frosting is too thick to get the desired, spreadable, consistency.

  10. Once cakes have cooled completely, turn them out onto the cooling rack and pop them in the fridge for about 30 minutes. The texture of this cake is a bit crumbly, so having it cold will help. CAREFULLY cut each chilled cake in half horizontally. I suggest leaving the cake on a flat surface and using a large knife cut through the center. Carefully lift the top layer and place it on a cake board or whatever plate you wish to serve the cake on. Take 1/3 of the orange icing and spread it on the first layer of cake Again it may seem extra crumbly just get the icing spread as evenly as you can. Repeat with remaining layers until all layers are frosted and stacked.

  11. Take 1/3 of the chocolate frosting and crumb coat the cake. This simply means you are spreading a thin layer of frosting on the cake, and are not worried that some crumbles are mixing in. Once again, this cake is a bit crummy, so crumb coating it is an important step. Pop the cake into the fridge until the frosting hardens, then evenly frost the cake with the remaining frosting.

  12. Store cake in an airtight container at room temp or I personally like to store this cake in the fridge. Slice to serve.B

If you like this recipe, try these:

Vegan Lime Mojito Cupcakes

Vegan Lime Mojito Cupcakes

TYPE META DESCRIPTION HERE

Vegan Candied Pecan Maple Spice Cake

Vegan Candied Pecan Maple Spice Cake

I want to tell you a short story about how this cake is the product of a couple epic fails. One of those happy accidents, or maybe one of those Hail Mary passes in baking where you think you are done but give it one last shot, fingers crossed.

Why am I telling you this? Well in hopes of encouraging you. To let you know that even food bloggers have their fare share of kitchen disasters just like everyone else. And even though I bake all the time, and like to toot my own horn at veganizing just about any recipe I find that I want to try, sometimes I fail and fail hard.

I found a beautiful fall cake in a magazine that I could not wait to turn vegan. It never even crossed mind that it could go south the way it did.

Whenever adding fruit to a baked good you add moisture, and it does not always work in your favor. Long story short I ended up with three super dense, 9 inch pancakes instead of cakes.

I then came to the conclusion that I would not waist any more of my time on that cake and would just make a fall inspired spice cake for the delicious looking frosting in the original cake. It called for cool whip but I was convinced I could make a butter cream that was close. I was SO wrong.

Once again, certain fruits and butter cream only end in disaster. Thus the candied pecans stepped in, along with a maple butter cream, and I am not lying when I say this is now hands down my favorite cake on the website.

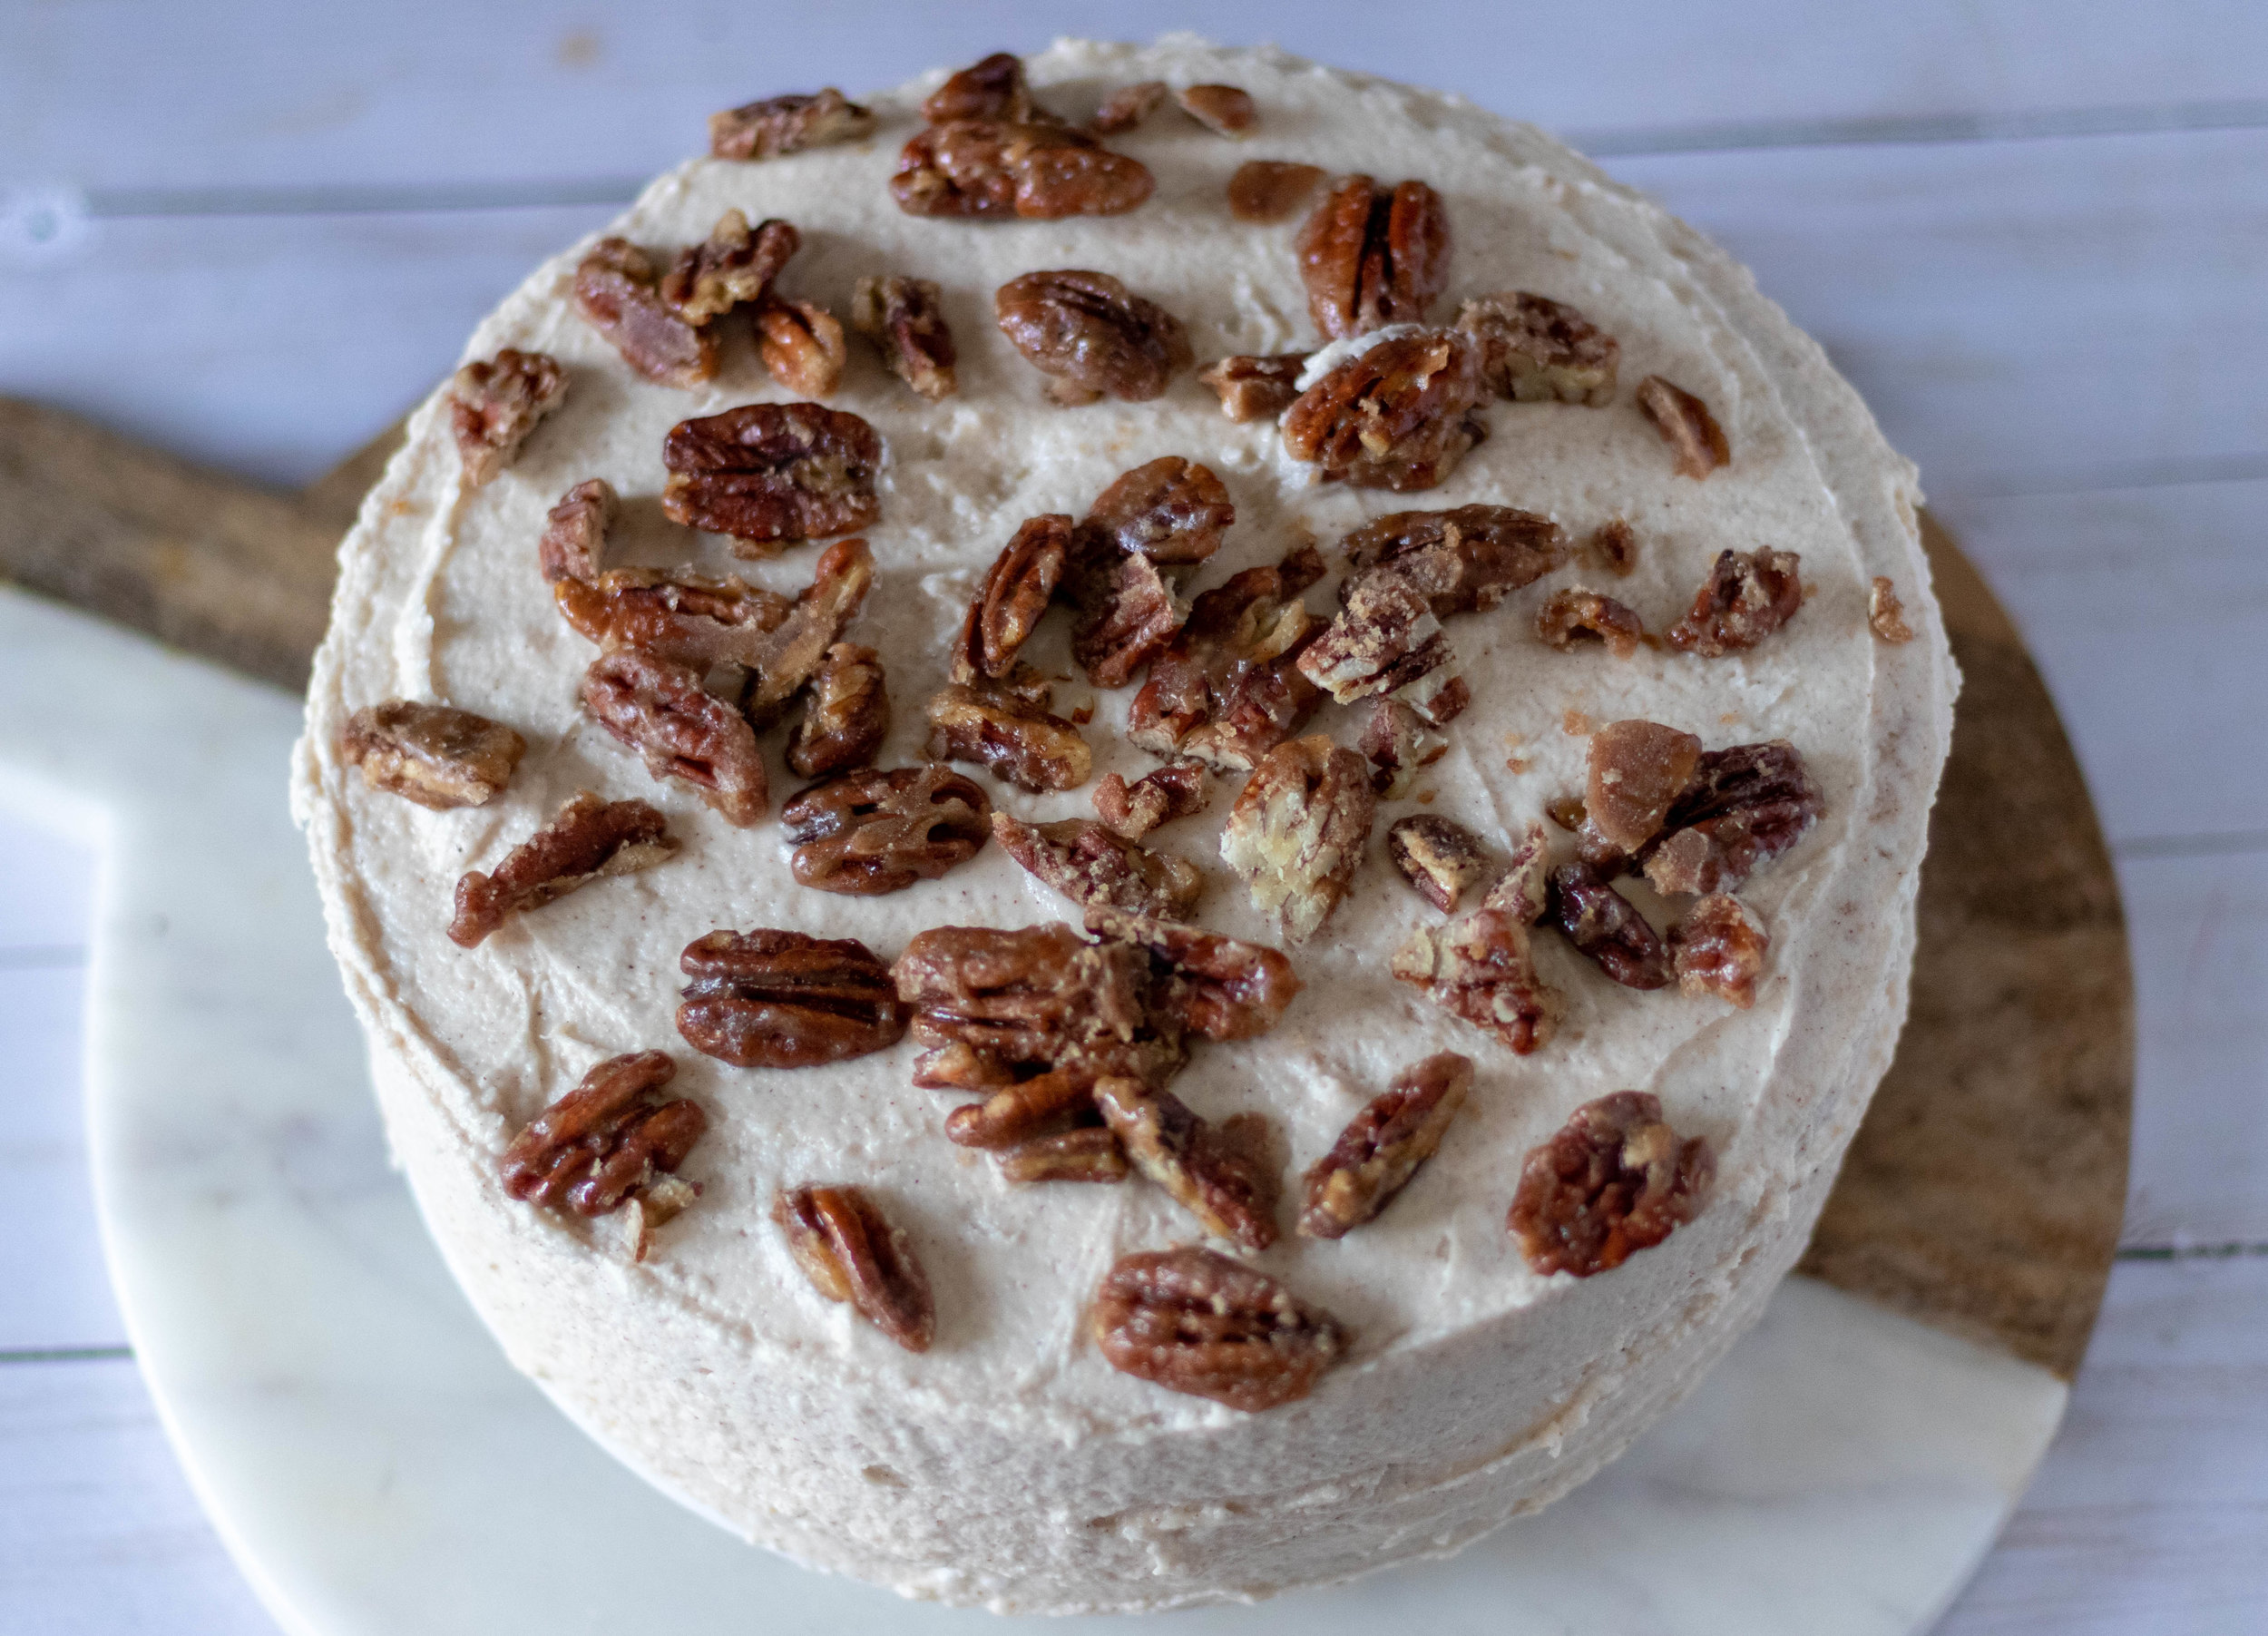
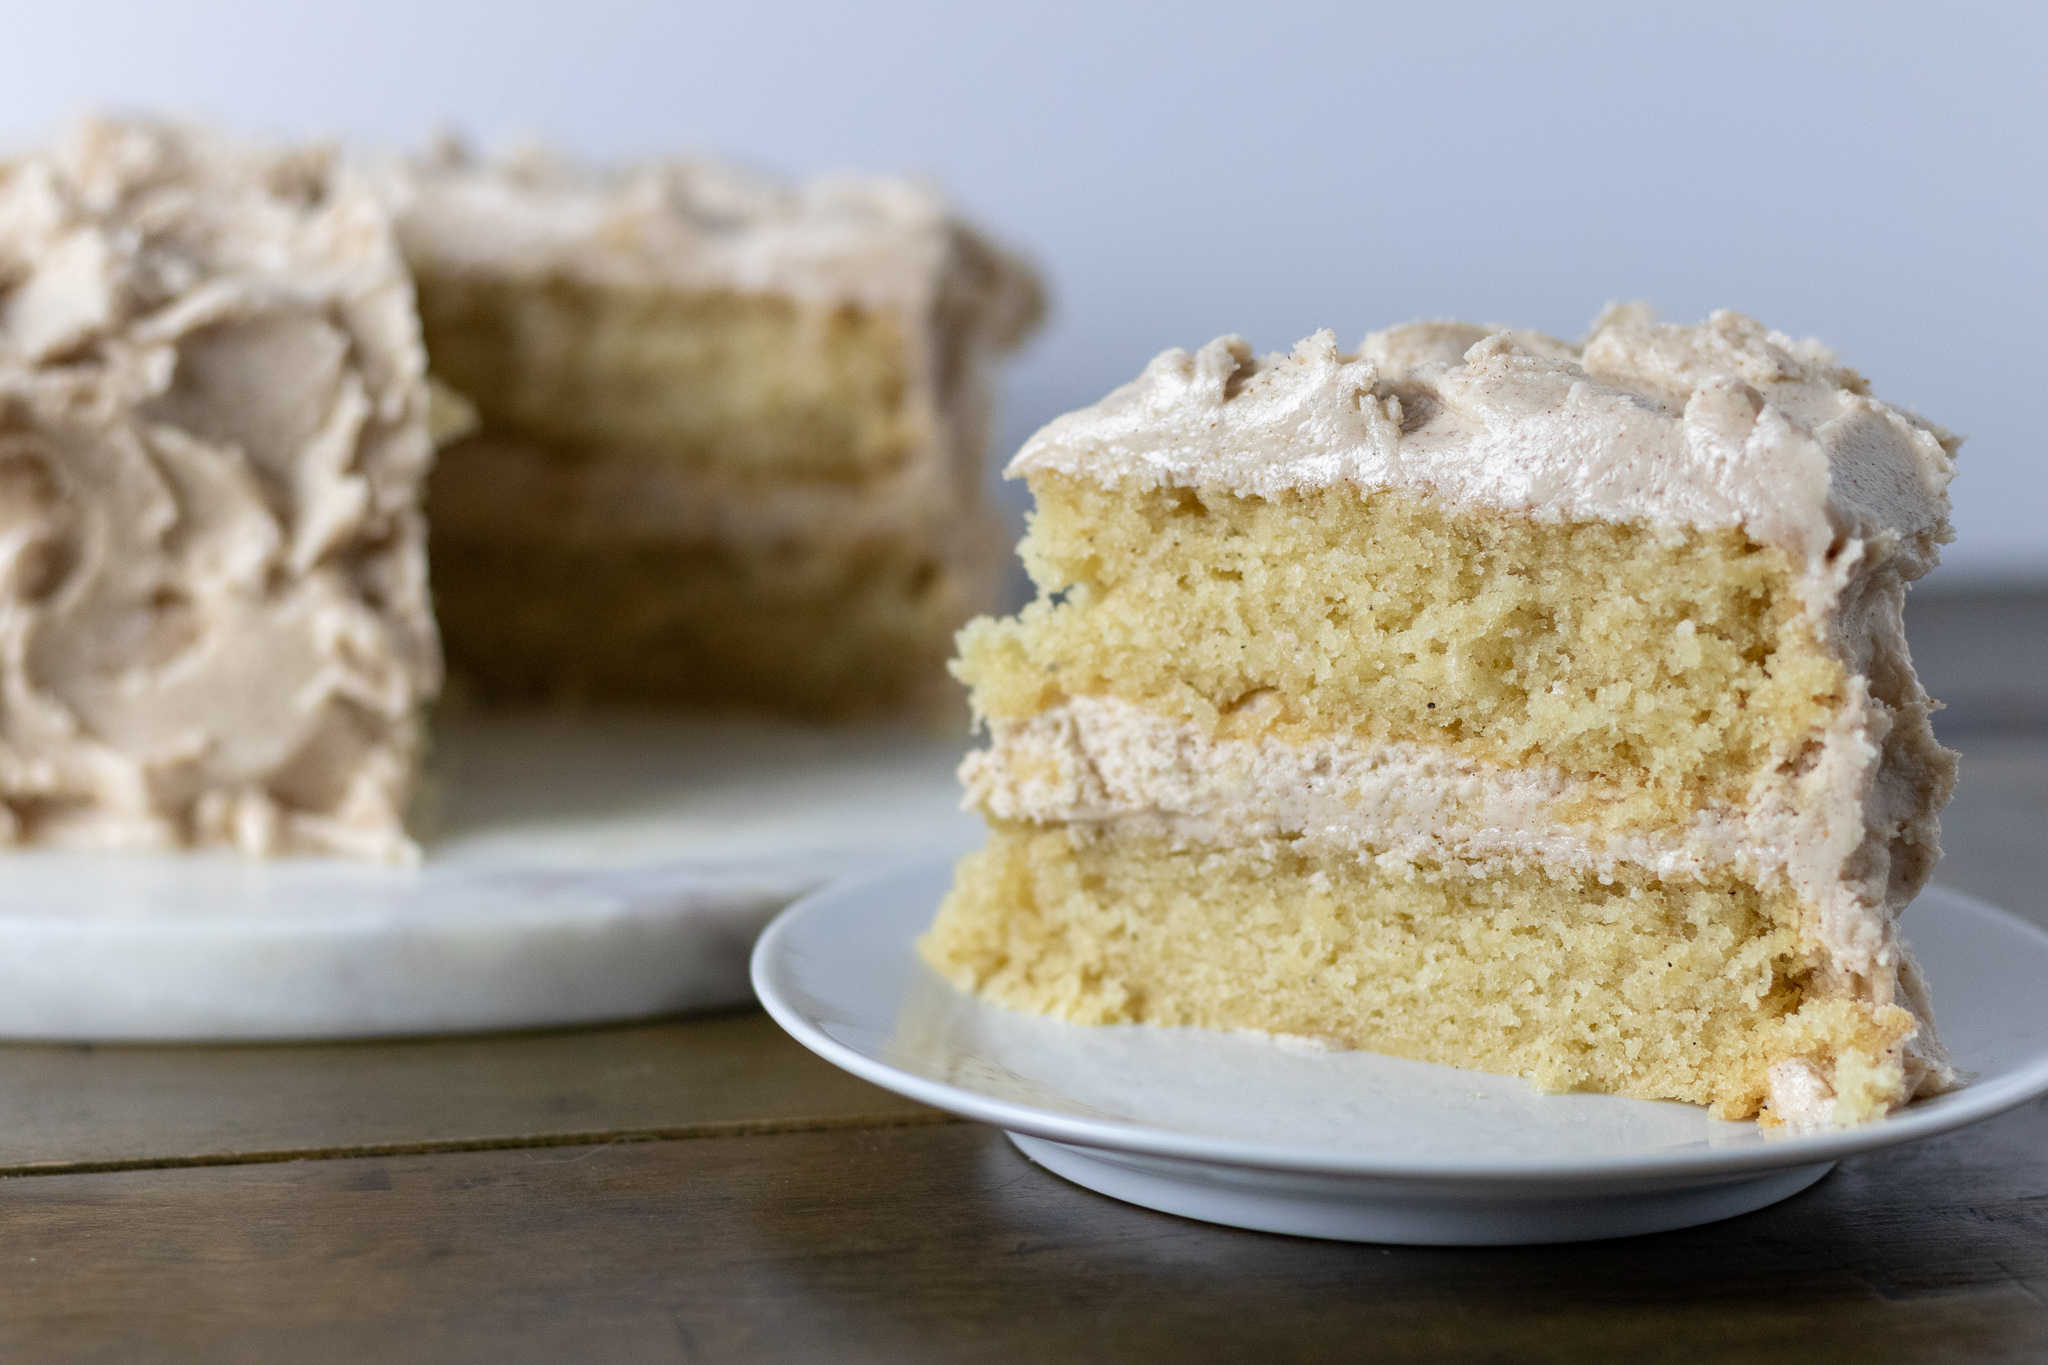
Its fluffy with the right amount of spice, the butter cream has a hint of maple and the candied pecans are the perfect sweet and salty crunch the cake needed. This cake would work beautifully for Thanksgiving or any fall gathering.

And remember, when a recipe seems like a failure, its not the end of the story. Just shake it off and keep baking. Something delicious may just come out of all the mess. Happy fall y'all !


Ingredients:

  • 2 1/2 cups all purpose white flour

  • 1 1/2 cups sugar

  • 1 tablespoon baking powder

  • 2 teaspoons ground cinnamon

  • 1/2 teaspoon nutmeg

  • 1/2 teaspoon ground ginger

  • 1 teaspoon salt

  • 1 1/4 cup aquafaba (whipped chickpea liquid, you are measuring out the WHIPPED aquafaba - not the liquid)

  • 1 cup oat or almond milk

  • 2 teaspoons vanilla extract

  • 1 1/4 cup vegan butter

Spiced Maple Buttercream:

  • 1/2 cup vegan butter

  • 1/2 cup shortening

  • 3 cups powdered sugar

  • 2 tablespoons maple syrup

  • 1-2 teaspoons cinnamon

  • 1 teaspoon ground nutmeg

  • 1 teaspoons vanilla extract

Candied Pecans:

  • 1 cup pecan halves

  • 2 teaspoons vegan butter

  • 2 tablespoon brown sugar

  • 1/2 teaspoon cinnamon

  • 2 teaspoons maple syrup

  • pinch of salt

Vegan Candied Pecan Maple Spice Cake

Instructions:

preheat oven to 350 degrees

  1. Prepare (2) 8 inch cake pans by first coating with a thin layer of vegan butter, then lightly dusting pans with flour.

  2. Prepare the aquafaba according to instructions. (follow link to recipe and instructions)

  3. In the bowl of your stand mixer, or a large bowl if using a hand mixer, whisk together all of your dry cake ingredients.

  4. Add the butter, and all of the milk into the dry ingredients. Cream on medium speed for a few minutes until completely smooth. Add vanilla and mix for a few more seconds.

  5. Next, with a spatula, gently fold in the aquafaba, careful not to over mix. You do not want to deflate the aquafaba. If you do, your cake will not be as fluffy.

  6. Evenly divide batter between the 2 prepared pans and bake cakes for 40 -45 minutes, or until a toothpick inserted in the center comes out clean.

  7. While the cakes are cooking, prepare the candied pecans by heating a small skillet on medium heat. Melt the butter, next adding the pecans, brown sugar, maple syrup, cinnamon, and salt. Lower the heat a bit and continue moving the pecans around the pan with a spoon while the sugar melts, and begins to get sticky. The nuts and sugar can burn quickly, so be sure to keep the pecans moving until the sugar becomes fully melted and looks like caramel. This can take between 5 and 10 minutes depending on the pan. Once pecans are done, pour them out onto a plastic cutting board or a piece of wax paper allowing them to cool, and the sugar to harden. Once they have cooled you can break them apart and into pieces. Set the pecans aside.

  8. Allow cakes to cool in the pans on a wire cooling rack for about 20 minutes.

  9. While cakes are cooling, prepare the frosting by mixing together the butter and shortening in your stand mixer or using an electric hand mixer. Add in the vanilla, spices, and maple syrup. Continue mixing until well incorporated. Slowly begin beating in the powdered sugar. If the frosting seems too stiff, add a few teaspoons of milk at a time until it has reached a spreadable constancy.

  10. Once cakes have cooled for 20 minutes, turn them out onto the cooling rack to cool completely. Once cakes are completely cooled, begin frosting by adding a layer of buttercream on one cake layer, and spreading evenly to the edges. Sprinkle half of the candied pecans evenly on the first layer. Place second cake layer on top and cover the cake with remaining buttercream and sprinkle with remaining candied pecans.

  11. Slice to serve. Store cake in an airtight container.

If you like this recipe, try these:
Vegan Coca-Cola Cake

Vegan Chocolate Peanut Butter Dream Cake

Vegan Lime Mojito Cupcakes

Vegan Candied Pecan Maple Spice Cake

Vegan Candied Pecan Maple Spice Cake

Vegan spice cake with maple frosting and candied pecans

Vegan Hummingbird Cake

Hummingbird Cake

I can remember very vividly the first slice of Hummingbird cake I ever ate. I was at the hospital waiting on my best friends daughter to be born and decided I needed a cup of coffee from the coffee cart. The cart also sold cake and I always need cake, sooooo. At first I thought the cake was a carrot cake so I just pointed to it and asked for slice.

Well, it was not carrot cake and I was in love from the first bite. I ran back over to a ask what I was eating to learn it was actually a Hummingbird cake. I had never in all my southern life eaten a hummingbird cake. I had to google it to figure out what is in it. It definitely looks carrot cake-esq. Instead of carrots it has crushed pineapple, and bananas to keep it nice and moist, and pecans and coconut for some crunch.

Cream cheese frosting has always been my favorite on just about any cake, and this is no exception. This cake reminds me of summer and It will forever remind me of the day sweet Teegan was born.

This classic southern cake is not hard to veganize either. We used starch and aquafaba to replace the eggs, vegan butter, and vegan cream cheese. It’s that easy and so delicious! Also, no actual hummingbirds were harmed in the making of this cake. You can rest easy!


INGREDIENTS:

You will need 3, 8 inch round cake pans, and parchment paper for this recipe

  • 3 cups all purpose flour

  • 2 teaspoons ground cinnamon

  • 1 teaspoon baking soda

  • 1 teaspoon baking powder

  • 1 teaspoon salt

  • 1/2 teaspoon allspice

  • 1/2 teaspoon nutmeg

  • 3 tablespoons tapioca or corn starch

  • 1/2 cup water

  • 2/3 cup brown sugar

  • 1 1/2 cups sugar

  • 1 1/2 cups whipped aquafaba

  • 2 teaspoons vanilla extract

  • 3/4 cup neutral tasting oil like grape seed or canola

  • 2 cups mashed bananas (5 - 6 small to medium bananas)

  • 1 can crushed pineapple (8 oz), drained

  • 1/2 cup chopped pecans

  • 1/2 cup shredded coconut

CREAM CHEESE FROSTING:

  • 3/4 cup vegan cream cheese

  • 1/2 cup vegan butter

  • 5 cups powdered sugar

  • 1 teaspoon vanilla

  • pinch of salt


INSTRUCTIONS:

Preheat oven to 350 degrees.

  1. Whisk together flour, salt, cinnamon, baking powder, baking soda, all spice, and nutmeg in a large bowl.

  2. Make aquafaba according to directions. Set aside.

  3. Mix 1/2 cup of water with three tablespoons of starch. Beat the starch, sugar, brown sugar, and vanilla together in a large bowl. Add the oil. Next beat in the bananas and pineapple until the bananas are good and mashed up, and everything is well combined.

  4. Fold the dry ingredients into the wet ingredients, just until everything is nice and evenly incorporated.

  5. Stir in the nuts and coconut.

  6. Lastly, fold the whipped aquafaba into the batter, just until it is incorporated. Try not to over mix it.

  7. Prepare all three cake pans by coating each pan with butter. Line each pan with a 8 inch circle of parchment paper. Just trace a circle onto the parchment using the bottom of the pan as your guide, cut it out, and place into the the bottom of each pan. Coat the parchment in butter as well, then add a little flour to each pan to coat, shaking out any excess flour. Divide the batter evenly between the three pans.

  8. Bake cakes for 25 - 30 minutes, or until a cake tester or skewer inserted in the middle comes out clean. Allow cakes to cool for about 15 - 20 minutes in the pans. Turn them out onto wire cooling racks to finish cooling.

  9. While the cakes are cooling prepare the frosting by beating the cream cheese and butter together in a stand mixer, or in a large bowl using an electric hand mixer. Add in the vanilla, then slowly beat in the sugar and salt until you have the desired consistency. You need the frosting on the stiffer side to keep the cakes from sliding apart.

  10. Once cakes have completely cooled, divide the frosting into thirds. Frost the first layer and sprinkle with a thin layer of extra pecans if you have any leftover. Top with the next layer, frost, and add a thin layer of leftover coconut. Add the top layer and frost. You can top the cake with more nuts, or nuts and coconut. You do not have to add nuts and coconut between the layers, we just prefer to do so if we have leftovers.

  11. Slice and serve. Store any leftovers in the fridge. This just keeps the cream cheese from getting too soft.

If you like this recipe, try these:

Vegan Chocolate Mint Cookie Cake

Vegan Lemon Pound Cake

Vegan Lime Mojito Cupcakes

A piece of Hummingbird Cake

vegan hummingbird cake with coconut, pecans, banana,and pineapple. Topped with vegan cream cheese frosting

Vegan Eggnog Cake

IMG_9941.jpg

Not everyone loves eggnog.

I am not one of those people!

I LOVE it.

I get giddy waiting for the grocery store to begin stocking my favorite holiday drink. How lucky we are that most stores now carry a vegan version!!Miracles happen everyday, y'all!

Even if you don’t love to drink eggnog, I’m going to go out on a limb and say I think you still may love this cake.

My eggnog hating husband went back for seconds. It’s the perfect mix of buttery vanilla, nutmeg, and a touch of bourbon in the frosting for an added noggy kick.

If you want to leave out the bourbon, go ahead, it will still be delicious!

Vegan and dairy free baking does not need to be intimidating. Now days more than ever it is so easy. There are so many options for replacing eggs and dairy in a recipe!

We use aquafaba in this recipe to replace the eggs. Aquafaba is simply the liquid from canned beans, and can be whipped up to resemble whipped egg whites, making it a wonder egg substitute in many recipes! Cheap, easy, and near vegan baking magic! Seriously, what a time to be alive y’all.

So go forth with confidence and bake yourself a vegan cake, and remember this holiday season you can have your nog, and eat it too!


Ingredients:

  • 2 1/2 cups all purpose white flour

  • 1 1/2 cups sugar

  • 1 tablespoon baking powder

  • 1 teaspoon ground nutmeg

  • 1 teaspoon salt

  • 1 1/4 cup aquafaba (whipped chickpea liquid, you are measuring out the WHIPPED aquafaba, not the liquid)

  • 1 cup vegan eggnog, store bought or try Meggan Leals recipe from Cooking On Caffeine

  • 2 teaspoons vanilla extract

  • 1 1/4 cup vegan butter

Buttercream:

  • 1/2 cup vegan butter

  • 1/2 cup shortening

  • 3 cups powdered sugar

  • 2 tablespoons bourbon (optional)

  • 1 1/2 teaspoons cinnamon

  • 1 teaspoon ground nutmeg

  • 1 teaspoons vanilla extract

  • 2-3 tablespoons eggnog


Instructions:

preheat oven to 350 degrees

  1. Prepare (2) 8 inch cake pans by first coating with a thin layer of vegan butter, then lightly dusting pans with flour.

  2. Prepare the aquafaba according to instructions. (follow link to recipe and instructions)

  3. In the bowl of your stand mixer, or a large bowl if using a hand mixer, whisk together all of your dry cake ingredients.

  4. Add the butter, and all of the eggnog into the dry ingredients. Cream on medium speed for a few minutes until completely smooth. Add vanilla and mix for a few more seconds.

  5. Next, with a spatula, gently fold in the aquafaba, careful not to over mix. You do not want to deflate the aquafaba. If you do, your cake will not be as fluffy.

  6. Evenly divide batter between the 2 prepared pans and bake cakes for 40 - 45 minutes, or until a toothpick inserted in the center comes out clean.

  7. Allow cakes to cool in the pans on a cooling rack for about 20 minutes.

  8. While cakes are cooling prepare the frosting by mixing together the butter and shortening in your stand mixer or using an electric hand mixer. Add in the vanilla, spices, and bourbon and continue mixing until well incorporated. Slowly begin beating in the powdered sugar. The frosting should be pretty stiff. Begin adding just enough eggnog to thin the frosting enough to easily spread on the cake. ( if you leave out the bourbon, you will need a little extra eggnog)

  9. Once cakes have cooled for 20 minutes, turn them out onto the cooling rack to cool completely. Once cakes are completely cooled, begin frosting by adding a layer of buttercream on one cake layer, and spreading evenly to the edges. Place other cake layer on top and cover the cake with remaining buttercream.

  10. Store cake in the refrigerator and serve at room temperature.

*We have altered some instructions from the original recipe to help cut down on the deflating of the aquafaba. Over mixing the aquafaba will cause it to deflate, resulting in a more dense cake. Being careful to gently fold in the aquafaba will help achieve a nice light crumb.