Sides

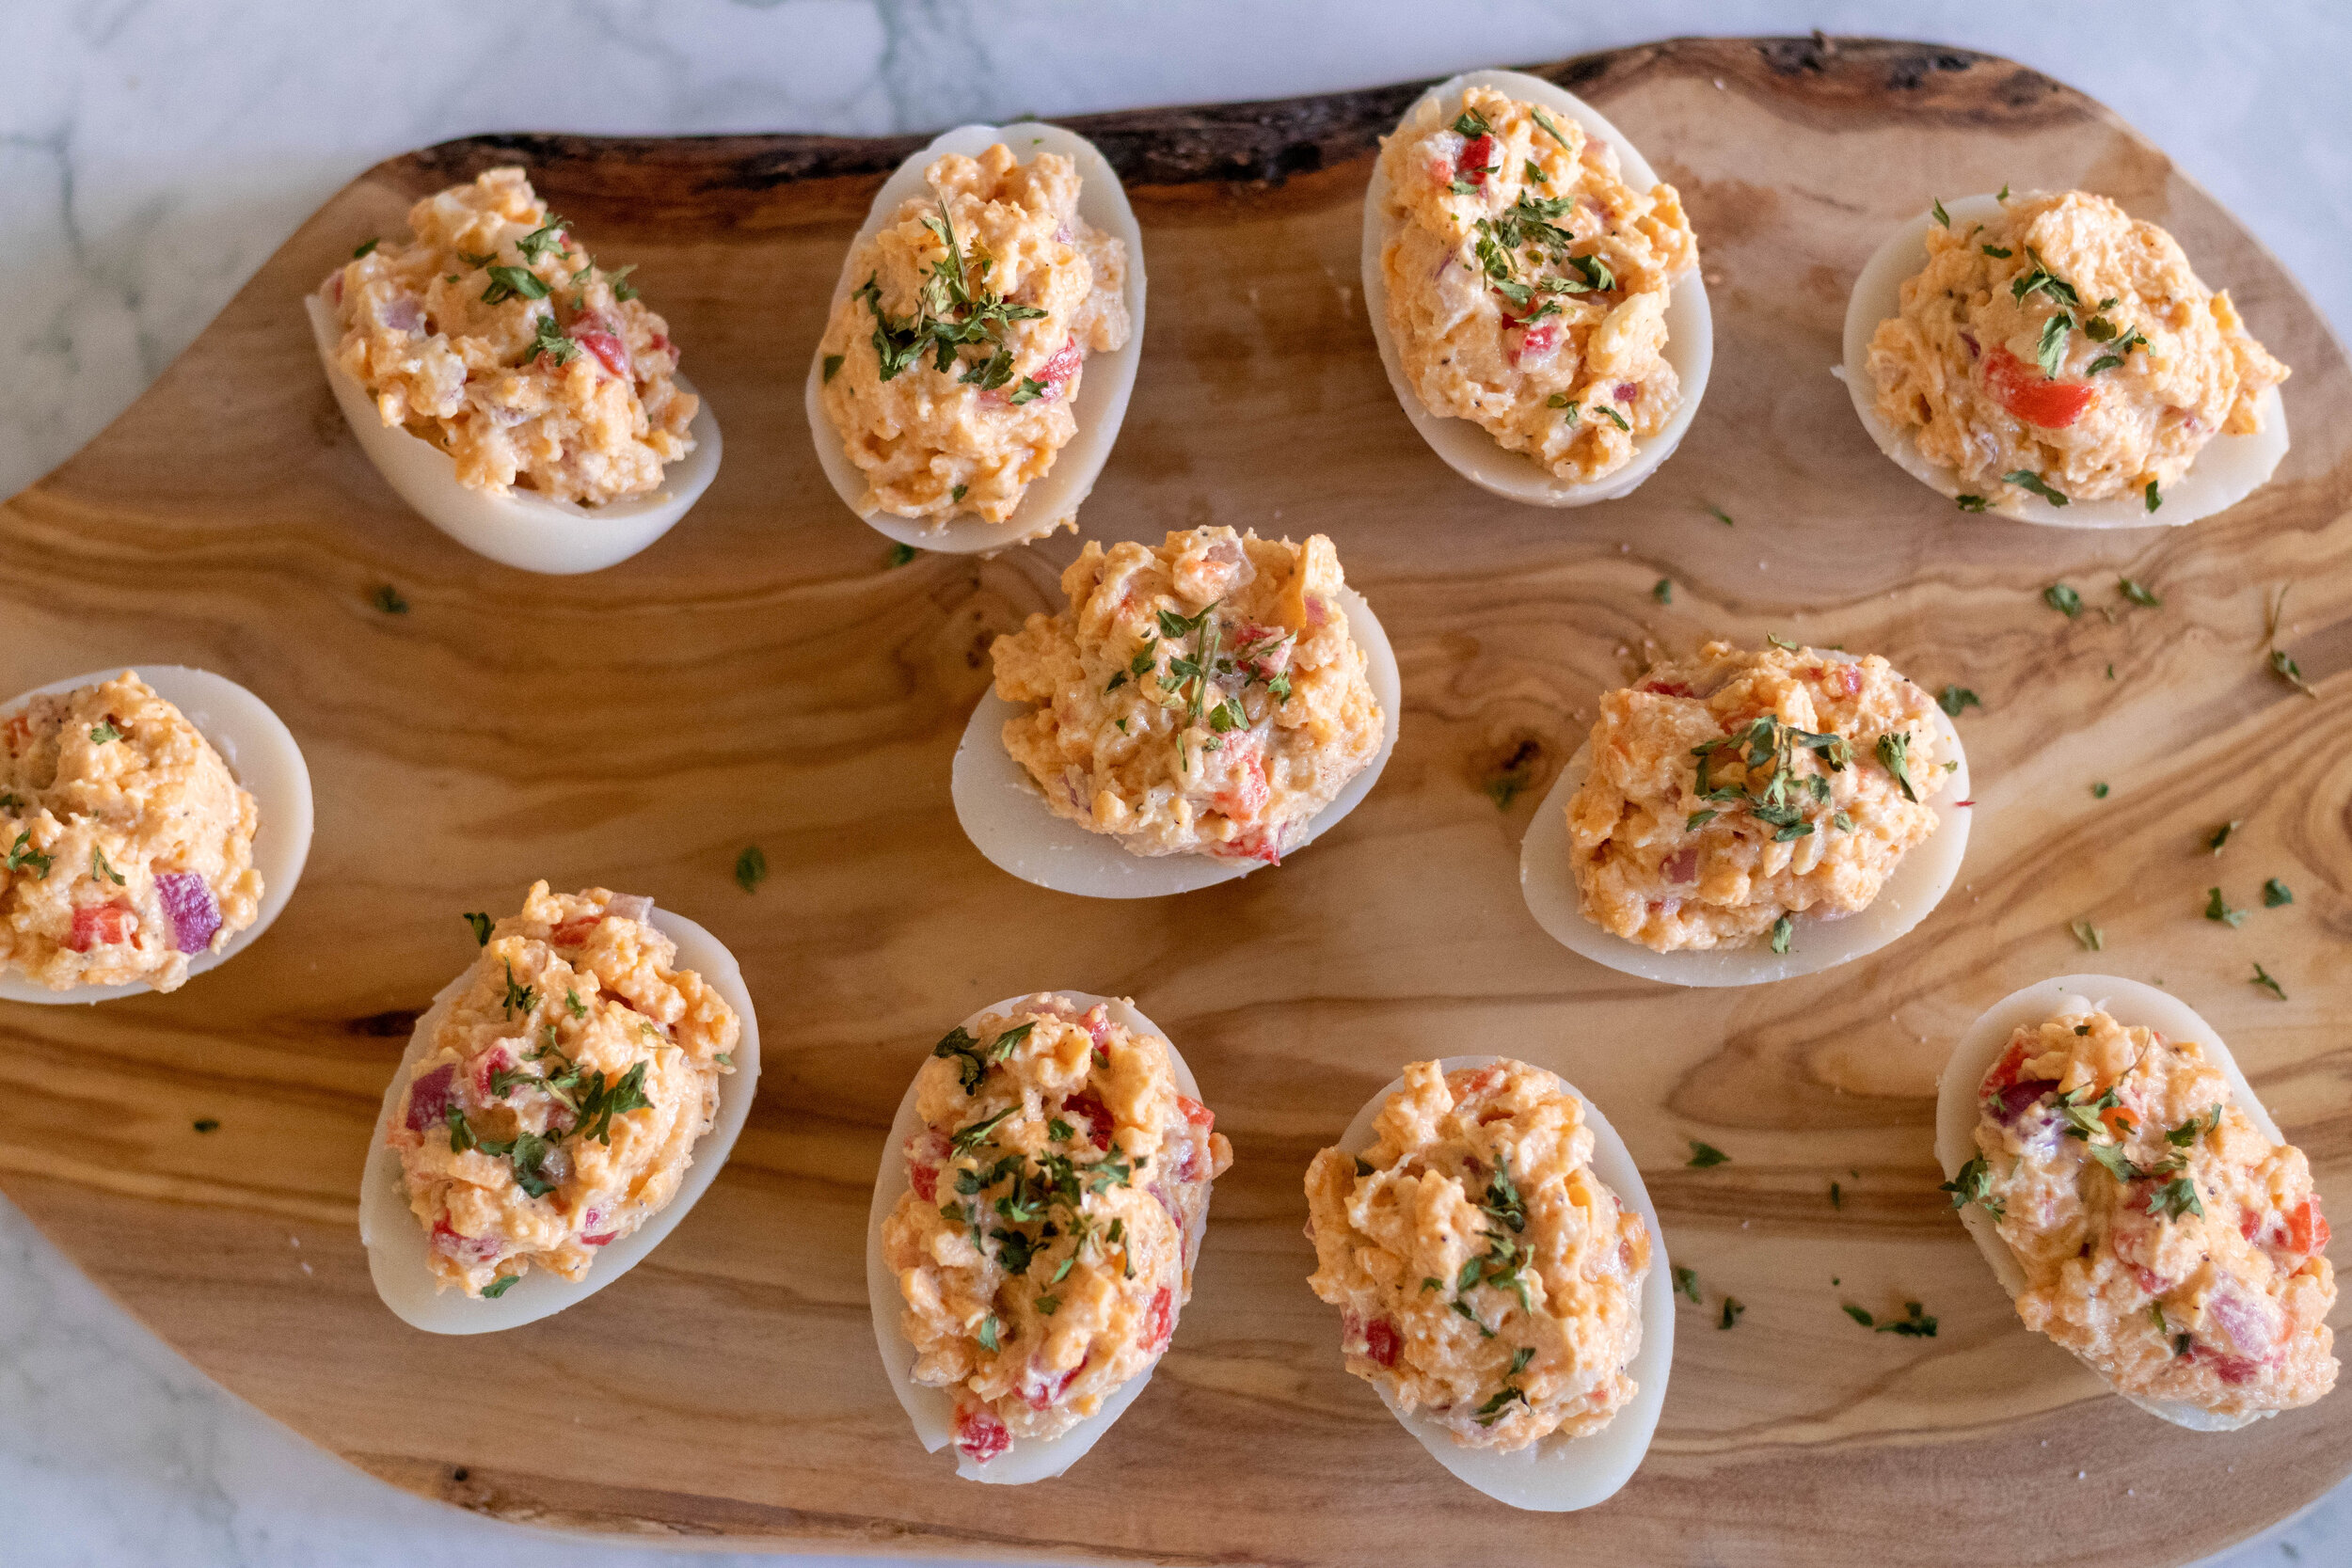
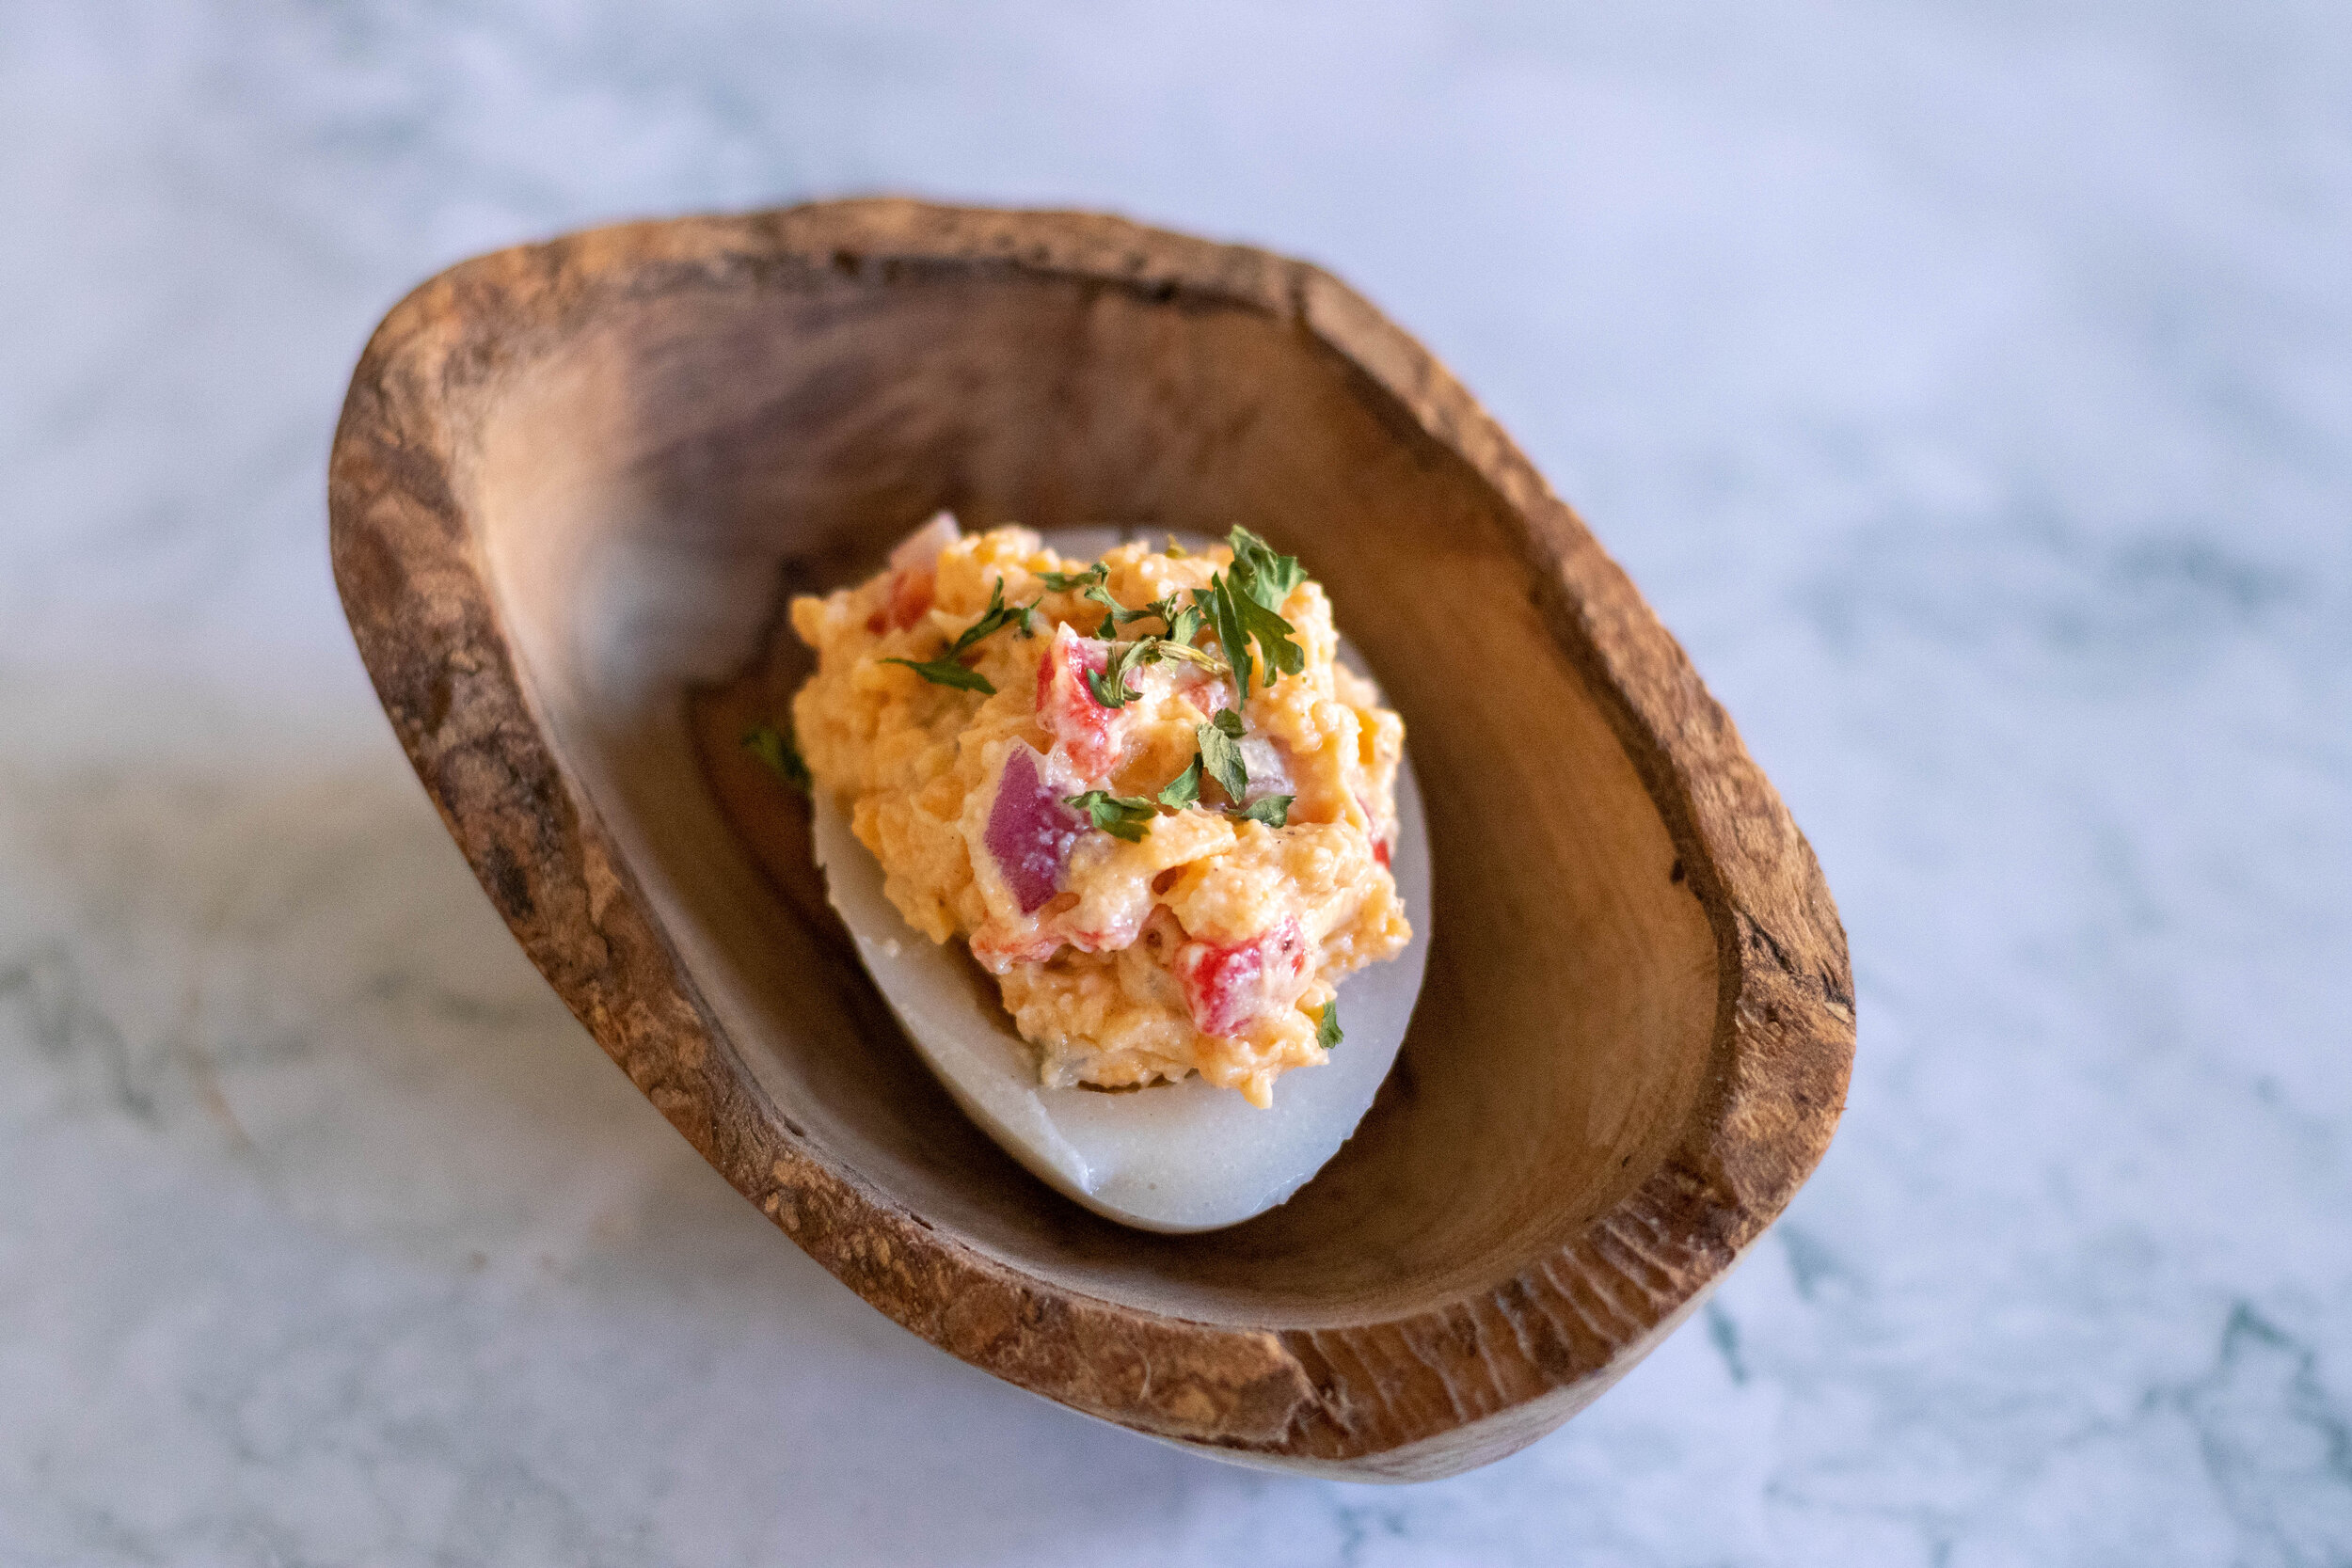
Vegan Pimento Cheese Deviled Eggs

vegan pimento cheese deviled eggs 1

I love deviled eggs.

Pre vegan they were seriously one of my most favorite things.

And, I am pretty sure my mom or aunts could win any deviled egg making contest there ever was.

I can not remember a single family holiday or get together that did not include a plate of deviled eggs.

Pretty early on in our crossover to a vegan diet, I discovered the magic of agar agar powder, and the mind blowing magic of vegan deviled eggs.

vegan pimento cheese deviled eggs 2

Just about all recipes out there use the same base. Vegan milk, agar, and Kala Namak, sulfur salt. The salt and agar come together to make a realistic looking, tasting, and even smelling egg!! Kitchen science at its finest!!!

Before you ask if you can skip the salt, let me tell you it is the ingredient that makes these vegan eggs taste and smell like eggs. I strongly recommend you find some at a local spice shop, or click the link I provided and order some online. It is a vegan egg game changer. I use it in my tofu egg salad, tofu scramble and even sprinkle it on my Just Eggs.

To make a traditional vegan deviled egg I use tofu as the filling and it works amazingly. I have served vegan deviled eggs to so many non vegan friends and family who truly could not believe they were not a real egg!! And that is exactly what you want when veganizing/replicating any classic recipe!

In the south, pimento cheese is just as much of a pot luck staple as a deviled egg is.

I whip up a batch of vegan pimento cheese just about every week for sandwiches, or snacking with crackers and raw veggies.

vegan pimento cheese

Vegan pimento cheese deviled eggs are also an already pretty popular southern staple, so I am not sure why this one took me so long!!

When I decided to make these I was a little stumped on the filling. Did I want to add some of my original deviled egg filling to the pimento cheese mix or just the cheese?

I decided nope to the original filling, it didn’t need it. I could just add some Kala Namak to the pimento cheese mixture to give it a nice eggy kick, and be done with it!

vegan pimento cheese deviled eggs 3

These vegan pimento cheese deviled eggs are delicious, actually really easy to make, pretty, and once again would probably fool even a non vegan.

I mean talk about party tricks! Bring a tray of these to your next party, or pot luck and you will quickly be known as everyones favorite vegan magician!


INGREDIENTS:

EGG WHITES:

  • 2 cups unsweetened almond or soy milk

  • 1 tablespoon agar powder ( we use this brand)

  • 1/4 teaspoon Kala Namak

PIMENTO CHEESE:

  • 1/3 cup vegan cream cheese, homemade or store-bought

  • 2 tablespoons of vegan mayo

  • 2-3 table spoons diced pimentos, drained

  • 1/4 of a small onion diced

  • 1/2 teaspoon garlic powder

  • 1 teaspoon all purpose greek seasoning (optional)

  • 1/2 teaspoon dried mustard

  • 1/2 to 1 teaspoon Kala Namak salt (add a little at time and give it taste to make sure the flavor is not over powering. A little goes a long way)

  • salt and pepper to taste

vegan pimento cheese deviled eggs 4

INSTRUCTIONS:

You will either need a silicon egg mold or a deviled egg serving tray, the kind with egg shaped divots, to form the egg whites. If you use the serving tray the eggs will be pretty shallow, but it still works.

  1. Prepare the pimento cheese by mixing all of the ingredients in a medium bowl until well combined. Give it a little taste and add more Kala Namak if you feel like it needs it.

  2. In a small sauce pan, whisk together almond milk, agar, and Indian black salt. Heat the mixture over medium heat until it comes to a simmer, then remove from the heat.

  3. Transfer the mixture to a pyrex, or glass bowl, and allow to cool on the counter top. Let the mixture sit until it appears to be thickening but is still liquid, and pourable, stirring occasionally. I have found if you pour the mixture into the molds too soon, while it is still very hot, the milk solids will separate and sink to the bottom, and the water will be left at the top. This is not an appetizing egg!

  4. Once the mixture is ready, pour it into the eggs molds and pop them in the fridge for about half an hour, or until they are nice and solid.

  5. Once the vegan egg whites are solid they should pop right out of the mold. Take a little spoon and carefully scoop out a divot from the center or the egg. This creates a little spot for extra pimento cheese to sit in.

  6. Fill each vegan egg white with a few teaspoons of vegan pimento cheese. Garnish with a little dried parsley or dill to serve.

  7. Store leftovers in the refrigerator for about 3-4 days in an airtight container.

If you like this recipe, then try these:

vegan pimento cheese deviled eggs 5

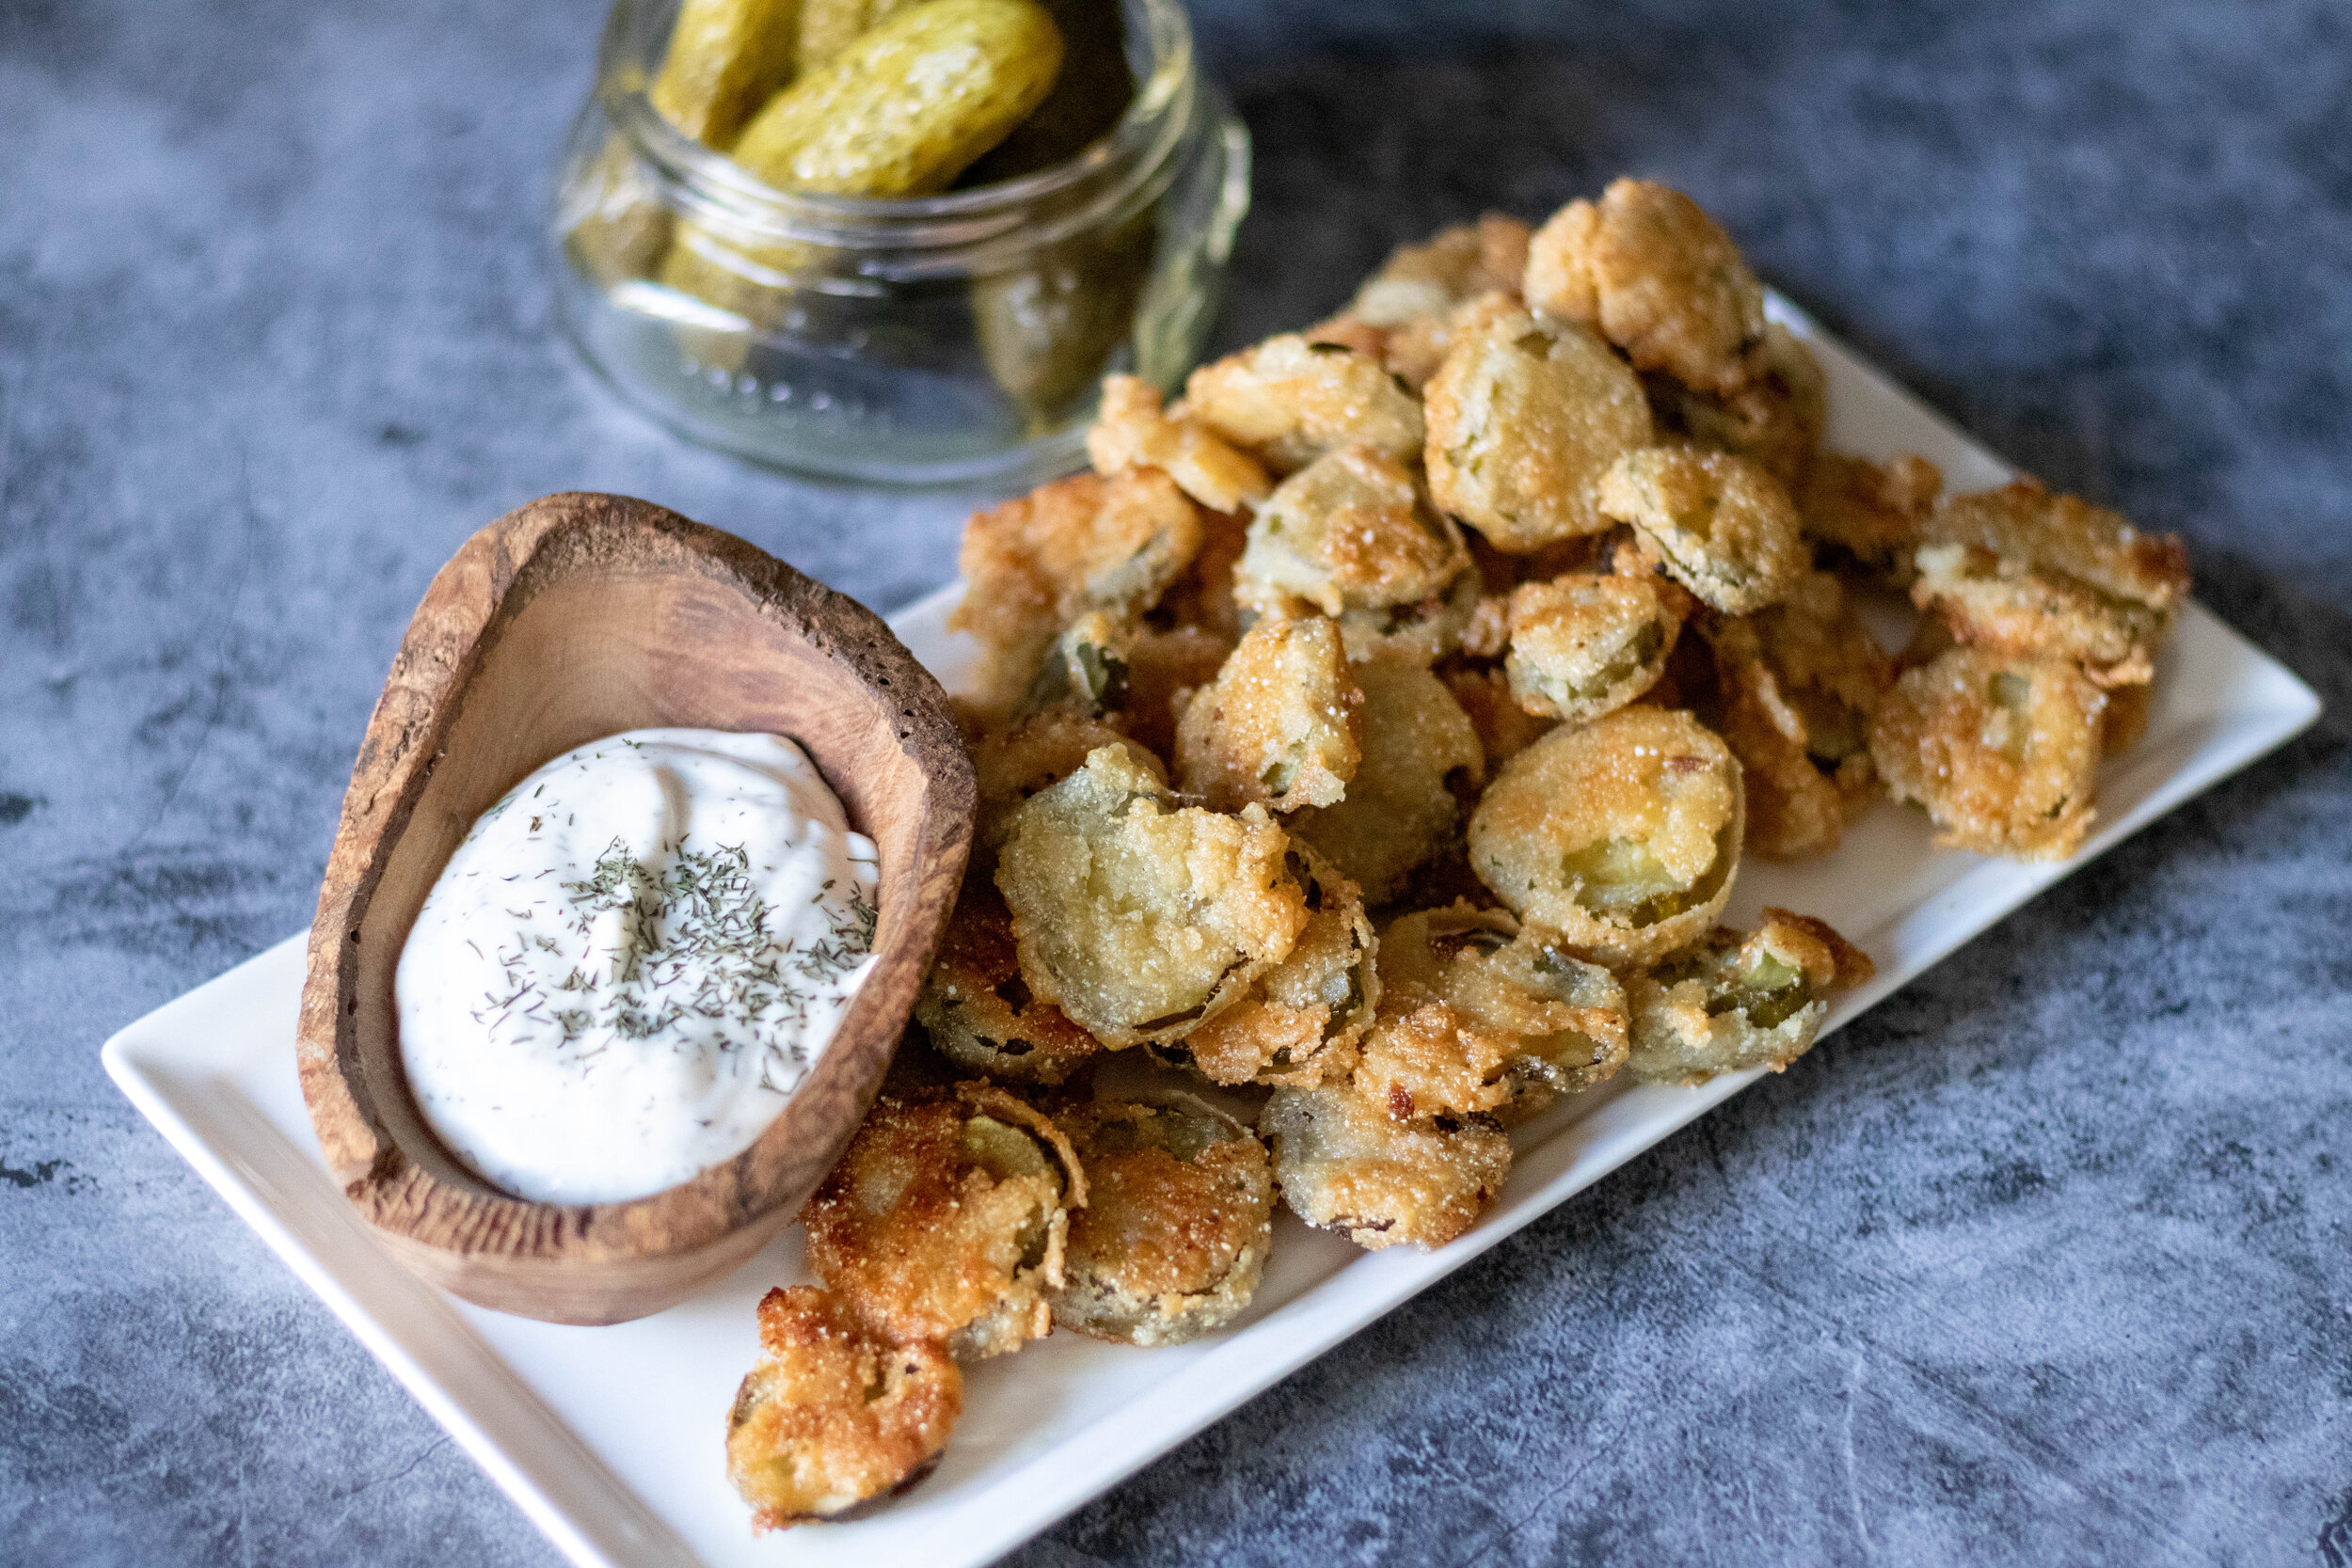
Vegan Fried Dill Pickles

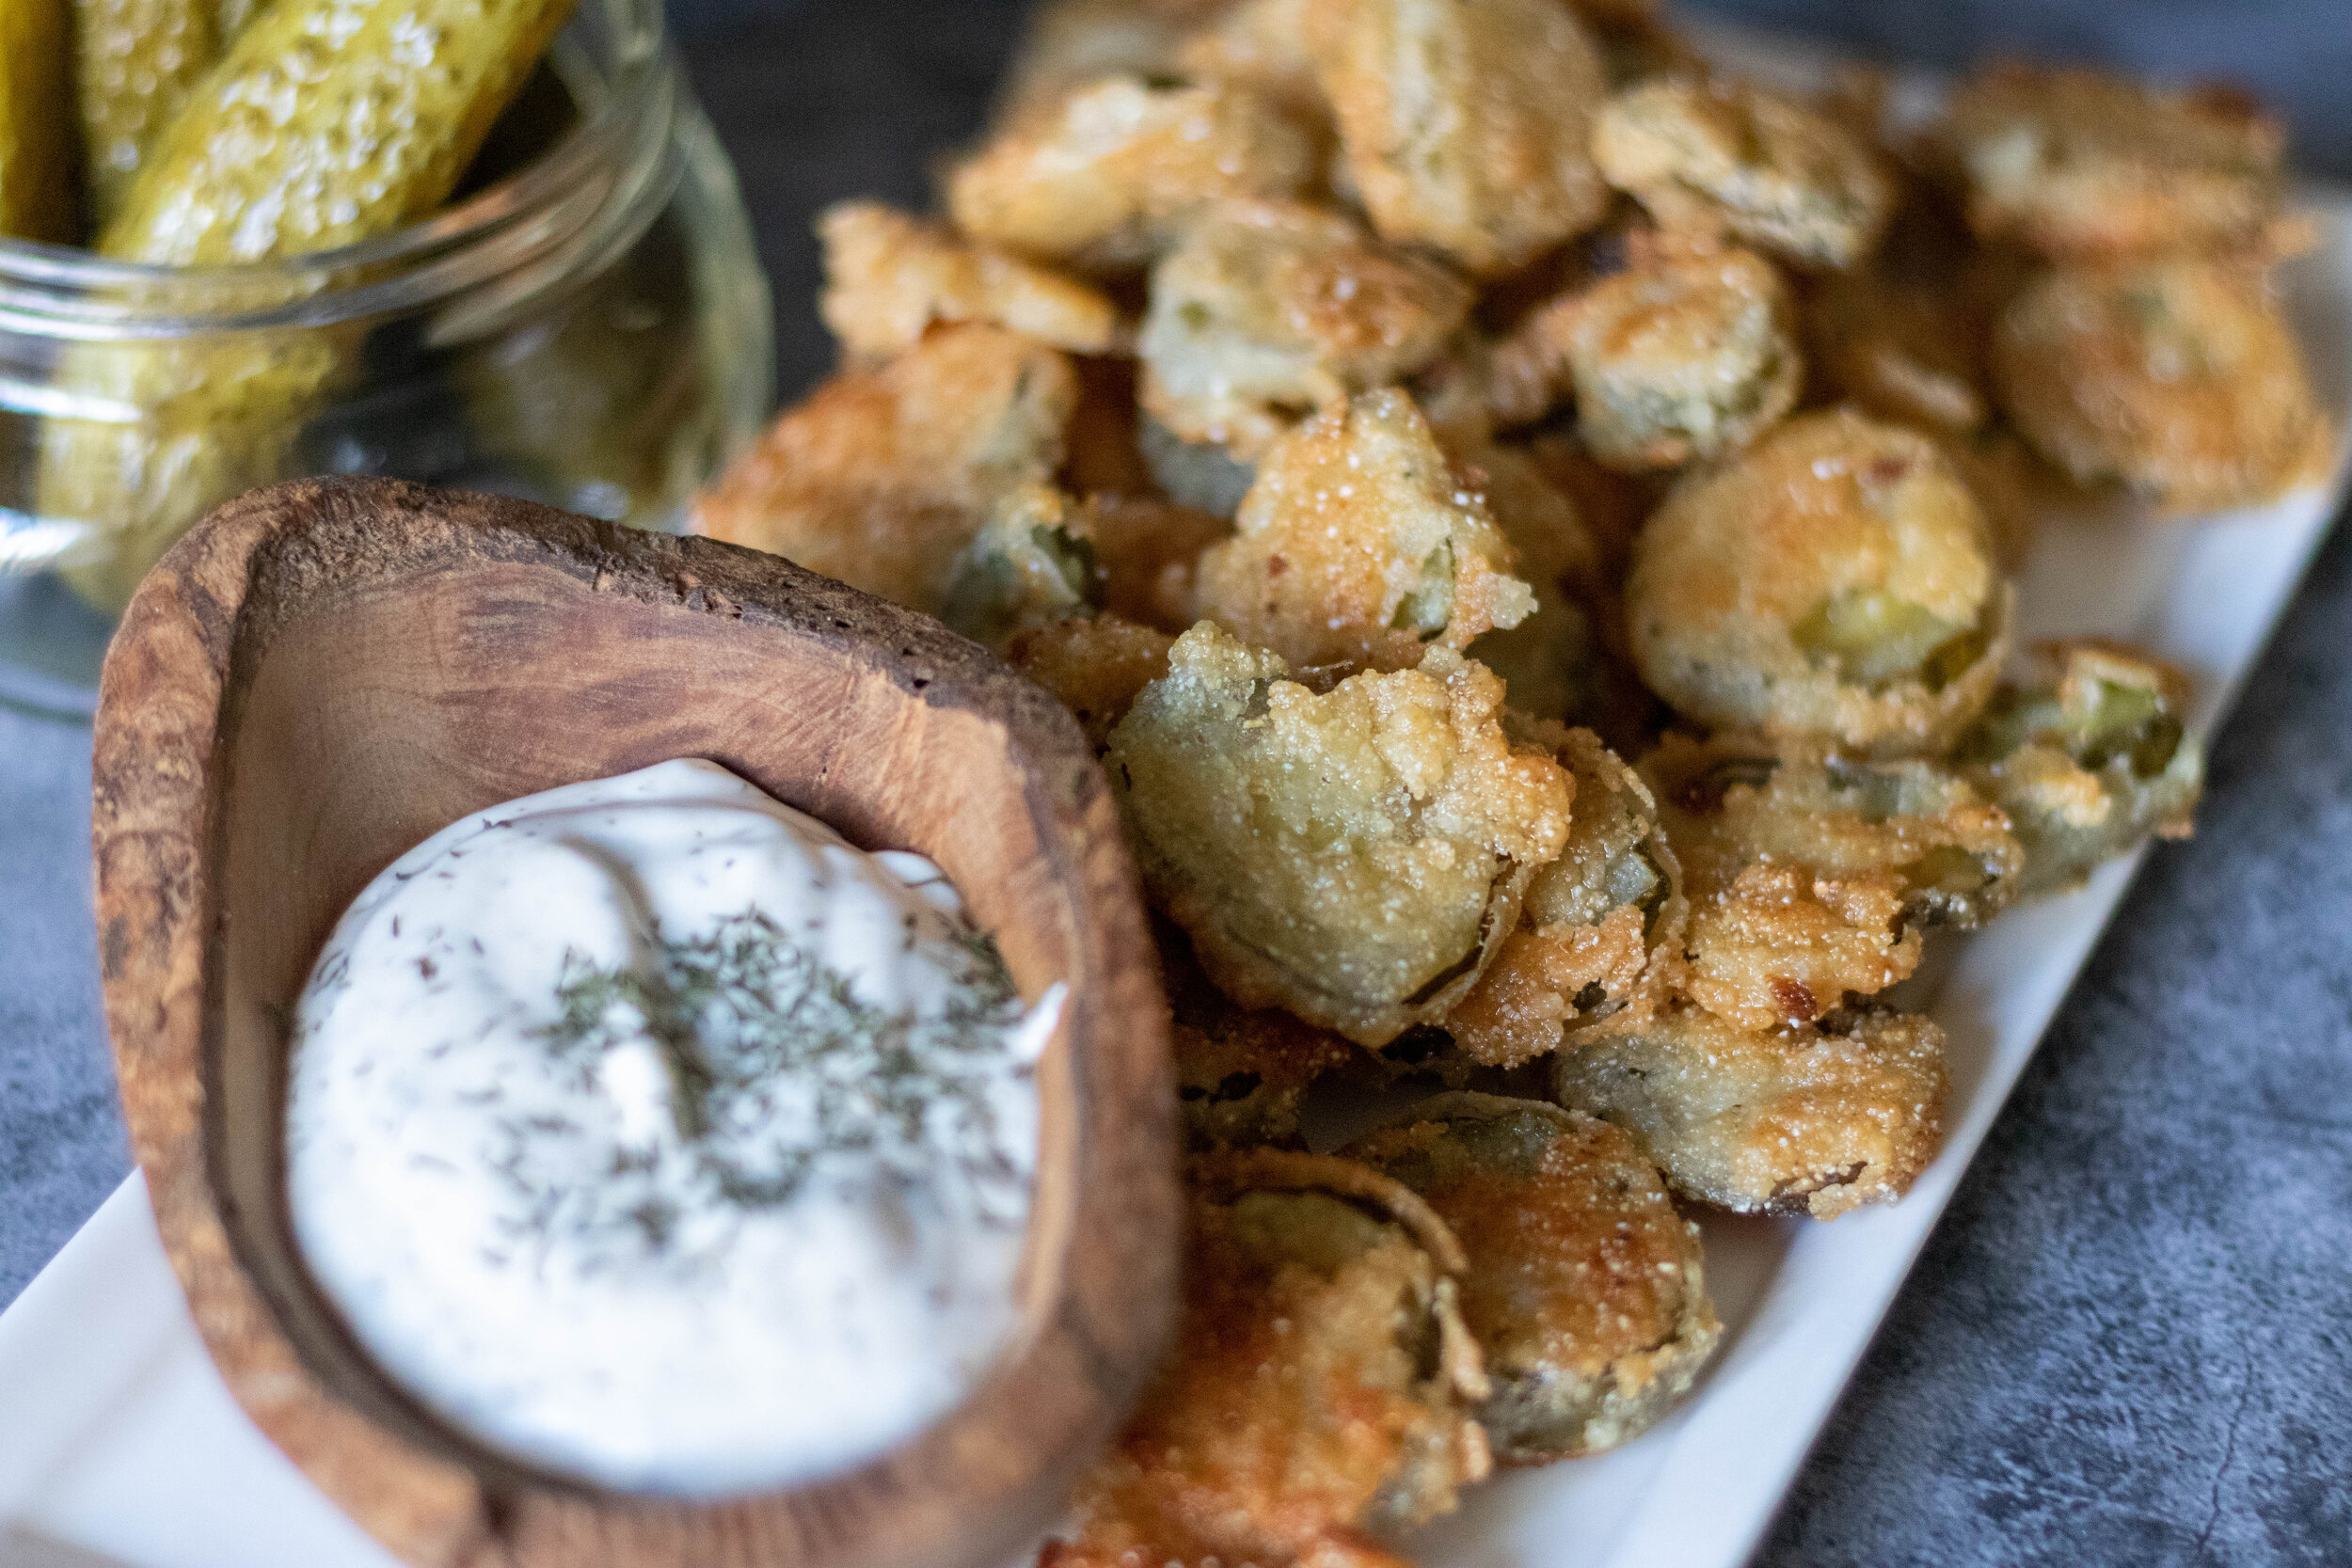
vegan fried dill pickles

vegan fried dill pickles

Sometimes you eat a certain food and you can remember forever the first time you had it.

That is fried dill pickles for me.

I ate my first batch of fried dill pickles in high school at a place called the Pizza Farm. And after just one bite, I declared they would be one of my most favorite food for forever!

I was raised by southern parents and spent a lot of time with my Grandmama when I was a kid. She canned all kinds of things because they lived on a farm. She also pickled a lot of things and made some of the best dill pickles I have ever eaten in my life.

IMG_9153.jpg

We also fry just about anything in the south!

I have always loved a good dill pickle, pickled okra, pickled green beans, pickles asparagus. But y’all, when I ate my first FRIED dill pickle I think it almost blew my mind.

Now 25 years later and they are still one of my favorite things. Sadly they are normally not vegan if you are ordering them out.
The obvious and easiest solution is making your own easy vegan fried dill pickles at home!!

Seriously!! They take hardly any time at all and so, so, so, so crispy, tangy, and delicious!

And don’t forget the vegan ranch! Nothing goes better with a batch of vegan fried dill pickles than a side of cool, creamy, vegan ranch!

If you have never eating an crispy fried pickle or think I am crazy for suggesting it, you just have to trust me here. They are seriously one of the best things, and I feel like if you love dill pickles there is no way you would not love them crispy fried and dipped in some ranch!

vegan fried dill pickles

vegan fried dill pickles

INGREDIENTS:

  • 2 cups sliced dill pickles

  • 1/2 cup unsweetened almond or oat milk

  • 1/2 cup vegan plain yogurt or sour cream

  • 1/2 cup all purpose flour

  • 1/2 cup corn meal

  • 1/4 cup corn starch

  • 1 teaspoons salt

  • 1 teaspoon all purpose seasoning of your choice

  • neutral flavored oil for frying

  • Vegan ranch for dipping

vegan fried dill pickles

vegan fried dill pickles

INSTRUCTIONS:

  1. Slice 2 cups worth of dill pickles into thin pickle chips

  2. Whisk the plant milk along with the yogurt or sour cream in a medium sized bowl.

  3. In a sperate medium sized bowl, whisk the flour, corn meal, starch, and seasoning.

  4. Begin by dipping the pickles chips into the the milk mixture. Next dip them into the dry mix making sure to get a nice coating. Repeat with remaining pickles.

  5. Heat an iron skillet or any high sided skillet with a few inches of oil over medium heat.

  6. Prepare a cookie sheet lined with paper towels and a cooling rack on top.

  7. Once the oil is nice and hot (you can poke a chopstick or wooden skewer touching the bottom of the pan, if little bubbles form around the chopstick then the oil is ready) add a handful of pickles to the pan, just make sure not to over crowd them or they will stick together. Let the pickles fry on each side until golden brown.

  8. Place the finished vegan fried dill pickles on the cooling rack and continue frying the remaining pickles.

  9. Serve the vegan fried dill pickles hot, with a side of vegan ranch.

If you like this recipe, then try these:
vegan fired dill pickles

vegan fired dill pickles

Vegan Cheesy Tuna Noodle Casserole

vegan cheesy tuna noodle casserole

vegan cheesy tuna noodle casserole

When I was a kid we pretty much lived off of Hamburger Helper. My dad grocery shopped and cooked, but mostly easy convenient foods, and stuff from a can.

In his defense it was the late 80s, early 90’s and boxed foods like hamburger helper were all the rage.

Affordable, easy, and deliciously comforting.

We never ate a lot of Tuna Helper but once my dad remarried, my stepmom added some new dishes to the mix, like her famous tuna casserole.

IMG_9097.jpg

I think because I had been living off of Hamburger Helper for so long, any change was a welcome change. Especially when she made her tuna and rice casserole.

Like most southern casseroles it involved a few cans of “cream of” soup, cheese, a starch and a protein. Her casserole was rice, tuna, cream of mushroom, and cheese. And to top it all off, she microwaved it.

Say what you want, but I ate my weight in that casserole growing up, and even when I was grown, she often would make it when I came to visit until we went vegetarian and eventually vegan.

Now despite my affection for this nostalgic classic, my own kids were never fans. So when I decided I was craving some tuna casserole, I decided I would take a chapter out of the old Tuna Helper book, and but would veganize it, but also change it up. I would try to convince my kids that they LOVE vegan tuna NOODLE casserole…since they were not buying the tuna rice combo.

IMG_9102.jpg

So how does one recreate a tuna, noodle, cheesy casserole when vegan, you may be asking?!?

Its easy, y'all! Jackfruit in a can (in brine) is great at mimicking lots of meats, and when you shred it, the texture is super tuna-y. Next all you need is a super, easy, all purpose vegan cheese sauce, and a box of macaroni! Sprinkle on a crunchy topping, and you are good to go.

This vegan tuna noodle casserole is so quick and easy, and surprisingly every single person in my family ate it up, even the four year old, who mostly only currently eats beige carbs. ( I mean if I thought I could get away with it I could live off the same diet as she is currently attempting)

This vegan tuna noodle casserole recipe actually makes a LOT, but will freeze well. You can very easily half this recipe if you do not need a giant 9x13 pan of casserole. Or you can make the full recipe and eat on it all week. We just happen to have a large family and extra kids over all of the time so it’s my habit to make extra, knowing it will get eaten eventually!

So if you used to eat a lot of box casserole mixes or even a homemade non vegan tuna noodle casserole and have been craving it, this recipe might be the answer. Quick and easy vegan comfort food is always my favorite!

vegan cheesy tuna noodle casserole

vegan cheesy tuna noodle casserole

  • INGREDIENTS:

This recipe makes a full 9x13 casserole dish, making it good for pot lucks or larger gatherings. You can easily half this recipe and bake it in a smaller dish. I often bake a large one and freeze half for later.

  • 3 cups dried macaroni, or ribbon noodles

  • 2 cans jackfruit in brine, drained and rinsed

  • 1 large yellow onion

  • 2 teaspoons vegan butter

  • 2-3 teaspoons dulse flakes (optional)

  • 2 teaspoons minced garlic

  • 2 teaspoon dijon mustard

  • 1/2 cup vegan sour cream

  • 2 cups vegan panko bread crumbs

  • 1 tablespoon nutritional yeast

  • 1 teaspoon salt

Cheese Sauce:

  • 1 cup cashews (plus water for soaking)

  • 2 cups water

  • 1/4 cup sauerkraut (cabbage only, no liquid)

  • 1 teaspoon salt

  • 3 tablespoons nutritional yeast

  • 3 tablespoons tapioca or corn starch

  • 1 teaspoon turmeric

  • 2 teaspoons smoky paprika

  • 1 tablespoons apple cider vinegar

DIRECTIONS:

Preheat oven to 350 degrees

  1. Boil noodles according to package directions in a large pot or dutch oven. Drain and set aside.

  2. Add cashews to a microwave safe container and cover in water. Heat on high for three minutes. Drain the water. Add the the softened cashews along with remaining cheese sauce ingredients to a high speed blender, and blend until the mixture is completely smooth and there are no more bits of cashew floating around. If you have something small like a bullet blender, you may have to blend in batches. Set aside.

  3. Shred the pieces of jackfruit between your fingers or with a knife ( heads up, using your fingers is faster and easier.) Finely dice the onion.

  4. Heat the pot you boiled the noodles in over medium heat. Add the butter, onion, jackfruit and garlic. Cook unit the onions are translucent.

  5. Add the blended cheese sauce to pot with the onions and jackfruit and reduce the heat to medium/ low. Cook for a few minutes, stirring continuously until the vegan cheese sauce begins to thicken. Once it thickens, add the drained noodles back to the pot. Add the sour cream, and dijon mustard, and give it all a good stir.

  6. Transfer the mixture to a 9x13 baking dish. Mix the panko bread crumbs, salt, and nutritional yeast together and sprinkle on the top of the casserole. Give it a spray with a little cooking oil and pop it in the oven on the middle rack.

  7. Bake for 25-30 minutes or unit the breadcrumbs begin to get golden brown. You can garnish with fresh parsley or diced green onions to serve.

If you like this recipe, then try these:

vegan cheesy tuna noodle casserole

vegan cheesy tuna noodle casserole

Vegan Spanish Rice with Pigeon Peas

IMG_8473.jpg

Rice and beans, or in this case, rice and peas.

I had never in my life had a pigeon pea until my friend Yanira introduced me to them. She cooked them up in a big batch of Spanish rice, and oh my gosh, I could live of this dish.

IMG_2205.jpg

It is so easy to make and super inexpensive. And it can easily feed a family of 6 with a side salad, or as a side for taco night, and there are still leftovers.

This Spanish rice is so quick and easy to make. You can use any long grain rice, I normally just use basmati because it is what I have on hand.

You just need a can of tomato sauce, the peas, an onion, and few pantry spice staples. Thats it! So easy!

I can easily find canned pigeon peas in the international isle at my grocery store in the Hispanic section. I have no solid description of them other than delicious. If you have never had a pigeon pea, then trust me, you are missing out!

All I know is that if I am making rice and beans (peas) this is the recipe I am making. It cheap, filling, delicious, easy, and flavorful. So pretty much the perfect recipe!

IMG_8481.jpg

INGREDIENTS:

  • 1 small yellow onion, finely diced

  • 2 cups any long grain white rice

  • 2 tablespoons oil

  • 3 1/3 cups water

  • 15 oz can tomato sauce

  • 2 teaspoons minced garlic

  • 2 teaspoons No Chicken, or Vegetable Better Than Bouillon ( you can also skip this and replace the water with 3 1/2 cups veggie broth)

  • 15.5 oz can pigeon peas

  • 1 teaspoon cumin powder

  • 1 teaspoon salt

  • 1/2 teaspoon black pepper

  • 1/4 cup chopped cilantro

IMG_8483.jpg

INSTRUCTIONS:

  1. Heat a large pot or dutch oven over medium heat with the oil. Once the oil is nice and hot toss in the onion and garlic and cook until translucent.

  2. Next add the rice to the pot and let it cook a few minutes until it begins to brown.

  3. Whisk the Better than Bouillon with the 3 1/2 cups of water and add it to the pot along with tomato sauce, cumin, salt, and pepper. Give it a good stir.

  4. Cover the pot and let the mixture simmer for about 20 minutes. Drain and rinse the can of peas and add them to the pot. Let simmer 10-15 more minutes or until all the liquid is absorbed and the rice is cooked through.

  5. Stir in fresh cilantro and serve.

If you like this recipe, then try these:

IMG_8491.jpg

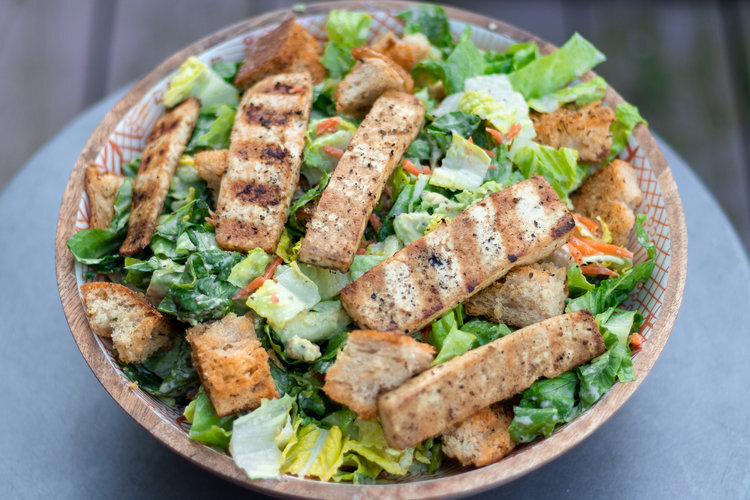
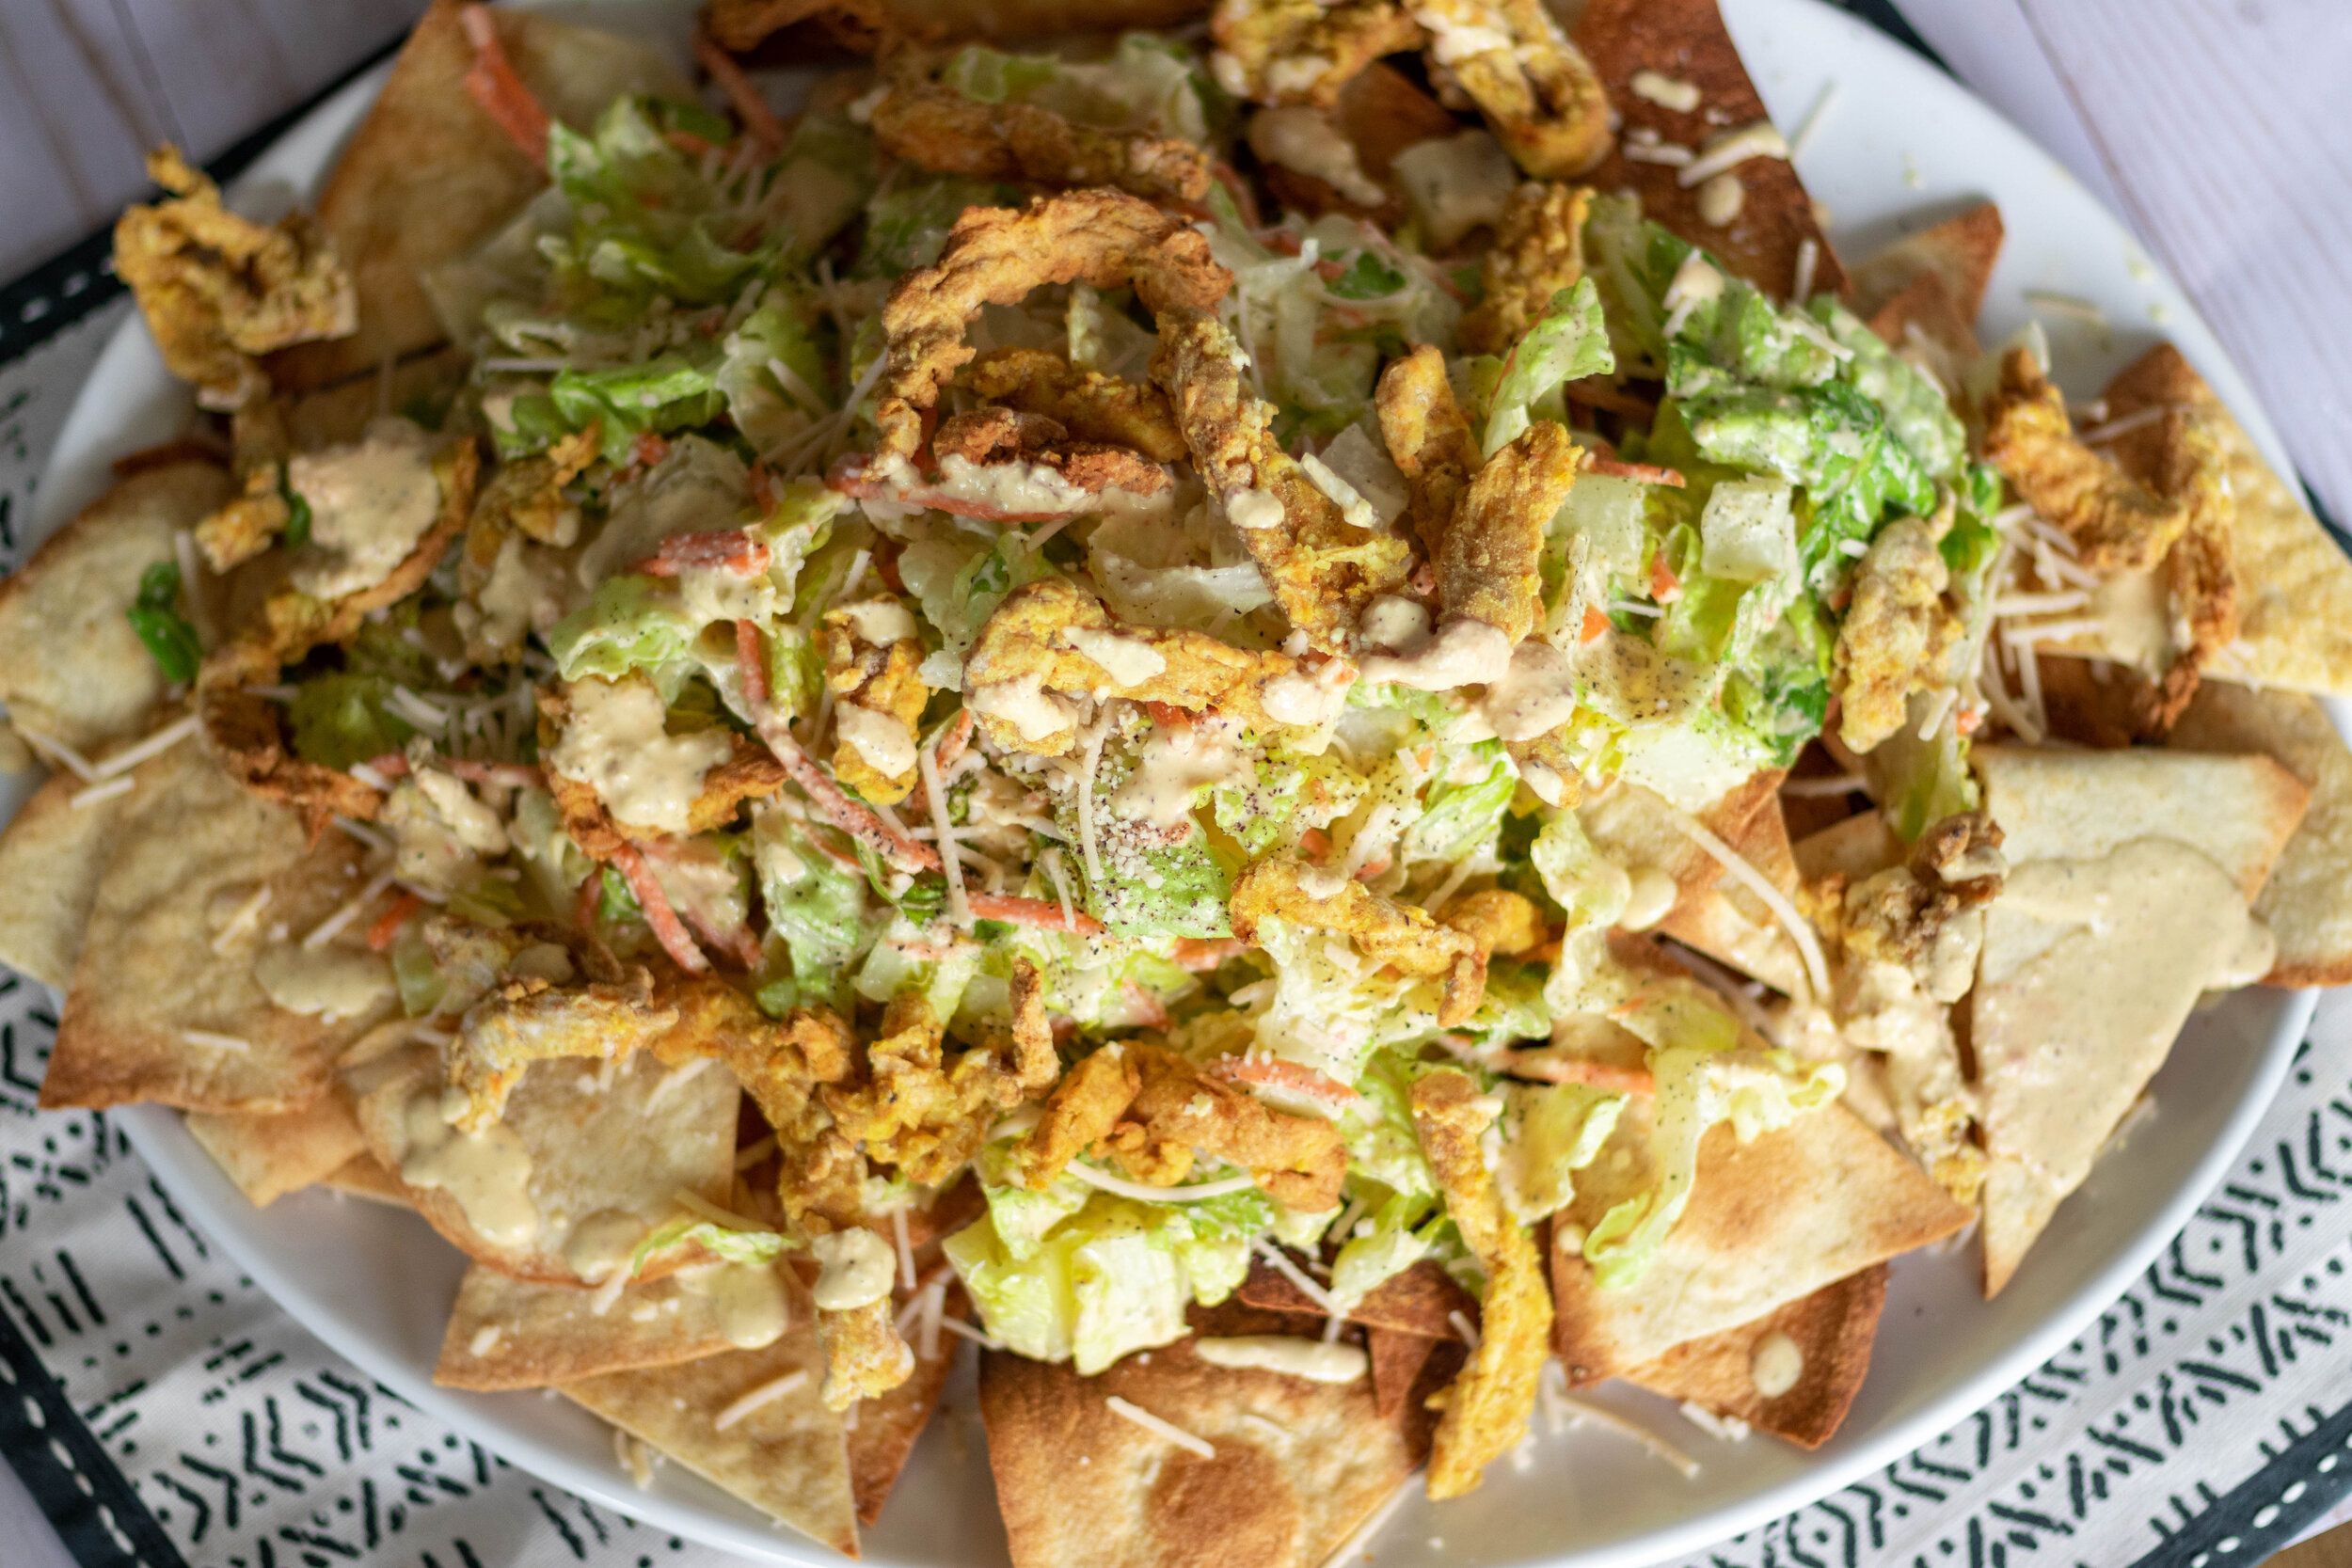
Vegan Caesar Salad Nachos with Fried Soy Curls

IMG_8266.jpg

Lets talk nachos.

Chips, a protein, normally something cold and crunchy like lettuce, some cheese. Nachos.

So when I saw a recipe in some magazine for some grilled chicken caesar salad nachos, at first I was confused, but then intrigued. And then it all made sense that one could make a caesar salad nacho and it probably be delicious.

I don’t really know what all was going on in that non vegan recipe version, I didn’t really look past the pic, but I knew I could take my favorite vegan caesar salad recipe and add some kind of vegan protein, and probably find my new favorite summertime dinner!

IMG_8260.jpg

I have tried a ton of vegan caesar salad recipes, and dressings over the years, and until now none have been a winner.

So when recently I was making a caesar salad, and contemplating the protein I would add, I decided on Alabama White Sauce Grilled Tofu, and a light bulb went off.

Alabama White Sauce (AWS) is a a tangy, vinegar and mayo based bbq sauce which originated it Northern Alabama at Big Bob Gibson’s Bar-B-Q.

Our AWS is a vinegar and mayo based sauce like the original, with a little kick and has just enough tang to work as a caesar dressing substitute. AWS is a staple condiment in our house because it is delicious and versatile, and not just for bbq!

So after I grilled up the tofu, it occurred to me to take the leftover sauce and turn it into the dressing for this salad .

IMG_1659.JPG

PURE JOY! It was so good that I will never attempt another “caesar” dressing recipe again.

I also added some carrots to the salad because I’m adult and I can do what I want..right?? And what I want is carrots on everything, even if it's not the norm, who cares if it tastes good.

When making the nachos I first considered adding my grilled Alabama White Sauce Grilled Tofu, and honestly I think that could be delicious too, but I had a bag of Butler Soy Curls staring at me and I was in the mood for some fried soy curl goodness. So that is what I did and I am glad I did because fried soy curls are one of my favorite things.

The chips act as a crouton crunch without adding croutons!!! I imagine you could also toast up some pita bread as well If you didn’t want to sue tortillas, and if you are gluten free you could use corn tortillas!

I served these nacho on a big ol plate and let everyone dig in. I think this recipe would work great for a BBQ or gathering, game night or movie night. It’s light but filling and pretty fun to scoop up that salad and crispy soy curls on a garlicy chip.

This might be how we eat caesar salad in our house for the foreseeable future!

INGREDIENTS:

  • 2 heads romaine lettuce

  • 1/3 cups shredded carrots

  • 1 package flour tortillas (you could use corn if GF)

  • A few teaspoons garlic powder or garlic salt

  • spray oil

  • A few tablespoons vegan parmesan cheee

For The Soy Curls:

  • 1 (8 oz) bag Butler soy curls

  • 3 cups boiling water

  • 1 teaspoon Vegetable or Chickenless Better than Bouillon

  • 1 cup all purpose flour

  • 2/3 cups tapioca starch

  • 1 teaspoon garlic salt

  • 1 teaspoon onion powder

    ( you could also use the 86eats easy seitan chicken breast, grilled or fried and cut into strips)

Alabama White Sauce Caesar Dressing:

  • 1/2 batch Alabama White Sauce

  • 2 tablespoons apple cider vinegar

  • 1 teaspoon minced garlic

  • 2 teaspoons lemon juice

IMG_8271.jpg

INSTRUCTIONS:

  1. Prepare the Alabama White Sauce according to instructions. Whisk in the remaining dressing ingredients with 1/2 of the sauce. The other half of the Vegan Alabama White Sauce can be used as a dip for veggies, used to make grilled tofu, or even Alabama white sauce tempe tacos.

  2. Cut the entire pack of tortillas into triangle shapes. Arrange them on two baking sheets in a single layer and give them a light mis of oil and good shake with some garlic salt or powder. Bake them at 350 degrees until they begin to brown and get crispy. (about 10 minutes but keep an eye on them.) Remove from oven and allow to cool. Set aside.

  3. Pour hot water along with Better than Bouillon into a large bowl, whisking in the bouillon until it has dissolved. Add the soy curls and let them soak for 10 minutes.

  4. While the curls are soaking, whisk together the flour, starch, and seasoning in a large bowl.

  5. Drain the soy curls in a colander over the sink, return the curls to the bowl they were soaking in.

  6. Begin adding a handful of curls at a time to the flour mixture, making sure to fully coat the curls. Place coated curls on a baking sheet pan, and repeat with remaining curls.

  7. Line another baking sheet pan with paper towels and place a wire cooling rack on top.

  8. HOT OIL COOKING METHOD: Heat a large deep skillet or dutch oven with a few inches of oil, over medium heat. You can poke a chop stick or wooden skewer into the pan, if small bubbles form around the stick the oil is ready. Once the oil is nice and hot begin adding batches of curls to the pan, making sure not to over crowd them. Using a pair of metal tongs, keep the curls moving around in the pan so they cook evenly. Allow the curls to fry for several minutes until golden brown and crispy. Place finished curls on the wire rack and repeat with remaining curls. I like to sprinkle a little extra salt and old bay on the finished curls

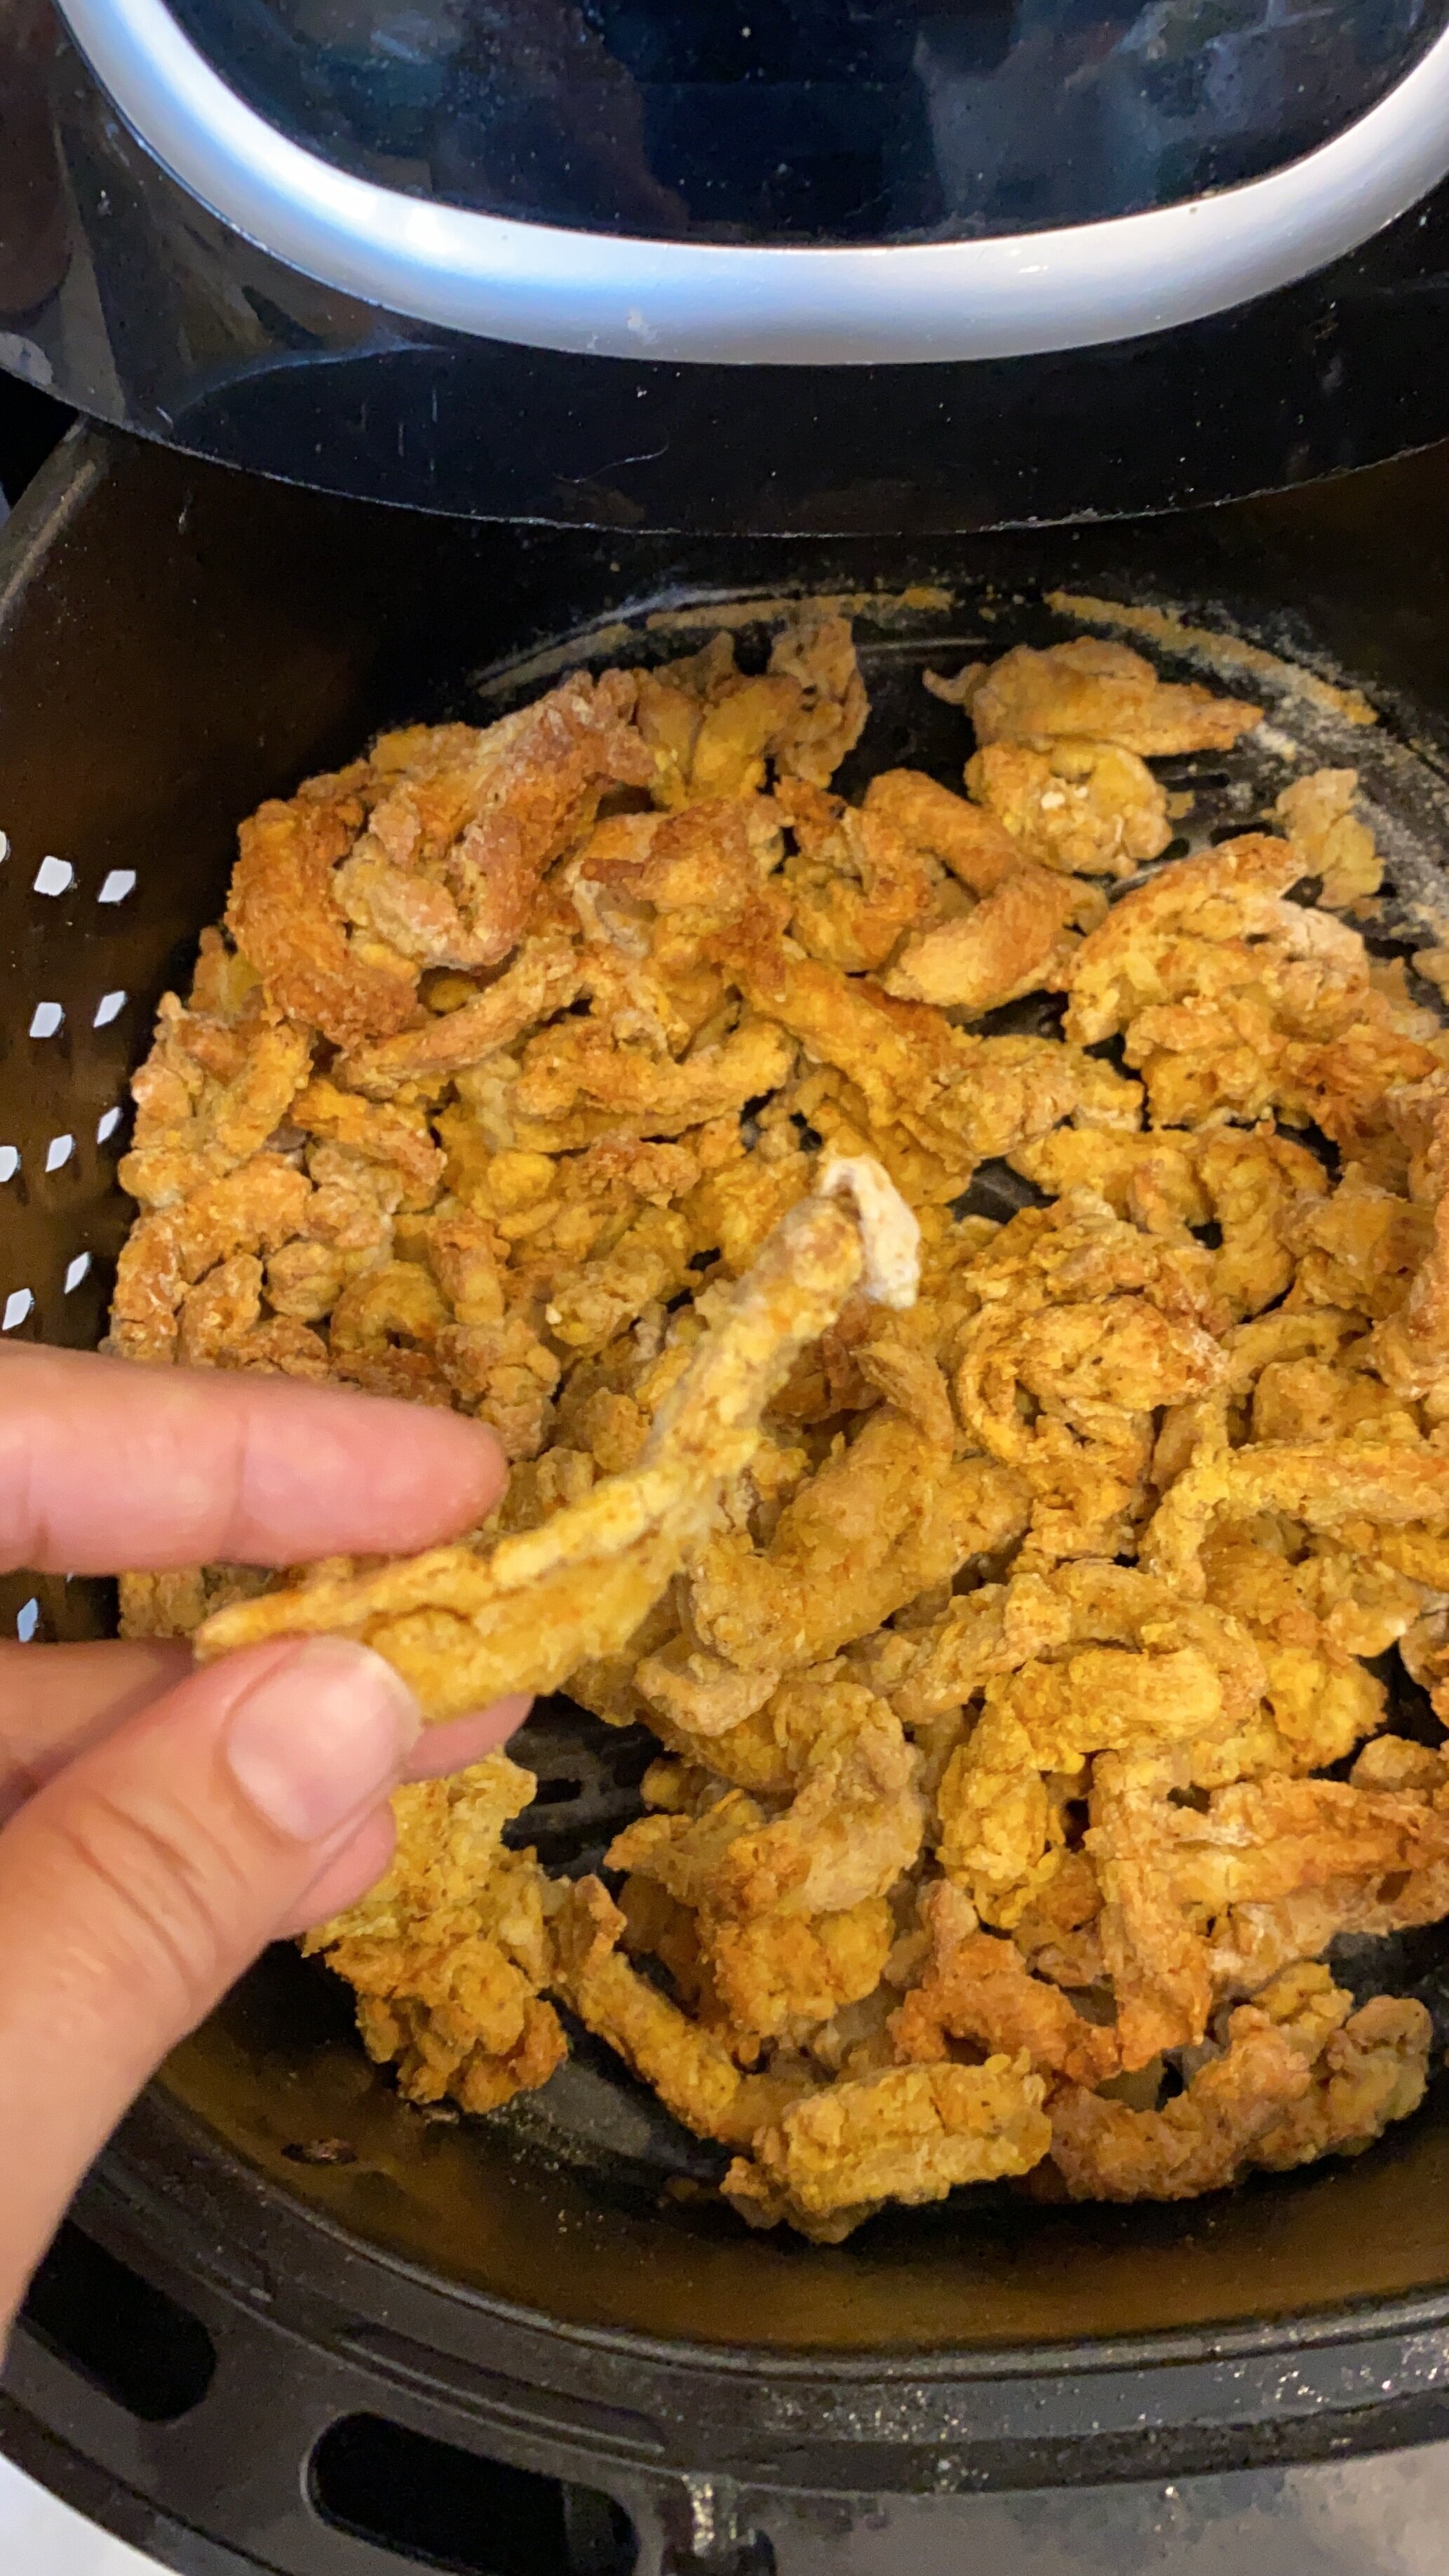
  9. AIR FRYER COOKING METHOD: Depending on the size of your air fryer, you may have to cook the curls in batches. I have a 7 quart air fryer and can fit them all in at once. Place the coated curls in the air fryer and give them a light spray with some oil. Fry at 375 for 10 minutes, opening and shaking the basket a few times throughout their cooking. I often use tongs and stir them around to keep them from sticking. You may need another 5 minutes on the fry. Just make sure they fry long enough that they are all crispy. You may also want to give them another mist of oil when you open the basket to shake and stir them around.

  10. Wash and chop the lettuce. In a large bowl toss the lettuce, carrots, and 2/3 of the dressing.

  11. To serve, arrange the chips on a large platter (or if you want individual servings, arrange on single plates) top with salad, some crispy soy curls (I don’t use the entire batch, but my kids always just snack on the leftovers with dip, or I save a reheat what I don’t use later) , sprinkle with vegan parmesan cheese, and drizzle with remaining dressing. Serve right away.

Serves 4- 6 (you can half this recipe easily for less nachos)

If you like this recipe, then try these:

IMG_8269.jpg

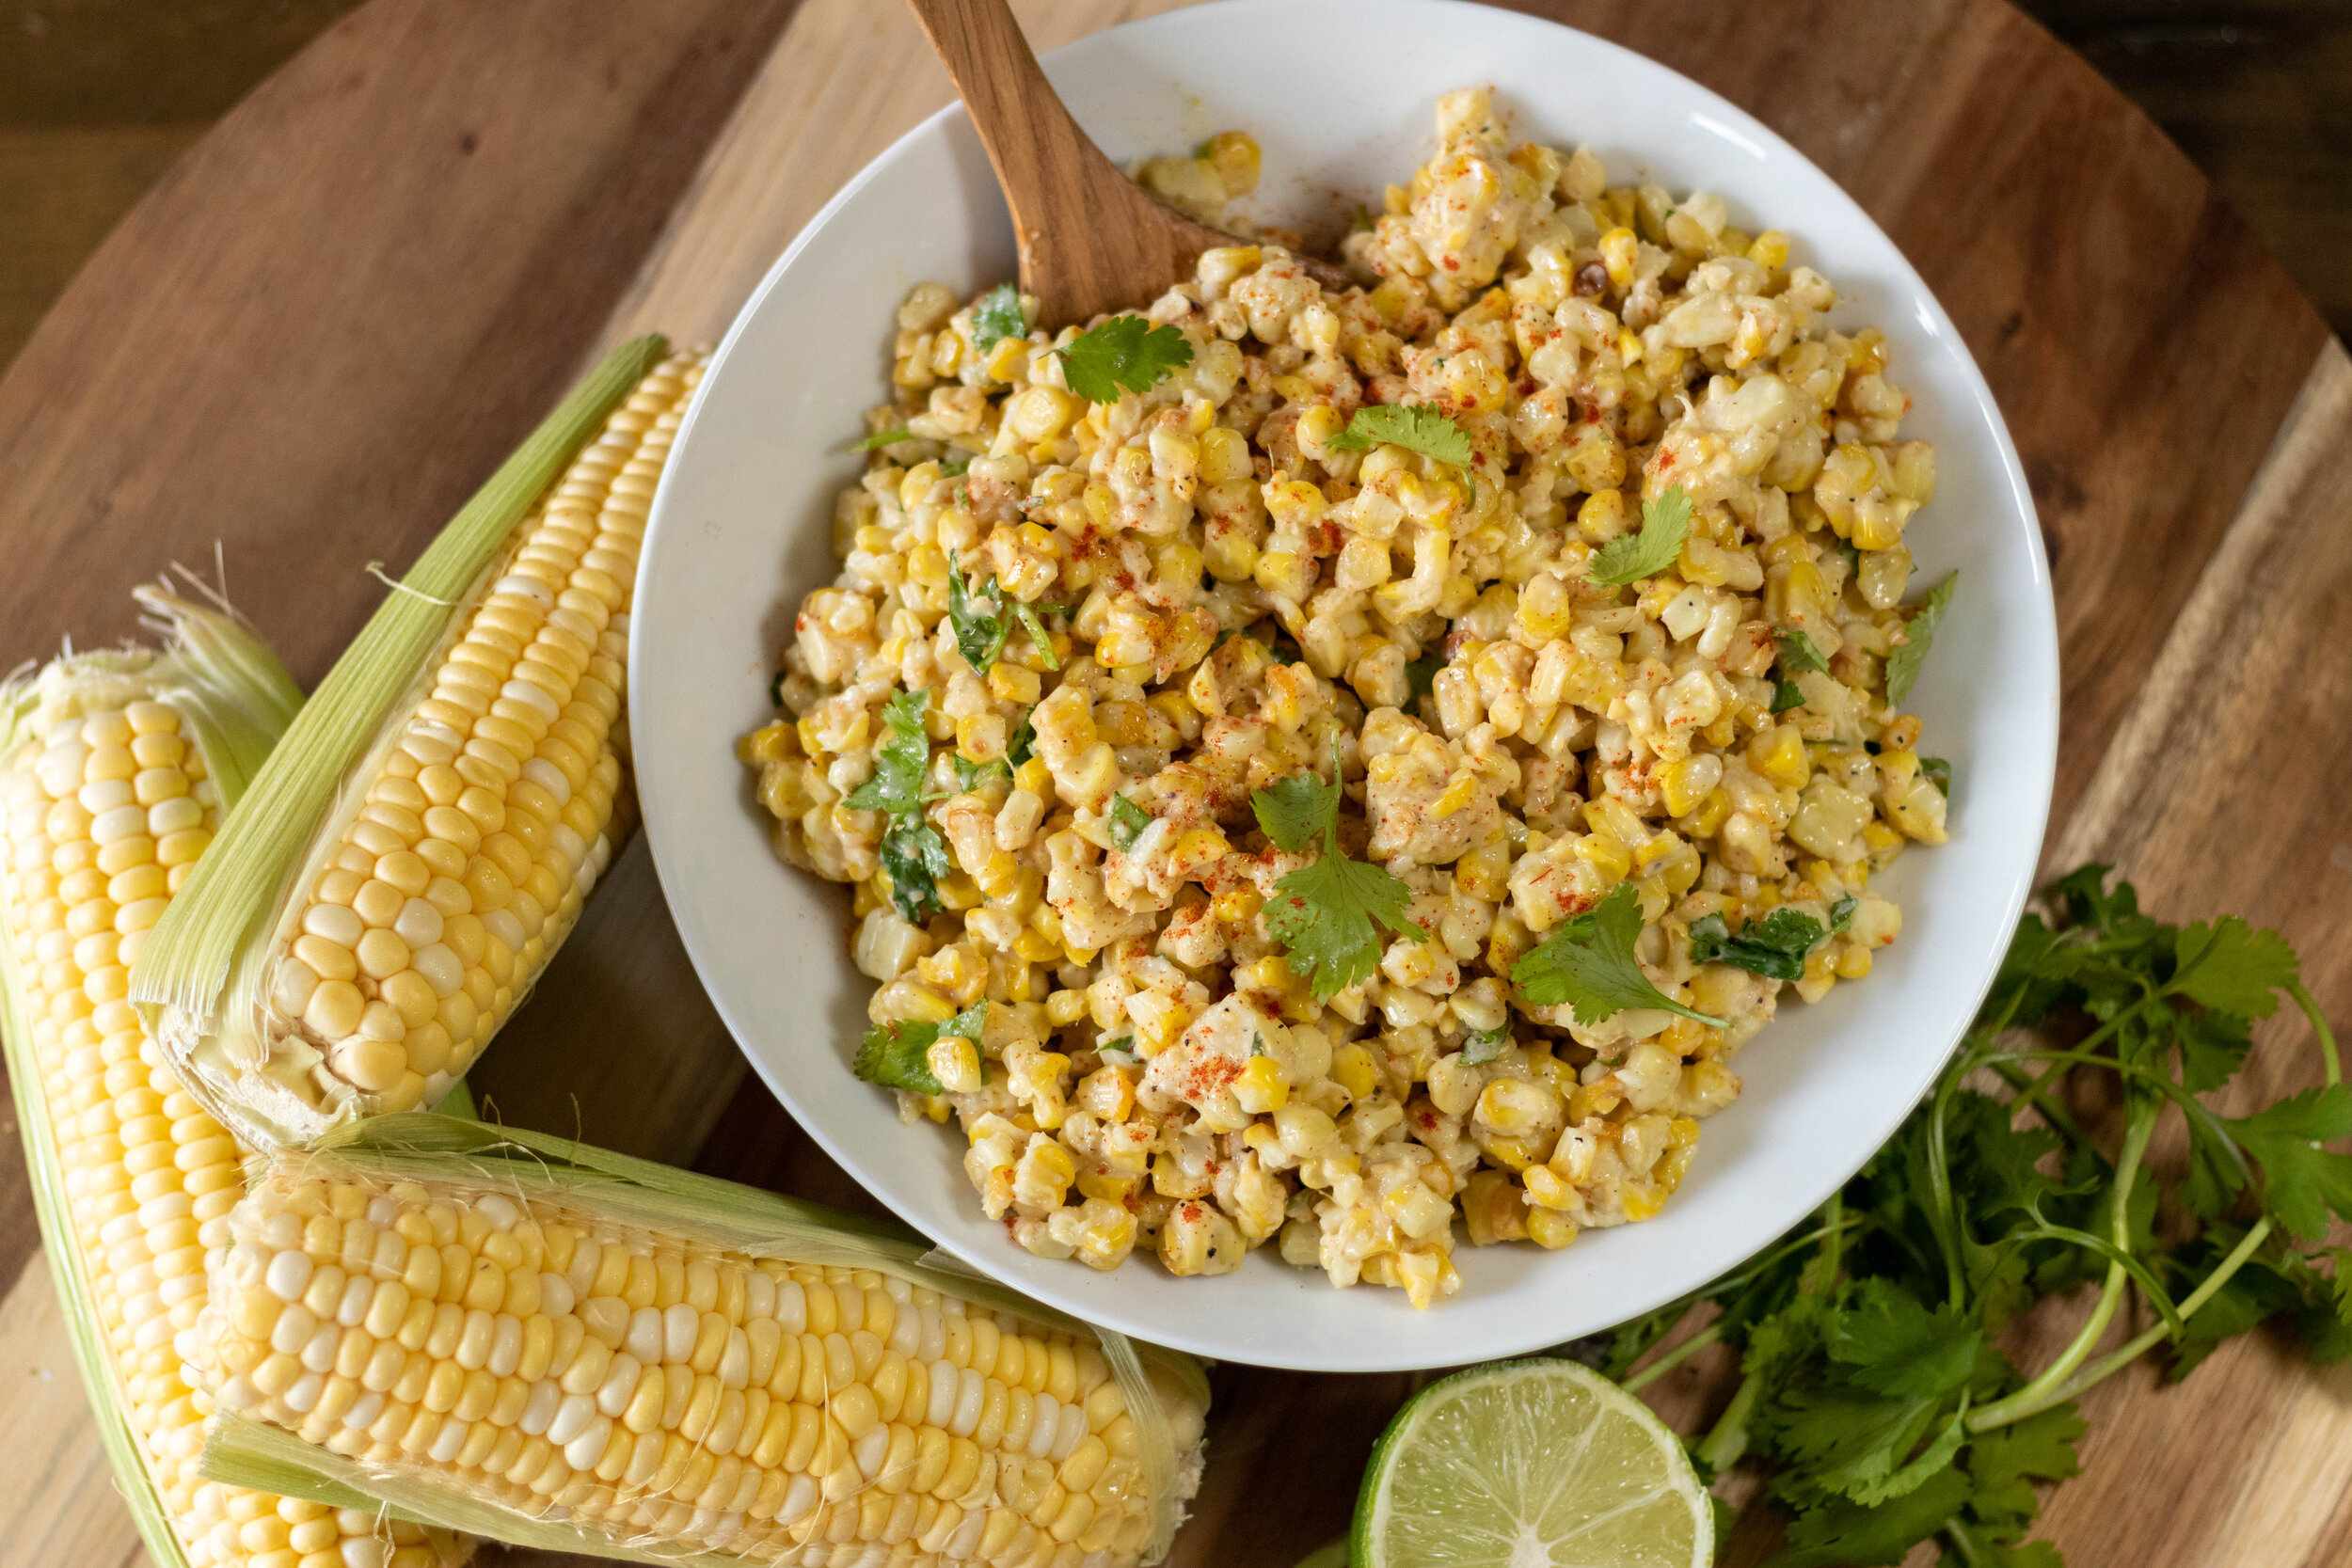
Vegan Mexican Street Corn Salad (Elote Salad, Esquites)

IMG_7247.jpg

I love vegan elote. Vegan Mexican Street Corn is a favorite side dish of mine but since nobody near us makes a vegan version, it is something we had to start making at home once we were no longer vegetarian.

Making your own elote is pretty easy! You just need to grill or roast the corn, brush it with some vegan crema, sprinkle it with some seasoning and vegan cheese, and give it a squeeze of lime. Most elote has a chili powder seasoning mixture on it, but since my family doesn’t like spicy, we used smoked paprika instead.

Recently I was thinking about how to make vegan elote a little easier to serve. For say a party or even for my kids who waste so much corn when attempting to eat it off the cob. So I thought why not just turn the elote into a salad. I would just grill the corn, cut it off the cob, mix all the yummy goodness together in a bowl and be done with it. And that is what I did.

This is not a new thing, its just the first time I thought to do it then learned when you make it like this. It’s called esquites!

Not rocket science, not recreating the wheel here, just making something we already make pretty often a little easier to serve to kids or at a get together or pot luck.

You can grill or roast your corn in the oven, which ever you prefer. We use vegan sour cream or plain yogurt to replace the creama, mixed with vegan mayo and sprinkle vegan parm on our corn, and it is DELICIOUS!!

If corn is in season, this the BEST summer side dish! Trust me, even if you have never had elote (Mexican street corn) you need to try it. It is just about one of the best things! Period!!

IMG_7248.jpg

INGREDIENTS:

  • 8 ears of corn, shucked and cleaned

  • Juice from 1-2 limes, depending on taste and size of limes

  • 1/4 cup vegan mayo

  • 2 tablespoons vegan sour cream or plain vegan yogurt

  • 1/4 cup vegan parmesan cheese, store bought or homemade

  • 1/2-1 teaspoon salt

  • 1 teaspoon garlic powder

  • 1 teaspoon smoked paprika

  • 1/4-1/2 cup copped cilantro

IMG_7257.jpg

INSTRUCTIONS:

  1. Shuck and clean the corn.

  2. Grilling: If you want to grill the corn, just heat up your grill, give the corn a little spray of cooking oil and grill until the corn starts to get some good color on it, around 10 minutes, turning a few times durning grilling. Remove from the grill and let it cool.

  3. Oven roasting: heat oven to 400 degrees. Place corn on a baking sheet. Place on top oven rack and let it bake, turning it a few times while baking unit it gets nice color on it. It should only need 10-15 minutes in the oven. Remove from oven and allow to cool.

  4. CAREFULLY cut the cooled corn off of the cob. I like to place the cob in a shallow bowl or pie plate and cut the corn off the cob with a sharp knife in a downward motion, allowing the bowl to catch the corn kernels.

  5. Mix the corn and remaining ingredients together in a medium sized bowl and serve at room temperature or cold. Store any leftovers in the fridge for 3 or 4 days.

If you like this recipe, then try these:
IMG_7264.jpg

Vegan Green Bean Casserole Cups

Vegan Green Bean Casserole Cups

Since I was a kid, green bean casserole has long been my favorite holiday side. My mom made it every holiday without fail.

Once we went vegan I was on a mission to recreate a convincing cream of mushroom soup so I could make vegan green bean casserole among other classic dishes that require the non vegan “soup” from a can. Cashews work really well for this. They are super creamy once broken down and with just a little starch and a few other ingredients and you are left with a delicious vegan homemade cream of mushroom soup.

This year I wanted to try something a little different with my green bean casserole. I am pretty obsessed with making single serving meals in muffin tins. I have made stuffing, lasagna, quiche, rice cups for Banh Mi filling just to name a few. You name it, and I have probably tried to turn it into a single serving cup.

I also love using crescent roll dough for all kinds of things. A lot of brands are vegan, you just need to read the label. More often than not it’s the non organic brands that are vegan. The organic brands tend to add butter. So it only seemed natural that I could use the crescent dough for the shell of these green bean casserole cups since they are another holiday meal favorite side. I would just marry the two and cross my fingers that it turned out.

Well, it really did! Not only are these vegan green bean casserole cups adorable, and a creative twist on the original classic, they are extra delicious nestled into a “buttery” crescent crust! So instead of making a traditional vegan green bean casserole this year, maybe try these, I think you may love them as much as we do!

INGREDIENTS:

You will need a muffin tin for this recipe. The recipe yields 12 cups

  • 1 lb fresh green beans

  • 1/2 cup finely diced button mushrooms (itty bitty pieces)

  • 2 tubes vegan crescent roll dough

  • 1 cup crispy fried onions (not all brands are vegan, read the label)

  • 1/2 cup cashews (plus water for soaking)

  • 1 cup water

  • 2 tablespoons tapioca or corn starch

  • 2 tablespoons nutritional yeast

  • 2 teaspoons apple cider vinegar

  • 1 teaspoon salt

  • 1 teaspoon onion powsder

  • 1/2 tesaspoon black pepper

Vegan Green Bean Casserole Cups

INSTRUCTIONS:

  1. Wash green beans, and snap or cut them into thirds. They have to fit in a muffin tin, so the pieces need to be pretty small.

  2. Fill a medium pot with water and bring it to a boil. Add the green beans and let them cook for about 5 minutes, just until they are tender. Drain and set aside.

  3. Cover cashews in water in a microwave safe container. Microwave them on hight for 3 minutes then drain. If you do not have a microwave you can soak them in hot water for a few hours, or even boil them in a small pot for several minutes.

  4. Add cashews, 1 cup of water, starch, nutritional yeast, onion powder, vinegar, salt, and pepper to a high speed blender or food processor. Blend on high until the mixture is COMPLETELY smooth and there are no bits of cashews left.

  5. Heat a large pot over medium heat. Add the mushrooms and a sprinkle of salt and let them cook for several mintues until cooked through. Pour the cashew mixture into the same pot with the mushrooms and heat, whisking continuously until the mixture thickens. You want the the mixture kind of thick , about the consistency of pudding. Mix in the drained green beans and 1/2 cup of crispy onions into the pot, and set aside to cool.

  6. Preheat oven to 350 degrees. Open up both cans of crescent rolls. On a clean surface roll out each can so the precut seams press together and seal, and you have on large square piece of dough (I do one can at a time, and aim for a square shape vs a rectangle) cut the square into 6 equal pieces. Kind of eyeball how big the squares will have to be to fit in the tin. Muffin tin sizes can vary, so you may have little dough left over, as you don’t want to over fill each cup with dough. You just want the piece of dough to fill the space of the cup. Spray a muffin tin with some cooking oil if things tend to stick. I have a ceramic muffin pan and typically don’t need to spray it. Fit a square of dough into each muffin cup, pressing it in to fit and making sure the dough goes all the way up the sides of the cup.

  7. Pop the dough filled pan into the oven for about 5 minutes, you just want the dough to pre cook a bit. Remove from the oven and using the back of a spoon, press the dough that has puffed up, back down into the cups. Divide the green bean mixture between each muffin cup. Sprinkle more crispy onions on top, and pop back into the oven on the middle rack for 20-25 minutes. Once you see the edges of crescent begin to brown, they should be done.

  8. Remove from the oven and allow to cool a bit before removing the green bean cups from the tin and serving.

If you like this recipe, try these:

 
Vegan Green Bean Casserole Cups

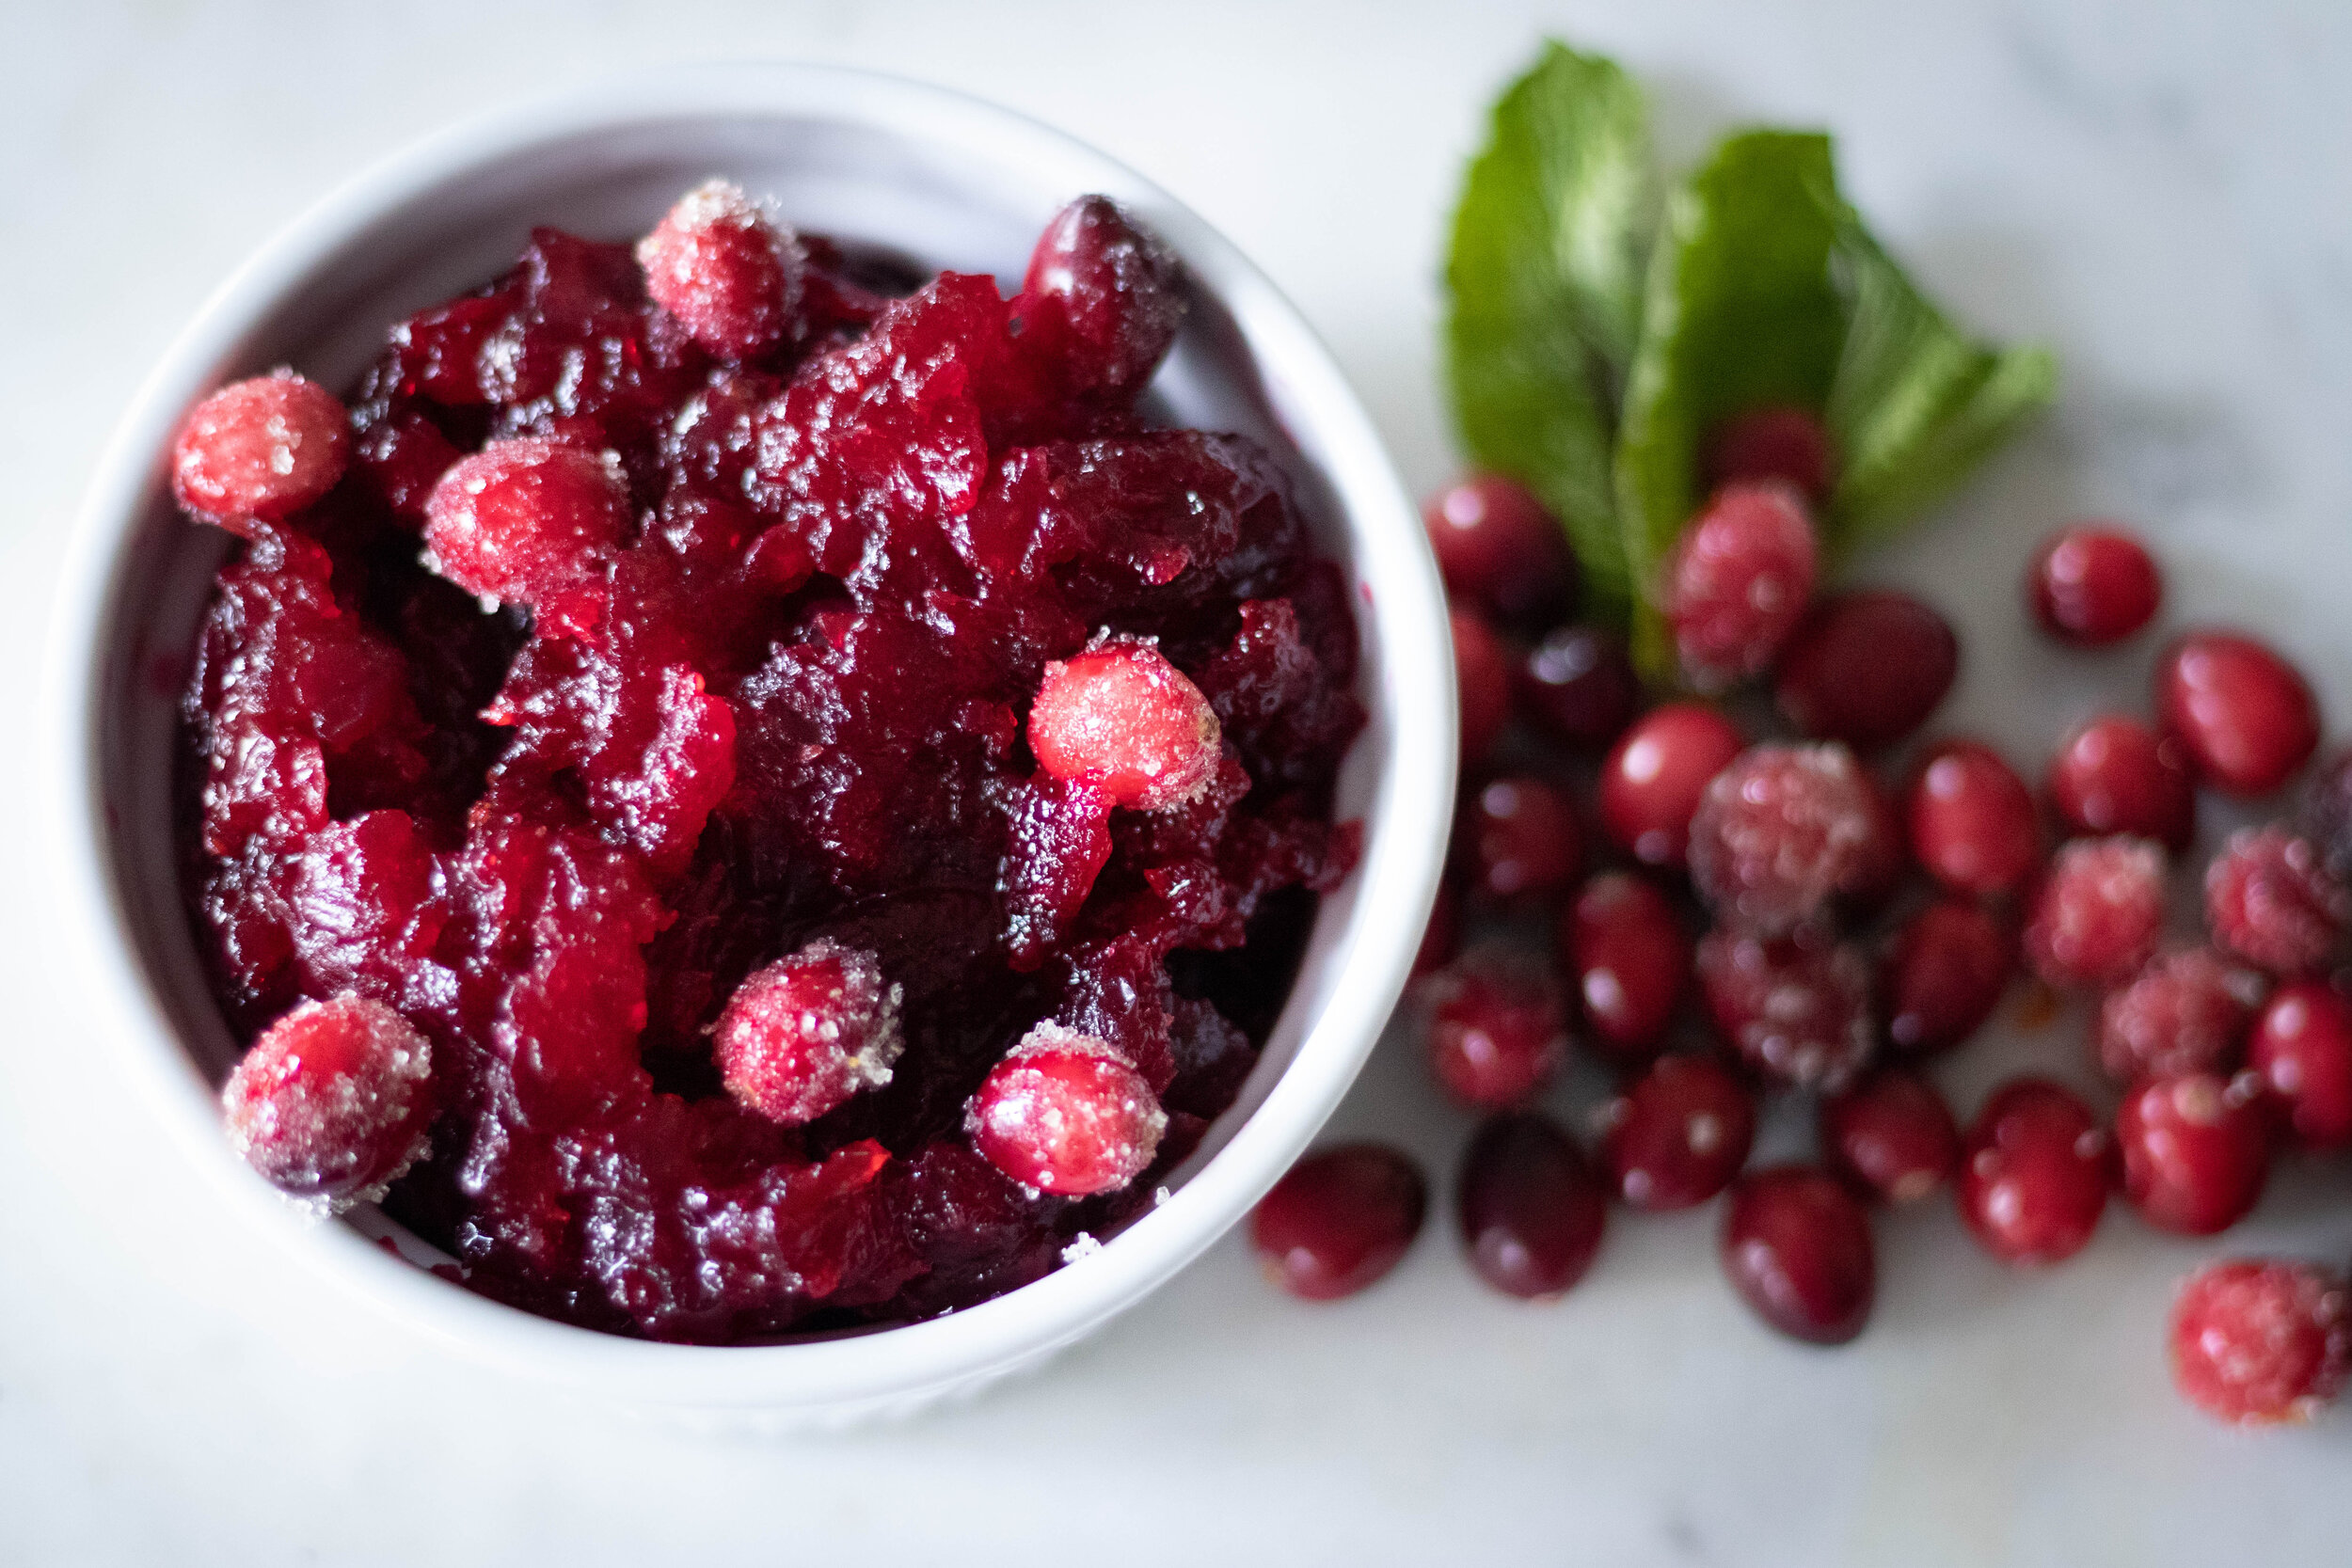
Easy Homemade Cranberry Sauce

Easy Homemade Cranberry Sauce

What would a Thanksgiving meal be without the cranberry sauce?!

I love cranberry sauce year round, but unfortunately fresh cranberries are only in season for a short time. My husband has long preferred canned cranberry sauce, and I have long gotten over letting that hurt my feelings.

But for the rest of the world that agrees homemade is superior, it could not be easier to make! I like mine on the the thick side so add less water so it is nice a jellied! If you like yours thinner, just add more water! Easy Peasy!

I also like mine with a kick or orange because I love orange and cranberry together! Again, you can skip the orange if you want, It’s no big deal.

I also like to serve mine garnished with some fresh candied cranberries just to be a little extra around the holidays. They are also super easy to make but add a nice touch if you are serving the sauce for a holiday meal! However you deiced to make it is up to you! Just whatever you do, pass the cranberry sauce, please!!!!!


INGREDIENTS:

  • 16 oz fresh cranberries, or about 2 cups

  • 1 cup water

  • 1 cup white sugar

  • optional, zest from one orange

Easy Homemade Cranberry Sauce on a Spoon

INSTRUCTIONS:

  1. Rinse and sort the cranberries, tossing out any squishy, or discolored ones.

  2. Add cranberrie , sugar, water, and orange zest to a large pot over medium heat.

  3. Let the water come to a simmer. The cranberries will begin to burst as they heat and you will here the sound as they pop. Once they begin to start popping, I take a hand potato masher and start mashing them in the pot to speed the process. You do not have to do this, as they cook they will burst on their own, I am just impatient. Reduce the heat and let the cranberries do their thing while stirring occasionally for about 20 minutes, or until the cranberries are all broken down and the sauce is thick and sticky.

  4. Transfer the sauce to an airtight container and store in the fridge. The sauce will firm up in the fridge as it cools. I like my cranberry sauce really thick. If you are a fan of thinner cranberry sauce you can add and extra 1/4 cup water to the recipe.

If you like this recipe, try these:


Creamy Vegan Cheddar Mac and Cheese

Creamy Vegan Mac n Cheese

Who doesn’t love Mac and Cheese?!?!? If you don’t, then maybe this is not the recipe blog for you after all, and you should move on. Ok, I’m kidding, please don’t leave, just maybe you should give vegan Mac and Cheese another try.

Maybe you just tried a bad recipe. This recipe is not bad. This recipe is creamy, smoky, and gooey. It’s vegan Mac and Cheese perfection. It’s quick and easy too.

If you happen to have an allergy or aversion to cashews, you can sub them out for 1 cup of sunflower seeds. If you don’t like a smoky cheddar as much, just cut back a bit on the paprika and skip the liquid smoke. I love smoky cheddar so I always add the smoke!

You can also pour this Creamy Vegan Cheddar Mac and Cheese into a casserole dish, top it with some vegan butter and bread crumbs and bake it at 350 for a about 20 minutes for the perfect baked Vegan Mac and Cheese.

Trust me, leave the boxed macaroni and cheese right on the grocery shelf where you found it, and go home and make this. its almost just a quick and about 10,000 times more tasty! I promise! Pinky promise, cross my heart, and all that jazz!


INGREDIENTS:

  • 1 cup cashews (plus water for heating)

  • 2 cups water

  • 1/3 cup sauerkraut, cabbage not juice

  • 2 teaspoons light miso paste

  • 1 tablespoon apple cider vinegar

  • 1 teaspoon salt

  • 1/4 cup tapioca or corn starch

  • 1/4 cup nutritional yeast

  • 1 1/2 teaspoons turmeric

  • 1-2 teaspoons smoked paprika

  • optional 1 teaspoon liquid smoke, if you want a smokier mac

  • 16 oz package macaroni noodle, I like to use the fatter ones with ridges to help hold the cheese

  • 1 tablespoon vegan butter

  • splash of plant milk, optional

Creamy Vegan Mac n Cheese

INSTRUCTIONS:

  1. Cook noodles according to packing instructions in a large pot. Drain, return to pot and mix in the butter. Set aside.

  2. Cover cashews in water and microwave on hight for three minutes or soak in hot water for serval hours. Drain.

  3. Add cashews and all remaining ingredients, including 2 cups of water, to a high speed blender or food processor.

  4. Process and blend on high until the mixture is completely smooth (no lumps at all).

  5. Transfer the mixture to a medium size pot and cook on medium heat, stirring with a whisk continually until the mixture thickens.

  6. Once the cheese sauce gets to a thick, almost stretchy, gooey consistency, remove it from the heat and pour over the mac. Mix well. If it seems too thick you can add a splash of plant milk. Reheat the mac and cheese on the stove top to heat the noodles back up and serve.

Creamy Vegan Mac n Cheese

If you like this recipe, try these:

 
Creamy Vegan Mac n Cheese

Crunchy Ramen Noodle Salad

A quick and easy Crunchy Ramen Noodle Salad.

Crunchy Ramen Noodle Salad was a staple at every pot luck or family get together we had growing up. It is seriously so quick and easy to make, and really, just addictive.

The crunch of the cabbage and ramen noodles, mixed with diced green onions, and sliced almonds, and tossed in best sweet and savory asian dressing makes for a perfect summer side. I could seriously eat this salad every day in the summer months!

My kids were pretty skeptical at first, but once they tried it, they all loved it!! I like it just the way it is, but you can add shredded carrots or diced peppers if you like. I personally love the simplicity of this recipe just the way it is, and it is just like the ramen salad I ate growing up. I guess I believe some things just don’t need changing!

This recipe is also great for holidays and pot lucks. Its cheap and easy to make and everyone always loves it. I love having super affordable side options like this, especially when I was not prepared to make and take something to a gathering. This certainly won’t break the bank!

I also think its an easy way to get my kids to eat cabbage. This recipe is pretty healthy and is also really good with some grilled tofu on top, or on top of a vegan carrot dog. No matter what you serve it with, just make sure you are making this delicious and easy vegan side!! It is seriously just so good!

INGREDIENTS:

  • 1/2 head of green cabbage, chopped ( about 5 cups)

  • 2 packages ramen noodles (you do not need the spice packet)

  • 3 green onions

  • 1/3 cup sliced almonds

ASIAN SLAW DRESSING:

  • 1/4 apple cider vinegar

  • 3 tablespoon soy sauce or coconut aminos

  • 1 teaspoon sesame oil

  • 1 tablespoon white sugar

INSTRUCTIONS:

  1. Dice green onions, and add them to a large bowl along with the chopped cabbage.

  2. Crush up the dried ramen noodles into the cabbage mixture, and add the sliced almonds.

  3. Whisk together the ingredients for the dressing and pour it over the cabbage. Stir well.

  4. Serve at room temp or chilled. Store any leftovers in an airtight container in the fridge.

If you like this recipe, try these:

Raw Sesame Zucchini Noodle Salad

Brussels Sprout Slaw with Sweet Mustard and Maple walnuts

Quick and Easy Pickled Veggies

IMG_3449.jpg

Crunchy cabbage and ramen noodle salad with green onions and sliced almonds, tossed in a sweet and savory asian style dressing

Vegan Fried Green Tomatoes

Delicious fried green tomatoes with non dairy goat cheese

Every spring I eagerly wait for tomato season to start, simply so I can make fried green tomatoes! Seriously, I could eat them every single day.

Actually in Florida, we can grown tomatoes again in the winter months. This is one more reason I adore living here. Double grow season for tons of veggies.

I love all tomatoes actually, but fried green tomatoes are a whole different level of love for me. Growing up in the south, fried green tomatoes are a staple. Again, we will fry just about anything down here!

For this recipe, we paired vegan fried green tomatoes with a perfect roasted red pepper and garlic remoulade and vegan feta. The sauce is not hard to make and super delicious not only on this recipe but on lots of things.

You can either buy a vegan feta or make your own from tofu. We linked the recipe and if you have time to make a batch, its totally worth the effort!

These vegan fried green tomatoes make th perfect light side or meal. So if you are growing tomatoes, go ahead and pick some green ones and fry them up.

You can also normally find green tomatoes (in the south anyways) in grocery stores in the summer months, as well. Fingers crossed you find some, and love this easy southern staple as much as we do!


INGREDIENTS:

  • 2 - 3 green tomatoes

  • 1/3 cup all purpose flour

  • 1/3 cup panko bread crumbs (many are not vegans so be sure to check)

  • 1/3 - 1 cup plain unsweet non dairy yogurt

  • 1 teaspoon garlic powder

  • 1 teaspoon onion powder

  • 1 teaspoon smoked paprika

  • 1 teaspoon salt

  • 1/2 teaspoon black pepper

  • 1 teaspoon dried parsley

  • 1/2 cup Roasted Red Pepper and Garlic Remoulade (if refrigerated, allow it to come to room temperature)

  • vegan feta cheese, homemade or store bought

  • 1/4 cup fresh basil

  • neutral oil for frying, like grassed or canola


INSTRUCTIONS:

  1. Slice tomatoes about 1/4 of an inch thick. Sprinkle with a little salt.

  2. Add the yogurt to a shallow dish. In a separate shallow dish, add the bread crumbs, flour and seasonings and given them it a stir.

  3. Start by dipping and coating the tomatoes slices in the yogurt. Next dip them into the flour and bread crumb mixture, making sure they are fully coated.

  4. Line a baking sheet with a few paper towels and place a wire cooling rack on top.

  5. Heat a large skillet over medium heat with an inch or so of oil. Once the oil is nice and hot, add 3 or 4 tomato slices at a time. Allow them to fry on each side for a few minutes or until they are crispy and golden brown.

  6. Let tomatoes cool on the wire rack for a few minutes. This helps extra oil drip off as well.

  7. Repeat with remaining tomatoes.

  8. To serve, add a few spoon fulls of remoulade on a plate. Stack 3 tomatoes on top and sprinkle with feta and some fresh basil.


Brussels Sprout Slaw with Sweet Mustard and Maple Walnuts

Simple Vegan Brussels Sprout Slaw with Sweet Mustard and Maple Walnuts

Simple sides are my favorite sides to make, especially in the hot summer months. I am always looking for new, quick slaw ideas, and I love to use Brussels sprouts in place of cabbage. This Brussels sprouts slaw is tangy and sweet with the perfect amount of crunch. This slaw comes together quickly and is a crowd favorite. Perfect for a summertime bbq or get together! You can also easily change out the walnuts for pecans or sliced almonds. Use whatever nut you have on hand!! I promise this Brussels sprout slaw with sweet mustard and maple walnuts may become your new summer addiction.

INGREDIENTS:

  • 4 cups Brussels sprouts

  • 1/2 red onion

  • 1/4 cup vegan mayo

  • 2 tablespoons dijon mustard

  • 1-2 tablespoon maple syrup (depending on desired sweetness)

  • 1/2 teaspoon salt

  • 1/2 teaspoon pepper

Maple Walnuts

  • 1/3 cup chopped walnuts

  • 2 tablespoons maple syrup

  • 1 teaspoon minced garlic

COOKING INSTRUCTIONS:

  1. Heat a medium skillet over medium heat. Add the chopped walnuts, 2 tablespoons maple syrup, and 1 teaspoon of garlic. Let the walnuts cook for several minutes, keeping them moving with a spatula to avoid having them burn. Once the maple syrup has fully coated the nuts and has gotten nice and sticky, remove nuts from heat. Pour walnuts onto a silicon mat or a parchment lined baking sheet to cool.

  2. Wash and trim ends from Brussels sprouts. Shred the Brussels sprouts by using the shredding blade on your food processor, or you can carefully cut them into thin shreds using a sharp knife.

  3. Finely dice red onion.

  4. In a small bowl, mix together mayo, mustard, maple syrup, salt and pepper.

  5. In a large bowl combine shredded Brussels sprouts, walnuts, onions, and dressing.

  6. Serve room temperature or chilled.

If you liked this recipe, try these:

Easy Vegan Macaroni Salad

Raw Sesame Zucchini Noddle Salad

Vegan Gorgonzola Fried Brussels Sprouts

Simple Vegan Brussels Sprout Slaw with Sweet Mustard and Maple Walnuts

A simple recipe for Brussels Sprout Slaw with Sweet Mustard and Maple Walnuts

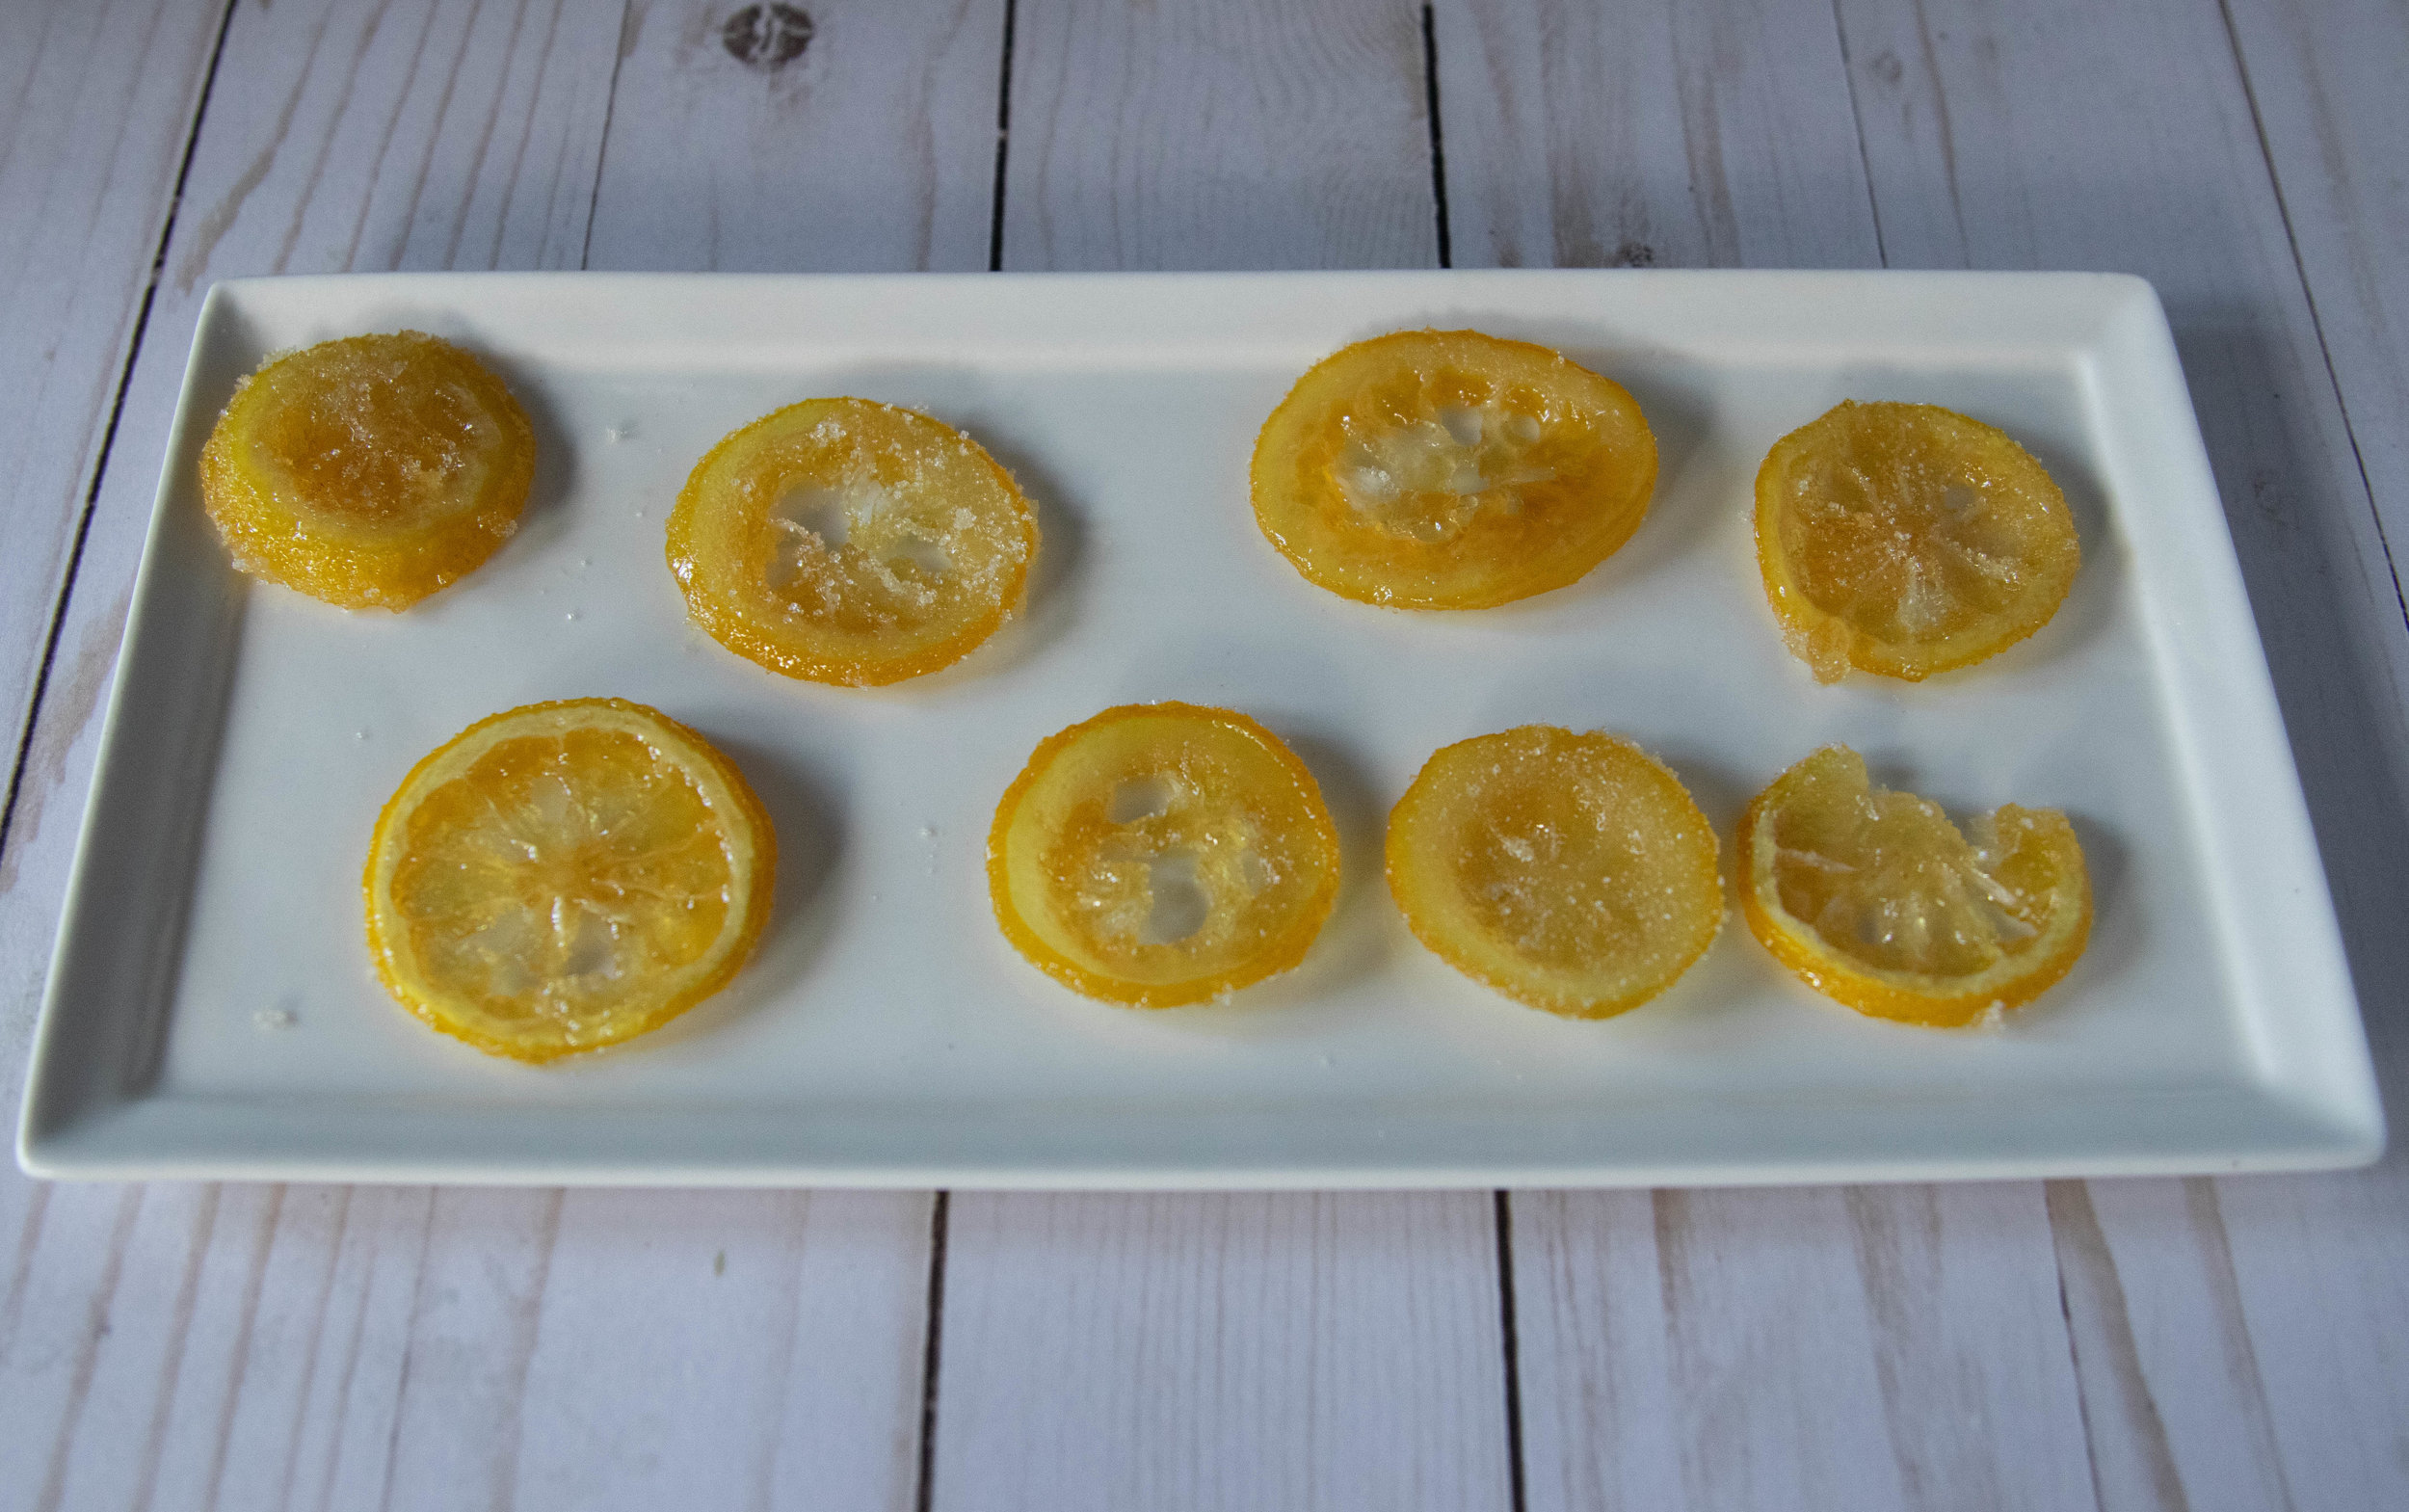
Easy Candied Lemons

Plate of candied lemons with granulated sugar.

When I think of summer, I think of citrus fruit. We live in Florida so there is an abundance of lemons, limes, and oranges growing in our own neighborhood. A lot of citrus is actually ripe in the winter months, but that does not change my craving for all things citrus once the temperatures rise. Candied citrus is no exception. Candied lemons are the perfect easy garnish for cakes, cupcakes, cocktails, or even as a snack. You could just as easily candy limes or orange slices as well. Be sure to allow the candied lemons plenty of time to cool. They will stay a bit sticky but be firm enough to cut into smaller pieces once they are cooled and set.

INGREDIENTS:

  • 2 lemons, sliced thinly

  • 1 cup refined sugar (plus more for sprinkling)

  • 2/3 cups water

COOKING INSTRUCTIONS:

  1. Add water and sugar to medium sized pot over medium heat. Bring to a simmer and whisk until the sugar has dissolved.

  2. Remove any seeds from the lemon slices and add them to the water and sugar mixture. Allow the lemons to simmer for about 15 minutes.

  3. Remove lemons from the water sugar mixture carefully, using a pair of tongs and transfer them to a parchment lined cookie sheet. Sprinkle with extra sugar.

  4. Let the lemons cool at room temperature until completely cool. Store in the fridge in an air tight container.

Candied lemons are the perfect easy garnish for cakes, cupcakes, cocktails, or even as a snack.

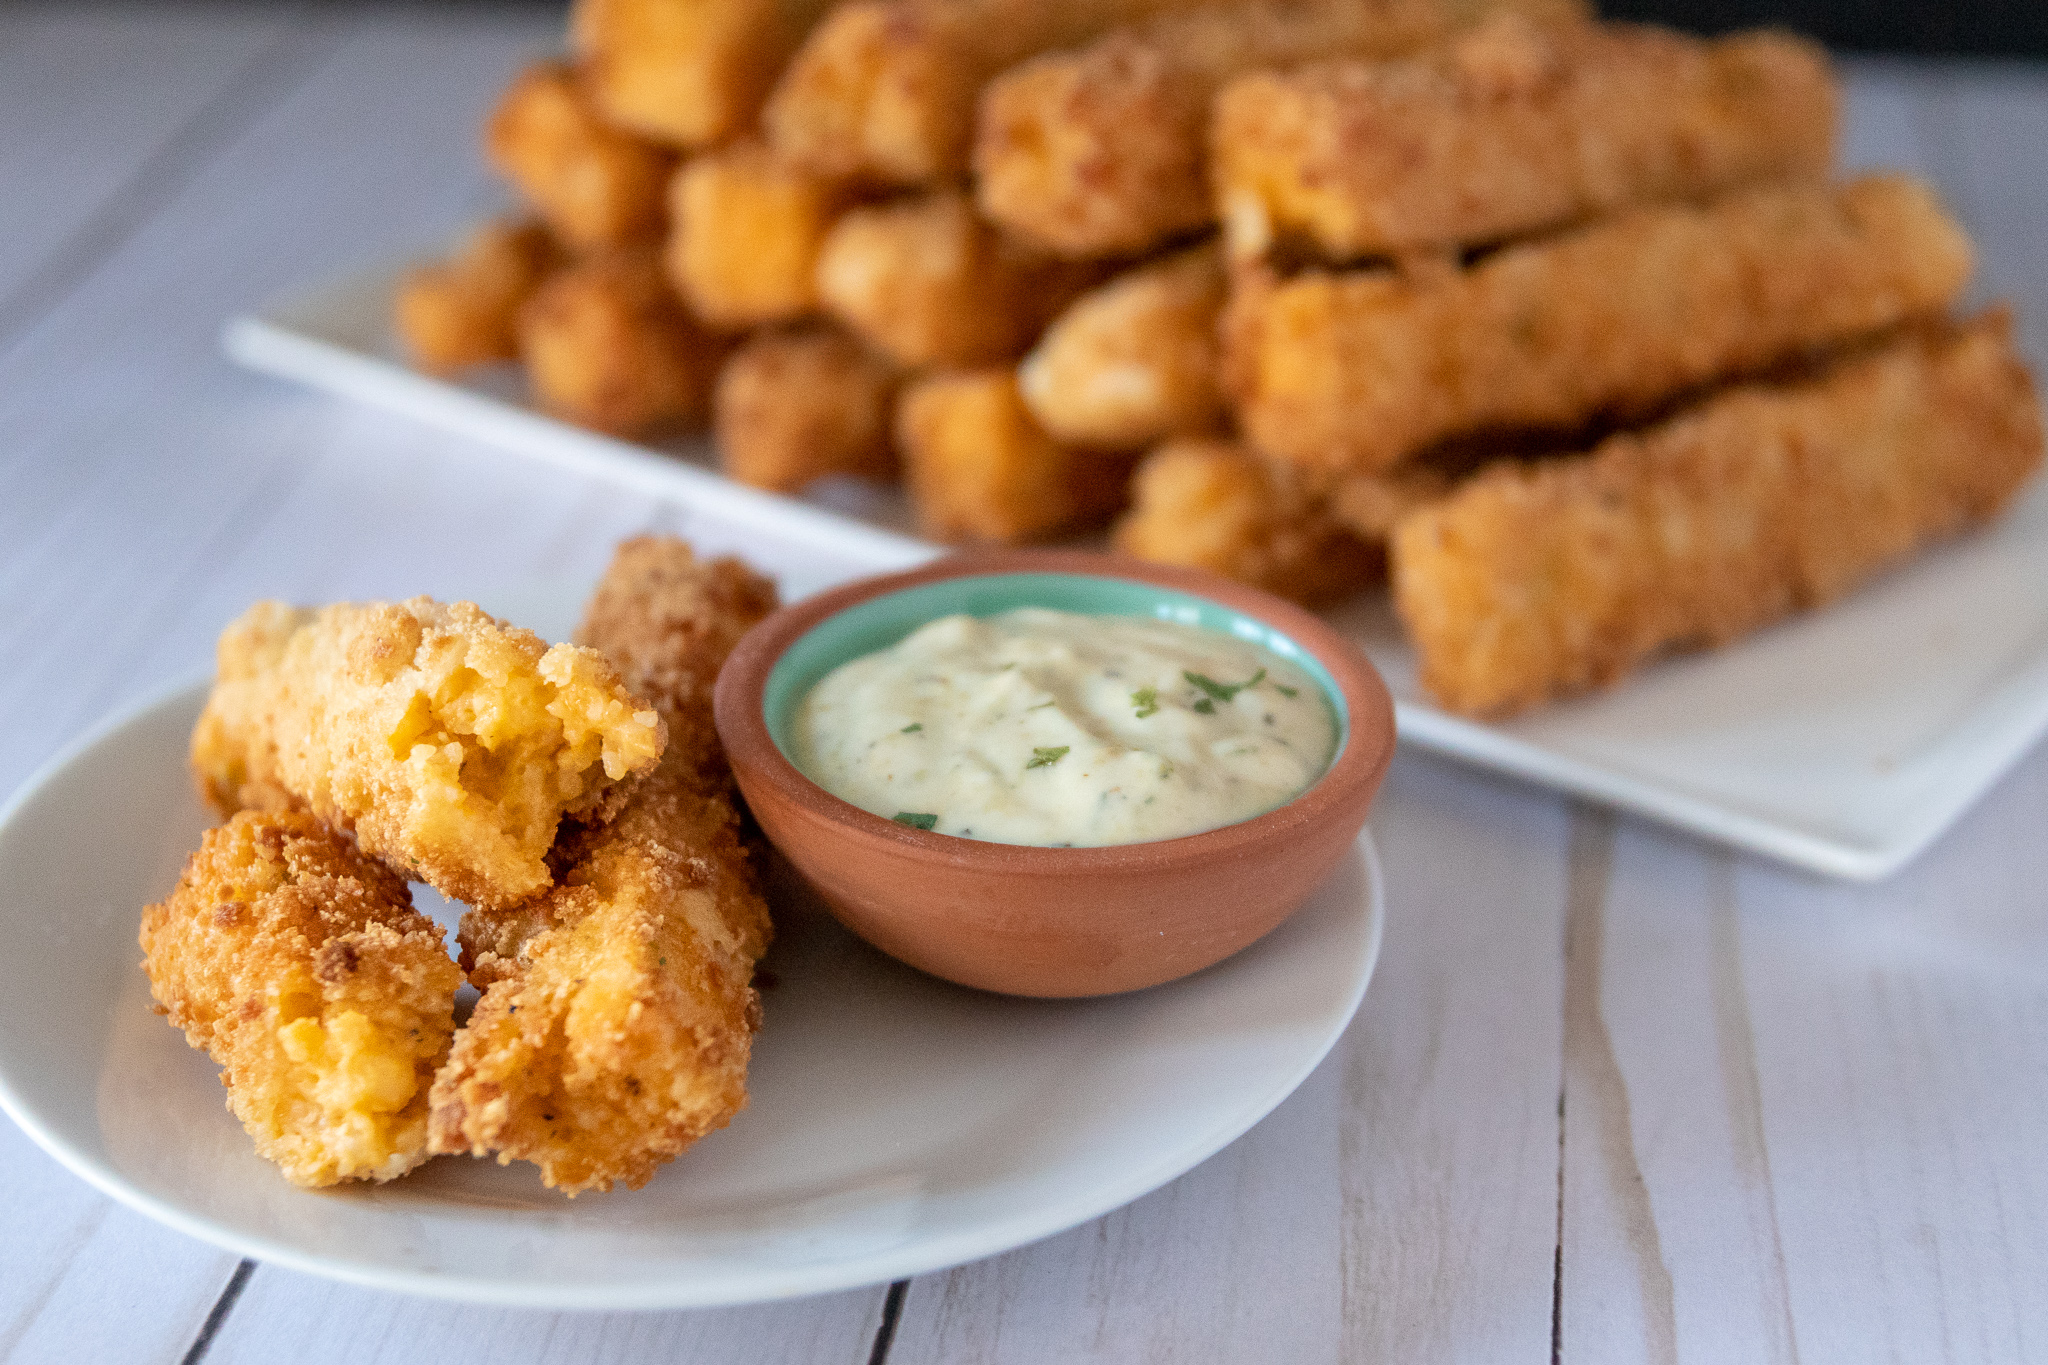
Vegan Fried Cheese Grits

IMG_2820.jpg

In the south, we eat grits.

In the south we also love to fry all kinds of things that were not originally intended to be fried! So cheese grits are no exception to that rule!

These grits are crispy on the outside, and cheesy creamy perfection on the inside.

We dipped ours in vegan ranch, but I think they would be super delicious dipped in some marinara sauce as well.

They are perfect a tasty snack, party food, or even a creative brunch side! I have not attempted to air fry these treats, but I think it would work just fine if you gave them a spray of oil and cooked them for 10-15 minutes or so on 375 degrees.

And if you are one of those people in the sweet grit camp, I urge you to step over to the other side and give these a try. I promise you don’t have to be an absolute convert..just a little open minded..although I will never put sugar on my grits..like, never :)


INGREDIENTS:

  • 1 cup dry old fashioned grits

  • 2 cups plant milk ( we used almond)

  • 2 cups water

  • 1 teaspoon Vegetable Better Than Bouillon

  • 1 cup vegan cheddar shreds, homemade or store bought

  • 2 tablespoons vegan cream cheese

  • 2 green onions, finely diced

  • 1/2 teaspoon salt

  • 1/2 teaspoon pepper

  • 3 cups panko bread crumbs, regular or gluten free (make sure they are vegan, many brands are not)

  • 1/2 cup plant based milk

  • 2 tablespoons vegan plain yogurt or sour cream ( we used kite hill plain yogurt)

  • 1 and 1/4 cups all purpose flour, or gluten free flour blend

  • oil for frying ( we use grapeseed)

IMG_2800.jpg

INSTRUCTIONS:

  1. Bring milk, water, and Better Than Bouillon to a boil in a medium/ large pot over medium heat.

  2. Once the liquid is boiling, add in the grits and stir. Reduce heat to low, and allow the grits to cook and thicken for about 15 minutes Be sure to stir the grits several times to avoid them sticking to the bottom of the pot.

  3. Once grits are done, stir in the cheddar, cream cheese, salt pepper, and green onions.

  4. Spray a 9 inch baking pan with some oil and transfer the grits to the pan. Place pan in the fridge for about 4 hours or until the grits seem firm. You can also do this the day before you want to make these. They will be fine hanging out in the fridge for a day or so.

  5. Once grits are firm, turn the pan over onto a cutting board. You may have to tap the pan on the counter to get the grits out, but if you sprayed the pan well, they should come right out.

  6. Cut the grits into sticks that are about 1/2 inch thick and 4 inches long. They will be a little soft still so just handle them gently to avoid them breaking.

  7. Place flour in a shallow dish. In a separate dish wish the milk with the yogurt. In another dish, add the panko.

  8. Start by dipping the grit sticks first into the flour, next the milk yogurt mixture, and finally into the panko. Repeat with all of the grits sticks.

  9. Heat a large deep skillet with about an inch of oil over medium heat. Once the oil is nice and hot, fry the grits sticks 3 or 4 at a time, turning them with tongs to make sure they get crispy on all sides. They only need a few minutes in the oil to get them nice and crisp. Line a baking sheet with some paper towels and place a cooling rack on top. Place finished grits on the cooling rack while you finish frying the rest.

  10. Serve fried cheese grits with vegan ranch or marinara sauce.

Reheat fried cheese grits in a 350 degree oven until crisp

If you like this recipe, then try these:

Southern Tofu Scallops and Grits

Fried Vegan Mozzarella Bites

Vegan Gorgonzola Fried Brussels Sprouts

IMG_2798.jpg

Vegan Rice Paper Bacon

IMG_2163.jpg

Over the years I have attempted may faux bacons. I have burnt more batches of eggplant bacon than I care to admit.

I really like an easy coconut bacon for adding flavor to dishes or sprinkling on salads, but I was still missing the bacon-y crunch on a BLT.

So when I discovered that you could make bacon from rice paper, I was intrigued. What I like about this mock bacon is that it gets super crispy, and so far I have only burnt one batch of this magic vs the 5,999 batches of eggplant bacon Ive destroyed.

I have also had a tragic knife incident involving eggplant bacon that I just can’t shake (eggplants are not that easy to cut, y’all!) But this recipe uses a pair of scissors so, hooray!! I didn’t get my nickname, Hazard, by accident.

This fake bacon is cheap, easy, quick to make, and pretty foolproof! So break out the lettuce, and mayo, because its BLT time!


INGREDIENTS:

  • 9-12 pieces of rice paper

  • 1/4 cup coconut aminos

  • 2 teaspoons liquid smoke

  • 2 tablespoons maple syrup

  • 1/2 teaspoon salt

  • 1/2 teaspoon garlic powder

  • 1 teaspoon smoked paprika


INSTRUCTIONS:

Preheat oven to 350 degrees

  1. Stack 3 to 4 circles of rice paper on top of one another, depending on how thick you want the bacon.

  2. Using a pair of kitchen scissors, trim the stacked circle into a square, then cut 3 to 4 strips of “bacon” from the square. (if you can find square rice paper, then it will be easier, but normally my local market only sells the round ones) It is very hard to cut the paper with a knife but they will cut quickly with scissors. Make sure to keep the pieces stacked after cutting. Repeat with remaining rice paper.

  3. Whisk marinade ingredients together in a small bowl. Place the strips of rice paper bacon in a shallow dish and cover with the marinade. Let the bacon strips marinate for 10 minutes.

  4. Cover a baking sheet in a piece of parchment paper. Carefully pick up pieces of bacon, making sure they stay stacked, and let the marinade dip off some before placing them on the baking sheet. Give them a little spray with some cooking oil.

  5. Bake the rice paper bacon for 15 minutes. Remove pan from the oven and carefully turn the pieces of bacon over using a pair of tongs. Place back in the oven for 7-10 more minutes.

  6. Remove from oven and allow the bacon to cool before serving


If you like this recipe, you may also like this:

Easy Coconut Bacon

Vegan Maple Bacon Yeast Donuts

IMG_2126.jpg
IMG_2122.jpg

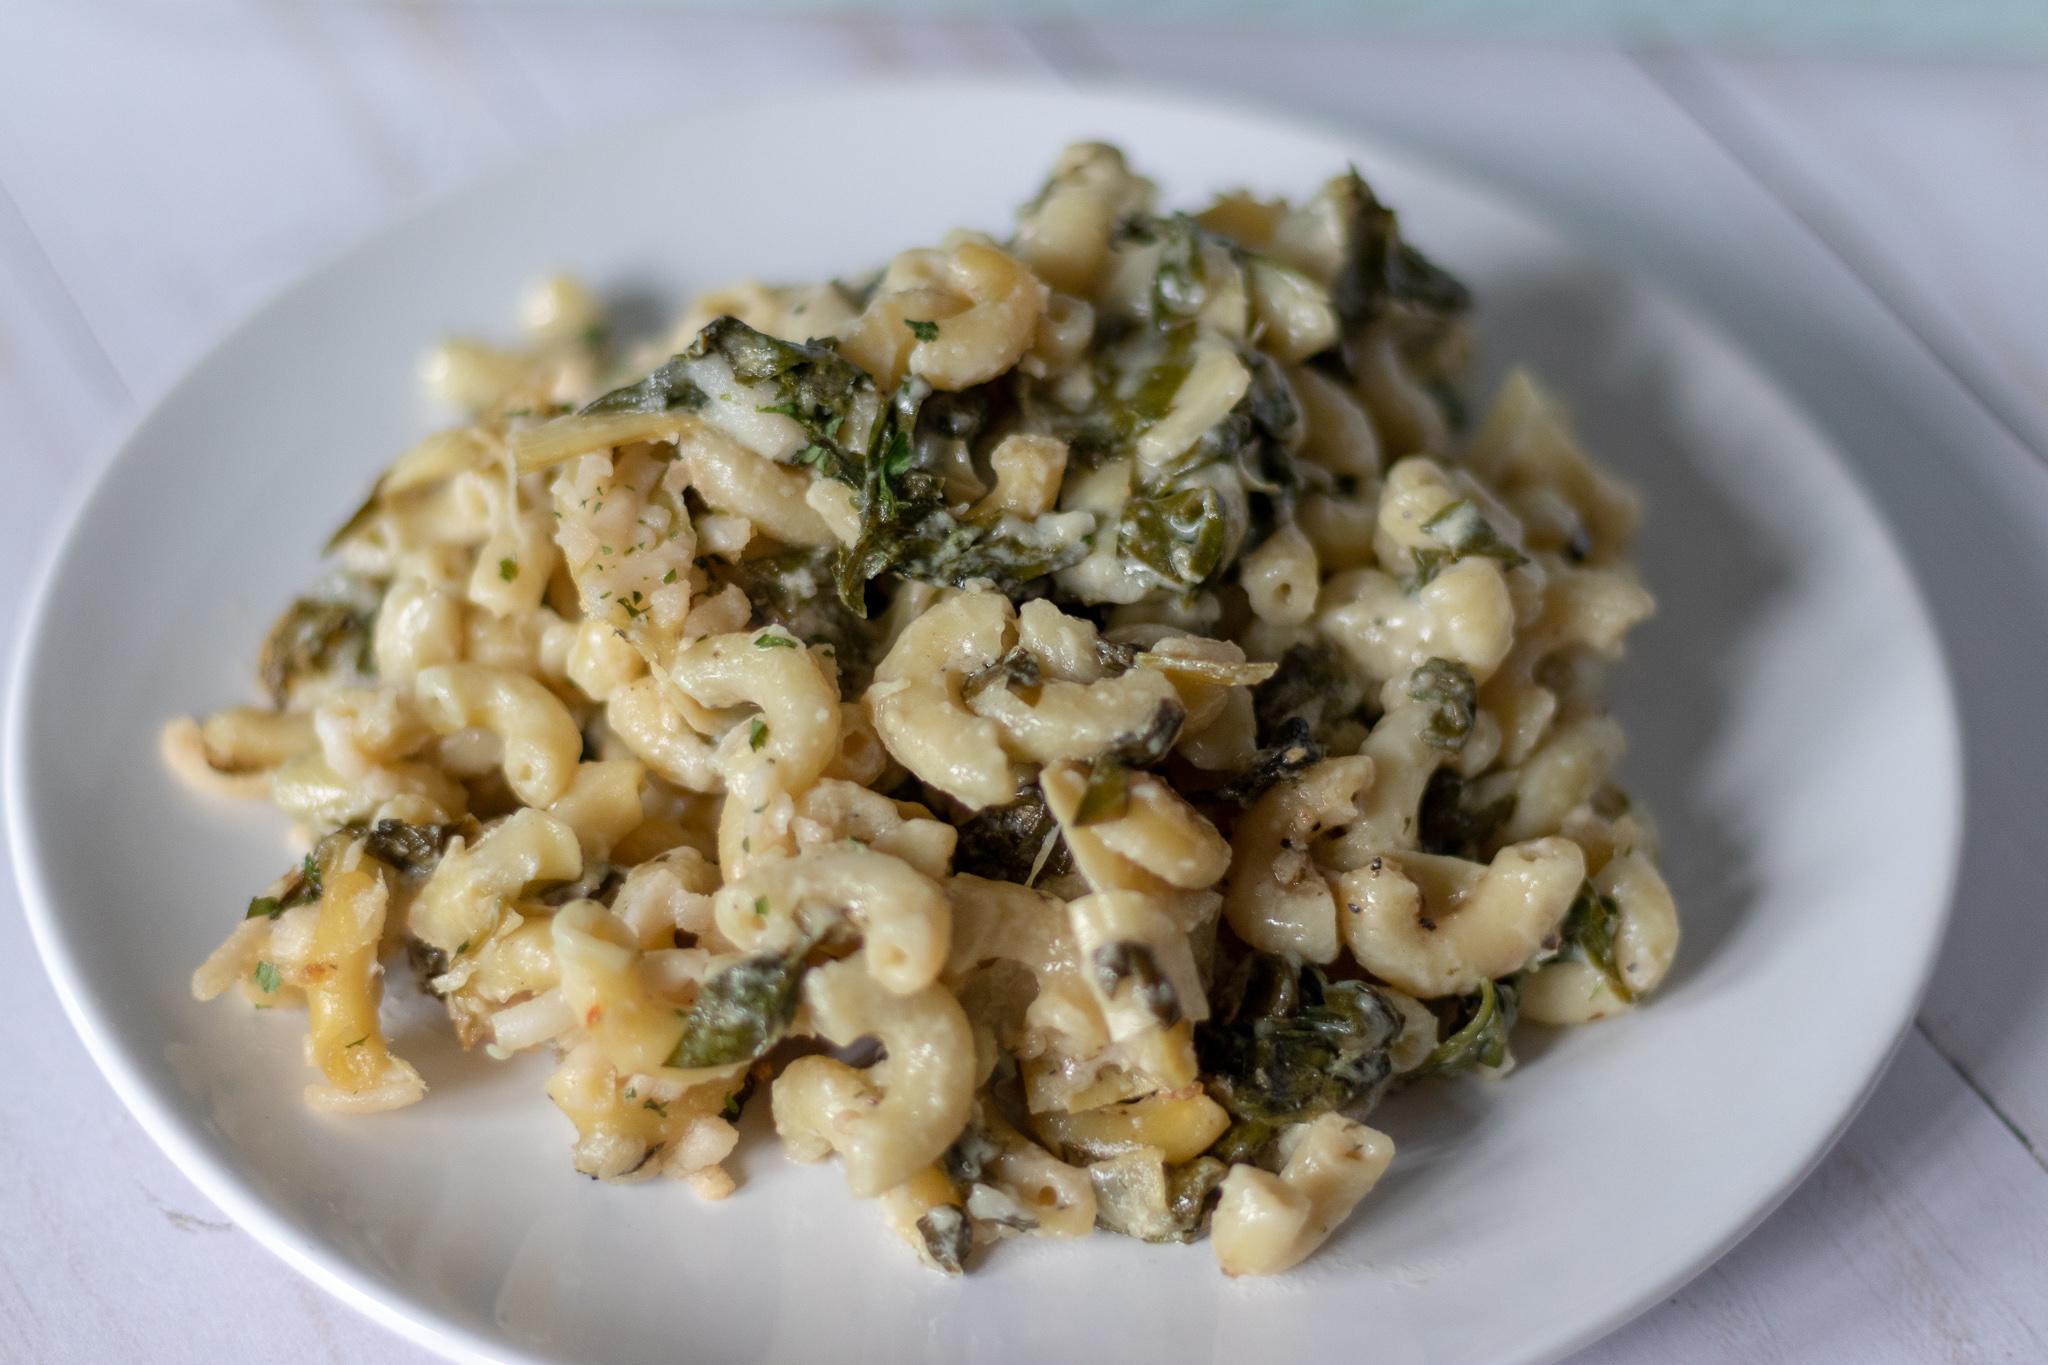
Vegan Spinach and Artichoke Mac and Cheese (The Lori Mac)

IMG_2585.jpg

It helps to have friends that are genius, like my vegan friend Lori!

Lori is great for a multitude of reasons, including rodent rescue and release. She even took in, and raised, a baby mouse we found in our house, and was able to release it into the wild (and before you say, ewwwww, let me tell you, a baby mouse no bigger than you thumb nail is literally the cutest thing.)

She is GREAT, and has the biggest heart for all animals. Lori also apparently has some mad culinary skills, because not too long ago I saw her post on Facebook that she was going to make spinach and artichoke mac and cheese!!

WHAT!?!? Why had my brain not gone there yet? So we quickly whipped up a batch of our vegan spinach and artichoke dip and mixed into some noodles with a little extra cheese and, WOW!

Lori was not wrong with this one!!! So thank you Lori for being all around awesome and genius, and thanks for always saving all the little critters nobody else wants to save! We are your biggest fans and so are our stomachs!


INGREDIENTS:


INSTRUCTIONS:

Preheat oven to 350 degrees

  1. Boil noodles according to package instructions. Drain and set aside.

  2. Make Spinach and Artichoke dip according to recipe instructions.

  3. Mix in 1 cup of mozzarella shreds into the dip.

  4. Pour dip into a 9x13 casserole dish and sprinkle the top with the remaining 1 cup of mozzarella.

  5. Bake for 25 to 30 minutes. Just long enough to heat through and melt the cheese on top.

If you like this recipe, try these:

Nut free Vegan Mac n Cheese

Vegan Buffalo Chicken Mac n Cheese

IMG_2587.jpg

Easy Summer Corn Salad

I have so many memories as a kids sitting around with family shucking corn. My grandparents lived on a farm and grew a lot of their food. Every summer we would have to shuck the corn so my grandmother could freeze it for later. As kids we  hated thi…

I have so many memories as a kids sitting around with family shucking corn. My grandparents lived on a farm and grew a lot of their food. Every summer we would have to shuck the corn so my grandmother could freeze it for later. As kids we hated this job. As an adult, I am so thankful for the memories that come back to mind every time I shuck corn. Yes, you could use frozen corn in a bag to make this, but I promise it won’t be as good. Grilling the corn makes it so much more flavorful, that I would not even consider making this salad any other way! This salad is easy, affordable, light, and delicious. Its the perfect summer BBQ side, or even a quick weeknight dinner with a side of Alabama White Sauce Tofu Skewers, or a vegan burger or carrot dog. I will say that now that I am a grown up, I do try and make my kids shuck the corn. It’s still not my favorite task but, one that is worth it for the past memories and hopefully future memories for my kids.

INGREDIENTS:

  • 6-8 ears of corn

  • 1 red bell pepper

  • 1/2 red onion

  • 2 green onions

  • handful of cilantro

  • 2 limes

  • salt and pepper to taste

INSTRUCTIONS:

  1. Shuck and clean the corn. To grill the corn, spray each ear with a little oil and put directly on a hot grill. Allow the corn to grill for 5 minutes or so before turning. Grill another 5 minutes on the other side. You just want the corn to get some nice grill marks and color to it.

  2. If you do not have a grill you can place the corn on a cookie sheet and spray with some oil. Place the cookie sheet in the oven on broil. Keep a close eye on the corn. It should start to get some color to it pretty quickly. Carefully turn the corn once or twice with some tongs before removing from the oven.

  3. Allow the corn to cool before carefully cutting it off the cob with a sharp knife. I like to prop the corn cob up in a shallow bowl to cut it. The bowl catches the corn kernels with less mess, and helps to stabilize as you cut down the cob.

  4. Finley dice the onions and peppers. Chop the cilantro.

  5. Mix the corn and other veggies together and squeeze the juice from the 2 limes over the top. Salt and pepper to taste and mix well.

  6. Serve room temperer or chilled.

If you like this recipe, try these:

Vegan Street Corn

Southern Dill Potato Salad

Easy Vegan Macaroni Salad

IMG_2610.jpg

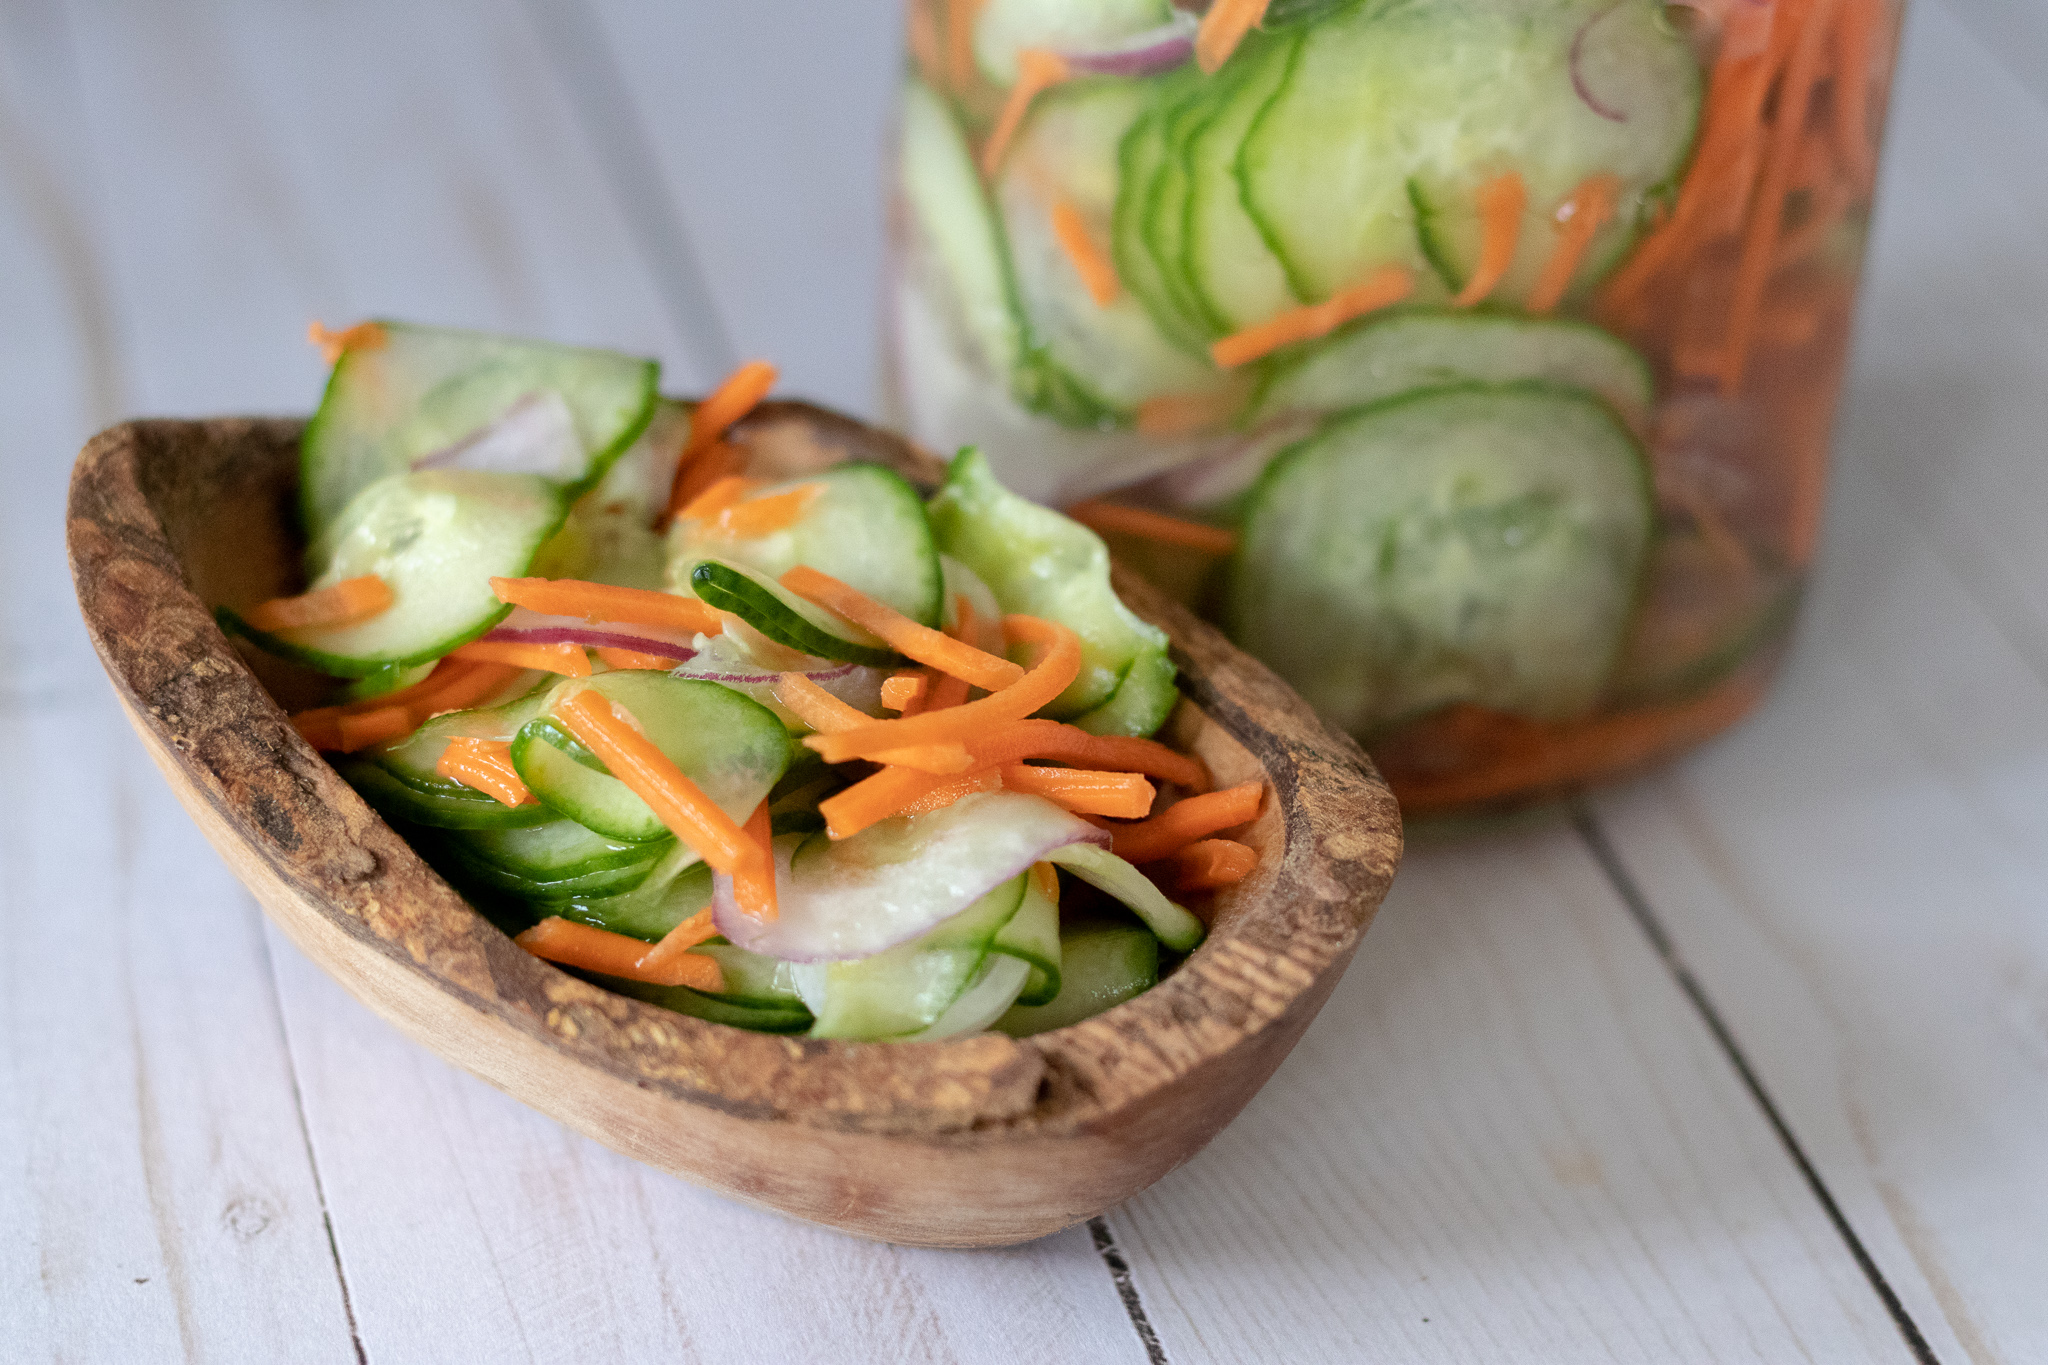
Quick and Easy Pickled Veggies

Pickles are a favorite food group of mine. These quick pickled veggies are no exception. They are perfect on sandwiches, salads, or just as a snack. Because they are so thinly sliced, they are ready to use in no time. Which is even better because I …

Pickles are a favorite food group of mine. These quick pickled veggies are no exception. They are perfect on sandwiches, salads, or just as a snack. Because they are so thinly sliced, they are ready to use in no time. Which is even better because I am not known for my patience.

INGREDIENTS:

  • 2 cups thinly slice cucumbers

  • 1 cup match stick carrots

  • 1 small red onion, thinly sliced

  • 3-4 thinly sliced radishes (optional)

  • 3/4 cups apple cider vinegar

  • 2 teaspoons agave

  • 2 teaspoons salt

INSTRUCTIONS:

  1. Using a mandolin or a very sharp knife, thinly slice the cucumbers, and red onion.

  2. Add all of the veggies to a large bowl and cover in the vinegar, agave and salt. Stir well, so all of the veggies get coated.

  3. Transfer the veggies to a mason jar or another air tight container and store in the fridge.

IMG_2645.jpg

Vegan Buffalo "Chicken" Mac and Cheese

IMG_1703-2.jpg

Creamy, cheesy, gooey, spicy, vegan buffalo “Chicken” mac and cheese with jackfruit! You heard me right. It’s a thing, and it is AMAZING!

Jackfruit is a great substitute for chicken in many vegan recipes and was the first thing that came to mind when I deiced to veganize my favorite dip, to create a vegan buffalo chicken cheese dip! It’s inexpensive, healthy, a great source of fiber, and it mimics the texture of shredded meat very well. It has little flavor on its own when you buy it canned in brine, and takes on the flavor of whatever you cook it in!

I love buffalo flavored anything, and I super love buffalo “chicken” dip! Like I could eat vegan buffalo every single day probably and not get tired of it. I also love Franks brand buffalo sauce and let just all give a big hallelujah that it is actually vegan!!

So taking my favorite vegan buffalo chicken dip recipe with a few adjustments, and mixing it into macaroni changed my favorite appetizer into dinner (insert me doing a happy dance!) I does not get much better than this, y’all!

It’s the best of both worlds. My favorite dip and favorite side dish, all rolled into one seriously comforting dish.

This mac and cheese is hearty enough to be a meal on its own with side salad, or a super delicious side dish!! It freezes and reheats well making it perfect for meal prep, too.

So if you love mac and cheese and you love buffalo sauce on everything too, we might be new best friends! Buffalo sauce lovers of the world unite!


INGREDIENTS:

  • 16 oz package of macaroni noodles

  • 1 can jackfruit in brine

  • 1 8oz of vegan cream cheese, homemade or store-bought

  • 1 cup of buffalo sauce (I use Franks)

  • 1/2 cup vegan mayo

  • Pinch of salt

  • 1/4 teaspoon pepper

  • 1 plus 1/2 cups vegan cheddar shreds, homemade or store-bought

  • 2 tablespoons vegan butter (for the drizzle)


INSTRUCTIONS:

Preheat oven to 350 degrees

  1. Cook noodles according package instructions. Drain, rinse and set aside.

  2. Drain jack fruit, rinse, and chop the pieces, or shred them using you fingers into a medium sized bowl. The fruit pulls apart easily, and I find using my fingers easier than chopping.

  3. Add 3/4 cups of the buffalo sauce, 1 cup of shredded cheese, plus the remaining ingredients minus the butter, to the jackfruit and mix well.

  4. Add the noodles to the jackfruit mixture and mix well.

  5. Transfer the mac and cheese to a 9x12 baking or caserole dish, and sprinkle the top with remaining 1/2 cup of shredded cheese.

  6. Melt 2 tablespoons of vegan butter and mix with the remaining 1/4 cup of buffalos sauce. Drizzle the mixture over the mac and cheese.

  7. Bake for 25-30 minutes, until all of the cheese on top is nice and melted and the mac is heated through.


If you liked this recipe, try these!

Buffalo “Chicken” Bites

Buffalo “Chicken” dip

IMG_1707.jpg

Quick Dill Sauerkraut

IMG_1715.jpg

Some recipes are just too easy…I mean like really, really, really easy.

Quick refrigerator sauerkraut is one of those recipes and so easy to make, in fact you can whip up a batch in as little as 15 minutes.

For starter, its microwaved. So easy. You literally just chop, sprinkle, cover and microwave.

Store it in a jar and pop it in the fridge and thats it!!! Seriously!

Not much muss no fuss. Just easy sauerkraut in minutes.

So who’s ready for a reuben?


Ingredients:

  • 1 small head green cabbage

  • 1 cup white vinegar

  • 1/2 cup water

  • 1 tablespoon salt

  • 2 teaspoons dried dill

  • 1-2 teaspoons caraway seed (optional)


Instructions:

  1. Wash and core the cabbage.

  2. Finely chop the cabbage and place in a large glass bowl.

  3. Add the remaining ingredients to the bowl, and cover in plastic cling wrap.

  4. Microwave for 7 minutes. Remove from microwave but leave the plastic wrap on until the cabbage has cooled.

  5. Transfer the cabbage and liquid to a large mason jar or airtight storage container.

  6. Store in the refrigerator.