party food

Vegan Cheese, Bacon, and Jalapeño Stuffed Bread

IMG_8524.jpg

Bread, check.

Vegan cheese, check.

Vegan bacon, check.

A little spice, check.

To sum it up, this is a perfect meal in my opinion.

I love carbs, I love vegan cheese, I love bacon, and I love a little pepper spice to top it all off.

I recently saw a similar thing done, but it was not vegan. But like most things, you can easily make it vegan and not be left out of the stuffed cheesy bread party. I mean anything they can make we can make vegan these days.

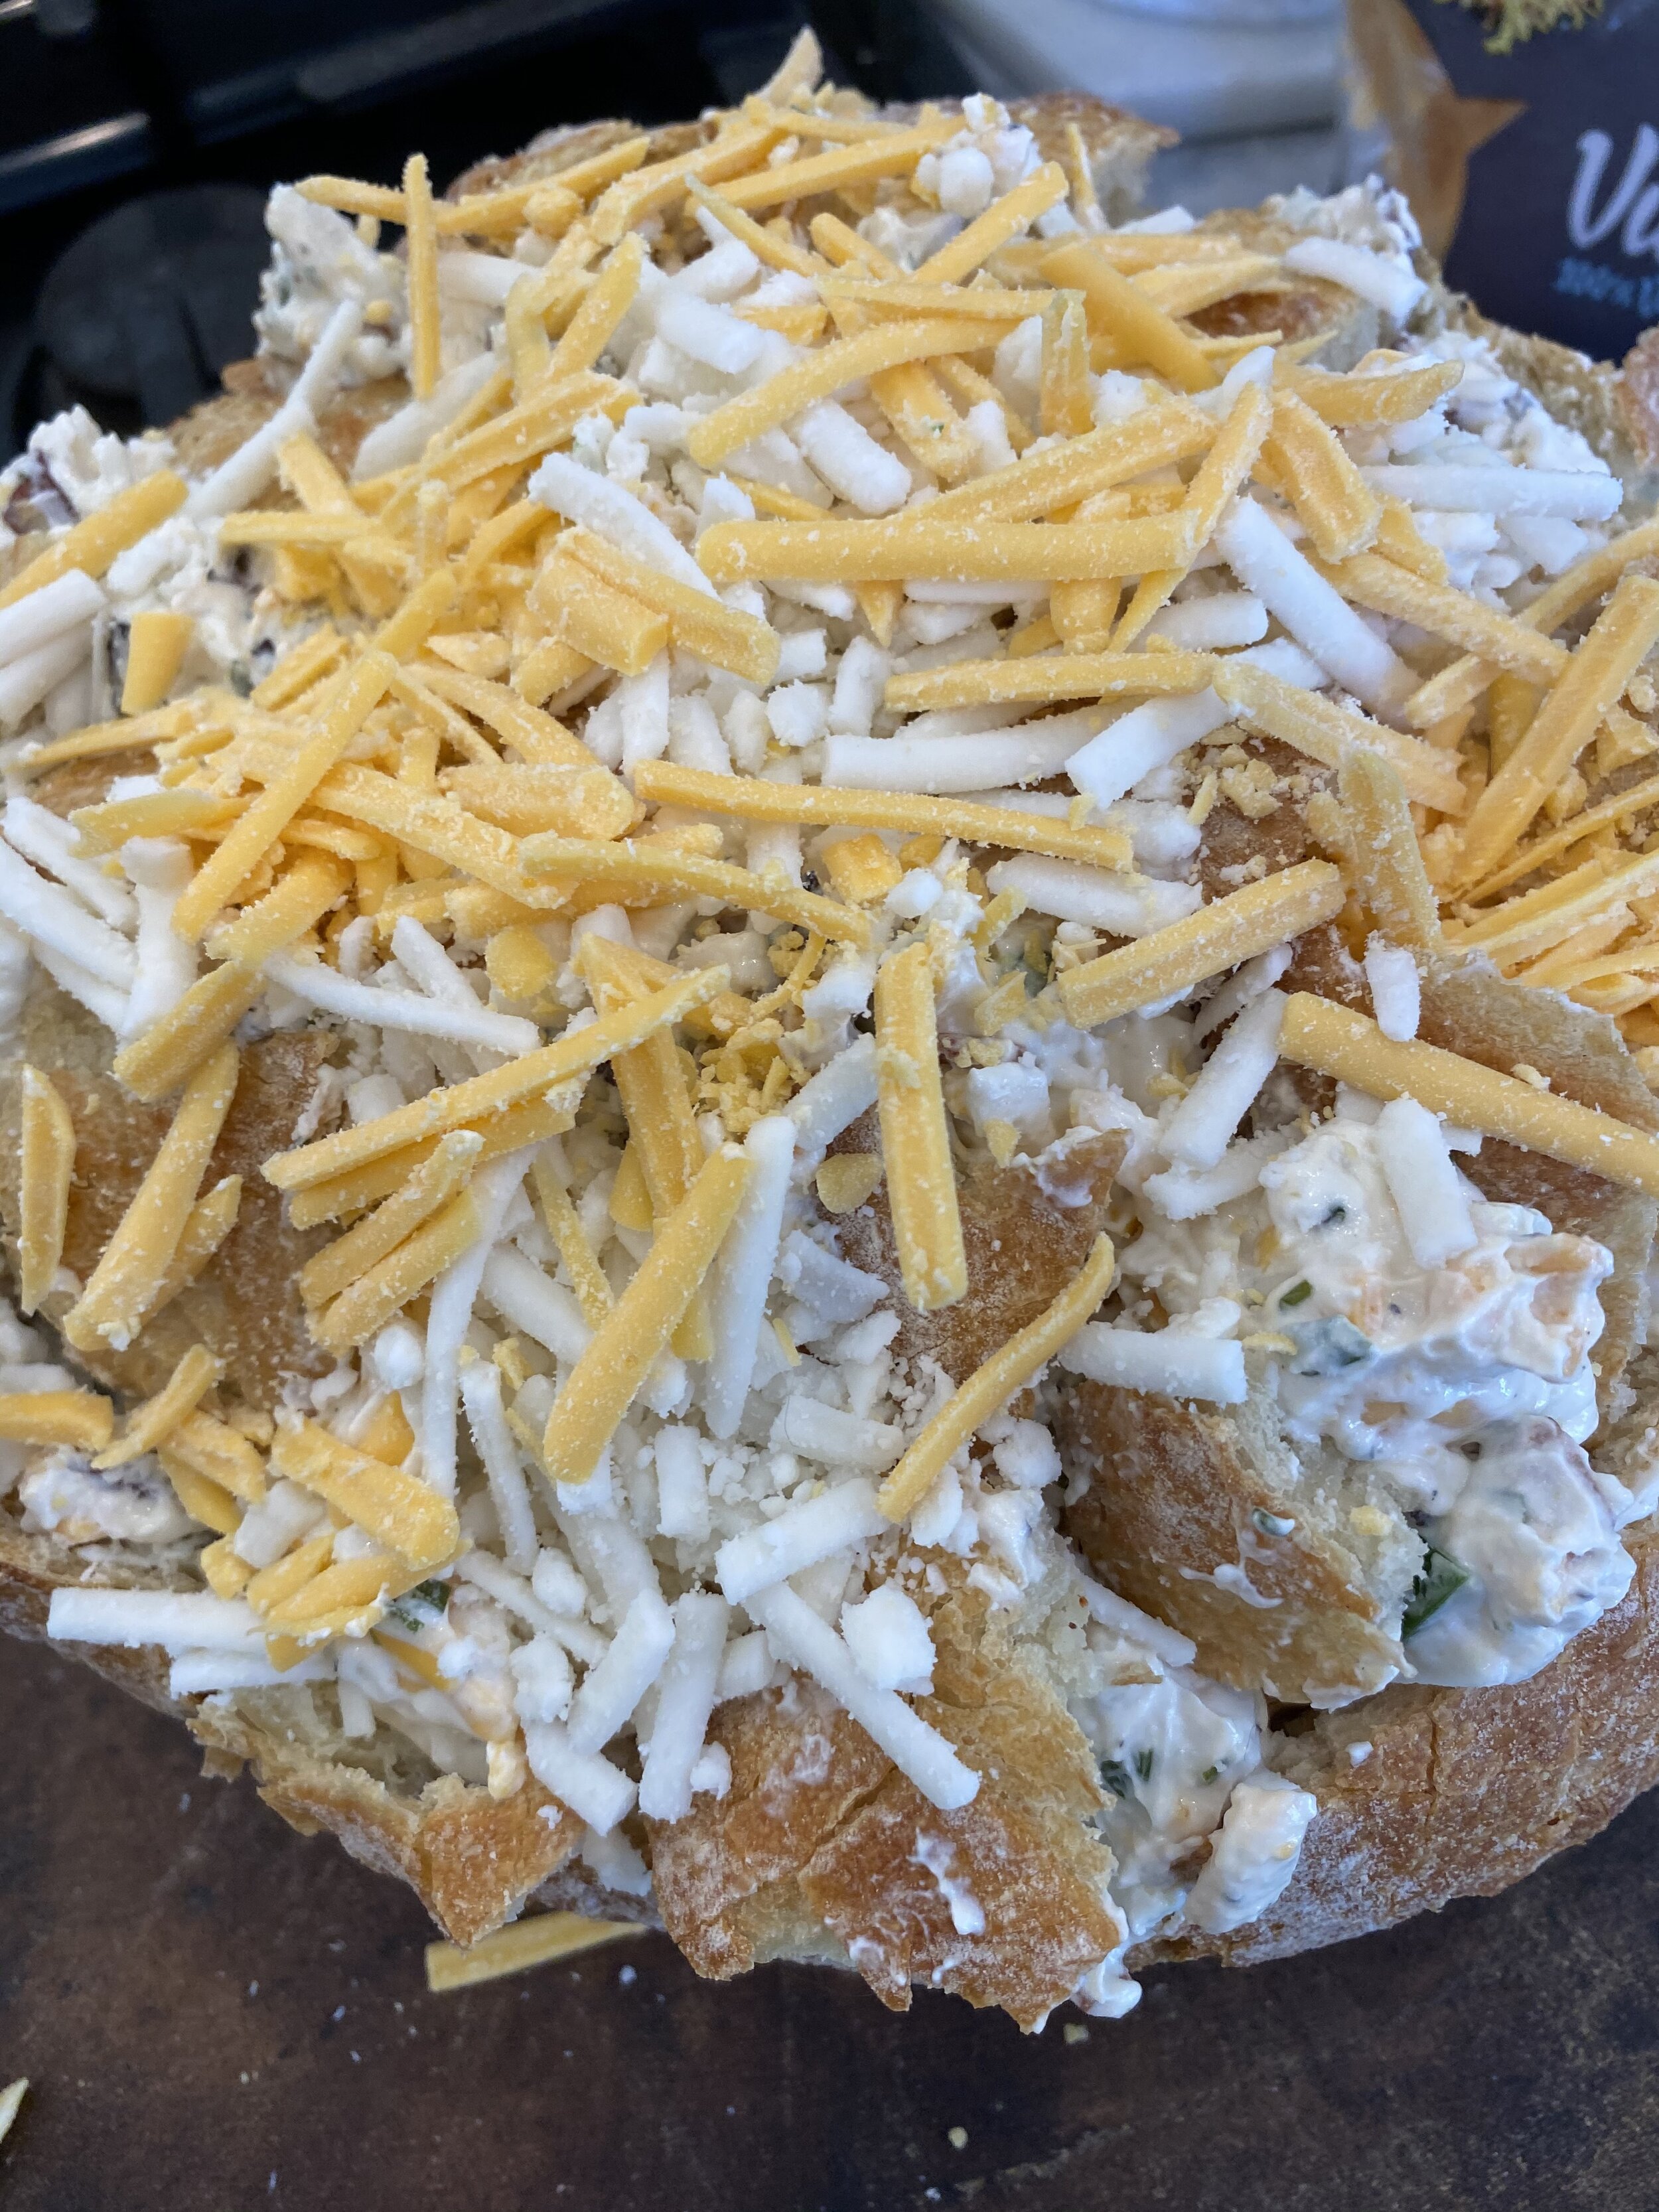
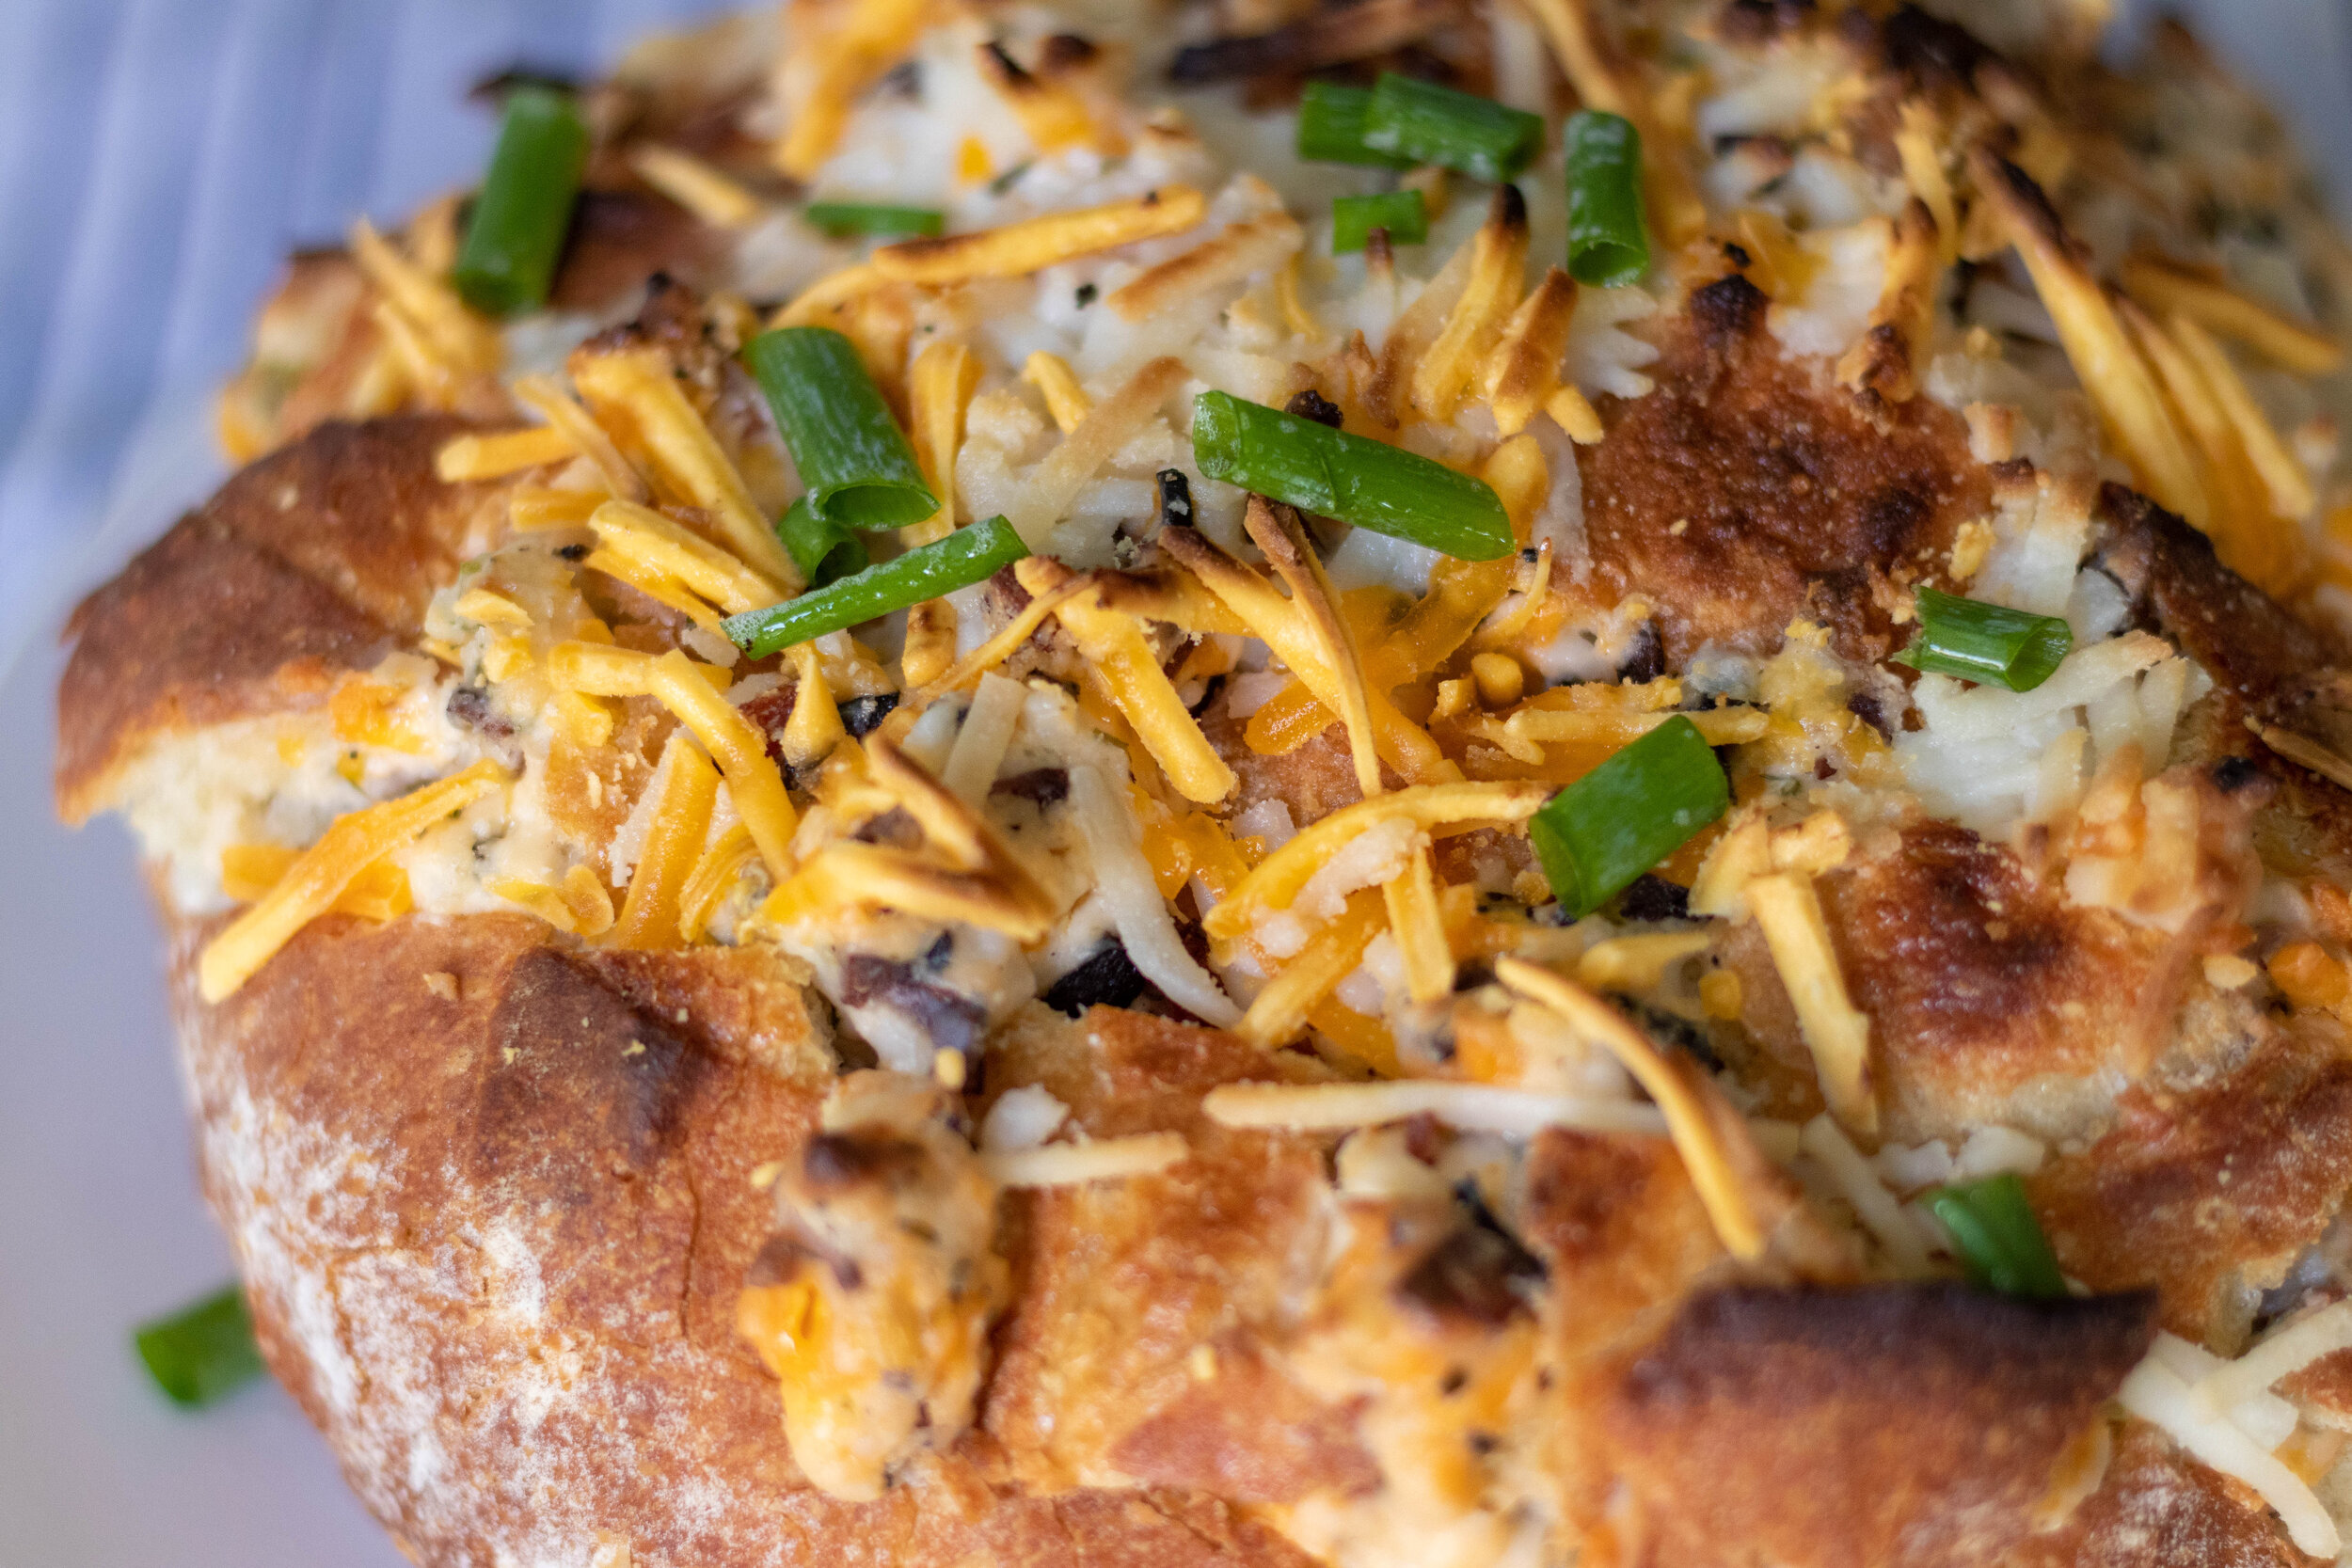
I started with a loaf of artisan bread and sliced it up to create little pockets for the filling. Then mixed up the vegan cheesy, gooey, filling and piped it right in. Easy peasy. Then sprinkled some more vegan cheese on it and baked it right up until it was bubbly, and gooey and crispy and ready to shove in my face.

I actually made this for lunch for my kids and had leftovers the next day, but I think it would work well for a party, or movie night snack as well.

IMG_8535.jpg

If you are not into vegan bacon you could always slice up some vegan pepperoni and dip the bites into some marinara! Then it would basically be pizza bread. I mean come on! I would eat that all day. I would dip it just they way it is in marinara because I love red sauce.

You can buy some vegan cheeses at the store or check out the site from homemade versions of all the cheeses you need to make this vegan stuffed cheesy bread.

And if you are not a fan of spice, leave out the peppers. You do what you want to do here. Your bread, your rules.

IMG_8529.jpg

INGREDIENTS:

  • 1 round artisan bread loaf, store-bought or homemade

  • 10-12 slices vegan bacon, I used lifelight

  • 1 (8 oz) container of vegan cream cheese, or 8 oz homemade

  • 1/2 cup vegansour cream

  • 1-2 teaspoon minced garlic

  • 1 teaspoon onion salt

  • 3 tablespoons vegan mayo

  • 1 cup shredded vegan cheddar cheese

  • 1 cup shredded vegan mozzarella cheese

  • 1 jalapeño seeded and finely diced

INSTRUCTIONS:

Preheat oven to 400 degrees

  1. Finely dice the bacon and cook it unit crispy in a small skillet. Let it cool.

  2. Cut the round bread loaf in a cross hatch pattern as deeply as you can without cutting through the bottom. I suggest using a sharp serrated knife. Place on a baking sheet lined with parchment paper.

  3. In a medium bowl mix the garlic, cream cheese, mayo, sour cream, bacon, jalapeños, and half a cup of each shredded cheese.

  4. Fill a piping bag, or zip lock bag with one corner tip cut off, with the cheese mixture. Pipe the mixture into each opening you cut in the bread, making sure to try fill each gap fully with the mixture.

  5. Sprinkle the top of the bread with remaining shredded cheese.

  6. Bake on the middle rack for 20- 25 minutes or until all of the cheese is gooey, bubbly, melty. Garnish with extra pepper slices and bacon if you like.

If you like this recipe, then try these:

IMG_8531.jpg

Vegan Bacon Butter Brown Sugar Bites

Vegan Bacon Butter Crackers

Ok, ok, ok….hear me out if you think this is a weird idea. Also try and say Vegan Bacon Butter Brown Sugar Bites threes times fast!

These are basically crunchy candied vegan bacon crackers. They are sweet, smoky, salty and perfectly crunchy.

They are SO easy to make and really kind of addictive.

My sister in law’s sister, Heather, who is as good as family to me, posted a non vegan version of this the other day. It popped up in my Face Book feed and I literally JUMPED out of my seat and had these babies in my oven within 10 minutes.

It’s the holiday season so I am always looking for new, EASY, recipes for taking to parties, or dinners, or whatever. These are them!

The recipe you needed when you are too busy ( that would be all of us, am I right) to do much else. These vegan bacon butter bites are just the recipe we all needed! You could use whatever vegan bacon you prefer. I like Lightlife smart bacon and it worked very well for this recipe and oddly enough Ritz cracker are actually vegan.

Hooray who would have thought?!?!. So go ahead and bake yourself up a batch of these first, just so you can, you know “quality control” taste test them, then bake up a batch the next time you need a super quick and easy party snack to share.


INGREDIENTS:

  • 1 sleeve vegan butter crackers. You can use round or rectangle crackers

  • 1 package vegan bacon, we used Lightlife

  • Brown sugar, 1 teaspoon per cracker

  • A pinch of salt

INSTRUCTIONS:

preheat oven to 350 degrees.

  1. Line a baking sheet with parchment paper. Place the cracker on the sheep spaced out so they are not crowded.

  2. Cut uncooked bacon slices to fit whatever size cracker you are using. I cut my bacon into thirds for the round crackers and the pieces fit nicely. Place one piece of bacon on each cracker.

  3. Spread 1 teaspoon of brown sugar over each cracker. Sprinkle a little salt over the tops of all the crackers.

  4. Bake for 20-25 minutes, or until all of the brown sugar has melted and is bubbly. Allow crackers to cool completely before serving. Store in an airtight container at room temperature.

If you like this recipe, try these:

Vegan Bacon Butter Crackers

Super easy vegan bacon butter brown sugar crakers

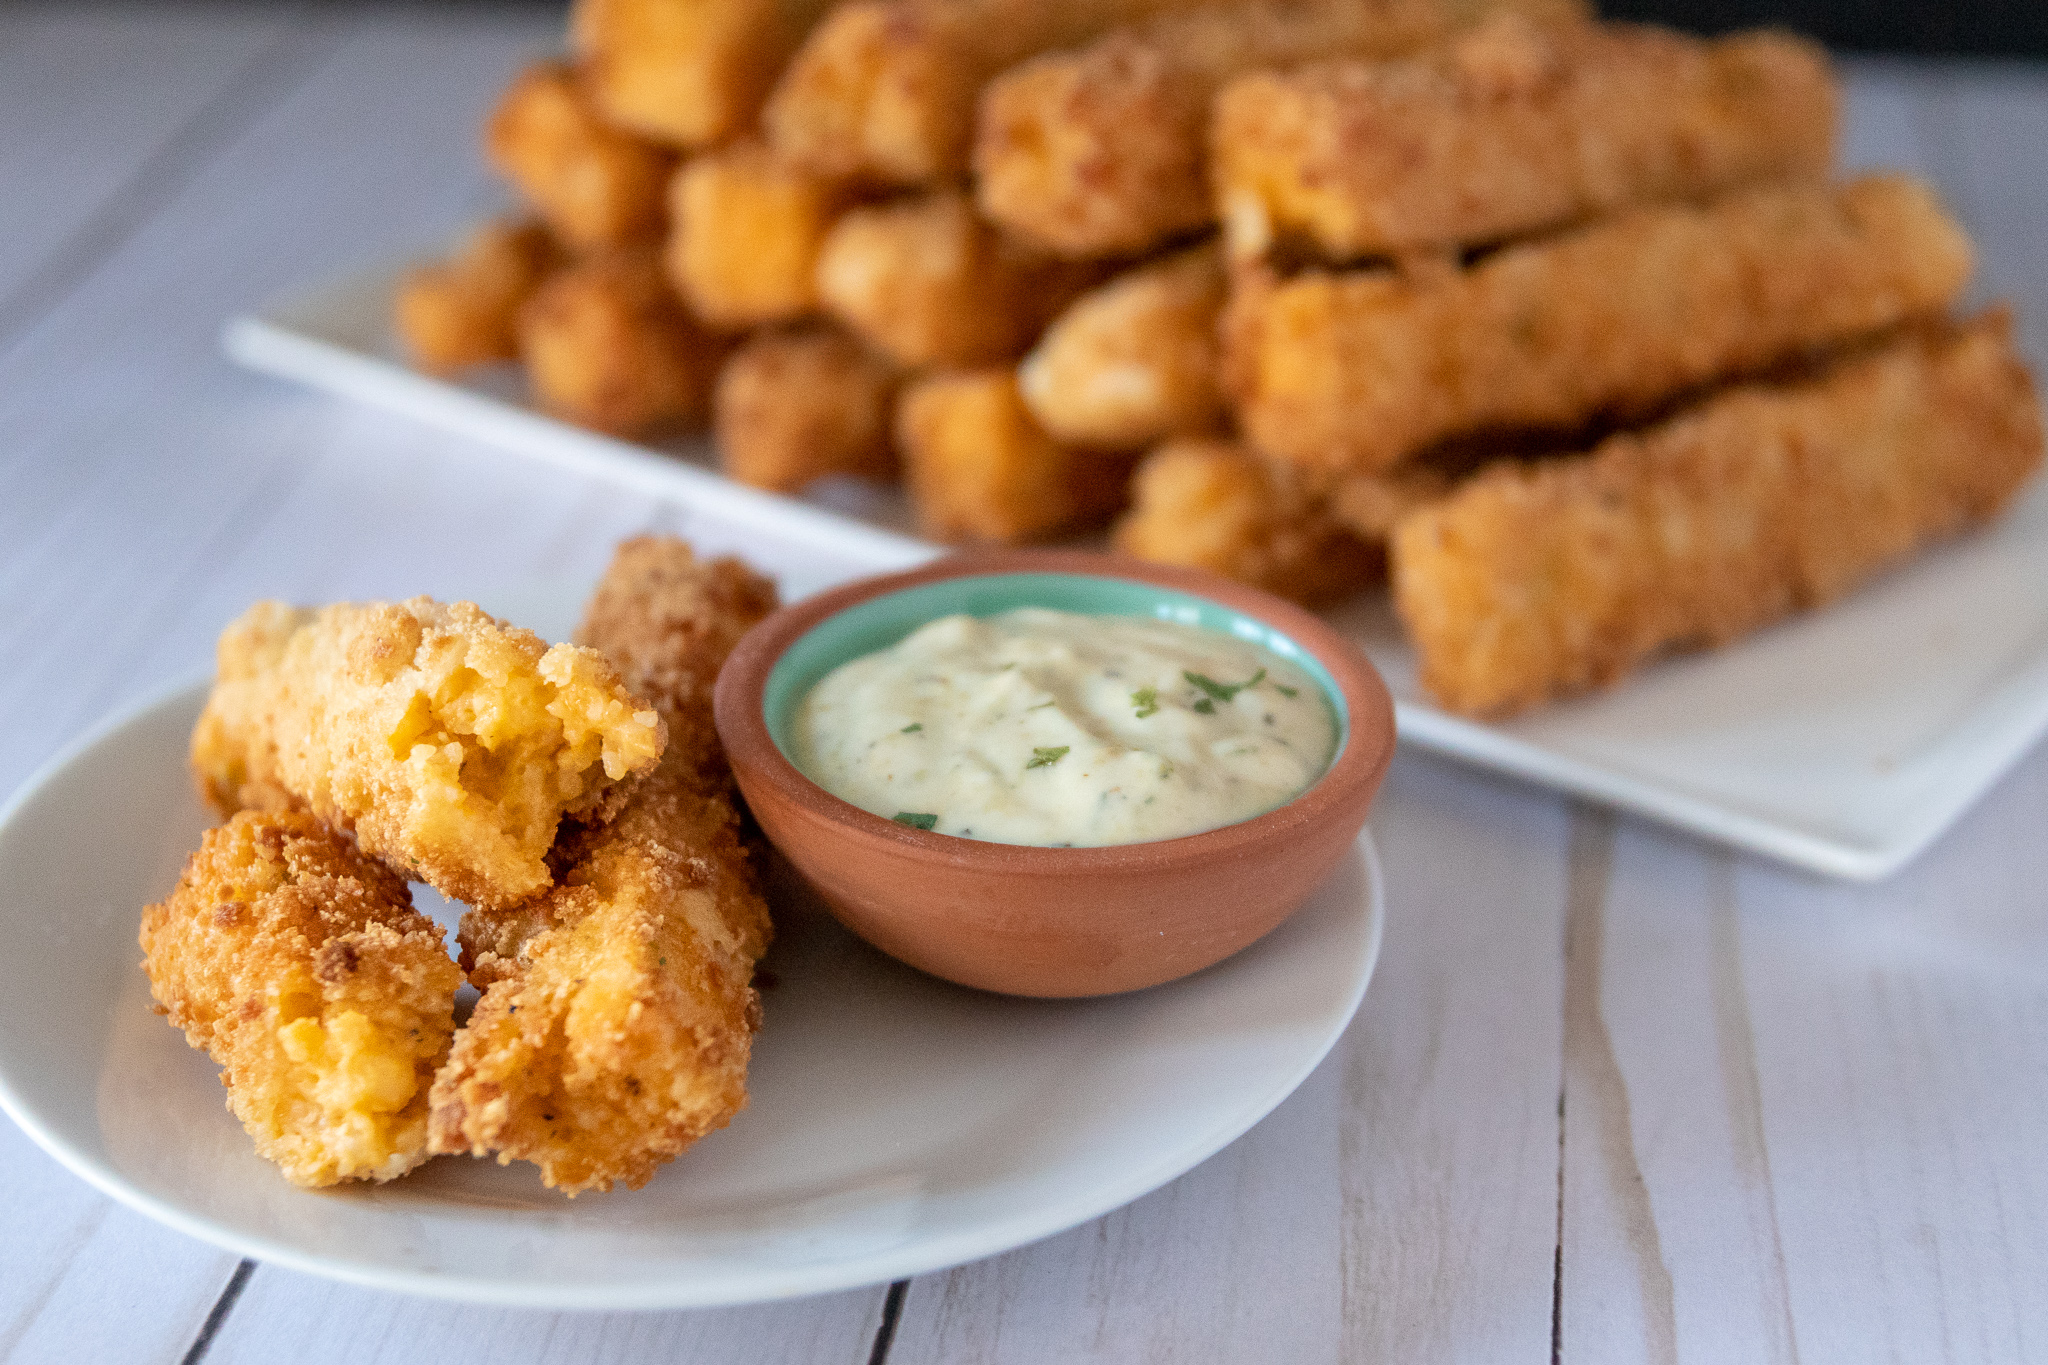
Vegan Fried Cheese Grits

IMG_2820.jpg

In the south, we eat grits.

In the south we also love to fry all kinds of things that were not originally intended to be fried! So cheese grits are no exception to that rule!

These grits are crispy on the outside, and cheesy creamy perfection on the inside.

We dipped ours in vegan ranch, but I think they would be super delicious dipped in some marinara sauce as well.

They are perfect a tasty snack, party food, or even a creative brunch side! I have not attempted to air fry these treats, but I think it would work just fine if you gave them a spray of oil and cooked them for 10-15 minutes or so on 375 degrees.

And if you are one of those people in the sweet grit camp, I urge you to step over to the other side and give these a try. I promise you don’t have to be an absolute convert..just a little open minded..although I will never put sugar on my grits..like, never :)


INGREDIENTS:

  • 1 cup dry old fashioned grits

  • 2 cups plant milk ( we used almond)

  • 2 cups water

  • 1 teaspoon Vegetable Better Than Bouillon

  • 1 cup vegan cheddar shreds, homemade or store bought

  • 2 tablespoons vegan cream cheese

  • 2 green onions, finely diced

  • 1/2 teaspoon salt

  • 1/2 teaspoon pepper

  • 3 cups panko bread crumbs, regular or gluten free (make sure they are vegan, many brands are not)

  • 1/2 cup plant based milk

  • 2 tablespoons vegan plain yogurt or sour cream ( we used kite hill plain yogurt)

  • 1 and 1/4 cups all purpose flour, or gluten free flour blend

  • oil for frying ( we use grapeseed)

IMG_2800.jpg

INSTRUCTIONS:

  1. Bring milk, water, and Better Than Bouillon to a boil in a medium/ large pot over medium heat.

  2. Once the liquid is boiling, add in the grits and stir. Reduce heat to low, and allow the grits to cook and thicken for about 15 minutes Be sure to stir the grits several times to avoid them sticking to the bottom of the pot.

  3. Once grits are done, stir in the cheddar, cream cheese, salt pepper, and green onions.

  4. Spray a 9 inch baking pan with some oil and transfer the grits to the pan. Place pan in the fridge for about 4 hours or until the grits seem firm. You can also do this the day before you want to make these. They will be fine hanging out in the fridge for a day or so.

  5. Once grits are firm, turn the pan over onto a cutting board. You may have to tap the pan on the counter to get the grits out, but if you sprayed the pan well, they should come right out.

  6. Cut the grits into sticks that are about 1/2 inch thick and 4 inches long. They will be a little soft still so just handle them gently to avoid them breaking.

  7. Place flour in a shallow dish. In a separate dish wish the milk with the yogurt. In another dish, add the panko.

  8. Start by dipping the grit sticks first into the flour, next the milk yogurt mixture, and finally into the panko. Repeat with all of the grits sticks.

  9. Heat a large deep skillet with about an inch of oil over medium heat. Once the oil is nice and hot, fry the grits sticks 3 or 4 at a time, turning them with tongs to make sure they get crispy on all sides. They only need a few minutes in the oil to get them nice and crisp. Line a baking sheet with some paper towels and place a cooling rack on top. Place finished grits on the cooling rack while you finish frying the rest.

  10. Serve fried cheese grits with vegan ranch or marinara sauce.

Reheat fried cheese grits in a 350 degree oven until crisp

If you like this recipe, then try these:

Southern Tofu Scallops and Grits

Fried Vegan Mozzarella Bites

Vegan Gorgonzola Fried Brussels Sprouts

IMG_2798.jpg

Tofu Banh Mi Style Rice Cups

IMG_2666-2.jpg

Tofu Banh Mi sandwiches are on constant rotation in our house. Everyone loves them, even the kids. What’s not to love about perfectly seasoned tofu, crispy pickled veggies,and spicy Sriracha mayo. In a recent effort to change things up , I decided to pile up tofu Banh Mi filling into these easy little rice cups.

I know that banh mi literally means bread or wheat but wanted to make something familiar for our gluten free friends and family that was a little different and fun! I love a banh mi, but my favorite part is the filling! It gets tricky to name a thing so people understand the origin and not cause disrespect to the culture from which it came. I wanted everyone to understand that this is all the parts of a tofu banh mi, but technically without the banh mi….so for lack of a better idea of how to have people identify what this is, I named it Tofu Banh Mi Rice Cups.

A local sushi place we frequent makes a tofu banh mi sushi roll that we love, so I decided to create a play on that. Just more rice and way more delicious filling!

I often make these for parties or potlucks and they are always such a hit. They cute, handheld, and delicious.

These light and fresh tofu Bahn Mi rice cups also work work great for meal prep because they keep well in the fridge for several days.

Who knows, you may end up loving these as much as we do, and may find yourself making them more often than a Bahn Mi sandwich!


INGREDIENTS:

You will need a muffin tin for this recipe. This recipe yields around 2 dozen cups. You can easily half the recipe for less cups.

  • 3 cups sushi rice (follow package cooking instructions)

  • 1 package extra firm tofu

  • 1/4 cup soy sauce or coconut aminos

  • 2 teaspoons sriracha

  • juice from 1 lime

  • 3/4 cups quick pickled veggies

  • 1/2 cup chopped cilantro

Sriracha Mayo:

  • 1/2 cup vegan mayo

  • 2 tablespoon Sriracha

  • 1 teaspoon lime juice


INSTRUCTIONS:

  1. Cook rice according to package instructions. I use my rice cooker and use 3 actual cups of rice, not the scoop that comes with the rice cooker, and fill the water to the 4 cup line. Again you can half this amount if making less cups. Allow the rice to cool. It’s gonna be kind of sticky and thats what you need. Once the rice has cooled enough to handle, scoop about 1/4 cup of rice into each muffin cup and press the rice to form the shape of the cup. I keep a cup of water on the counter to dip my fingers in. If your hands are wet it will be easier to press the rice down. You will get around 24 cups, give or take. Pop the muffin tin in the fridge and for 30 minutes.

  2. Drain tofu and wrap it in either a clean kitchen towel or a few paper towels. Place a few books on top to allow the excess liquid to press out for 10-15 minutes.

  3. Cut the tofu into 1/4 inch cubes. Whisk together soy sauce, Sriracha, and lime juice in a shallow dish and add the tofu. Allow it to marinate for 10-15 minutes.

  4. Heat a large skillet with a little oil over medium heat. Add the the tofu along with the marinade to the pan. Let the tofu cook until all of the liquid has absorbed and the tofu has began to get a little crisp and brown around the edges.

  5. Whisk the mayo, Sriracha, and lime juice together in a small bowl. If you like it spicy, add a little more Sriracha!

  6. Carefully remove the rice cups from the muffin tin. They should just peel out. Divide the tofu among the cups, and top with some pickled veggies and chopped cilantro. Add a little of the Sriracha Mayo to each cup to serve.

  7. Store leftovers in an airtight container in the fridge for serval days.

IMG_2676.jpg

Bitesize Vegan Taco Dip Cups

IMG_2289.jpg

I love party food, and I love to host parties!!!

7 layer taco dip being one of my favorite party foods. I mean it’s a bowl full of all the the most delicious taco-y things all stacked up together!

What is not to love there? Recently I found these adorable little street taco tortillas and my oldest daughter suggested we use them to make little taco dip cups.

I am so proud of our genius offspring and their brilliant ideas!! We have raised them well!!

So as she requested, we made these bitesize vegan taco dip cups! Not only are they super tasty, they are so super cute…I mean if a food can be cute, then I am standing by these being the cutest!

Make them for a snack, make them for a party, make them because eating tiny food is normally more fun to eat!

I made them for lunch and our family plowed through them! But I am still rooting for another party in the near future to show off these adorable little bites.


INGREDIENTS:

*You will need a muffin tin for this recipe.

  • 24 (1 package) corn street taco tortillas

  • 1 can refried beans

  • 1/3 cup vegan cream cheese

  • 1/4 cup vegan cheddar shreds (homemade or store bought)

  • 2 avocados

  • 1 lime

  • 1 teaspoon cumin powder, divided

  • 1 teaspoon chili powder, divided

  • salt and pepper to taste

  • Handful of chopped lettuce

  • 1/4 cup diced bell pepper

  • 1/4 cup diced tomatoes

  • 1/4 cup diced red onion

  • 1/4 cup chopped cilantro

  • optional: hot sauce

IMG_2299.jpg
IMG_2285.jpg

INSTRUCTIONS:

Preheat over to 350 degrees

  1. Spray the inside of a cupcake tin lightly with some cooking oil. Take a tortilla and press it into the muffin tin so that it forms to the shape of the cup. You will have to overlap it some to make it fit. Corn tortillas tend to tear when you are trying to press them into the pan.No big deal, just overlap at the tear if that happens. Repeat with remaining tortillas. If you only have a 12 cup muffin tin, then you will have to do this in batches.

  2. Place the pan in the preheated oven and allow the tortillas to bake for 10-15 minutes. Just make sure they are crisp around the edges and down the sides before removing from the oven. Once they are done remove from oven and allow to cool for 5 to 10 minutes.

  3. Mix cream cheese and cheddar shreds together with 1/2 teaspoon of cumin and 1/2 teaspoon of chili powder. Set aside.

  4. For the guacamole, remove avocado from peels and add them to a medium size bowl. Mash the avocados with a fork until they are relatively smooth. Add 1/2 teaspoon of cumin, 1/2 teaspoon of chili powder, juice from the lime, and salt and pepper to taste. Stir well and set aside.

  5. Remove the tortillas from the muffin tin and place them on a platter.

  6. Begin layering each tortilla by first adding a few teaspoons of refried beans, then the cheese mixture, lettuce, tomato, onions, peppers, and guacamole. Top each on with a sprinkle of cilantro and a drop of hot sauce if you like a spicy kick!

If you like this recipe, try these!

Grilled Watermelon Tofu Tacos

Alabama White Sauce Tempeh Tacos

Vegan Beer Battered Fish Tacos

Vegan Gorgonzola and Balsamic Glazed Chips

IMG_9538-2.jpg

As much as I love french fires, my love for loaded chips is probably just as equal.

Lets be real, offer me a fried potato of any kind and I will eat it.

That being said, this recipe is my all time favorite chip recipe. A local restaurant we used to frequent served a non vegan version of these chips, and I was obsessed.

It took me a while to get a convincing vegan gorgonzola sauce, but once I did, it was game on. The sauce can actually be used in all kinds or recipes and should! We used cashews to get a super creamy and convincingly cheesy texture and added the right amount of lemon, vinegar, and dijon to give it that gorgonzola zip.

The homemade balsamic is sweet and tangy as well, pairing really well with the creamy cheese sauce.

These chips are salty, tangy, sweet, and perfect. You can top them with chives, but we like to chop up cilantro stems and sprinkle on top for a bright, fresh contrast!

I promise you, these will be one of your new favorite chips, too!


Ingredients:

  • 4 - 6 russet potatoes

  • 1/2 cup balsamic vinegar

  • 1 - 2 tablespoons agave

  • oil for frying (air fryer instructions also given)

  • optional: chives or chopped cilantro for garnish

Gorgonzola Cheese Sauce

  • 1/2 cups cashews, soaked in hot water for a few hours, or covered in water and microwaved for 3 minutes.

  • 1 cup water (this is used to process the cashews, not for soaking)

  • 2 tablespoons nutritional yeast

  • 2 tablespoons tapioca or corn starch

  • juice from 1 lemon

  • 1 teaspoon dijon mustard

  • 2 teaspoons apple cider vinegar

  • 1 teaspoon light miso paste

  • 1/2 teaspoon salt

  • 1/2 cup plant based milk

  • 1 tablespoon vegan butter

IMG_9525-2.jpg
IMG_9548-2.jpg

Instructions:

  1. Wash Potatoes but do not peel. Using a kitchen mandoline, slice the potatoes on the thinnest setting. You can also use your food processor with the slice attachment, or use the side of box grater that has one horizontal blade. Whatever you use, you want a super thin slice.

  2. IF USING AN AIR FRYER: Toss the potatoes in a teaspoon of oil and a few shakes of some salt, then add them in batches to your basket. Cook on 360 degrees for 15 minutes. Half way through cooking, move the chips around in the basket; they like to stick together so you may have to peel some apart. Continue cooking for another 15 minutes or until all of the slices are crisp like a chip.

  3. IF PAN FRYING: Fill a large skillet with a few inches of your preferred oil for frying. Heat the pan on medium heat until the oil is sizzling. Begin adding chips in batches and allow to cook for several minutes until they are browning and crisp. Place finished chips on a wire cooling rack that you have placed on a paper-towel-lined baking sheet. Lightly salt the chips.

  4. Add balsamic and agave to small sauce pan. Bring mixture to a boil, then reduce heat to low and allow to simmer for about 10 minutes. You can start with 1 tablespoon of agave and if the glaze is not sweet enough for you, add more. It will thicken some as it sits, so if it is too thick and sticky when you are ready to use it, add a few splashes of balsamic vinegar back in and whisk.

  5. To prepare the cheese sauce, drain the cashews and add them along with remaining cheese sauce ingredients, minus the milk and butter, to a high speed blender or food processor. Blend on high until mixture is completely smooth.

  6. Transfer mixture to a sauce pan and heat on med/low heat. Whisk the sauce as it is cooking. Once the sauce begins to thicken, add in the milk and butter, and cook for one more minute. If the sauce gets too thick, you can always add a little more milk to thin it out.

  7. To serve, pile chips on a plate. Drizzle with cheese sauce, balsamic glaze, and sprinkle with diced chives or cilantro.

serves 4-6


Vegan Spinach and Artichoke Dip

Growing up, spinach and artichoke dip was my favorite dip, especially if it was served in a bread bowl!Growing up in the south, this dip was a staple at every baby shower, pot luck or holiday party.Luckily this classic dip is super easy to veganinze…

Growing up, spinach and artichoke dip was my favorite dip, especially if it was served in a bread bowl!

Growing up in the south, this dip was a staple at every baby shower, pot luck or holiday party.

Luckily this classic dip is super easy to veganinze, and once again you will likely fool just about anyone who tries it into thinking its not vegan at all.

We simply just replaced the regular mayo and cream cheese with our favorite vegan versions and kept the rest of the recipe pretty traditional, or make your own delicious homemade cream cheese . You can make your own bread bowl for buy whatever vegan bakery bread you like.

You can serve this dip in a bread bowl, or with a side of bread and veggies for dipping. No matter how you serve it, I promise you are gonna love it!


Ingredients:

  • 1 container of plain vegan cream cheese, or 8 oz of homemade cream cheese

  • 2 14 oz cans of artichoke hearts

  • 9 oz container of fresh baby spinach

  • 1 small/medium yellow onion

  • 1/4 cup vegan mayo

  • 2 teaspoons of minced garlic

  • juice from 1 lemon

  • 2 teaspoons all purpose seasoning ( I use Trader Joes 21 season salute)

  • 1 teaspoon of salt

  • 1/2 teaspoon pepper

  • OPTIONAL, 1 round loaf of vegan bread to use as a bread bowl


Instructions:

  1. Drain the artichoke hearts and chop them up a bit.

  2. Dice the onion and sauté in a medium pan with a teaspoon of oil until it becomes soft, and translucent.

  3. Place the spinach in a large microwave safe bowl, and microwave for 2-3 minutes, just long enough for the spinach wilt. Allow the spinach to cool, and place in a clean kitchen towel. Wring out the spinach in the towel to remove as much liquid as you can. Remove spinach form the towel, and chop it up a bit.

  4. In a large bowl combine spinach, artichokes, onion, and remaining ingredients. Stir well.

  5. Transfer mixture to a medium sized casserole dish, and bake for 25 to 30 minutes. You just want it to get nice, and bubbly hot.

  6. If you are serving the dip in a bread bowl, but the center out of the bread make a bowl for the dip. Save the scrap bread for dipping. Transfer dip to the bread bowl and serve with extra cut up bread, crackers, or veggies. Otherwise, serve in the dish you baked it in with bread, cracker, or veggies for dipping.

Vegan Buffalo "Chicken" Dip

IMG_8233.jpg

Every time I make this buffalo “chicken” dip for a party, there is not a single bite left.

Non vegans can not believe this dip is actually vegan and aways marvel at how well the jackfruit mimics the texture of chicken. Jackfruit is the great meat mimicker, especially when trying to replace shredded meat in recipe. It has little taste on it’s own when its picked green and packed in brine. Once its drained and shredded it looks and feels like meat. It easy takes on the flavors you are cooking with, making it great for this recipe!

You can use any vegan cheddar you like. You can use store bough or even try your hand at one of our many cheddar style cheeses on the site.

We also use Franks buffalo sauce in this recipe because it is in fact vegan. The butter “flavor” in the sauce contains no dairy!! Hooray for small miracles, because I am an official Frank’s sauce groupie if that is even a thing!?! If not I am happy to head up an official fan club! You can use any vegan buffalo sauce you like, though!

This classic dip is spicy, cheesy, gooey, and always a crowd pleaser. I also like to whip up a batch of this tasty dip for sandwiches or for my Vegan Buffalo “chicken” bites, Buffalo Mac and Cheese, or Buffalo Stuffed Challah!!

So go make yourself a batch and try to make a few other thing with it too!! Those are my favorite kinds of recipes. The ones that just giving you some love in all kinds of new ways.


NGREDIENTS:

  • 1 can jackfruit in brine or 4 easy vegan chicken breast finely diced

  • 1 8oz container vegan cream cheese

  • 3/4 cups of buffalo sauce (I use Franks)

  • 1/2 cup vegan mayo

  • Pinch of salt

  • 1/4 teaspoon pepper

  • 2 tablespoons corn or tapioca starch

  • 1 plus 1/2 cups vegan cheddar shreds (like Follow Your Heart)


INSTRUCTIONS:

Pre-heat oven to 350 degrees.

  1. If using jackfruit, drain and chop the pieces, or shred them using you fingers into a medium sized bowl. The fruit pulls apart easily, and I find using my fingers easier than chopping. If using chicken prepare following instructions and dice after the seitan has rested.

  2. Add the remaining ingredients, except 1/2 cup of cheese, to the bowl and mix well.

  3. Transfer mixture to a small baking dish and top with remaining 1/2 cup of cheese.

  4. Bake for 20 - 25 minutes or until cheese on top is melty.

  5. Serve with bread, crackers, carrots, or celery sticks.


Muffin Cup Vegan Lasagna

IMG_9391.jpg

If you have been looking for the perfect, cheesy, gooey, saucy, vegan lasagna, look no further! Layers of noodles, tofu ricotta, homemade marinara, and the perfect vegan mozzarella sauce make this lasagna the best vegan lasagna I have had, hands down!

It’s my go to dish to bake up for all of our non vegan friends and family, because no one ever even knows its vegan! We are house divided where lasagna is concerned, some preferring veggie lasagna, and others a classic “meaty” lasagna. So I have given instruction on making this lasagna 2 ways! Because two kinds of lasagna are always better than one!! Right?!?!?

You can always bake a lasagna in a 9x13 pan BUT how much cuter is it to make it in am muffin pan?! Everyone gets a little individual lasagna of their own. I love it! These also work great for pot lucks and parties since they are single serving. AND they freeze well for meal prep! Hooray for meal prep!!

I am telling you, you will never want to use store bought shredded mozzarella again after using this perfect cheese sauce. It’s super easy to whip up, and gets ooey gooey, bubbly, and browns. Its magic and it is staple in our house for so many recipes! Sometimes, like right now with this vegan lasagna, the secret is in the sauce!

So bake up a muffin tin for yourself, and one for a neighbor or friend. They will be so thankful for a night off from cooking and so impressed that this lasagna is actually vegan! I always say the way to convince someone that vegan food is just a delicious, if not more, than the non vegan version is by sharing it!! 


INGREDIENTS:

CHEESE SAUCE:

  • 1 cup of cashews (soaked in hot water a few hours, or microwaved in water for 3 mintues)

  • 2 cups of water

  • 2 teaspoons minced garlic

  • 1 tablespoon apple cider vinegar

  • 1 teaspoon salt

  • 5 tablespoons arrowroot or tapioca starch

  • 2 tablespoons nutritional yeast

COOKING INSTRUCTIONS:

  1. Drain cashews.

  2. Put all ingredients into a high speed blender, or food processor, and blend for several minutes until completely liquified. Totally Smooooooth!

  3. Heat on stove in a medium sauce pan, on medium heat, stirring with a whisk until it begins to thicken. It will thicken quickly so do not stop stirring! Once it thickens, remove from the heat!


SAUCE:

  • 1 large can crushed tomatoes

  • 1 small can diced tomatoes drained

  • 1 carrot diced

  • 1 onion diced

  • 1 cup diced mushrooms (optional)

  • 1-2 teaspoons crushed garlic

  • 1 teaspoon dried thyme

  • 1 teaspoon dried oregano

  • 1 teaspoon salt

  • pepper to taste

  • splash of red wine (optional)

“Meaty” option:

If you would rather have a "meaty” sauce, you could omit the carrot, pepper, and mushroom, and add a bag of meatless crumbles, or even use 2 Beyond Beef brand burgers. Simply thaw them, and cook as you would ground meat before adding to the sauce.


COOKING INSTRUCTIONS:

  1. In a large sauce pan, saute all of the veggies and garlic in a few teaspoons of oil until tender. If using meatless crumbles or Beyond Burgers, heat the faux meat, garlic, and diced onion together in a pan until cooked through.

  2. Add wine and let cook for a minute.

  3. Add both cans of tomatoes, and spices, and let the sauce simmer for 15 - 20 minutes.

IMG_9372-2.jpg


Lasagna

INGREDIENTS:

  • 1 box lasagna noodles, regular or gluten free

  • 1 batch tofu ricotta

  • White cheese sauce

  • Homemade veggie marinara, or you can use a jar of store bought to save time

COOKING INSTRUCTIONS:

Preheat oven to 350 degrees.

  1. Boil lasagna noodles according to package instructions.

  2. Once noodles are drained, and cooled, cut each noodle into 4 pieces.

  3. Once marinara, ricotta, white cheese sauce, and noodles are ready, you can begin building your lasagna cups.

  4. Prepare muffin tin by spraying with some oil.

  5. Start building the lasagna cups by first placing a piece of noodle into the bottom of the tins.

  6. Next add a tablespoon or so of ricotta, then marinara, then white cheese sauce. Repeat until cups are full. You should be able to fit 3 layers, ending with white cheese sauce.

  7. I like to place my muffin tin on a large cookie sheet while baking just in case any sauce bubbles over.

  8. Bake at 350 degrees for 25 - 30 minutes.

  9. Allow to cool some then sprinkle with fresh chopped basil and serve.


This recipes will yield around 12 lasagna cups. We typically serve 2 per adult, and 1 per child. They will freeze and reheat really well, so we normally just make a full batch and pop the leftovers into the freezer in an air tight container for up to one month. 

You can optionally cut this recipe in half pretty easily and make 6 - 8 cups. When halving the recipe I still make a full batch of marinara, and ricotta, then freeze half for next time. You can easily cut the cheese sauce recipes in half. I do not suggest making a full batch as the cheese does not freeze well.