cheese

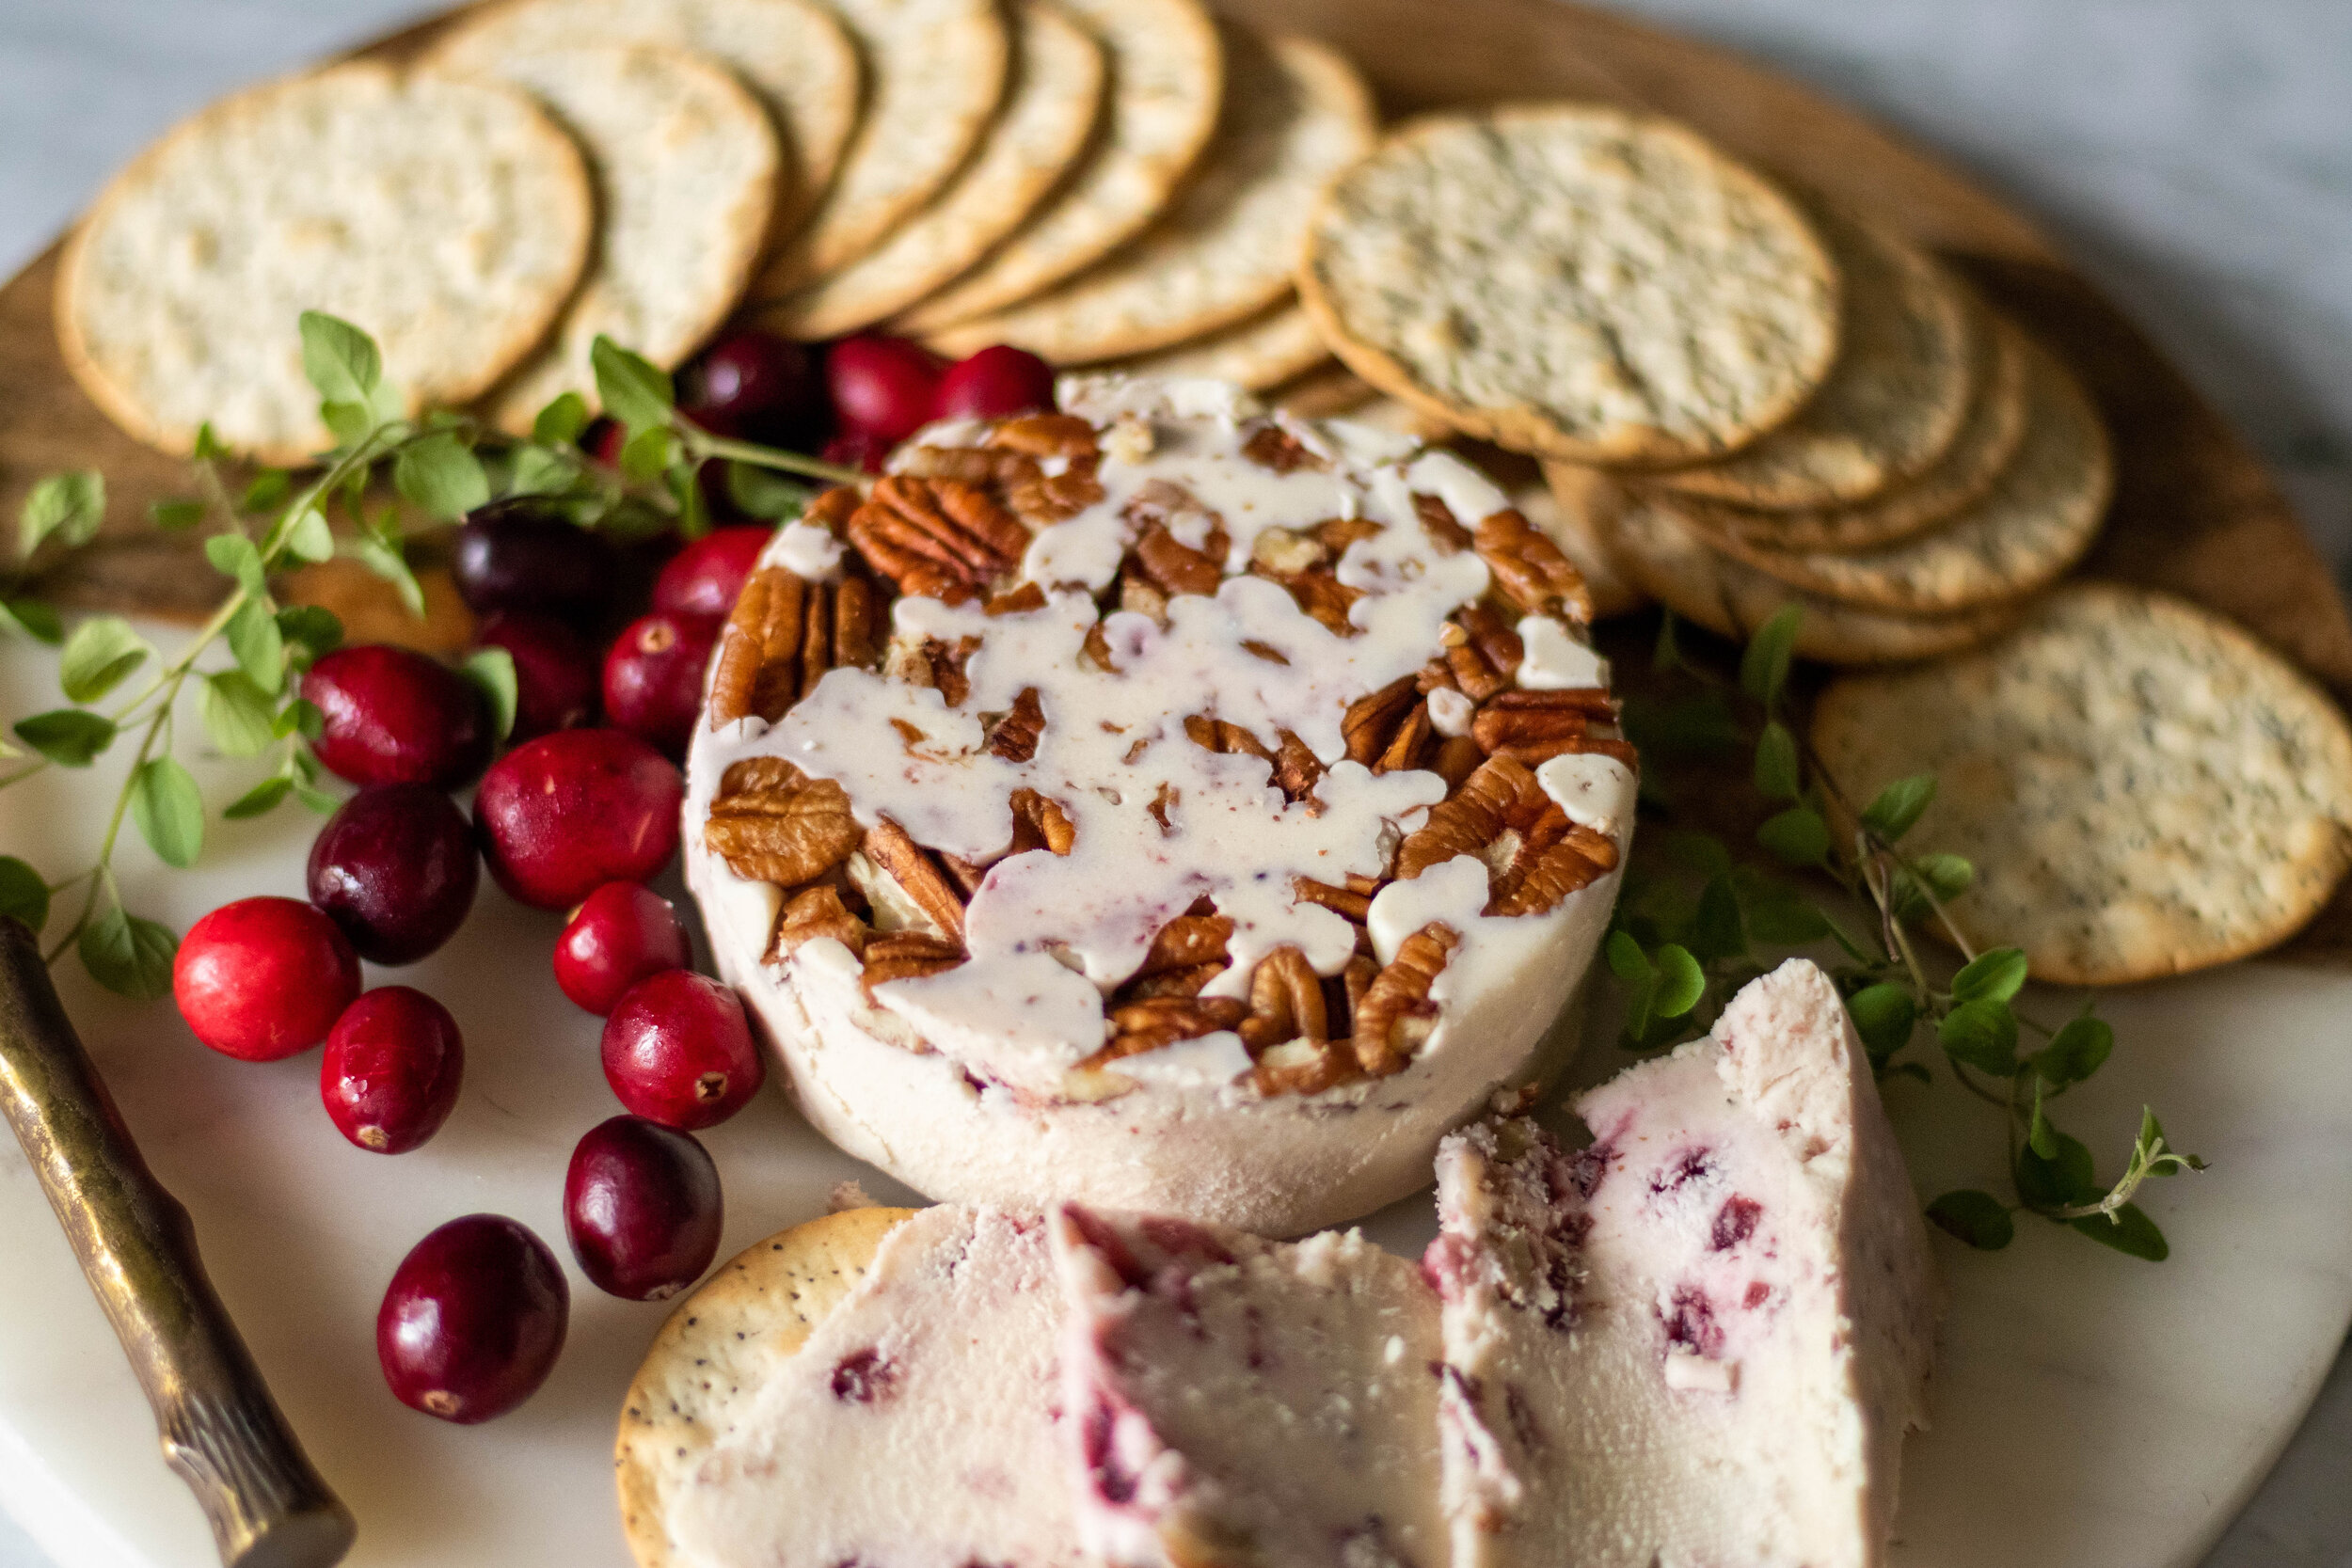
Vegan White Stilton with Cranberries and Pecans

IMG_9453.jpg

I make a lot of vegan cheese. It’s easier than most people think, fairly quick, and really affordable to make your own.

All you need are some basic ingredients that you can find at your local super market, plus some agar agar powder. Agar is a vegan gelatin make from seaweed and what is used to solidify the cheese. You can find agar on amazon, or your local Asian food store. It is also pretty inexpensive for the amount of cheese you will get from one bag!

Although vegan cheese options have come a long way over the years in super markets, I can still only find flavors like cheddar, mozzarella, and a few varieties of cheese slices.

IMG_9460.jpg

If you are like me and miss more artisan style cheeses, you best bet is to start making your own! Like this vegan cranberry and pecan stilton!! I used to impatiently wait for Trader Joe’s to put out their seasonal stilton’s. Traditional Stilton is a milder cheese and a little crumbly. It often is made with different fruits. I can think of no better fruit to toss into a cheese around the holidays than cranberries!!!

I love cranberries!! Cranberry sauce, cranberry desserts, I even love snacking on fresh raw cranberries!! I impatiently wait each year for fresh cranberries to come into season and to be available at my local super markets!


But for this cheese, you don’t need fresh cranberries unless you are wanting to make your own cranberry sauce, which who can blame you. I make it every single year!! But you can 100% use cranberry sauce from a jar or can for this recipe and don’t have to wait for the holiday season to make it! It is delicious year round!

Listen, don’t let a new or unfamiliar ingredient intimate you! This cheese is so quick and easy to make and pretty fool proof! You will be so amazed at how easy it was to make and how delicious home made vegan cheese is! And if you are on the fence about making a fruity cheese, don’t be. It is soooooo good!! Hooray for Stilton and thanks Trader Joe’s for your never ending inspiration!

IMG_9459.jpg

INGREDIENTS:

  • 1 can of full fat coconut milk or cream

  • 2 tablespoons agar agar powder

  • 2 teaspoons lemon juice or apple cider vinegar

  • 2 teaspoons miso paste

  • 2 tablespoons tapioca starch

  • 1 teaspoons of salt

  • 3 tablespoons sauerkraut (cabbage only, no juice)

  • 1/4 cup nutritional yeast

  • 1/4 melted cup refined coconut oil

  • 3 heaping tablespoons of whole cranberry sauce, homemade or store-bought

  • 1/4-1/3 cup chopped pecans (optional)

IMG_9455.jpg

INSTRUCTIONS:

  1. In a food processor or high speed blender, add all of the ingredients EXCEPT the milk, agar, and cranberry sauce .

  2. Pulse a few times to mix it all up.

  3. Now add the milk and agar to a medium sauce pan and bring to a boil. Reduce heat and simmer until mixture thickens to the consistency of a thin pudding.

  4. Add the milk mixture to the ingredients in the food processor, and mix for about a minute. The mixture will quickly begin to thicken as agar begins to solidify at room temperature.

  5. Using a rubber spatula, gently fold in the cranberry sauce into the cheese mixture, so it’s kind of a marble swirl.

  6. Sprinkle a tablespoons or so of nuts in the bottoms of 2-3 ramekins or small bowls. Transfer the cheese mixture to the ramekins or small bowls. You should be able to fill 2 or 3 small bowls.

  7. Place bowls uncovered in the fridge for a few hours, or until the cheese has fully hardened and is a sliceable consistency.

If you like this recipe, then try these:

vegan flank steak

vegan flank steak

Smoky Coconut Milk Chile Cheddar Cheese

Vegan Smokey Chile Cheddar Cheese sliced

I love experimenting with different vegan cheese flavors and bases. I really love using coconut milk because it’s easy and affordable.

I am often asked if these cheeses have a strong coconut flavor and the answer is, not really. I always used refined coconut oil which has little to no coconut flavor at all, and all of the spices and other ingredients in the cheese mask the flavor of the milk very well.

I love this particular chile cheddar for its deep smokey, peppery flavor without a lot of heat. You could always bump up the heat in this cheese by adding a few slashes of your favorite hot sauce. My kids and husband are not big fans of eye watering, nose running pepper heat, so this cheese has all the flavor without any of the pain.

We added reconstituted dried chiles and a can of small green chiles for the perfect smokey and tangy combo. This vegan cheese will slice, shred, and even remelt, making it perfect for quesadillas, enchiladas, tacos, sandwiches, or just snacking!

This is a quick set cheese and is so simple to make, there is no reason to keep overpaying for store bought vegan cheese! You can have delicious vegan cheese, start to finish in about 2 hours, and for a quarter of the grocery store price!


INGREDIENTS:

  • 1 can full fat coconut milk

  • 2 tablespoons agar powder

  • 2 teaspoons light miso paste

  • 2 tablespoons apple cider vinegar

  • 1 teaspoon salt

  • 1/4 cup plus 1 tablespoon nutritional yeast

  • 1 teaspoon turmeric

  • 2 teaspoons smoked paprika

  • 1 small can green chiles (4 oz can)

  • 2 dried chili peppers

  • 1/4 cup refined coconut oil

  • optional: a few shakes of your favorite hot sauce

Vegan Smokey Chile Cheddar Cheese on a cracker

INSTRUCTIONS:

  1. Place dried chiles in a medium sized bowl. Pour enough boiling water over the peppers to cover and place a plate on top of the bowl. Let the peppers soak for about 20 minutes

  2. In a food processor or high speed blender, add all of the ingredients EXCEPT the milk, and agar and peppers.

  3. Pulse a few times to mix it all up.

  4. After the peppers are done soaking and have softened, remove from the water. Cut the pepper open and remove the stem and the seeds. I just run a paper towel down the inside of the peppers to wipe out the seeds.

  5. Drop the whole peppers into the food processor. Open the green chiles and dump them onto several folded up paper towels or a clean kitchen towel just to absorb some of the liquid. Add them to the food processor as well. Pulse until the peppers are broken down.

  6. Now add the milk, and agar to a medium sauce pan and bring to a boil. Reduce heat and simmer until mixture thickens to the constancy of a thin pudding. This only takes a few minutes.

  7. Add the milk mixture to the ingredients in the food processor, and mix for about a minute. The mixture will quickly begin to thicken as agar begins to solidify at room temperature.

  8. Transfer to the mixture to several small bowls or cheese molds. I can fill three small bowls with this recipe.

  9. Allow the cheese to harden in the refrigerator uncovered for a few hours.

  10. Store in an airtight container in the fridge for about a week or so.

If you like this recipe, try these:

Coconut Milk Colby Jack Cheese

Coconut Milk Pepper Jack

Smokey Cashew Cheddar

A cheese board with vegan coconut chile cheddar cheese surrounded by chiles and crackers

smokey coconut milk chile cheddar vegan cheese

Vegan Buffalo "Chicken" Mac and Cheese

IMG_1703-2.jpg

Creamy, cheesy, gooey, spicy, vegan buffalo “Chicken” mac and cheese with jackfruit! You heard me right. It’s a thing, and it is AMAZING!

Jackfruit is a great substitute for chicken in many vegan recipes and was the first thing that came to mind when I deiced to veganize my favorite dip, to create a vegan buffalo chicken cheese dip! It’s inexpensive, healthy, a great source of fiber, and it mimics the texture of shredded meat very well. It has little flavor on its own when you buy it canned in brine, and takes on the flavor of whatever you cook it in!

I love buffalo flavored anything, and I super love buffalo “chicken” dip! Like I could eat vegan buffalo every single day probably and not get tired of it. I also love Franks brand buffalo sauce and let just all give a big hallelujah that it is actually vegan!!

So taking my favorite vegan buffalo chicken dip recipe with a few adjustments, and mixing it into macaroni changed my favorite appetizer into dinner (insert me doing a happy dance!) I does not get much better than this, y’all!

It’s the best of both worlds. My favorite dip and favorite side dish, all rolled into one seriously comforting dish.

This mac and cheese is hearty enough to be a meal on its own with side salad, or a super delicious side dish!! It freezes and reheats well making it perfect for meal prep, too.

So if you love mac and cheese and you love buffalo sauce on everything too, we might be new best friends! Buffalo sauce lovers of the world unite!


INGREDIENTS:

  • 16 oz package of macaroni noodles

  • 1 can jackfruit in brine

  • 1 8oz of vegan cream cheese, homemade or store-bought

  • 1 cup of buffalo sauce (I use Franks)

  • 1/2 cup vegan mayo

  • Pinch of salt

  • 1/4 teaspoon pepper

  • 1 plus 1/2 cups vegan cheddar shreds, homemade or store-bought

  • 2 tablespoons vegan butter (for the drizzle)


INSTRUCTIONS:

Preheat oven to 350 degrees

  1. Cook noodles according package instructions. Drain, rinse and set aside.

  2. Drain jack fruit, rinse, and chop the pieces, or shred them using you fingers into a medium sized bowl. The fruit pulls apart easily, and I find using my fingers easier than chopping.

  3. Add 3/4 cups of the buffalo sauce, 1 cup of shredded cheese, plus the remaining ingredients minus the butter, to the jackfruit and mix well.

  4. Add the noodles to the jackfruit mixture and mix well.

  5. Transfer the mac and cheese to a 9x12 baking or caserole dish, and sprinkle the top with remaining 1/2 cup of shredded cheese.

  6. Melt 2 tablespoons of vegan butter and mix with the remaining 1/4 cup of buffalos sauce. Drizzle the mixture over the mac and cheese.

  7. Bake for 25-30 minutes, until all of the cheese on top is nice and melted and the mac is heated through.


If you liked this recipe, try these!

Buffalo “Chicken” Bites

Buffalo “Chicken” dip

IMG_1707.jpg

Cheesy Vegan Scalloped Potatoes

IMG_0603.jpg

I love potatoes and I love cheese. So what’s not to love about these super easy cheesy vegan scalloped potatoes.

All you need is a pretty simple vegan cheese sauce, some thinly sliced potatoes, an 8x8 pan, and you are on your way to a veganized classic!

I used a mandolin to slice the potatoes to get them extra thin. You do need the potatoes as thin as you can get them. If you do not have a mandolin you can use the long cutting side of a box grater or a really starp knife.

Basically you cut a pile of thin potatoes, whip up an easy cheese sauce, layer and bake. It’s that easy.

if you are allergic to cashews, you can replace them with sunflower seeds or a mix of sunflower and pumpkin seeds. Just follow the same measurements and instructions for the cashews!

This side dish is warm and comforting and pretty easy to make. Its gluten free, too!

I am all in when it comes to my favorite carb and anything vegan cheese related!


Ingredients :

  • 4 - 5 medium russet potatoes

  • 1 cup cashews soaked in hot water for a few hours

  • 2 cups water

  • 1/4 cup nutritional yeast

  • 1/2 teaspoon turmeric

  • 1/2 teaspoon smoked paprika

  • 1 teaspoon light miso paste

  • 1 tablespoon apple cider vinegar

  • 4 tablespoons tapioca or corn starch

  • 1 teaspoon salt

  • 1/2 cup plant milk (I used almond milk)

  • diced green onions for garnish (optional)


Instructions:

preheat oven to 350 degrees

  1. Wash potatoes, but do not peel. Thinly slice the potatoes using a kitchen mandolin. If you do not have a mandolin you can thinly slice the potatoes using the single blade side of your box grater, or cut them as thinly as possible using a sharp knife. If they are on the thicker side it will just take them longer to bake.

  2. Drain the cashews, adding them and the remaining ingredients,minus the plant milk, to a high speed blender or food processor. Blend on high until the mixture is completely smooth.

  3. Transfer the cheese mixture to a medium sized sauce pan and heat over medium heat. Whisk the mixture continuously until it begins to thicken to the consistency of thick pudding. Once it has thickened, whisk in 1/2 cup of plant milk.

  4. Lightly spray an 8x8 casserole pan with oil. Start by placing a thin layer of potatoes on the bottom, cover in some cheese sauce, then another layer of potatoes, cheese sauce, and continue the pattern until all of the potatoes and cheese have been used. The top layer should be cheese sauce.

  5. Bake for about 45minutes to one hour, or until the potatoes are cooked through. The time may vary depending on how thick you cut the potatoes. If the top seems to be browning before the potatoes are finished, you can cover the pan with some foil for the remainder of the bake.

  6. Once the scalloped potatoes are finished cooking, sprinkle with diced green onions to serve.

IMG_0589.jpg

Sliceable Smoky Garlic Cashew Cheese

IMG_0004.jpg

Quick dairy free cheeses are easier to make than most people think. This smokey garlic cheese firms up in just a few hours and can be sliced, or grated. This cheese is super creamy and a great replacement for dairy for vegans, or those allergic to dairy.

Agar powder is a plant based gelatin and the ingredient used to make this cheese solid. It can easily be found online, or in your local asian market or order online at retailers like Amazon.

We also use coconut milk in this cheese to help firm it up. Be sure to always use refined or filtered coconut oil in this recipe. It does not have any flavor like regular coconut oil so won’t leave the cheese tasting like coconut.

I am often asked if the oil can be omitted, or replaced. In this recipe I am afraid not. It is part of what gives the cheese its firm sliceable texture once cooled. If you are oil free, there are oil free vegan cheese recipes out there. They are however going to include different ingredients to help solidify them. I personally do not have issue with consuming a small amount of coconut oil in my cheeses as I do not prescribe to an oil free diet. It is only 1/4 cup to make 2 to 3 wheels of cheese. Divide that over the number of slices you will get and it is really not that much oil. But if you are oil free, somewhere out in the land of the internet, there is a recipe for you. So go forth, google, and find a recipe that is just right for you. What a wonderful time to be alive, am I right!

So if you have never ventured into vegan or plant based cheese making, go ahead, you will be surprised how simple and delicious homemade cheeses can be! You will also be happy at all the money you save making your own. You really have nothing to lose here!


INGREDIENTS:

  • 1 cup cashews, soaked in hot water for a few hours and drained.

  • 1/4 cup nutritional yeast

  • 1 teaspoon salt

  • 1 teaspoon onion powder

  • 2 teaspoons minced garlic

  • 1 teaspoon liquid smoke

  • 1 and 2/3 cups almond or coconut milk

  • 2 tablespoons of agar powder

  • 1/4 cup triple filtered coconut oil

  • 1/4 cup sauerkraut, without the juice ( this surprising ingredient helps give the cheese that tangy bite that most cheeses have)

  • 3 tablespoons tapioca starch

  • 2 teaspoons light miso paste

  • 1 tablespoon lemon juice


NSTRUCTIONS:

  1. In a food processor, add all ingredients except milk, and agar. Blend a few minutes until the mixture becomes smooth.

  2. In a medium sized sauce pan, combine milk, and agar and bring to a boil. Reduce heat and simmer for 3-5 minutes. You want the mixture to thicken to a thin pudding like consistency.

  3. Pour the milk and agar mixture into the food processor with the other ingredients.

  4. Mix for a few minutes until all of the ingredients are well incorporated, and smooth.

  5. Pour the cheese mixture into 2 - 3 ramekins or small bowls. Let cool, uncovered in the refrigerator for serval hours to firm up.

  6. Store in an airtight container for up to one week in the refrigerator.