Vegan Pumpkin Spice Monkey Bread

Vegan pumpkin spice monkey bread

It’s fall y’all, well maybe not here in Florida. We don’t actually get fall. We get summer, a little bit cooler summer, a month of “ summer winter”, and back to summer.

That being said, I tend to force the feeling in our house, and pretend there are actually leaves falling in crispy fall air by baking up all things autumn. That includes all things pumpkin.

I have attempted monkey bread several times with epic failure and then I discover my error was the dough. I had made all previous attempts with a biscuit type dough instead of a simple yeast dough. So I took our artisan bread dough recipe and jazzed it up a little, and it was like instant monkey magic.

I know there seems to be a lot of ingredients in this bread but most are staples in my house anyways. You will use almost one full can of pumpkin puree. This recipe seems complicated at first, but it’s not.

The hardest, or most time consuming part is rolling all the little dough balls, but if you have kids, this is your chance to have them help you in the kitchen. My kids love helping with this!

This bread is perfect to take to a pot luck or party because you literally just pull pieces off, no cutting required! Its sweet, nutty, gooey, and most importantly, it taste like fall! Even if you live in a place that doesn’t really offer you all of the seasons! So if you love monkey bread and fall flavors, this recipe is a must try! Pumpkin spice for life!


INGREDIENTS:

  • 6 cups all purpose flour

  • 1/2 cup plus 2 tablespoons pumpkin puree

  • 1 and 1/3 cup water

  • 1/3 cup sugar

  • 4 teaspoons active dry yeast

  • 1 teaspoon salt

  • 2 teaspoon cinnamon

  • 2 teaspoons pumpkin pie spice ( or you can add 1/2 teaspoon each nutmeg, allspice, ginger, and clove)

  • 2 teaspoons vanilla extract

Coating For Dough

  • 3 tablespoons vegan butter

  • 2 tablespoons pumpkin puree

  • 2 tablespoons maple syrup or agave

  • 3/4 cups sugar

  • 1-2 teaspoons cinnamon

  • 1/2 cup chopped pecans or walnuts

Glaze

  • 2 tablespoons pumpkin puree

  • 2 cups powdered sugar

  • 1 teaspoons cinnamon

  • teaspoon milk if you need to thin the mixture out some

Vegan pumpkin spice monkey bread

INSTRUCTIONS:

  1. In the bowl of stand mixer, add all of the ingredients for the dough. If you do not have a stand mixer, add all of the ingredients to a large bowl.

  2. Use a spoon to mix the ingredients together, well. If using a stand mixer, attach the dough hook and let the mixer run on medium speed for a few minutes to knead the dough. If mixing by hand, make sure are the ingredients are mixed well, then knead the dough by hand for several minutes on a clean floured surface. If you dough seems too dry and is not coming together you can add a few extra tablespoons of water, if it seems too sticky, add a few tablespoons of four.

  3. Place the dough in a lightly greased bowl and cover with plastic wrap or a kitchen towel. Place the dough in a warm place and allow it to double in size. This take about an hour.

  4. Coat an angle food cake, fluted pan ( a round cake pan with a hole in the middle. Not a bunt pan. you want smooth sides) with some vegan butter.

  5. Melt 3 tablespoons of butter, then add 2 tablespoons pumpkin puree, and 2 tablespoon maple syrup . Mix well. In a shallow dish combine the 3/4 cups of sugar and 1- 2 teaspoons of cinnamon. Once dough has risen pinch of pieces and roll golf ball size balls with the dough. Coat each ball in the butter, pumpkin mixture then roll them in the sugar and cinnamon. Place balls into the pan in a single layer. Sprinkle 1/4 cup of the chopped nuts over the first layer of dough, then repeat another layer of dough balls and cover with remaining nuts. You should have two layers of dough balls stacked into the pan.

  6. Cover the cake pan with a kitchen towel and allow the dough to rise once more. This should only take about half and hour.

  7. Preheat oven to 350 degrees. Place the pan on the center rack of the oven and bake for 30-35 minutes or until a cake tester or skewer inserted into the center of the bread comes out clean.

  8. Let the monkey bread cool for about 10 minutes on a wire cooling rack, then run a knife carefully around the edges. Flip the pan carefully onto a plate. Mix up the ingredients for the glaze and drizzle over the monkey bread. Serve warm or at room temperature.

  9. Store leftovers in an airtight container at room temperature or in the fridge.

If you like this recipe, try these:

Pumpkin Butter

Pumpkin Spice Vegan Pop-Tarts

Pumpkin Spice Cashew Creamer

Vegan pumpkin spice monkey bread

Vegan pumpkin spice monkey bread

Tofu Buffalo Wings

Tofu Buffalo Wings

If I can find a way to use buffalo sauce, trust me, I will. Tofu buffalo “wings” may be one of my favorite quick and easy meals. They make a great snack, perfect sandwich, or a delicious salad topping. My pantry is never without a bottle of Franks buffalo sauce because it is vegan, and I always have plenty of tofu on hand making this recipe a regular.

I learned early on making tofu, the best and easiest way to get super crispy tofu is to use starch mixed with flour. No matter if you pan fry it in oil, or toss into your air fryer you will get super crispy, perfect tofu every time!!

You can serve these tofu wings with vegan ranch or blue cheese dressing if you like, and big side of celery. You can dice it into cubes and use it to top your favorite salad. You can slice it into a square and use it for a delicious buffalo tofu sandwich!

So if you love buffalo everything too, this recipe could not be easier, crispier, or more delicious! Buffalo tofu might become one of your quick and easy go to recipes as well!


INGREDIENTS:

  • 1 block extra firm tofu (I use the high protein tofu that is vacuum sealed in very little liquid. It is extra super firm, and has the best chewy texture of any I have tried)

  • 1/4 cup tapioca starch

  • 1/4 cup white flour

  • 1 teaspoon onion salt

  • 1 teaspoon garlic powder

  • oil for frying

  • 1/3 cup buffalo sauce. We use Franks.

  • 1 teaspoon vegan butter


INSTRUCTIONS

  1. Drain tofu and wrap in a few paper towels or clean kitchen towel. Place a few cookbooks or heavy pan on top and let tofu press for about 10 minutes. This helps remove some of the moisture from the tofu.

  2. Cut tofu into strips.

  3. Whisk together the flour, starch, garlic and onion salt.

  4. Dredge the tofu strips into the mixture until they are fully coated.

  5. Heat a skillet over medium heat with a few inches of oil. Allow the oil to get nice and hot.

  6. Line a baking sheet with a few paper towels and place a wire cooling rack on top. Place next to the stove.

  7. Fry the tofu on each side for several minutes or until they seem nice and crispy. Remove finished tofu and place on the wire cooling rack.

  8. In a small bowl, microwave the buffalo sauce with the butter for about a minute. Toss the tofu in the heated sauce and serve immediately.

  9. Serve with vegan ranch or blue cheese dressing. (side note: these “wings” reheat really well in an air fryer or in the oven)

If you like this recipe, try these:

Vegan Buffalo Mac n Cheese

Vegan Buffalo “Chicken” Dip

Vegan Buffalo “Chicken” Bites

Tofu Buffalo Wings

Tofu Buffalo Wings

Crispy tofu buffalo wings

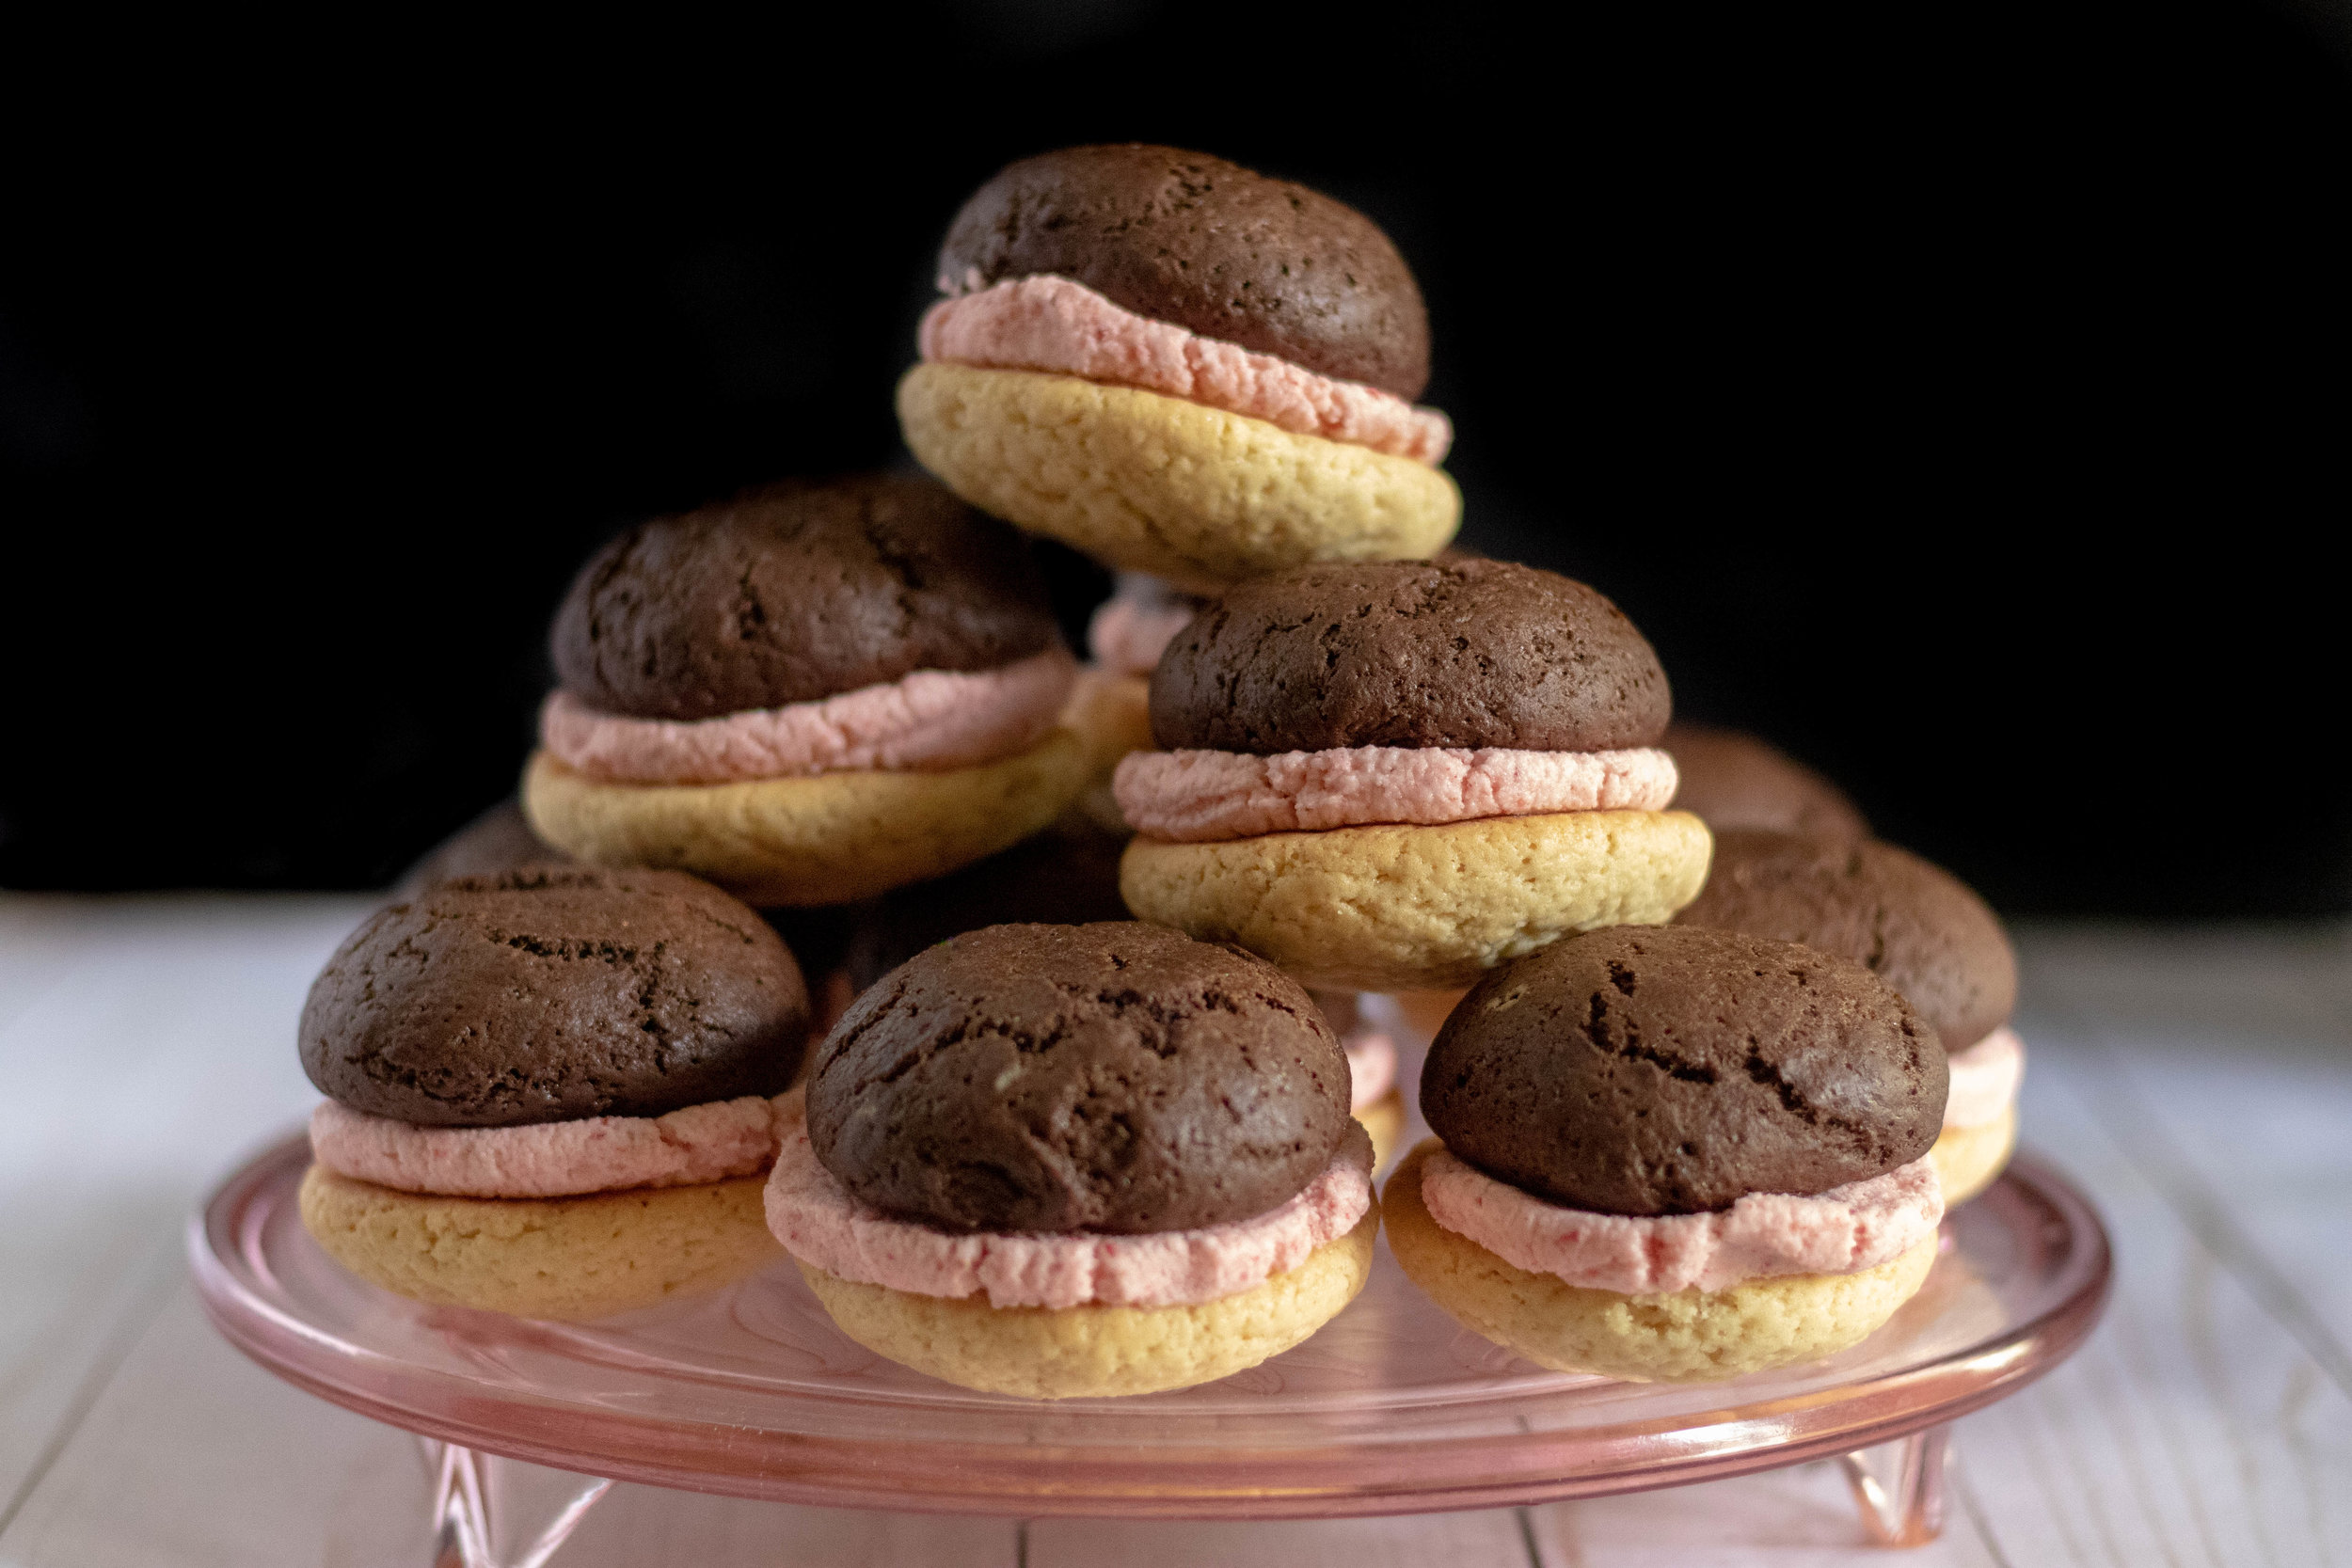
Vegan Neapolitan Whoopie Pies

IMG_4817.jpg

Neapolitan has always been my favorite ice cream. It is a basic but delicious flavor combo.

I have also always loved a whoopie pie because it’s like the perfect marriage between and cookie and a cake, with just the right amount of forsting.

So when my daughter asked if we could make vegan neapolitan whoopie pies, the only answer was absolutely YES! We (pretty much just her, if I am being totally honest here) attempted a few batches to get the all of the flavors right and finally came up with a winner.

I am a fan of using freeze dried strawberries in baking. They can be ground up to powder so don’t add too much moisture to your bake or frosting like fresh strawberries or jam can. They also pack a pretty big punch of strawberry flavor, so a little goes a long way.

I also love that a whoopie pie travels better than a cupcake, making these the perfect treat to take to. a bbq, or pot luck.

So a big WOOPIE for one of my favorite vegan treats, and an awesome daughter who thought to bake them up. My stomach and heart are super grateful! Long live one of the best flavor combos to ever exist!


INGREDIENTS:

  • 2 3/4 cups all purpose flour

  • 1 teaspoon baking soda

  • 1 teaspoon baking powder

  • 1/2 teaspoon salt

  • 1 1/3 cup sugar

  • 1/2 cup vegan butter, room temperature

  • 2 teaspoons vanilla extract

  • 1 tablespoon tapioca or corn starch

  • 3 tablespoons water

  • 2/3 cups plant based milk, plus 3 tablespoons

  • 1/3 cup cocoa powder

STRAWEBERRY BUTTER CREAM :

  • 1/4 cup vegan butter

  • 1/4 cup shortening

  • 3 cups powdered sugar

  • 3 tablespoons freeze dried strawberry powder (we buy freeze dried strawberries and pop them into to a blender to turn them to powder)


INSTRUCTIONS:

  1. In a medium sized bowl whisk together flour, baking powder, baking soda, and salt.

  2. In a small bowl whisk the starch and 3 tablespoons of water.

  3. In a large bowl, using an electric hand mixer, or in the bowl of a stand mixer on medium speed, beat the butter, sugar and vanilla until light and fluffy. Add the starch and water mixture and mix until well combined.

  4. Reduce the speed on your mixer and slowly begin adding in the flour and 2/3 cups of milk, alternating adding a little of each at a time. Mix just until the ingredients are well combined.

  5. Scoop out half of the batter into a separate bowl. Add the cocoa powder and 3 tablespoons of milk to one half of the batter and mix until well combined.

  6. Line 2 baking sheets with parchment paper. Scoop 2 tablespoons sized scoops of dough into the parchment paper, leaving several inches between each mound. Wet your hands and smooth out the dough, forming them into a small disc shape, flattening them out a bit. You should have 12 vanilla and 12 chocolate cookies. Pop both cookie sheets into the fridge for about half an hour.

  7. In a large bowl beat the butter, and shorting for the frosting together. Beat in the strawberry powder, then begin adding in the powered sugar a little at a time to avoid a big mess. Beat until the frosting is smooth. If it seems too dry, you can a few drops of plant based milk. Set aside.

  8. Preheat oven to 400 degrees.

  9. Bake the cookies for 10-12 minutes. Remove from oven and allow to cool a bit before transferring them to a wire cooling rack. Allow the cookies cool completely.

  10. Pair up vanilla and chocolate cookies into a dozen pair. Divide the frosting evenly between the cookies, frosting and sandwiching them together to serve.

  11. Store in an airtight container at room temp or in the fridge.

If you like this recipe, try these:

Vegan Strawberry Lemonade Cupcakes

Vegan Chocolate and Peanut Butter Dream Cake

No Bake Vegan Strawberry Pie

IMG_4828.jpg

vegan neapolitan whoopie pies. Vegan vanilla and chocolate soft cookies with vegan strawebery butter cream

Vegan Sausage, Egg, and Cheese Breakfast Pizza

Vegan breakfast pizza served with a cup of coffee

Recently, my kids asked if I could veganize a breakfast their Grammy used to make them before we went vegan.

Honestly, I had never eaten my mother in law’s breakfast pizza, so I had no idea what was on it. The kids claim it was sausage, egg, and cheese. I decided I wanted to add sausage gravy, veggie filled scramble, and cheese.

We are going to give this recipe all of its points for taste, certainly not looks. It’s what’s inside that matters right…or how it taste more than how it looks? I mean I am all about drooling over beautiful food pics, don’t get me wrong. But with this one, I just want to cram this whole pizza in my mouth as fast as I can, so there is really no time to gaze upon it anyway.

Feel free to add any veggies you like, add no veggies at all, double the fun with some vegan bacon crumbled on top, or use whatever vegan cheese you have on hand, or prefer.

Its that easy! And thanks again Grammy for the inspiration! The kids are super fans of your breakfast pizza!


INGREDIENTS:

  • 2 cans crescent roll dough (make sure the ingredients are vegan)

  • 1 package vegan sausage (we used Lightlife brand)

  • 1/3 bottle Just Egg or 1/2 batch tofu scramble

  • 1/3 cups flour

  • 3 cups unsweetened plant based milk (we used almond)

  • 1 teaspoon salt

  • 1 teaspoon black pepper

  • Optional add ins: diced onion, peppers, mushrooms, tomatoes

  • 1-2 cups vegan cheddar shreds (we prefer Follow Your Heart)

vegan-sausage-breakfast-pizza.jpg

INSTRUCTIONS:

Preheat oven to 350 degrees

  1. Carefully roll out both tubes of crescent dough flat onto a parchment lined cookie sheet. Use your hands to press the seams together so that you have one giant rectangle of dough. Bake for about 10 minutes, or until the dough begins to brown and seems mostly cooked through. Remove from over and set aside.

  2. In a large skillet over medium heat, crumble and cook the sausage until cooked through. Lower the heat to med/low. Sprinkle the flour over the sausage and let it cook for about a minute. Whisk in the milk, salt, and pepper. Cook until the gravy has thickened, making sure to stir several times as it thickens. Remove from the heat.

  3. If you want veggies on your pizza, finely dice them, and add them to a large skillet over medium heat with a few teaspoons of vegan butter. Cook the veggies until they have softened. If using Just Egg, add 2/3 of a bottle over the veggies and allow the eggs to cook until done. If using tofu scramble, prepare the tofu according to the recipe, and add it to the veggies. Cook according recipe instructions.

  4. To prepare the pizza, evenly spread the sausage gravy over the baked crescent dough. Add the “egg” mixture over the gravy, and top with cheese. Place the pizza back into the hot oven and cook until the cheese has melted. ( I am not sure what brand of cheese I used with this recipe but it was not Follow Your Heart. It did not melt as well as some other brands we have tired, but still tasted good. My preference for store bought cheese that melts well is still Follow Your Heart)

  5. Slice to serve

If you like this recipe, try these:

Vegan Deluxe Biscuits and Gravy

Easy Tofu Quiche Cups

Tempeh Summer Grit Bowl

Vegan breakfast pizza in a baking pan

vegan sausage breakfast pizza

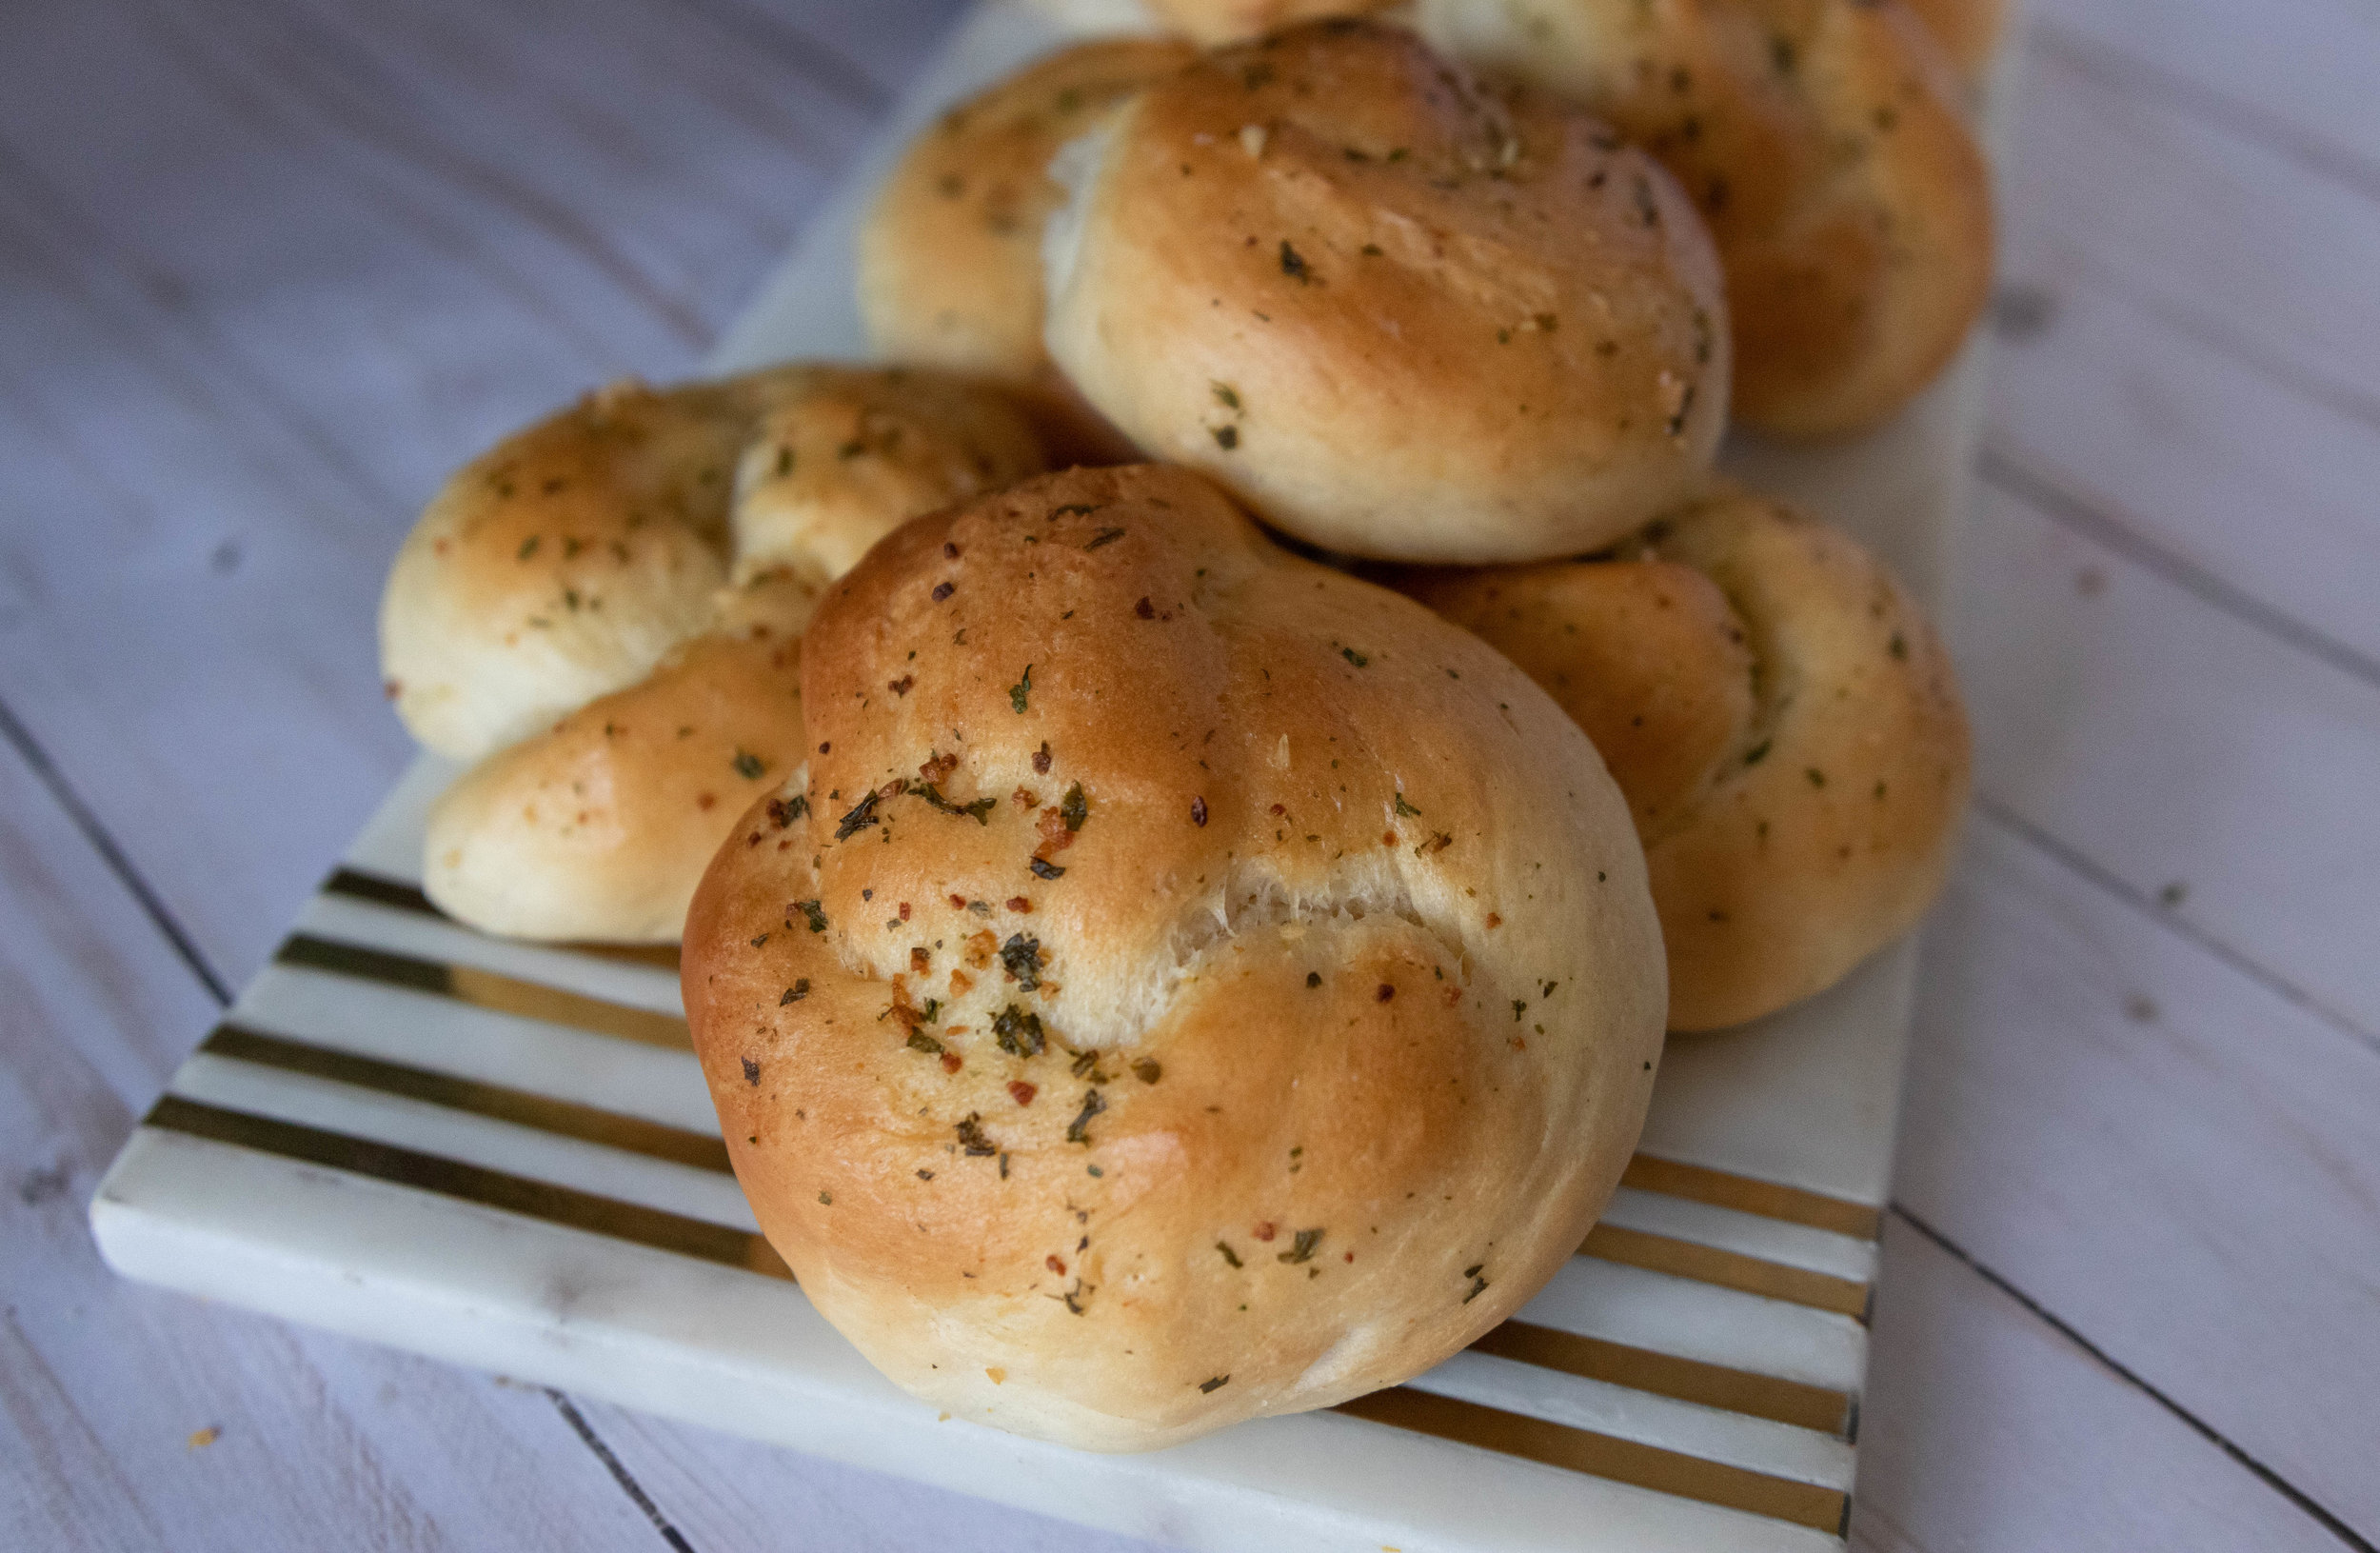
Vegan Garlic Challah Rolls

Garlic Challah Rolls

You probably already know that I bake lot of vegan challah. I talk about it constantly and have quite a few recipes for challah on the site!

It’s the perfect fluffy bread in my opinion. But, the dough is also pretty perfect for things like these vegan garlic challah rolls. Instead of baking up 2 loaves of bread with the dough, you get a giant batch of rolls!! You can make them bigger and use them for sandwiches, or make them smaller, like little garlic knots to serves with pasta or a nice dinner salad.

These are perfect for entertaining as well. It’s easier to grab a roll at a party then cut a slice of challah! These challah rolls will also freeze well, so you can save half the batch for later!! Freezable recipes for easy meal prep are always my favorite kind!

Challah Y’all for all things challah!


INGREDIENTS:

  • 4 cups all purpose flour

  • 1 1/4 cup aquafaba (measure the whipped product)

  • 1/3 cup sugar

  • 1/2 cup oil (I use grape seed but you can use any neutral oil you like)

  • 4 1/2 teaspoons dry active yeast

  • 1 tablespoon sugar

  • 1 tablespoon salt

  • 1 cup hot water. I just use hot water from the tap, you don't want it too hot or the yeast will die and it will not activate.

Garlic Butter:

  • 1/4 cup melted vegan butter

  • 3 teaspoons minced garlic

  • 1 teaspoon dried parsley


COOKING INSTRUCTIONS:

  1. In a large glass bowl mix hot water, yeast, and 1 tablespoon sugar

  2. Let the that sit for 10 minutes to activate, or until the mixture is super foamy at the top.

  3. In a stand mixer add the yeast mixture, aquafaba, sugar, oil, salt, and 2 cups of flour. (you can mix by hand, just mix the above, and add remaining flour slowly. You will need to knead it for the same amount of time. It's a good workout though!

  4. Mix until all of the ingredients are incorporated then add in the remaining flour. I typically will hand mix the first 2 cups of flour in, or use my paddle attachment and replace with the dough hook when I add the remaining flour.

  5. The dough should come together and not be sticky, if it seems sticky you can add 1/4 more flour a little at at time until the dough comes together. Your goal is smooth, and elastic-y dough, not sticky.

  6. Let the dough kneed in the mixer on low/medium speed for 10 minutes. The dough should be smooth at this point and have a sort of bounce back if you poke it.

  7. Form dough into a nice ball, and place in a lightly greased glass bowl. Cover the bowl with a damp kitchen towel, and place inside your oven turned off, OR on the bread proof setting if your oven has one.

  8. Bring a small pot of water to a boil and place in the bottom of the oven. The heat and steam from the water will help the dough to rise.

  9. Let dough rise about an hour, or until the dough has doubled in size.

  10. Remove dough from oven, and on a clean lightly floured work surface, divide the dough in half. Evenly divided each half into 8 pieces for dinner rolls, or you can divide each half into 16 pieces if you would like to make smaller garlic knots. Roll each piece of challah into a about a 6 inch rope. Criss cross the rope tucking one end into the the center to knot it, then tucking the ends under the roll.

  11. Place the rolls on 2 cookie sheets, and cover with a damp towel. You don't want the rolls touching or they will stick together as they bake. Place challah back in the oven and allow the rolls to rise again for about an hour.

  12. Once the rolls have risen, remove from oven, and preheat oven to 350 degrees.

  13. Mix the melted butter, minced garlic, and parsley in a bowl. Generously brush the mixture over each of the rolls after they have risen.

  14. The rolls will need to bake around 15- 20 minutes, depending on the oven. Keep an eye on them and once they begin to brown all over, give them a tap with your finger. If they sound hallow, they are done! if you have any leftover butter and garlic mix you can give them another brush mid bake.

  15. Let the rolls cool on a wire cooling rack before serving.

If you like this recipe, try these:

Vegan Pretzel Buns

Vegan No Rise Hamburger Buns

Easy Vegan Sandwich Bread

Garlic Challah Rolls

vegan garlic butter challah rolls!

Beyond Meat Vegan Meatloaf

Beyond Meat Vegan Meatloaf

I have been a fan of Beyond Burgers since the second they went on the market. The burgers were the most convincingly “meaty” burgers we had found up util that point, and I was beyond (pardon the pun) excited!

What I was most excited about was the possibilities these burgers opened up. Once they are thawed they can be used in place of “ground meat” in just about any recipe.

Meatloaf was always a weekly meal at our house in our pre vegan days. I personally loved the leftovers more, because that meant a meatloaf sandwich, and a meatloaf sandwich is seriously one of the greatest food on earth.

So learning I could just thaw the burgers and make my old meatloaf exactly the same as I always had, minus the actual real meat, had me beside myself!! I hear a lot of complaints about the price of these burgers, and I hear ya. That said, I also reason that as an occasional meal for my family of 6, the price really is not terrible. I 100% promise you that it is still a TON cheaper than taking my large family out to eat. Also, as an added bonus, Costco now carries the burgers in packs of 8 for about $14. So If I use 6 burgers to make a meatloaf, it’s costing me around $10.50 per loaf, or $1.75 a person. I would reason that this is not astronomical. It is less than I would spend ordering pizza delivery.

I have seen other brands of meatless ground “meats” popping up as well. Even Beyond Brand is selling their product packaged as a ground chuck alternative, not just in patties. If there is another brand you have tired and like, by all means, use it! You can NOT however use frozen meatless crumbles in this recipe. It won’t work. You need it to be an uncooked meatless product that is moldable, for forming into a loaf.

This meatloaf will also convince most carnivores. I fed it to my dad a few years ago at Thanksgiving and he thought he was eating meat. A man that scoffs at us being vegan, and eats some form of meat at every meal. He ate it, he liked it, and would eat it again. Win, win, win.

These new meatless products are designed to help those who want to give up meat but never stopped liking meat. I am in that camp. I gave it up for health, animal welfare, and the environment, not because meatloaf tasted bad.

So if you have been on the fence about trying these meatless brands, give them a try, you will be very surprised! You can actually give up eating animal products, and not give up all the foods you always loved. There are meatloaf sandwiches in your future….and they don’t have to taste like beans.


INGREDIENTS:

  • 1 and 1/2 pounds vegan ground “meat.” I use 6 thawed Beyond Burgers.

  • 1 cup panko breadcrumbs

  • 2 tablespoons tapioca starch, plus 3 tablespoons water

  • 1/2 small yellow onion, finely diced

  • 2 teaspoons minced garlic

  • 2 tablespoons tomato paste

  • 2 teaspoons vegan Worcestershire sauce

  • 1/2 teaspoon salt

  • 1 teaspoons dried thyme

  • 1 teaspoon all purpose greek seasoning

  • 1/2 teaspoon black pepper

  • 1/4 cup ketchup

  • dried parsley for garnish


INSTRUCTIONS:

Preheat oven to 350 degrees

  1. Add the ground meatless “meat” to a large bowl. If you are using thawed burgers then break them up with a spoon.

  2. Mix in the diced onion, garlic, tomato paste, and seasonings.

  3. Next, mix in bread crumbs, starch mixed with water, and Worcestershire sauce.

  4. Line a loaf pan with some parchment paper making sure it hangs over the sides a bit, and give it a spray with some nonstick cooking spray. Transfer the mixture to the loaf pan and press it down into the pan.

  5. Add the ketchup to the top and spread it evenly.

  6. Bake on the middle oven rack for about an hour.

  7. Let the loaf cool for a about 5 minutes, then carefully lift it out of the pan by the parchment paper that is hanging over the edge. Place the meatloaf on a cutting board, sprinkle with dried parsley, and cut to serve.

Serves 4-6

If you like this recipe, try these:

Unstuffed Vegan Cabbage Rolls

Savory Cranberry Vegan Meatballs with Mashed Potatoes

Vegan Meatball Sub Bake

Beyond Meat Vegan Meatloaf

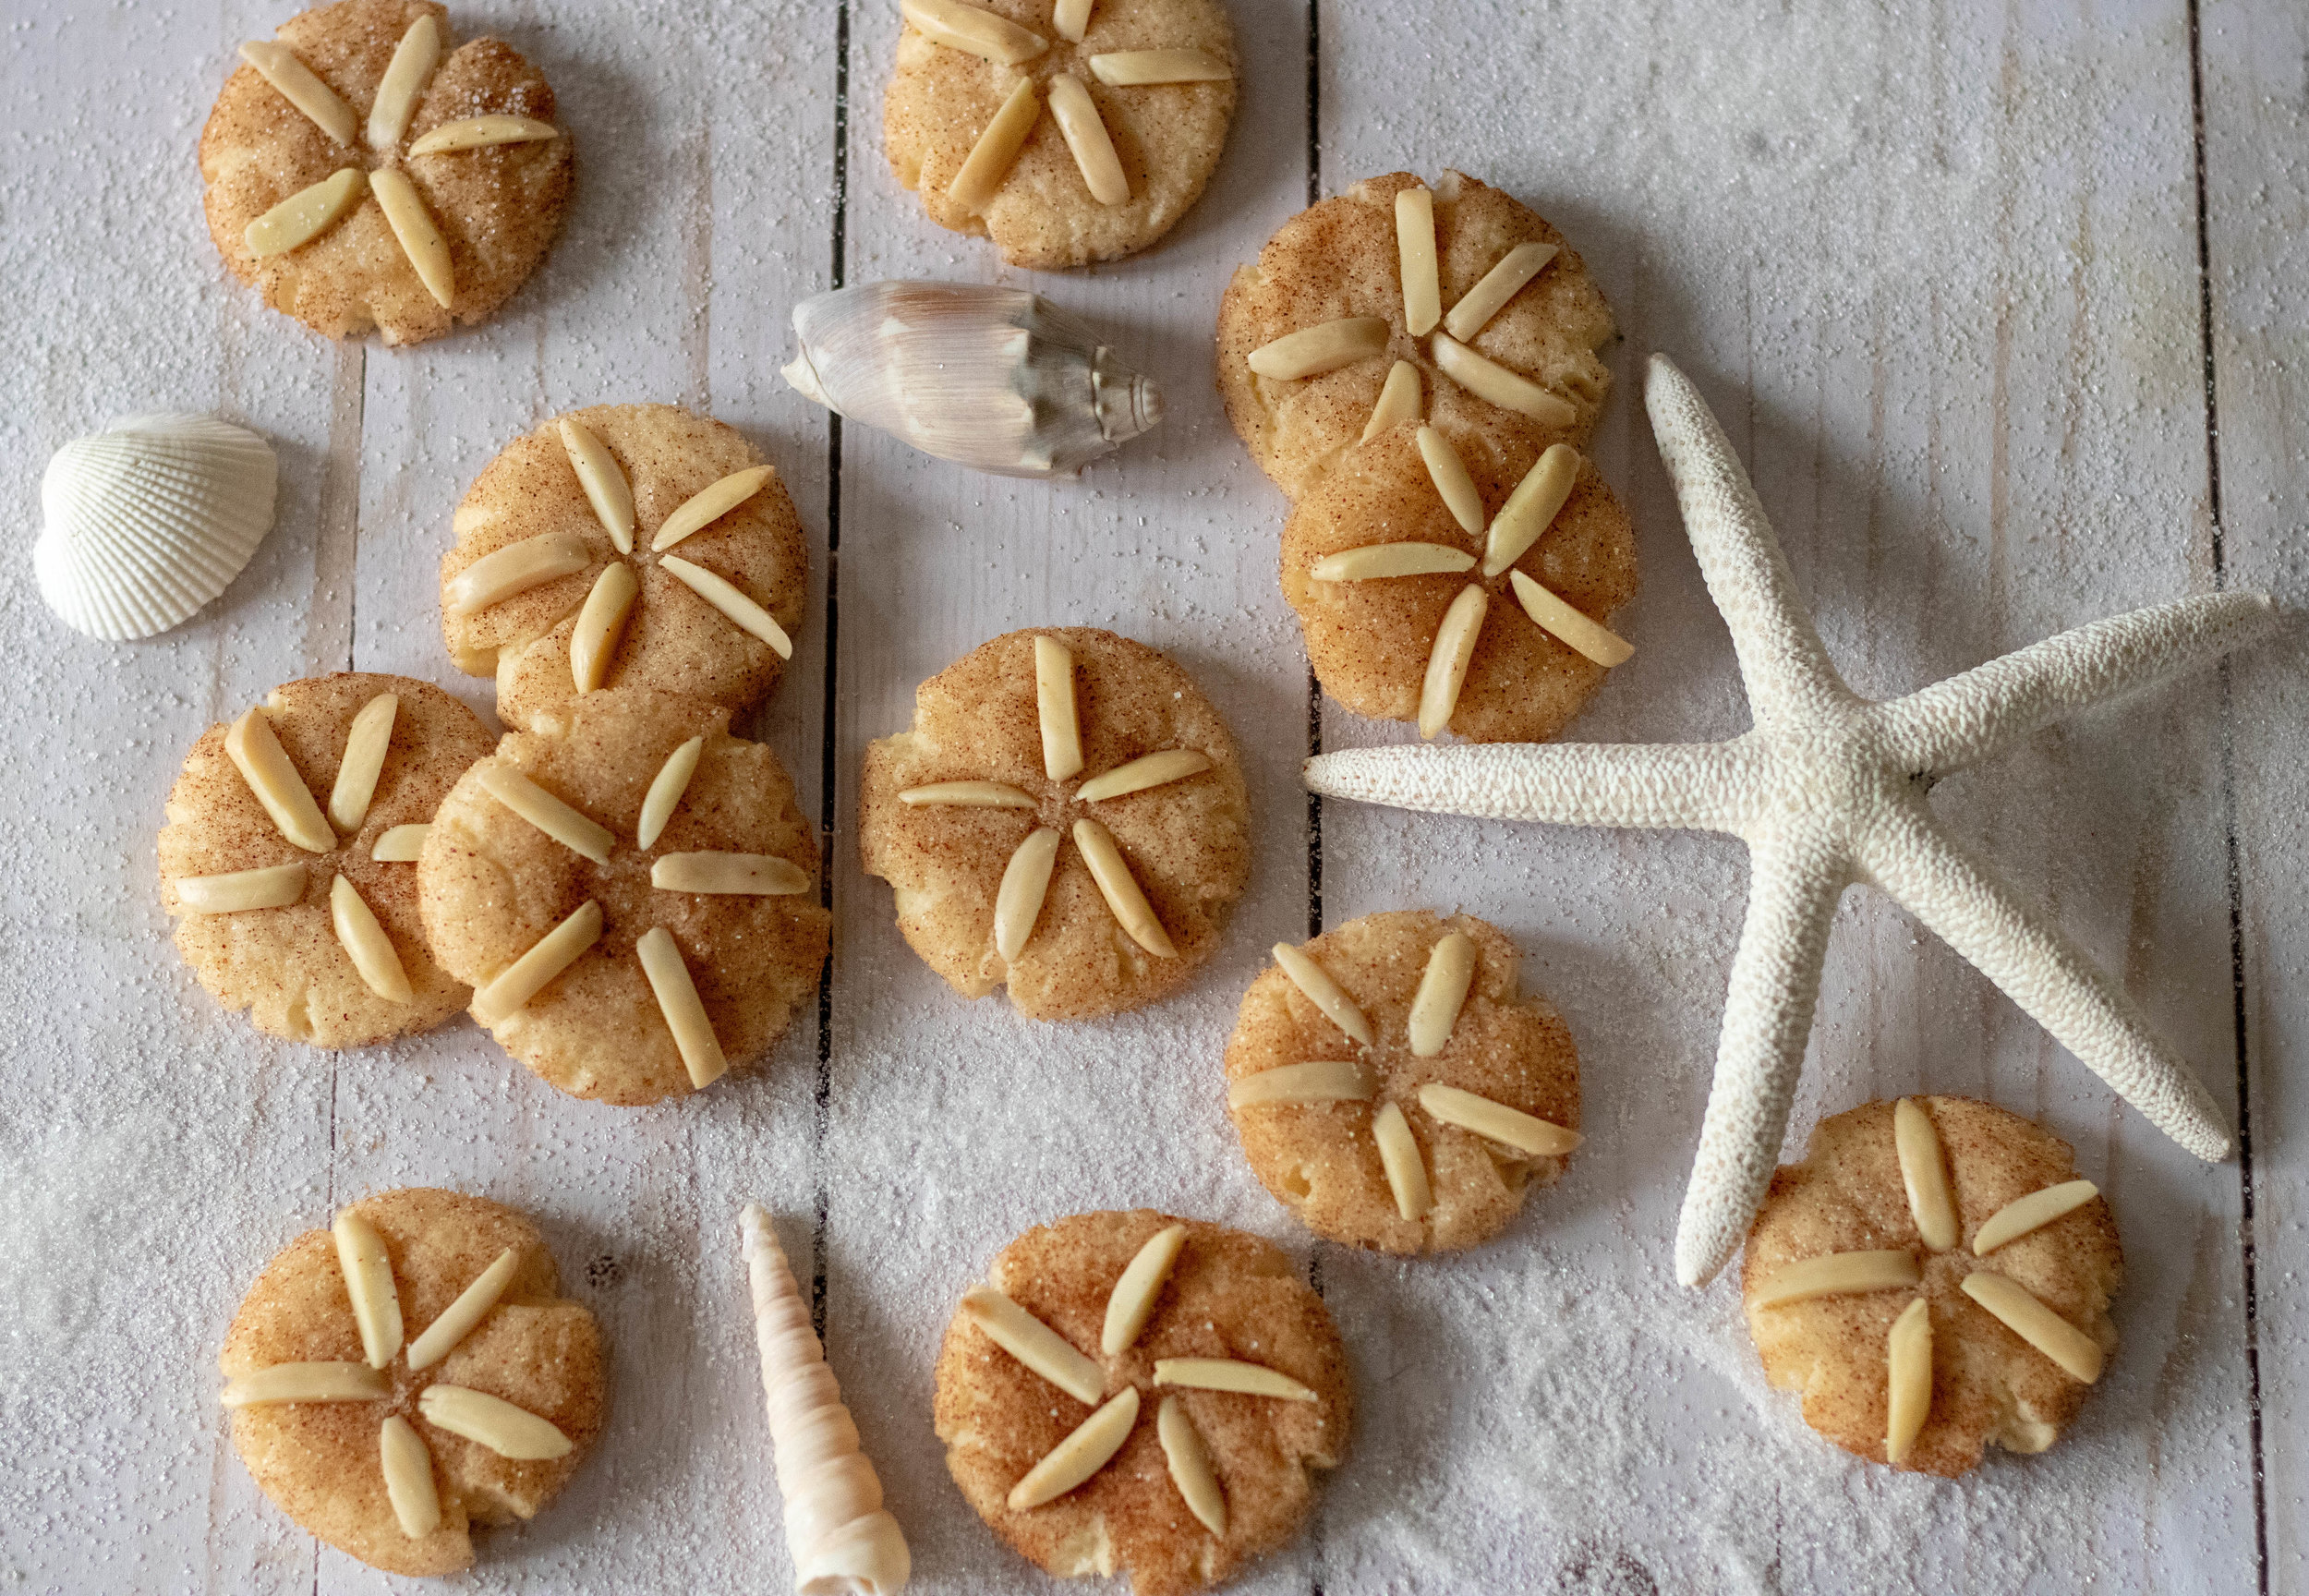
Vegan Cinnamon Sand Dollar Cookies

Vegan cinnamon sand dollar cookies surrounded by sea shells.

These adorable little vegan cinnamon sand dollar cookies are basically a summertime themed snickerdoodle!

We are parents to 3 girls and a 1 boy. This means we have watched the Little Mermaid and Finding Nemo approximately 9 gazillion times, and have hosted about seventy eleven mermaid/ocean themed birthday parties over the years. These cookies scream beach themed gathering!

They are pretty easy to make, they just require a little time to press all those almonds down into the dough! They bake up quickly and are super delicious to boot.

So if you need a beachy themed cookie for a party, or just want to whip up a batch for yourself because they are so cute and addictive, then we are here to serve.

And if you are stuck watching a the same mermaid or fish movie for the millionth time and just need something to break up the monotony of this phase of life, these should help. They won’t however help with the songs that are forever stuck in your head from said mermaid movies. Hey, I just make food, not miracles.


INGREDIENTS:

  • 3 cups all purpose flour

  • 1/2 teaspoon baking powder

  • 1/2 teaspoon salt

  • 1 cup vegan butter, softened

  • 1 cup powdered sugar

  • 1 cup granulated sugar, divided

  • 2 tablespoons tapioca starch, plus 6 tablespoons water

  • 2 teaspoons vanilla extract

  • 1 tablespoon ground cinnamon

  • slivered almonds


INSTRUCTIONS:

  1. Whisk together the flour, baking powder and salt in a medium sized bowl.

  2. Using a stand mixer or an electric hand mixer and a large bowl, cream together butter, powdered sugar, and 1/2 cup granulated sugar until light and fluffy. This will take a few minutes.

  3. Mix the tapioca starch and water together.

  4. Add starch mixture and vanilla to the butter sugar mixture and mix.

  5. Add in the flour and mix until well combined.

  6. Mix remaining 1/2 cup granulated sugar and cinnamon in a small bowl.

  7. Preheat oven to 350 degrees. Line 2 baking sheets with parchment paper.

  8. Scoop dough using a small cookie scoop or spoon ( around 2 teaspoons of dough) and roll into balls. Roll the balls in the cinnamon sugar mixture.

  9. Use the bottom of a glass to press the cookies out flat. It helps to spray the bottom of the glass with some cooking spray so they dough does not stick.

  10. Press 5 pieces of slivered almonds into each cookie to make a star shape.

  11. Bake cookies for 7-10 minutes, just until the edges seems done. Let cookies cool on the sheet for a few minutes then transfer to a cooling rack to finish cooling.

  12. Store cookies flat in an airtight container. This helps the almonds stay put! We stored them in a zip lock and it caused some of the almonds to fall out.

If you like this recipe, try these:

Vegan Ranger Cookies

Gluten Free Mexican Wedding Cookies

Dairy Free Oreo Truffles

A woman holding a vegan cinnamon sand dollar cookie

Vegan cinnamon sand dollar cookies

Vegan Po'Boy with Popcorn Tofu

Vegan Po’Boy with Popcorn Tofu

I would eat popcorn tofu every single day. It’s that good and addicitve.

Depending of the seasonings you use, it makes a perfect stand in for popcorn chicken or popcorn shrimp. I had not really even considered serving it in place of shrimp until a friend was over and tried the tofu. She said it reminder her of shrimp or clams.

I had originally made the recipe to replicate my favorite popcorn chicken from before we went vegan. My friend suggested I use the popcorn tofu in a Po’Boy, and I happily complied. I am a big fan of most sandwiches and a Po’Boy is no exception.

Crispy, chewy, fried tofu seasoned with Creole seasoning. Crispy lettuce and pickles, sliced tomatoes, hot sauce, and creamy vegan mayo. What’s to hate here?!?! Nothing, nothing at all.

Once again I can thank the people smarter than me for thinking up things for me to make. And to think I would have just kept dipping that popcorn tofu in some bbq sauces and called it good!!


Ingredients:

  • 1 block extra firm tofu (look for extra firm high protein tofu. It’s much firmer than regular extra firm tofu, and lends a bit of “chew” that this recipe needs)

  • 3/4 cups corn or tapioca starch

  • 2 cups bread crumbs

  • 1/2 cup vegan plain yogurt (I use Kite Hill)

  • 1/2 cup non dairy milk

  • 1 teaspoons salt

  • 2 teaspoons smoked paprika

  • 1 teaspoon each, garlic powder, onion powder, oregano, black pepper, thyme

  • 1/2 teaspoon cayenne pepper

  • oil for frying

  • 4-5 baguettes, or other crusty vegan rolls

  • shredded letttuce

  • sliced tomatoes

  • sliced dill pickles

  • vegan mayo

  • hot sauce

  • old bay seasoning


Instructions:

  1. Remove tofu from package and drain. Wrap the tofu in a clean kitchen towel or some paper towels and place a few books, or a heavy pan on top. Let the tofu sit for 15 minutes to press out any extra water.

  2. Cut the tofu block in half, then cut halves into 1/2 inch strips. Using your hands, break off pieces of the strips to form little tofu nuggets.

  3. In a medium bowl, whisk together the yogurt and milk.

  4. In another, bowl whisk 1/2 cups of the starch and all of the seasonings.

  5. In another bowl, add the bread crumbs.

  6. First toss the tofu into the starch and seasoning mixture

  7. Next add the tofu to the milk and yogurt and stir. All of the liquid should be absorbed by the tofu, although it will be a sticky mess. Now sprinkle the remaining 1/4 cup of starch over the tofu and toss.

  8. Using your hands (I promise, it’s just easier) pick up a small handful of tofu and toss it around in the breadcrumbs until fully coated. You can use your hands to separate any tofu that got clumped together, sifting it though your fingers. Place coated tofu into a dish, and repeat until all of the tofu is coated.

  9. Heat a few inches of oil in a high sided skillet. I use my cast iron for this. While the oil is heating, place a wire cooling rack on top of a paper towel lined baking sheet. This is where you will place the finished tofu to cool.

  10. Once the oil is nice and hot, carefully add the tofu in small batches to the pan (you can poke a chopstick into the oil, and if tiny bubbles form around the stick, the oil is ready). Using a slotted spoon, keep the tofu moving around for a few minutes to make sure all of the sides get nice and crispy. Once tofu is browned and crispy, remove and place on a wire cooling rack. Repeat with remaining tofu. I like to sprinkle the finished tofu with some old bay . You don’t have to, but I’m a fan.

  11. Assemble sandwiches by slicing bread lengthwise. Spread mayo on each side of bread, add popcorn tofu, lettuce, tomatoes, and pickles. Drizzle with hot sauce and serve.

If you like this recipe, try these:

Vegan Fried Green Tomato Sandwich with Bacon and Mozzarella

Pulled Jackfruit Mexican Torta

Beyond Meatball Subs

Vegan Po’Boy with Popcorn Tofu

vegan po'boy with popcorn tofu

Asian Summer Roll Salad with Grilled Tofu

Asian summer salad with grilled tofu

We eat a lot of salads. Actually, most days I eat a salad for either lunch or dinner.

We live in Florida where it is normally hot, so cold salads are my go to. I also love Thai and summer rolls, and really wanted to make a salad that included all of the goodness of a summer roll, but didn’t require me rolling up a batch.

If I am being perfectly honesty, I am terrible at rolling them. If they handed out awards for ugly summer rolls, I know I could win! So I created this Asian summer roll salad with grilled tofu, and added in all the things I would put in a summer roll. Soaking rice stick noodles and adding them to this salad gives it a more summer roll feel and makes it extra delicious.

I meant to add fresh mint and forgot, but will definitely add it next time and maybe even some cilantro. This salad is perfect for hot summer days. It was also great as leftover, even after being tossed in the dressing.

So if you love summer rolls, but not all the work, give this salad a try. It’s quick, easy, delicious, and no rice paper rolling skills required.


INGREDIENTS:

  • 1 head romaine lettuce, chopped

  • 2 cups copped/shredded cabbage

  • 1/2 English cucumber, halved and thinly sliced

  • 1 cup shredded carrots

  • 1/2 cup edamame

  • 2 green onions , chopped

  • 3 oz rice stick noodles

  • 2 tablespoons sesame seeds

  • 1 avocado, thinly sliced

  • optional add ins: fresh mint leaves, cilantro

THE TOFU:

  • 1 block extra firm tofu

  • 3 tablespoons coconut aminos

  • 1 teaspoon sesame oil

  • 1 teaspoons garlic powder

PEANUT DRESSING:

  • 3 tablespoons peanut butter

  • 1/4 cup coconut aminos

  • 1 teaspoon sesame oil

  • 1/2 teaspoon garlic powder

  • 2 tablespoons water


INSTRUCTIONS:

  1. Drain tofu and wrap in a clean kitchen towel or a few paper towels. Place a few books on top or a heavy pan, and let sit for 10 minutes to press out any excess liquid.

  2. Slice the tofu into strips. In a shallow pan mix remaining tofu ingredients. Let the strips marinate in the mixture for about 10 minutes. Heat a large grill pan over medium heat. You can use a regular skillet if you don’t have a grill pan. Give it a spray with some cooking oil, and add the tofu along with all of the marinade. Let the tofu cook, turning the pieces several times until the liquid is absorbed, and the tofu is slightly crispy around the edges.

  3. Place the rice noodles in a dish and cover in hot tap water. Let the noodles sit for about 5 minutes. Drain noodles and rinse in cold water. Set aside.

  4. In a small bowl whisk the ingredients for the dressing. I like to use a fork to get the peanut butter all mixed in. It takes a minute to get it broken down and mixed well with the other ingredients.

  5. Toss all of the the salad ingredients in a large bowl along with the rice noodles and cooked tofu. Drizzle the dressing over the salad and toss again.

Serves around 6.

If you like this recipe, try these:
Raw Sesame Zucchini Noodle Salad

Southwest Salad with Crispy Potatoes

Kale Salad with Lemon Tahini Dressing

Asian summer salad with grilled tofu

asian summer roll salad with grilled tofu

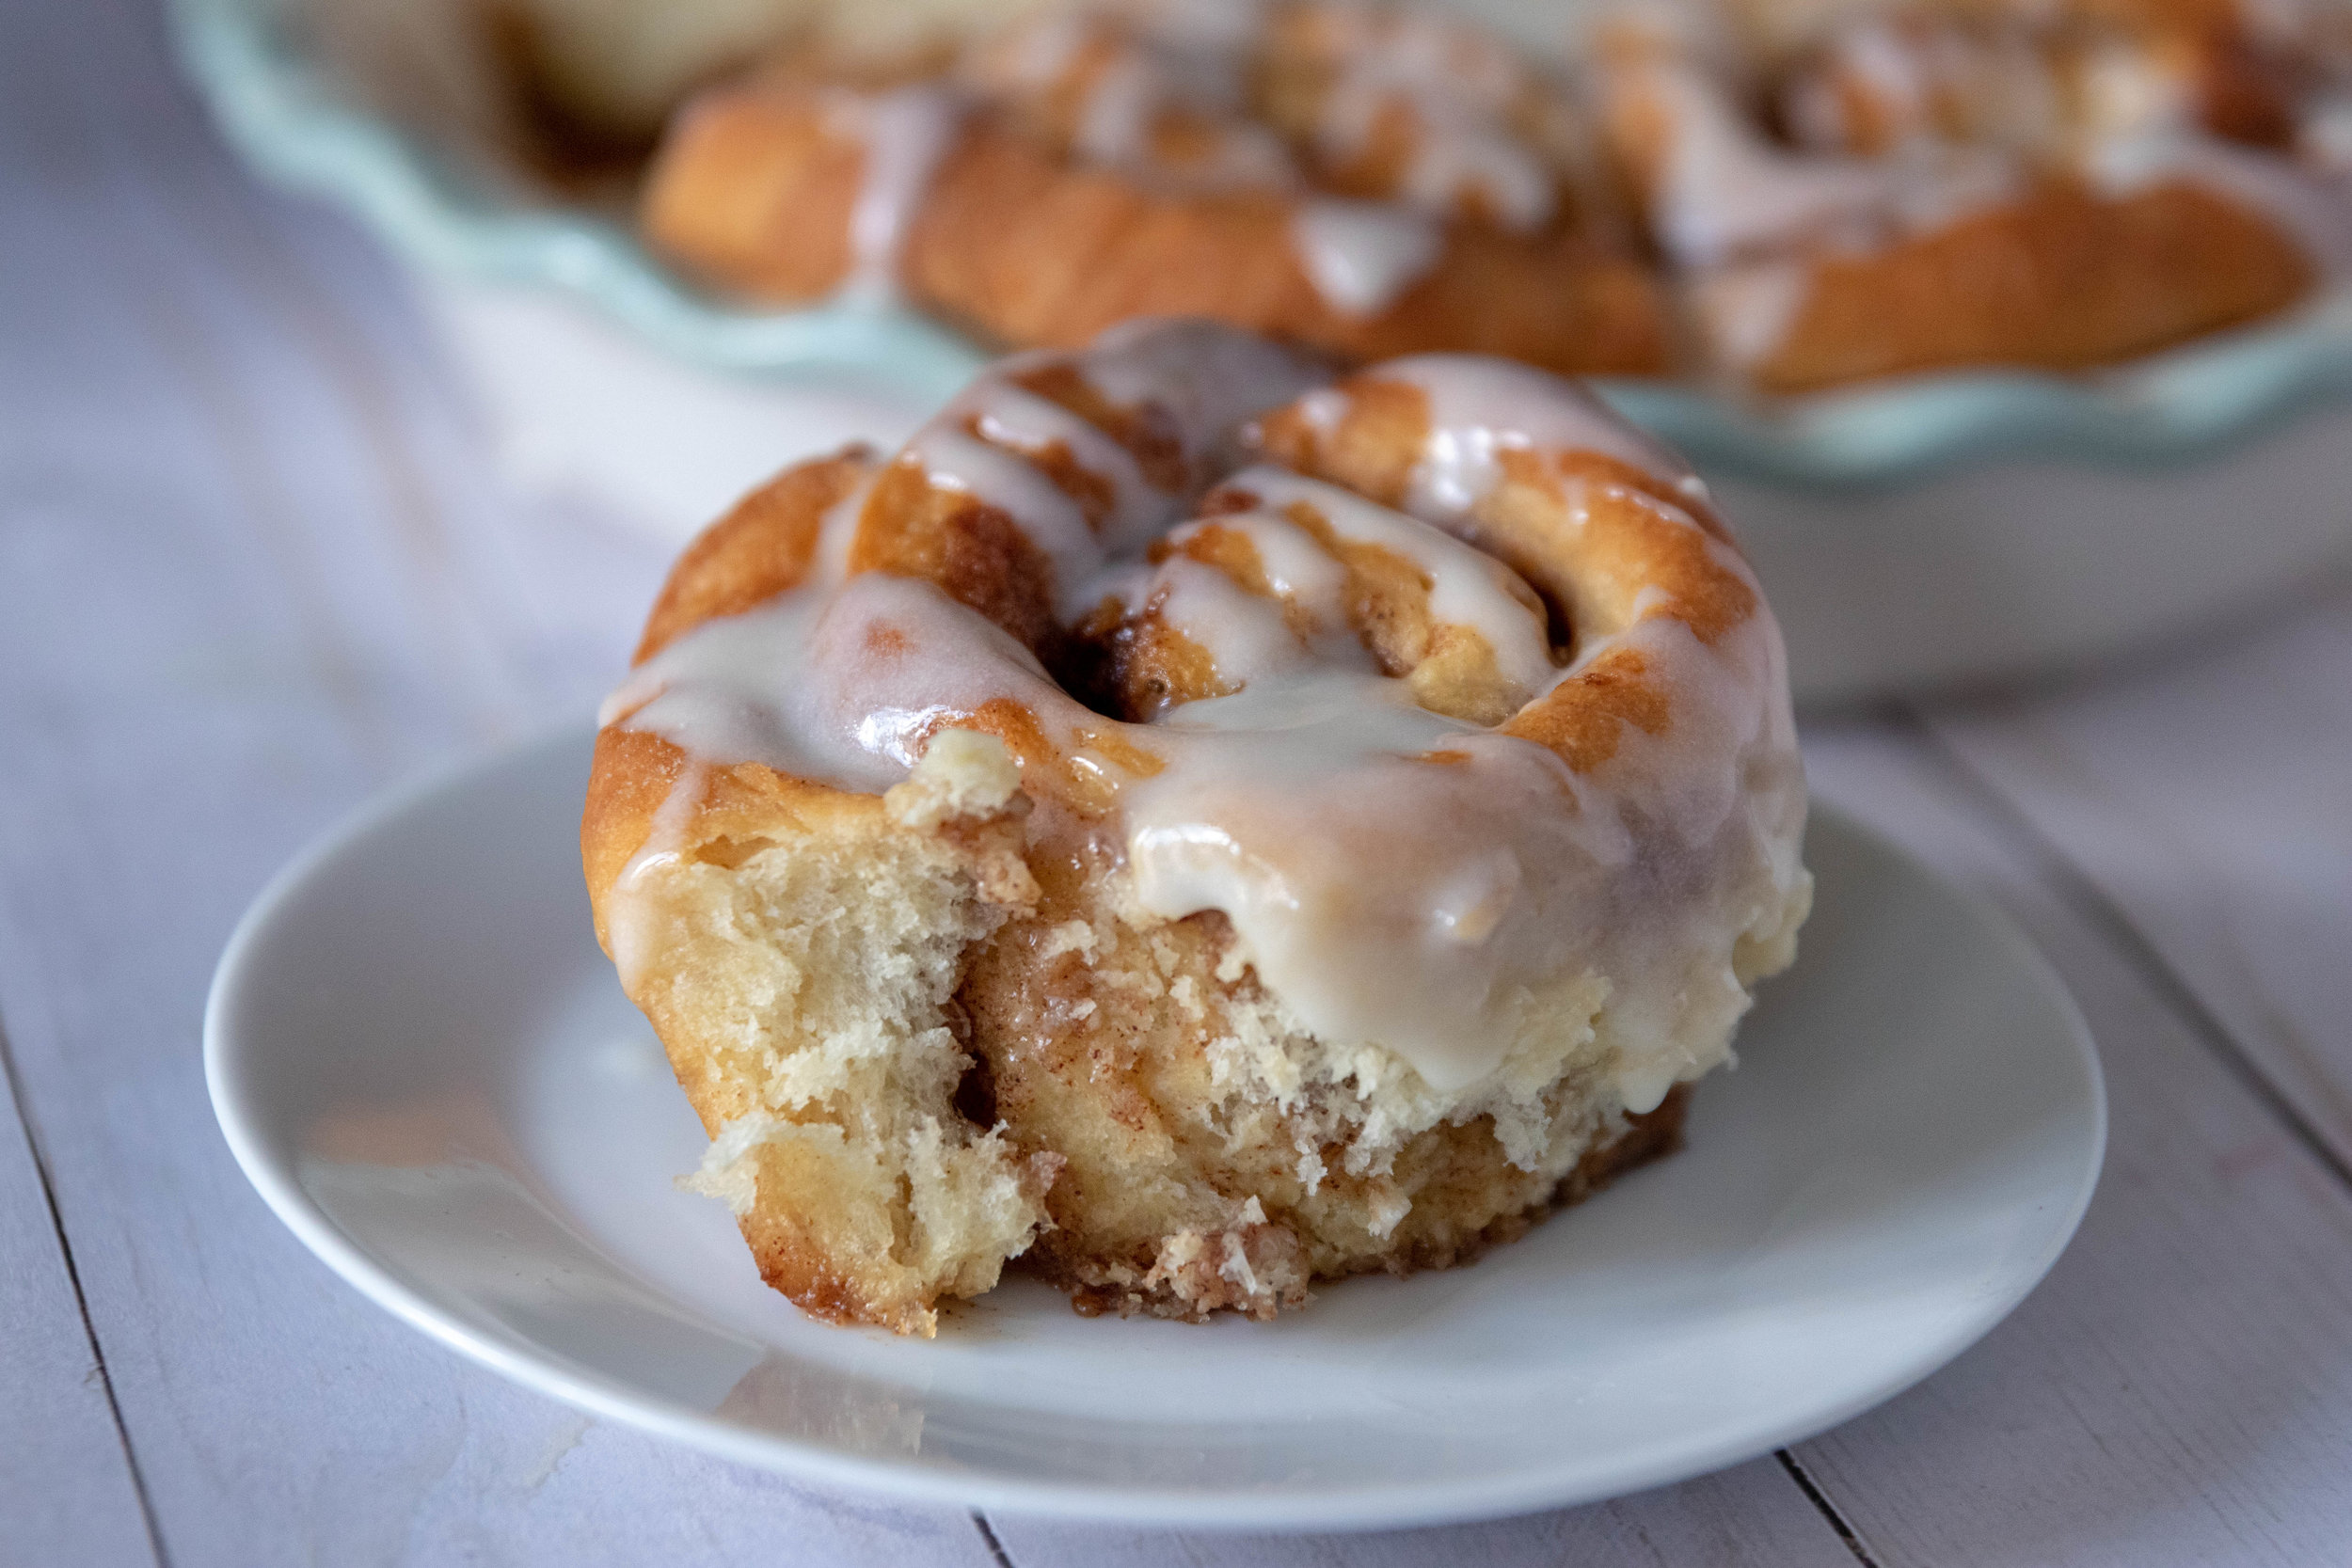
Vegan Cinnamon Rolls with Cream Cheese Icing

Vegan cinnamon rolls with cream cheese icing

I think a lot of people are intimidated by making yeast breads and rolls. These kinds of breads take a while to make, are some what time consuming, but 100% worth your effort.

Cinnamon rolls fall under the category of yeast breads that take a while. This dough has to rise twice, so if you are craving a cinnamon roll when you wake up, just know its gonna be a while before you get to eat one.

For this reason we often bake them the evening before, and wait to ice them until the next morning. They will reheat just fine.

Vegan cinnamon rolls are easy to make, and do not even require a stand mixer. We personally like to mix some orange zest into the dough and icing but you don’t have to. We also make a vegan cream cheese icing for these vegan cinnamon rolls, because I will put cream cheese icing on anything and everything that I can.

So if you have been looking for a basic, delicious, vegan cinnamon roll recipe, look no further. Also, this recipe makes a double batch, so you will be eating cinnamon rolls for days, and days, and days!!! See, this time the wait will totally be worth it!


INGREDIENTS:

  • 5 cups all purpose flour, divided

  • 1 teaspoon baking powder

  • 2 1/4 teaspoons active dry yeast

  • 1 teaspoon salt

  • 1/2 cup melted vegan butter

  • 2 cups almond or oat milk,

  • 1/2 cup sugar

  • optional 1/2-1 teaspoon orange zest

THE FILLING:

  • 3/4 cup vegan butter, softened

  • 3/4 cup brown sugar

  • 2 tablespoons cinnamon

  • 1/2 teaspoon vanilla extract

THE ICING:

  • 1/2 cup vegan cream cheese

  • 2 tablespoons vegan butter

  • 2 tablespoons almond or oat milk

  • 1 teaspoon vanilla extract

  • 1 cup powdered sugar

  • optional, 1/2 teaspoon orange zest


INSTRUCTIONS:

  1. Heat milk in a microwave safe container to about 100-110 degrees. Any warmer and It will kill the yeast. It should feel warm but not scalding hot.

  2. In a large bowl mix the heated milk, butter and sugar. Sprinkle the yeast over the mixture and let it sit for a few minutes. (don’t stir it in, just sprinkle)

  3. Add 4 cups of the flour to the wet mixture, and mix until well combined. Cover the bowl in plastic wrap and allow the dough to double in size. This should take about an hour.

  4. Once the dough has doubled in size, add the last cup of flour, baking powder, and salt. If adding orange zest, add that now as well. Mix well until a soft dough has formed. Turn the dough out onto a clean, lightly floured surface. Lightly knead the dough, adding extra flour as needed until the dough is no longer sticky. The dough should be soft, but you should be able to handle it without it sticking to your hands.

  5. Roll the dough out into a rectangle that is about 18 inches by 12 inches, and 1/2 inch thick, give or take.

  6. Mix the softened butter, brown sugar, vanilla, and cinnamon together in a bowl. Spread the mixture evenly over the surface of the dough, leaving 1/2 inch around the edges free from the butter sugar mixture. This will allow the rolls to seal properly

  7. Roll the dough tightly, forming a log. Cut log into 12- 14 equal pieces. Place the cinnamon rolls into 2 buttered pie pans or round cake pans. Cover each pan in plastic wrap and allow the cinnamon rolls to rise for another half hour.

  8. Preheat oven to 350 degrees

  9. Once the cinnamon rolls have risen, place the pans on the middle oven rack and bake for 30-35 minutes.

  10. To make the icing, mix the cream cheese, butter, and milk until creamy and smooth. Add the vanilla and powdered sugar and stir until everything is well incorporated and smooth. Divide the icing and drizzle it over both pans of cinnamon rolls.

  11. Store left over cinnamon rolls in an airtight container at room temperature.

If you like this recipe, try these:

Vegan Angel Biscuits

Vegan Strawberry Pop-tarts

Easy Homemade Vegan Bagels

Vegan cinnamon rolls with cream cheese icing

Vegan cinnamon rolls cream cheese icing

Vegan Tuna Salad with Jackfruit

Jackfruit Tuna Salad Sandwich cut in half

In my pre-vegan days, tuna salad was my favorite. On a sandwich, on a cracker, straight out of the bowl, just about anyway you could think of.

It was really the only non vegan food I kept craving and missing once we went vegan. I tired the chickpea tuna recipes and liked them fine, but being perfectly honest, none of them remind me of tuna.

So once again, I turned to my favorite magical meat substitute, canned jackfruit in brine. Not only is it cheap, gluten free, and healthier than faux meats, it is a master at mimicking just about any shredded meat you could want.

Once you shred it, the texture is spot on, and because it’s pretty flavorless, it can convincingly morph into so many shredded meats.

For this recipe, I strongly suggest you don’t leave out the dulse flakes, because they are what give this vegan tuna salad that convincingly “fishy” flavor! Also, if you prefer sweet pickles in you tuna salad, feel free to swap them out for the dill. I personally have always been in the dill pickle tuna salad camp, but I won’t judge you if you are not a fan. You could also leave pickles out all together and add celery instead. You just do what ever makes you and your vegan tuna sandwich happy.


INGREDIENTS:

  • 1 can of jackfruit in brine

  • 1/4 cup minced onion

  • 2-3 teaspoons dulse flakes

  • 3 tablespoons vegan mayo

  • 1 teaspoon salt

  • 1/2 teaspoon black pepper

  • 1 teaspoon garlic powder

  • 2-3 tablespoons minced dill pickles


INSTRUCTIONS:

  1. Drain and rinse jackfruit. You can toss it in the blender or food processor to mince it up quickly, or finely chop it with a knife.

  2. Add the jackfruit and remaining ingredients to a medium sized bowl, and mix well.

  3. Store in an airtight container in the fridge for 4-5 days

If you like this recipe, try these:

Tarragon Almond “Chicken” Salad

Tofu Egg Salad

Vegan Pimento Cheese

Jackfruit Tuna Salad Sandwich

vegan tuna salad with jackfruit

Vegan Gluten Free Mexican Wedding Cookies

Vegan Gluten Free Mexican Wedding Cookies

When I was a kids I used to beg my dad to buy me a bag of the Keebler Danish wedding cookies in the pink bag, every time we went to the grocery store. I am not sure if it was the pink bag, or the delicious little cookies inside, all covered in snowy powdered sugar.

Either way I loved them! I did not attempt making my own until I good and grown, and needed a Russian treat for an international school festival one of our kids attended. The Russian apple cake I fist attempted was an epic failure ( I forgot to add sugar, I’m and genius, I know) so In a pinch I turned to googling and found what seemed to be a Danish wedding cookie, but called a Russian tea cookie, but also commonly known as a Mexican wedding cookie.

Apparently this cookie goes by a lot of names, but I most often hear it called a Mexican wedding cookie, or snow ball. The cookies were so easy to make, a huge hit, and whatever you call the, rest assured they are amazing.

My awesome daughter was kind enough to bake up a gluten free batch recently for my Man Jong Club (I know, I am all over the place in this post, but y’all Mah Jong is SO FUN) so everyone could enjoy a treat. We used our favorite, fail proof, gluten free flour blend from the A Little Insanity website. It has worked in any recipe we have ever used it in, and is 100% worth your time to mix up a batch. Also, her site is great for all things allergy friendly and GF, so give it a gander!

You can also use regular all purpose flour in this recipe if you are not GF! It works just fine. So if you have been craving a vegan Danish, Mexican, Russian, Italian, tea, butter ball, snow ball, international cookie of mysterious origin, we have you covered, dipped, and rolled in powdery sugar goodness!


INGREDIENTS:

  • 2 1/2 cups gluten free flour blend (we use this one, it is hands down the best we have tried)

  • 1 cup vegan butter, softened

  • 1 cup powdered sugar, plus extra for rolling

  • 1 teaspoon vanilla extract

  • 1/2 teaspoon almond extract (optional)

  • 1/4 teaspoons salt

  • 1 cup almond meal ( ground up almonds)

Vegan Gluten Free Mexican Wedding Cookies

INSTRUCTIONS:

Preheat oven to 350 degrees

  1. In large bowl mix softened butter and sugar until creamy. Add in the vanilla and almond extracts and mix.

  2. Add in the dry ingredients and mix until well incorporated. The dough be dry but wet enough to hold the shape of a ball. You can find almond meal in the baking section of most stores now. It is NOT almond flour. It is more coarse. We normally just pop some almonds in a blender to make the meal.

  3. Line 2 baking sheets wth parchment paper. Using a small cookie scoop or a talbesppon, scoop dough and roll into balls. The cookies do not really spread, so you do not have to space them out too much.

  4. Bake for about 12-15 minutes, just until the cookies are starting to brown around the edges.

  5. Allow cookies to cool completely before rolling them in powdered sugar. If the cookies are even still warm it will cause the powdered sugar to cake up and melt on the cookies. So make sure they are totally cool.

  6. Store cookies in an airtight container.

If you like this recipe, try these:

Vegan ranger cookies

The Perfect Vegan Peanut Butter Cookie

Easy Vegan Fudge

**you can sub the same GF flour blend in these cookie recipe. We have done it and it works great!

Vegan Gluten Free Mexican Wedding Cookies cut in half

vegan gluten free mexican wedding cookies

Vegan Marshmallow Cream Cheese Fruit Dip

Vegan marshmallow cream cheese fruit dip surrounded by strawberries, grapes, blueberries, and apples.

I have a friend named Shannon who is just about perfect. She is for sure the perfect hostess, and ever since I have known her (which has been forever) she could host a perfect party with her eyes closed.

It was at one of her many gatherings a million years ago that I first had marshmallow fluff cream cheese fruit dip. I had no idea what I was eating, I just knew I could not stop eating it.

This is saying a lot for me because I will always choose a veggie plate over a fruit plate, every single time. I like fruit just fine, but I like dip more, and veggie trays normally involve dip. So give me a dip for my fruit and its a game changer.

I have not eaten this dip in years or even thought about it since going vegan. That is until we were trying to plan snacks for our daughters princess themed third birthday party, and I need a “grey stuff” from Beauty and the Beast. Suddenly I remembered the marshmallow cream cheese dip, and realized that I could use sweet aquafaba whip in place of marshmallow fluff! It worked y’all, and I actually had to refill the bowl of dip during the party.

Also, you can dye it any color with a few drops of food color, in case you ever need some “grey stuff, its delicious, don’t believe me, ask the dishes. And thanks again Shannon for being an amazing friend all these years, for hosting the best parties, and for making this dip a gazillion times so I could stuff my face with all the fruits!


INGREDIENTS:

  • 2 cups Sweet Aquafaba Whip

  • 8 oz container of vegan cream cheese, we used Kite Hill

  • 1/2 teaspoon vanilla extract


INSTRUCTIONS:

  1. Make Sweet Aquafaba Whip according to instructions. You will have a good bit leftover, but could use it to make meringues, or store in the fridge for later to use as whip cream.

  2. Beat cream cheese with an electric hand mixer or briskly stir it with a fork to soften it up. Using a plastic spatula, fold in the 2 cups of sweet aquafaba whip and 1/2 teaspoon of vanilla extract, just until everything is well incorporated.

  3. Serve with fruit, vegan graham crackers or cookies.

  4. I prefer to serve immediately just because the aquafaba will break down some once stored in the fridge. This dip does hold up better than the whip does on its own, and I have eaten the leftover dip the next day without it being weird or liquidly.

If you like this recipe, try these:

Vegan Caramel Sauce

Vegan Fudge Sauce

Grilled Peaches with Maple and Vegan Ricotta

A strawberry being dipped in vegan marshmallow cream cheese fruit dip

vegan marshmallow cream cheese fruit dip

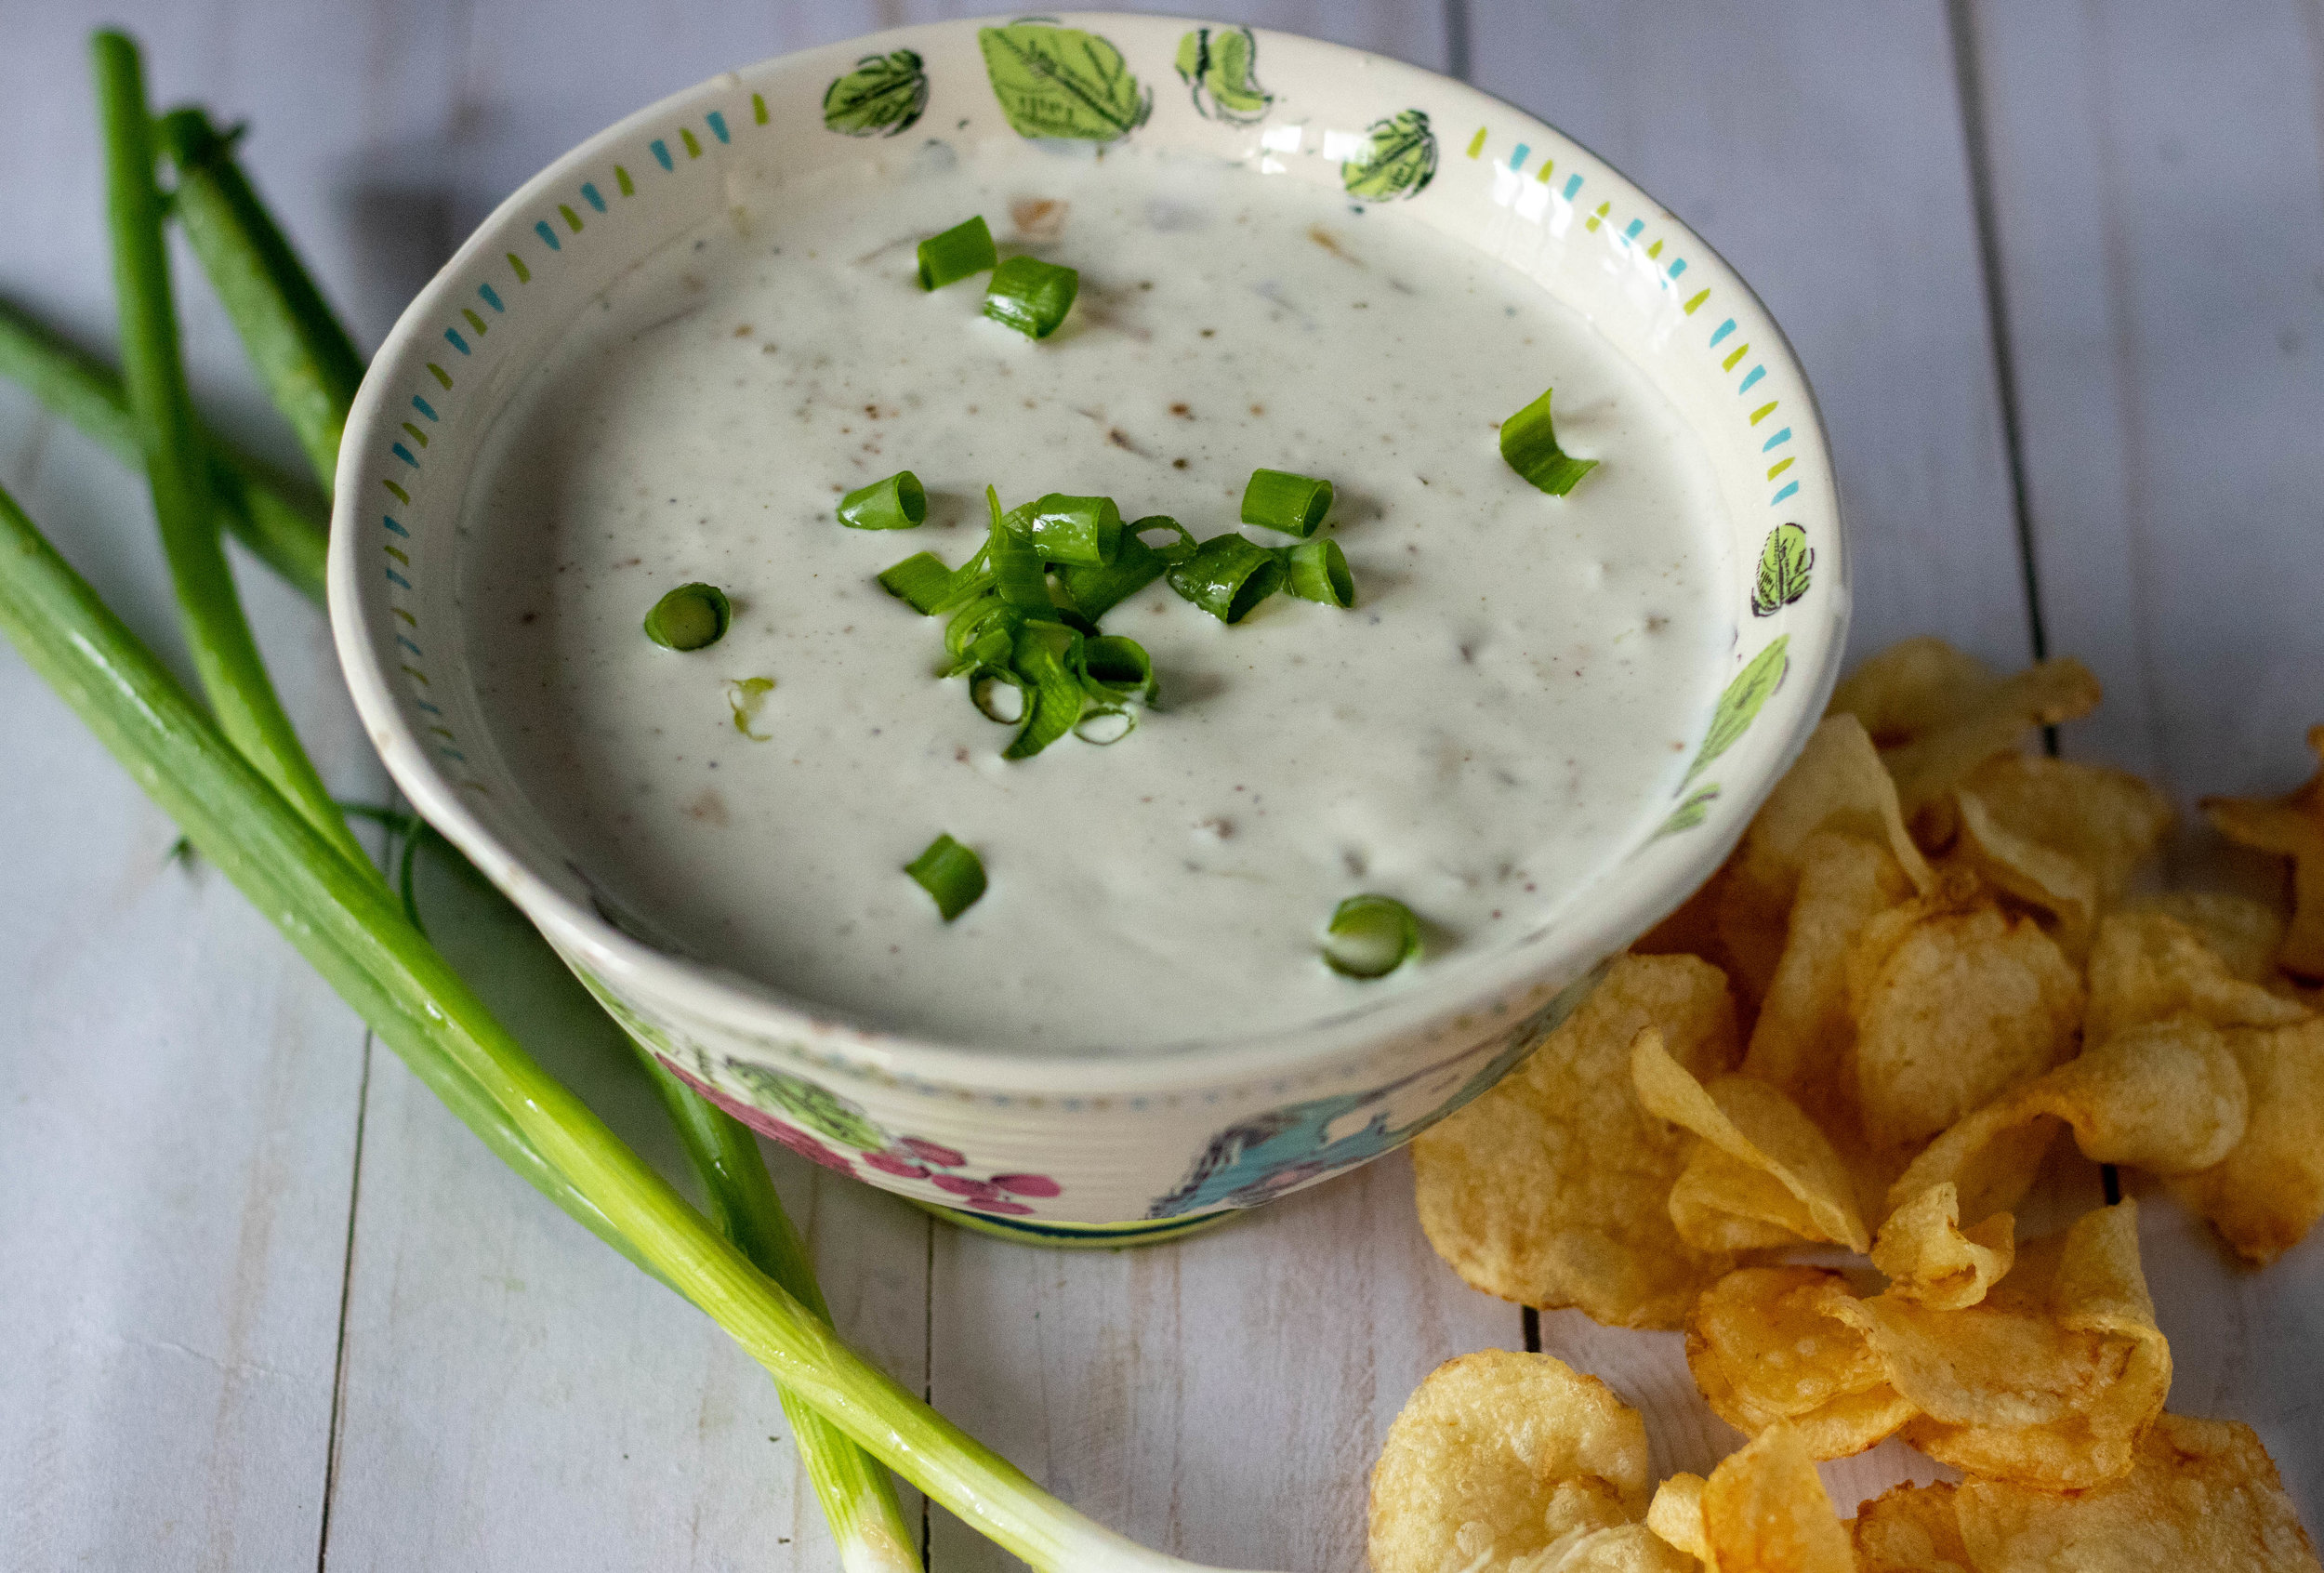
Vegan French Onion Dip

Vegan French Onion Dip

Who doesn’t love a good french onion dip with potato chips, or a veggie plate.

Vegan french onion dip is super quick, and easy to throw together, and is the perfect dip for snacking.

We used almond milk plain yogurt to make this dip, but use your favorite brand of vegan plain yogurt or sour cream. I often use plain vegan yogurt in the place of sour cream because for me, its easier to find, and works great in place of sour cream.

I also prefer to use an almond milk yogurt to a coconut yogurt, but that is just my preference. Use whatever you like! Just make sure you have enough chips on hand because this dip is addictive!


INGREDIENTS:

  • 1 cup finely diced yellow onion

  • 1/3 cup vegan mayo

  • 1/3 cup plain vegan yogurt or sour cream (we used Kite Hill yogurt)

  • 1 teaspoon onion salt

  • 1 teaspoon garlic powder

  • 1/2 teaspoon black pepper

  • garnish with diced green onions, chives, or fresh chopped parsley

INSTRUCTIONS:

  1. Make sure the onions are diced super fine. Heat a medium skillet over medium heat. Add 1/2 teaspoon of oil or vegan butter and the onions. Cook until the onions are soft, and beginning to brown. Allow onions to cool.

  2. Mix mayo, yogurt, or sour cream, spices and cooled onions together. Sprinkle with garnish. Pop the dip back in the fridge to thicken. Store in an airtight container in the fridge for 3-4 days.

  3. Serve with chips or veggies.

If you like this recipe, try these:

Vegan Ranch

Vegan Alabama White Sauce

Cashew Queso

Dipping a chip into a bowl of vegan french onion dip

Vegan french onion dip

Vegan Strawberry Lemonade Cupcakes

Vegan strawberry lemonade cupcakes

We have 4 kids, so we bake a lot of cupcakes. I mean who doesn’t love cupcakes. They are quicker to bake than a whole cake, and always my preference for birthday parties and gatherings.

This summer we seem to be stuck on a fruity cupcake kick. Our 13 year old daughter is an amazing baker and love thinking up new cupcake flavors. Recently we decide to take two of our favorite cupcake flavors, strawberry and lemon, and combine them!

These Vegan Strawberry Lemonade Cupcakes are not just delicious, but also pretty adorable with the little straw poking out of the top! We prefer to use freeze dried strawberries in this recipe because they pack a punch of strawberry flavor without adding too much extra liquid to the cupcake like fresh strawberries can. You can normally find these strawberries where you find other dried fruits or fruit and nut snacks in your local grocery store.

So if you are celebrating a birthday, holiday, or just the fact that its summer, these cupcakes are the perfect sweet treat for any occasion! And I promise nobody will ever even guess they are vegan!


INGREDIENTS:

  • 3 cups all purpose flour

  • 2 cups white sugar

  • 1 1/2 teaspoons baking powder

  • 1 teaspoon baking soda

  • 1/2 teaspoon salt

  • 2/3 cups lemon juice (about 4 lemons)

  • zest from 2 lemons

  • 3 tablespoons crushed, freeze dried strawberries

  • 2 cups plant milk (I like to bake with oat milk)

  • 1/2 cup melted vegan butter

  • 1 teaspoons vanilla extract

  • fresh strawberries for garnish

Frosting:

  • 1/2 cup vegan butter

  • 1/2 cup shortening

  • 5-6 cups powdered sugar

  • zest from 1 lemon

  • juice from 1/2 lemon

  • 1 teaspoon vanilla extract

  • 2 tablespoons crushed, freeze dried strawberries


INSTRUCTIONS:

PREHEAT OVEN TO 350 DEGREES

  1. In a large bowl, whisk together dry cake ingredients. In a smaller bowl, whisk together the wet ingredients. We put the strawberries into a blender and blend until they are powdery.

  2. Combine the wet ingredients into the dry and mix until well combined.

  3. Line a muffin tin with 24 cupcake liners. We actually have a tin that holds 2 dozen cupcakes, but if yours holds 1 dozen, you will need to bake in batches.

  4. Fill the cups 3/4 of the way full. Bake for 25 to 30 minutes or until a toothpick inserted in the middle of one of the cupcakes comes out clean.

  5. Allow the cupcakes to cool completely.

  6. In a stand mixer, or using a hand mixer, cream together the butter and shortening. Add in the vanilla, lemon juice and lemon zest. Begin adding the powdered sugar a little at a time and beat it in until the frosting is the desired stiffness. Divide frosting in half. Beat in the crushed strawberry powder into one half of the frosting.

  7. Fill a piping bag with half lemon frosting and half strawberry side by side. We do this by laying out a piece of plastic wrap. Scoop equal amounts of frosting side by onto the wrap. Roll the plastic wrap into a log shape. Twist both ends. Cut one end of place the plastic wrap, then place the log with the cut end side down into a piping bag fitted with a large piping tip. Pipe frosting onto cooled cupcakes in a swirl pattern, and garnish with a piece of fresh strawberry and small paper straw if you like ( we cut a regular straw into 4 pieces to garnish the cupcakes) This video shows a different method of piping 2 different frostings. You can use which ever one you find easier! https://www.youtube.com/watch?v=mUawMYKM29E

  8. Store cupcakes in an airtight container at room temp or in the fridge. I like to store them in the fridge until I am ready to serve just because we live in Florida and I don’t like the frosting getting too soft since its always, ALWAYS hot here!

Serves 24.

If you like this recipe, try these:
Vegan Lime Mojito Cupcake

Vegan Lemon Cupcakes with Cream Cheese Frosting

Vegan No Bake Strawberry Pie

vegan strawberry lemonade cupcakes

Vegan strawberry lemonade cupcakes

Vegan Hummingbird Cake

Hummingbird Cake

I can remember very vividly the first slice of Hummingbird cake I ever ate. I was at the hospital waiting on my best friends daughter to be born and decided I needed a cup of coffee from the coffee cart. The cart also sold cake and I always need cake, sooooo. At first I thought the cake was a carrot cake so I just pointed to it and asked for slice.

Well, it was not carrot cake and I was in love from the first bite. I ran back over to a ask what I was eating to learn it was actually a Hummingbird cake. I had never in all my southern life eaten a hummingbird cake. I had to google it to figure out what is in it. It definitely looks carrot cake-esq. Instead of carrots it has crushed pineapple, and bananas to keep it nice and moist, and pecans and coconut for some crunch.

Cream cheese frosting has always been my favorite on just about any cake, and this is no exception. This cake reminds me of summer and It will forever remind me of the day sweet Teegan was born.

This classic southern cake is not hard to veganize either. We used starch and aquafaba to replace the eggs, vegan butter, and vegan cream cheese. It’s that easy and so delicious! Also, no actual hummingbirds were harmed in the making of this cake. You can rest easy!


INGREDIENTS:

You will need 3, 8 inch round cake pans, and parchment paper for this recipe

  • 3 cups all purpose flour

  • 2 teaspoons ground cinnamon

  • 1 teaspoon baking soda

  • 1 teaspoon baking powder

  • 1 teaspoon salt

  • 1/2 teaspoon allspice

  • 1/2 teaspoon nutmeg

  • 3 tablespoons tapioca or corn starch

  • 1/2 cup water

  • 2/3 cup brown sugar

  • 1 1/2 cups sugar

  • 1 1/2 cups whipped aquafaba

  • 2 teaspoons vanilla extract

  • 3/4 cup neutral tasting oil like grape seed or canola

  • 2 cups mashed bananas (5 - 6 small to medium bananas)

  • 1 can crushed pineapple (8 oz), drained

  • 1/2 cup chopped pecans

  • 1/2 cup shredded coconut

CREAM CHEESE FROSTING:

  • 3/4 cup vegan cream cheese

  • 1/2 cup vegan butter

  • 5 cups powdered sugar

  • 1 teaspoon vanilla

  • pinch of salt


INSTRUCTIONS:

Preheat oven to 350 degrees.

  1. Whisk together flour, salt, cinnamon, baking powder, baking soda, all spice, and nutmeg in a large bowl.

  2. Make aquafaba according to directions. Set aside.

  3. Mix 1/2 cup of water with three tablespoons of starch. Beat the starch, sugar, brown sugar, and vanilla together in a large bowl. Add the oil. Next beat in the bananas and pineapple until the bananas are good and mashed up, and everything is well combined.

  4. Fold the dry ingredients into the wet ingredients, just until everything is nice and evenly incorporated.

  5. Stir in the nuts and coconut.

  6. Lastly, fold the whipped aquafaba into the batter, just until it is incorporated. Try not to over mix it.

  7. Prepare all three cake pans by coating each pan with butter. Line each pan with a 8 inch circle of parchment paper. Just trace a circle onto the parchment using the bottom of the pan as your guide, cut it out, and place into the the bottom of each pan. Coat the parchment in butter as well, then add a little flour to each pan to coat, shaking out any excess flour. Divide the batter evenly between the three pans.

  8. Bake cakes for 25 - 30 minutes, or until a cake tester or skewer inserted in the middle comes out clean. Allow cakes to cool for about 15 - 20 minutes in the pans. Turn them out onto wire cooling racks to finish cooling.

  9. While the cakes are cooling prepare the frosting by beating the cream cheese and butter together in a stand mixer, or in a large bowl using an electric hand mixer. Add in the vanilla, then slowly beat in the sugar and salt until you have the desired consistency. You need the frosting on the stiffer side to keep the cakes from sliding apart.

  10. Once cakes have completely cooled, divide the frosting into thirds. Frost the first layer and sprinkle with a thin layer of extra pecans if you have any leftover. Top with the next layer, frost, and add a thin layer of leftover coconut. Add the top layer and frost. You can top the cake with more nuts, or nuts and coconut. You do not have to add nuts and coconut between the layers, we just prefer to do so if we have leftovers.

  11. Slice and serve. Store any leftovers in the fridge. This just keeps the cream cheese from getting too soft.

If you like this recipe, try these:

Vegan Chocolate Mint Cookie Cake

Vegan Lemon Pound Cake

Vegan Lime Mojito Cupcakes

A piece of Hummingbird Cake

vegan hummingbird cake with coconut, pecans, banana,and pineapple. Topped with vegan cream cheese frosting

Crispy Sesame Tofu

Sesame tofu over rice with broccoli.

Who needs Chinese take out when you can whip up some delicious sesame tofu at home, quickly and affordably!

I love making crispy tofu and learned a long time ago that starch is the secret. Just press the tofu, coat, fry, and slather in this perfectly sticky, savory and sweet, vegan sesame sauce!

I like to serve our sesame tofu with a side of rice and broccoli, but serve it however you like! This meal is a go- to when I am in a hurry and havnt’t had time to plan dinner.

If you prefer not to fry the tofu in oil, you can use an air fryer! I just coat the tofu, give it a light spray with some oil (or not), and air fry at 375 for 10-15 minutes! It always comes out perfectly crisp!

Just another quick and simple dinner recipe to add to your arsenal! Who doesn’t love that!?


INGREDIENTS:

  • I batch crispy fired tofu

  • 1/4 cup soy sauce or coconut amnios

  • 1/4 cup water

  • 2 teaspoons sesame oil

  • 2 teaspoons rice vinegar

  • 3 tablespoons brown sugar

  • 1 teaspoon minced garlic

  • 1 teaspoon tapioca or corn starch

  • 1 -2 tablespoons toasted sesame seeds


INSTRUCTIONS:

  1. Prepare crispy tofu according to instructions.

  2. Add the remaining ingredients, minus the sesame seeds, to a medium sized sauce pan. Heat over medium/low heat, whisking continuously, until the sugar has melted and the mixture thickens. If it gets too thick, add a tablespoon or so of water to thin it back out a bit.

  3. Coat the crispy tofu in the sesame sauce and sprinkle with sesame seeds. Serve over rice and with a side of steamed broccoli if you like.

serves 4

If you like this recipe, try these:

Popcorn Tofu

Crispy Coconut Tofu with Tropical Rice

Tofu Japchae

Sesame Tofu

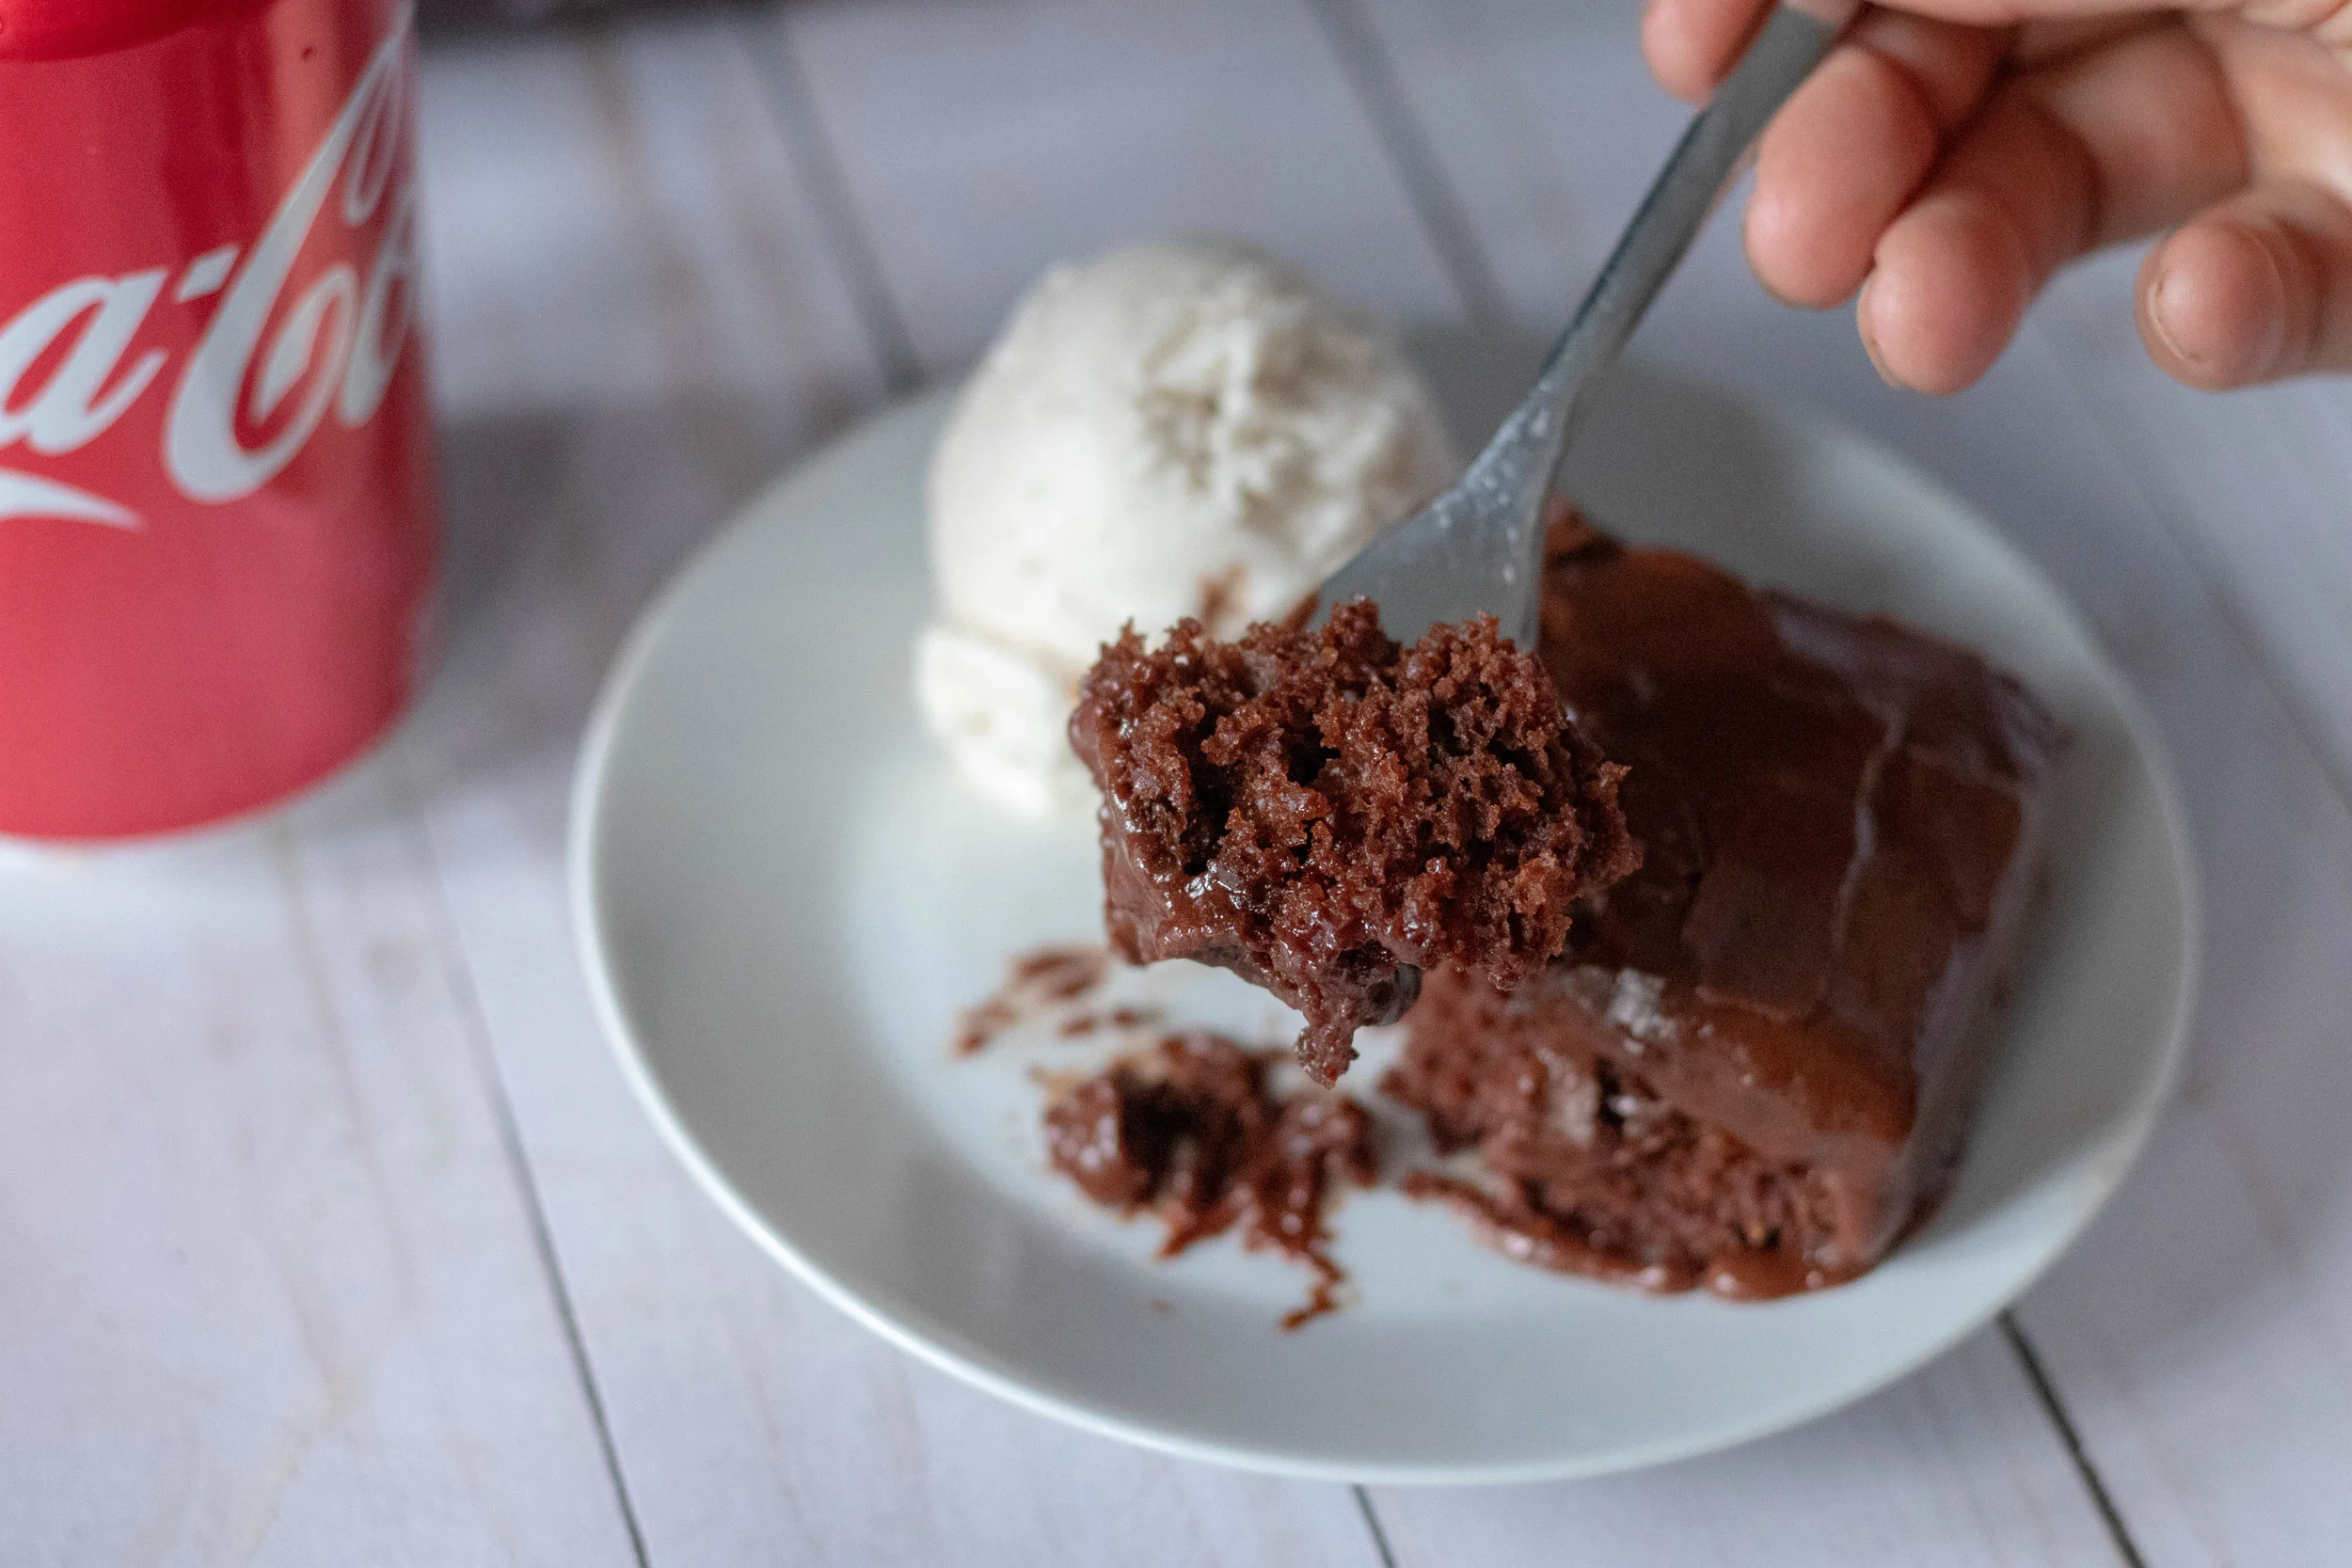
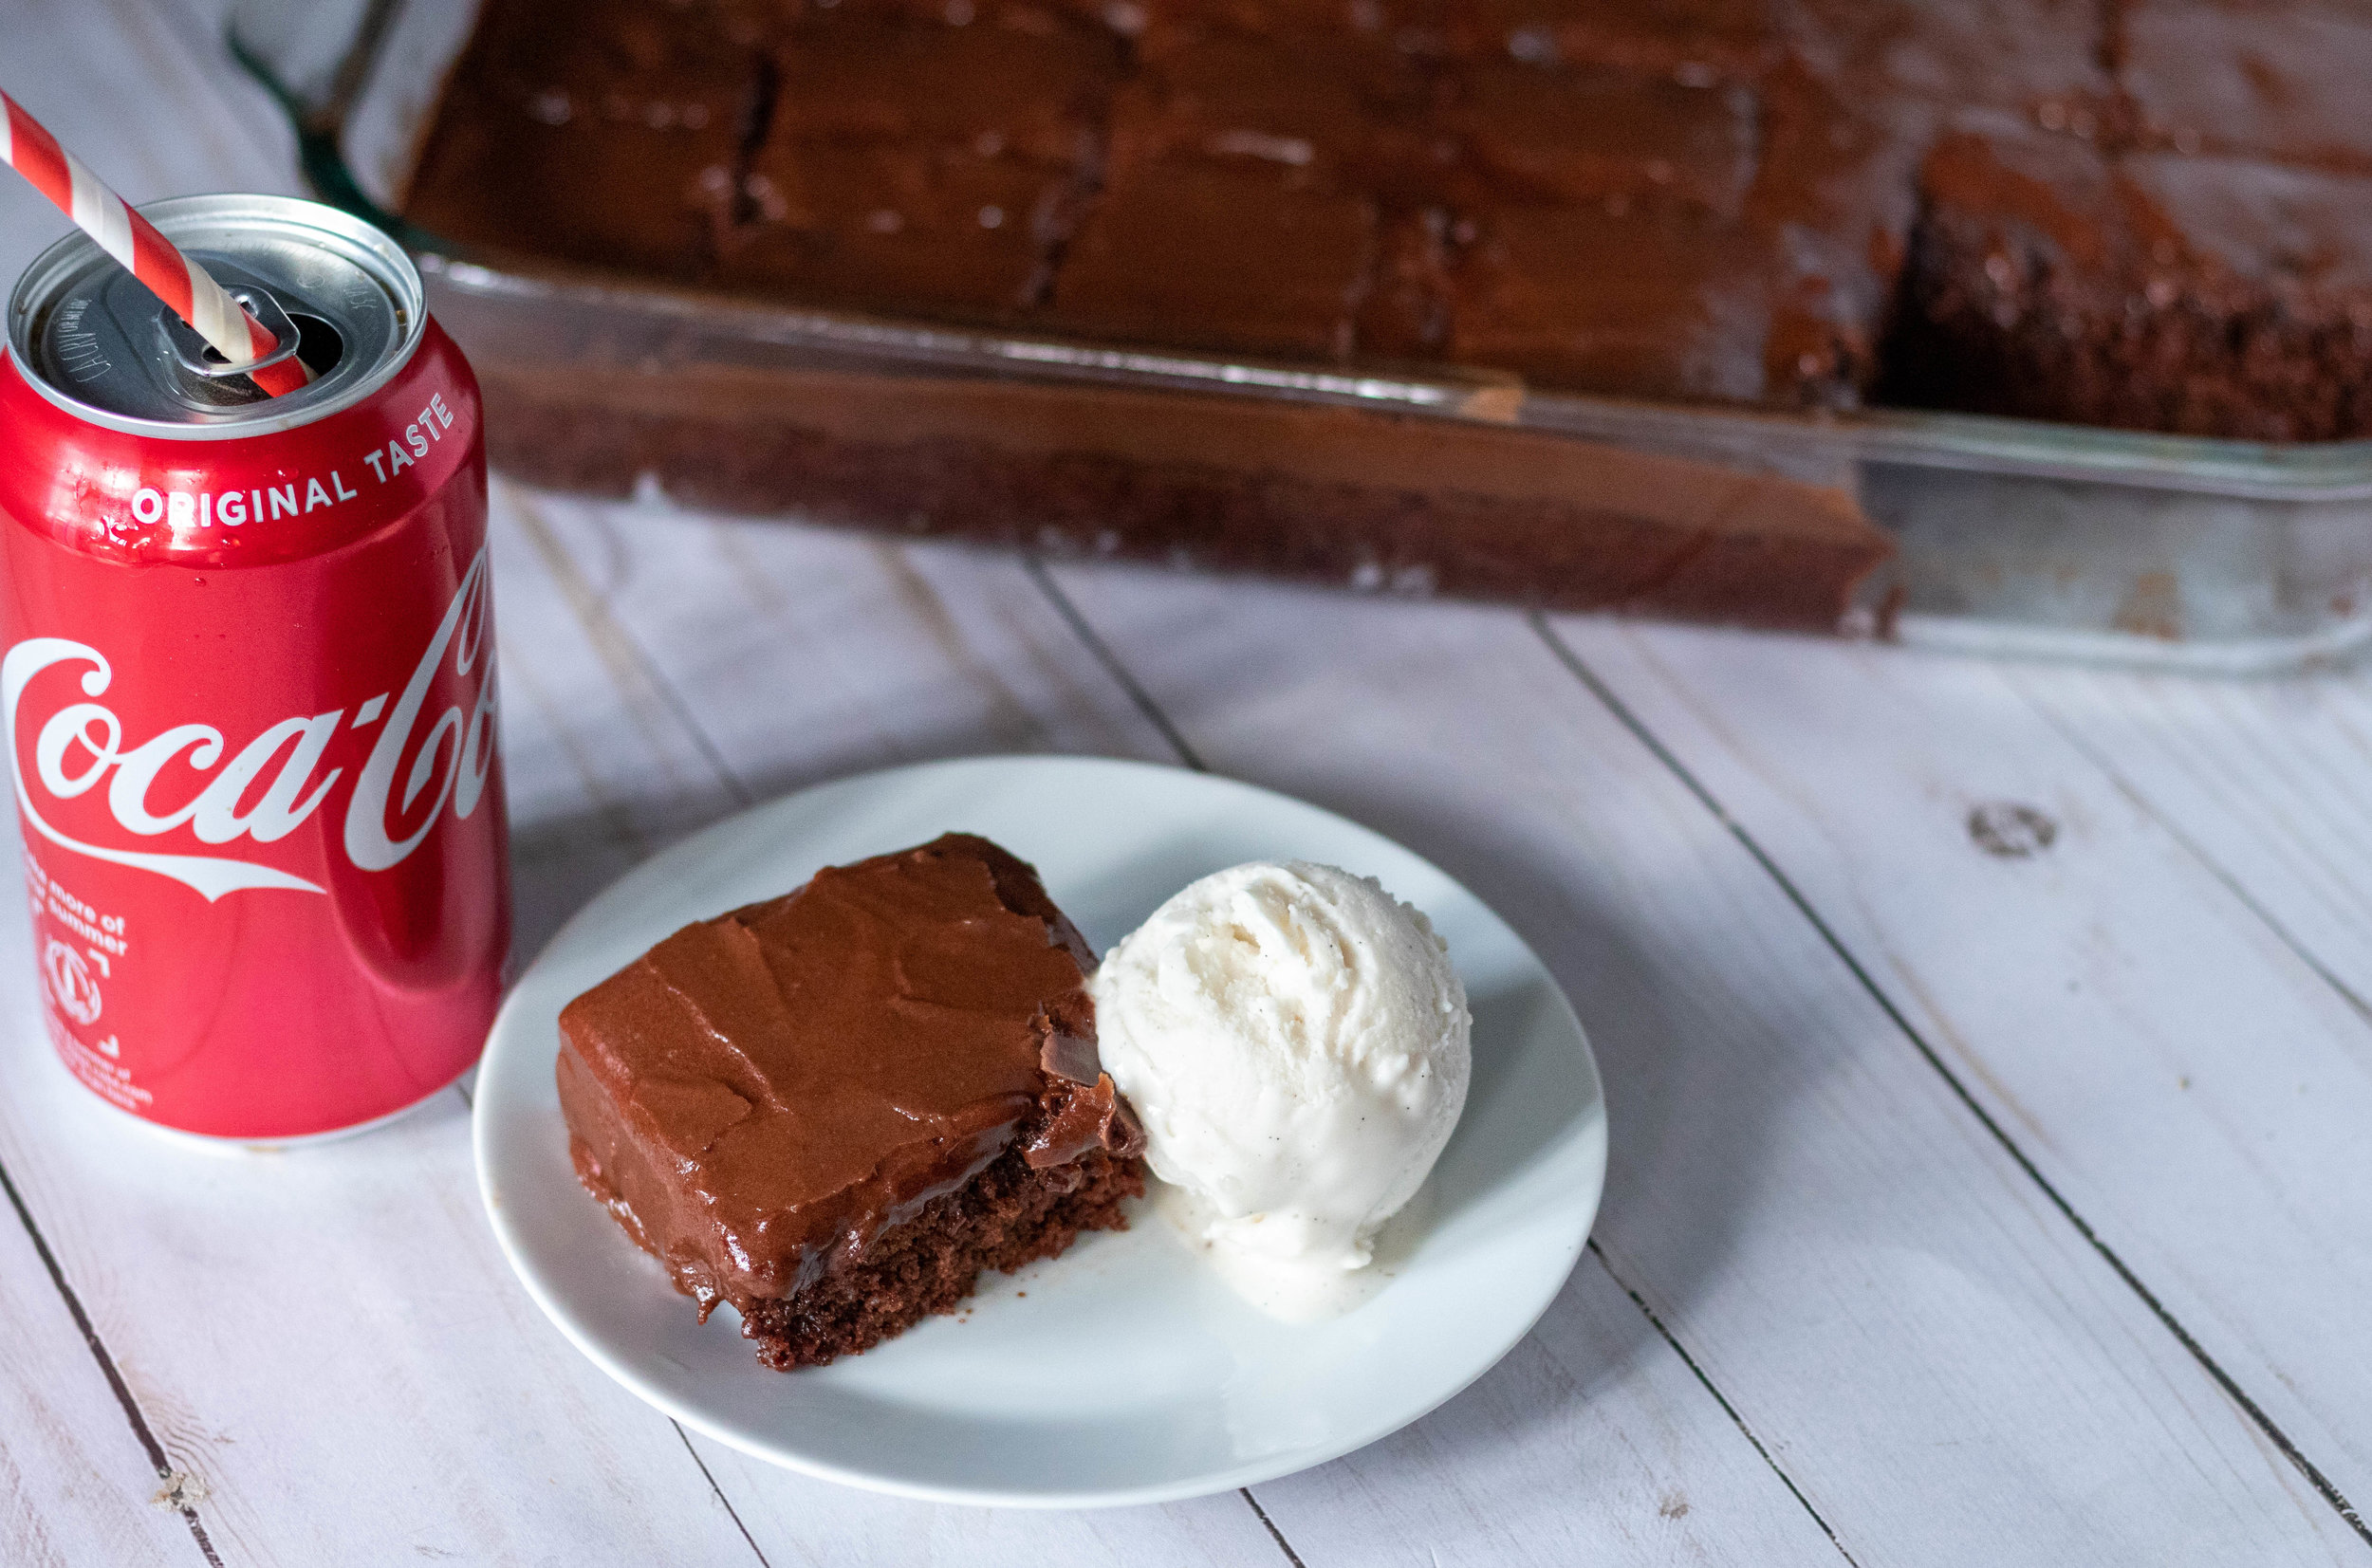
Vegan Coca-Cola Cake

Vegan CoCola Cake with a scoop of vanilla ice cream.

So, for many, many years of my life, eating at Cracker Barrel was a road trip staple. Actually, since I was a kid, eating at Cracker Barrel was just a regular thing, road trip or not. I mean, they have candy, toys, audio books , scented candles, and delicious southern food! Also, they bring you biscuits AND corn muffins with your meal. It’s a dream really.

Even as a non vegan kid, I could have lived off of their vegetable plate! On the rare occasion where I didn’t need to unbutton my pants just to breath after my dinner, I would order my all time favorite dessert, fudgy Coca-Cola Cake!

I mean y’all, its a chocolate cake baked with COKE! My husbands nana used to make a chocolate cake where you poured the frosting onto the cake and it hardened on top and tasted like fudge, I think this is just a southern thing. This frosting is kind of like that. You spread it onto a warm cake so it melts, then hardens back up to perfection.

Veganizing this classic cake isn’t hard to do. We used starch in place of the eggs, swapped butter, chocolate, and milk for plant based versions, and tada!!!!!

Now my kids get to know about this magic, too! I know, I know, this cake is not even remotely good for you, but sometimes you gotta compromise your otherwise healthy ways and eat cake, vegan chocolate coca-cola cake! Just trust me here!


INGREDIENTS:

  • 2 cups all purpose flour

  • 2 cups white sugar

  • 1 teaspoon baking soda

  • 2 teaspoons baking powder

  • 3/4 cups cocoa powder

  • 2 tablespoons tapioca or corn starch

  • 6 tablespoons water

  • 1 1/4 cup Coca-Cola

  • 1/2 cup vegan butter

  • 1/2 cup oil like grape seed or canola

  • 1/2 cup plant based milk plus 1 teaspoon vinegar

  • 2 teaspoons vanilla

CHOCOLATE FROSTING:

  • 3 cups powdered sugar

  • 1/2 cup vegan butter

  • 1/4 cocoa powder

  • 1/4 cup vegan chocolate chips, plus 1 teaspoon butter

  • 1/4 cup Coca-Cola

  • 1 teaspoon vanilla

Vegan CoCola Cake Bite

INSTRUCTIONS:

Preheat oven to 350 degrees

  1. Whisk the starch and 6 tablespoons of water together in a small bowl.

  2. In a medium size sauce pan, over medium heat, add the butter, sugar and coke. Let mixture simmer until the sugar and butter have melted.

  3. Add the milk and vinegar together in a cup and let the mixture sit for a few minutes.

  4. Mix all of the remaining dry ingredients together in a large bowl. Pour in the heated coke mixture, oil, milk , vanilla, and starch mixture. Mix until well combined.

  5. Spray an 9x13 cake pan or pyrex with some oil. Pour batter into the pan and bake for 25-30 minutes or until a cake tester or tooth pick inserted into the center comes out clean. Remove from oven. Begin making the frosting. The cake still needs to be warm when you frost it!

  6. Start the frosting by adding the chocolate chips and 1 teaspoons of butter to a microwave safe container. Microwave for 30 seconds, then stir. Repeat until the chocolate has melted.

  7. Using a stand mixer or large bowl and electric hand mixer, add the melted chocolate, cocoa powder, vanilla, butter, and mix until everything is well incorporated. Begin alternating adding a little coke, then a little powdered sugar at a time. This helps with avoiding a big mess. Mix until creamy and smooth.

  8. Spread the frosting over a still warm cake and let cool before slicing into squares . The frosting will melt then re-harden as it cools. Store covered at room temperature.

  9. Serve with dairy free vanilla ice cream.

If you like this recipe, try these:
Chocolate Peanut Butter Dream Cake

Nostalgic Vegan Ice Cream Cake

Vegan Coconut Chocolate Blondie Skillet Sundae

Vegan Cocola Cake

vegan chocolate coca-cola cake

Vegan Cheez-Its

Vegan Cheezits

I have actually only ever met one person who hates a cheez-it (I’m looking at you Dustin.) Its baffling to me, honestly. I think 20% of my diet in high school may have been cheez-its.

My kids also loved them before we went vegan, and my 13 year old daughter suggested we try and make a vegan version. Done and done, kid. This recipe could not be easier. The hardest part is trying to evenly cut the crackers, which I 100% failed at doing. My personality is pretty haphazard so who cares about evenly cut crackers, just put them in my mouth. My sincerest apologies to all of y’all that need each cracker to be the exact same size. Hats off to ya, and the precision you bring to the world, you are needed!

We actually used Follow You Heart brand cheddar in this recipe because I had a bag on hand and it made it fast and easy. But if you are feeling especially extra, you can whip up a batch of your own vegan cheddar and use that. We linked are few of our cheddar recipes at bottom of this page!

Make sure to get the dough rolled out thin enough or these crackers will stay on the chewy side. If you get the dough thin, they come out nice and crispy and just as good as an original, if not better because these are vegan! Even Dustin ate a handful, and thats saying something!


INGREDIENTS:

  • 1 cup all purpose flour

  • 8 ounces of vegan cheddar shreds, store bought or homemade

  • 2 tablespoons nutritional yeast

  • 3 tablespoons ice water

  • 1/4 cup cold vegan butter

  • 1-2 teaspoons of salt ( to sprinkle on the crackers)


INSTRUCTIONS:

Preheat oven to 375 degrees (when ready to bake)

  1. Add the cheese, flour, butter, and nutritional yeast to a food processor. Pulse until the cheese is nice and minced up. Add in the ice water and process until a ball of dough forms. If you want to make these without a food processor, place cheese in a blender to get it good and chopped up. Add the cheese with the flour, nutritional yeast, and butter to a bowl. Using your hands mix in the butter. Once butter is incorporated, add in the ice water. Dump out on to a clean floured surface and knead just until you have a ball of dough. Do not over knead because it will cause the dough to be tough.

  2. Wrap up the dough in some plastic wrap and pop it in the fridge for about an hour.

  3. Lightly flour a clean surface. Divide dough in half. Pop the half you are not using back in the fridge. Roll out one half of the dough into a about a 10x12 inch rectangle that is about 1/8 of an inch thick. Any thicker and it is hard to get them crispy. Wrap up any scrap dough and refrigerate until you are ready to use it.

  4. Using a pastry cutter or pizza cutter, cut small squares, about 1/2 inch by 1/2 inch. Place them on a parchment lined baking sheet and sprinkle with a little salt if you like. If you want to make a classic cheez-it hole in the middle of each cracker you can use the small end of a chopstick or a skewer. Bake for 18-22 minutes on the middle oven rack. Watch the first batch of crackers closely. You want to leave them in until they are nice and crispy but you don’t want them to brown to much. You will know how long to bake the remaining batches for after the first batch.

  5. Repeat with remaining dough. Store crackers in an airtight container. You can also store leftover dough for a few days in the fridge and bake later.

If you like this recipe, try these:

Smokey Cashew Cheddar

Smokey Coconut Milk Chile Cheese

Classic Vegan Sausage Balls

Vegan Cheezits

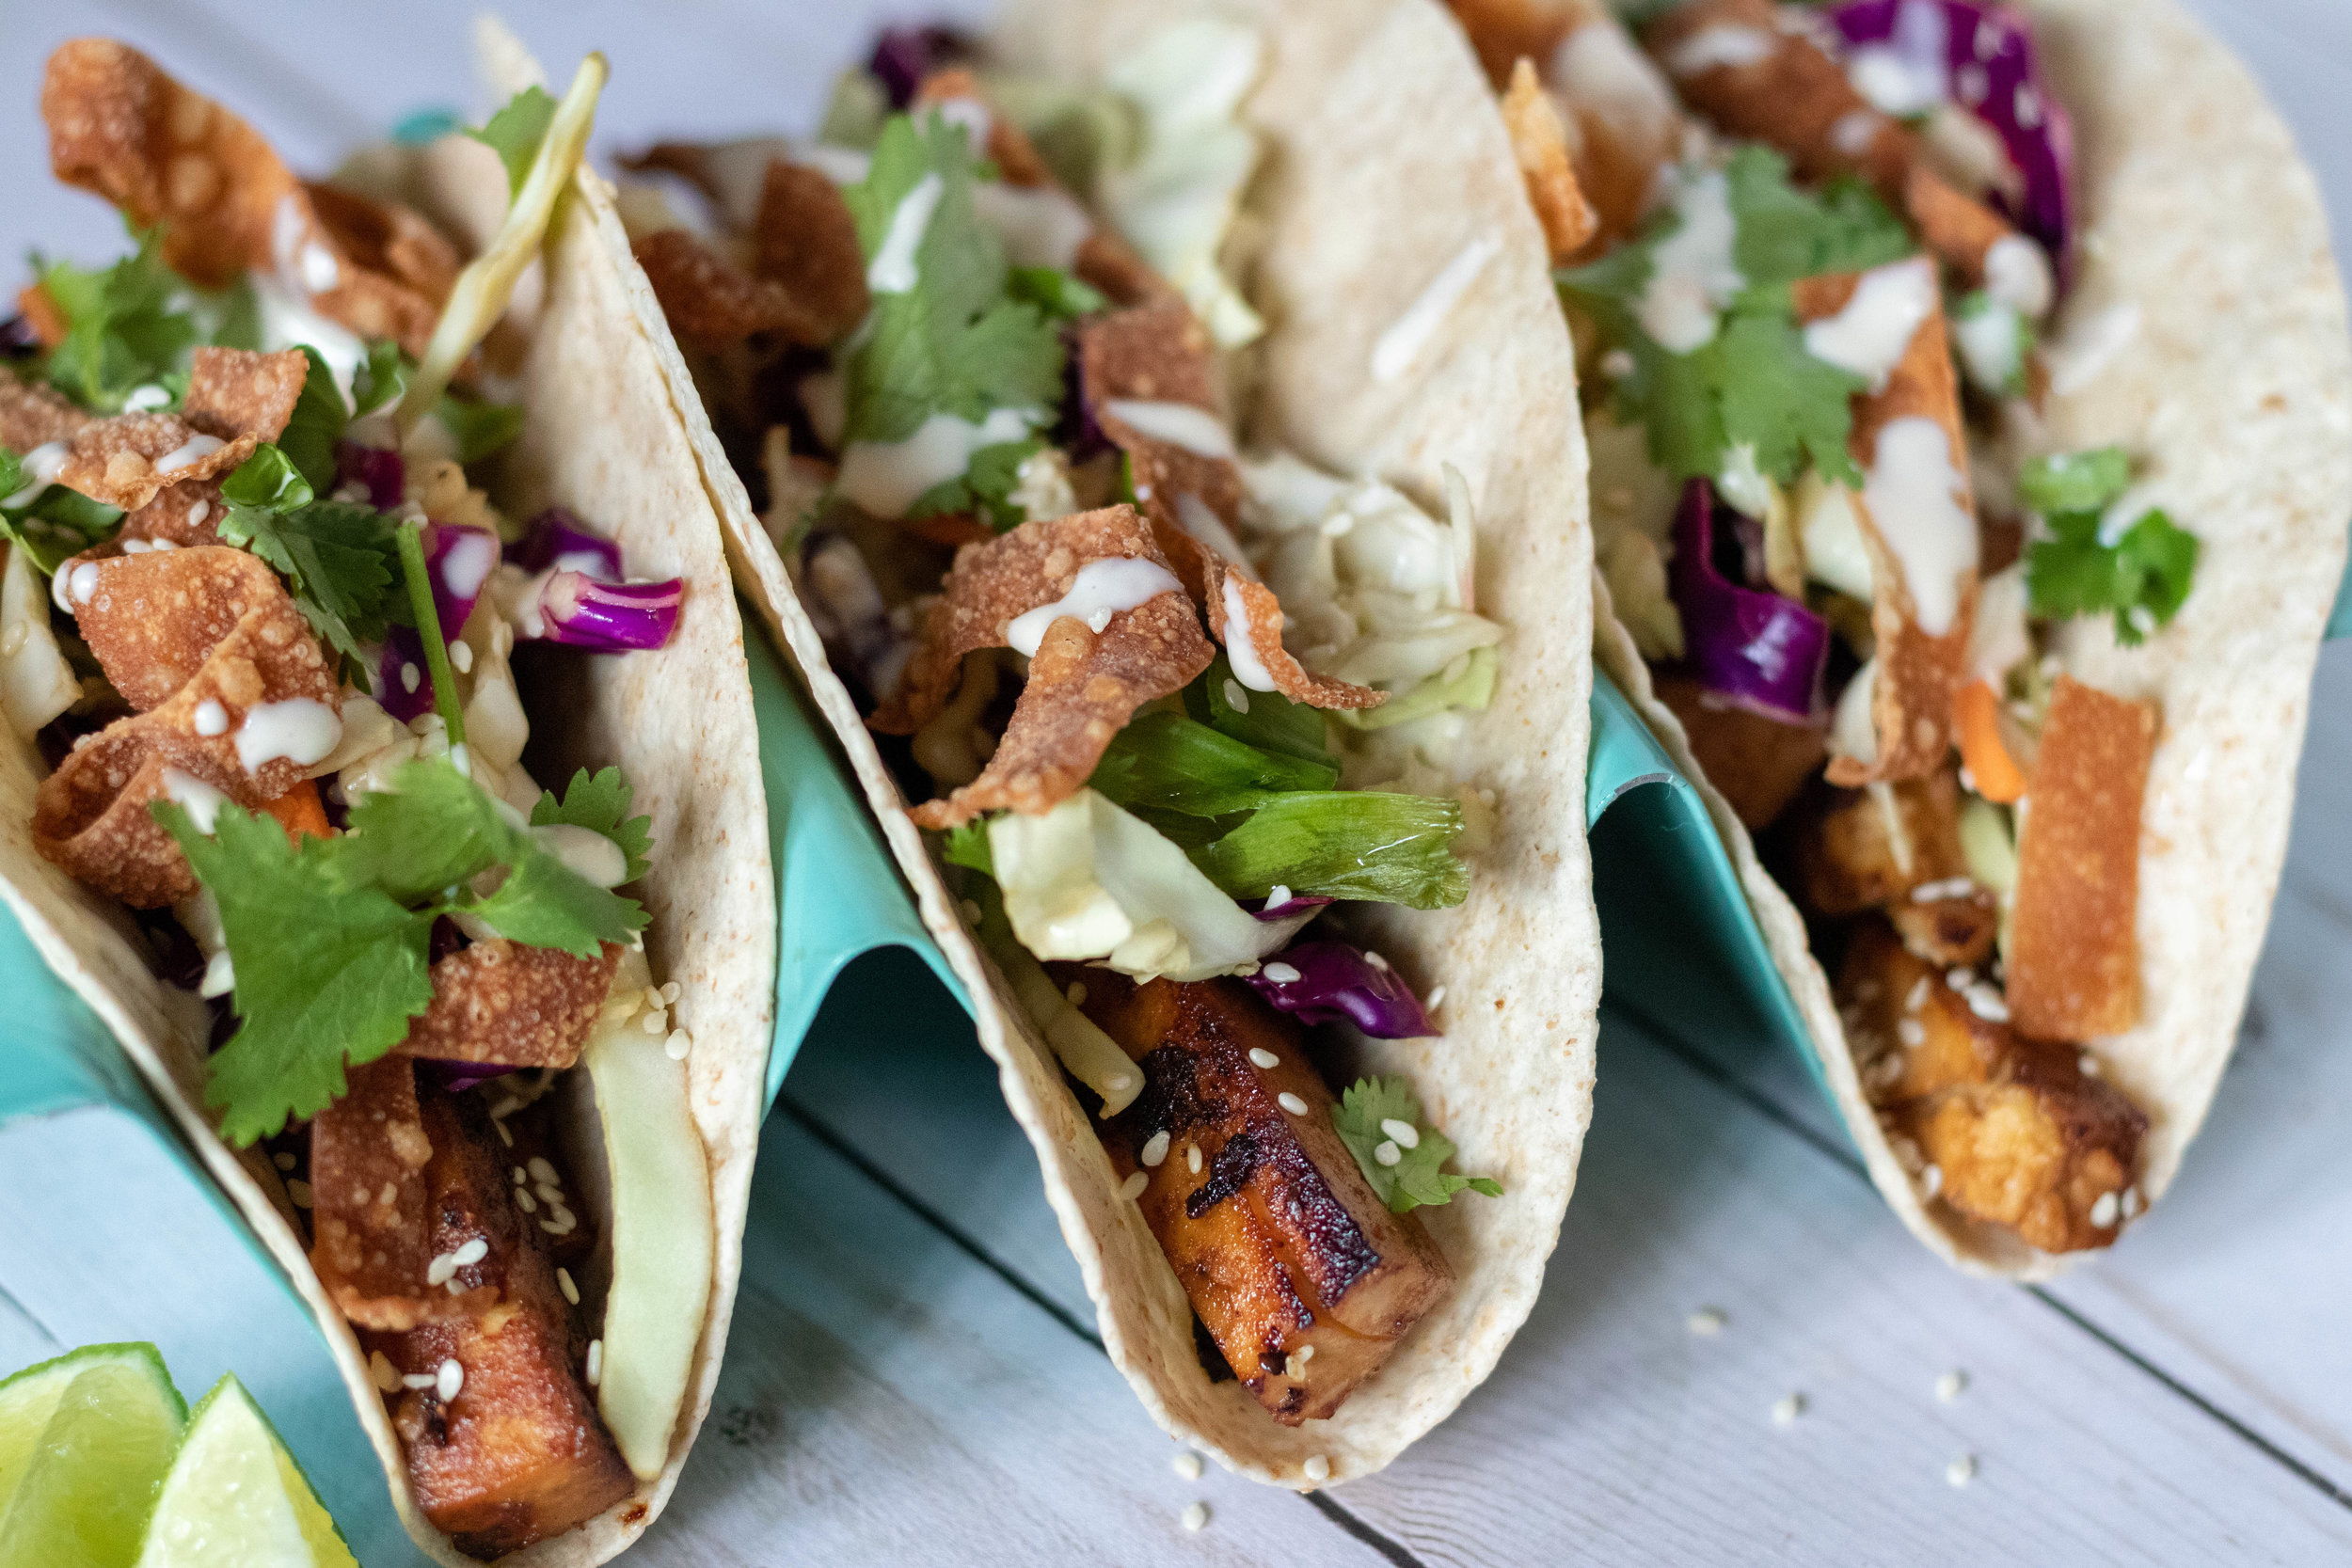
Sesame Tofu Tacos with Asian Slaw

Sesame Tofu Tacos

We eat a lot of tacos in our house.

Tacos are easy, inexpensive, and typically make everyone happy. If I am in a pinch for time, or have no clue what else to make for dinner, I will normally throw together some tacos with whatever ingredients we have on hand.

Most recently I was in the mood for something light, crunchy, and asian inspired. So I decide to marinate some tofu, make a light crunchy slaw, a creamy ginger dressing , and fry up some leftover wonton wrappers I had on hand.

Everyone in the house loved these tacos, and I have a feeling will be my go to taco this summer. I always have tofu and slaw mix in my fridge, and my pantry always has the ingredients for this quick marinade!

I have most recently started buying a tube of minced ginger to keep in the fridge for quick flavor and less hassle. It seems we just keep getting busier in this house, so I am currently all about anything that can save me some time and effort.

So if you are in the mood to switch up your taco game, try these sesame tofu tacos with asian slaw. Taco Tuesday ( or any other day of the week) just got a little more exciting!


INGREDIENTS:

  • 1 block extra firm tofu

  • 1/4 cup soy sauce, or coconut aminos

  • juice from 1 lime

  • 2 teaspoons sesame oil

  • 1 teaspoon minced garlic

  • 2 tablespoons brown sugar

  • 1 pack flour tortillas

  • a handful of cilantro

  • 10 vegan wonton wrappers

  • oil for frying


Asian Slaw:

  • 3 cups slaw mix, or shredded cabbage

  • juice from 1 lime

  • 1 -2 teaspoon sesame oil

  • 1-2 tablespoons toasted sesame seeds

Ginger Dressing:

  • 1/4 cup vegan mayo

  • 2 teaspoons minced ginger

  • 1 teaspoon minced garlic

  • 2 teaspoons apple cider vinegar

  • 2 teaspoons agave or sugar

  • 2 teaspoons soy sauce


INSTRUCTIONS:

  1. Remove tofu from package and wrap in a clean kitchen towel, or a few paper towels. Place a few books on top and let the tofu sit for 10-15 minutes to press out the excess liquid.

  2. Cut tofu in 1/4 inch thin long strips. Whisk together the soy sauce, lime juice, sesame oil, garlic, and brown sugar in a shallow dish. Let tofu strips marinate in the mixture for about 15 minutes.

  3. While the tofu is marinating mix together the ingredients for the slaw and set aside.

  4. Mix the ingredients for the dressing and set aside.

  5. Stack the wonton wrappers on top of each other and cut them into 1/4 inch strips. Separate the strips.

  6. Heat a medium skillet or small sauce pan with an inch or two of oil over medium heat. Once the oil is hot, add the wonton strips in batches, careful not to over crowd the pan. Fry the strips for just a few minutes or until golden brown. Place cooked strips on a paper towel lined plate.

  7. Heat a large skillet over medium heat. Add the tofu, along with the marinade to the pan. Let the tofu cook on each side for a few minutes before flipping. Cook the tofu until all of the liquid has been absorbed and the tofu is browning and crisping around the edges.

  8. To build the tacos, add some tofu to a tortilla, top with slaw, a drizzle of dressing, some crispy wontons, and some fresh cilantro.

If you like this recipe, try these:

Vegan Alabama White Sauce Tempeh Tacos

Vegan Beer Battered Fish Tacos

Grilled Watermelon and Tofu Tacos

Sesame Tofu Tacos

sesame tofu tacos with asian slaw, crispy wontons and creamy vegan ginger dressing