Vegan Churro Ice Cream Sandwiches

Vegan Vanilla and Chocolate Churro Ice Cream Sandwiches

If you are a fan of churros and ice cream, then we have the perfect dessert for you! On a recent trip to Walt Disney World we saw someone walking around with a churro ice cream sandwich, and we instantly knew what we would be making once we got home! Mickey never fails us! I mean its genius really, and I am not sure why we didn’t think of it ourselves. Deliciously creamy vegan ice cream, sandwiched between crispy, chewy, perfectly fried cinnamon-sugar-coated vegan churros. Nothing not to love here…nothing! You can use any ice cream you like. We used almond milk chocolate and vanilla. I honestly can’t say which is my favorite, so I just ate one of each! You can also freeze these tasty treats for later, so don’t worry about trying to eat them all at once, but if I am being perfectly honest, that wouldn’t be hard either! So this summer, step up your ice cream sandwich game with vegan churros! I don’t think you will be sad that you did.

INGREDIENTS:

  • 4 cups all purpose flour

  • 1/4 cup vegan butter, room temp

  • 1 teaspoon salt

  • 1/4 cup sugar

  • 2 cups water

  • neutral oil for frying (we use grapeseed oil or canola oil)

  • 1 cup sugar plus 2 tablespoons cinnamon (this is for coating the fried churros)

  • Plant based ice cream. (we used vanilla and chocolate)

INSTRUCTIONS:

  1. Heat a medium size pot over medium heat. Add the water, sugar, and salt. Cook unit the sugar has dissolved.

  2. Add in the butter and let it melt in the water mixture. Remove from heat.

  3. Stir in the flour and mix until well combined.

  4. Add the mixture to a piping bag fitted with medium to large star tip. If you do not have a piping bag or star tip, you can add the batter to a zip lock bag and snip a tiny piece of the corner.

  5. Add 1 cup of sugar and 4 teaspoons of cinnamon to a small bowl and set aside.

  6. Heat a few inches of oil in a deep skillet or pot. You need enough oil that the churros can float in the oil, and not hit the bottom of the pot. You want the temperature of the oil around 350 - 375 degrees. If you do not have a candy thermometer for testing the oil temperature, you can poke a chop stick or wooden skewer into the oil. If bubbles form around the chop stick, it’s ready. You can also just let it heat for several minutes, and try a little dough at first before trying a whole churro.

  7. Line a baking sheet with some paper towels and place a wire cooling rack on top.

  8. Once the oil is ready, pipe a circle by making a swirl with the batter. I like to do 2 at a time so I can try and get them an equal size. Allow they churros to fry on each side for about a minute or until they are golden brown. Place finished churros on the wire rack to cool for a minute. Once they are cool enough to handle, coat the churros in the sugar and cinnamon mixture.

  9. Once churros are completely cool, make sandwiches by adding a scoop of plant based ice cream or homemade nice cream between two churros. Serve right away or you can freeze these sandwiches for later. You just have to let them sit at room temperature for a few minutes to allow the churro to thaw enough to bite through!

Serves 6 - 8 depending on the size you make your churros.

If you like this recipe, try these:

Nostalgic Vegan Ice Cream Cake (Dairy Queen)

Vegan Banana Pudding Milkshake

Chocolate, Peanut butter, Banana Nice cream

Vegan Chocolate Churro Ice Cream Sandwich

Step up you ice cream sandwich game with these delicious vegan churro ice cream sandwiches. Summer just got a lot tastier.

Brussels Sprout Slaw with Sweet Mustard and Maple Walnuts

Simple Vegan Brussels Sprout Slaw with Sweet Mustard and Maple Walnuts

Simple sides are my favorite sides to make, especially in the hot summer months. I am always looking for new, quick slaw ideas, and I love to use Brussels sprouts in place of cabbage. This Brussels sprouts slaw is tangy and sweet with the perfect amount of crunch. This slaw comes together quickly and is a crowd favorite. Perfect for a summertime bbq or get together! You can also easily change out the walnuts for pecans or sliced almonds. Use whatever nut you have on hand!! I promise this Brussels sprout slaw with sweet mustard and maple walnuts may become your new summer addiction.

INGREDIENTS:

  • 4 cups Brussels sprouts

  • 1/2 red onion

  • 1/4 cup vegan mayo

  • 2 tablespoons dijon mustard

  • 1-2 tablespoon maple syrup (depending on desired sweetness)

  • 1/2 teaspoon salt

  • 1/2 teaspoon pepper

Maple Walnuts

  • 1/3 cup chopped walnuts

  • 2 tablespoons maple syrup

  • 1 teaspoon minced garlic

COOKING INSTRUCTIONS:

  1. Heat a medium skillet over medium heat. Add the chopped walnuts, 2 tablespoons maple syrup, and 1 teaspoon of garlic. Let the walnuts cook for several minutes, keeping them moving with a spatula to avoid having them burn. Once the maple syrup has fully coated the nuts and has gotten nice and sticky, remove nuts from heat. Pour walnuts onto a silicon mat or a parchment lined baking sheet to cool.

  2. Wash and trim ends from Brussels sprouts. Shred the Brussels sprouts by using the shredding blade on your food processor, or you can carefully cut them into thin shreds using a sharp knife.

  3. Finely dice red onion.

  4. In a small bowl, mix together mayo, mustard, maple syrup, salt and pepper.

  5. In a large bowl combine shredded Brussels sprouts, walnuts, onions, and dressing.

  6. Serve room temperature or chilled.

If you liked this recipe, try these:

Easy Vegan Macaroni Salad

Raw Sesame Zucchini Noddle Salad

Vegan Gorgonzola Fried Brussels Sprouts

Simple Vegan Brussels Sprout Slaw with Sweet Mustard and Maple Walnuts

A simple recipe for Brussels Sprout Slaw with Sweet Mustard and Maple Walnuts

Vegan Lemon Cupcakes with Cream Cheese Frosting

A spread of delicious vegan lemon cupcakes with cream cheese frosting garnished with candied lemons.

Lemon and cream cheese might be one of my favorite dessert combos. So this year for my 40th birthday, my super talented 13 year old daughter and I decided to whip up a batch of vegan lemon cream cheese cupcakes. They are so delicious and just about perfect as far as I am concerned. Soft lemony cake with zesty vegan cream cheese frosting, and a little wedge of candied lemon on top! If you love lemon and cream cheese together as much as I do, then you can not go wrong with these cupcakes! If you are no into candied citrus then you could top these with some sprinkles or a piece of lemon candy. I personally love candied lemon slices, so for me it’s the “cheery “ on top…err the lemon on top. You know what I mean!

INGREDIENTS:

  • 3 cups all purpose flour

  • 2 cups white sugar

  • 1 1/2 teaspoons baking powder

  • 1 teaspoon baking soda

  • 1/2 teaspoon salt

  • 2/3 cups lemon juice (about 4 lemons)

  • zest from 2 lemons

  • 2 cups plant milk (I like to bake with oat milk)

  • 1/2 cup melted vegan butter

  • 1 teaspoons vanilla extract

  • Candied lemon slices (optional garnish)

Lemon Cream Cheese Frosting:

  • 1/2 cup vegan butter

  • 1/2 cup vegan cream cheese

  • 5-6 cups powdered sugar

  • zest from 1 lemon

A line of delicious vegan lemon cupcakes with cream cheese frosting garnished with candied lemons.

COOKING INSTRUCTIONS:

PREHEAT OVEN TO 350 DEGREES

  1. In a large bowl, whisk together dry cake ingredients. In a smaller bowl, whisk together the wet ingredients.

  2. Combine the wet ingredients into the dry and mix until well combined.

  3. Line a muffin tin with 24 cupcake liners. We actually have a tin that holds 2 dozen cupcakes, but if yours holds 1 dozen, you will need to bake in batches.

  4. Fill the cups 3/4 of the way full. Bake for 25 to 30 minutes or until a toothpick inserted in the middle of one of the cupcakes comes out clean.

  5. Allow the cupcakes to cool completely.

  6. In a stand mixer, or using a hand mixer, cream together the butter and cream cheese. Add in the vanilla and lemon zest. Begin adding the powdered sugar a little at a time and beat it in until the frosting is the desired stiffness.

  7. Pipe or spread frosting onto cooled cupcakes and garnish with a wedge of candied lemon.

Serves 24.

If you liked this recipe, then try these:

Vegan Lemon Pound Cake

Vegan Lemon Lavender Cream Cheese Pop Tarts

Blueberry Pancakes with Sweet Lemon Ricotta

A closeup of delicious vegan lemon cupcakes with cream cheese frosting garnished with candied lemons.

Lemon and cream cheese is a classic combination and these vegan cupcakes highlight these flavors so perfectly.

Easy Candied Lemons

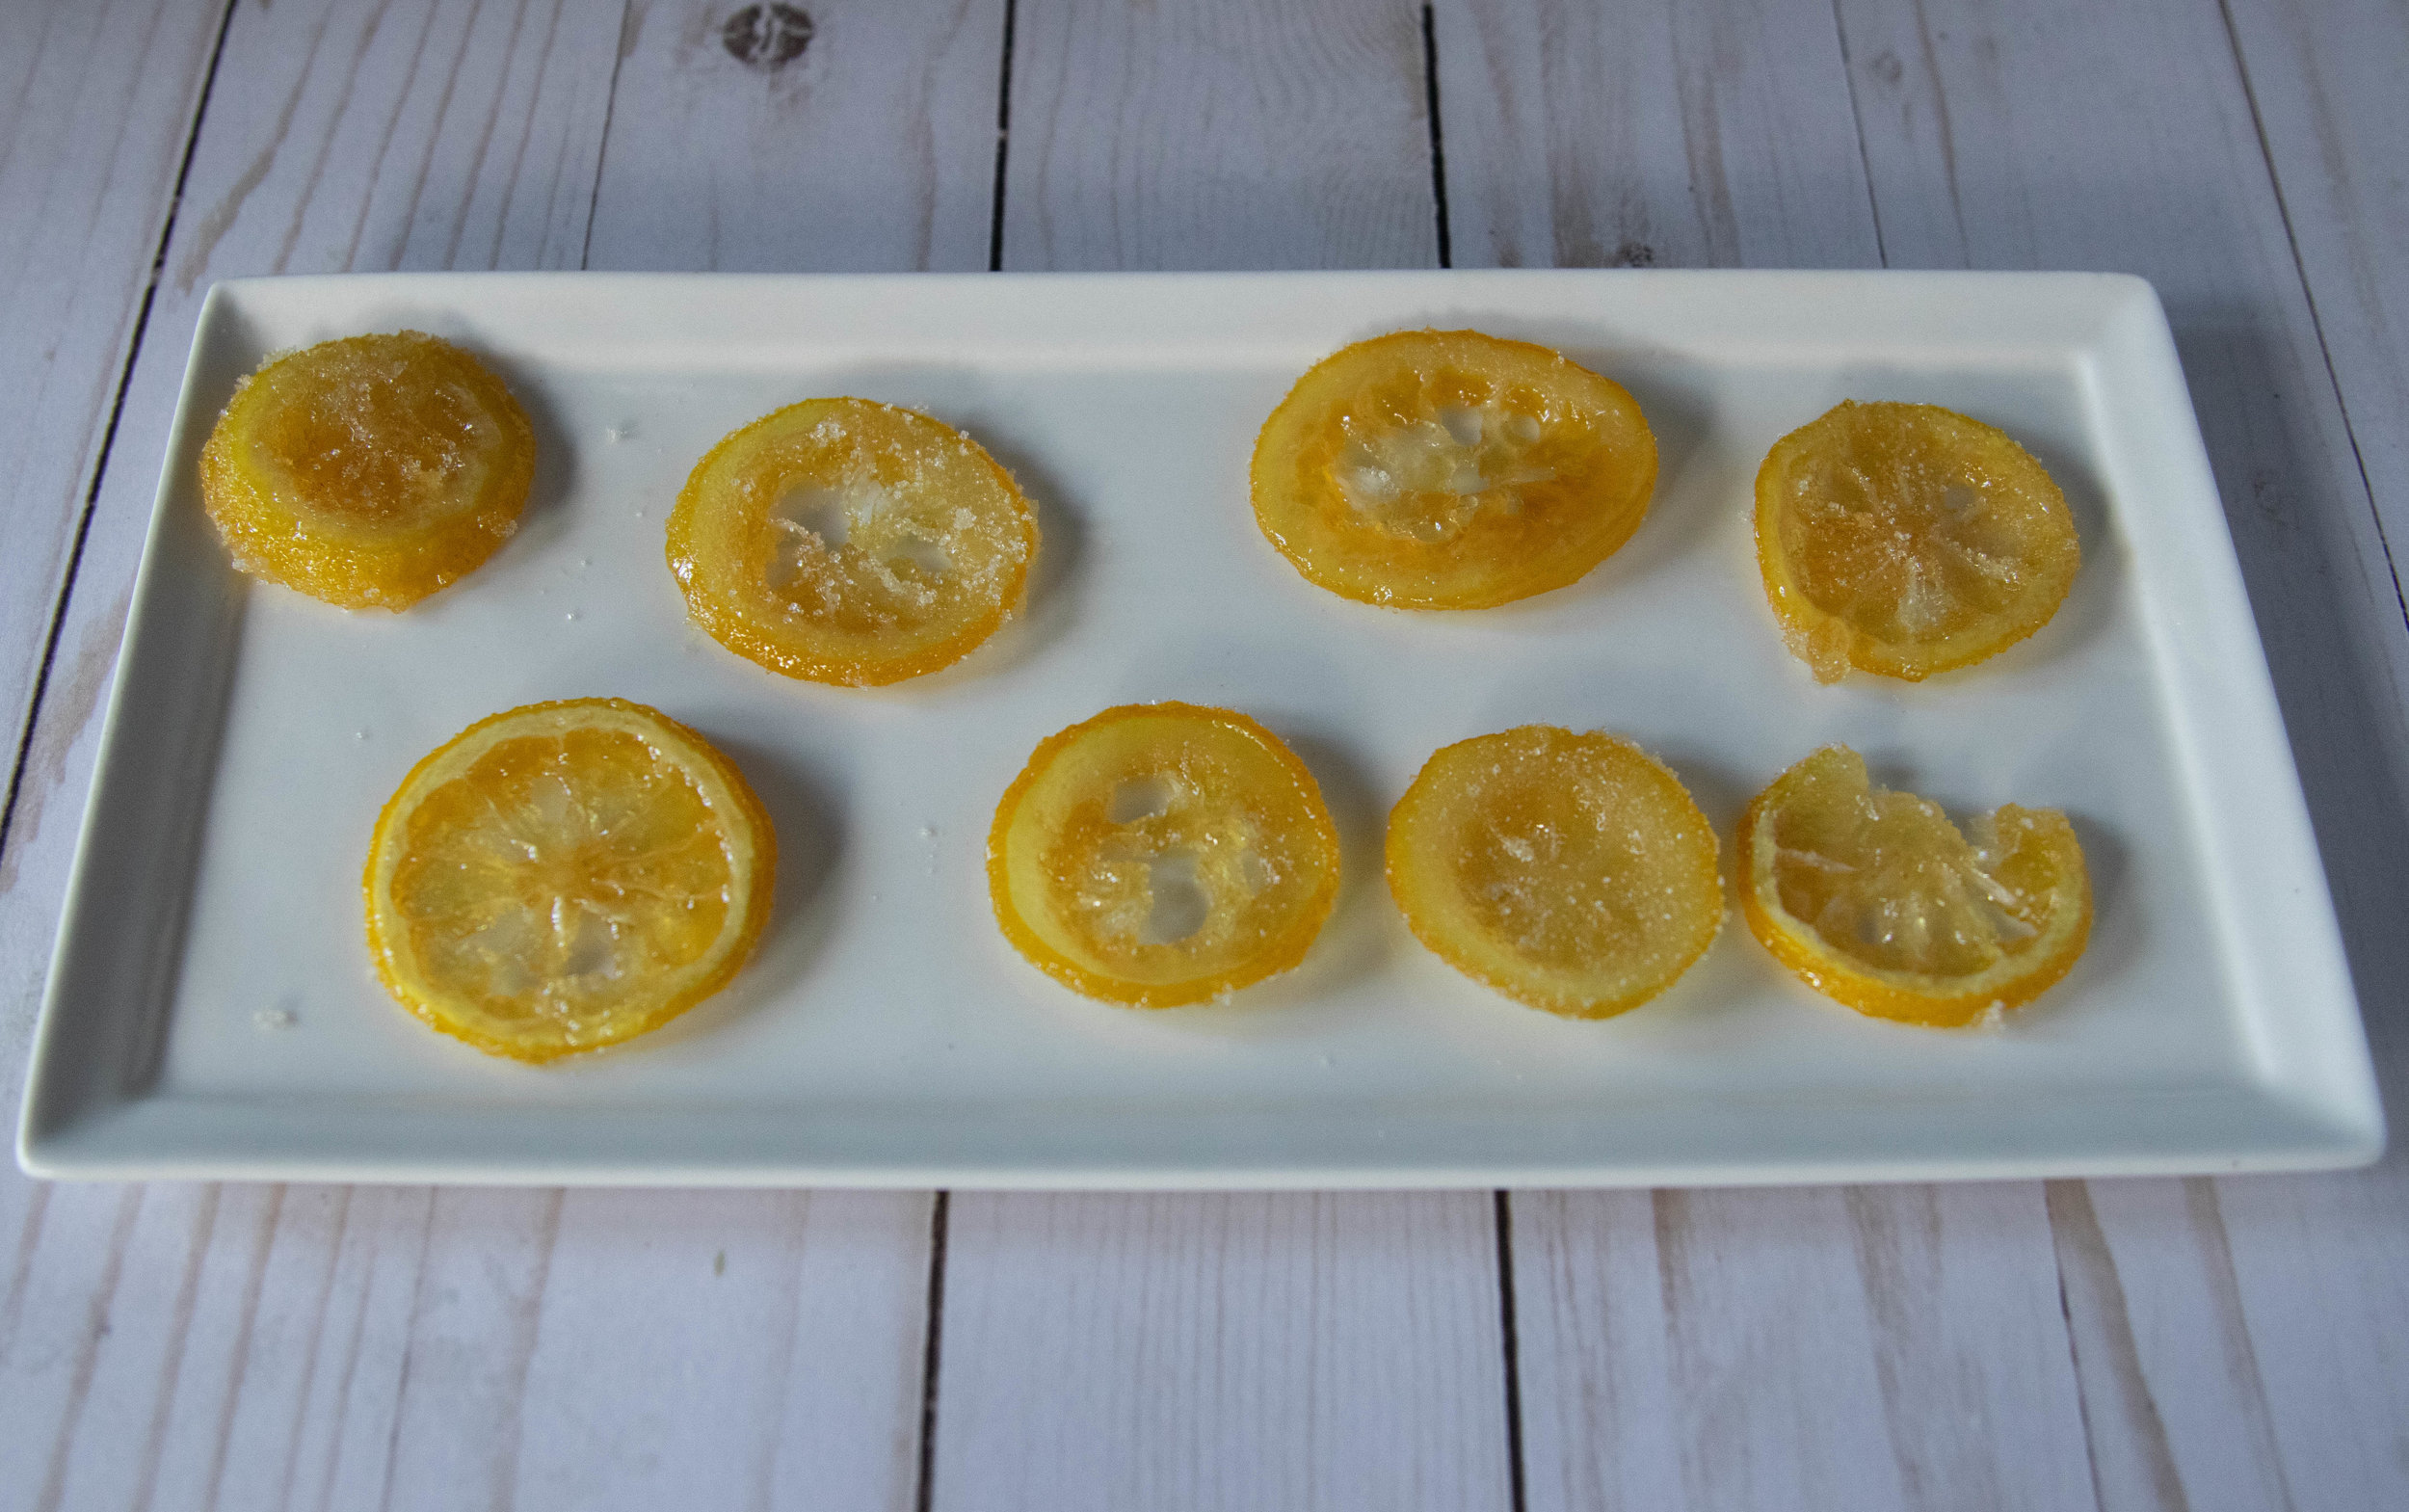
Plate of candied lemons with granulated sugar.

When I think of summer, I think of citrus fruit. We live in Florida so there is an abundance of lemons, limes, and oranges growing in our own neighborhood. A lot of citrus is actually ripe in the winter months, but that does not change my craving for all things citrus once the temperatures rise. Candied citrus is no exception. Candied lemons are the perfect easy garnish for cakes, cupcakes, cocktails, or even as a snack. You could just as easily candy limes or orange slices as well. Be sure to allow the candied lemons plenty of time to cool. They will stay a bit sticky but be firm enough to cut into smaller pieces once they are cooled and set.

INGREDIENTS:

  • 2 lemons, sliced thinly

  • 1 cup refined sugar (plus more for sprinkling)

  • 2/3 cups water

COOKING INSTRUCTIONS:

  1. Add water and sugar to medium sized pot over medium heat. Bring to a simmer and whisk until the sugar has dissolved.

  2. Remove any seeds from the lemon slices and add them to the water and sugar mixture. Allow the lemons to simmer for about 15 minutes.

  3. Remove lemons from the water sugar mixture carefully, using a pair of tongs and transfer them to a parchment lined cookie sheet. Sprinkle with extra sugar.

  4. Let the lemons cool at room temperature until completely cool. Store in the fridge in an air tight container.

Candied lemons are the perfect easy garnish for cakes, cupcakes, cocktails, or even as a snack.

Tempeh Summer Grit Bowl

A bowl of grits topped with tempeh, corn, tomatoes, and scallions.

I love grits and I especially love a grit bowl for breakfast, lunch or dinner.

You can make so many variations of grit bowls, but my favorite is always tempeh with some assortment of fresh veggies. T

his grit bowl is savory, filling, fresh, and delicious.

We added savory tempeh, broiled corn, fresh tomatoes, and onions, and mixed in some nutritional yeast to give the grits a cheesy kick.

This vegan grit bowl is perfect any time of day, super simple to throw together, and one of our easy summertime go to meals.


INGREDIENTS:

  • 1 cup old fashioned dry grits

  • 4 cups water

  • 1 - 2 ears of corn

  • 1 tomato

  • 2 green onions

  • 1 - 2 avocados

  • 1 package tempeh

  • 3 tablespoons nutritional yeast

  • 1/4 cup coconut aminos (you can use soy sauce as well, but skip the extra salt if you do)

  • 1 teaspoon minced garlic

  • 2 teaspoons liquid smoke

  • 2 tablespoons maple syrup

  • 1 teaspoon smoked paprika

  • salt and pepper to taste

  • 1/3 cup chopped cilantro


COOKING INSTRUCTIONS:

  1. Cook grits according to package instructions.

  2. Turn oven on broil and place shucked and cleaned corn on a baking pan. Once the oven is hot and the coils are red, place the pan in the oven and let the corn cook a few minutes. You just want it to get some nice color on the corn. Carefully remove the pan and turn the ears of corn using some tongs. Place back in the oven and let the other side cook a few minutes. Allow the corn to cool before cutting it off the cob using a sharp knife. I like to prop the ear of corn in a bowl and cut down the cob. The bowl helps hold the corn and catches the kernels.

  3. While the grits are cooking, cut tempeh into cubes. Whisk aminos, maple syrup, liquid smoke, garlic, paprika in a shallow dish and add the tempeh. Toss to coat.

  4. Heat a large skillet over medium heat. Add the tempeh along with the marinade. Allow the tempeh to cook for about 5 - 7 minutes, turning each piece until each side is a little crisp and all of the liquid has been absorbed.

  5. Dice onions, tomatoes, and avocados.

  6. Mix in nutritional yeast with the cooked grits along with salt and pepper to taste.

  7. Assemble bowls by adding a few scoops of grits. Top the grits with the tempeh, corn, tomatoes, onion, and avocados. Garnish with cilantro.

Serves 4.

If you liked this recipe, then try these:

Southern Tofu Scallops and Grits

Vegan Fried Cheese Grits

Tofu or Seitan Marengo with Lemon Polenta

A bowl of grits topped with tempeh, corn, tomatoes, and scallions.

This tempeh grit bowl is savory, filling, fresh, and delicious.

Easy Hibiscus Lime Tea

A couple cold glasses of hibiscus lime tea.

If you have never had an ice cold glass of hibiscus tea, well then you are missing out my friend.

It is so refreshing, and tangy, and I adore it. It is almost fruity and not nearly as floral as I would have expected.

You can find dried hibiscus flowers at Mexican markets or online, and as a bonus, its pretty inexpensive!

You can also add a splash of your favorite “adult” beverage to a glass for a light and refreshing cocktail!

You might find it labeled “Agua de Jamaica”, if you are looking in the Mexican market - just as a tip.

Hibiscus tea is full of vitamin C and antioxidants, among other heath benefits! So this summer change up your tea game and mix yourself a batch of this delicious, refreshing hibiscus lime tea. Cheers, y’all!


INGREDIENTS:

  • 1/2 cup dried hibiscus flowers

  • 6 cups water

  • 2-3 limes

  • 1/4 cup agave (or more if you like it sweeter)

  • sprigs of fresh mint (optional)


INSTRUCTIONS:

  1. Bring 2 cups of water, along with dried hibiscus flowers, to a boil in a small pot. Let it boil for a few minuets then remove from heat, and let steep for about 15 minutes.

  2. Pour the liquid through a sieve or colander over a tea pitcher to catch the flowers. Add 4 more cups of water to the pitcher.

  3. Juice 2 limes and add to the tea along with agave and stir. You can toss a few sprigs of mint in as well if you like.

Serve over ice. and garnish with lime wedges and fresh mint.

Refreshing and tangy hibscius lime tea.

BBQ Tofu Sandwich with Pickled Veggies

A BBQ tofu sandwich with pickled vegetables on sourdough bread.

I recently went to visit my niece, Madison, in Charlotte. She knows, and shares my love for food, so took me to get the BEST sandwich at a local coffee shop, AFTER she nearly killed me with a Crossfit workout.

I think the sandwich was maybe an apology, or maybe not. She is fierce and probably didn’t feel sorry for me at all…..but it was all worth if for that sandwich.

It was a BBQ Tofu Sandwich with pickled veggies and some vegan mayo. So simple but so, so, so good!

So once I got home I knew I wanted to recreate this sandwich with my own twist. I normally have a batch of quick pickled veggies in my fridge. They literally take minutes to make, and add a tangy crunch to all kinds of sandwiches, salads, or just as a snack.

I opted to mix up some mayo with a little bbq and lime to give the sauce a little more zip than the original plain mayo. I also added some cilantro because, I LOVE cilantro! I am fully aware that a ton of people do not share my affection for cilantro, and if thats you, then just skip it on the sandwich.

You can grill up a batch of this bbq tofu and quickly reheat any leftovers for later. I will seriously eat this sandwich every day unit all the tofu is gone, then want to cry because all of the tofu is gone :(

So thanks again Madi for being the best Crossfit coach, for not totally killing me, and for introducing me to this sandwich. You are the best.


INGREDIENTS:

  • 1 block extra firm tofu

  • 8-10 slices sour dough bread

  • 1 batch quick picked veggies

  • 1/2 cup of any bbq sauce you like

  • a handful of fresh cilantro

SAUCE:

  • 1/4 cup vegan mayo

  • 2 - 3 tablespoons bbq sauce

  • juice from 1/2 lime


COOKING INSTRUCTIONS:

  1. Drain tofu and wrap in a clean kitchen towel, or a few paper towels. Place a few books on top for 10-15 minutes to help press out the excess liquid. (or use a tofu press)

  2. Slice tofu into 1/4 inch thick slices, and place in a shallow dish. Cover with 1/2 cup of bbq sauce and let it sit for about 10 minutes.

  3. You can either cook the tofu on the grill or in a skillet. If grilling, place the tofu pieces directly onto the hot grill and allow each side to cook for about 5 minutes, brushing the excess bbq sauce from the pan onto the tofu slices before you flip them. If you do not want to place the tofu directly onto the grill, you can lay foil on the grill and cook the tofu that way. Yo can also give the grill a spray with some cooking oil before you heat it to help with sticking.

  4. If cooking in a skillet, heat a large skillet over medium heat and spray with a little oil. Place the tofu pieces into the pan and pour the excess bbq over the tops. Allow tofu to cook on each side for about 5 minutes.

  5. Mix the mayo, bbq, and lime in a small bowl.

  6. Toast the bread. Spread a little sauce on each slice after toasting, and top with a few pieces of tofu, some pickled veggies, and a few sprigs of cilantro to serve.


A BBQ tofu sandwich with pickled vegetables on sourdough bread.

BBQ Tofu Sandwich with Pickled Vegetables.

Vegan Fried Cheese Grits

IMG_2820.jpg

In the south, we eat grits.

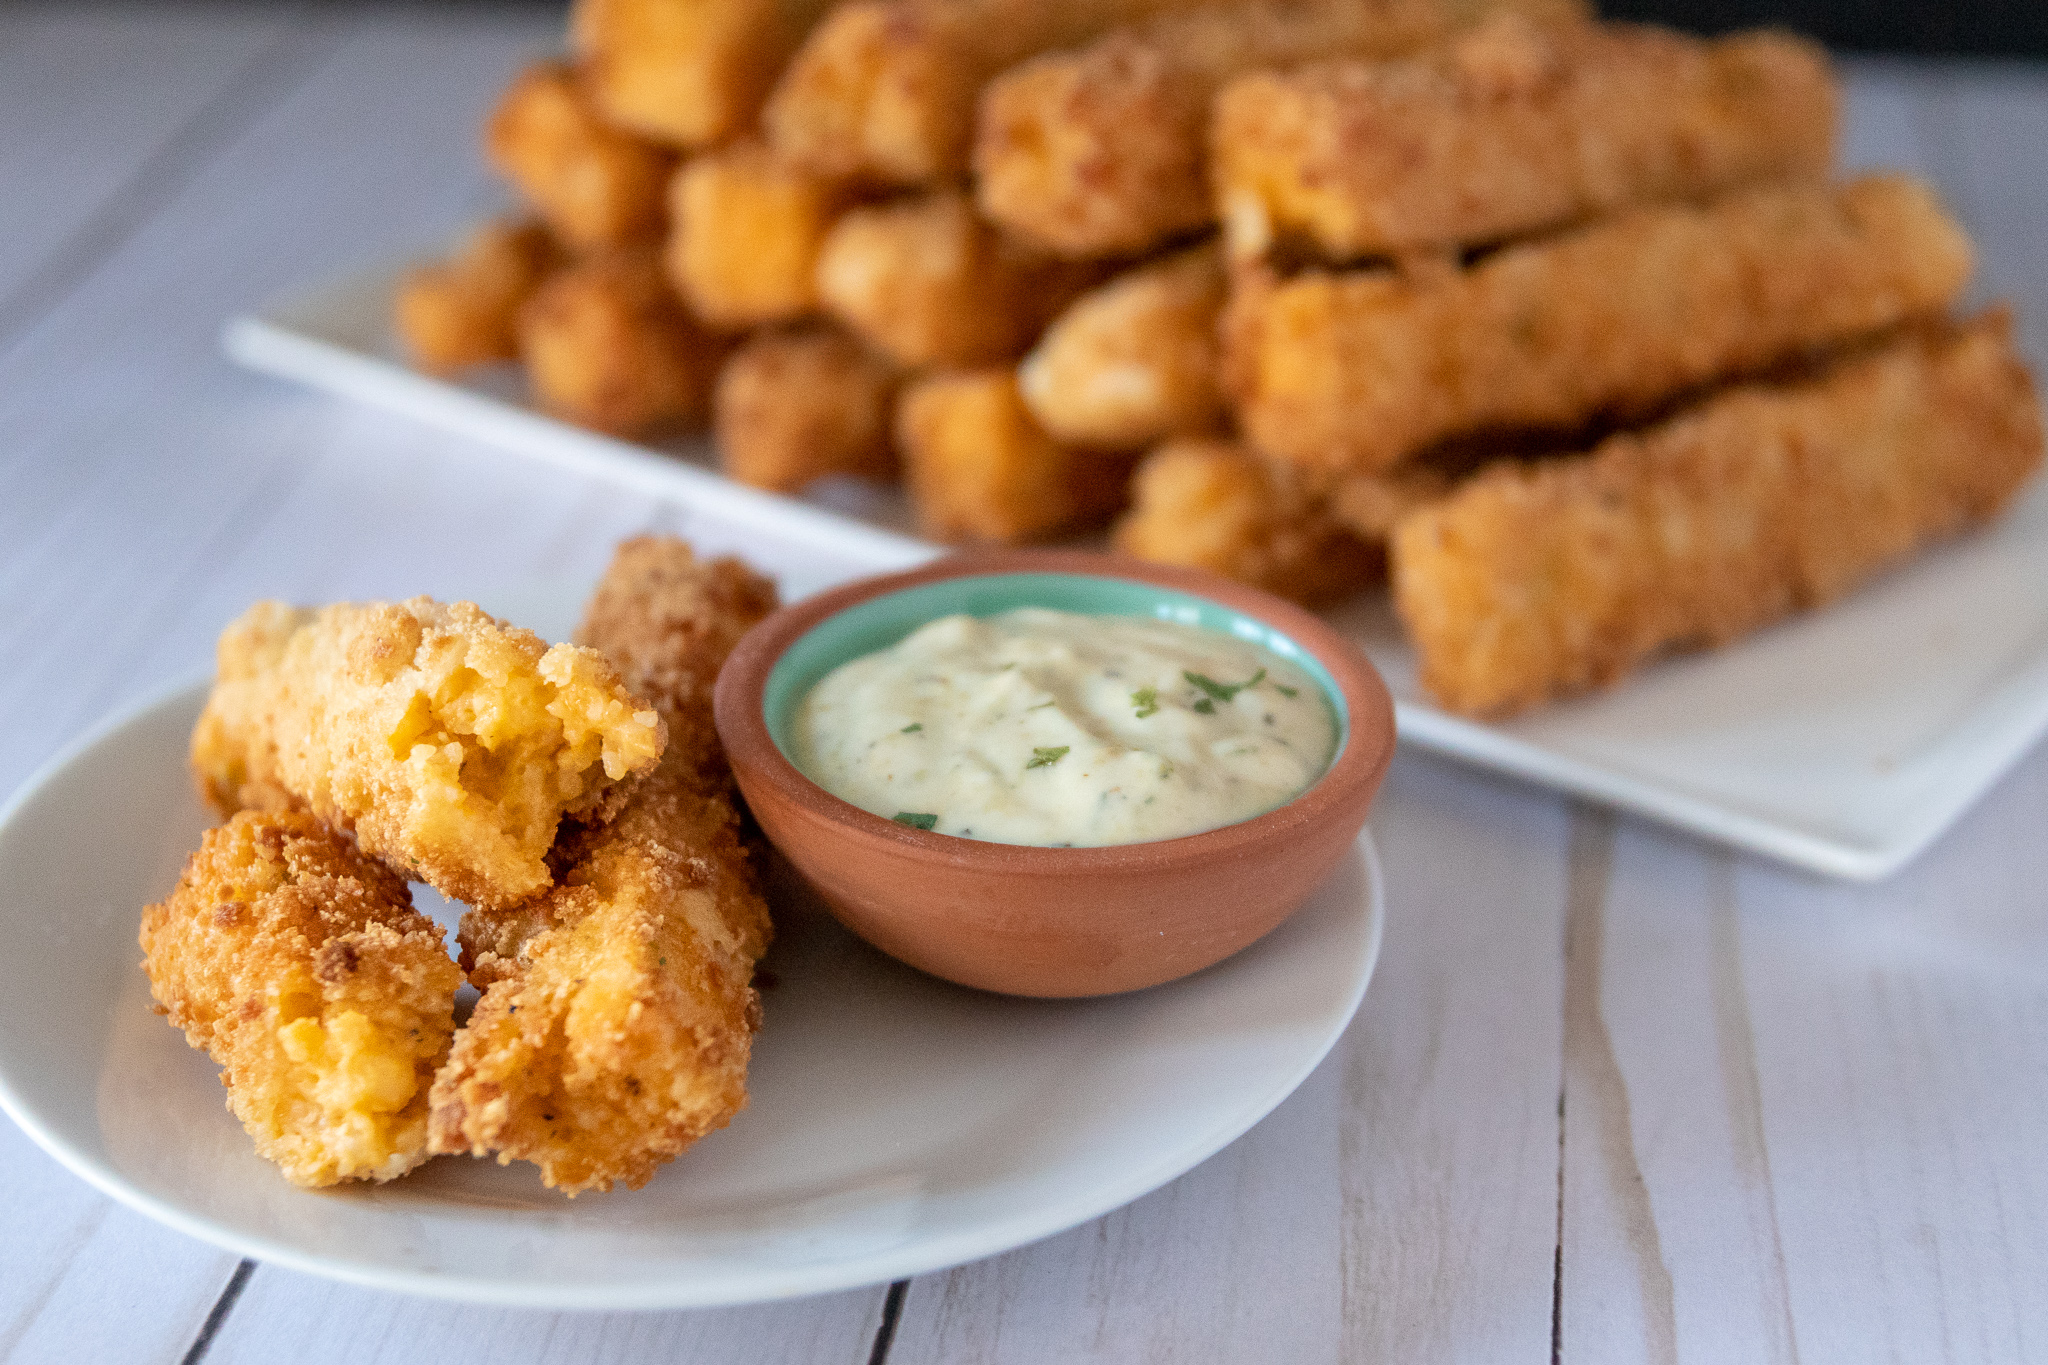
In the south we also love to fry all kinds of things that were not originally intended to be fried! So cheese grits are no exception to that rule!

These grits are crispy on the outside, and cheesy creamy perfection on the inside.

We dipped ours in vegan ranch, but I think they would be super delicious dipped in some marinara sauce as well.

They are perfect a tasty snack, party food, or even a creative brunch side! I have not attempted to air fry these treats, but I think it would work just fine if you gave them a spray of oil and cooked them for 10-15 minutes or so on 375 degrees.

And if you are one of those people in the sweet grit camp, I urge you to step over to the other side and give these a try. I promise you don’t have to be an absolute convert..just a little open minded..although I will never put sugar on my grits..like, never :)


INGREDIENTS:

  • 1 cup dry old fashioned grits

  • 2 cups plant milk ( we used almond)

  • 2 cups water

  • 1 teaspoon Vegetable Better Than Bouillon

  • 1 cup vegan cheddar shreds, homemade or store bought

  • 2 tablespoons vegan cream cheese

  • 2 green onions, finely diced

  • 1/2 teaspoon salt

  • 1/2 teaspoon pepper

  • 3 cups panko bread crumbs, regular or gluten free (make sure they are vegan, many brands are not)

  • 1/2 cup plant based milk

  • 2 tablespoons vegan plain yogurt or sour cream ( we used kite hill plain yogurt)

  • 1 and 1/4 cups all purpose flour, or gluten free flour blend

  • oil for frying ( we use grapeseed)

IMG_2800.jpg

INSTRUCTIONS:

  1. Bring milk, water, and Better Than Bouillon to a boil in a medium/ large pot over medium heat.

  2. Once the liquid is boiling, add in the grits and stir. Reduce heat to low, and allow the grits to cook and thicken for about 15 minutes Be sure to stir the grits several times to avoid them sticking to the bottom of the pot.

  3. Once grits are done, stir in the cheddar, cream cheese, salt pepper, and green onions.

  4. Spray a 9 inch baking pan with some oil and transfer the grits to the pan. Place pan in the fridge for about 4 hours or until the grits seem firm. You can also do this the day before you want to make these. They will be fine hanging out in the fridge for a day or so.

  5. Once grits are firm, turn the pan over onto a cutting board. You may have to tap the pan on the counter to get the grits out, but if you sprayed the pan well, they should come right out.

  6. Cut the grits into sticks that are about 1/2 inch thick and 4 inches long. They will be a little soft still so just handle them gently to avoid them breaking.

  7. Place flour in a shallow dish. In a separate dish wish the milk with the yogurt. In another dish, add the panko.

  8. Start by dipping the grit sticks first into the flour, next the milk yogurt mixture, and finally into the panko. Repeat with all of the grits sticks.

  9. Heat a large deep skillet with about an inch of oil over medium heat. Once the oil is nice and hot, fry the grits sticks 3 or 4 at a time, turning them with tongs to make sure they get crispy on all sides. They only need a few minutes in the oil to get them nice and crisp. Line a baking sheet with some paper towels and place a cooling rack on top. Place finished grits on the cooling rack while you finish frying the rest.

  10. Serve fried cheese grits with vegan ranch or marinara sauce.

Reheat fried cheese grits in a 350 degree oven until crisp

If you like this recipe, then try these:

Southern Tofu Scallops and Grits

Fried Vegan Mozzarella Bites

Vegan Gorgonzola Fried Brussels Sprouts

IMG_2798.jpg

Vegan Ranch

IMG_2852.jpg

Ranch dressing…I mean I’ll dip just about anything in ranch! Fries, pizza, veggies, fried pickles, and of course a nice big salad.

I don’t discriminate.

This vegan ranch is super simple and made with things you likely already have on hand.

It’s also nut free so a perk for anyone with allergies.

So if you have been looking for the perfect recipe to dip that pizza in, we got you covered!


INGREDIENTS:

  • 1 cup vegan mayo

  • 1 and 1/2 tablespoons apple cider vinegar

  • 1 tablespoon nutritional yeast

  • 2 teaspoons dried dill

  • 1 teaspoon garlic powder

  • 1 teaspoon dried parsley

  • 1 teaspoon onion powder

  • salt and pepper to taste


INSTRUCITONS:

  1. Whisk all ingredients together and store in the fridge in an airtight container.

  2. Use on salads or as a dip!

If you like this recipe, try these:

Lemon Tahini Dressing

Vegan Blue Cheese Dressing

Vegan Alabama White Sauce m

Vegan Lentil Shepherd's Pie

Shepherd’s pie is not a food I grew up eating. To be perfectly honest, I had never even heard of it until I married my husband, and he expressed his great dislike for traditional shepherd’s pie. I was in full agreement that the meaty version full of…

Shepherd’s pie is not a food I grew up eating. To be perfectly honest, I had never even heard of it until I married my husband, and he expressed his great dislike for traditional shepherd’s pie. I was in full agreement that the meaty version full of peas, and carrots and what ever else was in there sounded awful. Then recently our friend Deanne had us over for dinner, and served a vegan lentil version of shepherd’s pie, and much to my surprise, I liked it. I actually really, really liked it! Savory lentils and veggies topped with creamy mashed potatoes. What is not to like!!! It took some convincing to get my husband to try it when I decided to make my own, but when I did he ate two helpings!! So the husband is now a convert, the shepherd’s Pie ban has officaly been lifted, and I will now be adding this deliciously easy dinner to our regular rotation! Thanks again Deanne for proving us wrong!

INGREDIENTS:

  • 1 cup dried green lentils

  • 2 carrots, finely diced

  • 1 small onion, finely diced

  • 2 celery stalks, finely diced

  • 2 cups chopped mushrooms

  • 3 cups vegetable broth

  • 1 teaspoon salt

  • 2 teaspoons minced garlic

  • 1/2 teaspoon black pepper

  • 1 teaspoon dried thyme

  • 1 teaspoon dried rosemary

  • 1 teaspoon Vegetable Better Than Bouillon (optional, but adds flavor)

  • 3 large russet potatoes

  • 2 tablespoons vegan butter

  • 2 tablespoon vegan cream cheese

  • splash of milk

  • salt and black pepper to taste (for the potatoes)

INSTRUCTIONS:

  1. Heat 2 teaspoons of oil in a large pot or dutch oven over medium heat.

  2. Add the onions, carrots, and celery and allow to cook unit the onions are translucent and soft.

  3. Add the mushrooms and garlic and cook for a few minutes.

  4. Add the lentils, broth, and spices and reduce the heat to simmer. Let the lentils simmer for about half an hour to 45 minutes or until the liquid has been absorbed and the lentils are soft.

  5. While the lentils are cooking, bring a large pot of water to a boil. Add the potatoes and cook until they are soft and you can poke a fork through them.

  6. Drain water from potatoes and mash using a hand masher or an electric hand mixer, adding in the butter, cream cheese, salt, and pepper. If they seem too thick, add a splash of milk.

  7. Scoop cooked lentils into a pie dish or shallow casserole dish and top with the mashed potatoes.

  8. Preheat oven to 350 degrees. Bake the shepherds pie for about 25 minutes.

  9. Garnish with fresh or dried parsley if you like before severing.

If you like this recipe, try these:

“Chicken” Divan with Jackfruit

Loaded Vegan Roasted Red Potatoes

Cheesy Vegan Scalloped Potatoes

IMG_2790.jpg

Vegan Rice Paper Bacon

IMG_2163.jpg

Over the years I have attempted may faux bacons. I have burnt more batches of eggplant bacon than I care to admit.

I really like an easy coconut bacon for adding flavor to dishes or sprinkling on salads, but I was still missing the bacon-y crunch on a BLT.

So when I discovered that you could make bacon from rice paper, I was intrigued. What I like about this mock bacon is that it gets super crispy, and so far I have only burnt one batch of this magic vs the 5,999 batches of eggplant bacon Ive destroyed.

I have also had a tragic knife incident involving eggplant bacon that I just can’t shake (eggplants are not that easy to cut, y’all!) But this recipe uses a pair of scissors so, hooray!! I didn’t get my nickname, Hazard, by accident.

This fake bacon is cheap, easy, quick to make, and pretty foolproof! So break out the lettuce, and mayo, because its BLT time!


INGREDIENTS:

  • 9-12 pieces of rice paper

  • 1/4 cup coconut aminos

  • 2 teaspoons liquid smoke

  • 2 tablespoons maple syrup

  • 1/2 teaspoon salt

  • 1/2 teaspoon garlic powder

  • 1 teaspoon smoked paprika


INSTRUCTIONS:

Preheat oven to 350 degrees

  1. Stack 3 to 4 circles of rice paper on top of one another, depending on how thick you want the bacon.

  2. Using a pair of kitchen scissors, trim the stacked circle into a square, then cut 3 to 4 strips of “bacon” from the square. (if you can find square rice paper, then it will be easier, but normally my local market only sells the round ones) It is very hard to cut the paper with a knife but they will cut quickly with scissors. Make sure to keep the pieces stacked after cutting. Repeat with remaining rice paper.

  3. Whisk marinade ingredients together in a small bowl. Place the strips of rice paper bacon in a shallow dish and cover with the marinade. Let the bacon strips marinate for 10 minutes.

  4. Cover a baking sheet in a piece of parchment paper. Carefully pick up pieces of bacon, making sure they stay stacked, and let the marinade dip off some before placing them on the baking sheet. Give them a little spray with some cooking oil.

  5. Bake the rice paper bacon for 15 minutes. Remove pan from the oven and carefully turn the pieces of bacon over using a pair of tongs. Place back in the oven for 7-10 more minutes.

  6. Remove from oven and allow the bacon to cool before serving


If you like this recipe, you may also like this:

Easy Coconut Bacon

Vegan Maple Bacon Yeast Donuts

IMG_2126.jpg
IMG_2122.jpg

Vegan Blueberry Pancakes with Sweet Lemon Ricotta

IMG_2756-2.jpg

Have I mentioned how much I love summer! It yields all of my favorite fruits, and picking our own makes me feel so much more accomplished!

Every year in May we drive 45 minutes north to a local organic blueberry farm and we pick blueberries until we can no longer stand the heat.

We live in Florida, so by May the temps are easily already into the 90s. This means we maybe can last an hour tops before everyone is melting and miserable. The heat, and bugs are well worth the reward, though.

Affordable, beautiful, organic blueberries, pound and pounds of them. I have 4 kids, so thats a lot of hands for picking!

So instead of just making the obvious but favorite blueberry pancake this weekend, I decided to step up my game, and made these beautiful and delicious vegan lemon blueberry compote pancakes with sweet lemon ricotta! I am always looking for recipes to pile sweet tofu ricotta on top of, and these pancakes were the perfect fit.

They were such a hit that I have a feeling we will be eating these all summer! I mean after all, we have 16 lbs of blueberries to get through!!!

If it happens to not be summer time or you can’t get your hands on fresh blueberries, no worries, frozen will work just as well. Like I said, we picked a ton and there will still be some in my freezer come winter. I really love making recipes like this in the colder months as a bright and happy pick me up.

In the south, winter time is actually citrus season, so finding nice fresh lemons in the winter months should be super easy!! I end up making a lot of citrus themed recipes in the winter, which is perfect for cold and flu season. We need all the vitamin C we can get to fight off all those sniffles!!


INGREDIENTS:

  • 2 1/2 cups all purpose flour

  • 4 tablespoons white sugar (If vegan, not plant based, make sure the brand you use is in fact vegan, not all white sugars are. I use Florida Crystals)

  • 4 teaspoons baking powder

  • 1/2 teaspoon salt

  • 1 teaspoon vanilla extract

  • 2 1/2 cups plant based milk

  • 2 tablespoons melted vegan butter

  • zest from 1 lemon

  • 3/4 cups fresh or thawed frozen blueberries

Lemon Ricottta:

  • 1 block firm tofu

  • 1/4 cup maple syrup, or a few tablespoons agave

  • Juice from 1 lemon

  • zest from 1 lemon

Blueberry Compote:

  • 1 and 1/2 cups fresh or frozen blueberries

  • 1/2 cups refined sugar


COOKING INSTRUCTIONS:

  1. For the compote: place blueberries and sugar in a medium sauce pan over medium. Mash up the blueberries some using the back of a spoon. Allow the berries to come to a simmer. Let them continue to simmer for about 20 minutes, stirring occasionally and allowing the liquid to reduce. After 20 minutes turn off the stove and let the berries cool in the pot.

  2. For the pancakes: Whisk all dry ingredients in a large bowl.

  3. Add in the melted butter, plant based milk, vanilla, and stir well.

  4. Heat a large skillet on medium heat. Add a teaspoon of vegan butter or spray the pan with cooking oil. Using a 1/4 cup measuring cup, scoop out batter into the skillet, 2 or 3 pancakes at time. Sprinkle 4-5 blueberries on top of each pancakes. This works better than mixing them into the batter because they like to sink to the bottom.

  5. Let pancakes cook until tiny bubbles begin to form and pop, once this happens they are ready to flip. Cook on the other side for another minute or two, until cooked through.

  6. Repeat, adding more butter or oil to the pan as needed, until all batter is used.

  7. For the ricotta: Drain the tofu, and break it into a few pieces. Add it along with the sweetener, lemon juice, and zest to a high speed blender, and blend until creamy and smooth.

  8. To serve, stack 3 or 4 pancakes and top with blueberry compote, lemon tofu ricotta, and extra lemon zest if you like.

Serves 4 - 6.

If you like this recipe, try these:

Vegan Orange Creamsicle Pancakes

Vegan Banana Pudding Pancakes

Vegan Samoa Pancakes

IMG_2743-2.jpg

Vegan Spinach and Artichoke Mac and Cheese (The Lori Mac)

IMG_2585.jpg

It helps to have friends that are genius, like my vegan friend Lori!

Lori is great for a multitude of reasons, including rodent rescue and release. She even took in, and raised, a baby mouse we found in our house, and was able to release it into the wild (and before you say, ewwwww, let me tell you, a baby mouse no bigger than you thumb nail is literally the cutest thing.)

She is GREAT, and has the biggest heart for all animals. Lori also apparently has some mad culinary skills, because not too long ago I saw her post on Facebook that she was going to make spinach and artichoke mac and cheese!!

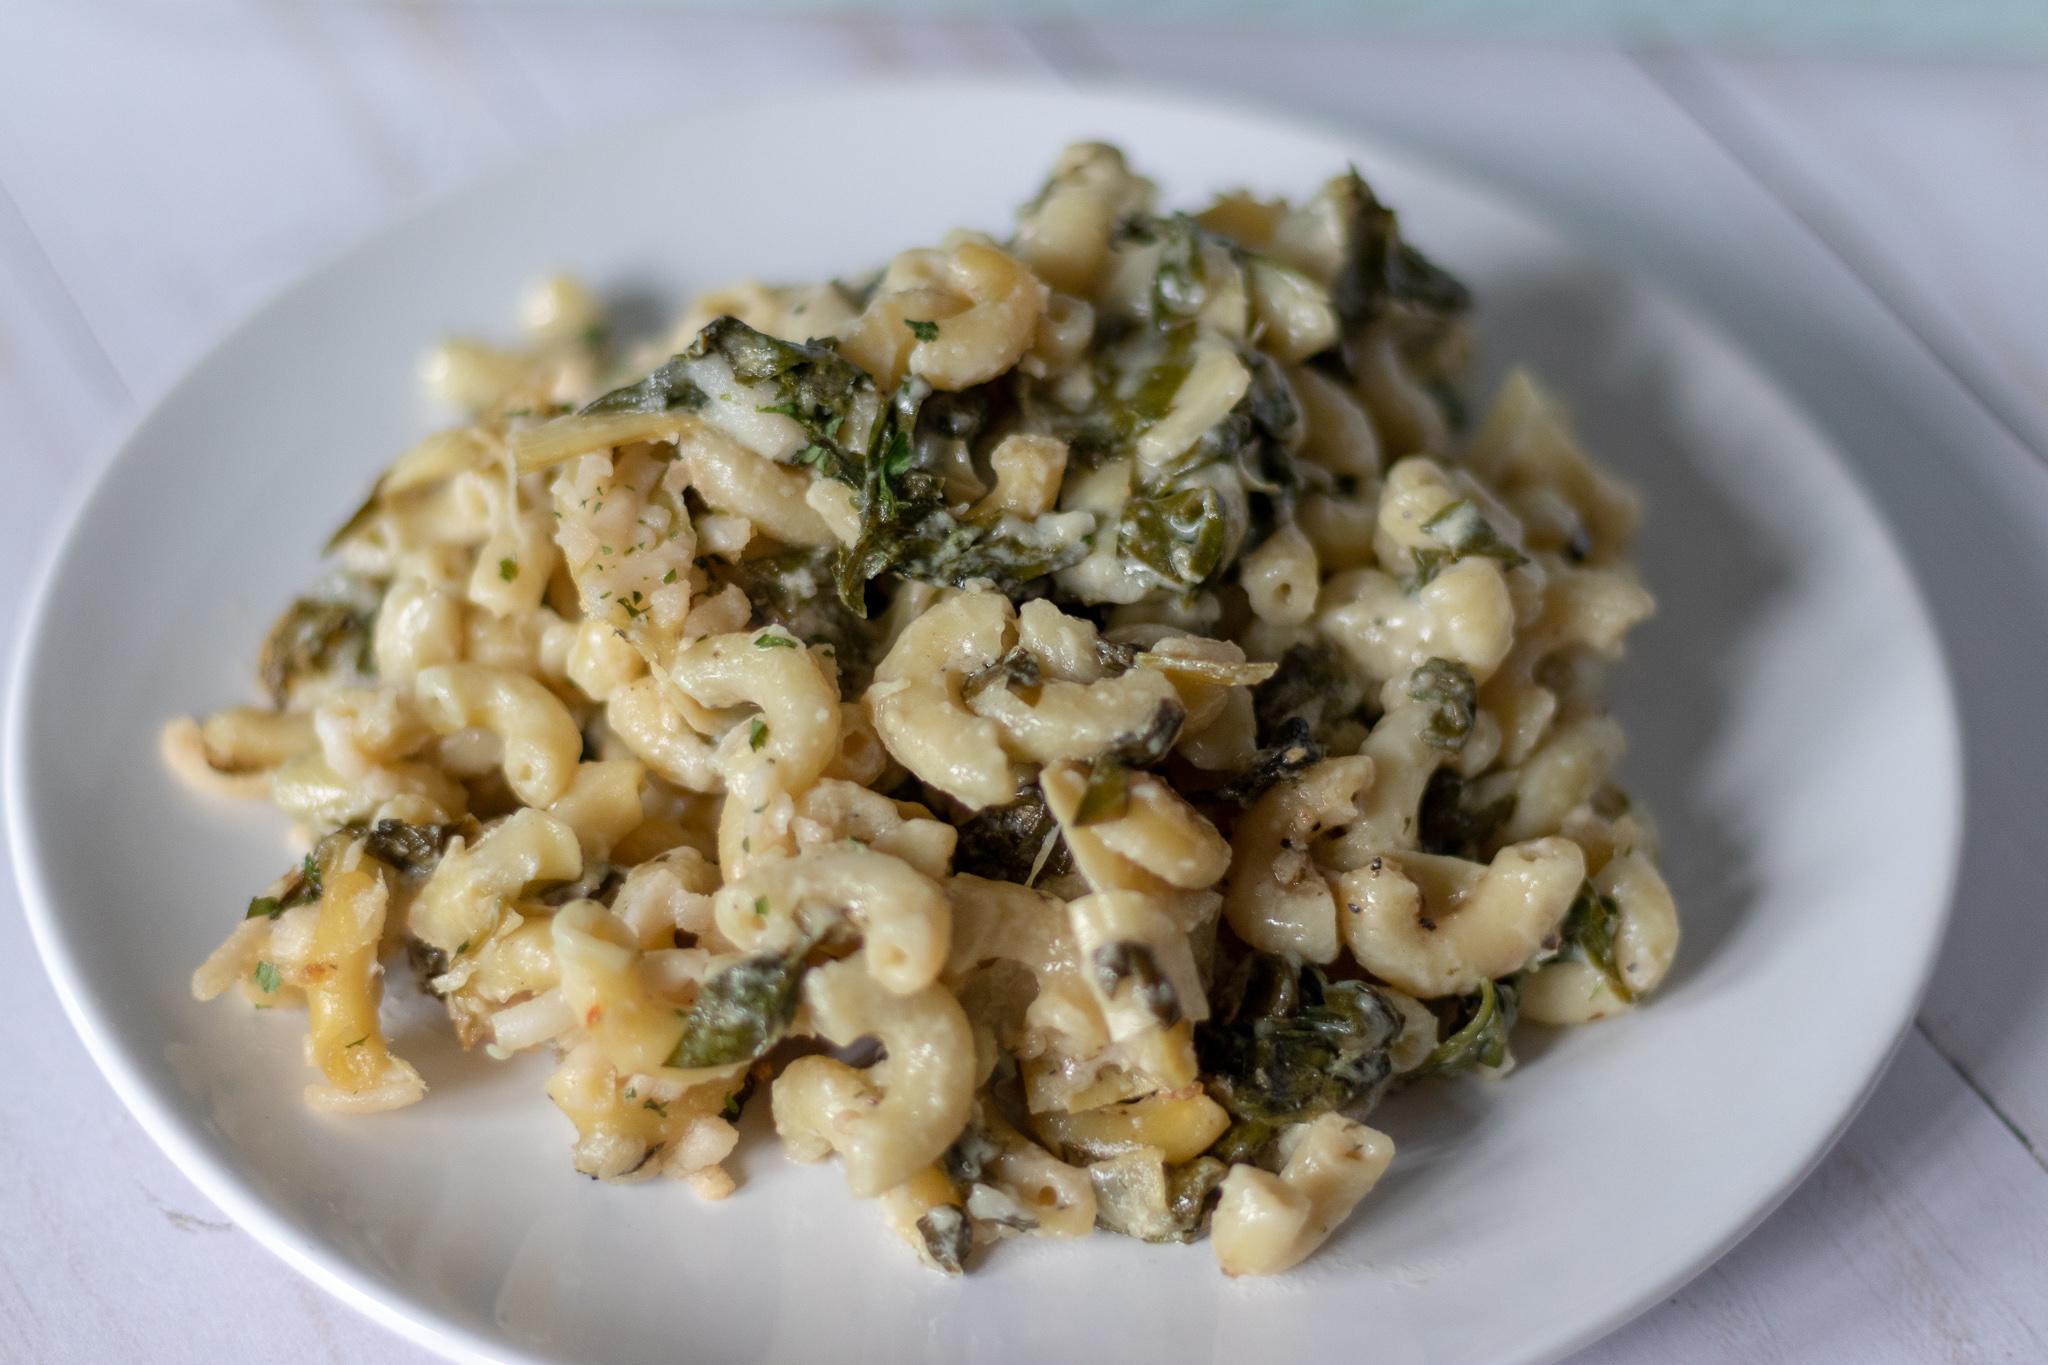
WHAT!?!? Why had my brain not gone there yet? So we quickly whipped up a batch of our vegan spinach and artichoke dip and mixed into some noodles with a little extra cheese and, WOW!

Lori was not wrong with this one!!! So thank you Lori for being all around awesome and genius, and thanks for always saving all the little critters nobody else wants to save! We are your biggest fans and so are our stomachs!


INGREDIENTS:


INSTRUCTIONS:

Preheat oven to 350 degrees

  1. Boil noodles according to package instructions. Drain and set aside.

  2. Make Spinach and Artichoke dip according to recipe instructions.

  3. Mix in 1 cup of mozzarella shreds into the dip.

  4. Pour dip into a 9x13 casserole dish and sprinkle the top with the remaining 1 cup of mozzarella.

  5. Bake for 25 to 30 minutes. Just long enough to heat through and melt the cheese on top.

If you like this recipe, try these:

Nut free Vegan Mac n Cheese

Vegan Buffalo Chicken Mac n Cheese

IMG_2587.jpg

Easy Summer Corn Salad

I have so many memories as a kids sitting around with family shucking corn. My grandparents lived on a farm and grew a lot of their food. Every summer we would have to shuck the corn so my grandmother could freeze it for later. As kids we  hated thi…

I have so many memories as a kids sitting around with family shucking corn. My grandparents lived on a farm and grew a lot of their food. Every summer we would have to shuck the corn so my grandmother could freeze it for later. As kids we hated this job. As an adult, I am so thankful for the memories that come back to mind every time I shuck corn. Yes, you could use frozen corn in a bag to make this, but I promise it won’t be as good. Grilling the corn makes it so much more flavorful, that I would not even consider making this salad any other way! This salad is easy, affordable, light, and delicious. Its the perfect summer BBQ side, or even a quick weeknight dinner with a side of Alabama White Sauce Tofu Skewers, or a vegan burger or carrot dog. I will say that now that I am a grown up, I do try and make my kids shuck the corn. It’s still not my favorite task but, one that is worth it for the past memories and hopefully future memories for my kids.

INGREDIENTS:

  • 6-8 ears of corn

  • 1 red bell pepper

  • 1/2 red onion

  • 2 green onions

  • handful of cilantro

  • 2 limes

  • salt and pepper to taste

INSTRUCTIONS:

  1. Shuck and clean the corn. To grill the corn, spray each ear with a little oil and put directly on a hot grill. Allow the corn to grill for 5 minutes or so before turning. Grill another 5 minutes on the other side. You just want the corn to get some nice grill marks and color to it.

  2. If you do not have a grill you can place the corn on a cookie sheet and spray with some oil. Place the cookie sheet in the oven on broil. Keep a close eye on the corn. It should start to get some color to it pretty quickly. Carefully turn the corn once or twice with some tongs before removing from the oven.

  3. Allow the corn to cool before carefully cutting it off the cob with a sharp knife. I like to prop the corn cob up in a shallow bowl to cut it. The bowl catches the corn kernels with less mess, and helps to stabilize as you cut down the cob.

  4. Finley dice the onions and peppers. Chop the cilantro.

  5. Mix the corn and other veggies together and squeeze the juice from the 2 limes over the top. Salt and pepper to taste and mix well.

  6. Serve room temperer or chilled.

If you like this recipe, try these:

Vegan Street Corn

Southern Dill Potato Salad

Easy Vegan Macaroni Salad

IMG_2610.jpg

Tofu Banh Mi Style Rice Cups

IMG_2666-2.jpg

Tofu Banh Mi sandwiches are on constant rotation in our house. Everyone loves them, even the kids. What’s not to love about perfectly seasoned tofu, crispy pickled veggies,and spicy Sriracha mayo. In a recent effort to change things up , I decided to pile up tofu Banh Mi filling into these easy little rice cups.

I know that banh mi literally means bread or wheat but wanted to make something familiar for our gluten free friends and family that was a little different and fun! I love a banh mi, but my favorite part is the filling! It gets tricky to name a thing so people understand the origin and not cause disrespect to the culture from which it came. I wanted everyone to understand that this is all the parts of a tofu banh mi, but technically without the banh mi….so for lack of a better idea of how to have people identify what this is, I named it Tofu Banh Mi Rice Cups.

A local sushi place we frequent makes a tofu banh mi sushi roll that we love, so I decided to create a play on that. Just more rice and way more delicious filling!

I often make these for parties or potlucks and they are always such a hit. They cute, handheld, and delicious.

These light and fresh tofu Bahn Mi rice cups also work work great for meal prep because they keep well in the fridge for several days.

Who knows, you may end up loving these as much as we do, and may find yourself making them more often than a Bahn Mi sandwich!


INGREDIENTS:

You will need a muffin tin for this recipe. This recipe yields around 2 dozen cups. You can easily half the recipe for less cups.

  • 3 cups sushi rice (follow package cooking instructions)

  • 1 package extra firm tofu

  • 1/4 cup soy sauce or coconut aminos

  • 2 teaspoons sriracha

  • juice from 1 lime

  • 3/4 cups quick pickled veggies

  • 1/2 cup chopped cilantro

Sriracha Mayo:

  • 1/2 cup vegan mayo

  • 2 tablespoon Sriracha

  • 1 teaspoon lime juice


INSTRUCTIONS:

  1. Cook rice according to package instructions. I use my rice cooker and use 3 actual cups of rice, not the scoop that comes with the rice cooker, and fill the water to the 4 cup line. Again you can half this amount if making less cups. Allow the rice to cool. It’s gonna be kind of sticky and thats what you need. Once the rice has cooled enough to handle, scoop about 1/4 cup of rice into each muffin cup and press the rice to form the shape of the cup. I keep a cup of water on the counter to dip my fingers in. If your hands are wet it will be easier to press the rice down. You will get around 24 cups, give or take. Pop the muffin tin in the fridge and for 30 minutes.

  2. Drain tofu and wrap it in either a clean kitchen towel or a few paper towels. Place a few books on top to allow the excess liquid to press out for 10-15 minutes.

  3. Cut the tofu into 1/4 inch cubes. Whisk together soy sauce, Sriracha, and lime juice in a shallow dish and add the tofu. Allow it to marinate for 10-15 minutes.

  4. Heat a large skillet with a little oil over medium heat. Add the the tofu along with the marinade to the pan. Let the tofu cook until all of the liquid has absorbed and the tofu has began to get a little crisp and brown around the edges.

  5. Whisk the mayo, Sriracha, and lime juice together in a small bowl. If you like it spicy, add a little more Sriracha!

  6. Carefully remove the rice cups from the muffin tin. They should just peel out. Divide the tofu among the cups, and top with some pickled veggies and chopped cilantro. Add a little of the Sriracha Mayo to each cup to serve.

  7. Store leftovers in an airtight container in the fridge for serval days.

IMG_2676.jpg

Quick and Easy Pickled Veggies

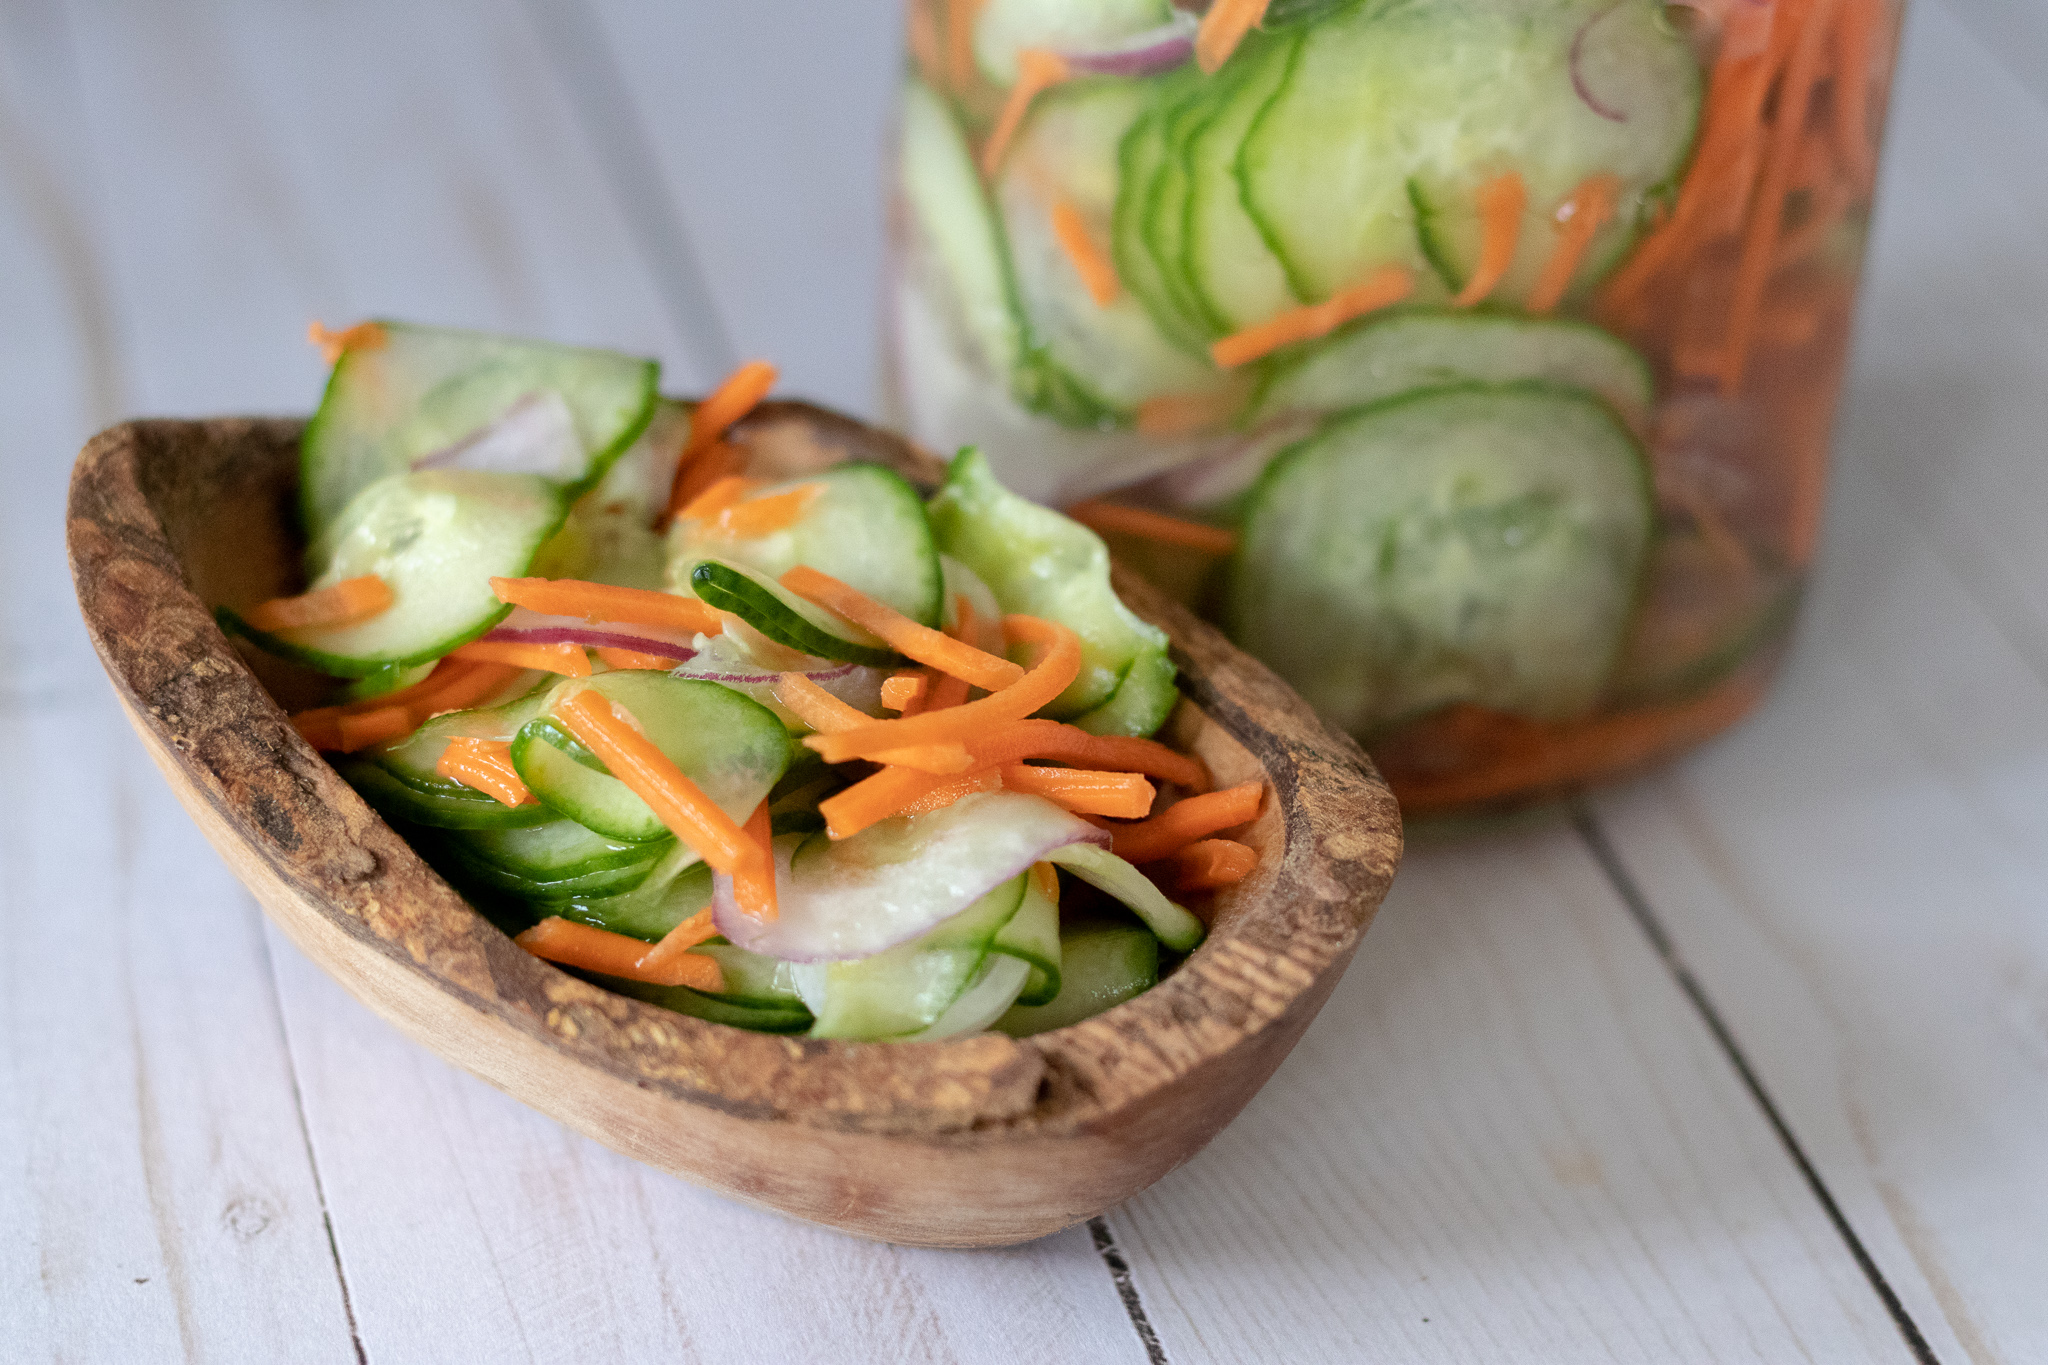
Pickles are a favorite food group of mine. These quick pickled veggies are no exception. They are perfect on sandwiches, salads, or just as a snack. Because they are so thinly sliced, they are ready to use in no time. Which is even better because I …

Pickles are a favorite food group of mine. These quick pickled veggies are no exception. They are perfect on sandwiches, salads, or just as a snack. Because they are so thinly sliced, they are ready to use in no time. Which is even better because I am not known for my patience.

INGREDIENTS:

  • 2 cups thinly slice cucumbers

  • 1 cup match stick carrots

  • 1 small red onion, thinly sliced

  • 3-4 thinly sliced radishes (optional)

  • 3/4 cups apple cider vinegar

  • 2 teaspoons agave

  • 2 teaspoons salt

INSTRUCTIONS:

  1. Using a mandolin or a very sharp knife, thinly slice the cucumbers, and red onion.

  2. Add all of the veggies to a large bowl and cover in the vinegar, agave and salt. Stir well, so all of the veggies get coated.

  3. Transfer the veggies to a mason jar or another air tight container and store in the fridge.

IMG_2645.jpg

Vegan Carrot Cake Biscuits with Maple Cashew Butter

IMG_2630.jpg

Who says you can’t have cake for breakfast, or something pretty close.

Carrot cake is one of my favorite cake flavors and biscuits are hands down my favoite bread.

So mix the two together, and you have absolute breakfast perfection!

These vegan carrot cake biscuits are light and fluffy, packed full of healthy carrots and walnuts. They are just the right amount of sweet and even better topped with our quick and easy Maple Cinnamon Cashew Butter!

These little beauties also make a tasty dessert or late afternoon snack. But is there ever a wrong time to eat a biscuit? I don’t think so!


INGREDIENTS:

  • 4 cups all purpose flour

  • 1 tablespoon baking powder

  • 1/2 teaspoon salt

  • 1/2 cup granulated sugar

  • 1/2 cup plant based milk

  • 1 teaspoon vinegar

  • 2 cups grated carrots

  • 1/2 cup chopped walnuts, or raisins

  • 1/4 cup vegan butter

  • 2 teaspoons cinnamon

  • 1/2 teaspoon nutmeg

  • 1 teaspoon vanilla extract


Maple Cinnamon Cashew Butter:

  • 3/4 cups cashews

  • 2 tablespoons maple syrup

  • 2 tablepsoons coconut oil

  • 1 to 2 teaspoons cinnamon

  • pinch of salt


INSTRUCTIONS:

Preheat oven to 450 degrees.

  1. In a large bowl, combine flour, baking powder, salt, and sugar. Whisk well.

  2. Add the butter to the bowl and using your hands, break up the butter into rice size pieces, mixing it into the flour.

  3. Mix the grated carrots and nuts into the flour mixture.

  4. Add the 1 teaspoon of vinegar to a glass then pour the milk over it. Let It sit for a few minutes until the milk begins to curdle. (you are basically making butter milk)

  5. Pour the milk into the bowl of flour and gently mix, using your hands. You just want to get the milk and flour incorporated into a dough. You do not want to over mix. The less you work the dough, the lighter and fluffier the biscuits will be. If they dough still seems a little dry, you can add another splash or two of milk. If it seems too wet, just sprinkle will some extra flour. Biscuits are forgiving and easy in this way.

  6. Turn the dough onto a floured surface and pat it out into a 3/4 to 1 inch thick oval. Cut biscuits using a biscuit cutter or the rim of a glass.

  7. Place biscuits on a parchment lined baking sheet and bake on the top rack of the oven for 10-12 minutes. The biscuits should begin to brown on the tops.

  8. Allow the biscuits to cool for a minute before serving or serve at room temperature. Store leftovers in sealed bag or airtight container at room temperature. These biscuits also freeze well. Just pop them in a freezer bag and thaw to serve.

  9. Maple Cinnamon Cashew Butter: Cover cashews in water in a microwave safe container. Microwave on high for 3 minutes. Drain and rinse cashews. If you do not have a microwave, you can soak the cashews in hot water for about an hour.

  10. Place cashews in a high speed blender or food processor along with the remaining ingredients and process until smooth. You can use as is, on fresh baked biscuits, then store leftovers in an airtight container in the fridge. The butter will firm up once cold.

Yields about 10 - 12 biscuits depending on the size of cutter you use.

If you like this recipe, try these:

Fluffy Vegan Southern Biscuits

Classic Vegan Cranberry Scone

Spiced Apple and Pecan Stuffed Challah

IMG_2640.jpg

Vegan Italian Noodle Bake

IMG_2470.jpg

I love Italian food, especially lasagna, but don’t always feel like taking the time and energy to make it.

So when I am craving noodle filled, cheesy, saucy Italian goodness in a hurry, this quick Italian noodle bake fits the bill!

It’s delicious comfort food at it’s best! Like lasagna but easier!! And sometimes I am just in the mood for easier!!

I especially love the wide eggless ribbon noddles that we use, but if you can’t find any near you, feel free to use any noodle you like. This quick recipe also freezes and reheats well, so Its perfect for meal prep!

You can use any easy ground meat substitute you like. Vegan round sausage or beef. Store-bought or homemade ground seitan would work.

This recipe also has lots of cheese. Which I am always a fan of. You can buy vegan cheese already shred, or try your hand at making your own easy vegan cheese! We have lots of sliceable, shreddable vegan cheese recipes on the the site that would be delicious in this recipe, and even a super easy vegan cream cheese recipe that is my all time favorite !

Thanks goodness for easy comfort food vegan dinners!


INGREDIENTS:

  • 16 oz package of wide ribbon eggless noodles

  • 28 oz can crushed tomatoes

  • 1 lb Lightlife ground “beef” or sausage, or any other ground vegan meat you like

  • 1 small yellow onion, diced

  • 1 small red or yellow bell pepper, diced

  • 2 teaspoons minced garlic

  • 1/2 cup non dairy plain yogurt

  • 2 tablespoons dijon mustard

  • 3 tablespoons non dairy cream cheese

  • 1 cup vegan cheddar shreds, homemade or store bought

  • 1 cup vegan mozzarella shreds, homemade or store bought

  • 1 teaspoon dried thyme

  • 1 teaspoon dried oregano

  • 1 teaspoon dried basil

  • 1 teaspoon salt

  • 1/2 teaspoon pepper


INSTRUCTIONS:

Preheat oven to 350 degrees

  1. Boil Noodles according to package instructions. Drain noodles and mix in the yogurt, cream cheese, and dijon mustard. Set aside.

  2. In a large skillet, add a few teaspoons of oil over medium heat. Add the onion, garlic and pepper to the pan. Cook until the veggies are soft. Add the Lightlife and break apart into a crumble using a spatula. Allow the meatless crumble to cook through.

  3. Once the the meatless crumbles have cooked through, add the can of crushed tomatoes to the same pan. Add the thyme, oregano, salt and pepper and allow the sauce to simmer for about 10 minutes.

  4. In a large casserole dish or 9x13, add half of the noodles to the bottom. Top the noodles with half of the sauce mixture. Next, add the remaining noodles and top with the remaining sauce.

  5. Sprinkle the top with the cheddar and mozzarella cheeses ,and place on the top rack of the oven for 25-30 minutes. Long enough to melt the cheese and heat the casserole through.

  6. This recipe works well for meal prep. You can easily freeze any leftovers and thaw to reheat for a quick and easy weeknight dinner.


IMG_2464.jpg

Savory Beet and Tempeh Burgers

IMG_2263.jpg

I really love beets. This has not always been the case.

There once was a time where I thought I really hated beets! I refused, REFUSED, to believe they could taste like anything other than dirt.

Well, one day that all changed when I received a giant bunch of beets in a local produce delivery and was determined not to waste them. I

made my first batch of borscht and from that moment on beets went from my most hated food to one of my favorite foods.

There isn’t any way I won’t eat a beet now. I love them roasted, raw, pickled, in smoothies, and always in a burger.

I think these beet and tempeh burgers have the perfect texture and amount chew to them, thanks to the tempeh, and vital wheat gluten.

They are packed with protein, and all the many health benefits of beets! So if you think you hate beets too, I urge you to give them another chance! You may be surprised. They make a mighty tasty burger!

And if you are looking for the perfect grillable vegan burger recipe, this my just become your new go to!

And don’t forget to check out our quick rise or pretzel bun recipes too! The only thing better than a homemade vegan burger is one on a homemade vegan bun!


INGREDIENTS:

  • 1 small red beet, peeled

  • 1/2 cup vital wheat gluten

  • 1 package plain tempeh

  • 1 can chickpeas, drained and rinsed

  • 2 teaspoons vegan Worcestershire sauce

  • 1/4 cup coconut aminos or soy sauce

  • 1/4 cup water

  • 1 teaspoon Vegetable Better than Bouillon

  • 1/4 cup diced onion

  • 3 teaspoons liquid smoke ( optional, if you don’t like liquid smoke, skip it or reduce amount)

  • 2 teaspoons smoked paprika

  • 1 teaspoon minced garlic

  • 1/2 teaspoon salt ( omit if you use soy sauce, or don’t like a lot of salt)

  • 1/2 teaspoon black pepper

  • 1 teaspoon thyme


INSTRUCTIONS:

  1. Cut the beet into quarters and add it along with the onion to a food processor or high speed blender. Process until the beet is nice an minced up. If you do not have either a food processor or blender, then shred the beet using a box grater and finely dice the onion.

  2. Next add the chickpeas and 1/4 cup of water, and process until they are nice and broken down. Again if you do not have a blender or food processor, you can mash up the chickpeas using a potato masher or a fork.

  3. Break the block of tempeh into pieces, and add it to the blender. If you are making the burgers by hand, chop the tempeh into super small pieces, then using your fingers, crumble the tempeh over the beets, onion, and chickpeas and mix.

  4. Add the remaining ingredients and blend for a minute, or until all of the ingredients are broken down and well incorporated. If mixing in a bowl, mix well until all ingredients are incorporated. It may be easier to use your hands to mix everything up vs using a spoon, but be forewarned your hands will be stained red for a while. The only downside of beets.

  5. Equally potion the mixture, and form burger patties. You should be able to get about 10 burgers depending on the size. You can pan fry these burgers or grill them. If using the grill, be sure to spray it well with some cooking oil before putting the burgers down to avoid them sticking. They also freeze well, making them great for meal prep. Just form the patties and portion them into freezer bags. They should stay good in the freezer for a few months.

  6. Server burgers on a vegan pretzel bun or quick no rise hamburger bun. You can also top the burgers with any of our quick and easy vegan cheeses.

If you like this recipe, try these:

Vegan Pretzel Buns

No Rise Hamburger Buns

Coconut Milk Gouda

Smokey Cashew Cheddar

Quinoa and Black Bean Burger

IMG_2265.jpg

Bitesize Vegan Taco Dip Cups

IMG_2289.jpg

I love party food, and I love to host parties!!!

7 layer taco dip being one of my favorite party foods. I mean it’s a bowl full of all the the most delicious taco-y things all stacked up together!

What is not to love there? Recently I found these adorable little street taco tortillas and my oldest daughter suggested we use them to make little taco dip cups.

I am so proud of our genius offspring and their brilliant ideas!! We have raised them well!!

So as she requested, we made these bitesize vegan taco dip cups! Not only are they super tasty, they are so super cute…I mean if a food can be cute, then I am standing by these being the cutest!

Make them for a snack, make them for a party, make them because eating tiny food is normally more fun to eat!

I made them for lunch and our family plowed through them! But I am still rooting for another party in the near future to show off these adorable little bites.


INGREDIENTS:

*You will need a muffin tin for this recipe.

  • 24 (1 package) corn street taco tortillas

  • 1 can refried beans

  • 1/3 cup vegan cream cheese

  • 1/4 cup vegan cheddar shreds (homemade or store bought)

  • 2 avocados

  • 1 lime

  • 1 teaspoon cumin powder, divided

  • 1 teaspoon chili powder, divided

  • salt and pepper to taste

  • Handful of chopped lettuce

  • 1/4 cup diced bell pepper

  • 1/4 cup diced tomatoes

  • 1/4 cup diced red onion

  • 1/4 cup chopped cilantro

  • optional: hot sauce

IMG_2299.jpg
IMG_2285.jpg

INSTRUCTIONS:

Preheat over to 350 degrees

  1. Spray the inside of a cupcake tin lightly with some cooking oil. Take a tortilla and press it into the muffin tin so that it forms to the shape of the cup. You will have to overlap it some to make it fit. Corn tortillas tend to tear when you are trying to press them into the pan.No big deal, just overlap at the tear if that happens. Repeat with remaining tortillas. If you only have a 12 cup muffin tin, then you will have to do this in batches.

  2. Place the pan in the preheated oven and allow the tortillas to bake for 10-15 minutes. Just make sure they are crisp around the edges and down the sides before removing from the oven. Once they are done remove from oven and allow to cool for 5 to 10 minutes.

  3. Mix cream cheese and cheddar shreds together with 1/2 teaspoon of cumin and 1/2 teaspoon of chili powder. Set aside.

  4. For the guacamole, remove avocado from peels and add them to a medium size bowl. Mash the avocados with a fork until they are relatively smooth. Add 1/2 teaspoon of cumin, 1/2 teaspoon of chili powder, juice from the lime, and salt and pepper to taste. Stir well and set aside.

  5. Remove the tortillas from the muffin tin and place them on a platter.

  6. Begin layering each tortilla by first adding a few teaspoons of refried beans, then the cheese mixture, lettuce, tomato, onions, peppers, and guacamole. Top each on with a sprinkle of cilantro and a drop of hot sauce if you like a spicy kick!

If you like this recipe, try these!

Grilled Watermelon Tofu Tacos

Alabama White Sauce Tempeh Tacos

Vegan Beer Battered Fish Tacos