Vegan Matzah Oven Nachos

IMG_2402.jpg

Matzah Matzah Matzah…You can actually do a lot with matzah if you are forced to eat it for a week!

But even if you don’t celebrate passover, matzah still makes a nice crunchy base for vegan nachos.

I actually get really excited about these nachos! Sometimes its just fun to change it up!

These nachos are covered in our gooey spicy, cashew queso, and topped with the yummiest tofu!

I love this recipe most because you built the nachos on a giant sheet pan, making them great for dinner parties or easy weeknight dinners!

They also make a great quick snack if your teenager comes home with a gaggle of hungry friends, and I might be speaking from personal experience here. I mean, who doesn’t want to dig in to a GIANT pan of nachos? Its literally the stuff of my dreams.


INGREDIENTS:

  • 5-6 sheets of matzah

  • 1/2 batch vegan cashew queso (If you are celebrating passover, substitute with a passover appropriate option or omit the nutritional yeast in the recipe. It will still be tasty)

  • A handful of shredded lettuce

  • 1/2 cup diced tomatoes

  • 1/4 cup sliced olives

  • A few tablespoon sliced green onions

  • 1 can refried beans

  • 2 avocados

  • Juice from 1/2 lime

  • 1/2 teaspoon chili powder

  • 1/2 teaspoon cumin


MARINATED TOFU:

  • 1 block of extra firm tofu

  • 1/4 cup soy sauce or coconut aminos

  • 1 teaspoons onion powder

  • 1 teaspoon garlic powder

  • 1/2 teaspoon chili powder

  • 1-2 teaspoons agave or maple syrup


INSTRUCTIONS:

Preheat oven to 350 degrees

  1. Drain tofu and wrap in a few paper towels or a clean kitchen towel. Place a few books on top and let sit for 10 minutes to press out any excess liquid.

  2. Dice the tofu into small 1/2 inch cubes. Whisk the ingredients for the marinade in a shallow baking dish and add the tofu. Allow the tofu to marinate for 10-15 minutes.

  3. For the guacamole, scoop the avocados from the peel into a small bowl. Mash the avocado using a fork until they are relatively smooth. Add the lime juice, cumin, and chili powder and stir. Add salt and pepper to taste. Set aside.

  4. While tofu is marinating prepare a cookie sheet by lining it with foil or parchment paper. Break up the pieces of matzah and scatter them on the pan. Dollop the beans over the matzah. Set aside.

  5. Heat a large skillet over medium heat. Add the tofu along with the marinade to the pan and cook until all of the liquid is absorbed and the tofu begins to brown and and crisp.

  6. Scatter the tofu over the matzah and drizzle with the queso cheese sauce. Place the pan in the oven for about 10 minutes. The nachos just need to say in long enough to heat the beans and warm the queso.

  7. Remove from oven and top with lettuce, tomatoes, olives, onions, and guacamole to serve.

IMG_2408.jpg

Vegan Italian Potato Roll Up

IMG_2356.jpg

Potatoes are my favorite food group. Mashed, fried, baked, loaded, stuffed, you name it.

So obviously I am not going to bat an eye at the idea of using them as the vessel that holds in all of the cheesy, “meaty”, saucy goodness in this roll up!

My whole family loved this recipe and fought over the leftovers! If you are not a fan of vegan sausage, you can easily swap it out for any meatless crumble you like, or even use a mixture of diced veggies.

I used vegan tofu ricotta in this recipe. If you have never made it, its super easy and any leftovers keep for about a week in the fridge. I love it and kind find so many ways to use up whats left over!

The super thin potatoes crisp up when you bake the roll, making the perfect gluten free alternative to a pastry wrap. Plus, potatoes are delicious and agin my favorite food group, so I don’t even miss a bready wrap!

This recipe is hearty, filling and sooooo good! Just know that a fight might break out over any left overs, so get your game face on.


INGREDIENTS:

  • 2-3 russet potatoes, peeled (I used 2 large potatos)

  • 1/2 batch tofu ricotta

  • 1 package vegan sausage (I used Lightlife) or you can use 4 vegan sausage, casing removed and crumbled up.

  • 16 oz fresh spinach

  • 1/2 to 1 cup marinara sauce

  • 1/2 cup vegan parmesan shreds, any that melt (we used follow your heart)

INSTRUCTIONS:

Preheat oven to 350 degrees

  1. Using a mandolin, cut the potatoes on the 1/8 inch setting. If you do not have a mandolin, you can try thinly slicing them on a box grater, using the side that has one single blade, or carefully, thinly slice them using a sharp knife. They need to be around 1/8 of an inch thick.

  2. Line a baking sheet with parchment paper, and lightly spray with some cooking oil. Sprinkle the pan with 1/4 cup of the parmesan shreds.

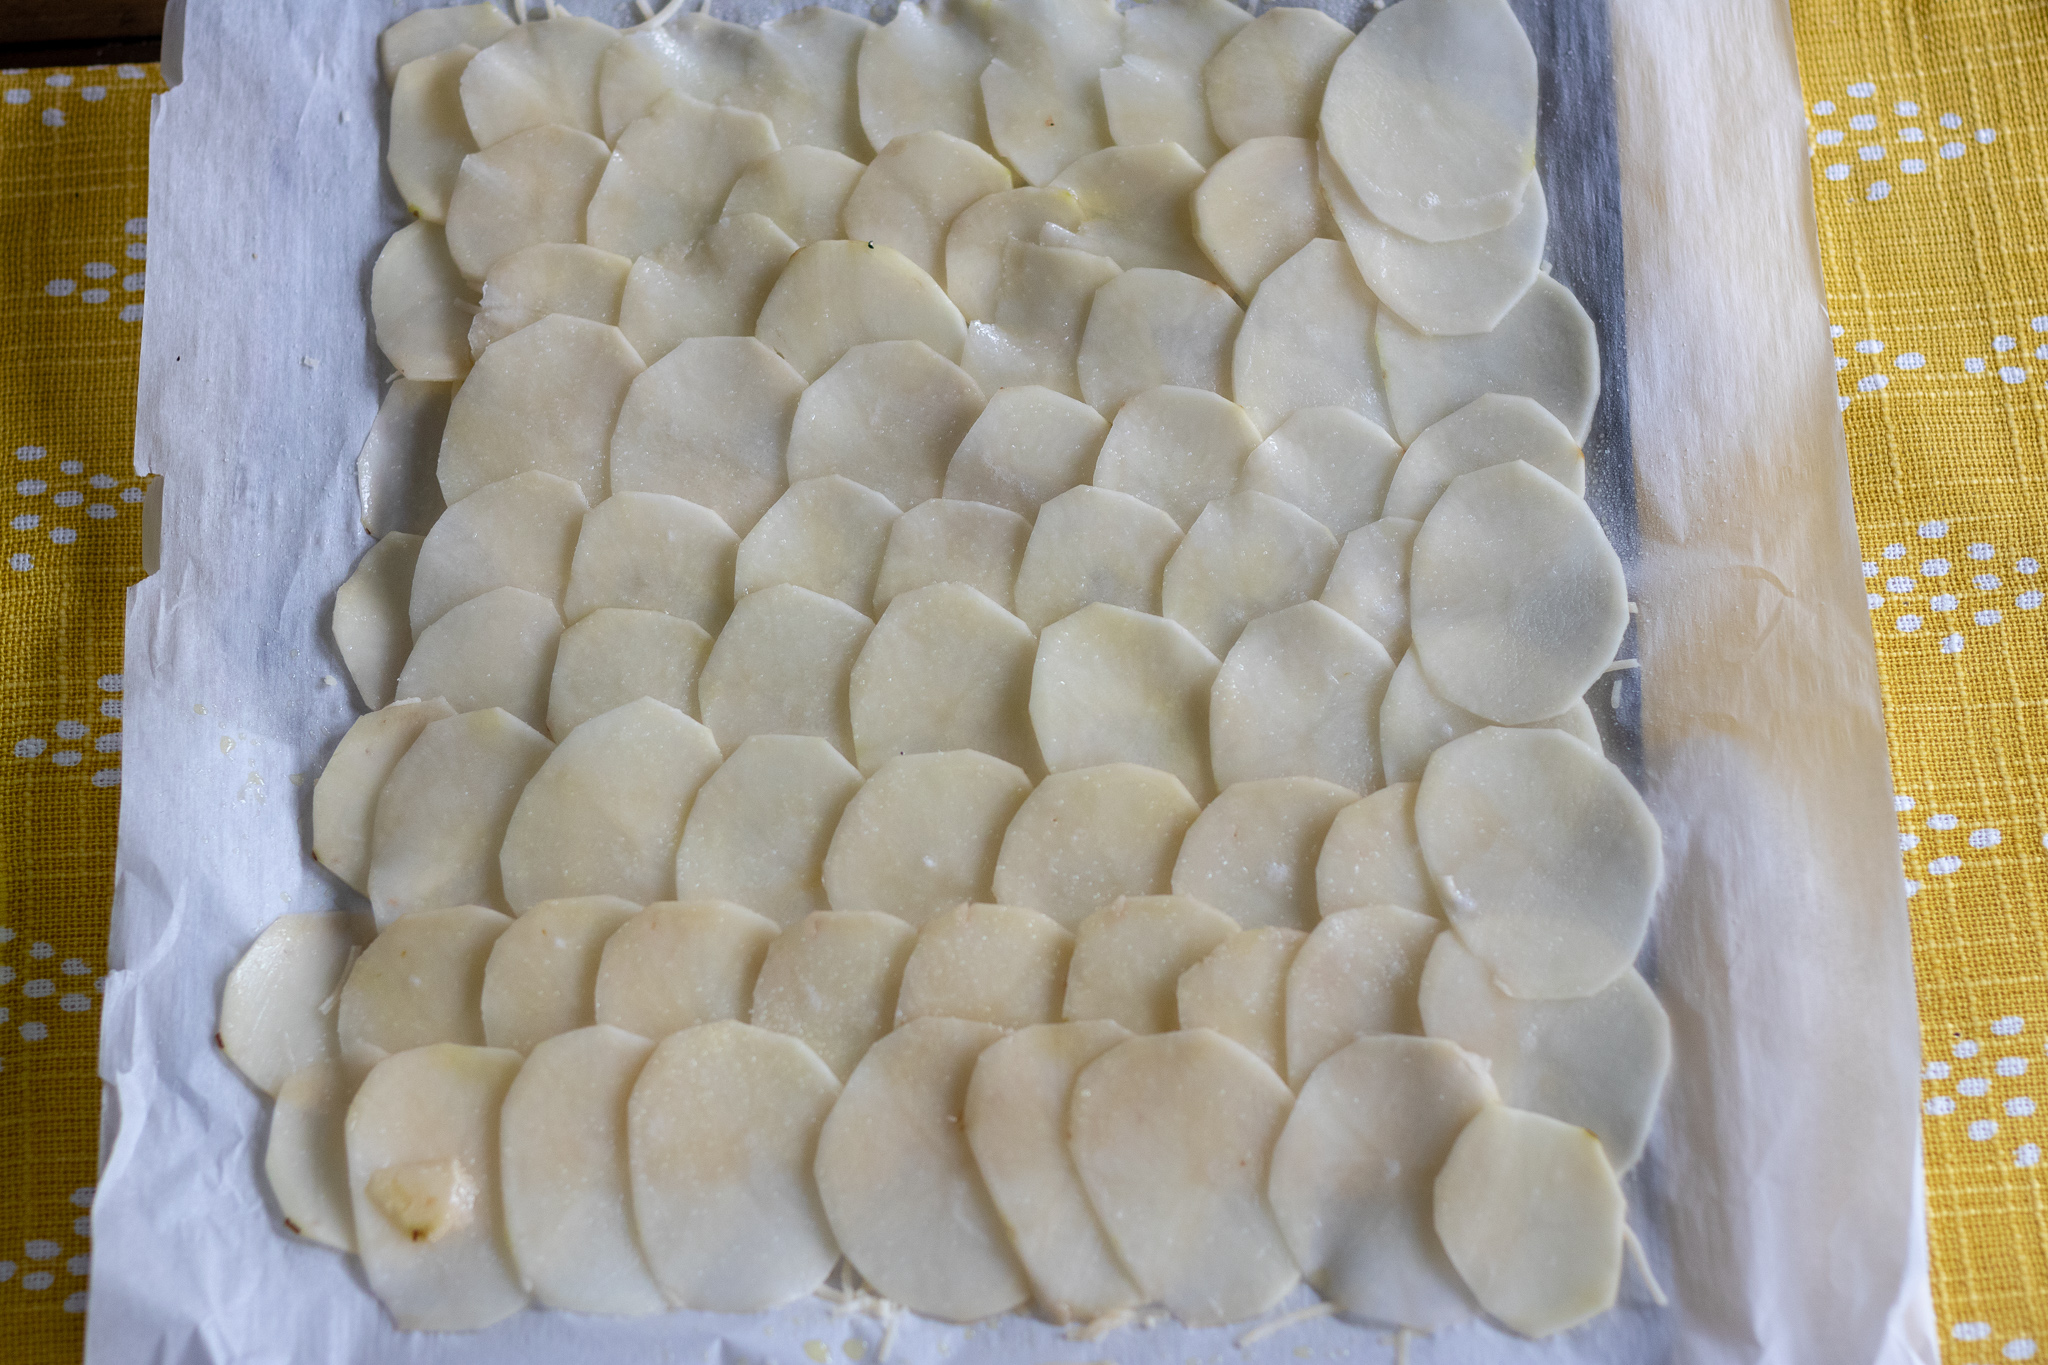
  3. Lay the potatoes on the pan in a thin single layer, making sure each potatoes is touching and overlapping just a little. You should be able to cover the pan with the potatoes. Give the potatoes a little sprinkle of salt, and another spray with some oil. Place the pan in the oven and bake for 25 minutes.

  4. While the potatoes are baking, prepare the ricotta according to instructions.

  5. Add the sausage to a large skillet over medium heat, breaking it into a crumble with a spatula and allowing it cook though. When the sausage is 3/4 of the way done cooking, add the spinach to the pan and let it wilt, and finish cooking with the sausage.

  6. Check the potatoes after 25 minutes. They should be soft and sticking together. If they do not seem done, give them 5 more minutes. Once they are done cooking, remove from oven (but leave the oven on) and allow them to cool on the pan for about 10 minutes.

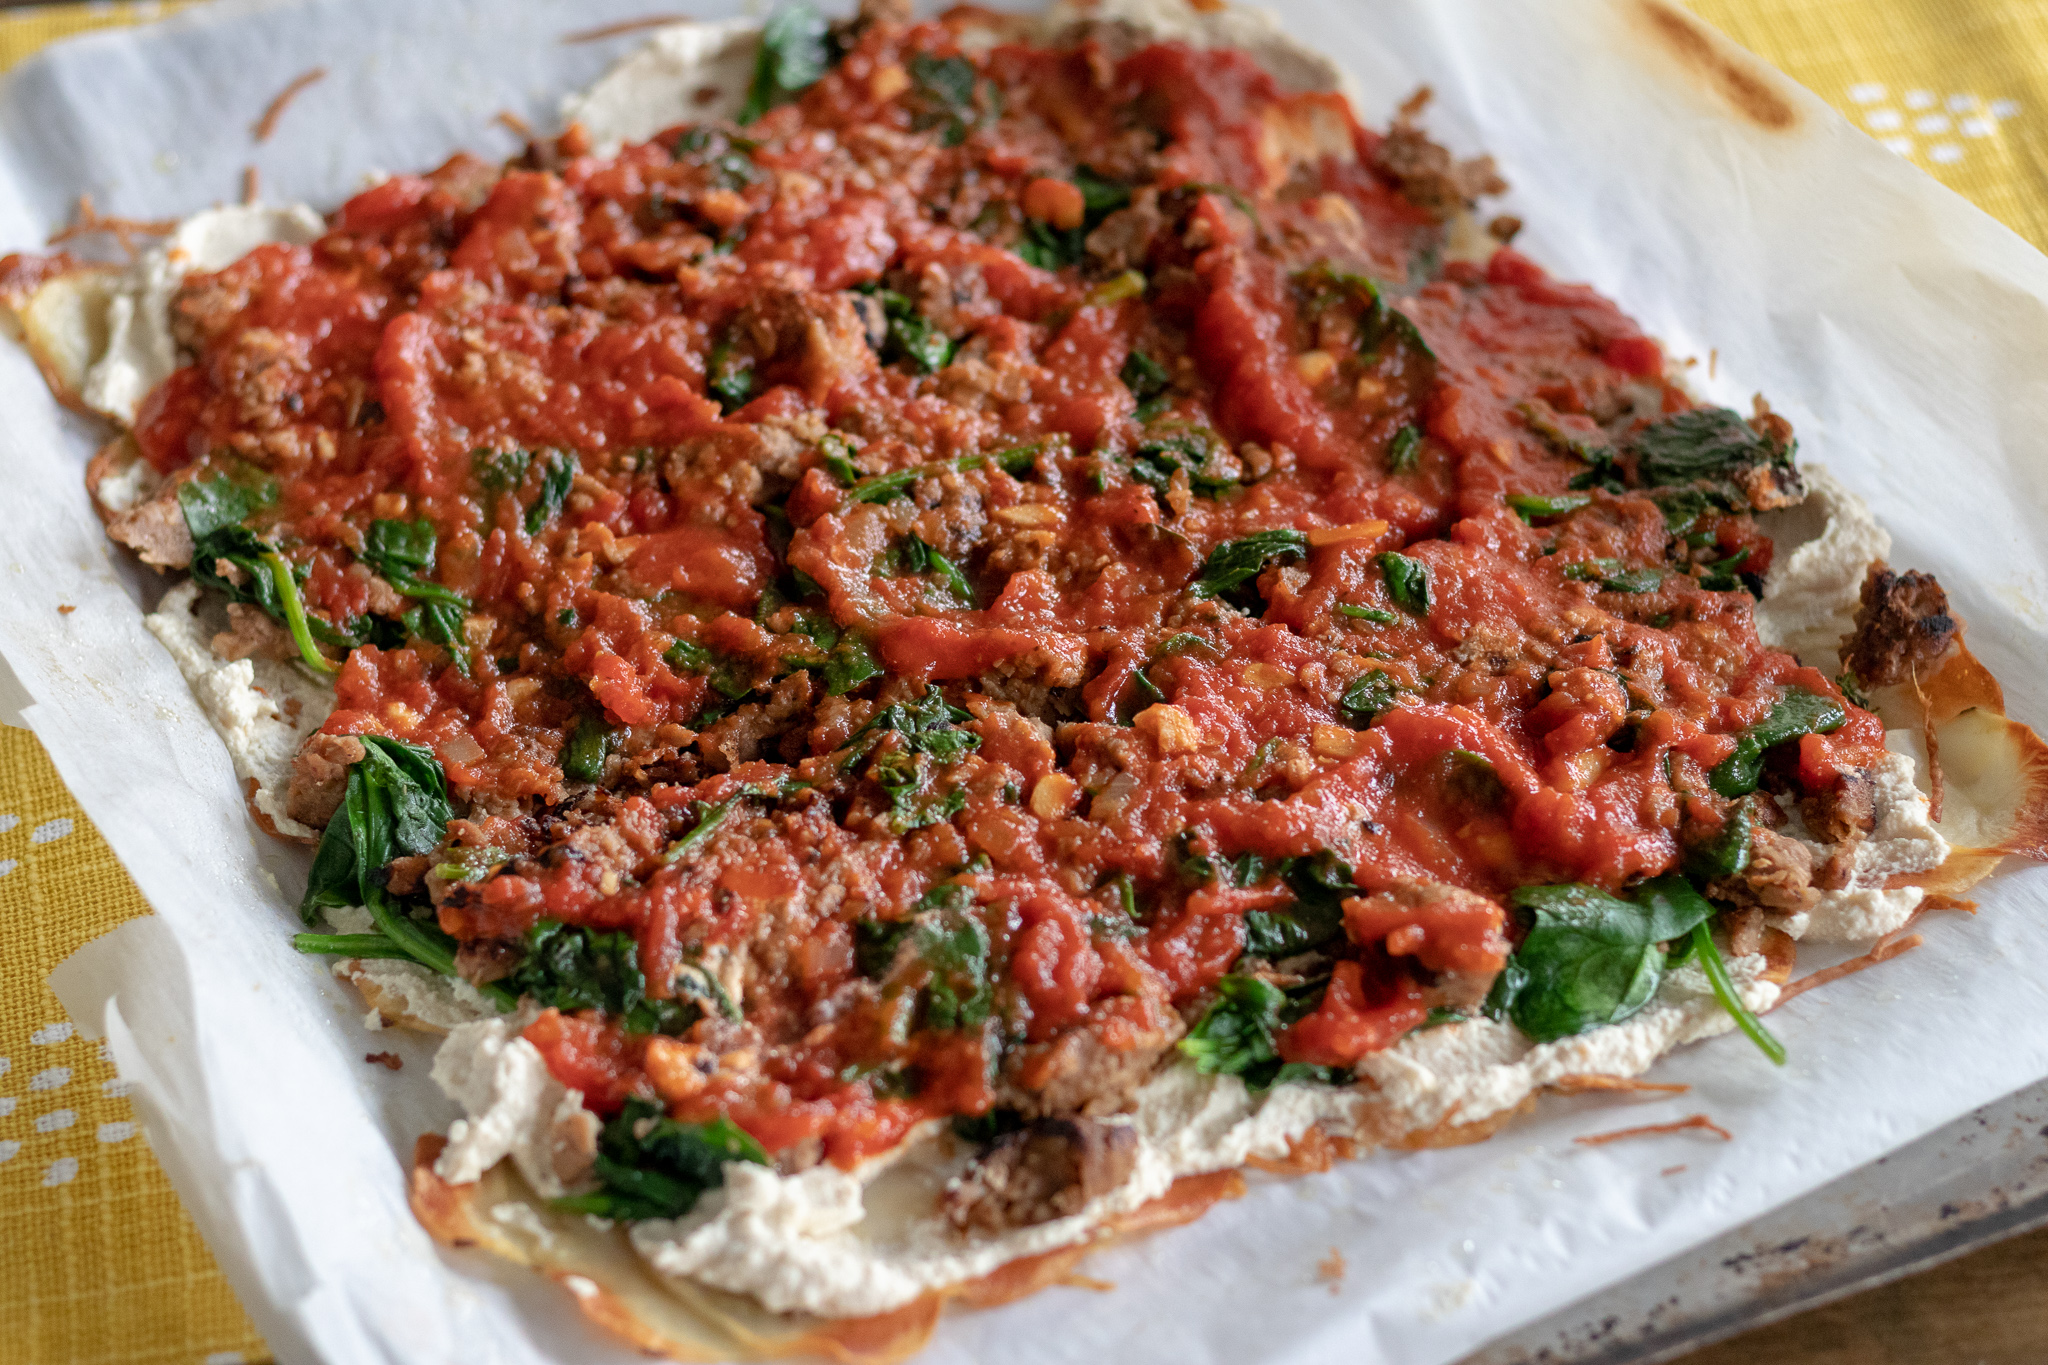
  7. Once the potatoes have cooled, spread a nice thick, even, layer of ricotta over the surface of the potatoes. Next sprinkle the sausage and spinach mixture over the ricotta. Lastly, cover the sausage layer in a layer or marinara.

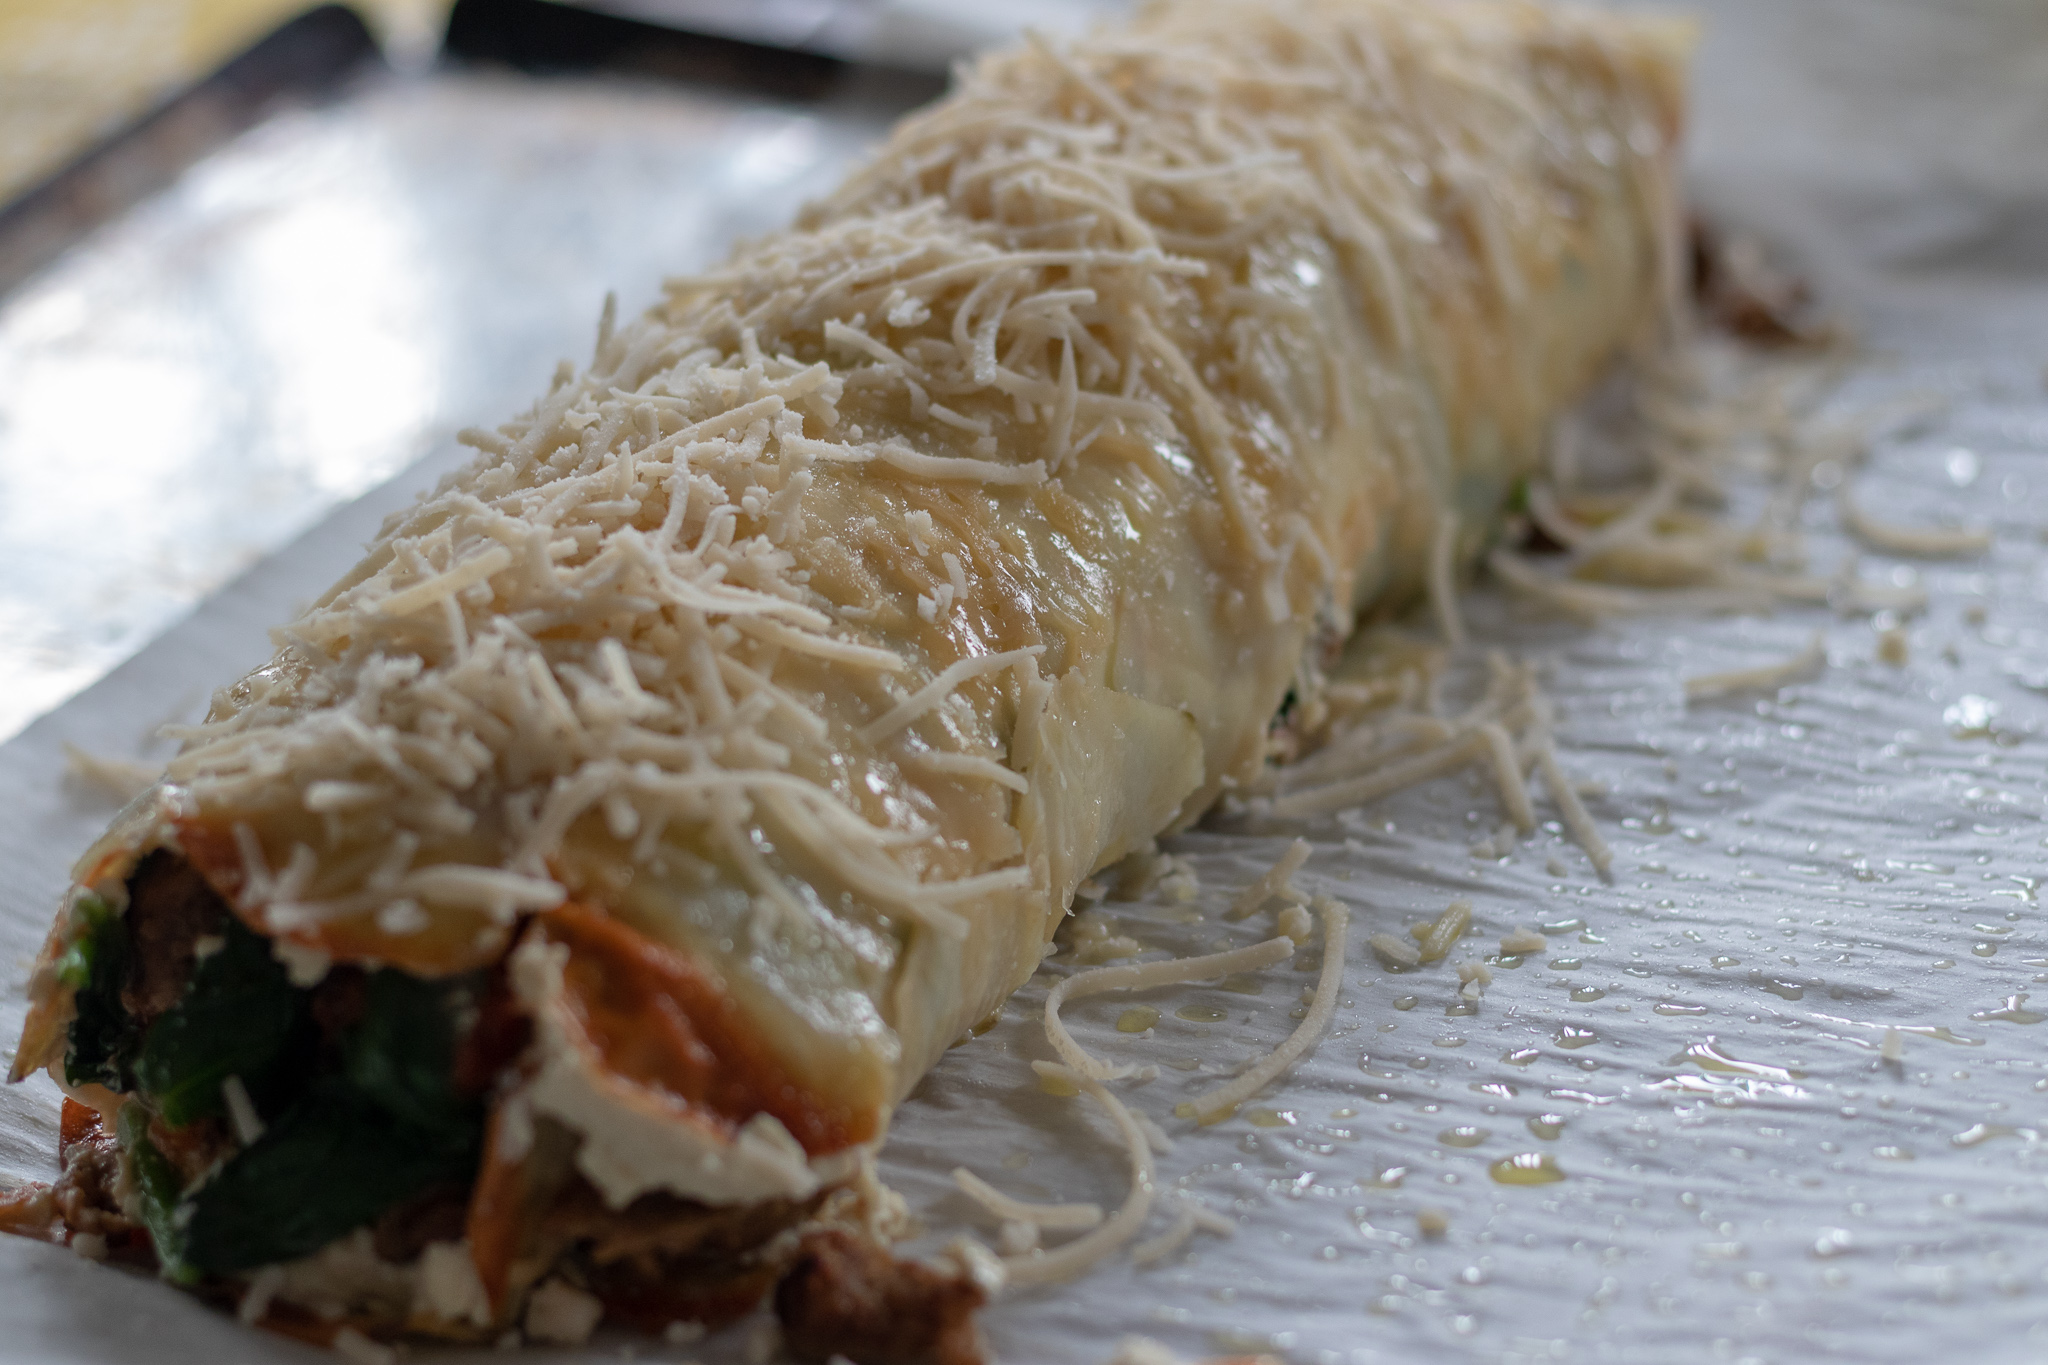
  8. Starting at the end that you began layering the potatoes, carefully begin rolling into a burrito shape, using the parchment paper to help you get started. One potatoes might break when you are rolling it up, just press them back together and keep rolling. Give the roll up another spray of oil, and sprinkle the remaining 1/4 cup of parm shreds over the top. Put the roll up back in the oven for about 25 minutes. You want the roll up to heat through, and the parm to melt and brown.

  9. Remove from oven and allow to cool some before slicing and serving. Sprinkle with dried parsley or oregano to garnish.

IMG_2344.jpg

Chocolate Coconut Macaroon Smoothie (With Matzah Toffee)

IMG_2417.jpg

Sometimes I want a healthy smoothie with a side of not so healthy matzah toffee. I mean, I am gonna feel a whole lot less badly about drinking this than I am an actual milk shake!!

And that little bit of matzah toffee on the side gives me just enough guilty pleasure without totally wrecking an otherwise healthy and filling shake! This my friends is what we call balance.

Feel free to skip the matzah toffee. I tend to make this shake at passover when I have matzah toffee laying around.

The smoothie is still delicious without it! Its quick and easy with just the right amount of sweetness. Drop some protein powder in it, and call it breakfast, lunch, or dinner!


NGREDIENTS:

  • 2 cups coconut or almond milk

  • 2 cups ice

  • 1/4 cup cashews

  • 3 tablespoons dark cocoa powder

  • 5-6 pitted dates

  • 3 tablespoons shredded coconut (more if you like)

  • Optional: 2 tablespoons agave, if the dates have not made it sweet enough for you

  • optional: 1 to 2 scoops vanilla protein powder

  • Optional: A few pieces of matzah toffee for garnish


INSTRUCTIONS:

  1. Add all of the ingredients to a blender and mix until smooth. You can add the dates before adding any agave and taste it to see if its sweet enough. When I make this for myself, I think the dates make it plenty sweet. When I make it for my family they beg to differ, so I always have to add a few squirts of agave. Just adjust according to your own taste. If you are using protein powder and it is sweet, then that may do it as well.

  2. Divide between 2 large glasses or 3 smaller glasses, and garnish with more shredded coconut or a few pieces of broken up Matzah Toffee. If making fresh matzah toffee for the recipe, you can sprinkle it with shredded coconut instead of sprinkles.

Vegan Chocolate Toffee Matzah

IMG_2450.jpg

If you celebrate Passover then you probably already know all about matzah toffee, otherwise known as matzah crack.

I mean if you have to eat matzah for a week, you gotta get creative! I don’t hate matzah. I am however 100% over eating it after a week.

I don’t hate it, lets say I tolerate it. BUT when you pour butter, sugar, chocolate and sprinkles all over it, I FLIPPING LOVE IT!

Suddenly Passover is the best time of year. So much for feeling afflicted!

You may have also had something like this made with saltine crackers, but I promise, PROMISE, it is better on thin, crispy, light matzah!

So even if you do not celebrate passover, you can still grab a box of matzah in the international isle of your local grocery store and make yourself a batch of this yearly favorite. And if you by some chance get invited to a Passover Seder, now you know what to make!


INGREDIENTS:

  • 5 pieces of plain matzah (you can use regular or Gluten Free)

  • 3/4 cups dairy free butter (I use earth balance)

  • 1 cup brown sugar

  • 1 cup chopped vegan dark chocolate, or chocolate chips

  • course sea salt

  • sprinkles (optional)


INSTRUCTIONS:

Preheat oven to 350 degrees.

  1. In a medium sauce pan, heat brown sugar and butter over medium heat, stirring continuously. Simmer for 3 to 5 minutes, allowing all of the sugar to melt, and the mixture to become smooth.

  2. Cover a large cookie sheet in a layer of parchment or foil (this makes for easier cleanup.) Make a single layer of matzah on the pan. You may have to break a piece in half to fit it all on one pan, or you can use 2 pans.

  3. Evenly spread the sugar/ butter mixture over the pieces of matzah. You want to completely cover each piece with the mixture . Place the pan in the oven on the middle rack. Allow the matzah to bake for about 5 minutes.

  4. Remove matzah from the oven, leaving it on the pan. Sprinkle the tops of the hot matzah with the chocolate. It will quickly melt. Evenly spread the melted chocolate over the matzah. Sprinkle with salt and sprinkles.

  5. Place the pan in the fridge or the freezer to cool, and allow the chocolate to harden.

  6. Once the matzah has hardened, either cut into bite size pieces with a knife, or break into pieces with your hands. Store in an airtight container in the fridge, or at room temperature.

1.jpg

Nostalgic Vegan Ice Cream Cake (Dairy Queen)

2.jpg

Every year when I was a kid I hoped and wished my parents would get me a Dairy Queen classic ice cream cake for my birthday.

I think I got a few over the years, but would have happily eaten that cake every day of my life.

A fudgy cookie bottom, chocolate ice cream, more fudge, vanilla ice cream, coved in frozen whipped topping.

It’s every ice cream lovers dream, and nobody did it like the Dairy Queen.

Recreating a vegan version of this ice cream cake is actually really simple, but it will take some time. If you want it for dessert then start it in the morning or if you want it for an afternoon birthday party, prepare it the night before.

Sometimes you just cant rush perfection, or make ice cream freeze faster than it wants to in this case.

If you have never experianced the joy and bliss of this DQ wonder, then I am truly sorry, but hey, now you can try it in all of it’s vegan form and glory!

Does this make me the Vegan Dairy Queen?? Just let me dream, Y’all!


INGREDIETS:

  • 3 pints non dairy vanilla ice cream

  • 1 pint non dairy chocolate ice cream

  • 1 regular sized package of chocolate cream filled sandwich cookies

  • 2 cups vegan fudge sauce (recipe below)

  • 2-3 cups Sweet Aquafaba Whip

  • optional: vegan sprinkles

VEGAN FUDGE SAUCE:

  • 1/3 cup coconut oil

  • 3 tablespoons white sugar

  • 1/2 cup light corn syrup

  • 1/3 cup dark cocoa powder

  • 1 cup chopped vegan dark chocolate or chocolate chips

  • 3/4 cups full fat coconut milk

  • 1 teaspoon vanilla extract


INSTUCTIONS:

  1. Start by letting the chocolate ice cream sit out on the counter to soften while you prepare the fudge.

  2. Make the fudge sauce by adding all of the ingredients minus the chopped chocolate and vanilla to a medium sauce pan over medium/low heat. Allow the mixture to come to a simmer for about 5 minutes, stirring continuously, allowing the mixture to thicken. Remove from heat.

  3. Stir in the chopped chocolate and vanilla, and continue stirring until all of the chocolate has melted. It should be thick and glossy. Set aside.

  4. Crush up the entire pack of sandwich cookies. You can put them into a food processor and pulse until they are nice and crushed, or you place them in large zip lock and roll over them with a rolling pin, or crush them using a kitchen mallet.

  5. Place crushed cookies in a large bowl and stir in one cup of the chocolate fudge (the recipe makes 2 cups of fudge so just use half)

  6. Line the bottom of a 9 inch inch spring form pan with a circle of parchment paper. Take half of the cookie mixture and press it evenly into the bottom of the spring form.

  7. Empty the chocolate ice cream into a medium size bowl and stir it until it is nice and smooth. You dont want it totally melted, you want it the consistency of soft serve so it will spread evenly.

  8. Spread the chocolate ice cream evenly over the chocolate cookie bottom and pop the pan in the freezer for 20-30 minutes to let the ice cream firm back up.

  9. Take the vanilla ice cream out of the freezer and let it soften up.

  10. Remove pan form the freezer and, spread the remaining cookie mixture evenly over the chocolate ice cream. Pour the remaining 1 cup of fudge over the cookie mixture and spread evenly as well. Pop pan back in the freezer for 10-15mintues

  11. Dump all three containers of vanilla ice cream into a large bowl and stir them up until they are also creamy and smooth like soft serve.

  12. Spread the vanilla ice cream evenly over the fudge layer and place back in the freezer so the whole cake can refreeze and firm up. You can press on the cake in the center to see if it seems frim after about 3 or 4 hours. If not, let it stay in the freezer for another hour or until the center seems nice and frozen.

  13. While the cake is freezing, prepare the Sweet Aquafaba Whip. Once the cake seems frozen through, remove from the spring form pan. Coat the entire cake in a thick layer of the whip. You can pipe stars along the rim and add sprinkles if you like. Pop the cake back into the freezer for about an hour to let the whip firm up.

  14. To serve, fill a tall glass with hot water and drop a sharp knife into the glass for a few minutes. Dry off the knife and cut the cake. The hot knife will cut more easily through the frozen cake. Store any leftovers back in the freezer.

IMG_2372.jpg

Vegan Pretzel Buns

IMG_2274.jpg

What’s better than a delicious vegan soft pretzel!?!? Well, maybe a delicious soft vegan pretzel bun!

I mean come on! Who doesn’t want a tasty plant based burger on a homemade pretzel bun? Our family eats a lot of Beyond brand burgers, fried tofu “chicken” sandwiches, and bbq jackfruit. These buns work great for any burger or sandwich you wanna make. You can also make them smaller and use them as a dinner roll to serve with soups or salad! Or if you are like me just cram them in your mouth all by themselves because bread is my love language!

We use our original Challah Y’all, Vegan Challahdough to make these super tasty buns and they are just about perfect. Soft and chewy on the inside, crisp and salty on the outside! Everything a pretzel bun should be, plus they vegan!!

Don’t be discouraged by unfamiliar ingredients or techniques. If you have never made vegan challah dough, its pretty simple and easy to make.

We use aquafaba in place of eggs in the recipe. Aquafaba in the simplest term is bean liquid from canned beans. It will whip up to resemble fluffy egg whites and makes an excellent egg substitute in baked goods. Just make sure you measure out the aquafaba after you have whipped it. There will be leftovers to use for another recipe, and you can ever freeze it for later use!

So go forth and make challah dough, then turn it into pretzel buns!! Because as far as buns go, pretzels buns are kinda the best!


INGREDIENTS:

  • 4 cups all purpose flour

  • 1 1/4 cup aquafaba (measure the whipped product, not the liquid itself)

  • 1/3 cup sugar

  • 1/2 cup oil (I use grapeseed but you can use any neutral oil you like)

  • 4 1/2 teaspoons dry active yeast

  • 1 tablespoon sugar

  • 1 tablespoon salt

  • 1 cup hot water. I just use hot water from the tap, you don't want it too hot or the yeast will die and it will not activate.

  • course salt ( for bun tops)

  • 1 cup extra aquafaba plus 1 tablespoon maple syrup, for brushing bun tops

  • 2 teaspoons baking soda, for boiling water


COOKING INSTRUCTIONS:

  1. In a large glass bowl mix hot water, yeast, and 1 tablespoon sugar

  2. Let the that sit for 10 minutes to activate, or until the mixture is super foamy at the top.

  3. In a stand mixer add the yeast mixture, aquafaba, sugar, oil, salt, and 2 cups of flour. (you can mix by hand, just mix the above, and add remaining flour slowly. You will need to knead it for the same amount of time. It's a good workout though!

  4. Mix until all of the ingredients are incorporated then add in the remaining flour. I typically will hand mix the first 2 cups of flour in, or use my paddle attachment and replace with the dough hook when I add the remaining flour.

  5. The dough should come together and not be sticky, if it seems sticky you can add 1/4 more flour a little at at time until the dough comes together. Your goal is smooth, and elastic-y dough, not sticky.

  6. Let the dough kneed in the mixer on low/medium speed for 10 minutes. The dough should be smooth at this point and have a sort of bounce back if you poke it.

  7. Form dough into a nice ball, and place in a lightly greased glass bowl. Cover the bowl with a damp kitchen towel, and place inside your oven turned off, OR on the bread proof setting if your oven has one.

  8. Bring a small pot of water to a boil and place in the bottom of the oven. The heat and steam from the water will help the dough to rise.

  9. Let dough rise about an hour, or until the dough has doubled in size.

  10. Remove dough from oven, and on a clean lightly floured work surface, divide the dough into 10 equal pieces and form them into round bun shapes. Place them on a parchment lined baking sheet to rest.

  11. Preheat oven to 400 degrees

  12. Bring a large pot of water to a boil. I use my dutch oven. Once it is boiling add 2 teaspoons baking soda.

  13. Gently put 1 to 2 buns into the boiling water at a time. After 30 seconds carefully flip the buns over suing a slotted spoon and let them boil for another 30 seconds. Remove from the water and place back on parchment lined baking sheet. Repeat with remaining buns.

  14. Mix reserved cup of aquafaba with 1 tablespoon of maple syrup, and brush bun tops with the mixture. Sprinkle buns with course salt.

  15. Place buns in the oven on the middle rack and bake for 20-25 minutes. You can brush them a few times with the aquafaba mixture during the baking process to help make them shiny and to darken up.

  16. Allow buns to cool before slicing and serving.

If you like this recipe, try these:


IMG_2277.jpg

Vegan Dry Rubbed Brisket

3.jpg

When we used to eat meat, smoked brisket was on the top of my meat favorites list!

Brietet Sandwichs, brisket knish, brisket slathered in bbq with side of baked beans and potato salad. Now I am super hungry!!

Obviously its been a LONG time since we have eaten brisket, but from what I remember, this vegan brisket is a close second!

We added some jackfruit to the jazzed up seitan recipe to add some extra meaty texture and it worked great. This vegan brisket is perfectly seasoned and coated in a savory, sweet dry rub.

If you have a food processor this recipe could not be easier. Just dump everything in there, let it mix and knead. Wrap it, bake it, and LET IT REST. Really, head my warning, it must rest to firm up. Don’t come at me if you cut right into yours and its not firm. I warned you!!

You can serve it as is, or pop it on the grill with some BBQ sauce and sliced up for the most delicious BBQ brisket sandwich. I have added a drool worthy picture below of said magnificent sandwich!!!

It firms up nicely and can be sliced extra thin using a mandolin, if you let it rest as stated above!

So if you have been missing smokey, savory, dry rub crusted brisket, hopefully this recipe will do the trick! I for one know what’s going to be on our grill this summer!

! Glory Glory! Brisket is back, baby!!!


INGREDIENTS:

You will need aluminum foil, and a 9x13 baking dish for this recipe

  • 1 can jackfruit in brine

  • 1 cup vital wheat gluten

  • 1/4 cup tapioca starch

  • 1/4 cup nutritional yeast

  • 1 teaspoon Vegetable Better than Bouillon

  • 2 tablespoons water

  • 2 tablespoons soy sauce or coconut aminos

  • 2 tablespoons oil ( I used grape seed)

  • 2 teaspoons liquid smoke

  • 2 teaspoons minced garlic

  • 2 teaspoons onion powder

  • 2 teaspoon vegan Worcestershire sauce

  • 2 teaspoons cumin

  • 2 teaspoons smoked paprika

  • 1 teaspoon dried thyme

  • 1 teaspoon each salt and pepper

DRY RUB:

  • 3 tablespoons smoked paprika

  • 2 tablespoons brown sugar

  • 2 teaspoons onion powder

  • 1 teaspoon salt

  • 1 teaspoon pepper

  • 1 teaspoon thyme


INSTRUCITONS:

preheat oven to 350 degrees.

  1. Drain and rinse the jackfruit. Chop the jackfruit in your food processor by pulsing a few times.

  2. Add the remaining ingredients to the food processor and mix for a minute, until a sort of dough forms.

  3. If you do not have a food processor, finely chop the jackfruit using a sharp knife. In a medium bowl add the jackfruit and remaining ingredients. Using your hands, (I promise its just easier) mix all of the ingredients together until a dough forms. Knead the dough by hand for a few minutes.

  4. Form the dough into a sort of oval shape, mimicking a brisket. Tear off a piece of foil that is about 3 times the size of the dough.

  5. Mix up the ingredients for the dry rub in a bowl.

  6. Pour dry rub into the middle of the foil. Take the “brisket and roll it in the rub to cover all sides.

  7. Spray the brisket and the foil with some cooking spray and wrap the brisket in the foil, sealing it up. Just make sure it is going to be easy to open.

  8. Place the foil covered brisket into a 9x13 pan and place in the oven on the top rack. Bake sealed for 30 minutes. After 30 minutes open up the foil pouch and continue baking for another 30-40 minutes.

  9. Allow the brisket to cool and rest in the fridge overnight. The brisket should slice easily once cooled. It should even be firm enough to thinly slice on a mandolin.

You can also baste the brisket it BBQ sauce and grill to reheat. I normally place brisket on a piece of foil on the grill to avoid a mess. I let it grill with the lid closed just until its heated through, then slice for sandwiches.

2.jpg

Easy Vegan Chocolate Fudge

When I was a kid, we spent countless weekends camping out in the North Ga Mountains. By camping I mean sleeping comfortably in an RV right outside of the tourist town of Helen, Ga. It’s a cute little mountain town that looks like an old Bavarian vil…

When I was a kid, we spent countless weekends camping out in the North Ga Mountains.

By camping I mean sleeping comfortably in an RV right outside of the tourist town of Helen, Ga. It’s a cute little mountain town that looks like an old Bavarian village.

Growing up the shops ranged from things like candle making, local jewelry, outlets, a cool/creepy wax museum, and the fudge shop!


My dad always let me get fudge and it was the thing I looked forward to the most. Fast forward 20 something years and we recently went back to take our own kids. Neeless to say, the architecture hasn’t changed, but the shops and crowds certainly have. It’s still charming and fun to visit, but It wasn’t the Helen of my childhood. Time keeps on moving I guess, and people no longer want swirly, hand dipped, wizard and dragon carved candles? What?!?! I was genuinely surprised by this?


I was able to get ridiculous matching airbrush t-shirts with one of my favorite old friends, but otherwise it was sort of a let down. Also, now that we are vegan, I couldn’t share the joy of choosing a slab of fudge with my kid.

So what’s a girl to do, other than go home and make her kids some vegan fudge, and assure them that back in the day, Helen was once one of her favorite places on earth. An amazing place I spent summers floating down the Chattahoochee river on inner tubes, watching candles get carved, and eating enough fudge to make you sick.


I just hope we can give our kids memories like this, and find our own places that they hold dear in their hearts, even if they change over time. And I assure you every time I make a batch of vegan fudge, I will remember Helen like it was when I was a kid, and it will make my heart happy. So, now where can a girl get a swirly, glittered, hand carved wizard candle?

INGREDIENTS:

  • 4 1/2 oz vegan dark chocolate

  • 1 can full fat coconut milk or cream

  • 1/2 cup sugar

  • 1/4 cup peanut, almond, or sunbutter

  • pinch of salt

  • 1/4 cup chopped walnuts (optional)

INSTRUCTIONS:

  1. Chop the dark chocolate into small pieces.

  2. Add chocolate, sugar, and coconut milk to a medium sauce pan. Heat over medium/low heat, allowing the the chocolate to melt, and the mixture to come to a simmer. Let the mixture simmer for about 5-7 minutes, stirring continuously. Stir in the peanut butter and allow it to melt. Add the pinch of salt.

  3. Line an 8x8 baking dish with parchment paper. Pour the fudge mixture into the pan.

  4. Top with walnuts if you like, then allow the fudge to chill uncovered in the fridge for about 4 hours to firm up.

  5. Cut and serve fudge. Store leftovers in an airtight container in the fridge.

IMG_2234.jpg

Easy Vegan Sandwich Bread

IMG_2154.jpg

I love to smell fresh bread baking. Carbs are my weakness. I actually have a necklace that I wear often that says “carbs” with a heart engraved on it.

So you can see my love for bread and all things carbs runs deep.

I really, really love a nice big delicious sandwich on fresh baked bread! If you have never made loaf bread, let me tell you, you are missing out.

You do not need a fancy bread machine to make easy and fresh baked bread either! Just a loaf pan and an oven.

I am always amazed at just how many ingredients are in store bought bread, half of which I do not know what they are ,or how to pronounce. So I end up paying $5 or more for a loaf of vegan organic, healthier bread, which will be gone after my family of 6 make a sandwich.

Homemade vegan bread is far cheaper, and much healthier than most store bought options, and its easy to make!

You can easily double this recipe as well, and bake up two loaves at once if you are like us and have a lot of mouths to feed. It also freezes well so you could bake up 2 loaves,and just freeze one for later!!! So to all you other carb lovers out there, may your bread always be fresh, fluffy, and make you super happy!!


INGREDIENTS:

  • 3 1/2 cups all purpose flour

  • 1 tablespoon sugar or agave

  • 2 teaspoons salt

  • 1/4 teaspoon baking soda

  • 2 1/2 teaspoons active dry yeast

  • 1 cup plant based milk (I like baking with oat milk, because it browns better than other milks)

  • 1/4 cup water

  • 2 tablespoons oil ( I used grape seed oil)

  • corn meal for dusting


INSTRUCTIONS:

  1. In a microwave safe container, heat the milk and water to around 110 degrees, You can use a thermometer to test the temp, but if you do not have one, the liquid should feel a little hotter than hot tap water. You do not want the liquid too hot (not boiling) because It will kill the yeast.

  2. Add the hot milk, along with the yeast and the sugar to a large glass bowl. Let the mixture sit for about 10 minutes to activate the yeast. It should get foamy on top. If nothing seems to happen with the yeast, and it does not get foamy on the top, then you may have gotten the milk too hot and killed the yeast.

  3. Add the yeast and milk mixture, along with the remaining ingredients to a stand mixer. I often stir using a wooden spoon just to incorporate the ingredients before attaching the dough hook. Mix on medium speed for about 2 minutes,. If the dough seems too sticky and is sticking to the bottom of the bowl, add a few more tablespoons of flour. The dough will be very soft though. If you do not have a stand mixer, add the ingredients to a large bowl and mix by hand. Turn dough over onto a clean, floured surface, and knead for 2 to 3 minutes.

  4. Lightly grease an 8 1/2 by 4 1/2 loaf pan and sprinkle the bottom with a little corn meal. Press the dough evenly inside the pan and cover with plastic wrap. Let dough sit in a warm place for about an hour to rise. The dough should rise almost to the top of the pan.

  5. Preheat oven to 400 degrees. Bake bread for about 25 minutes. Allow the bread to cool in the pan on a wire cooling rack for about 10 minutes before turning it out onto the rack to continue cooling. I normally run a sharp knife around the edge of the pan to help release the bread.

  6. This bread works well for sandwiches. We also like to slice it thick and heat it with vegan butter in an iron skillet to use as Texas Toast.

Serving size, 1 loaf

If you like this recipe, then try these:

Challah Y’all, Vegan Challah

Easy Artisan Bread

Vegan No Rise Hamburger Buns

IMG_2132.jpg

Matcha White Chocolate Peanut Butter Cups (vegan)

For years I have searched for a plant based version of those little mini coffee creamers to carry in my purse. You know, for all of those times that there was not a non dairy creamer option, and my choices were black coffee or no coffee at all! The …

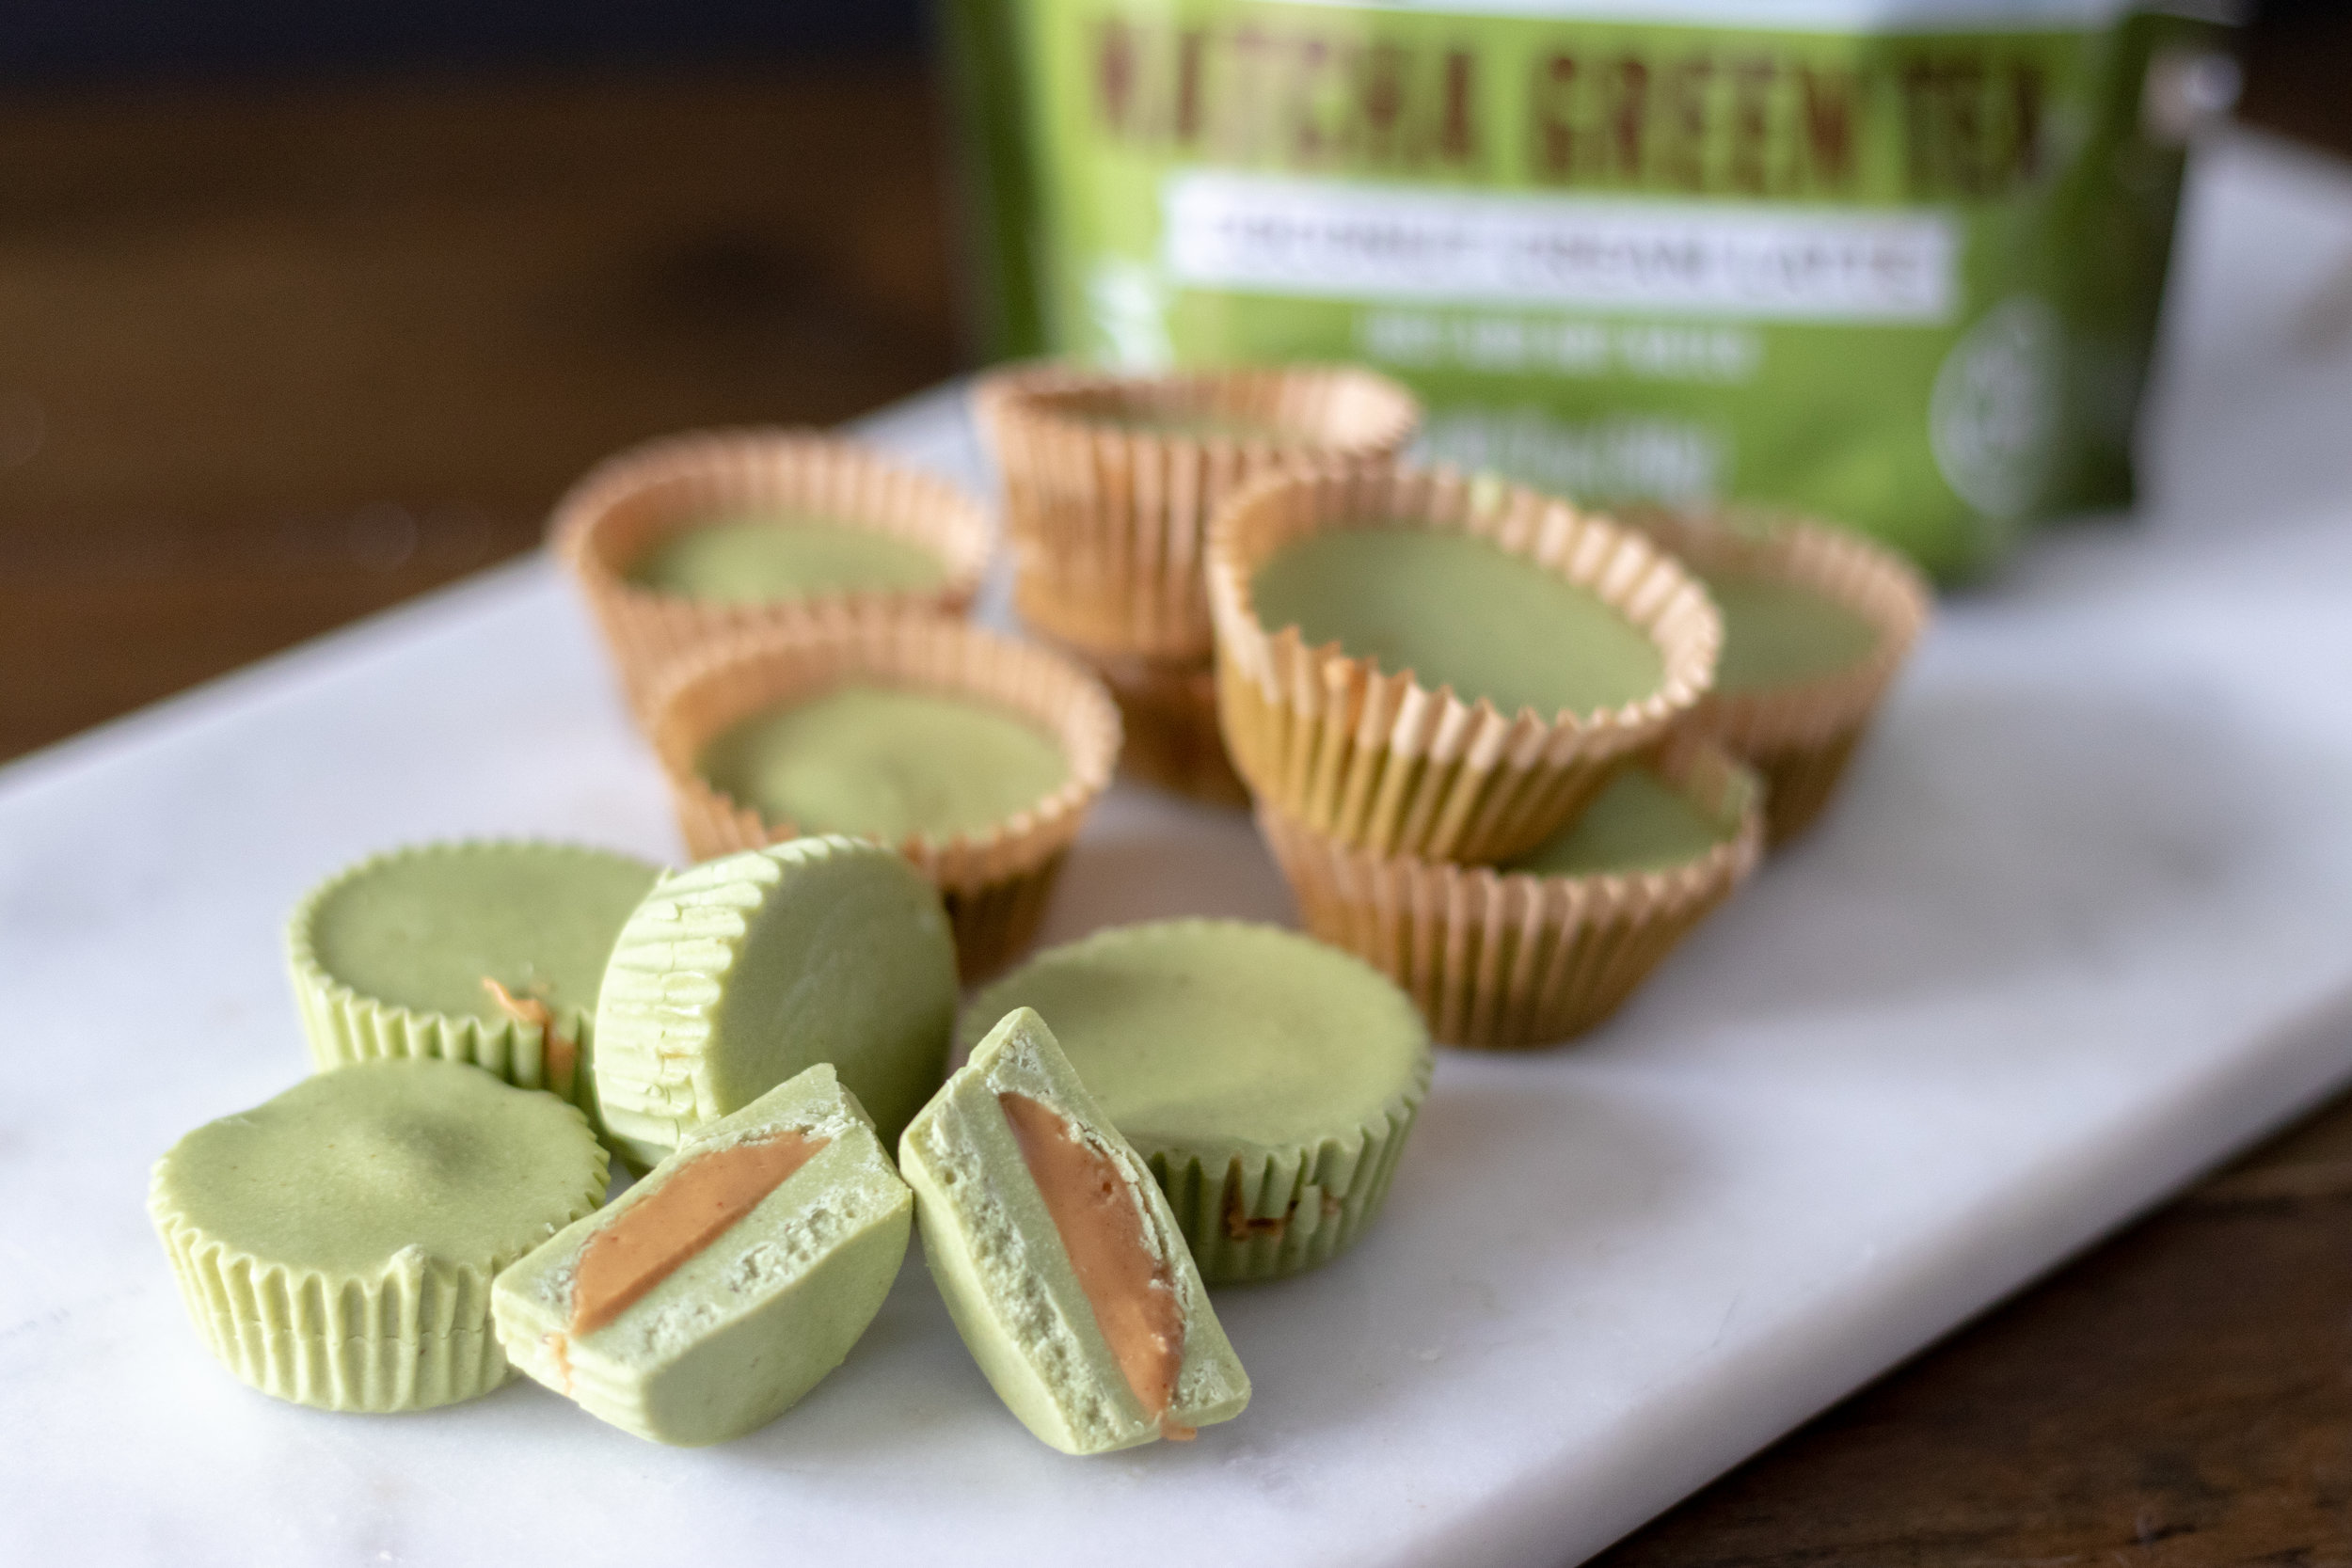
For years I have searched for a plant based version of those little mini coffee creamers to carry in my purse. You know, for all of those times that there was not a non dairy creamer option, and my choices were black coffee or no coffee at all! The horror! I always wondered why this didn’t seem to be a thing until I recently discovered that it is! I found powdered coconut vegan coffee creamer, and they even have single serving packets! You heard me correctly! The company is called Coconut Cloud. One of the things I love best about this company outside of product itself, is that they are an all female company (sorry guys, I’m a lady and I am all about lady ran businesses that make cool products). All of their products are made in the US, and are dairy free, lactose free, gluten free, GMO free, soy free, and VEGAN! Pretty cool, huh? I was able to try the original coconut creamer, and the Matcha Green Tea Coconut Cream Latte. We are big matcha fans in this house, so I was most excited about this drink mix. Just add hot water ,and you have yourself a delicious, and easy, green tea latte in seconds! It is super convenient, more affordable, and way healthier than a lot of coffee shop options. There are only about 4 ingredients in the mix, and you can pronounce and recognize each one! Hooray for real, healthy ingredients. But what is even better is that you can use the mix in other ways. We used the Matcha mix to make these delicious little matcha white chocolate peanut butter cups! Who says you can’t have your drink mix and eat it too! If you are a fan of matcha and peanut butter cups, then I promise you will love these easy little treats! And if you have been looking for a great vegan powdered creamer, or an easy, coconut based vegan drink mix, then check out all of the coconut based creamer, lattes, and cocoa mixes Coconut Cloud has to offer!

INGREDIENTS:

* you will need 12 mini cupcake liners for this recipe and a muffin tin

INSTRUCTIONS:

  1. Add the white chocolate chips and coconut oil to a microwave safe bowl. Microwave in 30 second intervals, stirring in between until the chocolate has completely melted.

  2. Stir in 1/3 cup of the Matcha Green Tea Latte powder and a pinch of salt with the melted chocolate.

  3. Place cupcake liners in a muffin tin. You can use a mini, or a full size muffin tin. This just helps to keep the liners in place. Fill each liner about 1/3 full with the white chocolate matcha mix. Place the muffin tin in the freezer for a few minutes to harden the chocolate.

  4. While the chocolate is in the freezer, put the 2 tablespoons of peanut butter in a microwave safe bowl. Microwave for 30 seconds. Stir well. This just helps to soften the peanut butter and makes it easier to manage.

  5. Remove the white chocolate matcha cups from the freezer and scoop a little peanut butter into the center of each cup. Try not to get the peanut butter too close to the edges.

  6. Evenly divided the rest of the white chocolate matcha mix between each muffin cup, covering the peanut butter. Once all liners are filled, gently tap the tin on the counter top to even out the chocolate. Place the muffin tin back in the freezer for 5 minutes to allow the chocolate to harden.

Makes 12 mini peanut butter cups.

IMG_2096-Edit.jpg

Vegan Casey's Corner Slaw Dog

IMG_2007.jpg

Our family LOVES Disney!. We are lucky enough to live in sunny Florida, only a few hours from the park, and have the additional perk of discounted residence season passes. I

f you are fan, or frequent visitor of Disney’s Magic Kingdom as well, then you probably know all about Casey’s Corner.

For those not familiar, it is a quick serve restaurant that serves hot dogs and fries. In the last couple of years Disney has really stepped up their vegan game, adding lots of vegan options including beyond burgers, and sausages to all of their parks.

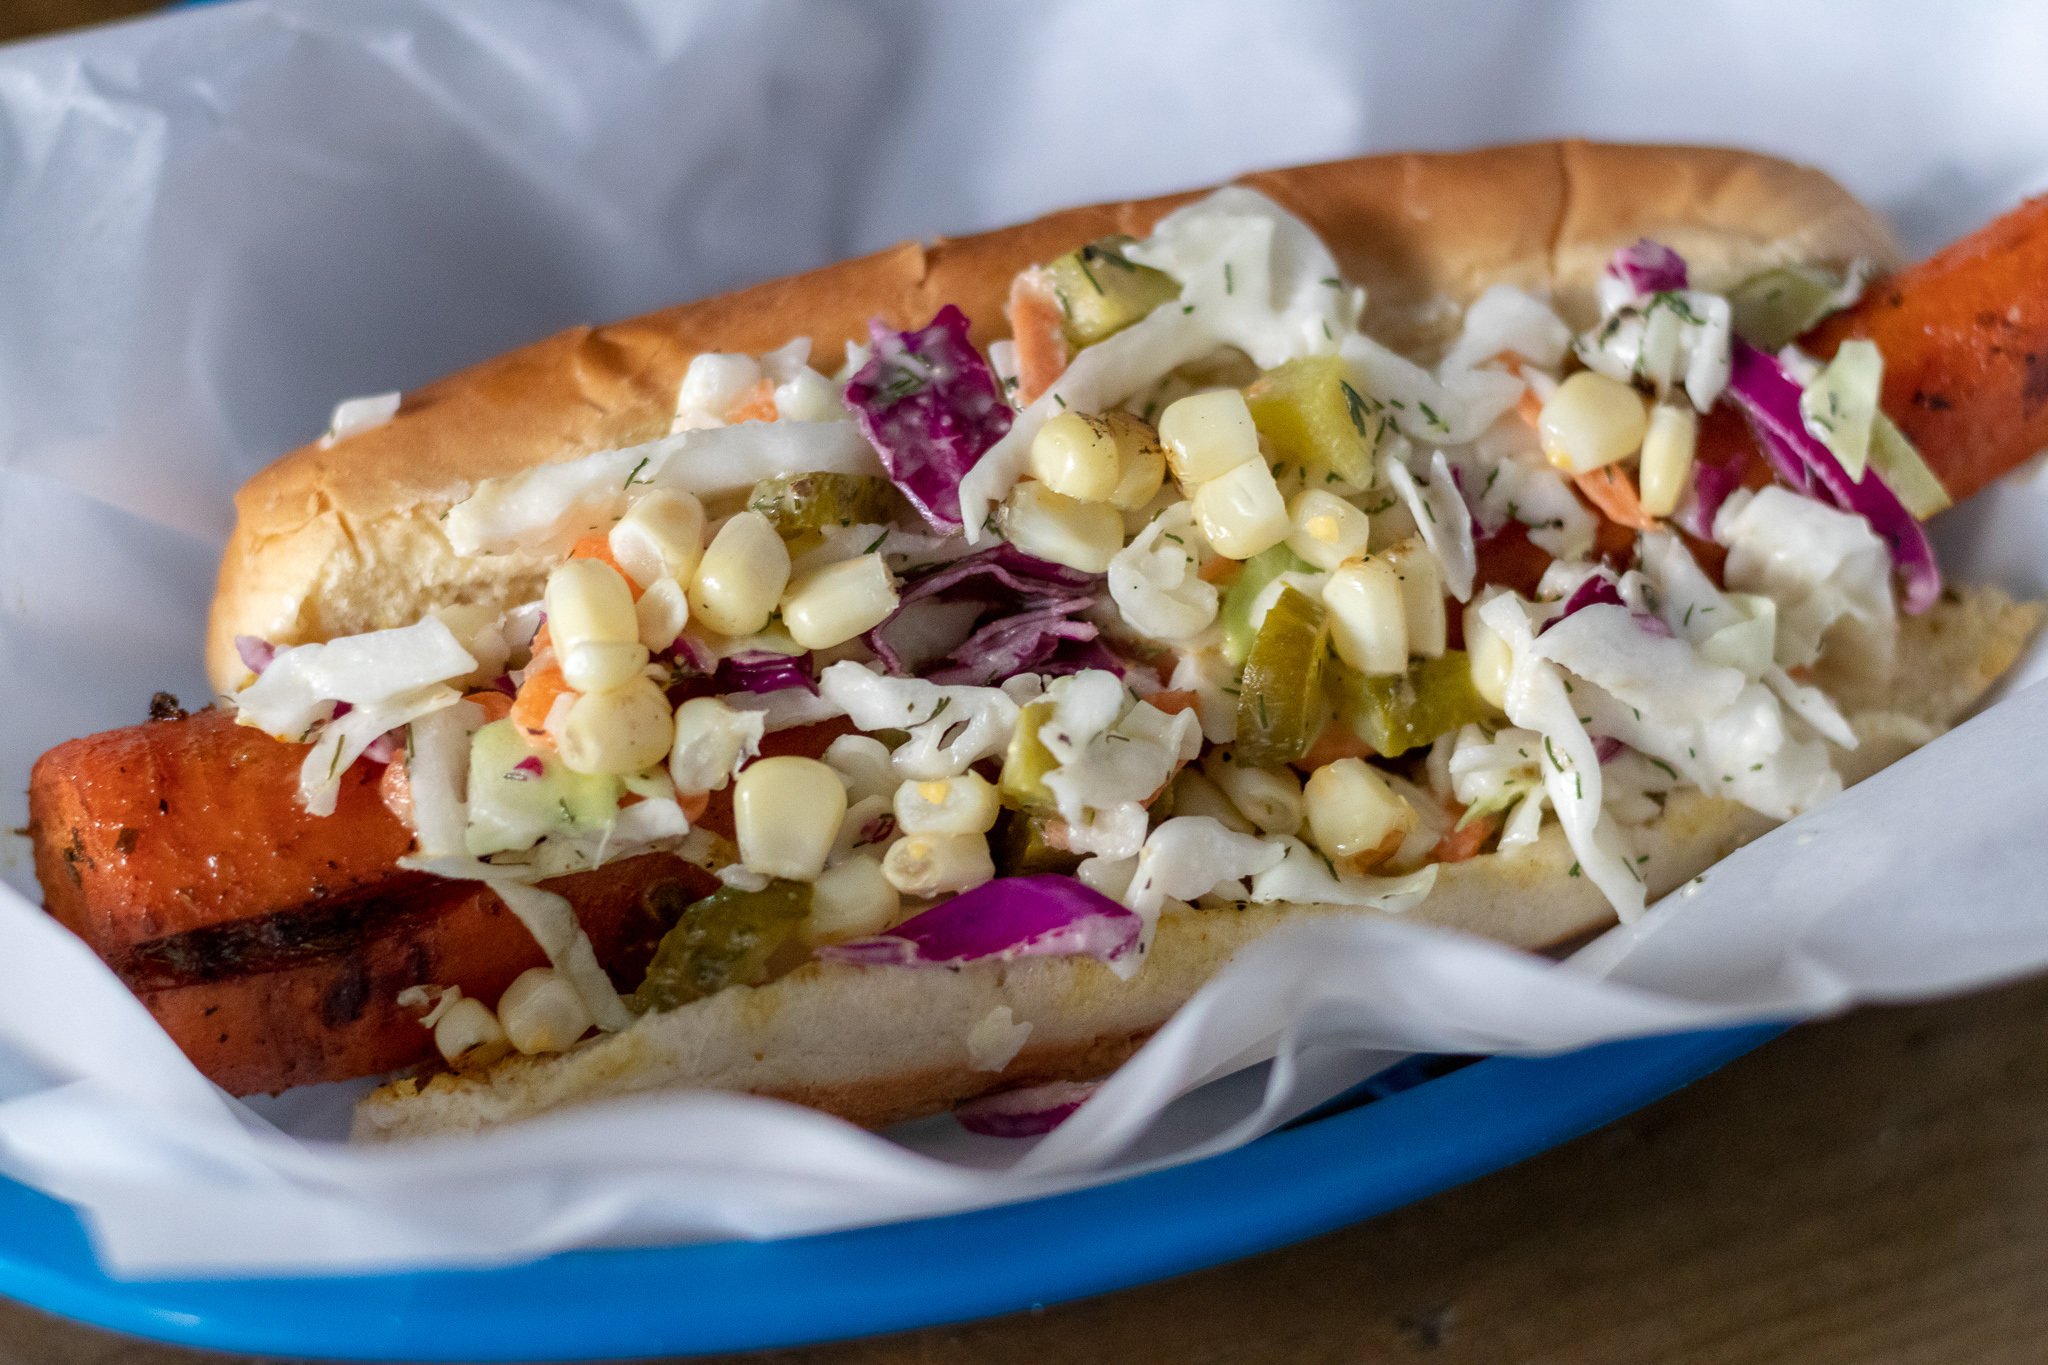
Thanks to these new offerings, Casey’s Corner now has a vegan hot dog that is so crazy good! It is actually a beyond sausage topped with pickle slaw, grilled corn and a special sauce.

I not only ate mine, but half of one of my kids, and wished I had another.

So when we came home from our last Disney day, I decided we could easily recreate this tasty treat, but maybe make it a bit healthier, and more budget friendly using carrot dogs.

I have never been a big fan of faux meat hot dogs, and although I love the Beyond brand sausage, we can not always easily find them, and they are not nearly as cheap as a bag of carrots!

You could 100% use any vegan sausage or hot dog you like for this recipe you like if you are not a carrot dog fan. I can tell you first hand it is just as delicious as a sausage, or a carrot dog!!

So if you have been to the park, had this hot dog, and are still craving more, it’s so easy to make yourself one or 3 (I’m not judging) at home.

If you have never had this hot dog, then you really have try it!! And if you ever get over the the Magic Kingdom, just know your biggest issue finding something vegan to eat, is actually just deciding on WHICH vegan thing to eat! Not a bad problem to have at a theme park!


INGREDIENTS::

  • 1 batch carrot dogs, or store bought vegan hotdogs or sausage

  • 1 pack hot dog buns

  • 2 cups slaw mix or shredded cabbage

  • 2 tablespoons apple cider vinegar

  • 2 tablespoons vegan mayo

  • 1/4 cup finely diced dill pickles

  • salt and pepper to taste

  • 2 ears of corn

THE SAUCE

  • 2 tablespoons mayo

  • 2 tablespoons bbq sauce


DIRECTIONS:

  1. Prepare carrot dogs according to instructions. They are best if marinated over night, but I often will start a batch in the morning and grill them at dinner time.

  2. In a medium bowl add the cabbage, pickles, mayo, vinegar, salt and pepper to taste, and stir. Store in the fridge covered until ready to use.

  3. You can grill the carrot dogs (my preference) or also heat them in a skillet. If using the grill, lightly spray the grill surface with some spay oil. Grill the carrots for about 10 minutes or until you have some nice grill makes on all sides. If heating in a pan, spray pan with some oil, and heat carrot dogs for about 5 minutes to make sure they are cooked through.

  4. Shuck and clean both ears of corn. If using a grill, lightly spray the corn with some oil or brush with vegan butter, and place on the grill along with the carrot dogs. Grill for about 10 minutes turning the corn serval times to avoid burning. If you do not have a grill you can boil the corn for 5 to 10 minutes just to heat through.

  5. Allow the corn to cool. Using a sharp knife, carefully cut the corn off of the cob.

  6. Whisk together 2 tablespoons of mayo and bbq sauce in a small bowl.

  7. To serve, top the carrot dog with slaw, some corn, and a drizzle of sauce.


Seves 6-8

If you like this recipe, try these:

Carrot Dogs

Carrot Corn Dogs

Vegan Pigs in a Blanket (carrot dogs)

IMG_1994-2.jpg

Vegan Banana Pudding Milkshake

IMG_2112-Edit@0,25x.jpg

If I have not made my affection for vegan banana pudding clear by now, then I don’t what else I could do to drive it home.

It’s my favorite dessert! So since it is getting warmer outside, I decided a banana pudding milkshake was in order! Creamy vanilla ice cream, delicious bananas, vanilla wafers, and the best aquafaba meringue on top!

We often make our own vanilla wafers for this recipe unless I can find a vegan version already premade. But the recipe to make your own is really pretty easy..and they are super tasty. So worth the work in my opinion! We went ahead and linked the recipe we make in the ingredients!

And now I can’t honestly say if regular banana pudding, or this banana pudding milkshake is my favorite dessert. But hey, nobody has to choose, right? We can just enjoy them both with equal affection!


INGREDIENTS:

  • 1/2 pint dairy free vegan vanilla ice cream

  • 2 frozen bananas, sliced

  • 5-7 vegan vanilla wafers ( store bought or homemade)

  • 1/2 to 3/4 cups plant based milk

  • 2 cups sweet aquafaba whip ( meringue)


INSTRUCTIONS:

  1. Prepare aquafaba whip according to directions. The leftover whip will store well in the fridge, and can be rewhipped for later use.

  2. Add the bananas, ice cream, and milk to a high speed blender. I normally freeze my bananas in the peel once they become over ripe. They will peel easily if you just take them out of the freezer for minute. They will also slice pretty easily even when frozen. Blend until completely smooth. Add the cookies and blend for another minute.

  3. For the Meringue: You can put the aquafaba whip into a piping bag with a large star shaped tip, and pipe onto a piece of parchment paper placed on a baking sheet, into two mounds. You can also just scoop out two mounds of whip onto the parchment paper if you dont want to pipe it.

  4. Turn your oven to broil. Once the coils are bright red place the baking sheet with the aquafaba into the oven. Do not take your eyes off of the oven. The aquafaba meringue will brown in just a few seconds and will burn VERY quickly. You just want the tips to brown then remove from the oven.

  5. Divide the shake between 2 glasses. Using a spatula, carefully scoop up the mounds of meringue and place them on top of the shakes. Garnish with more sliced bananas and vanilla wafer cookies if you like.

Serving size is 2 regular sized shake glasses. You can always divide the shake into 4 smaller shakes. If so, just make 4, 1/2 cup sized mounds of aquafaba meringue.


If you liked this recipe, you might like these:

Southern Vegan Banana Pudding

Vegan Banana Pudding Pancakes

If I have not made my affection for vegan banana pudding clear by now, then I don’t what else I could do to drive it home. It’s my favorite dessert! So since it is getting warmer outside, I decided a banana pudding milk shake was in order! Creamy va…

Vegan Pepperoni

IMG_1910.jpg

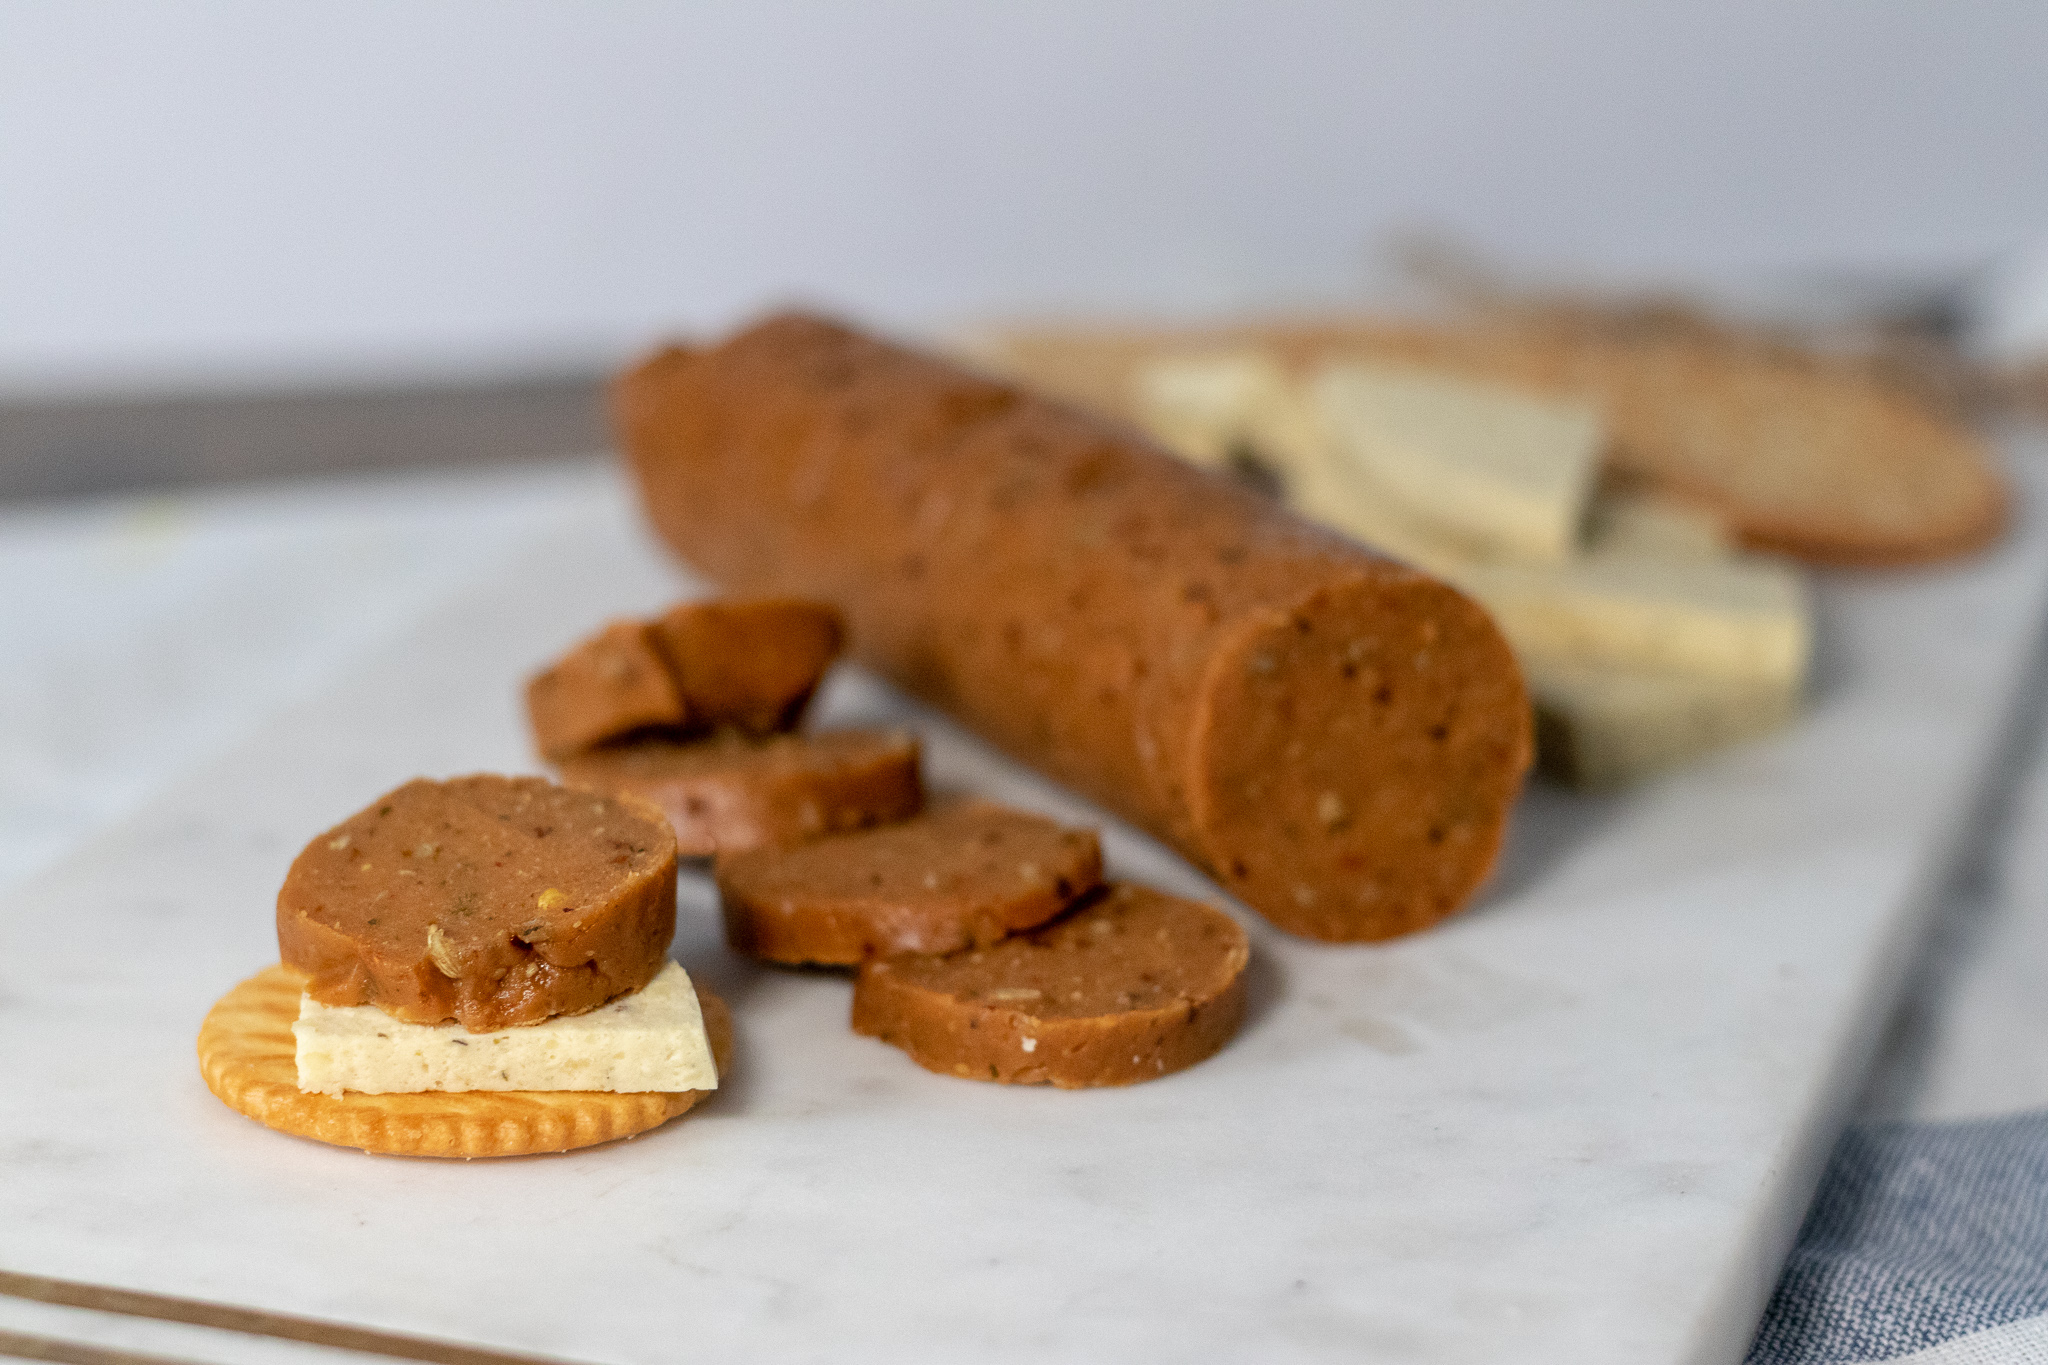
I just want to let y’all know how super easy making a batch of vegan pepperoni can actually be. Seriously! Mix the ingredients, roll it up in some foil, bake, and you are eating delicious homemade vegan pepperoni before you know it! Put it on a cracker, put it on a pizza, eat it all by itself because its that good!!

Don’t be intimidated by making seitan if you have never tried you hand at it. Working with vital wheat gluten is as easy as working with regular flour. Making seitan is really just making dough! You can steam it, boil it, or bake it. For this recipe we are steaming it in foil to achieve a pepperoni like texture!

I often make vegan pepperoni when making a cheese plate for parties, or for just snaking on with vegan cheese and crackers for my kids. I have over 30 cheese recipes on the site, so find one you love and make up a batch to go along with your vegan pepperoni!

This recipe makes two logs of pepperoni, so if you don’t think you will use both very quickly, you can freeze the second for up to a a few months. Just drop it in a freezer bag and thaw when you are ready to use it.

I often top our vegan stuffed crust pizza with this pepperoni! Its made with an easy vegan homemade mozzarella cheese sauce and is so easy and so tasty!! Its one of my kids favorite dinners.

INGREDIENTS:

  • 1 cup vital wheat gluten

  • 1/4 cup nutritional yeast

  • 2 teaspoons minced garlic

  • 2 teaspoons smoked paprika

  • 2 teaspoons onion powder

  • 2 teaspoons dijon mustard

  • 2 teaspoons fennel seeds

  • 1 teaspoon oregano

  • 1/2 teaspoon salt

  • 1/2 teaspoon black pepper

  • 1 teaspoon red pepper flakes

  • 1/4 cup tapioca or corn starch

  • 1 tablespoon soy sauce or amnios

  • 1 teaspoon liquid smoke

  • 2 teaspoon light miso paste

  • 1 teaspoon vegetable Better than Bouillon

  • 3/4-1 cup water


INSTRUCTIONS:

Preheat oven to 350 degrees

  1. Food processor instructions: Add all ingredients to the food processor and mix for about a minute to allow a dough to form and knead.

  2. Hand mixing instructions: Add all ingredients to a bowl and mix until a ball of dough has formed. Transfer the mixture to a clean countertop or cutting board and knead the dough for a few minutes. Start with 3/4 cups water but If the dough seems too dry or isn’t coming together, add a few tablespoons more until you have a soft, but well formed dough.

  3. Divide the dough in half and form each half into a 10 inch log shape.

  4. Spray a good sized piece of foil, maybe 7 tot 8 inches long, with some cooking spray. Place a log of pepperoni at one end and begin rolling the pepperoni into the foil. Twist the ends and repeat with a second piece of foil. You need the foil nice and tightly wrapped and the ends good and sealed. The pepperoni will bake in a water bath so you don’t want any liquid getting in.

  5. Repeat the same processes with the second pepperoni.

  6. Fill baking dish with about a half inch of water and place both foil wrapped pepperonis into the water.

  7. Bake for 30 minutes then turn each pepperoni and bake for another 30 minutes.

  8. Carefully remove foil wrapped pepperonis from the baking pan and transfer to a plate. Leave pepperonis wrapped in foil and allow to cool for about 20 minutes before attempting to unwrap them. Once they have cooled and you can handle them, unwrap the foil and let pepperoni cool uncovered in the fridge for an hour. The pepperoni will firm up more and slice easier if you leave it over night to rest! I typically make a batch the day before I want to use it! But it can be eaten as soon as it cools.

  9. Store in an airtight container or zip lock bag in the fridge.

  10. Serve on pizza, with vegan cheese and crackers, or by itself!

*giving credit where credit is due…Pepperoni was the first vegan meat I ever made using the recipe by Robin Robertson from Veganize It! cook book. I have adapted and changed the recipe over the years to suit my taste and pantry staples, as most seitan pepperoni recipes are pretty similar…but I woulnd’t know know the first thing about most things vegan cooking if not for this particular woman’s cookbooks when we first became vegan. I can not recommend her cookbooks enough! She’s a vegan genius.

IMG_1915.jpg

Vegan Beer Battered Fish Tacos

IMG_1875-2.jpg

The magic of battering and frying up banana blossoms is mind boggling. It looks like, feels like, and tastes like fried fish!

So aside from eating a giant plate of vegan beer battered fried fish fillets(which I will gladly do with some fries and tarter sauce) fish tacos are my next favorite way to enjoy this magic!

Now, I know most people serve fish tacos on a flour tortillas, but the fact is, if you know how to prepare corn tortillas, they reign supreme over flour all day! I was pretty anti corn tortillas until someone (my brother in law, Dan) showed me if you cook them in a hot pan with a little oil and seasoning, they are seriously the best thing.

We also made the slaw with sauerkraut instead of fresh cabbage for this recipe. We make our own quick dill kraut, and it is the perfect amount of briny tang, mixed with creamy vegan mayo, and little sugar to round out these tacos. If you have never made a slaw from kraut, as my mom always says, don’t knock it til you try it! It’s also a convenient option if you do not have any fresh cabbage on hand. I normally have a jar of sauerkraut in the fridge making a quick slaw that much quicker.

And lets not forget the '“fish” is beer battered, so as far as I am concerned, there is nothing not to love about these tasty vegan fish tacos!


INGREDIENTS:

  • 1 can of banana blossoms in brine

  • 3/4 cups all purpose white flour

  • 1/2 teaspoon salt

  • 1 teaspoon old bay

  • 1 teaspoons dulse flakes

  • 1 1/2 teaspoons baking powder

  • 1/2 can of cold beer, any beer is fine as long as it’s not a dark, thick beer

  • Oil for frying (I used peanut)

  • 8-10 corn tortillas

  • 1 lime

  • 1 avocado

  • 1/2 teaspoons garlic powder

  • 2-3 tablespoons plain vegan yogurt or sour cream

The Slaw:

  • 1 cup quick dill sauerkraut (or any sauerkraut you have)

  • 1/4 red onion thinly sliced

  • 1/4 cup shredded carrots

  • 2 tablespoons vegan mayo

  • 1-2 tablespoons sugar, or agave

  • A few shakes of dried parsley or cilantro

  • black pepper to taste

IMG_1882.jpg

INSTRUCTIONS:

  1. Mash the avocado and mix it with juice from half of the lime, sour cream or yogurt, garlic powder, salt and pepper to taste until it is nice and creamy. You can also drop all of the ingredients into a bullet blender or food processor. Set aside.

  2. Mix the sauerkraut (not the juice, just the cabbage) and remaining slaw ingredients together in a medium sized bowl. Set aside.

  3. Drain can of banana blossoms and carefully remove the blossoms, laying them out on a paper towel to remove some liquid. They can easily fall apart so be careful. I found that only a few blossoms in the can that were fully in tact. I simply took all of the loose leaves and stacked them back together to resemble full blossoms. I have only been able to find one brand of blossoms on Amazon. I am uncertain if this is an issue with all canned banana blossoms, but stacking the leaves back together worked just fine for me.

  4. Transfer the blossoms to a shallow baking dish and sprinkle with the 2 teaspoons of dulce flakes and a dash of salt.

  5. For the batter, whisk together the flour, baking powder, teaspoon salt, old bay, and 1/2 can of cold beer (oh well, guess you have to drink the rest) in a medium sized bowl. The batter will be thick.

  6. Heat a deep skillet with a few inches of oil over medium/ high heat.

  7. While the oil is heating, begin carefully dipping the blossoms into the batter. For any blossoms that you had to reassemble, place them into the batter, and using a spoon, cover the top in batter. This will help keep the blossom in tact vs attempting to dip them. Carefully transfer the blossoms to the hot oil. TIP: if you are not sure if the oil is hot enough, place a chopstick into the oil, if tiny bubbles form around the chopstick, the oil is ready!

  8. Fry each blossom for a minute or two on each side, or until they are golden brown. If they seem to be browning too quickly, reduce your heat a bit. Transfer the finished blossoms to a wire cooling rack that has been placed on top of a paper towel lined cookie sheet.

  9. Heat a large skillet and spray with some cooking oil. Heat tortillas on each side, sprinkling them with a little all purpose seasoning, or any seasoning you like, and a squirt of lime juice. You just need to let them heat for a minute or two on each side, just until they get a little brown and crisp. This will help the tortillas taste amazing and not rip.

  10. Cut fish fillets into bite size pieces. Place a few “fish” pieces in each tortilla, along with some slaw, and a drizzle of avocado cream to serve.


IMG_1862.jpg

Vegan Maple Bacon Yeast Donuts

IMG_1847.jpg

INGREDIENTS:

The Donuts

  • 4 cups all purpose flour

  • 3/4 cups aquafaba

  • 1/2 cup plus 2 tablespoons melted vegan butter

  • 1/4 cup sugar

  • 2 and 1/4 teaspoon dry active yeast

  • 1 cup plus 2 tablespoons plant based milk

  • 1/2 teaspoon salt

  • 2-3 cups of oil for frying, I use grapeseed or peanut oil, but you could use whatever oil you normally fry with

The Glaze

  • 1 1/2 cups powdered sugar

  • 1/4 cup maple syrup

  • 1 teaspoon vanilla extract

  • a few splashes of plant based milk

  • Vegan coconut bacon

COOKING INSTRUCTIONS: 

  1. Heat milk in microwave for 30 - 45 seconds. You want it warm, but not boiling hot.

  2. Add the warm milk, yeast, and sugar to the bowl of your stand mixer. If you do not have a stand mixer, add the contents to a large bowl. Let sit for 5 minutes to activate the yeast.

  3. After 5 minutes add the aquafaba, and melted butter to the mix. Next add the flour, and salt, and mix for 5 minutes on medium speed if using the stand mixer. If not using a stand mixer, then mix the ingredients together well in a bowl, then transfer to a floured counter top, and kneed the dough by hand for 5 minutes. The consistency of the dough should be soft, but not sticky.

  4. After the dough has been kneaded, place it in a lightly greased bowl and cover with plastic wrap. Pop it in the oven. You are NOT turning the oven on, just leaving it there to rise. If your oven has a dough proof setting you can turn that on. Leave dough to rise for one hour, or until it has doubled in size.

  5. Once the dough has finished rising, transfer to a lightly floured countertop. I like to divide the dough in half and work it in two batches. It makes it easier to roll out. Roll out one half of the dough to about 1/4 inch thick. Using a 3 inch circle biscuit or cookie cutter (or donut cutter if you have one) begin cutting circles. You will need to find something small to cut the center out with. We used the lid to our vanilla extract. Roll back out the scrap dough and continue cutting. Repeat with other half of dough. You should have a total of 2 dozen donuts.

  6. Place donuts on cookies sheets, and let rest for about 15 - 20 minutes. They will become bigger as they rest.

  7. While they are resting, heat 2 - 3 inches of oil in a deep skillet or medium sized pot.

  8. Once oil is hot, begin adding the donuts to the oil, 2 or 3 at a time. Fry the donuts for about one minute on each side. If you don't have enough oil in the pan, and they are hitting the bottom, they will easily burn. So make sure to use enough oil!

  9. Allow donuts to cool on a wire cooling rack, placed on top of a paper-towel-lined cookie sheet.

  10. Once all donuts are done frying, mix all of the ingredients for the glaze. If you find the glaze too thick, you can always thin it with some more milk.

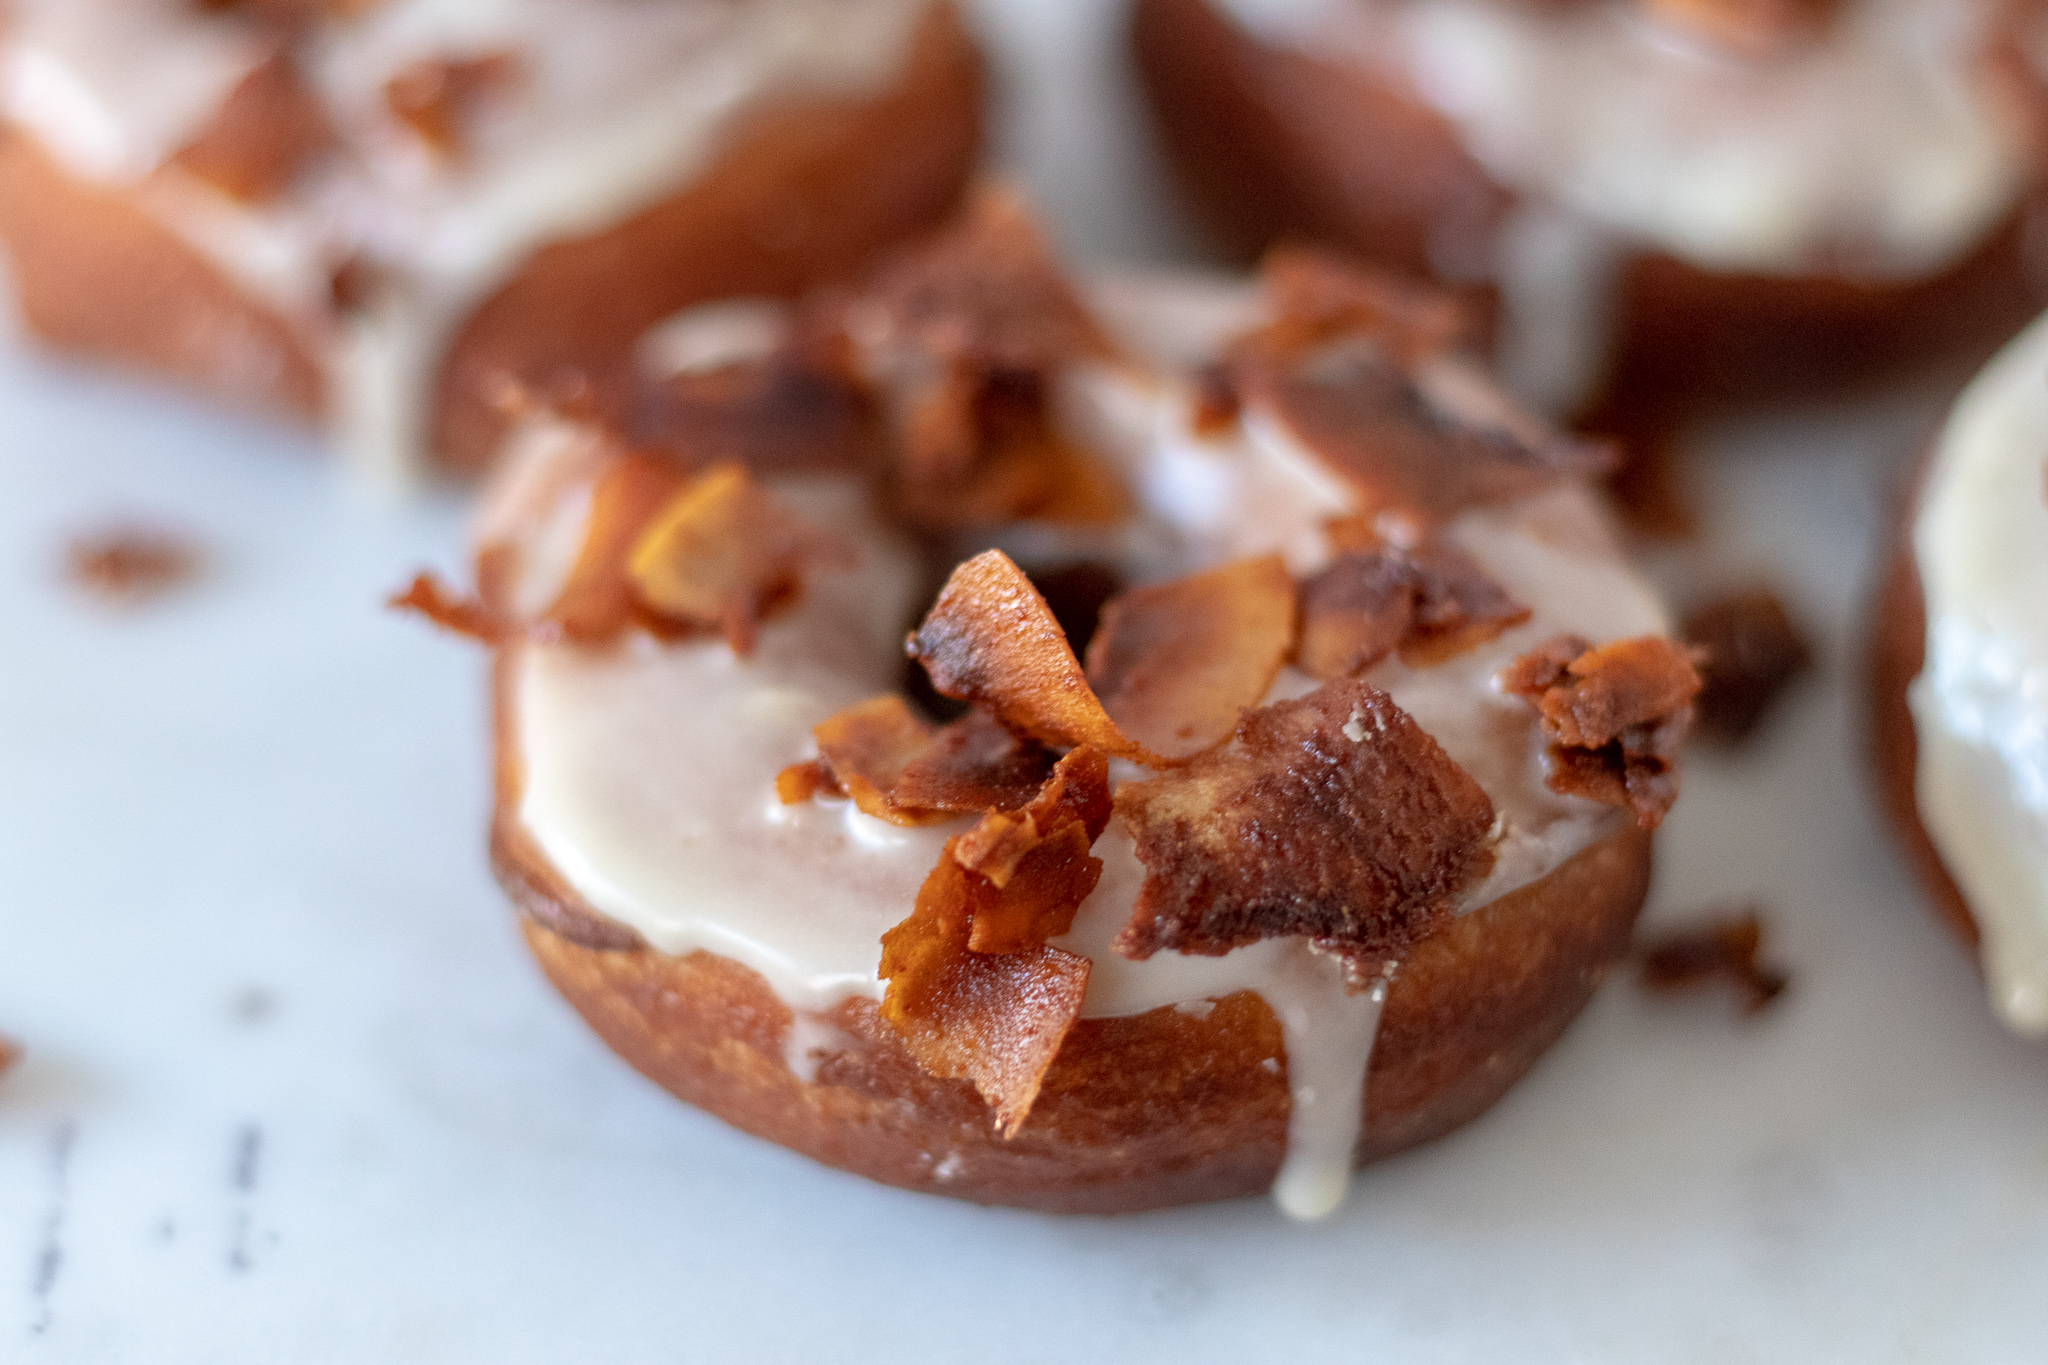
  11. Dip one side of the donut in the glaze and place back on the wire rack to allow the excess glaze to drip off. Sprinkle with coconut bacon while glaze is still wet

  12. It will only take a few minutes for the glaze to set, and for you to be stuffing your face with delicious glazed donut perfection!

Yields two dozen donuts

If you like this recipe, try these:

Vegan Glazed Yeast Donuts

Vegan Jelly Filled Donuts

IMG_1807.jpg

Alabama White Sauce Caesar Salad with Grilled Tofu

IMG_1481.jpg

I have tried a ton of vegan caesar salad recipes, and dressings over the years, and until now none have been a winner.

So when recently I was making a caesar salad, and contemplating the protein I would add, I decided on Alabama White Sauce Grilled Tofu, and a light bulb went off.

Alabama White Sauce (AWS) is a a tangy, vinegar and mayo based bbq sauce which originated it Northern Alabama at Big Bob Gibson’s Bar-B-Q.

Our AWS is a vinegar and mayo based sauce like the original, with a little kick and has just enough tang to work as a caesar dressing substitute. AWS is a staple condiment in our house because it is delicious and versatile, and not just for bbq!

So after I grilled up the tofu, it occurred to me to take the leftover sauce and turn it into the dressing for this salad .

PURE JOY! It was so good that I will never attempt another “caesar” dressing recipe again.

I also added some carrots and avocado to this salad because I’m adult and I can do what I want..right?? And what I want is avocado and carrots on everything, even if it's not the norm, who cares if it tastes good.

So if you are searching for a super tasty, all be it nontraditional caesar salad recipe, here ya go! And my guess is if you try it, AWS will become a fridge staple for you as well.


INGREDIENTS:

  • 2-3 heads romaine lettuce

  • 1-2 avocados

  • 1/3 cups shredded carrots

  • 1/4 loaf day old bread (french, artisan, gluten free, any thick bread will do)

  • 2 teaspoons olive or grape seed oil

  • 2 teaspoons all purpose seasoning, any you like

  • 1 batch Alabama White Sauce Grilled Tofu

  • A few tablespoons vegan parmesan cheee

Alabama White Sauce Caesar Dressing:

  • 1/2 batch Alabama White Sauce

  • 2 tablespoons apple cider vinegar

  • 1 teaspoon minced garlic

  • 2 teaspoons lemon juice


INSTRUCTIONS:

preheat oven to 350 degrees (for the croutons)

  1. For the croutons, cut day old bread into bitesize cubes. Place the cubes in a large bowl along with 2 teaspoons of oil and all purpose seasoning and toss.

  2. Once the bread is coated, spread the cubes onto a cookie sheet in a single layer, and bake for about 10 minutes or until the cubes are crisp and well toasted.

  3. Wash and chop the lettuce. Peel and dice the avocado.

  4. For the dressing, whisk together the Alabama White Sauce with 2 tablespoons apple cider vinegar, garlic and lemon.

  5. Add lettuce, avocado, carrots, and croutons to a large bowl. Drizzle with desired amount of dressing (enough to coat the lettuce) and top with strips of Alabama White Sauce Grilled Tofu and parmesan cheese to serve.

The Perfect Vegan Lasagna

IMG_1757.jpg

If you have been looking for the perfect, cheesy, gooey, saucy, vegan lasagna, look no further! Layers of noodles, tofu ricotta, homemade marinara, and the perfect vegan mozzarella sauce make this lasagna the best vegan lasagna I have had, hands down!

It’s my go to dish to bake up for all of our non vegan friends and family, because no one ever even knows its vegan! We are house divided where lasagna is concerned, some preferring veggie lasagna, and others a classic “meaty” lasagna. So I have given instruction on making this lasagna 2 ways! Because two kinds of lasagna are always better than one!! Right?!?!?

If you are looking for a mini version that is perfect for meal prep, check out the links below for our Muffin cup lasagna, and ourLasagna stuffed peppers!! The lasagna cups are perfect for easy meal prep. Just bake them in a muffin tin and freeze. Pop out what you need later and reheat!! Easy Peasy!

I am telling you, you will never want to use store bought shredded mozzarella again after using this perfect cheese sauce. It’s super easy to whip up, and gets ooey gooey, bubbly, and browns. Its magic and it is staple in our house for so many recipes! Sometimes, like right now with this vegan lasagna, the secret is in the sauce!

So bake up a pan for yourself, and one for a neighbor or friend. They will be so thankful for a night off from cooking and so impressed that this lasagna is actually vegan! I always say the way to convince someone that vegan food is just a delicious, if not more, than the non vegan version is by sharing it!!


INGREDIENTS:

  • 1 box lasagna noodles (regular or gluten free) DO NOT BOIL THE NOODLES. We will be using them dry in the recipe. This works fine, and there is no need to boil them first. Do not use “no boil” noodles. They typically contain eggs. Just use regular lasagna noodles.

Tofu Ricotta:

  • 1 package extra firm tofu, drained

  • 2 tablespoons nutritional yeast

  • Juice from 1/2 lemon

  • 2 teaspoons miso paste

  • 1 teaspoon minced garlic

  • 1/2 onion

  • 1/2 teaspoon of salt

1. Add the onion to a high speed blender or food processor and blend for a minute to mince up. Add remaining ingredients and blend until completely smooth.


White Cheese Sauce:

  • 1 cup of cashews (soaked in hot water a few hours, or coved in water and microwaved 3 minutes)

  • 2 cups of water

  • 2 teaspoons minced garlic

  • 1 tablespoon apple cider vinegar

  • 1 teaspoon salt

  • 1/4 cup corn, or tapioca starch

  • 2 tablespoons nutritional yeast

1.Drain cashews. Add cashews and remaining ingredients to a high speed blender or food processor and blend until completely smooth and liquified. Make sure there are no little bits of cashews left.

2. Add the mixture to a medium sized sauce pan and heat over medium heat, whisking continuously. The mixture will go from liquid to thick very quickly so do not stop stirring! You want the cheese sauce to be the constancy of a thick pudding. If it gets clumpy or too thick, you can add a little more water to the pan and it will thin back out.

IMG_9853.JPG

The Sauce:

  • 1 28 oz can crushed tomatoes

  • 1 14.5 oz can diced tomatoes drained

  • 1 carrot, diced

  • 1 yellow onion, diced

  • 1 bell pepper, diced (optional)

  • 1 cup diced mushrooms (optional)

  • 4 cups raw spinach (optional)

  • 2 cloves crushed garlic

  • 1 teaspoon dried thyme

  • 1 teaspoon dried oregano

  • salt and pepper to taste

  • splash or 2 of red wine (optional)

“Meaty” option:

If you would rather have a ‘meaty” sauce, you could omit the carrot, pepper, and mushroom, spinach, and add a bag of meatless crumbles, or even use 2-3 Beyond Beef brand burgers. Simply thaw them ,and cook as you would ground meat before adding to the sauce.

  1. In a large sauce pan, sauté all of the veggies and garlic in a few teaspoons of oil until tender. if using spinach, add it last and let it cook down for a few minutes to evaporate some of the liquid.

  2. Add Wine and let cook for a minute

  3. Add both cans of tomatoes, and spices, and let the sauce simmer for 15-20 minutes.


INSTRUCTIONS:

Preheat oven to 350 degrees

  1. Start by adding a little sauce to the bottom of a 9x13 baking dish.

  2. Add a layer of noodles. Next, spread a nice sized scoop of tofu ricotta over the noodles, followed by marinara, then a layer of cheese sauce.

  3. Repeat layers until you have used up all of the ingredients.

  4. Make sure the top layer is the white cheese sauce. You can add some Italian seasoning to the cheese sauce if you like before you bake.

  5. Cover with foil a and bake at 350 degrees for 45- 60 minutes. Remove the foil after about 20 minutes so the top can begin to brown . If you have filled the pan to the top you might want to put it on a baking sheet, incase it decides to bubble over.

  6. Let lasagna cool a bit before before cutting, and serving.

If you like this recipe, try these:

Muffin Cup Vegan Lasagna

Vegan Lasagna Stuffed Peppers


Vegan Apricot Hamantaschen

IMG_1569.jpg

Hamantaschen cookies are typically baked durning the Jewish holiday, Purim.

These tasty little bites can be filled with an array of fillings, savory, or sweet, but often are filled with apricot jam.

Our apricot jam recipe is so easy and the perfect filling for these classic vegan hamantaschen. I make it with dried apricots and it is good on toast as well.

Also, you don’t have to celebrate Purim to enjoy these cookies. These tasty, sweet treats can be enjoyed any time of year!

And if you are not a fan of apricot jam, use your imagination and fill them with anything you like from jam, to chocolate, to vegan cheese!


INGREDIENTS:

The Dough

  • 3/4 cups vegan butter, room temperature

  • 2/3 cups sugar

  • 2 3/4 cups all purpose flour

  • 1 egg replacement, we used Bobs, you can use flax but it will leave dark flecks in the dough

  • 1 teaspoon orange or lemon zest (optional)

  • 1/2 teaspoon salt

  • 1 teaspoon vanilla extract

  • 1-2 tablespoons water

  • Apricot Jam


INSTRUCTIONS:

  1. In large bowl, cream together the sugar and butter until light and fluffy.

  2. Next, mix in the zest and egg replacer with the butter and sugar.

  3. Finally add the flour and the salt, and mix until a soft dough forms. If the dough seems crumbly, add in a tablespoon or two of water.

  4. Knead the dough on a lightly floured counter top for a few minutes. You do not want to over knead the dough, you just want to make sure all of the ingredients and well incorporated.

  5. Wrap the dough in plastic wrap and chill for 2-3 hours in the fridge. The dough is really soft and needs to be pretty cold to roll out.

  6. Once dough is ready, roll it out on a large, clean, floured surface. I like to split my dough in half and only roll out one half at a time, leaving the other half in the fridge so it does not soften back up. I find it easier to manage. Roll the dough out to around 1/8 of an inch thick.

  7. preheat oven to 350 degrees

  8. Using a 3 inch circle cookie cutter or biscuit cutter (or the rim of a small glass) cut circle in dough. Carefully transfer the circles to a parchment paper lined cookie sheet. Take about a teaspoon of apricot jam and place in the center of the circle.

  9. Form the cookie into a triangle by folding in the top of the circle and pinching to a point. Fold up the bottom half of the circle and fold the sides over the bottom. Lightly press the corners together or you can pinch them like the top. Just make sure all corners are sealed well so the triangles do not come open while baking. Continue with remaining dough, leaving about an inch of space between each cookie.

  10. Bake cookies for about 20 minutes. Once cookies are done, transfer to a wire rack to cool.

    Yields about 2 and 1/2 dozen cookies

    If you liked this recipe, try these:

    Savory Vegan Goat Cheese and Tomato Hamantaschen

    Easy Apricot Jam


IMG_1561.jpg

Apricot Jam

Apricot jam is as easy as chopping dried fruit, mixing it with sugar and water, and heating it until it has tuned to jam! It is always cheaper than buying it already made and only takes about half an hour. I love apricot jam in hamantaschen cookies,…

Apricot jam is as easy as chopping dried fruit, mixing it with sugar and water, and heating it until it has tuned to jam! It is always cheaper than buying it already made and only takes about half an hour. I love apricot jam in hamantaschen cookies, on toast, or as a cake filling. It also works well to sweeten sauces when making things like stir fry, and makes a great addition to a vegan cheese board. With so many uses, and with it taking so little time to whip up a batch of this deliciously easy jam, what are you waiting for?

INGREDIETS:

  • 1 cup dried apricots, chopped

  • 1 cup sugar

  • 2 cups water

  • 1 tablespoon lemon juice

  • pinch of salt

INSTRUCTION:

  1. Chop the apricots as finely as you can get them with a good, sharp knife.

  2. Add the apricots, and remaining ingredients to a medium sized sauce pan over medium heat.

  3. Once the water begins to simmer, reduce the heat to low.

  4. Allow the mixture to simmer for around 30 minutes, stirring regularly. The Apricots will begin to break down, the liquid will cook out, and you should begin to get a thick, and sticky jam that will stick to the back of a spoon without sliding off.

  5. Once the jam thickened, transfer to a mason jar and store in the fridge for several weeks.

Vegan Buffalo "Chicken" Mac and Cheese

IMG_1703-2.jpg

Creamy, cheesy, gooey, spicy, vegan buffalo “Chicken” mac and cheese with jackfruit! You heard me right. It’s a thing, and it is AMAZING!

Jackfruit is a great substitute for chicken in many vegan recipes and was the first thing that came to mind when I deiced to veganize my favorite dip, to create a vegan buffalo chicken cheese dip! It’s inexpensive, healthy, a great source of fiber, and it mimics the texture of shredded meat very well. It has little flavor on its own when you buy it canned in brine, and takes on the flavor of whatever you cook it in!

I love buffalo flavored anything, and I super love buffalo “chicken” dip! Like I could eat vegan buffalo every single day probably and not get tired of it. I also love Franks brand buffalo sauce and let just all give a big hallelujah that it is actually vegan!!

So taking my favorite vegan buffalo chicken dip recipe with a few adjustments, and mixing it into macaroni changed my favorite appetizer into dinner (insert me doing a happy dance!) I does not get much better than this, y’all!

It’s the best of both worlds. My favorite dip and favorite side dish, all rolled into one seriously comforting dish.

This mac and cheese is hearty enough to be a meal on its own with side salad, or a super delicious side dish!! It freezes and reheats well making it perfect for meal prep, too.

So if you love mac and cheese and you love buffalo sauce on everything too, we might be new best friends! Buffalo sauce lovers of the world unite!


INGREDIENTS:

  • 16 oz package of macaroni noodles

  • 1 can jackfruit in brine

  • 1 8oz of vegan cream cheese, homemade or store-bought

  • 1 cup of buffalo sauce (I use Franks)

  • 1/2 cup vegan mayo

  • Pinch of salt

  • 1/4 teaspoon pepper

  • 1 plus 1/2 cups vegan cheddar shreds, homemade or store-bought

  • 2 tablespoons vegan butter (for the drizzle)


INSTRUCTIONS:

Preheat oven to 350 degrees

  1. Cook noodles according package instructions. Drain, rinse and set aside.

  2. Drain jack fruit, rinse, and chop the pieces, or shred them using you fingers into a medium sized bowl. The fruit pulls apart easily, and I find using my fingers easier than chopping.

  3. Add 3/4 cups of the buffalo sauce, 1 cup of shredded cheese, plus the remaining ingredients minus the butter, to the jackfruit and mix well.

  4. Add the noodles to the jackfruit mixture and mix well.

  5. Transfer the mac and cheese to a 9x12 baking or caserole dish, and sprinkle the top with remaining 1/2 cup of shredded cheese.

  6. Melt 2 tablespoons of vegan butter and mix with the remaining 1/4 cup of buffalos sauce. Drizzle the mixture over the mac and cheese.

  7. Bake for 25-30 minutes, until all of the cheese on top is nice and melted and the mac is heated through.


If you liked this recipe, try these!

Buffalo “Chicken” Bites

Buffalo “Chicken” dip

IMG_1707.jpg