The Jax Biscuit Sandwich

IMG_1743.jpg

Just outside of our neighborhood is the best vegan breakfast and lunch spot in our city! It is our family’s go to spot for an always quick and delicious meal.

One of my most favorite menu items is something called the Blisscuit!

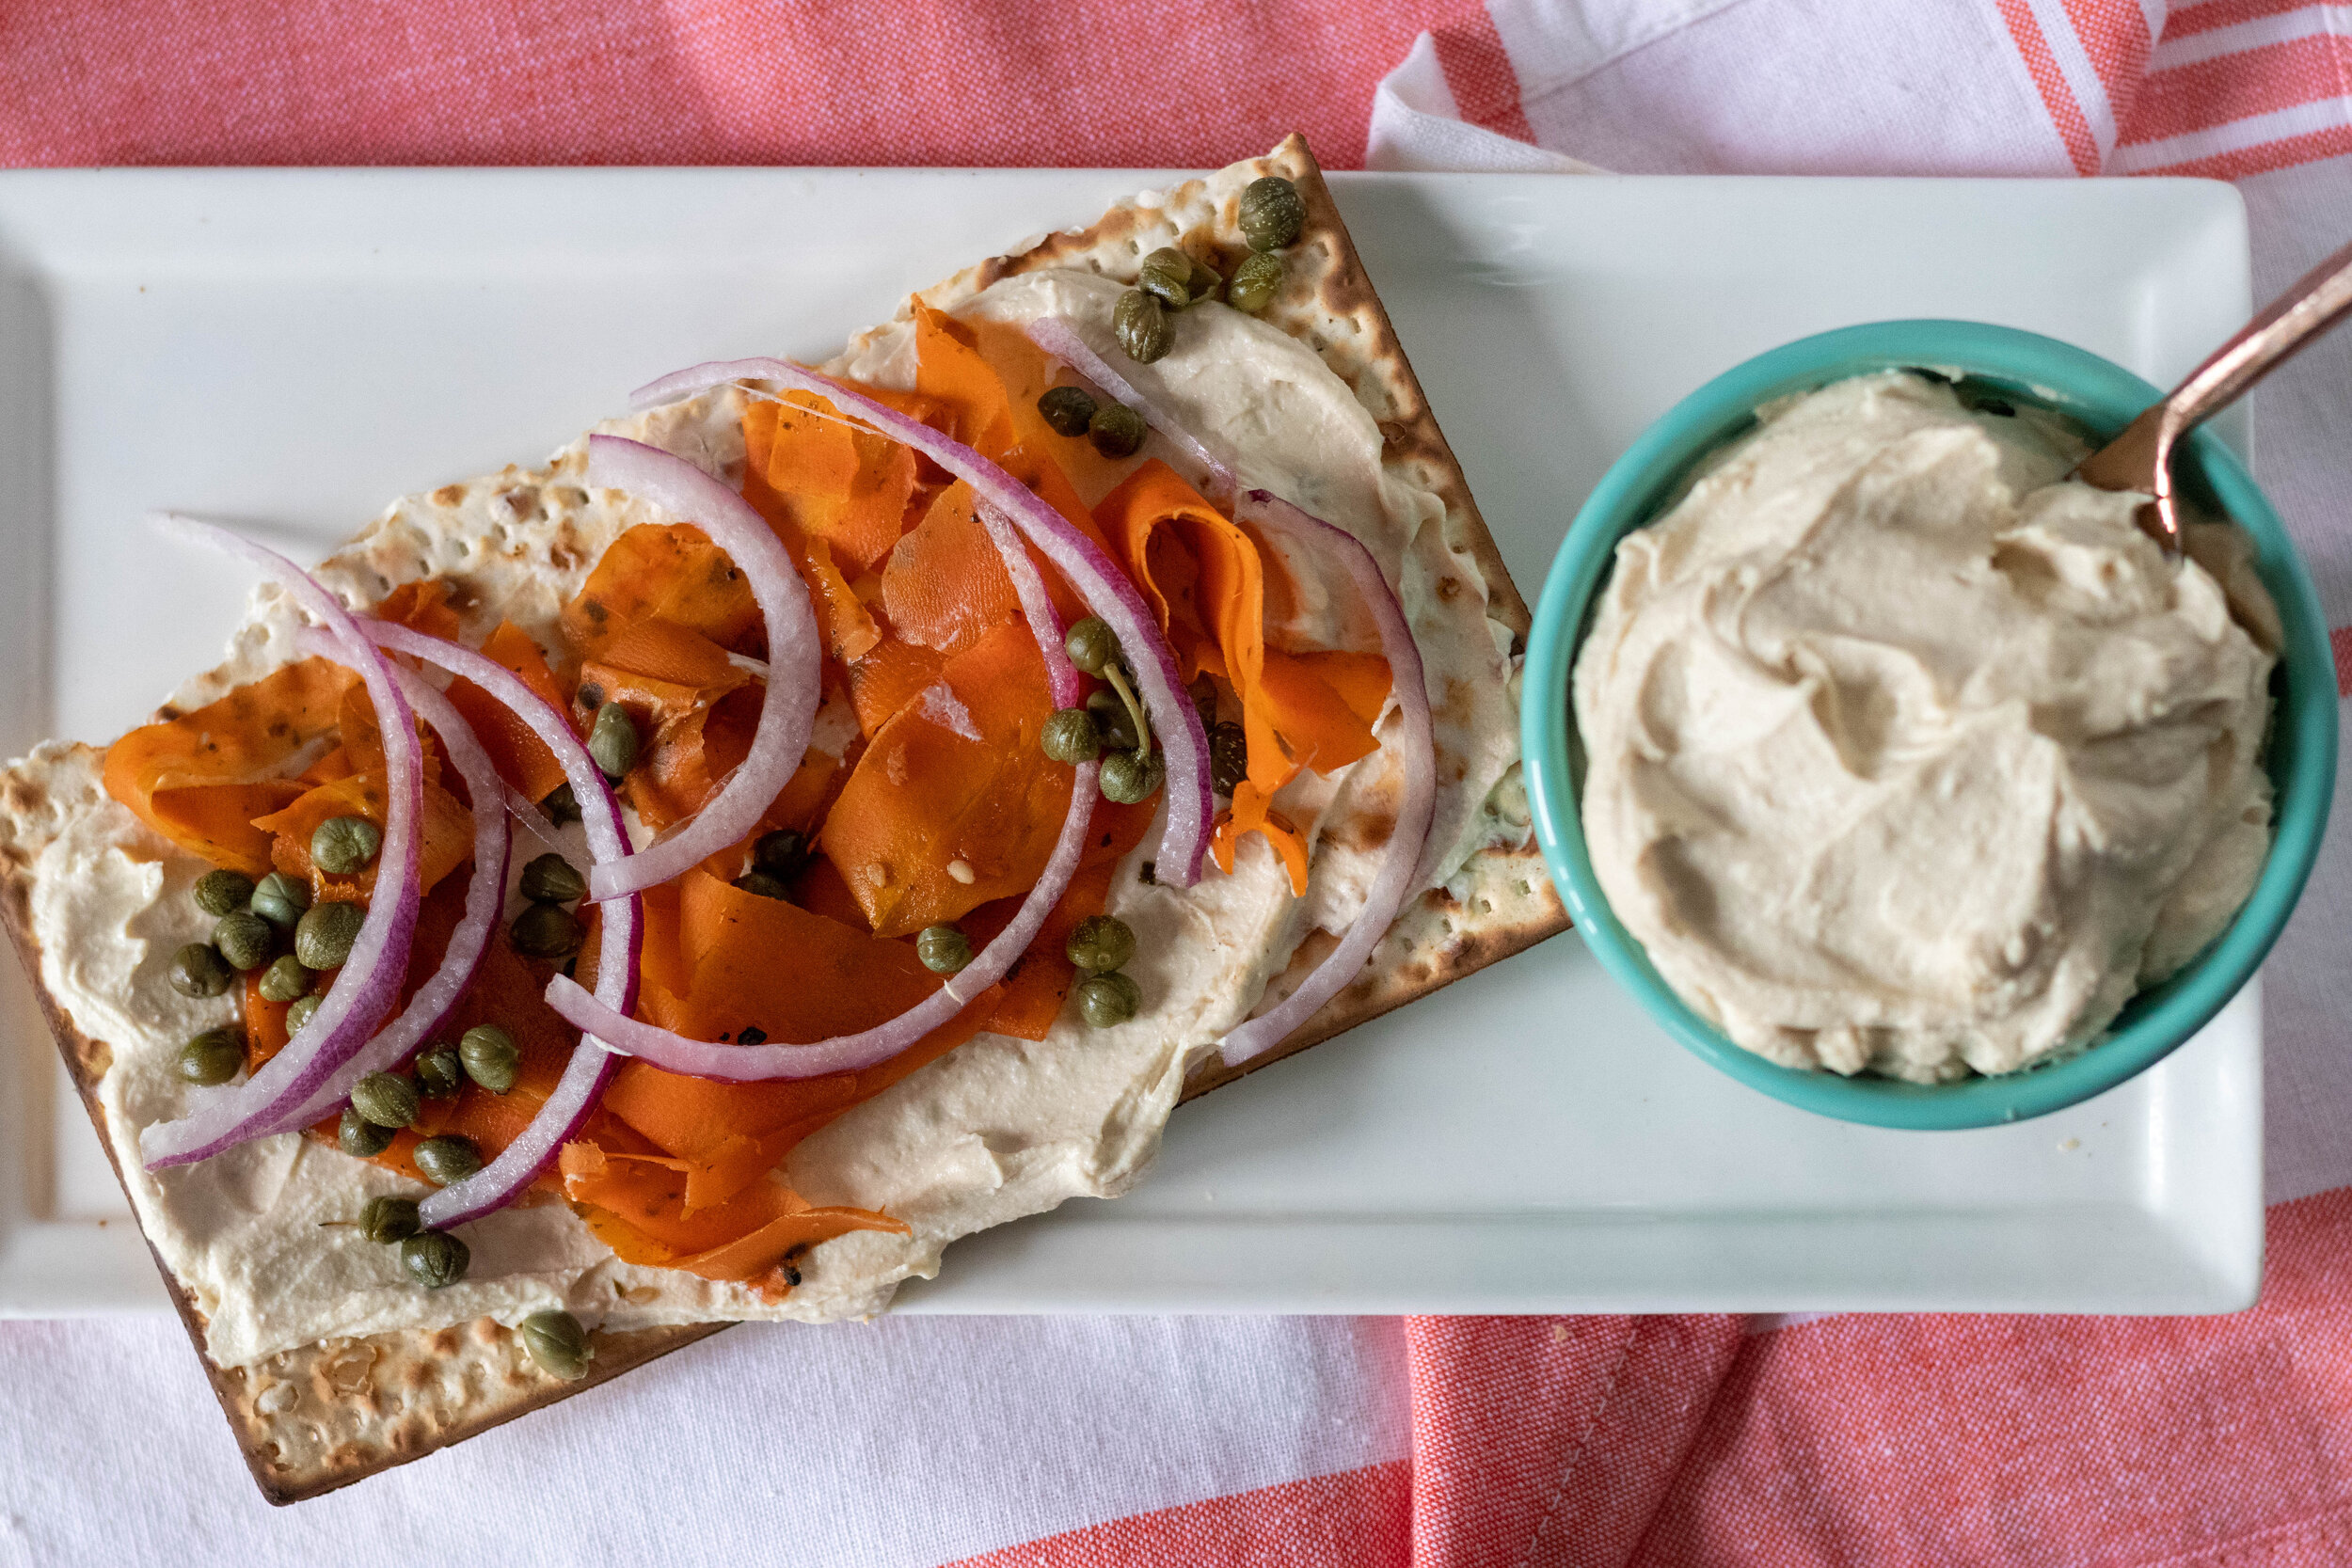
It is an herb biscuit topped with vegan egg salad, sauerkraut, and avocado.

So naturally for all y’all that are not in Jacksonville FL and who can not visit the infamous, Southern Roots, we decided to create our own version of this delicious bite with a few changes.

We used our fluffy southern biscuit recipe,tofu egg salad, and quick dill sauerkraut to create what we call the Jax Biscuit Sandwich!

We make a really simple quick dil sauerkraut to top this biscuit with. All you need is some cabbage, dil, vinegar, salt, and a microwave. You will have kraut in minutes!! It will only get better with time but is good from the start!

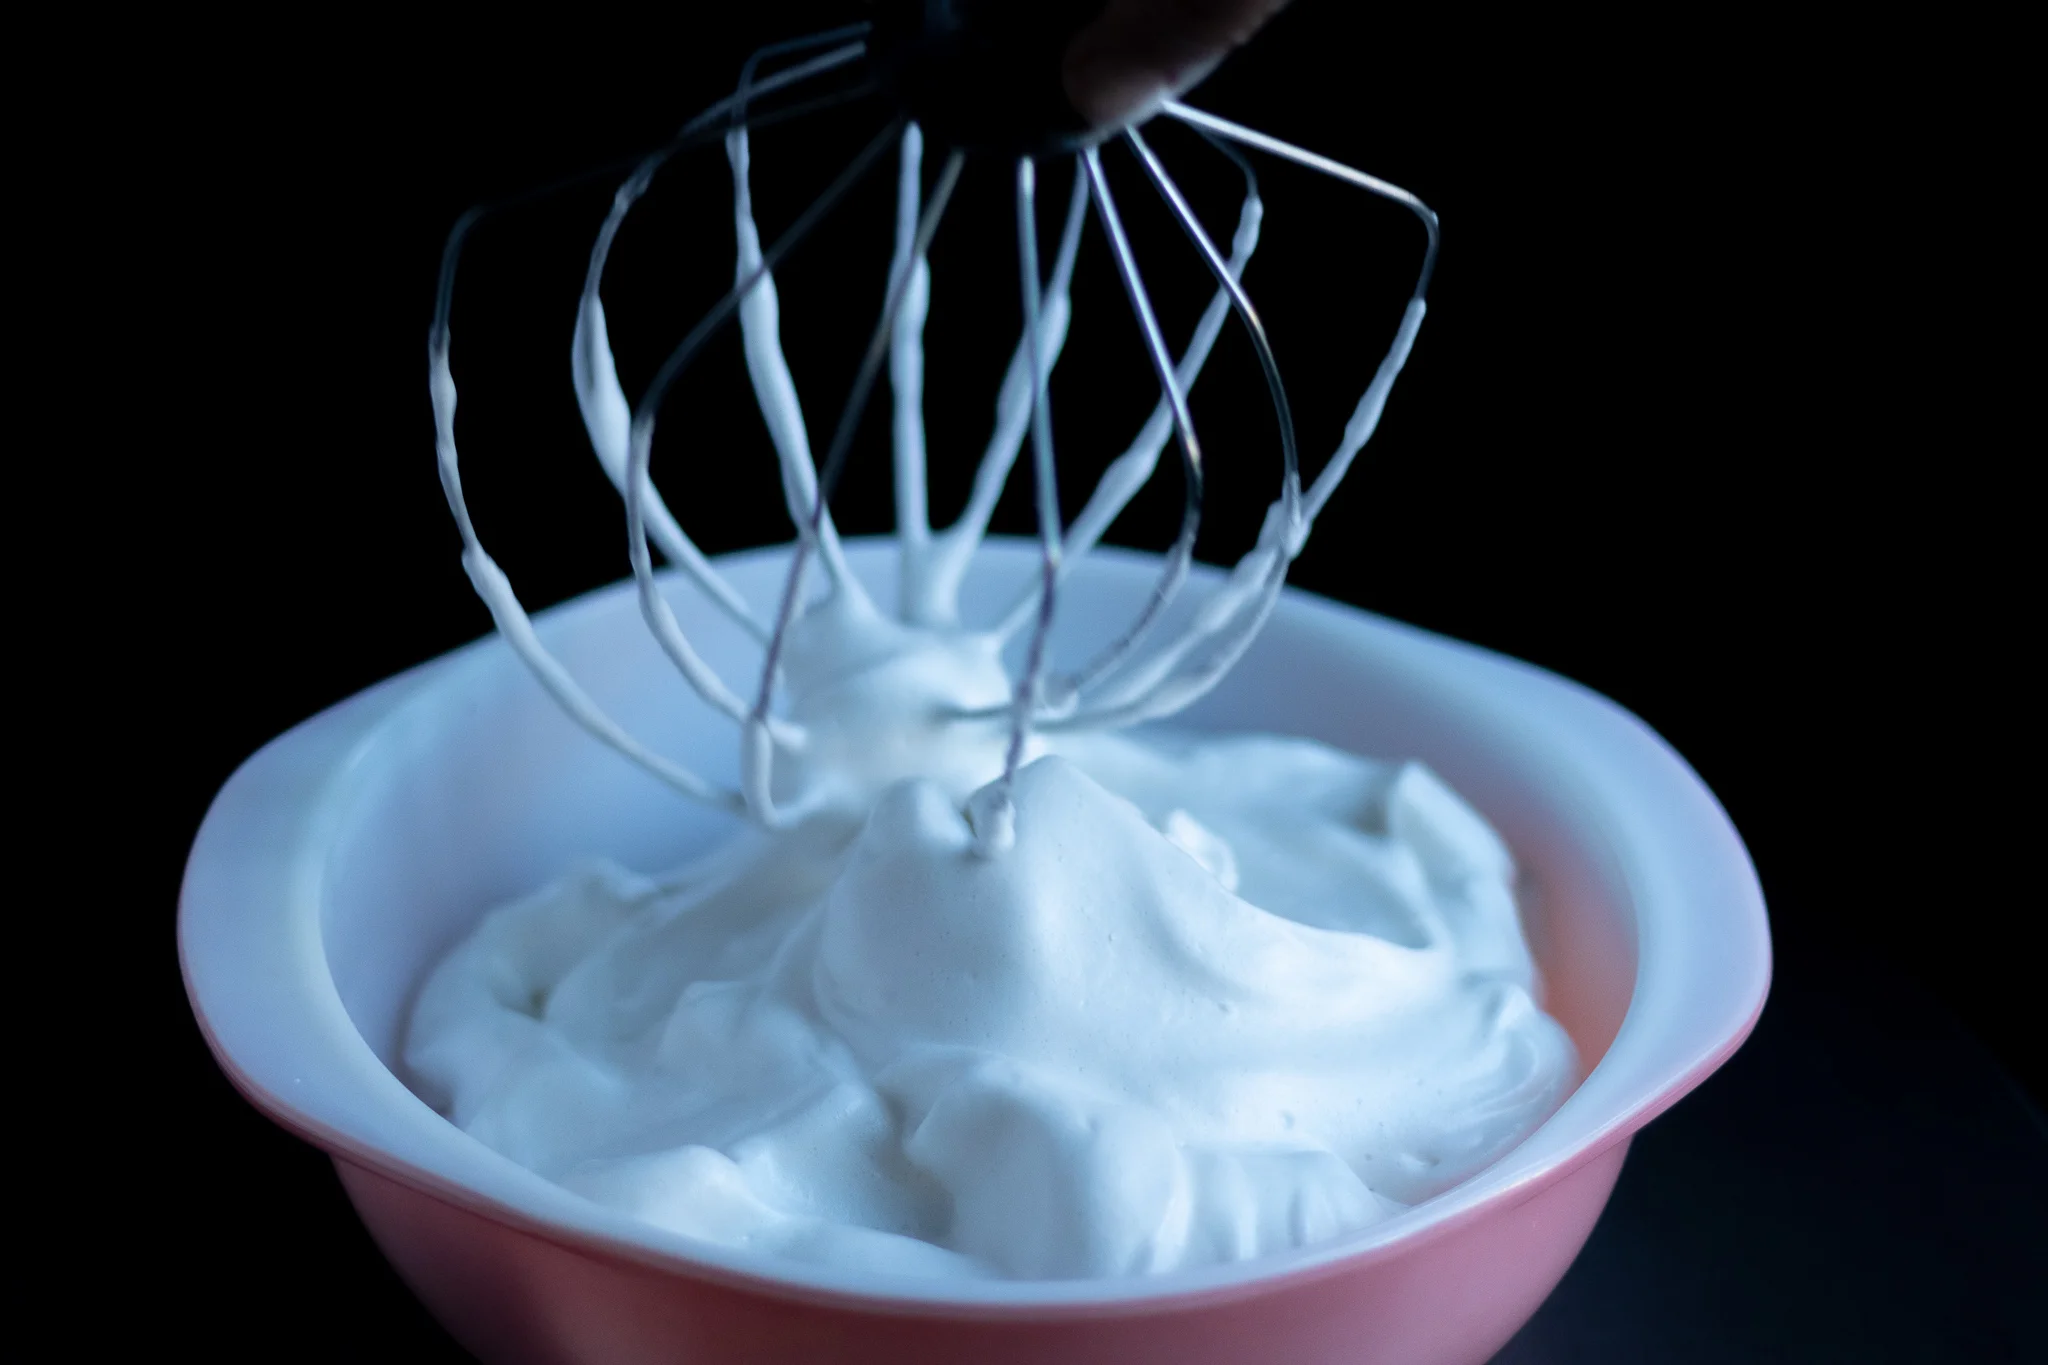
Our vegan egg salad using tofu is one of my favorite quick lunches and something we make almost weekly. Try and find some black salt (kala namak) if you can. Its actually pink and might also be called Indian kala namak. It is sulfur salt so taste and smells strongly of eggs. Its perfect for any and all vegan “egg” dishes you make!

And although we think our biscuit is pretty darn good, and you should definitely make yourself one or five, if you ever find yourself in our river city, go by and try the real deal! You won’t be disappointed! We are forever grateful for the full bellies Southern Roots brings us and all the tasty inspiration!


Ingredtiens:

Vegan Tofu Egg Salad:

  • 1 cube extra firm organic tofu

  • 1 teaspoons turmeric

  • 1 teaspoon garlic powder

  • 1 teaspoon onion powder

  • 3 tablespoon diced pickles (plus a teaspoon of pickle juice)

  • 1/4 cup vegan mayo

  • 1 tablespoon yellow mustard (optional)

  • salt and pepper to taste


Instructions:

  1. Drain tofu and wrap in a clean kitchen towel or a few paper towels. Place a few cookbooks or a heavy pan on top and let sit for 10 - 15 minutes to press out the excess liquid from the tofu.

  2. Crumble tofu into a medium sized bowl using your hands or a fork. Mix in the remaining egg salad ingredients along with the tofu, and mix well. Adjust seasoning to taste.

  3. Cut biscuits in half and add a scoop of tofu egg salad, sauerkraut, and a few slices of avocado.

  4. Eat and be happy!

If you liked this recipe, try these:

Brown Bag “Chicken” Fried Seitan Biscuit

Vegan Deluxe Biscuits and Gravy

Quick Dill Sauerkraut

IMG_1715.jpg

Some recipes are just too easy…I mean like really, really, really easy.

Quick refrigerator sauerkraut is one of those recipes and so easy to make, in fact you can whip up a batch in as little as 15 minutes.

For starter, its microwaved. So easy. You literally just chop, sprinkle, cover and microwave.

Store it in a jar and pop it in the fridge and thats it!!! Seriously!

Not much muss no fuss. Just easy sauerkraut in minutes.

So who’s ready for a reuben?


Ingredients:

  • 1 small head green cabbage

  • 1 cup white vinegar

  • 1/2 cup water

  • 1 tablespoon salt

  • 2 teaspoons dried dill

  • 1-2 teaspoons caraway seed (optional)


Instructions:

  1. Wash and core the cabbage.

  2. Finely chop the cabbage and place in a large glass bowl.

  3. Add the remaining ingredients to the bowl, and cover in plastic cling wrap.

  4. Microwave for 7 minutes. Remove from microwave but leave the plastic wrap on until the cabbage has cooled.

  5. Transfer the cabbage and liquid to a large mason jar or airtight storage container.

  6. Store in the refrigerator.

Easy Vegan Macaroni Salad

IMG_1642.jpg

I never ate at lot of macaroni salad growing up.

My dad would sometimes buy it from the deli, and on the rare occasion I did eat it, I loved it.

It’s sweet, creamy, tangy, and savory all at the same time! Crunchy veggies, and macaroni noodles, mayo, vinegar, and a little sugar.

One day my neighbor was talking about wising he had some vegan macaroni salad and suddenly I was craving it too. So I went home and recreated the macaroni salad of my childhood.

Now days, I make this side all of the time. Its quick, easy and crowd pleaser. All of my kids love it and that is a win as far as I am concerned.

I would like to think this kind of dish originated in the south, but I actually looked it up and you can thank the New England states for this tasty side.

My guess is it was the south that decided to add sugar. Just like ice tea, the south believes sugar makes most things better.

Regardless of where macaroni salad came from, I’m just glad it did, because this classic side dish is now one of my favorites, and is so easy to make!!


INGREDIENTS:

  • 16 oz package elbow macaroni

  • 1/2 red bell pepper

  • 1/2 small yellow onion

  • 1 carrot

  • 2 stalks celery

  • 1 cup vegan mayo

  • 2 tablespoons apple cider vinegar

  • 1/4 cup sugar, or 2 tablespoons agave

  • 1 teaspoons salt

  • 1/2 teaspoon pepper

  • optional: dried parsley for garish


INSTRUCTIONS:

  1. Boil noodles according to package instructions. Drain, rinse, and set aside.

  2. Finley dice the onion, pepper and celery. Grate the carrot on a box grater or finely dice it as well.

  3. Toss the noodles and diced veggies together in a large bowl.

  4. In a small bowl mix together the mayo, sugar, vinegar, salt and pepper.

  5. Pour the mayo mixture over the noddles and stir until everything is well combined.

  6. Serve room temp or chilled.

IMG_1651.jpg

Vegan Banana Pudding Pancakes

IMG_1696.jpg

If you are even remotely southern, you have probably had classic banana pudding in your lifetime.

Sweet vanilla pudding, sliced bananas, vanilla wafter cookies, topped with the most perfect, light and fluffy, golden brown peeked meringue!

It’s a work of art and a thing of beauty. I dream about banana pudding at night. So what is one to do when they can’t wait for dessert? You turn your favorite dessert into breakfast, obviously!

So may I introduce you to the vegan banana pudding pancakes! Perfectly fluffy pancakes, vanilla pudding, bananas, crushed vegan vanilla wafers. and sweet aquafaba meringue! I can not think of a better way to start my day than with these pancakes!


INGREDIENTS:

For the pudding:

  • 3 1/2 cups diary free milk ( we used almond)

  • 1/4 cup tapioca or corn starch

  • 3/4 cups sugar

  • 1 teaspoon vanilla extract

  • pinch of salt

For the Pancakes:

  • 2 1/2 cups all purpose flour

  • 4 teaspoons baking powder

  • 1/2 teaspoon salt

  • 1 teaspoon vanila extract

  • 2 tablespoons melted butter

  • 2 tablespoons sugar

  • 2 1/2 cups non dairy milk


Instructions:

  1. Prepare the aquafaba meringue according to instructions and set aside

  2. Add the ingredients for the pudding to a medium/large sized pot. Whisk in the starch so there are no lumps, and heat the mixture over medium heat. Continue to stir the mixture for about 5 minutes or until it has thickened to thin pudding consistency. You don’t want the pudding too thick because you want to be able to drizzle it over the pancakes. Once pudding has thickened, remove from stove top and set aside.

  3. Whisk dry pancake ingredients together. Add in the wet ingredients and mix until there are no lumps.

  4. Heat a large skillet or griddle over medium heat. Add a teaspoon of butter or some spray oil to the pan. Once the pan is nice and hot, scoop out pancake batter using a 1/4 cup measuring cup. Do not over crowed the pan. When tiny bubbles form and pop in the batter, the pancakes are ready to flip. If you notice the pancakes are too dark or beginning to burn, reduce the heat on your stove. Repeat with remaining pancake batter.

  5. On a baking sheet, make stacks of pancakes 3-4 high. If you want you can spread a little pudding between each pancake in the stack. I think it makes them extra yummy, but you can also just wait and drizzle it on at the end. Scoop a large dollop of sweet aquafaba whip on top of each stack. Set oven to broil. Once the coils are red in the oven, place the pan inside and DO NOT TAKE YOUR EYES OFF OF THE PANCAKES FOR EVEN A SECOND!!!! You just want the meringue to brown at the peeks. it will go from beautiful golden brown, to inedible black char in a matter of seconds, so once the aquafaba has started to brown, remove the pan from the oven.

  6. Using a spatula, transfer pancakes to a plate. Drizzle each pancake stack with vanilla pudding, and top with sliced bananas and crushed cookies.

Serves 4-6


Sweet Aquafaba Whip (Meringue)

IMG_1495.jpg

Aquafaba is a magical thing! Whatever genius decided chickpea liquid could be whipped up into a light, perfect, fluffy, could needs a trophy, hug, high five, and a million dollars as far as I am concerned.

Original aquafaba is used often as an egg replacer in baked goods.. This versions has a good bit of sugar in it, so it whips up to a sweet, glossy cloud, that can be used in place of whip cream, or as a perfect vegan meringue.

Just like meringue, this aquafaba will brown beautiful in the oven, and works great for pies, cakes, banana pudding, or anything else that would need a vegan meringue.

So lets just give a big ol HECK YES to the brain that realized this magic, and may all of your pies be covered in the most glorious vegan meringue from this day forward.


INGREDIENTS:

  • 1 can of chickpea liquid, or liquid from any white bean

  • 3/4 cups sugar

  • 1/4 teaspoon cream of tartar, or salt (this stabilizes the whip)


INSTRUCTIONS:

  1. Add chickpea liquid, sugar, and cream or tarter or salt to a stand mixer or a large bowl if you are using an electric hand mixer.

  2. Beat on high for about 10 minutes. I know this seems like a long time, and it will seem like the cream/meringue is not going to come together, but it will. You will know its done when stiff peeks form, and it becomes kind of shiny, and glossy.

  3. You can use the aquafaba as a whip cream as is, or use it as meringue. It will brown very nicely in the oven, and honestly most people never know it is not egg meringue.

  4. You can refrigerate any lefterovers and use with 2-3 days. You will just have to rebeat the whip because it will start to turn back to its liquid form. But don’t worry, it will rewhip to its original tasty glory in a few minutes.

Vegan Beer Cheese Potato Soup

IMG_1601-2.jpg

Traditional beer cheese soups are normally creamy, but I like some bite in my soup.

So for this recipe we decided to add potatoes. They makes the soup a little more hearty and add a nice texture.

If you still prefer your beer cheese soup creamy, then you can blend the soup after it has finished cooking! Easy Peasy! Now everyone is happy:)

This vegan beer cheese soup recipe calls for 2 cups of our beer cheese sauce. I never have trouble finding ways to use up our beer cheese!

We also have a recipe for a shreddable, sliceable beer cheese that would be perfect for garnishing this hearty soup!

We also baked up some of our Soft Challah Pretzels to dip in the soup, but made them into cute little bites instead of giant pretzels.

And just think, you can dip the leftover pretzels into the leftover beer cheese.

EEEKKK!! The recipe that just keeps giving! Beer, cheese, potatoes, soft pretzels….all I can say to that is CHEERS!


INGREDIENTS:

  • 2 cups Vegan Beer Cheese Sauce

  • 3 cups dairy free milk

  • 2 tablespoons vegan butter

  • 4 cups vegetable broth

  • 2 russet poatoes, peeled and diced

  • 1 yellow onion, diced

  • 3 stalks celery, diced

  • 2 teaspoons dried parsley, plus more for garnish

  • 1/2 cup all purpose flour

  • salt and pepper to taste

  • 2 teaspoons minced garlic

  • 1 can/ bottle of beer, I used a lager

  • 2 tablespoons dijon mustard

  • 1/4 cup vegan cream cheese

  • optional: 1/2-1 cup vegan beer cheese cheddar shreds


INSTRUCTIONS:

  1. Heat butter in a large pot, or dutch oven over medium /high heat. Once the butter has melted, add the onions, garlic, and celery and cook until the onions become translucent. Sprinkle the flour over the onion and celery, and allow it to cook for several minutes.

  2. Pour in the milk, broth, and beer cheese sauce. Add the potatoes, mustard, salt and pepper.

  3. Add in the cream cheese, using a whisk to make sure it breaks up and mixes into the soup. Finally add the beer.

  4. Let the soup simmer for about half an hour to 45 minutes over low heat so it can thicken. Be sure to stir a few times to make sure nothing is sticking to the bottom. If you taste the soup and feel like you want more cheese, you can add in the vegan cheddar shreds. I personally like it without the added cheese, but some prefer it extra cheesy. You can also just add sherds to the bowls when serving!


You can serve the soup with Soft vegan challah pretzels. We took our Soft challah pretzel dough and formed little pretzel bites to go with this soup! But you could also make soft pretzel sticks or a traditional pretzel shape. To make the bites, follow the instructions for the regular pretzel recipe, but instead of forming them into a pretzel shape, pinch off golf ball sizes of dough and roll them into balls. Continue with the recipe process. Your bake time on the bites will be shorter, so just keep an eye on them and remove them from the oven once they are nice and golden brown.

If you liked this recipe, try these:

Loaded Vegan Baked Potato Soup

Savory Maple Pumpkin Soup with Tofu Scallops

Smokey Vegan Tomato Bisque

Tarragon Almond "Chicken" Salad with Jackfruit

IMG_1657-2.jpg

Jackfruit is an easy and popular substitute for shredded meat. It mimics the texture of any shredded meat, and takes on the flavor of whatever you season it with. It is also low in fat and high in fiber making it a win win.

You can find jackfruit at a lot of regular super markets now, at Asian markets, and online retailers like Amazon. It is also really inexpensive, which is awesome! Just be sure to find young jackfruit packed in brine. It often comes canned in syrup as well and that is not what you want for this recipe!

It works especially well in this chicken salad substitute, and is perfect for this tarragon and almond “chicken” salad recipe.

This jackfruit salad is savory, creamy, and has just the right amount of crunch from the onion and almonds.

I love it on crackers, or on top of a nice green salad, but it also makes a pretty tasty sandwich!

It also works well as a party appetizer severed with fresh cut veggies, vegan coconut milk gouda and crackers.


INGREDIENTS:

  • 1 can jackfruit in brine, drained and rinsed

  • 1/4 small yellow onion, finely diced

  • 1/4 cup vegan mayo

  • 2 teaspoons dried tarragon

  • 1 teaspoon onion salt

  • 1/2 teaspoon black pepper

  • 1 teaspoon fresh or dried parsley

  • 1/2 teaspoon garlic powder

  • 2-4 tablespoons sliced almonds


INSTRUCTIONS:

  1. Drain the jackfruit and rinse well. Shred the pieces of jackfruit over a medium sized bowl using your fingers. You can also chop the jackfruit, but I find it easier to just use my hands.

  2. Add the remaining ingredients to the bowl with the jackfruit and mix well.

  3. Serve with crackers, veggies, on a salad, or sandwich. Store leftovers in an airtight container in the fridge for 2 to 3 days.

IMG_1660.jpg

Vegan Chocolate Mint Cookie Cake

IMG_1615.jpg

Raise your hand if you love chocolate mint everything!!

If you raised your hand then I have just the cake for you! Butter cake, chocolate frosting, mint frosting, and chocolate mint sandwich cookies between every layer of cake!

This is one of those cakes that dreams are made of! This vegan mint chocolate cookie cake may seem a little more ambitious than some of our other cake recipes, but its actually pretty easy to make. It just takes a little time, but I promise it will be totally worth it!

The actual cake recipe was adapted from the genius Gretchen Price’s cookbook, Modern Vegan Baking. This book is basically the vegan baking bible as far as we are concerned in this house. We actually came to know Gretchen online after we bought and obsessed over this book. As it turns out she is as amazing in real life as I has imagined through her book! GO BUY HER BOOK right now!!!!! And poke around her blog. You will not be disappointed in any recipe you ever make from her.

We made mad a few changes and additions to her easy vanilla cake recipe based on what we had on hand and the fact that we wanted a minty cake, not vanilla! But if you want the vanilla version, and her actual recipe since we changed a few things, I repeat, go buy her book!!! We use our copy ALLLLL THE TIME!

This cake is a bit ambitious. You can always frost the entire cake in solid green if you don’t want to dye the frosting various shades. It will taste just as good! If you have never used a star tip, squeeze the piping bag in small little burst making a little shell like shape while going around the cake.

This take practice, so maybe try on a paper towel before starting on the cake. Youtube is full of tutorials for frosting cakes. Try the video we linked or search “star tip shell boarder”, or “using a star tip.” You can always just flat frost the cake, or make little waves with a frosting spatula or butter knife to give it some texture. It will still be a pretty and delicious cake!

So if you’re looking for the perfect spring or St. Patricks Day cake, here it is!! I hope you love it as much as we do!


INGREDIENTS:

  • 1 large pack of mint sandwich cookies

  • 1 1/2 cups oat milk, you can use ANY non dairy milk, but we prefer oat for baking

  • 3 tablespoons apple cider vinegar

  • 1 cup vegan butter, melted

  • 1 3/4 cups sugar

  • 1/2 teaspoon salt

  • 1 1/2 teaspoons mint extract

  • 3 cups all purpose flour

  • 2 teaspoons baking soda

Chocolate butter cream frosting:

  • 1/4 cup vegan butter

  • 1/4 cup shortening

  • 1/4 cup cocoa powder

  • 1/2 teaspoon vanilla extract

  • 2 cups powdered sugar

  • splash of non dairy milk

Mint Buttercream Frosting:

  • 1/2 cup vegan butter

  • 1/2 cup vegan shortening

  • 3 3/4 cups powdered sugar

  • 2 teaspoons mint extract

  • splash of non dairy milk

  • green food dye


INSTRUCTIONS:

preheat oven to 350 degrees

  1. Sift baking soda, flour, and salt into a small bowl.

  2. In a cup combine milk and vinegar. Let the mixture sit for a few minutes until the milk begins to curdled.

  3. In a large bowl cream the butter, sugar, and mint extract with an electric mixer. Pour the milk into the bowl and mix. Next, add the flour mixture and mix until the batter is smooth.

  4. Prepare two 8 inch cake pans by rubbing a light layer of oil around the pan. Add a few teaspoons of flour to the pans and shake it around to coat, shaking out the excess flour. Divide batter evenly between pans.

  5. Bake for 40 minutes or until a tooth pick inserted into the middle comes out clean. Allow cakes to cool completely before removing from the pans.

  6. While cakes are cooling, prepare the frosting. First combine all ingredients for the chocolate frosting together in a large bowl and mix with an electric mixer until smooth. Add just enough milk to get the desired consistency. You can also put all of the ingredients into your stand mixer and mix until smooth. Set frosting aside.

  7. Repeat the same process with the ingredients for the mint frosting. If you want to frost the cake in an ombre style like in the picture, divide prepared frosting into 4 bowls. Put around 1/3 cup of the mint frosting into each of three smaller bowls, with the remaining frosting in the 4th bowl. One bowl of frosting will stay white, the other three will be gradual shades of green, the darkest green being the bowl with the most frosting. How much dye you use in each bowl is dependent on what type dye you are using. For example, gel dyes yield a stronger pigment than your average grocery store liquid dye. You will just need to add a drop or two more of dye to each bowl to achieve the gradual color difference.

  8. Crush up about half of the sandwich cookies and set aside.

  9. Carefully remove the cakes from the pans. Normally turning the pans upside down onto a flat surface and tapping the bottom works, as long as the pan was well prepared. Divide each cooled cake in half. A sharp serrated knife normally works well for this. Begin frosting the cakes by coating one layer in 1/2 of the chocolate frosting and sprinkling with 1/3 of the crushed cookies. Stack a second cake layer on top and frost with some of the darkest green frosting. Sprinkle with crushed cookies. Top with another layer of cake and frost with the remaining chocolate frosting and cover with remaining crushed cookies. Place final layer of cake on top. Take about a 1/4 cup scoop of the darkest green frosting and crumb coat the entire cake. This is just a SUPER paper thin layer of frosting that forms a barrier and helps keep the crumbs from getting into your finished frosting. I like to put the cake in the fridge for a bit to let the crumb coat harden before I decorate the cake. It just makes decorating the cake easier.

  10. Fill a piping bag, or a zip lock bag with a corner cut out, with a small star frosting tip. Add the white frosting first, and go around the cake in 2 rows, starting at the bottom. Repeat this process with the remaining colors lightest to darkest, circling around to the top of the cake, ending with the darkest green until the entire cake is covered.

  11. Cut remaining chocolate cookies in half and decorate the top of the cake. Store cake covered at room temperature.


If you liked this recipe, try these!

Vegan Chocolate Peanut Butter Dream Cake

Vegan Eggnog Cake

IMG_1636.jpg

Savory Vegan Goat Cheese and Tomato Hamantaschen

IMG_1557.jpg

Meet the unsung hero of the Hamantaschen cookie! The savory Hamantaschen!

Hamantaschen are made to celebrate the Jewish holiday of Purim, which celebrates the bravery of Esther against the evil, Haman. Although the cookies are typically sweet and filled with things like poppy seeds, jam, or chocolate, I decided this year to try a savory Hamantaschen using our alomond herb goat cheese, rosemary, and tomato.

We left the dough a little sweet with a hint of lemon, but y'all, it works! Nobody in my house was booing these cookies.

They are delicious!

I did have some trouble at first convincing some friends to try these. After all, who makes savory Hamantaschen? But once I talked them into it, they were pleasantly surprised!

So if you are ready to change up your regular Hamantaschen game, give these a go. Even if you have never heard of a Hamantaschen cookie, you don’t have to celebrate Purim to bake up a batch of these tasty treats!

Vegan Hamantaschen for everyone!


INGREDEINTS:

The Dough

  • 3/4 cups vegan butter, room temperature

  • 1/3 cup sugar

  • 2 1/2 cups all purpose flour

  • 1 egg replacement, we used Bobs

  • 1 teaspoon lemon zest

  • 1/2 teaspoon salt

  • 1-2 tablespoons water

The Filling


INSTRUCITONS:

  1. In large bowl, cream together the sugar and butter until light and fluffy

  2. Next , mix in the lemon zest and egg replacer with the butter and sugar.

  3. Finally add the flour and the salt, and mix until a soft dough forms. If the dough seems crumbly, add in a tablespoon or two of water.

  4. Knead the dough on a lightly floured counter top for a few minutes. You do not want to over knead the dough, you just want to make sure all of the ingredients and well incorporated.

  5. Wrap the dough in plastic wrap and chill for 2-3 hours in the fridge. The dough is really soft and needs to be pretty cold to roll out.

  6. Once dough is ready, roll it out on a large, clean, floured surface. I like to split my dough in half and only roll out one half at a time, leaving the other half in the fridge so it does not soften back up. I find it easier to manage. Roll the dough out to around 1/8 of an inch thick.

  7. preheat oven to 350 degrees

  8. Using a 3 inch circle cookie cutter or biscuit cutter (or the rim of a small glass) cut circle in dough. Carefully transfer the circles to a parchment paper lined cookie sheet. Take about a 1/3 teaspoon of the almond herb goat cheese and place in the center of the circle. Top the cheese with a ring of cherry tomato and a few springs of fresh rosemary.

  9. Form the cookie into a triangle by pinching the top to a point. Fold up the bottom half of the circle, and pinch the two bottom corners together all well. Make sure all three corners are pinched well so the triangles do not come open while baking. Continue with remaining dough, leaving about an inch of space between each cookie.

  10. Bake cookies for about 20 minutes. Once cookies are done, transfer to a wire rack to cool.

    Yields about 2 and 1/2 dozen cookies


IMG_1551.jpg

Vegan Herb Almond Goat Cheese

IMG_1638.jpg

Before we cut animal products, goat cheese was my go to. When I set out to create a vegan “goat” cheese I wanted it a little crumbly, yet still creamy, and I wanted it to have that goat cheese briny, tart, zip.

I have also been wanting to make an herbed cheese for a while, and a goat style cheese seemed like the perfect candidate!

If you have never used Herbs de Provence, you can normally find it in the spice section of your local market. I use it often in cooking and it is absolutely delicious in this cheese! If you can’t find it at your market, and don’t feel like mixing up your own, then you can use any combo of any herbs you like, or skip the herbs all together! It will still be delicious.

The sauerkraut in the recipe is important to give the cheese that briny tang, so don’t skip it! This vegan goat cheese also bakes up nicely, so get creative and think beyond cheese and crackers!


INGREDIENTS:

  • 1 cup blanched almonds

  • 1 cup almond milk

  • 2 tablespoon agar powder

  • 1/3 cup sauerkraut, no juice

  • 2 teaspoons light miso paste

  • 1/4 cup nutrional yeast

  • 1/4 cup refined coconut oil

  • 1 teaspoon salt

  • 2 teaspoons Herbs de Provence, this is a mix of marjoram, rosemary, thyme, oregano, and lavender

  • 1 tablespoon apple cider vinegar

  • 2 tablespoons lemon juice


INSTRUCTIONS:

  1. Soak almonds in hot water for several hours, or cover in water in a microwave safe container, and microwave for 3 minutes. Drain and rinse.

  2. Add almonds, and all of the remaining ingredients EXCEPT the almond milk and agar to a food processor or high speed blender. Blend for a minute to mix everything up and break down the almonds.

  3. Add the almond milk and agar to a medium sized sauce pan. Heat over medium heat on the stove top, whisking continuously until the mixture begins to bubble and thicken.

  4. Add the milk and agar mixture to the food processor along with the other ingredients, and blend for several minutes until the mixture is creamy and smooth.

  5. Transfer the cheese to a couple small bowls or large ramekins.

  6. Store uncovered in the fridge for several hours to allow cheese to set. Once the cheese has set, store in an airtight container in the fridge for about a week.

Yields 2-3 cheese rounds, depending on the size of bowls you use

If you like this recipe, then you may also like these:

Vegan Coconut Kimcheese

Coconut Mik Colby Jack

Smokey Cashew Cheddar

Vegan Deluxe Biscuits and Gravy

IMG_1539@0,5x.jpg

One of our favorite places to eat in Boone NC serves the best vegetarian biscuits and gravy!

Mushroom gravy, cheese, tomatoes and onions on top.

The combination of the hot gravy, melted cheese, and cold fresh veggies on top is just about perfect. So naturally I set out to create a vegan version of creative spin on a southern staple.

Don’t get me wrong, I still love a traditional plate of biscuits and “sausage” gravy, but this version is actually my go to!!

Also making homemade biscuits is really easy, so don’t be intimidated! Once you get the hang of it, I think you will want to make the alllllll the time!

So if you love biscuits and gravy ( and if you don’t, please explain this to me, I’m truly confused) then give this version try!

It might become your favorite version as well. And if you are ever in Boone NC, stop by the Hobnob!! They know what they are doing there!


Ingredients:

  • 1 batch Fluffy Southern Biscuits

  • 3 cups diced mushrooms

  • 1 small onion

  • 2 teaspoons vegan butter

  • 2 cups water

  • 2 teaspoons low sodium Better Than Bouillon

  • 1 teaspoon minced garlic

  • 4 tablespoons flour

  • 1 tablespoons tomato paste

  • 1 teaspoon dried thyme

  • pepper to taste

  • optional toppings:

  • diced tomatoes

  • vegan cheddar shreds

  • diced green onions


Instructions:

  1. Bake biscuits according to recipe

  2. In a medium sized skillet, melt 2 teaspoons of butter. Add the onion, garlic, and mushrooms and allow to cook until onions are translucent.

  3. Sprinkle the flour on top of the veggies and let cook for about a minute.

  4. Whisk togher the water, better than bouillon, and tomato paste and pour into pan.

  5. Add the spices and continue whisking until the gravy begins to thicken.

  6. Once gravy has thickened, allow to simmer for a few minutes.

  7. If adding cheddar shreds, place biscuits in an iron skillet or casserole dish. Cover in gravy and sprinkle with cheese. Turn oven to broil and leave the pan in the oven just long enough for the cheese to melt and get bubbly. Do not take your eyes off the biscuits while they are in the oven. They will burn VERY QUICKLY while on broil if you do not watch them.

  8. Once cheese is melted, remove biscuits from the oven, and sprinkle with diced onions and tomatoes to serve.

IMG_1532.jpg

Vegan Philly Fries with Beer Cheese Sauce

IMG_1474.jpg

What do you get when you mix a Philly cheese steak and a plate of fries, then top it off with vegan beer cheese sauce.

The best thing you have ever eaten?!?!?! That is probably a stretch BUT, these fries are really, really, really good!

Trust me when I tell you that you do not want to skip the vegan beer cheese sauce. Any other cheese sauce is a sad second.

Also if you have never made homemade easy basic seitan, now is your chance! Its super easy to make and can be used a gazzilion different ways. You an also use any seitan you like in this recipe. Flank steak, chicken, whatever!

We even have a video on the site to help you see the process of making homemade seitan! Just look under the video section!

You only need half a batch for this recipe, so pop the rest in the freezer for another nights dinner! Look at you meal prepping without even trying!!

So lets hear it for Philly fries and beer cheese!! You many never use a bun for your Philly again! You may never use another cheese sauce again, either. But honestly, who could blame you!


INGREDIENTS:

  • Half batch of basic seitan, seitan chicken, or flank steak (around 3 cups sliced, refer to video if you are new to seitan)

  • 2 cups sliced mushrooms, white or baby portabello are fine

  • 1/2- 1 red or orange bell pepper

  • 1 small yellow onion

  • 1-2 teaspoon vegan Worcestershire sauce

  • 2 teaspoons tomato paste

  • 1 teaspoon minced garlic

  • 3-4 tablespoons coconut aminos

  • 1 teaspoon smoked paprika

  • 1 teaspoon onion powder

  • Salt and pepper to taste

  • 1 -2 cups vegan beer cheese sauce

  • 4 medium russet potatoes

  • Diced scallions (optional as garnish)


INSTURCTIONS:

  1. Wash the potatoes, peels on

  2. Cut potatoes into fries.

  3. FOR FRYING THE POTATOES, heat a few inches of oil in a deep skillet (I use a cast iron skillet)on medium heat.Once the oil is nice and hot, start adding small batches of the fries to the oil. Allow them to fry until nice a crisp, about 5 minutes. Once they are done frying, remove from oil and place on a wire cooking rack with some paper towels underneath. This will help them stay crispy while you finish frying the rest.

  4. FOR OVEN BAKING, preheat oven to 400 degrees. Lightly coat fries in a few teaspoons of oil and place them on a cookies sheet lined with parchment paper. Make sure the fries are not over crowded. Sprinkle with salt and bake for about 15 minutes or until the fries seem crispy on one side. Take the cookie sheet out of the oven, and turn the fries with a spatula or a pair of metal tongs. Put the fires back in the oven for another 15 minutes, or until the fries seem fully crisp.

  5. USING AN AIR FRYER: Lightly spray potatoes with some cooking oil, sprinkle with salt and place in the air fryer basket. ( you may have to fry in batches if you have a smaller air fryer) cook on 400 for 15 minutes, taking the basket out and shaking it around a few times during the cooking process. If the fries are not crispy after 15 minutes, put them back in for 5 more minutes or until they have reached the desired crispness.

  6. FOR THE PHILLY, Slice seitan into thin strips. Thinly slice onions and peppers. Heat a large skillet over medium heat with a few teaspoons of oil. Add onions, garlic, and pepper and sauté until the onions begin to get soft. Add the mushrooms and let them cook for a few minutes. Add the seitan, all of the seasonings, tomato paste, Worcestershire sauce, liquid aminos, and cook for another 5 minutes, until the liquid is absorbed and the seitan is beginning to brown.

  7. To serve, stack fries on a plates, topping with Philly mixture and drizzled with Beer Cheese. You can also sprinkle some diced scallions if you like extra kick of onion.

    Serves 3-4

IF YOU LIKED THIS RECIPE, TRY THESE!

Vegan Chili Cheese Fries

Vegan BBQ Cheddar Fries with Slaw

Vegan Gorgonzola and Balsamic Glazed Chips

Funnel Cake Fries

IMG_1468.jpg

Vegan Chocolate, Coconut, Caramel Pancakes (The Samoas)

IMG_1483.jpg

Once again when Girl Scout cookie season is in full swing, I am left craving my favorite cookie from days of old.

Although the Girl Scouts do offer some delicious vegan cookie options, none hold a candle in my opinion to the gooey, coconutty, chocolatey, Samoa!

Naturally we needed to think outside the box and get creative, so we took all that goodness and turned it into a pancake!

These perfectly fluffy vegan pancakes are covered in vegan chocolate syrup, caramel sauce, sweet aquafaba whip and toasted coconut. I mean come on!! These things are amazing!

Don’t worry, if you feel guilty eating these for breakfast, just make them for dessert or brunch. These vegan Samoa pancakes are a thing of beauty and really do help take your mind off of the legendary forbidden cookie.

And if you haven’t tried some of the Girl Scouts vegan cookies, give them a whirl, they really are good. I mean, I will never turn down a thin mint!


INGREDIENTS:

  • 1 1/4 cups all purpose flour

  • 2 tablespoons white sugar (If vegan, not plant based, make sure the brand you use is in fact vegan, not all white sugars are. I use Florida Crystals)

  • 2 teaspoons baking powder

  • 1/4 teaspoon salt

  • 1/2 teaspoon cinnamon

  • 1/2 teaspoon vanilla extract

  • 1 1/4 cup plant based milk

  • 1 tablespoon melted vegan butter

  • 1 cup vegan chocolate chips or chopped dark chocolate, divided in half

  • 2 teaspoons coconut oil, or vegan butter for the chocolate sauce

  • 1/2 cup shredded coconut, toasted

Sweet Aquafaba Whip: (you could also use canned vegan whip cream)

  • liquid from 1 can of chickpeas

  • 3/4 cups sugar

  • 1/3 teaspoon cream of tarter

Easy Vegan No Cook Caramel:

  • 1/2 cup dried dates

  • 1/4 cup canned coconut cream

  • 1/3 cup maple syrup

  • pinch of salt

  • 1/4 teaspoon vanilla extract


COOKING INSTRUCTIONS:

  1. For the Sweet Aquafaba whip: Add sugar and chickpea liquid to a microwave safe container. Microwave for thirty seconds at a time, stirring each time until the sugar is dissolved. Add all of the ingredients to a stand mixer and mix for about 10 minutes until stiff peaks form and the whip is glossy. You can also do this in a large bowl with an electric hand mixer. It takes a good bit longer for aquafaba whip cream than it does basic aquafaba because of the sugar. Trust me when I say it’s worth the effort. It is like a marshmallowy/whip creamy perfect cloud of magic. I highly suggest trying a batch. You may never go back to coconut whip cream!

  2. For the Caramel: Add the ingredients for the caramel to a food processor or blender. You may have trouble getting it to process in your blender because it is a small volume of ingredients. If you do not have a food processor, I suggest doubling the ingredients so you have enough volume that your blender will break it down. Let’s be real, I’m sure you can find plenty of ways to use up the extra! Store caramel in the fridge 1 - 2 weeks.

  3. For the Pancakes: Whisk all dry ingredients in a large bowl.

  4. Add in the melted butter, plant based milk, vanilla, and stir well.

  5. Heat a large skillet on medium heat. Add a teaspoon of vegan butter or spray the pan with cooking oil. Using a 1/4 cup measuring cup, scoop out batter into the skillet, 2 or 3 pancakes at time. Sprinkle each pancake with some of the chocolate chips or chopped chocolate. You will only use half of the chocolate for pancakes.

  6. Let pancakes cook until tiny bubbles begin to form and pop, once this happens they are ready to flip. Cook on the other side for another minute or two, until cooked through.

  7. Repeat, adding more butter or oil to the pan as needed, until all batter is used.

  8. Take the other half of the chocolate that you reserved, along with the teaspoons of coconut oil or vegan butter in a microwave safe bowl, and microwave for 30 seconds. Stir well and repeat microwaving at 30 second intervals time until chocolate has melted.

  9. Add coconut to a skillet and heat over medium heat, stirring continuously until the coconut begins to brown. Remove coconut from the pan once it is toasted.

  10. Stack 3 - 4 pancakes on a plate, topping with sweet aquafaba whip and coconut. Drizzle with chocolate sauce and camel to serve.

Serves 3 - 4. but the pancake batter can be easily doubled!


IMG_1488.jpg

Vegan Beer Cheese Sauce

Whats better than vegan cheddar cheese sauces you might ask? Vegan BEER cheese sauce, y’all !! I honestly don’t know why I used water all of these years? All of those years that I now can not get back. But that just means I have a lot of lost time t…

Whats better than vegan cheddar cheese sauces you might ask? Vegan BEER cheese sauce, y’all !! I honestly don’t know why I used water all of these years? All of those years that I now can not get back. But that just means I have a lot of lost time to make up for, and I am gonna start dipping, pouring, slathering this magic vegan beer cheese on everything! Who’s with me on this one?

Ingredients:

  • 1 cup cashews

  • 1 can of beer

  • 4 tablespoons nutritional yeast

  • 1 teaspoon turmeric

  • 1/2- 1 teaspoon salt

  • 1/2 teaspoon smoked paprika

  • 1 tablespoon apple cider vinegar

  • 2 teaspoons light miso paste

  • 4 tablespoon tapioca or corn starch

  • 1 tablespoon dijon mustard

  • 1 teaspoon minced garlic (optional)

Instructions:

  1. Cover cashews in hot water and soak for several hours, or cover in water in a microwave safe container and microwave for 3 minutes Drain the cashews and rinse.

  2. Add the cashews and remaining ingredients to high speed blender or food processor, and blend on high until the mixture is completely smooth.

  3. Transfer the cheese sauce to a medium sized sauce pan. Heat on the stove top over medium heat, stirring continuously with a whisk until the mixture begins to thicken. Once the mixture has began thickening, remove from heat. If you get the sauce too thick, you can add some water (or more beer) and thin it back out. Even if it looks lumpy and weird, just add the water and whisk well.

  4. You can garnish with more paprika. Serve with fresh bread , vegan soft pretzels, or cut up veggies.

  5. Store in an airtight container in the fridge for about a week. Reheat on the stove top or microwave.

IMG_1468.jpg

Easy Homemade Vegan Bagels

IMG_1379.jpg

Warm, chewy on the outside, soft on the inside, fresh, homemade bagels! Yes, Yes, and YES!

Seriously, y'all, fresh homemade bagels are so easy to make, plus you get to top them with whatever you want!

Vegan cheese, sesame seeds, Trader Joe’s everything bagel seasoning, raisins, cinnamon, jalapeños, chocolate chips…whatever y’all want! I normally let each of my kids pick a flavor and try to accommodate. Everyone loves homemade bagel day in your house.

Bagels freeze really well, so make yourself a double batch on the weekend, and next week’s breakfast just got a lot easier, and a whole lot more tasty!

If you don’t believe me, I have left photo proof of our two year old digging into a fresh everything bagel that she slyly snatched as we were trying to photograph them. I mean she just did the thing the rest of us wanted to do. But who can blame her.

They are that good! And if y’all can’t do gluten, don’t worry! Our friends over at Not That Kind of Vegan took this recipe and turned it gluten free, so go check out their recipe !! Now everyone can have their bagel and eat it too!!

And if you are feeling super extra, you can give making your own easy homemade cream cheese a try. Super easy, cheaper than store bought and soooo good!!! We made ours with tofu and cashews to give it the perfect texture and taste!! And if you are feeling really super duper extra, you can make a quick batch of carrot lox to top it all off with!

IMG_7105.jpg

Ingredients:

  • 4 cups all purpose flour

  • 1 tablespoon dry active yeast

  • 1 and 1/2 cups warm water

  • 1 tablespoon white sugar

  • 3 teaspoons salt

  • optional toppings: everything bagel seasoning, sesame seeds, salt, poppy seeds, shredded cheese, or anything else you can think of!

Boiling liquid:

  • Enough water to fill a large pot

  • 2 teaspoons baking soda

IMG_1352.jpg

Instructions:

  1. In a large bowl add water, yeast, and 1 tablespoon of sugar. You want the water warm but not too hot. It needs to be around 100 degrees. Much hotter and it will kill the yeast. I just use hot water from the tap. Let the mixture sit for about 10 minutes until it is nice and foamy.

  2. Add the yeast mixture along with the remaining ingredients to a stand mixer. You can either use the paddle attachment to get everything mixed up, or mix it by hand before attaching the dough hook. Allow the dough to knead on medium speed for about 10 minutes. It needs to knead for this long! I promise. If you do not have a stand mixer then you can mix the ingredients by hand and knead for about 15 minutes. Baking and a workout at the same time! Heck yes! Look at you burning those bagel calories before you even eat one!

  3. Pull off a piece of dough and stretch it. You want it to make a “windowpane” that you can see through, but does not rip. That’s when you are done kneading!

  4. Place dough in large bowl and cover with plastic wrap or a damp kitchen towel. Allow dough to rise for about an hour. It will grow but not quite double in size.

  5. Once dough has risen, divide into 8 equal pieces. Form a ball with each piece and poke a hole in the middle using your finger. Stretch the ring of dough out a bit and place on a parchment lined baking sheet.

  6. Preheat your oven to 375 degrees.

  7. Bring a large pot of water to a boil. Once boiling, add 2 teaspoons of baking soda. Add 1 or 2 bagels at a time and allow to boil on each side for about 45 seconds. Remove the bagel from the water and place back on the parchment lined baking sheet.

  8. Sprinkle bagel with desired toppings while the bagel are still wet and the toppings will stick.

  9. Bake bagels for 25 - 30 minutes. You can brush the bagels with a 1/2 cup whipped aquafaba mixed with 2 tablespoons of maple syrup, or melted vegan butter. This just helps the bagels brown. You do not have to brush them with anything.

  10. Allow bagels to cool on a the baking pan before storing in an airtight container at room temperature.

  11. Serve with vegan cream cheese, carrot lox, or even our delicious vegan egg salad

You can freeze the bagels for up to a few months. You can also split the dough into 16 pieces if you want smaller bagels.

IMG_1357.jpg
IMG_1363.jpg

Vegan Buffalo Chicken Stuffed Challah

IMG_1428.jpg

If you have not noticed my affection for challah bread by now, then let me reiterate that I LOVE challah, LOVE IT!!!

I used to bake and sell challah each week actually, until I started this site and life got too busy.

I have t-shirts expressing my challah love, socks too. Challah at ya! Challah y’all! Challah day, celebrate! I ain’t no challah back girl. I could go on and on with my challah puns.

I love it start to finish, dough to bread. I love the act of preparing challah on shabbat, and I love finding new ways to stuff it so it becomes a total meal.

Challah takes some time to make, but it is 1,000% worth it!

This vegan challah was the request of our 13 year old daughter. She loves our Buffalo “chicken” dip with jackfruit and stuffing that magic into warm, soft, fluffy challah seemed like a no brainer to me! Covered in melted vegan cheddar and drizzled with hot sauce glaze, its now on my top 5 favorite stuffed challah list!

So bake up a batch of our Vegan Buffalo “chicken” dipand stuff your own vegan challah. Then challah at me and let me know how much you loved it!


Challah:

Follow the recipe for my basic Challah Y'all, Vegan Challah. You will follow the instructions through the first rise, then follow the below instructions for stuffing and braiding.

  • 1 batch of Vegan Buffalo Chicken Dip, baked and cooled

  • 1 cup leftover aquafaba

  • 2 tablespoons maple syrup

  • 3 teaspoons buffalo sauce (I always use Franks)

  • 1 cup shredded vegan cheddar (I always use homemade or follow your heart cheddar shreds)

Stuffing the Challah:

  1. Once Challah has completed its first rise, remove from oven and separate dough in half. This recipe will yield 2 stuffed challah loaves.

  2. Cut each half into thirds. (each loaf will have three pieces of dough. Work with one loaf at a time, leaving the other three pieces of dough covered in a bowl until you are ready to use them)

  3. Take one piece of dough in your hand and begin to stretch it both length wise, and width wise and the same, time, letting gravity help with the length. You want a rectangle of dough that is about 5 inches wide and about 6-7 inches long. Once your dough is the correct size, Add a few scoops of dip to the center of the dough. Do not get too close to the edges, if the dip wets the dough it will not seal together.

  4. Once stuffed, bring the outside edges together, and pinch to seal. Once dough is sealed, pick it up and start to gently stretch the dough into a fat rope. You will have to kind of squeeze and pull at the same time, just do not squeeze so hard that the filling comes out. You just need the rope long enough to braid, 10-12 inches.

  5. Repeat with the other two strands.

  6. Once all three strands are stuffed, and formed, carefully braid the three pieces together. If the seams begin to open, pinch them back and continue braiding. Tuck both ends of the loaf under when done braiding. Once again I will refer you to Tori Avey's challah braiding guide if you are unfamiliar with braiding challah! She does a fantastic job showing all the different ways to braid your bread, plus she has some really great recipes on her site.

  7. Repeat with the second loaf, and place both stuffed loaves on a baking sheet, and back in the oven to rise again for about 45 mintues. Once they have risen, remove from oven and pre-heat to 350.

  8. Mix 1 cup of left over aquafaba, maple syrup and buffalo sauce. Brush each loaf of challah with the mixture and sprinkle with vegan cheddar shreds. You can also add a little extra hot sauce to the aquafaba mix and drizzle it over the challah before you bake it.

  9. Bake both loaves for about 35 - 45 minutes. You can tap the tops to see if they sound a little hallow. It is hard to tell when stuffed challahs are done when there are wet ingredients inside, so if they do not seem cooked through after 35 minutes, let them keep cooking for 5 - 10 more minutes.

  10. Remove challah from the oven, and allow to cool some before cutting.


*Follow us on Instagram @86.eats and check out step by step challah making in our highlights. This shows making aquafaba, and the stages of the dough!

IMG_1437.jpg
IMG_1429.jpg

Vegan Chocolate Caramel and Coconut Smoothie (The Samoa)

Raise your hand if you have ever had a Samoa Girl Scout cookie. If you have, you probably know what all the hype is about. Gooey Caramel, Chocolate, and toasted coconut perfection. Sadly, Samoas are not one of the Girls Scout’s vegan cookie offering…

Raise your hand if you have ever had a Samoa Girl Scout cookie. If you have, you probably know what all the hype is about. Gooey Caramel, Chocolate, and toasted coconut perfection. Sadly, Samoas are not one of the Girls Scout’s vegan cookie offerings. No worries, Y’all! I think I have just the thing for you! This smoothie is far healthier than a cookie, but taste just as good in my opinion. It has it all!! Chocolate, coconut, and caramel all blended up creamy smooth and so delicious. What it doesn't have is refined sugar, and 100% less guilt than a cookie! Also you can have this for breakfast and not spend your day drowning in regret! WIN WIN WIN! Oh, and the caramel sauce is raw and you will probably find 100 different ways to use it, too! So don’t worry the leftovers, you will thank me later when you are dipping an apple into it ,and again not feeling one ounce of remorse! So blend yourself up a Vegan Samoa Smoothie and walk right past that cookie table those adorable girls have set up in front of your local grocery store, never looking back (OR run back and grab a box of the some of their vegan cookies because after all they are adorable, and its super hard to say no!)

Ingredients:

  • 2 frozen bananas

  • 1/4 cup dark chocolate cocoa powder

  • 1 and 1/2 cups coconut or almond milk

  • 2 cups ice ( you can use less if you don’t like a super thick smoothie)

  • 1/4 cup shredded unsweetened coconut

  • A handful of spinach (I keep a bag in the freezer for shakes and smoothies)

Easy Vegan No Cook Caramel:

  • 1/2 cup dried dates

  • 1/4 cup canned coconut cream

  • 1/3 cup maple syrup

  • pinch of salt

  • 1/4 teaspoon vanilla extract

Instructions:

  1. Peel and freeze 2 bananas. If you do no have a high speed blender like a Vitamix or Ninja, then I suggest slicing the bananas before freezing. A regular blender may have trouble breaking down a whole frozen banana. We normally just toss our bananas that are on the verge of going bad into the freezer so we do not waste them, and so we have them on hand for smoothies and nice cream.

  2. Add the ingredients for the caramel to a food processor or blender. You may have trouble getting it to process in your blender because it is a small volume of ingredients. If you do not have a food processor I suggest doubling the ingredients so you have enough volume that your blender will break it down. Lets be real, I’m sure you can find plenty of ways to use up the extra!! Store caramel in the fridge 1-2 weeks

  3. Toss frozen bananas and remaining shake ingredients into you blender. I have mentioned in other smoothie recipes that I keep bags of mixed greens or spinach in my freezer just for smoothies. It helps make the smoothie nice and cold, and my greens don’t go bad before I can use them! Blend on high until everything is nice and smooth.

  4. To serve, pour smoothies into glasses, top with more shredded coconut (I like to toast mine if I have time) and drizzle with caramel sauce!

makes 2 large smoothies

If you liked this recipe, try these:

Chocolate Peanut Butter Smoothie, The Run-DMC

Orange Creamsicle Smoothie

Sweet Potato Pie Smoothie

Chocolate Coconut Caramel Samoa Pancakes

Raw Sesame Zucchini Noodle Salad

IMG_1278.jpg

I love making noodles out of zucchini.

If you do not have one of those zoodle making gadgets, don’t fret! A regular vegetable peeler works fine for veggie ribbon noodles!

This Raw sesame zucchini noodle salad is one of my favorites because it is so easy, delicious, and healthy. Just peel, toss, and serve! I mean really, you don’t even cook it, how easy is that!

Toss on some grilled tofu, and this perfectly light side dish transforms into fully satisfying, healthy lunch or dinner in just minutes!


Ingredients:

  • 3 medium zucchini

  • 1 and 1/2 cup shredded cabbage or slaw mix

  • 1 cup match stick or shredded carrots

  • 1/2 thinly sliced red onion

  • 1 tablespoon toasted sesame seeds

  • 1/4 chopped cilantro

For the Dressing:

  • 1/4 cup coconut aminos or soy sauce (if using soy skip the extra salt)

  • 2 teaspoons sesame oil

  • 1 tablespoon apple cider vinegar

  • 1 teaspoon salt

  • 2 teaspoons of agave or white sugar


Instructions:

  1. Wash and trim ends from each zucchini. Using a veggie spiralizer (zoodle maker) cut noodles from each zucchini into a large bowl. If you do not have a zoodle making gadget, you can cut ribbons from the zucchini using a regular veggie peeler. Just make long ribbons from the zucchini until you reach the core. The seedy part does not peel well.

  2. Add the slaw mix, carrots, onion, sesame seeds, and cilantro to the bowl with the zoodles and toss.

  3. In a small bowl whisk together the ingredients for the dressing. You can taste and adjust to your liking. Pour dressing over the veggies and toss. Garnish with extra cilantro, and sesame seeds if you like.

Serve at room temp or allow to chill before serving.

Vegan Lemon Lavender Cream Cheese Pop-Tarts

IMG_0876.jpg

I never grow tired of making pop-tarts.

I also never grown tired of thinking of new flavors to fill them with! I love all things lemon lavender and these pop-tarts are no exception

. Filled with an easy, tangy sweet lemon curd, and cream cheese, and topped with a sweet lemon lavender glaze, these pop-tarts are hands down my favorite flavor!

This pie dough is super quick and simple, as is the recipe for the curd!

If you have never had lavender in a baked good, especially paired with lemon, I think you will love it! If you don’t, then I am terribly sorry and honestly confused, because it is delicious!

Look for dried culinary lavender In your grocery stores bulk spice section. If you do not have luck finding it in larger grocery stores, look at you local health food market or farmers market.

So if you have missed pop-tarts since going vegan, rest assured you can easily make your own at home and they are far more delicious than any store bought pop-tart you could ever eat! I promise!!


INGREDIENTS:

1 cup whole wheat flour

1 cup all purpose flour

3/4 cup vegan butter

a pinch of salt

3 - 4 tablespoons ice water

1/3 cup vegan lemon curd

1/3 cup vegan cream cheese

1/2 cup powdered sugar

2 teaspoons dreid culinary lavender

2-3 teaspoon lemon juice


IMG_0821.jpg

Preheat oven to 350.

  1. Add both cups of flour, butter, and salt to a food processor and pulse until well combined.

  2. Add in the water, one tablespoon at a time until a soft dough has formed.

  3. Roll the dough out on a flour dusted, smooth surface to a 1/8 of an inch thick rectangle. You can trim up the edges with a sharp knife and save the scrap dough.

  4. Once the dough is trimmed and even, cut 3 inch by 5 inch rectangles from the dough, give or take. Be sure when you are calculating how many you can cut, to have a even number. Each pop tart needs 2 rectangles. Roll out any scrap dough and repeat the process.

  5. Scoop a heaping teaspoon each of lemon curd and cream cheese onto a rectangle, and smear it around a bit in the middle, carefully to not get too close to the edges.

  6. Top the lemon curd and cream cheese covered piece of dough with another rectangle of dough, and use a fork to press, and seal the edges. (for step by step pictures of the process, check out our Strawberry Pop-Tart recipe)

  7. Place pop tarts on a parchment lined baking sheet, or lightly spray one with cooking oil and bake for 20 - 25 minutes.

  8. While pop tarts are baking, mix together the powdered sugar with lemon juice. Add dried lavender and stir. If it is too thin, you can add a little more powdered sugar to thicken it back up. You want a spreadable consistency.

  9. Once pop tarts have cooled a bit, spread the icing and serve.

Yields 8 pop tarts.

IMG_0831.jpg

If you like this recipes, try these:

Vegan Lemon Curd

IMG_0950.jpg

This vegan lemon curd is quick, straightforward, and can be used in all kinds of recipes.

The base of this vegan lemon curd is coconut cream and is thickened with coconut oil and starch. The curd will thicken up during cooking and more when it cools.

I love all things lemon and can think of a million and ten ways to use this curd!

We use it in our lemon lavender pop-tarts, but it would be delicious on pancakes, waffles, inside cakes or pie, filling of cupcakes or just by the spoonful. No shame!! I will not judge you one bit.

This curd should stay good in the fridge for about 10 days, but it has never lasted that long in our house!

So go make this vegan lemon curd, put it on all the things, and regret nothing!


Ingredients:

  • 1 cup coconut cream, divided ( heavy coconut cream in the can, shaken well)

  • 2 tablespoons coconut oil

  • 1/3 cup lemon juice

  • 1/2 cup white sugar

  • 1/4 cup corn or tapioca starch. Tapioca will yield a more stretchy curd.

  • pinch of salt

  • Optional: 2 teaspoons lemon zest for extra lemon flavor


Instructions:

  1. In a medium sauce pan, whisk together 1/2 cup coconut cream and remaining ingredients over medium/low heat until the mixture thickens (about 5 minutes.) The curd will continue to thicken as it cools.

  2. Remove from heat and stir in the remaining 1/2 cup coconut cream.

  3. Allow curd to cool. Store in the fridge in an air tight container for up to 10 days.