Vegan Glazed Yeast Donuts

Vegan Glazed Yeast Donuts

Who doesn’t love a donut, am I right?

I mean I guess maybe you could dislike donuts, but I am really going to need you to explain, because I am confused!

I grew up eating Krispy Kreme in a small town where every weekend someone would stand at a stop light selling Krispy Kremes as a band, camp, church, footballs, whatever fundraiser! You could always get boxes of red light intersection donuts. Does anyone else know what I am talking about? It was a thing, and I didn't hate it! My parents were far more willing to buy us a box of donuts if it benefited our high school marching band.


So after going vegan my heart was broken to never again get to pull up to a Krispy Kreme when the HOT sign was lit. I could never again dress my kids up for Krispy Kreme’s Pirate day and get a free donut. I was SAD.

Now don’t lecture me about how they are not good for you. I am perfectly aware. But they are delicious and sometimes it’s ok to eat a bad for you thing. It’s not like I am only eating donuts and hate vegetables.

But no matter what, I could not live in a donut-less world. I would not!

So I set out to make a perfectly glazed vegan yeast donut that would make me no longer miss Krispy Kreme every time I drove by and saw the HOT light shinning and taunting me.


And I did! These donuts are the best vegan yeast donuts I have had. Not to toot my own horn, but it’s the truth. If you don’t believe me, then make a batch and see for yourself! Are there better glazed vegan donuts out there somewhere? Maybe, I have not found them where I live. I am always on the hunt for vegan donuts where we travel. I want all the donuts, all the time. But, seriously there is no need to search the internet high and low for a better recipe if you want to make them on your own. This one is perfect.

You can glaze them, dip them in chocolate, cover them in powdered sugar, dip them in coconut. Whatever your little donut loving heart desires. We have even covered them in vegan maple bacon, and filled them with jelly for Hanukkah.

So, may all you vegan donut dreams come true, now! Mine sure have. And we no longer have to be sad when passing a school fundraiser at an intersection selling boxes of Krispy Kreme. I still might hand them a 5 and pass on the donuts. After all they are just trying to go band camp.


INGREDIENTS:

The Donuts

  • 4 cups all purpose flour

  • 3/4 cups aquafaba (we are using and measuring the whipped product, not the liquid, follow link for instructions)

  • 1/2 cup plus 2 tablespoons melted vegan butter

  • 1/4 cup sugar

  • 2 and 1/4 teaspoon dry active yeast

  • 1 cup plus 2 tablespoons plant based milk

  • 1/2 teaspoon salt

  • 2-3 cups of oil for frying, I use grapeseed but you could use whatever oil you normally fry with


The Glaze

  • 3 cups powdered sugar

  • 1/4 cup melted vegan butter

  • 1 teaspoon vanilla extract

  • 1/2 cup plant based milk, give or take

Vegan Glazed Yeast Donuts

COOKING INSTRUCTIONS: 

  1. Heat milk in microwave for 30 - 45 seconds. You want it warm, but not boiling hot.

  2. Add the warm milk, yeast, and sugar to the bowl of your stand mixer. If you do not have a stand mixer, add the contents to a large bowl. Let sit for 5 minutes to activate the yeast.

  3. After 5 minutes add the aquafaba, and melted butter to the mix. Next add the flour, and salt, and mix for 5 minutes on medium speed if using the stand mixer. If not using a stand mixer, then mix the ingredients together well in a bowl, then transfer to a floured counter top, and kneed the dough by hand for 5 minutes. The consistency of the dough should be soft, but not sticky.

  4. After the dough has been kneaded, place it in a lightly greased bowl and cover with plastic wrap. Pop it in the oven. You are NOT turning the oven on, just leaving it there to rise. If your oven has a dough proof setting you can turn that on. Leave dough to rise for one hour, or until it has doubled in size.

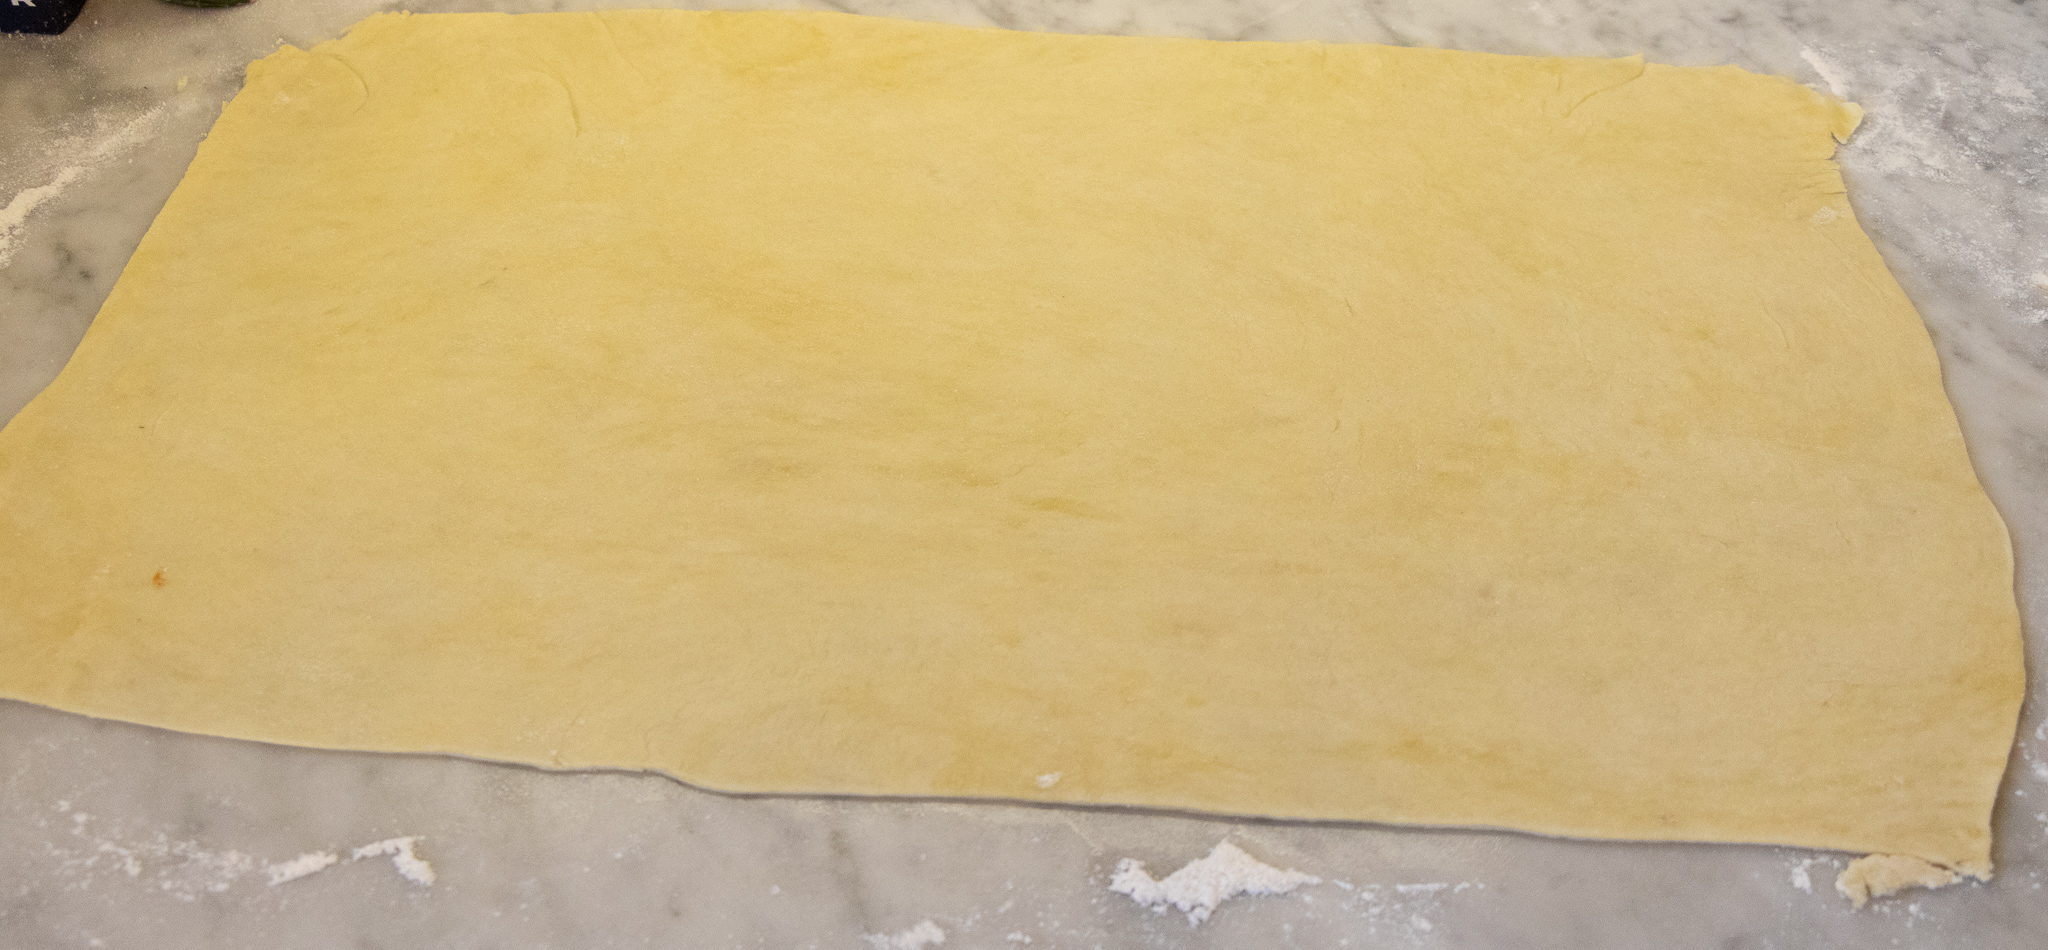
  5. Once the dough has finished rising, transfer to a lightly floured countertop. I like to divide the dough in half and work it in two batches. It makes it easier to roll out. Roll out one half of the dough to about 1/4 inch thick. Using a 3 inch circle biscuit or cookie cutter (or donut cutter if you have one) begin cutting circles. You will need to find something small to cut the center out with. We used the lid to our vanilla extract. Roll back out the scrap dough and continue cutting. Repeat with other half of dough. You should have a total of 2 dozen donuts.

  6. Place donuts on cookies sheets, and let rest for about 15 - 20 minutes. They will become bigger as they rest.

  7. While they are resting, heat 2 - 3 inches of oil in a deep skillet or medium sized pot.

  8. Once oil is hot, begin adding the donuts to the oil, 2 or 3 at a time. Fry the donuts for about one minute on each side. If you don't have enough oil in the pan, and they are hitting the bottom, they will easily burn. So make sure to use enough oil!

  9. Allow donuts to cool on a wire cooling rack, placed on top of a paper-towel-lined cookie sheet.

  10. Once all donuts are done frying, mix all of the ingredients for the glaze. If you find the glaze too thick, you can always thin it with some more milk.

  11. Dip one side of the donut in the glaze and place back on the wire rack to allow the excess glaze to drip off.

  12. It will only take a few minutes for the glaze to set, and for you to be stuffing your face with delicious glazed donut perfection!

Yields two dozen donuts.

Vegan Coconut Milk Dill Havarti

IMG_9791.jpg

When we first became vegan it was out of necessity for our youngest daughters food allergies. We had been vegetarian for years but cheese was the thing I 100% swore I would never give up. I loved cheese despite it not loving my back. My husband went vegan before I did and I refused, becauseI was a dairy addict and could not imagine a world without cheese and crackers.

When our daughter first started showing signs of food allergies I prayed it was wheat. Bread Is possibly my second favorite food, but I could give it up far more easily than cheese. At the time we did not have nearly the amount of store bought dairy alternatives easily available at regular grocery store or restaurants. What I had tried was super gross and expensive . But, because I love my kids more than food, I had to give dairy up ,and it did not take long for me to realized how awful dairy had been making me feel for more than 30 years.

I quickly had to scramble for a solution because I still missed cheese and found my recipe ideas limited if I could not include some kind of convincing dairy. That is when I learned about agar agar powder and how EASY it is to make cheese at home. Not only easy, but CHEAP. Vegan dairy product tend to be pricey, bu you can very affordably make a variety of vegan cheeses using a few simple ingredients like canned coconut milk, vegan gelatin, and coconut oil! Y’all, sooooo easy, and quick too! This vegan cheese will slice, shred, and melt! It’s nearly magic as far as I am concerned! For around $5 you will get 3xs the vegan cheese you could buy in the store, and it’s delicious.

Also. don’t be intimidated by agar agar. You can buy it online on amazon or in many Asian markets. It’s just a gelatin made from seaweed that helps the cheese solidify! The agar coupled with coconut oil makes for a perfect cheese texture that slices, shreds and melts beautifully! I am also often asked if the cheese taste like coconut. It really doesn't! I use refined or filtered coconut oil to cut back on some of the coconut flavor, and all the other ingredients like the nutritional yeast and spices help mask the flavor.

So, don’t be scared to try making your own vegan cheese at home! It’s so quick, easy and affordable. You will also likely impress friends and family with your new vegan kitchen skills! But most of all you will be able to enjoy cheese again!! Because I don’t want to live in a world where I can not eat some kind of cheese!! And now, nobody has to!

INGREDIENTS:

  • 1 can of full fat coconut milk or cream

  • 2 tablespoon of lemon juice

  • 2 teaspoons miso paste

  • 1 teaspoons of salt

  • 1/4 cup nutritional yeast

  • 1/4 melted cup triple refined coconut oil

  • 2 tablespoons agar powder

  • 3 tablespoons arrow root or tapioca starch

  • 2 teaspoons dried dill

COOKING INSTRUCTIONS:

  1. In a food processor or high speed blender, add all of the ingredients EXCEPT the milk, and agar.

  2. Pulse a few times to mix it all up.

  3. Now add the milk, and agar to a medium sauce pan and bring to a boil. Reduce heat and simmer until mixture thickens to the constancy of a thin pudding.

  4. Add the milk mixture to the ingredients in the food processor, and mix for about a minute. The mixture will quickly begin to thicken as agar begins to solidify at room temperature.

  5. Transfer to the mixture to a few ramekins or small bowls. You should be able to fill 2 or 3 small bowls.

  6. Allow the cheese to harden in the refrigerator uncovered for about several hours.

  7. Once the cheese is set, store in an airtight container in the fridge for about a week.


Vegan Strawberry Pop-Tarts

IMG_9515-2.jpg

I LOVE pop tarts! Love them. Over the years I have tried several variations of dough and filling.

I settled on this dough because the little bit of extra butter gives them a nice flakey crust, somewhere between a pop tart, and a toaster strudel.

If you don't like strawberries then I'm baffled, but its your pop tart, so fill it with any flavor jam you like. You can fill them with nut butter, maple butter, sweet vegan cream cheese....anything you want!

Just know that however you deiced to make them, they are surprising easy to make, and so good that you will probably want to just go ahead and make a double batch!

We have a family of 6 so these do not last!!! They keep well and will reheat nicely, too.

So if you have never made a homemade vegan pop-tart before, nows the time!


INGREDIENTS:

  • 1 cup whole wheat flour

  • 1 cup all purpose flour

  • 3/4 cup vegan butter

  • a pinch of salt

  • 3 - 4 tablespoons ice water

  • 3 tablespoons Strawberry jam

  • 1/4 cup powdered sugar

COOKING INSTRUCTIONS: 

  1. Preheat oven to 350.

  2. Add both cups of flour, butter, and salt to a food processor and pulse until well combined.

  3. Add in the water, one tablespoon at a time until a soft dough has formed.

  4. Roll the dough out on a flour dusted, smooth surface to a 1/8 of an inch thick rectangle. You can trim up the edges with a sharp knife, and save the scrap dough.

  5. Once the dough is trimmed and even, cut 3 inch by 5 inch rectangles from the dough, give or take. Be sure when you are calculating how many you can cut, to have a even number. Each pop tart needs 2 rectangles. Roll out any scrap dough and repeat the process.

  6. Scoop a teaspoon of strawberry jam onto a rectangle, and smear it around a bit in the middle, carefully to not get too close to the edges. ( this is where you are allowed to laugh at my careless smearing in the above picture..and notice in the next picture how that jam oozed out the sides when I pressed the edges of dough together....the whole do as I say, not as I do thing absolutely applies here)

  7. Top the jam covered piece of dough with another rectangle of dough, and use a fork to press, and seal the edges.

  8. Place pop tarts on a parchment lined baking sheet, or lightly spray one with cooking oil and bake for 20-25 minutes.

  9. While pop tarts are baking, mix together the powdered sugar with 1 teaspoon of jam and 1/2 teaspoon of water. If it is too thin you can add a little more powdered sugar to thicken it back up. You want a spreadable consistency.

  10. Once pop tarts have cooled a bit, spread the icing and serve.

Yields 8 pop tarts.

Layered Vegan Breakfast Pie with Quinoa Crust

This delicious and beautiful breakfast pie, combines layers of tofu quiche, with roasted tomatoes, and potatoes, all nestled in savory quinoa crust.

This delicious and beautiful breakfast pie, combines layers of tofu quiche, with roasted tomatoes, and potatoes, all nestled in savory quinoa crust.

INGREDIENTS:

Quinoa crust

  • 1 cup dry quinoa

  • 1/4 cup vegan cream cheese

  • 1/2 teaspoon thyme

  • 1/2 teaspoon garlic powder

Pie filling

  • 1 block firm or extra firm tofu

  • 1/4 cup plain plant based milk

  • 2 large tomatos

  • 2 medium sized russet potatoes

  • 3 green onions chopped

  • 3 tablespoons nutritional yeast

  • 1 teaspoon garlic powder

  • 1 1/4 teaspoons tumeric

  • 1 teaspoon onion powder

  • 1 teaspoon thyme

  • 1 teaspoon salt

  • pepper to taste

  • fresh basil for garnish

COOKING INSTRUCTIONS:

IMG_9319.jpg
  1. Wash potatoes, and leave the skin on. With a kitchen mandoline, thinly slice both potatoes. If you do not have a mandoline, you can VERY thinly slice them with a knife.

  2. Thinly slice the tomatoes.

  3. On 2 parchment-lined baking sheets, spread out the potatoes and tomatoes in a single layer. Lightly spray both pans of vegetables with some cooking oil, and sprinkle with a little salt. Bake at 400 degrees for 15 - 20 minutes.

  4. Cook quinoa according to package instructions.

  5. Once quinoa is cooled, mix in vegan cream cheese, 1/2 teaspoon garlic, and 1/2 teaspoon thyme.

  6. Press the quinoa mixture evenly into a lightly oiled pie pan, and set aside.

  7. Add drained tofu (no need to press it,) milk, nutritional yeast, garlic, and remaining seasonings to a high speed blender or food processor. Blend until mixture is completely smooth.

  8. Once the veggies are done, remove from oven and allow to cooled. Turn oven down to 350 degrees.

  9. Begin layering the pie by scooping 1/3 of the tofu mixture into the bottom of the quinoa crust. Next add half of the tomatoes in a single layer. Evenly spread another 1/3 of the tofu on top of the tomatoes. Now add all of the potatoes in an even layers, and sprinkle the green onions over them. Top potatoes with the remaining 1/3 of the tofu mixture and spread evenly. Evenly arrange the remaining tomatoes on top.

  10. Place pie in the the 350 degree oven and bake for 30 mintues.

  11. Allow pie cool a bit before adding some fresh basil leaves on top and serving.

Chocolate, Peanut Butter, Banana "Nice cream"

Banana "nice cream" is a pretty popular frozen treat these days. As it should be. It could not be easier to whip a batch of this yummy, and healthy frozen treat! I like to freeze our over-ripe bananas so that I always have some on hand when I get an…

Banana "nice cream" is a pretty popular frozen treat these days. As it should be. It could not be easier to whip a batch of this yummy, and healthy frozen treat! I like to freeze our over-ripe bananas so that I always have some on hand when I get an ice cream craving. You can easily omit the chocolate and nut butter, and add some fresh strawberries or other fruit to the mix!

INGREDIENTS:

  • 5 - 6  sliced, frozen bananas
  • 1/4 cup plant based milk
  • 1/4 cup cocoa powder
  • 1/4  cup nut butter
  • vegan chocolate chips or coconut for sprinkling (optional)

INSTRUCTIONS:

  1. Place all ingredients into a high speed blender or food processor, and blend until completely creamy. You will likely have to pause blending to scrape sides, or move the mixture around a little with a spoon to get it to fully blend. If it still seems too thick, you can add a tiny bit more milk. Just don't add too much, because you want the mixture thick.
  2. Seve right away with whatever toppings you like.

Serves about 4.

Beyond Meatball Stuffed Challah

IMG_9190.jpg

 The only thing better than vegan challah may just be stuffed vegan challah! And the only thing better than a meatball sub may just be a whole loaf of soft, delicious bread ,stuffed with cheesy, saucy, meatballs.

You read that correctly! Soft, fluffy, perfect vegan challah, stuffed with vegan meatballs, marinara, mozzarella.

It’s saucy, “meaty”, gooey, vegan cheesy magic, all wrapped into a warm fluffy challah bread.

It’s a meatball sandwich you can eat without worrying about the meatballs falling out the back and into your lap, and that will feed a whole family ( or maybe still just you if you are extra hungry!) This recipe actually makes 2 loaves so you can be stingy and there will still be one to share!

I promise vegan challah is easier than it may seem, and I also promise stuffing it with vegan meatballs (or anything else for the matter) is not that hard either!

We used Beyond Brand Meat for the meatballs because it is my favorite brand to use. You can use whatever is handy or easy to find. You can also use pre-made vegan meatballs if that is easier for you. I like Trader Joes brand if going that route!

For the cheese you can use store bought vegan mozzarella or fry your hand at making your own. We have serval mozzarella recipes on the the site. This vegan mozzarella cheese stick recipe can be molded in a bowl then easily shredded for this recipe. It shreds, slices, and melts really well!

This recipe hands down my favorite stuffed challah to make and eat! If you love challah and you love meatball subs, then this is gonna be your favorite too. I have zero doubts!


Challah

Follow the recipe for my basic Challah Y'all, Vegan Challah. You will follow the instructions through the first rise, then follow the below instructions for stuffing and braiding.

INGREDIENTS:

  • 4 thawed Beyond Meat Burgers or 1 lb of vegan ground mince

  • 1/4 cup panko bread crumbs

  • 1 teaspoon minced garlic

  • 1 teaspoon Italian seasoning (a mix of thyme, sage, basil, marjoram, rosemary, and oregano) if you do not have Italian seasoning feel free to add a combo of any of the listed spices

  • 1 teaspoon tomato paste

  • 1 flax egg

  • 1 bag vegan mozzarella shreds, like Follow Your Heart brand


Sauce

  • 1 onion, diced

  • 1 carrot, diced

  • 1 28 ounce can crushed tomatoes

  • 1/3 cup red wine (optional)

  • 2 teaspoons crushed garlic

  • 1 teaspoon salt

  • 2 teaspoons Italian seasoning

COOKING INSTRUCTIONS:


Meatballs

  1. Mix thawed burgers, panko bread crumbs, garlic, spices, and flax egg together in a bowl.

  2. Once well combined, form meatballs with a small scoop, or spoon, and place them on a baking pan. You can line the pan with parchment paper for easier clean up.

  3. Bake at 350 degrees for 30 minutes.

Sauce

  1. Sauté onions and carrots in 1 teaspoon of oil until onions are translucent with 1 teaspoon of salt in a large pot for 5 minutes.

  2. Add the wine, and let it cook for 2 minutes.

  3. Add the remaining ingredients, and let the sauce simmer for 30 minutes.

  4. Add the cooked meatballs, and let simmer in the sauce for 15 minutes.

Stuffing the Challah

  1. Once Challah has completed its first rise, remove from oven and separate dough in half. This recipe will yield 2 stuffed challah loaves.

  2. Cut each half into thirds. (each loaf will have three pieces of dough. Work with one loaf at a time, leaving the other three pieces of dough covered in a bowl until you are ready to use them)

  3. Take one piece of dough in you hand and begin to stretch it both length wise, and width wise and the same, time, letting gravity help with the length. You want the dough to be about 12 inches long, and maybe 4 inches wide. Once you have it stretched length wise, you can put it on a floured counter top and press it to get it the width stretched.

  4. Once your dough is the correct size, begin adding the meatballs in a row, it works best if you cut them in half. You can add a LITTLE sauce, but if the dough becomes wet on the edges, it WILL NOT seal together when pinched. So do not over fill. Sprinkle with vegan cheese shreds. Save the extra sauce for dipping, later.

  5. Once stuffed, bring the outside edges together, and pinch to seal.

  6. Repeat with the other two strands.

  7. Once all three strands are stuffed, and formed, carefully braid the three pieces together. If the seams begin to open, pinch them back and continue braiding. Tuck both ends of the loaf under when done braiding. Once again I will refer you to Tori Avey's challah braiding guide if you are unfamiliar with braiding challah! She does a fantastic job showing all the different ways to braid your bread, plus she has some really great recipes on her site.

  8. Repeat with the second loaf, and place both stuffed loaves on a baking sheet, and back in the oven to rise again for about 45 mintues. Once they have risen, remove from oven and pre-heat to 350.

  9. Brush tops of challah with some vegan butter.

  10. Bake both loaves for about 35 - 45 minutes. You can tap the tops to see if they sound a little hallow. It is hard to tell when stuffed challahs are done when there are wet ingredients inside, so if they do not seem cooked through after 35 minutes, let them keep cooking for 5 - 10 more minutes.

  11. Remove challah from the oven, and allow to cool some before cutting. Serve with reserved sauce for dipping.

IMG_9183.jpg
IMG_9186.jpg

Vegan Chocolate Chip Cannoli

IMG_9427-2.jpg

Holy Cannoli! It’s vegan cannoli!

I mean if you didn’t know this is a thing, it’s totally a thing! And they are so flipping delicious.

It was actually our 13 year old daughter who decided she wanted to make vegan cannoli. Ya’ll, she is 13! So if she can do it, you can too!

The shells take a little time but are worth it! So worth it! We don’t have a cannoli tube/maker, so made one out of foil. If you plan on making them often, I suggest investing in the the tube. But making your own totally works!


We also used tofu for the filling. We made it into a sweet tofu ricotta and it is super delicious! I love using tofu to make sweet and savory ricottas. The texture is creamy perfection and the chocolate chips add just the right bite.

You could dip your finished cannoli in chocolate, sprinkles, pistachios, whatever. We just wanted to give you the basic recipe and beyond that, get as creative as you want.


Just remember to fill the shells when you are ready to eat them. They tend to get a little soggy if you fill them and let them sit for extended period of time.

So, go forth and make cannoli! Just because you are vegan does not mean you cant’t enjoy the same treats as everyone else. Cannoli included!!


The Dough:

  • 2 cups all purpose flour

  • 1 tablespoon sugar

  • 1/4 teaspoon salt

  • 2 tablespoons plus 2 teaspoons vegan butter, like Earth Balance

  • 1 egg replacement , we used store bought powdered egg replacement for this recipe

  • 1/2 cup dry white wine

  • enough oil for frying.

The Filling:

  • 1 package firm organic tofu (drained)

  • 1/2 cup powdered sugar

  • Juice from one lemon

  • 1 teaspoon cinnamon

  • 1/4 teaspoon salt

  • 1 teaspoon vanilla

  • 1/4 cup mini vegan chocolate chips


Instructions for the Dough:

  1. In a medium sized bowl, mix dry ingredients.

  2. Add in the cold vegan butter to the dry ingredients. Using your hands, mix the butter in until you have a rice like, crumble.

  3. Add the flax egg, and wine, and work mixture with your hands until a soft dough has formed. If it seems too dry, add another teaspoon or two of wine until it comes together.

  4. Flatten dough into a disk, and wrap in plastic wrap. Pop the dough in the fridge to rest while you make the filling.

Instructions for Filling:

  1. Add all of the filling ingredients EXCEPT the chocolate chips to a high speed blender, or food processor. Mix on high until filling becomes completely smooth.

  2. Once smooth, fold in the chocolate chips with a spoon. Place in fridge until ready to use.

Making the Cannoli:

  1. Remove dough from the fridge, and roll it out to about 1/8 of of an inch thick. You want the dough very thin.

  2. Cut 3-4 inch circles from the dough with a circle cookie cutter, or the rim of a drinking glass.

  3. You should be able to get about 20 circles from the dough.

  4. You will need a cannoli mold, OR you can make some with some aluminum foil (pictured above.) Take 4 sheets of foil, you want tear the foil at about 4 inches. So your sheets will be 4x12 inches. Start rolling the first sheet at the short end into a tight tube. Begin rolling that tube into another sheet, and so on, until all sheets of foil have been used up. Now you have a foil tube. You can make 3 or 4 tubes to make frying a little faster. The tubes get very hot so you will have to wait for them to cool each time before you start another batch.

  5. Heat a deep skillet (I just used a small/medium cast iron skillet) with an inch or two oil on medium heat.

  6. Take a circle of dough and wrap it around your mold. Brush the dough with a tiny bit of water at the seams to help seal them. Use your fingers to flare out the edges just a tiny bit.

  7. Take some metal tongs, and place the cannoli into the hot oil. Let cook for 15 to 20 seconds on one side, then turn it. It will begin to brown instantly. You only need to cook each one for a minute or less. Be carful because the foil tubes will hold oil. When you pick the cannoli up out of the pan, hold it vertically above the pan with your tongs, and allow the extra oil to come out before placing on a wire cooling rack.

  8. After a minute or so, allowing the cannoli to cool, grab the tube with the tongs in one hand, use a paper towel in the the other hand to help you carefully pull the cannoli off the tube. I like to place the still hot foil tubes on a plate, and stick them in the freezer for a few mintues to let them cool enough to handle before starting the next batch of cannoli shells.

  9. Repeat this process until you have fried all of the dough.

  10. Once all of the cannoli shells are done and cooled, fill a piping bag, or large zip lock with the filling. If using a zip lock, snip a corner with some scissors. Pipe the filling into the shells, and dust with some powdered sugar.

 The shells will store well at room temperature, so if not serving immediately, wait to fill the shells until ready to serve. 

IMG_9409.jpg

Meaty Vegan Potato Knish

IMG_9157.jpg

If you have had knish then you know just how delicious they are, and if you haven't, I promise you won't be disappointed.

Knish originated as an Eastern European Jewish street food. Traditionally filled with mashed potatoes and minced meat, these days you can them filled with just about anything.

We often fill them with meat and potatoes, or sautéed veggies and cheesy potatoes. The dough is actually really easy to make. The rolling and cutting of the dough is also easy once you understand the process, so we have added step by step pics to help!

Don’t worry if your first batch or two are not super pretty! They will still taste delicious. I think this is just one of those recipes that practice makes perfect. And once you make them once, ou will likely want to make them all the time. So you will be a knish pro before you even know what happened.

Once again, I am southern, so I take every opportunity to smother almost everything in gravy, giving this traditional dish a southern twist. Feel free to omit the gravy! They are just as good without!

Knish also freeze really well, making them a great meal prep item. We normally double our batch and freeze half. Just thaw and reheat in the oven. Cook once, eat twice is my favorite!

Finally, if you are not a fan of faux meat, feel free to replace it in this recipe wth some minced and sautéed mushrooms, or walnut meat. Both would be just as tasty!


INGREDIENTS:

The Filling

  • 2 Thawed Beyond Meat burgers, or half a bag of meatless crumbles, or 1 cup minced seitan flank steak

  • 2 medium sized potatoes

  • 1/2 onion

  • 1/3 cup vegan cream cheese

  • 1 teaspoon of thyme

  • 1/2 teaspoons salt

  • pepper to taste

  • 2 teaspoons cooking oil

Knish dough

  • 2 1/2 cups all-purpose flour

  • 1 teaspoon baking powder

  • 1/2 teaspoon salt

  • 1 flax egg

  • 1/2 cup oil, I use grapeseed, but you could use vegetable or even coconut if you want

  • 1 teaspoon apple cider vinegar

  • 1/2 cup water

  • vegan butter for brushing

Brown onion gravy

  • 3 cups of water

  • 3 tablespoons all purpose flour

  • 1 small onion, diced

  • 1 teaspoon minced garlic

  • 2 teaspoons reduced sodium Better Than Bouillon

  • 1 tablespoon tomato paste

  • 2 teaspoons dijon mustard

  • salt and pepper to taste

COOKING INSTRUCTIONS:

Knish Dough:

  1. First prepare the dough by mixing the dry ingredients together in large bowl.

  2. In a smaller bowl mix the oil, water, vinegar and flax egg together, then add to the dry mix.

  3. Work the dough with your hands until it is well combined.

  4. Kneed the dough for a few minutes, just until smooth.

  5. Place dough back into the bowl, and cover with plastic wrap.

  6. Pop it in the fridge for one hour to rest.


The Filling:

  1. Begin preparing the filling by peelinig, and dicing the potatoes to a very fine dice.

  2. Dice onion to a very fine dice as well.

  3. In a large skillet on medium heat, add a teaspoon or two of oil, onions, and potatoes. Cook the veggies until the potatoes are cooked through. It wont take too long since they are cut so small.

  4. Now add the thawed burgers (breaking them up with a spatula,) or meatless crumbles, and seasonings to the pan with the potatoes. Continue cooking until the "meat" is cooked through.

  5. Transfer mixture to a medium sized bowl, and let cool for 5 minutes. Mix in the cream cheese until well combined. Set pan aside to use later for the gravy. Don't wash the pan.


Making the Knish

pre-heat oven to 350 degrees

  1. Remove dough from the the fridge and roll it out on a big floured surface (a counter top works best, you need a lot of room) into a large rectangle. The dough should be about a 1/4 inch thick. It's ok if you cannot get it into a perfect rectangle, you can trim up the edges with a sharp knife to even it out. You can save the scrap dough and roll it back out, adding any left over filling you may have to yield a few more knish.

  2. Now at the edge of the dough closest to you, form a log 2 inches wide by 1 inch thick (give or take) with your filling, the length of the dough.

  3. Once all of the filling is in place, start rolling the dough (starting on the filling end) trying to get the roll as tight as you can, without having the filling squish out the ends. Before you come to the end, brush some water along the edge of the dough to help seal the seam.

  4. You now have a long log of dough. Starting at either end of the dough, measure in about 3 inches from the end and pinch, then twist the dough. Cut the dough on the twist, and place twist side up on a parchment-paper-lined baking sheet. Take your finger and poke the twist down into the center of the knish. Repeat with the remaining dough. You will get about 8 knish depending on the length of your original dough rectangle , and how big you make each knish. You may have some scrap dough, and extra filling that you can use to make a few more, as well.

  5. Brush the tops of the knish with some vegan butter and bake for 30 - 35 minutes. You can brush some more butter on mid bake if you like. This will help the knish brown a little better.

  6. As the knish are baking, prepare the gravy by sauteing the onions and garlic in the same pan you used for your filling, with a few teaspoons of vegan butter over medium heat. Once the onions are translucent, sprinkle on the flour and stir, letting it cook for a few minutes. Whisk the water, Better than Bouillon, tomato paste, and mustard together, then add to the pan. Reduce the heat to low, add salt and pepper, and let simmer, stirring regularly, until the gravy begins to thicken.

  7. Once knish are done, you can top with the gravy, and garnish with some fresh parsley.

The knish freeze, and reheat really well. We often make a double batch, and freeze half. They should be good in the freezer for up to one month. 

Easy Tofu Quiche Cups

IMG_9095.jpg

Tofu, it’s magic, am I right?!?!?

You can sauté it, fry it, bake it, turn it into cheese, and even use it as a really convincing egg substitute.

Did you know you can blend it right up with a few more ingredients and get an amazing and healthy quiche?

And for all of you that are gluten free, just skip the crust and bake your tofu vegan quiche right in a muffin pan. Aren’t they cute??

You can add any veggies you like to the recipe, whatever you have on hand, vegan sausage, bacon, or cheese The sky, errrrr, the muffin pan is the limit. What I meant to say is just don’t overfill the cup or you will have a mess on your hands.

These little beauties reheat like a dream and that makes them perfect for meal prep and an easy grab and go breakfast or lunch!

So for all of y’all that think tofu is gross or boring or you just don’t know what to do with it, here is a solid idea for breakfast, lunch, or dinner. It’s easy, healthy, and super delicious! So really these are a no brainer!


INGREDIENTS:

  • 1 package extra firm tofu

  • 1/4 cup plant based milk

  • 2 tablespoons nutritional yeast

  • 1 teaspoon turmeric

  • 1 teaspoon powder garlic

  • 1 teaspoon salt

  • 1/2 teaspoon pepper

  • 2 cups chopped brocoli

  • 1/2 medium onion diced

  • 1/4 bell pepper


COOKING INSTRUCTIONS:

  1. Preheat oven to 350 degrees.

  2. In a medium sized skillet, spray a little cooking oil and add the veggies. Sauté until the onions become translucent, then remove from heat.

  3. Add the remaining ingredients to a food processor, or a high speed blender, and blend until the mixture is completely smooth.

  4. Dump the veggies into the tofu mix, and pulse just a few times to mix them up.

  5. Spray a muffin tin with some spray oil, and divide the mixture evenly. The mixture will yield 6 - 8 cups depending on how full you fill the muffin cups.

  6. Bake the quiche cups for 25 - 30 minutes. They are done once they begin to brown, and you can pull them away from the side of the pan easily.

  7. Store leftovers in the fridge.


Vegan Spanakopita Triangles

IMG_8889.jpg

INGREDIENTS: 

  • 1 package phyllo dough 
  • 1 pound baby spinach, roughly chopped
  • 3 green onions, chopped
  • 1 cup vegan feta
  • 1/3 tofu ricotta
  • 1 tablespoon minced garlic (or 2 cloves garlic minced)
  • Juice from half a lemon
  • 2 tablespoons fresh dill
  • 1 teaspoon salt
  • 1/2 teaspoon pepper

COOKING INSTRUCTIONS:

Preheat oven to 350 degrees

  1. Following phyllo package instructions for thawing the dough. Normally the package says to thaw in the fridge over night. If you did not do that, you can leave it on the counter, and allow to thaw for 2 hours, still in the box. 
  2. Heat a large skillet on medium heat, add a few teaspoons of oil, and saute the onions and garlic for a few minutes.
  3. Begin adding the spinach in batches to the pan, allowing it to cook down before adding more. Continue until all of the spinach has been added, and it has just wilted. 
  4. Crumble up the feta a bit in a large bowl, then mix in the ricotta, lemon, dill, salt and pepper. 
  5. Add the spinach mixture to the bowl and stir.
  6. Carefully remove the thawed phyllo from the package, and lay it out flat.
  7. You want 4 sheets stacked together, so carefully remove one sheet at a time, lay flat, and spray or brush with some cooking oil. Repeat until you have 4 pieces stacked. Be sure to also spray or brush the top sheet. Repeat this process with the remaining sheets of phyllo dough.
  8. Using a pizza cutter, or a sharp knife, divide and cut each stack of dough into 4 - 6 equal strips, the strips should be about 3 - 4 inches across each.
  9. Take about 2 tablespoons of filling, and place at one end of a dough strip. Form the filling into a triangle shape, and start folding the dough over, from one side to the other, until you reach the end.
  10. Repeat with remaining strips, and place triangles on a parchment paper lined baking sheet.
  11. Bake for 30 - 35 minutes.
  12. Serve with Lemon tahini dip.

Yields about 2 dozen triangles.

IMG_8864.jpg

Green Goodness Vegan Cheese Ball

IMG_9124.jpg

Vegan cheese balls are so easy to make, and pretty quick too.

Combining cashews, herbs, and some pantry staples, you can make a delicious vegan cheese ball at home in no time at all.

You can use a high speed blender or a food processor to make this recipe. You just need something powerful enough to completely break the cashews down until they are creamy and smooth.

You will actually get 2 -3 cheese balls out of this recipe and they will keep in the fridge for about a week. So even though you are using cashews, it is pretty affordable recipe for the amount of cheese you get in the end!

If you are allergic to cashews or are just not a big fan, you can also use sunflower seeds. Use the same quantity and follow the same instructions as you would for the cashews.

Also make sure to use filtered or refined coconut oil in this recipe. It is often labeled as has no coconut flavor unlike regular coconut oil. You can use regular coconut oil just be aware that it will alter the favor of the cheese ball.

This vegan cheese ball uses green onion, lemon and a mix of herbs to make it zesty and deliciously flavorful. You could toss in any herb you have on hand. I often toss in some fresh dill or sometimes cilantro if I have any on hand. Use what you have or what you like!

This herbed vegan cheese ball is perfect for serving with cracker, veggies, or it is even delicious spread on a sandwich. It is also pretty tasty on top of some grilled portobello mushrooms or tofu!!


INGREDIENTS: 

  • 1 cup cashews, soaked in hot water for a few hours or microwaved for 3 minutes, then drained

  • 1/2 cup filtered coconut oil

  • 2-3 teaspoons minced garlic depending on preference

  • 2 teaspoons dijon mustard

  • 3 tablespoons nutritional yeast

  • Juice from 1 lemon

  • 1 tablespoon apple cider vinegar

  • 3 green onions, chopped

  • 3 tablespoons, chopped fresh parsley

  • 1 teaspoon salt


COOKING INSTRUCTIONS:

  1. Add all of the ingredients EXCEPT green onions and parsley to a high speed blender or food processor (I actually prefer a food processor for this).

  2. Process until the mixture is completely smooth. I have noticed because of the volume of the mix, it takes some doing in the vitamix. If using a vitamix you will have to scrape the sides down several times, and use your plunger to keep pushing the mixture down while it blends. It will work, it will just take some time.

  3. Once mixture is completely smooth, drop in your onions and parsley, and pulse until the greens are broken down and incorporated.

  4. Line 2 small bowls, or larger ramekins with enough plastic wrap that it hangs over the sides a good bit.

  5. Evenly divide the mixture between the bowls, pull up the plastic wrap and twist at the top, sealing up the cheese.

  6. Refrigerate for 3 - 4 hours, or until the cheese is firm. If you are in a hurry, you can pop it in the freezer for a bit, then transfer it to the fridge.

  7. Store the cheese ball in an airtight container in the fridge for up to a week.

Yields 2 cheese balls.

Southern Vegan Banana Pudding

IMG_8660.jpg

I am from the south, and in the south we eat banana pudding...not with cool whip, not with cream cheese, but with nilla wafers, bananas, vanilla pudding, and meringue. Anything else, and my Grandmama might have slapped you. Pre vegan, I made banana pudding all the time. Every holiday, every party. So naturally it was one of the first recipes I attempted to veganize. I won't lie, it took me MANY attempts, and a 12 year old baking wonder of a daughter to get it right. She perfected the vegan wafer, while I worked on the pudding. Topped with the most delicious aquafaba meringue, and you have a banana pudding your own southern Grandmama might be willing to try.

INGREDIENTS:

  • 5 - 6 ripe bananas, sliced

Vegan vanilla wafers

  • 2 1/2 cups all purpose flour
  • 1 cup vegan butter
  • 1 cup powdered sugar
  • 1/2 cup white sugar
  • 1 teaspoon salt 
  • 1 tablespoon vanilla extract
  • 1/2 cup plant based milk (oat milk works really well when wanting baked goods to brown, but any plant based milk will work)

Pudding

  • 3 1/2 cups almond milk, divided
  • 1/4 cup corn starch
  • 3/4 cups white sugar
  • 2 teaspoons vanilla extract
  • 1/2 teaspoon salt 

Meringue

  • Liquid from 1 can of chick peas
  • 2/3 cups sugar
  • 1/4 teaspoon cream of tarter

COOKING INSTRUCTIONS:

Cookies

  1. Preheat oven to 350 degrees.
  2. With an electric hand mixer, beat the butter, and both sugars, until soft and creamy.
  3. Add in the milk and vanilla, and mix into the sugar and butter . The batter will look weird, and separated, but will come back together, don't worry.
  4. Beat in the flour and salt a little at time until well mixed.
  5. Pour batter into piping bag, or a zip lock bag with a hole cut in the corner, and pipe one inch circles onto a cookie sheet lined with parchment paper.
  6. Bake cookies for 20-25 minutes.

Pudding

  1. In a medium sized pot, add 3 cups milk, vanilla extract, salt, and sugar.
  2. Heat on medium heat, and whisk until the sugar is disoloved.
  3. In a small bowl, whisk the remaining 1/2 cup of milk, and corn starch together until well combined, adding mixture to the pot.
  4. Whisk well, and continue stirring, letting the mixture simmer until it begins to thicken. Once it thickens, let simmer a few more mintues, and then remove from the heat.
  5. It may still seem a little thin, but will get thicker in the fridge.

Meringue

  1. Microwave the sugar and chickpea liquid for 30 seconds, stir and repeat in 30 second intervals, until the sugar is dissolved.
  2. Add the liquid, and cream of tarter to a stand mixer. If you do not have a stand mixer just make sure the mixture is in a nice big bowl, and use an electric hand mixer.
  3. Beat the mixture on high until it thickens, and stiff peaks form. You want it to look like a fluffy, glossy, perfect cloud of meringue! This can take up to 10 minutes, so don't give up if nothing happens for a while. It will get there.

Layering the pudding

  1. In medium sized glass serving bowl, one that can go into an oven, start by adding some pudding to the bottom, then a single layer of wafers, and finally a layer of bananas.
  2. Repeat layering until all ingredients are gone, then top with a thick layer of meringue.
  3. Turn oven to broil, and place pudding inside, keeping the oven door OPEN. You will have to watch the pudding the whole time because it only takes a second for it to burn to a crisp. Trust me, I've lived it.
  4. It will only take a few seconds for the peaks to begin to brown. Once they do, remove from the oven and let cool before serving. 
  5. Serve warm, or refrigerate for a bit if you prefer it cold.
IMG_8667.jpg

Grilled Peaches with Maple and Vegan Ricotta

IMG_8625.jpg

These grilled peaches are such an easy, and delicious summer dessert. The warm sweet, and tart peaches, paired with the creamy maple ricotta is summer perfection.

My daughter adores all things peaches and peach season happens to coincide with grilling season. So since I I grill any chance I can get, it was an obvious choice to throw some peaches onto the grill and top them with some easy tofu ricotta.

We decided to give the peaches a drizzle of maple and top them with some sliced almonds for a nice crunchy contrast and truly they are just there perfect healthy, easy, summer time dessert!

If you can’t find any peaches I am certain this would also be just as tasty with a nectarine.

So, the next time you are grilling up dinner, toss on a few peaches, whip up some quick tofu ricotta, and dessert is done in minutes.


INGREDIENTS:

  • 4 - 6 peaches

  • 1 package firm tofu

  • 3 tablespoons maple syrup

  • 1 lemon

  • 1/4 teaspoon salt

  • 1 teaspoon cinnamon

  • 1 teaspoon vanilla extract

  • 1/4 cup sliced almonds (optional)

  • More maple for drizzling


COOKING INSTRUCTIONS:

  1. Prepare peaches by rinsing with skin on. Cut peaches in half and remove pit.

  2. In a blender, or food processor, add drained tofu with juice from 1 lemon, maple syrup, vanilla, salt, and cinnamon. Process until completely smooth.

  3. Spray grates of grill with cooking oil, and heat.

  4. Spray or brush the cut side of the peaches with a little oil, and place face side down on the heated grill.

  5. Grill peaches for about 10 minutes, or until nice grill marks have formed.

  6. Flip peaches, and grill the other side for about 5 minutes.

  7. Remove from grill, and let cool for a few minutes.

  8. Add a scoop of the tofu ricotta in the dips of the peaches, sprinkle with almonds, and drizzle with maple syrup to serve.

Serves 4-6


Grilled Watermelon and Tofu Tacos

IMG_8615-2.jpg

Ok, so I know watermelon and tofu tacos may seem weird, but trust me, they are delicious!

When the weather is nice, I would way rather grill than cook in my kitchen. I love to be outside and love not having a mess to clean up inside.

I will now speak for my husband and say watermelon is maybe one of his top 3 favorite foods of all time. When watermelon is in season, we always have one sliced up in the fridge! If I am being honest, on its own, its not my fave. I don’t dislike watermelon but I don’t normally crave it, either.

In an effort to use up the piles of watermelon on my counter or in my fridge, I decided to get creative. I have seen other grilled watermelon dishes and decided what the heck….why not tacos, and why not paired with tofu! I really liked the idea of a savory marinade of the tofu paired wit the sweet watermelon, and y’all, it WORKS!! It works and I really, really love it!!

Seriously, just toss the marinated tofu on the grill with the water melon slices. So easy. You can heat the tortillas right on the grill, too. I used corn but if you prefer flour, thats fine too! The sauce is also super simple and really quick to mix up. The tangy balsamic mixed with the creamy mayo and garlic is just simple perfection!

So, don’t be weirded it out and just try these tacos. I think you will be super surprised how good grilled watermelon on a taco actually is! Change up that taco Tuesday with these grilled watermelon and tofu tacos!!


INGREDIENTS:

  • 1 package extra firm tofu

  • 4-5 slices of watermelon with the rind still on

  • 1/3 cup cilantro, chopped

  • 1/2 red onion, thinly sliced

  • 1 avocado, thinly sliced

  • corn or flour tortillas

  • jalapeño slices (optional)

Sauce

  • 3 tablespoons vegan mayo

  • 2 tablespoons balsamic vinegar

  • 1 teaspoon minced garlic

  • salt and pepper to taste

Tofu Marinade

  • Juice from 1 lime

  • 2 tablespoons balsamic vingar

  • 1 teaspoon minced garlic

  • 1/2 teaspoon salt


COOKING INSTRUCTIONS:

  1. Wrap tofu in a clean kitchen towel or a few paper towels, and place a few books on top for about 15 minutes. This helps remove excess liquid.

  2. Cut tofu into 1 inch strips, and soak in the marinade for 15 - 20 minutes.

  3. Heat your grill and place a cast iron, or an oven safe skillet on the grill to heat. If you do not own either skillet, you can cook your tofu on the stove top in whatever frying pan you have.

  4. Once the grill, and pan have heated, add tofu and the marinade to the pan, and close the grill lid.

  5. Check on the tofu in about 10 minutes, turning the pieces. Continue letting the tofu cook until all the marinade is absorbed, and the tofu begins to brown. You may need to turn pieces several times.

  6. Spray or brush the watermelon with some cooking oil, and add the slices to the grill. Allow them to grill for several minutes on each side or until they have nice grill marks on them.

  7. You can add the tortillas to the grill on the top rack for a few minutes if you have room, or heat them in your oven.

  8. Once watermelon and tofu are done, carefully remove from grill, (make sure to grab the pan handle with an oven mitt,) and cut watermelon off the rind in bite size pieces.

  9. Whisk together the ingredients for sauce, and build your tacos by adding a slice of tofu, some watermelon, avocado, onion, and cilantro.

  10. Drizzle with creamy balsamic sauce, and top with jalapeño slices.

IMG_8604.jpg

Black and White Vegan Chocolate Cheese Ball

This sweet and creamy chocolate cheese ball is perfect for serving with fruit or cookies at your next get together. It is also makes for a great anytime snack, or dessert. Cheese balls don't always have to be savory, and this one proves it!

This sweet and creamy chocolate cheese ball is perfect for serving with fruit or cookies at your next get together. It is also makes for a great anytime snack, or dessert. Cheese balls don't always have to be savory, and this one proves it!

INGREDIENTS:

  • 1 cup cashews soaked in hot water for a few hours or microwaved for 3 minutes then drained
  • 1/2 cup refined coconut oil 
  • 1 teaspoon vanilla extract
  • 1/4 cup maple syrup or maple butter
  • 1/4 teaspoon salt
  • 1/2 teaspoon cinnamon (optional)
  • 2 - 3 tablespoons plant based milk
  • 1/2 cup mini chocolate chips (if you only have regular, give them a pulse in the food processor first to break them up a bit)

Chocolate coating

  • 3 tablespoons cocoa powder 
  • 3 tablespoons refined coconut oil
  • 2 tablespoons maple syrup

COOKING INSTRUCTIONS:

  1. Add all of the ingredients except the chocolate chips to a food processor, and blend until it becomes completely smooth. You may need to add the third tablespoon of milk if it seems too thick.
  2. Add the chocolate chips and fold in with a spoon.
  3. Line 2 small bowls, or ramekins, with a pieces of plastic wrap. You want a piece big enough that it will hang a good bit over the sides. 
  4. Divide mixture evenly into the bowls. Now take the plastic wrap hanging over the edges, bring together and twist to seal up the cheese. Allow to harden in the fridge for 3 - 4 hours to firm up.
  5. Once cheese is ready, whisk together the chocolate coating ingredients until smooth.
  6. Remove both cheese balls from the bowls, and plastic wrap. Dip the bottom halves into the chocolate coating. It will instantly begin to harden because the cheese is cold. 
  7. Put cheese balls in an airtight container and store in the fridge for up to 5 days.

serve with fruit or cookies 

Vegan Soft Frosted Sugar Cookies

IMG_8513.jpg

Before we went vegan, soft iced sugar cookies from the grocery store bakery were my kids favorite.

The thing they would beg for, and I would say no, and they would beg and I would say no, and they would beg some more….and if you have kids you might be very familiar with this grocery store scenario.

I would normally only cave on holidays or special occasions, but once we went vegan, that all changed.

Our daughter Peyton is a baking wonder and decided a few years back to try her hand at baking her favorite old cookies, and as usual, she nailed it. And now is cookie baking hero to her sisters and brother.

We made our first batch for the 4th of July but you could decorate them any way like for any holiday or a random Monday.

These vegan sugar cookies are soft and buttery, and have the perfect amount of frosting on top. It’s no wonder my kids love them so much, I love them just as much.

And if my at the time 12 year old can bake up a batch of cookies this perfect and beautiful, I am pretty sure you can too!


INGREDIENTS:

  • 3 cups all purpose flour

  • 1/2 teaspoon baking powder

  • 1/2 teaspoon baking soda

  • 1/4 teaspoons of salt

  • 1/2 cup vegan butter

  • 1 cup white sugar

  • 1 teaspoon vanilla extract

  • 2 egg replacers (in this recipe we use store bought powdered egg replacer)

  • 3/4 cups vegan plain yogurt


Frosting

  • 1/3 cup vegan butter

  • 1/4 cup vegan shortening

  • 4 cups powdered sugar

  • 1/2 teaspoon vanilla

  • 1/2 teaspoon lemon extract (optional, you can use 1 full teaspoon vanilla if leaving this out)

  • 2 - 3 tablespoons plant based milk

COOKING INSTRUCTIONS:

  1. For the cookies, mix all dry ingredients together in a bowl.

  2. In another bowl beat together butter, and sugar until just combined.

  3. Mix the yogurt, egg replacer, and vanilla with the butter and sugar.

  4. Slowly add the dry ingredients to the wet, about 1/2 cup at a time, until well combined.

  5. Divide the dough in half, wrapping in plastic wrap, and refrigerate for 2 - 3 hours.

  6. Once dough is ready, roll it out to 1/4 inch thickness and cut circles with a 2 inch cookie cutter, or using the rim of a small glass.

  7. Bake at 425 degrees for 6 - 7 minutes, depending on the oven. They will still be very soft, but not doughy. Do not let them over bake!

  8. Let cookies cool and prepare frosting.

Frosting

  1. Beat the butter and shortening together with an electric mixer.

  2. Add in the vanilla extract and salt.

  3. Slowly beat in the powdered sugar.

  4. Add just enough milk to get the icing to a spreadable consistency.

  5. Spread frosting on cookies, and cover with sprinkles.

IMG_8551.jpg

Gluten Free Vegan Waffles

IMG_8017.jpg

Some years ago my friend Deanne introduced me to The Little Insanity website. The all purpose gluten free flour mix recipe has since become my go to! It has worked great in every recipe I have ever used it in!   If you are looking for a fail proof flour blend, check it  out, along with the rest of their Gf and vegan recipes. Not that kind of vegan Is another great  website to check out for a smaller batch  Gf flour blend and other GF vegan recipes. You can just as easily use a store bough gluten free flour blend, I have just learned over time that I am far more pleased with the ones I have made at home!  So check out both of these GF flour blends, and whip up a batch of these easy and tasty waffles!

INGREDIENTS:

  • 1 3/4  all purpose gluten free flour blend. If your blend does not have xanthan gum in it, you will need to add 1/8 teaspoon
  • 1/4 almond meal (or another 1/4 cup GF flour)
  • 1 3/4 cups dairy free milk
  • 1/4 cup maple syrup
  • 1/4 cup melted coconut oil
  • 1 teaspoon vanilla
  • 1/4 teaspoon salt
  • 2 teaspoons baking powder
  • 1 flax egg

COOKING INSTRUCTIONS:

  1. Whisk together dry ingredients in a small bowl.
  2. In a larger bowl, mix milk, flax egg, vanilla, maple syrup, and melted coconut oil.
  3. Add the dry ingredients into the wet ingredients and mix well.
  4. Heat waffle iron on med/high heat and add 1/4 of your batter, following your waffle iron's cooking instructions. 

Yields 4 regular size waffles.

Tofu Bibimbap

IMG_8402.jpg

Bibimbap is a Korean rice bowl that is normally served with beef and fried egg, but it is super easy to veganize this dish. Tofu is a great protein substitute for biminnbap, plus you can add any veggie you like or that you have on hand, making it a perfect, quick weeknight dinner.

INGREDIENTS:

  • 1 block extra firm tofu
  • 2 carrots 
  • 1 cucumber
  • 4 cups spinach
  • 4 scallons 
  • 1 cup bean sprouts
  • 1 tablespoon sesame seeds
  • 4 cups rice 
  • cilantro(optional)
  • vegan kimchi (optional)

Tofu marinade

  • 3  tablespoons coconut aminos
  • 1 teaspoon minced garlic
  • juice from 1 lime

Bibimbap sauce

  • 4 tablespoons sweet chili sauce 
  • 2 tablespoons brown sugar
  • 1 tablespoon coconut aminos 
  • 1 tablespoon water
  • 2 teaspoons rice or apple cider vinegar
  • 1 teaspoon minced garlic
  • 2 teaspoons toasted sesame seeds (optional)

COOKING INSTRUCTIONS: 

  1. Prepare rice according to package instructions, or in a rice cooker.
  2. In a medium size bowl, whisk together the ingredients for the sauce and set aside.
  3. Wrap tofu in a few paper towels, or a clean kitchen towel, and stack a few books on top for about 15 minutes to remove excess liquid. Once ready, cut tofu into small cubes.
  4. Whisk together the tofu marinade and let tofu marinate for about 15 minutes while you prepare the veggies.
  5. Thinly cut carrots into match sticks.
  6. Thinly slice the  cucumber.
  7. Chop the green onions, white ends included.
  8. In a large frying pan, on medium heat, add a few teaspoons of oil, tofu, and the marinade. Cook until all of the liquid is absorbed and the tofu begins and starts to crisp.
  9. Once the the tofu is done, remove from pan, and add 1 tablespoon of water back to the same pan. Begin adding the spinach in batches and let it cook just until it begins to wilt.
  10. Begin building your bowl by first adding rice, then arranging the veggies, and tofu around the bowl. 
  11. You can sprinkle some sesame seeds and chopped cilantro on top if you like. You can also add some vegan kimchi for some spice.
  12. Drizzle with sauce and serve.

serves 4-6


Vegan Pigs in a Blanket (carrot dogs)

IMG_8457@0,25x_2.jpg

We regularly make carrots dogs, so making vegan pigs in a blanket with tiny carrots seemed like the perfect party idea.

This recipe is quick and easy.

The best kind!

Just boil, and marinate the carrots, wrap them in some crescent dough, bake, and you are good to go.

These pigs in a blanket are perfect for parties, or just a healthy little snack!

Just add mustard and you are ready to snack


INGREDIENTS:

  • 1 package baby carrots (you need 32 baby carrots, which is about a small bag)

  • 2 cans of store bought crescent dough (most brands are plant based, but read the ingredients on the back to be sure)

  • 1/2 cup vegan parmesan (optional)

The carrot marinade

  • 1/4 cup coconut aminos

  • 1 table spoon maple syrup

  • 1 teaspoon of the following: garlic powder, salt, mustard powder, smoked paprika, turmeric

  • 3 teaspoons liquid smoke

  • 1 tablespoon grape seed oil

  • 2 tablespoons water


COOKING INSTRUCTIONS:

  1. Mix marinade ingredients in a 9x13 baking dish, or a large zip lock bag.

  2. Boil baby carrots until they are just soft enough to poke a fork in. Be careful not to get the too soft though.

  3. Drain carrots and add them to your marinade.

  4. Let the carrots marinate at least 6 - 7 hours. You can start them in the morning and have them for dinner, or marinate them over night for the next day.

  5. Remove crescent dough from package and cut each triangle of dough in half, creating 2 triangles from each crescent.

  6. Place carrot on the widest end of the triangle and roll to the end.

  7. Arrange pigs in a blanket on a cookie sheet. Two packs of crescents yields 32 pigs in a blanket, so you will need 2 cookies sheets. (You can easily half this recipe, and use only one can of crescents, and half the carrots)

  8. Bake according to crescent package instructions, or for about 10 - 15 minutes at 350.

  9. Once pigs in a blanket are done and cooled, you can roll them in some vegan parmesan for extra zip, or leave them as is!

IMG_8431.jpg
IMG_8432.jpg

Smoky Coconut Milk Gouda

IMG_8412-2.jpg

I make a lot of vegan cheeses with cashews, but it is always nice to have an alternative for those with nut allergies.

There are a lot of recipes out there for coconut milk gouda, and after experimenting with different ones, I finally settled on using coconut milk and adding the coconut oil to help firm up the cheese a bit more! Always look for filtered coconut oil because it does not have strong coconut flavor like regular coconut oil.

People always ask me if coconut milk cheeses taste like coconut and I don’t think they do. All of the other ingredients in the cheese help mask coconut taste.

This cheese is super quick to make and perfect for a beginner. Agar agar makes a quick set cheese, meaning you will have a firm cheese that will slice and shred, start to finish, in just a few hours.

You can easily find agar agar powder on line at Amazon or at your local Asian food market.

You can also omit the liquid smoke and add some dill, or garlic to change up the flavor. You could also add a teaspoon of turmeric, and smoked paprika for a cheddar flavored cheese!

So don’t be intimidated by vegan cheese making, y’all!! It can be quick and really easy! It is also far more affordable and taste better than most store bough versions! So what are you waiting for! Lets make some vegan cheese!!!


INGREDIENTS:

  • 1 can of full fat coconut milk or cream

  • 2 tablespoon of lemon juice

  • 2 teaspoons miso paste

  • 1 teaspoons of salt

  • 1/4 cup nutritional yeast

  • 1/4 melted cup triple refined coconut oil

  • 2 tablespoons agar powder

  • 3 tablespoons arrow root or tapioca starch

  • 1 teaspoon liquid smoke


COOKING INSTRUCTIONS:

  1. In a food processor or high speed blender, add all of the ingredients EXCEPT the milk, agar, and liquid smoke.

  2. Pulse a few times to mix it all up.

  3. Now add the milk, agar, and liquid smoke to a medium sauce pan and bring to a boil. Reduce heat and simmer until mixture thickens to the constancy of a thin pudding.

  4. Add the milk mixture to the ingredients in the food processor, and mix for about a minute. The mixture will quickly begin to thicken as agar begins to solidify at room temperature.

  5. Transfer to the mixture to a few ramekins or small bowls. You should be able to fill 2 or 3 small bowls.

  6. Allow the cheese to harden in the refrigerator uncovered for several hours.

  7. Once the cheese is set, store in an airtight container in the fridge for about a week.