Vegan Seitan Ribs

IMG_8310.jpg

In college I worked at Chili’s. You know the place with the song about the ribs.

At the time I ate meat and I loved ribs, so other than the annoying song I was often asked to sing by customers, it was a pretty sweet gig. Never mind the fact that I still have nightmares to this day, 20 plus years later, about being the only person working and waiting on a full restaurant. I mean It actually happened once 5 minus before close when a convention of people came in and I was the last server there to close…..needless to say I have some PTSD about ti.

So once going vegan and learning all of the wonders of vital wheat gluten, I knew I wanted to learn to make ribs. And I did.

Once again I turned to Robin Roberson and the Veganze it cookbook (buy this book..trust me) and internet to investigate vegan ribs. What I learned is that most recipes I looked at, including the vegan queen Robin’s, were all pretty much spot on, so I married several of the recipes that seemed very much the same, and made adjustment according to what had on hand and made ribs. I was not disappointed.

I would say this is one the easiest seitan recipes I make! Mix, baked, then grill. Its not hard at all y’all and I have even watched a non vegan 9 year old boy tear a plate of these up.

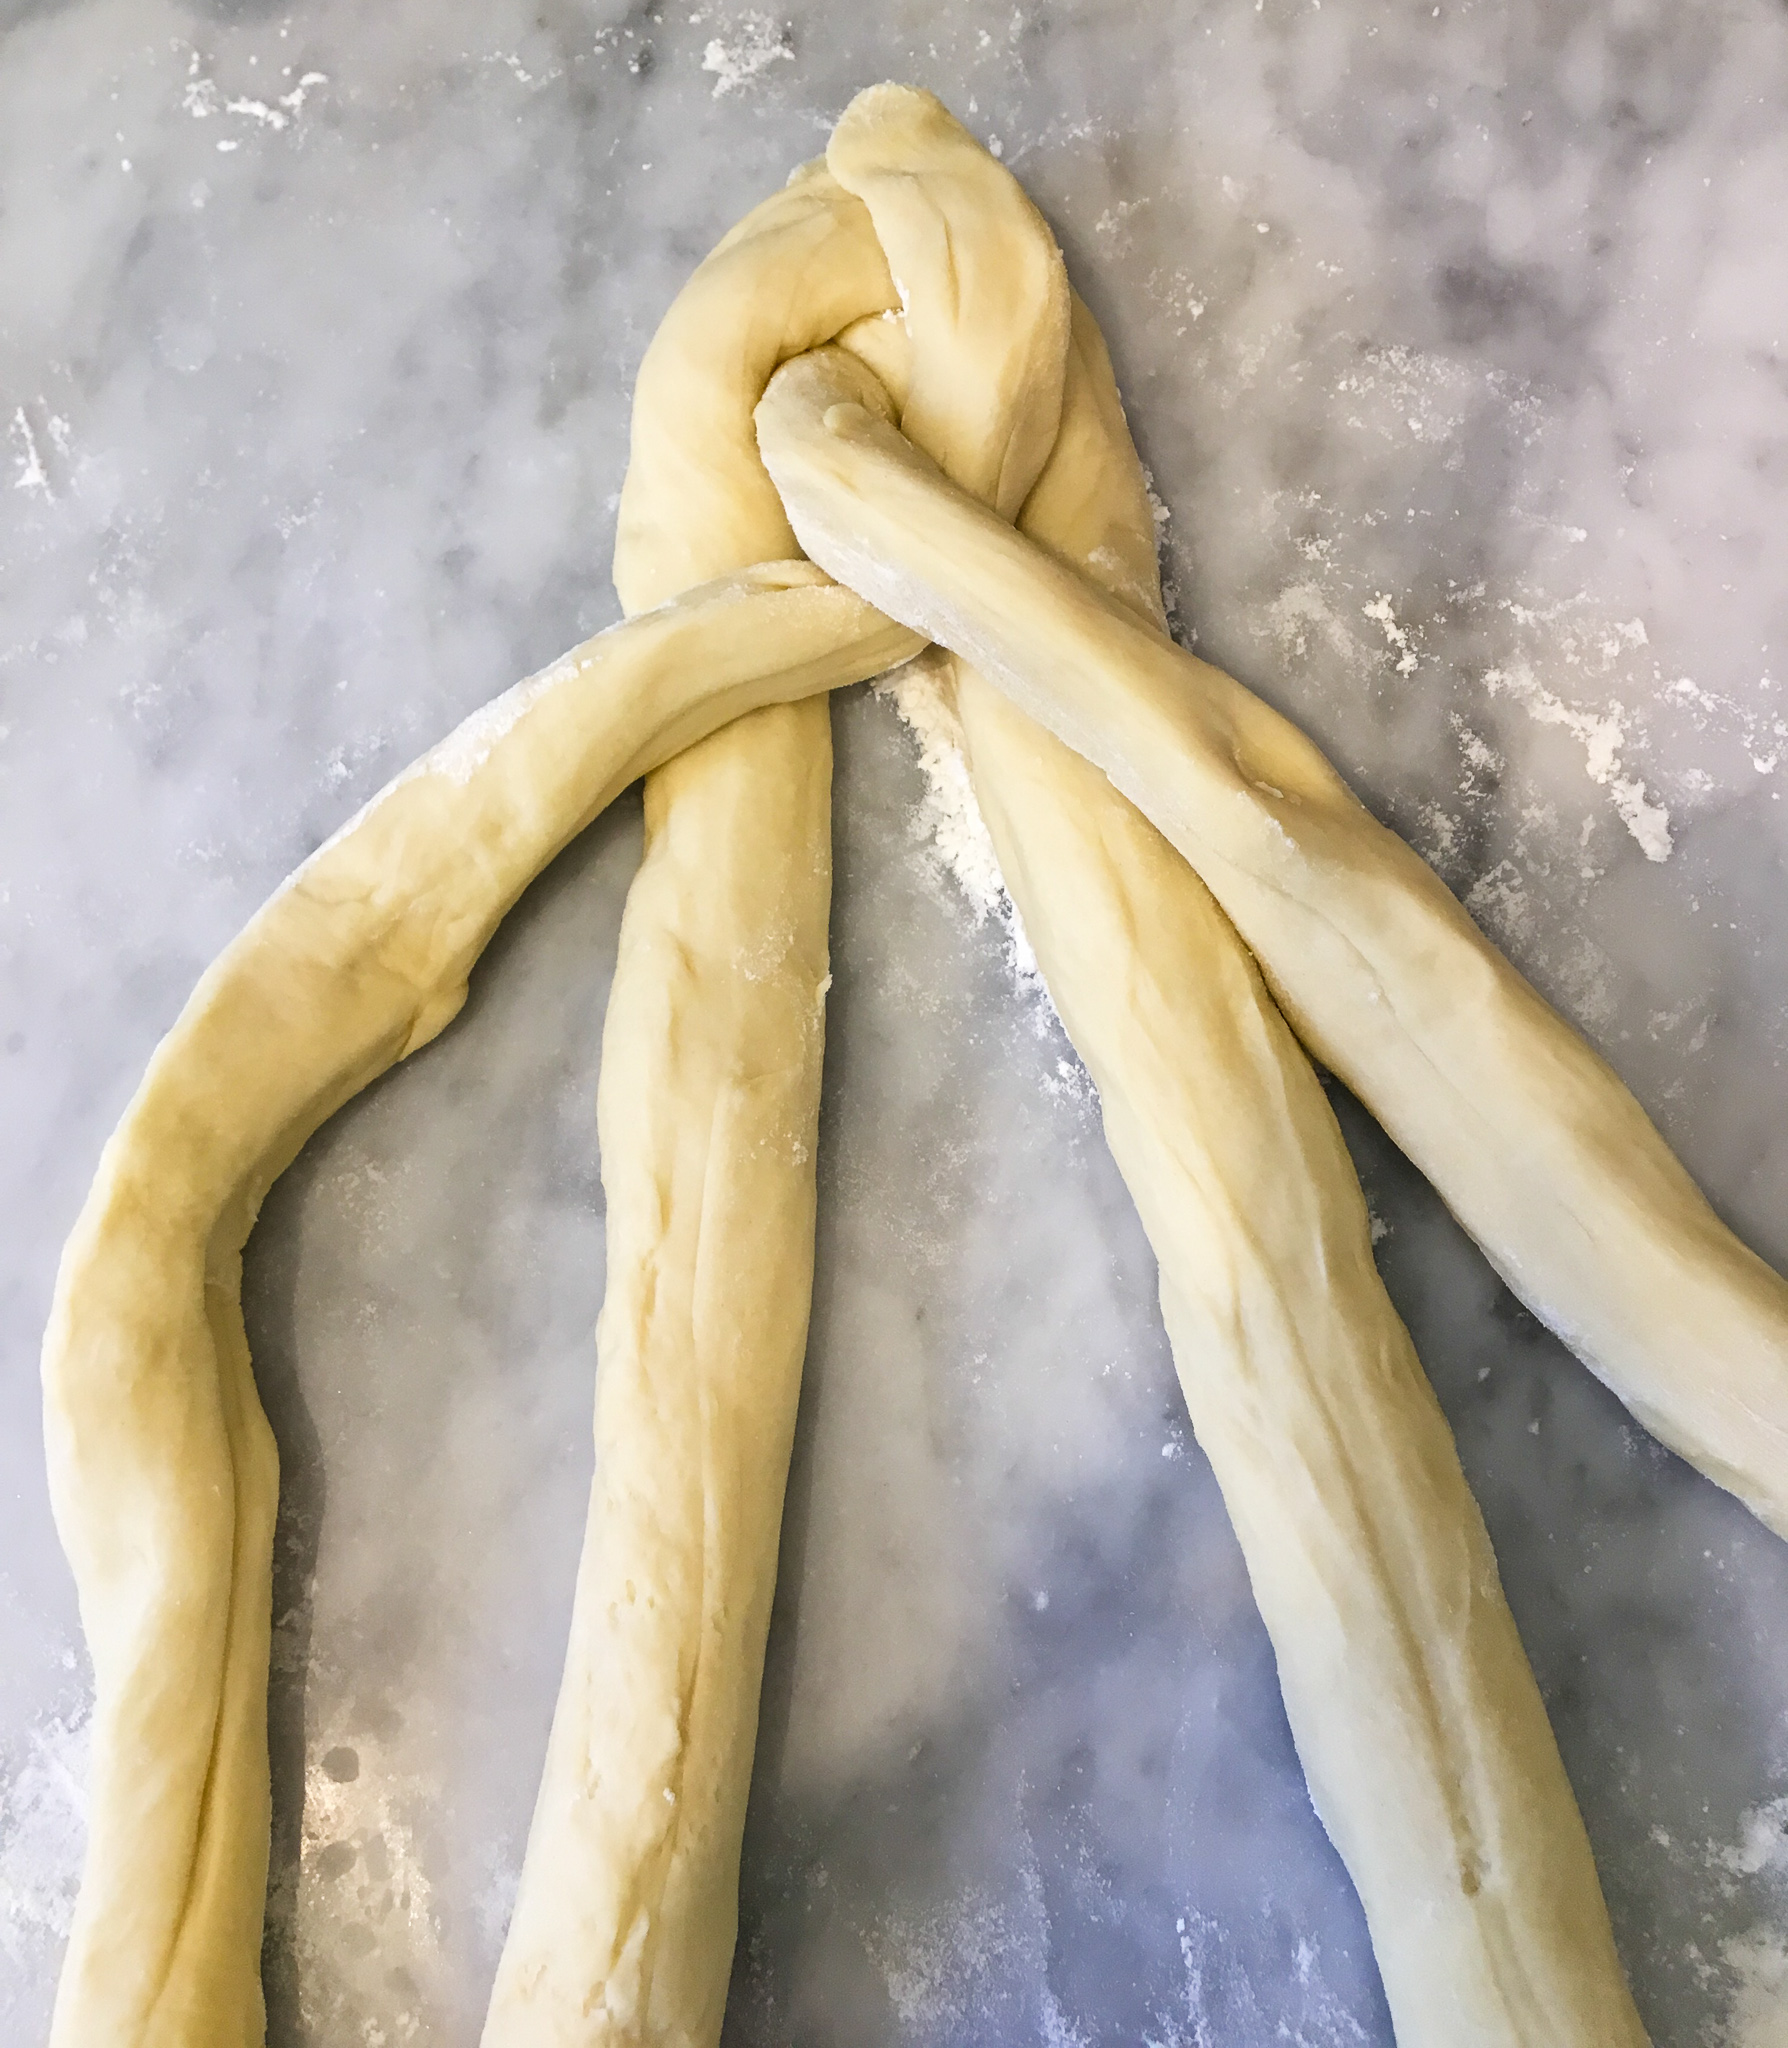
Vital wheat gluten can be found in most health food stores or on line. If you have never worked with it, it’s just the gluten part stripped from the wheat. It is like making any kind of bread, as you are just making a dough out of the wheat gluten. Once you add liquid and knead it, It becomes stretchy and that texture is what give seitan its remarkable ability to mimic meat.

So fire up the grill and get ready to be wowed! And just as friendly suggestion, never ever ask me to sing that rib song. I promise it won’t end well.


NGREDIENTS: 

  • 1 cup vital wheat gluten

  • 3/4 cups vegetable broth

  • 2 tablespoons nutritional yeast

  • 1 teaspoon minced garlic

  • 2 teaspoons smoked paprika

  • 2 teaspoons onion powder

  • 1/2 teaspoon salt

  • 2 tablespoons nut butter (I use almond butter)

  • 1 tablespoon coconut aminos

  • 1 - 2 cups BBQ sauce


COOKING INSTRUCTIONS:

  1. Add all ingredients except for the BBQ sauce in a food processor, and blend until a sort of dough forms. Let the dough mix for about a minute.

  2. If you do not have a food processor, you can combine dry ingredients in a bowl. Mix together the wet ingredients in a separate bowl. Slowly add the wet ingredients to the dry, combining until forming a dough. Kneed the dough for several minutes by hand.

  3. Preheat oven to 350 degrees.

  4. Press dough into an 8x8 baking dish. Score the dough with a sharp knife, cutting only about halfway through the dough (don't cut to far, you want then to hold together through grilling.) 8 lines down, then one through the middle making 16 ribs. This will make it easy for them to pull apart after you grill them.

  5. Bake ribs for 25 minutes

  6. Remove ribs from oven, and let cool enough to handle.

  7. Baste ribs with BBQ sauce, then transfer to a heated grill.

  8. Grill on each side for about 5 minutes, adding more sauce while grilling. You just want to get a little char on them, and some nice grill marks before taking them off of the grill.

  9. Once done pull the ribs apart, and serve with extra BBQ sauce for dipping.

Serves 4.


Seitan Lemon Piccata with Mashed Potatoes

IMG_8205.jpg

The first seitan I ever leaned to make was a basic, simmered seitan.

If you don’t know, then seitan is basically wheat meat made from vital wheat gluten. And as long as you do not have a gluten intolerance, its an excellent source of vegan protein! It is also really inexpensive so an added bonus for sure!

Noting fussy, just make the dough, divide it, simmer it, and its ready to go.

This seitan works well for all kinds of recipes like this piccata. It is pretty versatile and we use it in fajitas, cheese steaks, fry it up to make wings, stir fry, all kinds of things.

The beauty of it is how easy it is, and how well it freezes! If you have ever made dough of any kind, you can make seitan. There are so many methods for making faux meats but this basic method is still my go to.

I often make 2 batches and toss them in the freezer. I quarter each batch so I can thaw smaller portions quickly for fast weeknight dinners.

If you are feeling like make a more traditional vegan chicken piccata you can try making my easy vegan chicken breast. It really is easy, and although you do bake it verses simmering it, it is a very convincing chicken seitan. And it is very, very simple and easy to make. It does contain soy, so if you are soy free the easy basic seitan is probably a better choice.

This piccata is so flavorful and the seitan gets so nice and crispy on the outside. The buttery, lemony, garlicky sauce is perfection and who doesn’t love a glorious creamy pile of mashed potatoes.

So if you have been looking for the perfect vegan piccata, look no further. And I can not encourage you enough to just make a double batch of the seitan so recipes like this are twice as easy and quick when you are ready to make them!


INGREDIENTS:

  • 1 batch seitan (all 4 pieces) or 4 easy vegan chicken breast cut in half length wise for 8 thin breasts.

  • 2 lemons

  • 3 tablespoons capers

  • 2 tablespoons vegan butter, like Earth Balance

  • 3 tablespoons to 1/4 cup olive or grape seed oil (this amount depends on the size of the pan you are using to fry the seitan )

  • 1 cup vegetable broth

  • 3 tablespoons chopped flat leaf parsley

  • 2 teaspoons minced garlic

  • 1/3 cup four

  • 1/3 cup organic corn starch

  • salt and pepper to taste

  • 1/4 cup white wine (optional)


Mashed Potatoes

  • 6 medium russet potatoes

  • 2 tablespoons vegan butter

  • 1/4 cup vegan cream cheese or vegan sour cream

  • 1/4 cup plant based milk (give or take)

  • salt and pepper to taste


COOKING INSTRUCTIONS:

  1. With a very sharp knife, carefully slice all 4 pieces of seitan into cutlets. You should be able to get about 3 cutlets from each piece.

  2. Mix flour and corn starch in a shallow dish, and dredge the cutlets in the mixture. Make sure you fully coat each piece.

  3. Heat oil in a med/large skillet on medium heat. You may need more or less oil depending on the size of your pan. You need just enough oil in the bottom of your pan to quickly fry each side the seitan cutlets.

  4. Once the pan is good and hot, add the cutlets and cook each side a few minutes, or until they begin to brown and get crispy.

  5. Place finished cutlets on a paper-towel-lined plate.

Mashed Potatoes

  1. Peel, dice, and boil potatoes in a large pot while preparing the piccata sauce.

  2. Once potatoes and soft enough to pierce with a fork, drain the water, and return potatoes to the pot you boiled them in.

  3. Mix in cream cheese or sour cream, and butter. Mash with a hand masher, or use an electric hand mixer.

  4. Add enough milk to get the potatoes to the consistency you prefer using 1/4 cup of plant based milk, give or take.

  5. Add salt and pepper to taste.


Piccata sauce

  1. Wipe out the pan you just used for the seitan.

  2. Reheat the pan on medium heat, and add the 2 tablespoons of vegan butter.

  3. Add the garlic, and wine if using. Let the alcohol cook out of the wine for a few minutes, then add the juice from 1 and 1/2 lemons, vegetable broth, capers, half of the parsley, and salt and pepper to taste.

  4. Let sauce simmer for about 5 minutes on low heat.

Prepare you plates by adding mashed potatoes, topping with a few cutlets, and drizzling the piccata sauce over each plate. Garnish with the remaining parsley and a thin lemon slice (using your remaining half a lemon)

Serves 4 - 6.

Vegan Alabama White Sauce Tempeh Tacos

IMG_8246.jpg

I have talked about this delicious sauce before, and I'll do it again! You can use this magic sauce on so much. It's not limited to its BBQ roots. In fact, it makes a super tasty tempeh marinade, and taco topping! Add some fresh crispy slaw, tangy lime, and creamy avocado, and I promise you will not be disappointed.

INGREDIENTS: 

  • 2 packages of tempeh
  • 1 batch Alabama white sauce
  • 1/2 bag of slaw mix, or a few cups chopped cabbage
  • 1 lime
  • 1/4 of a red onion, thinly sliced
  • 1/2 teaspoon chili powder
  • 1 - 2 avocados
  • 8-12 corn tortillas 
  • Fresh cilantro for garnish

COOKING INSTRUCTIONS: 

  1. Cut tempeh into cubes, and place in a shallow pan or a large zip lock bag. Add half of the  Alabama white sauce to the tempeh, and marinate for at least an hour in the fridge.
  2. In a large skillet, heat a few teaspoons of oil on medium/high.
  3. Add the tempeh, and the marinade to the pan, and fry tempeh on each side until tempeh browns, and begins to get crispy. 
  4. In a bowl, mix together slaw mix, onion,  juice from 1 lime, and 1/2 teaspoon chili powder.
  5. Heat another large pan or griddle, adding a little vegan butter or oil to the pan. Use this pan to heat the tortillas on each side until they begin to crisp. I like to sprinkle a little chili powder and cumin on my tortillas while they are cooking for flavor. 
  6. Add some tempeh, slaw mix, and sliced avocado to each tortilla, drizzling some of the remaining Alabama white sauce on top.
  7. Top with some fresh cilantro 

Serving size 4-6 (depending on if you eat 2 or 3 tacos.) You can use one pack of tempeh, and half the amount of Alabama white sauce for a smaller serving size.

One Pot Creamy Vegan Chicken Pasta

IMG_8263-2.jpg

I love one pot meals!

They are quick, easy, and don’t make a ton of dishes you have to clean up.

So yeah, I am here for it, always.

This creamy vegan chicken one pot pasta dish is no exception.

It is all the things…..quick, easy, one pot required, and most importantly it is delicious.

You can use our easy vegan chicken breast in this recipe or a can of jackfruit in brine. Both work well and both are tasty. The jackfruit is a great gluten free alternative to chicken if you can’t eat seitan and the seitan is super easy and freezes beautifully for recipes such as this. I often make a big batch of the chicken every week or 2 and freeze half for easy week night dinners like this!

IMG_8669.jpg

If you are not a fan of mushrooms (my family is pretty evenly divided on this topic) you can replace them with a can of drained chicken peas, or any other veggie you may like! No need to complicate things, use what you have or what you like.

So if you were looking for an easy weeknight dinner you can toss together in no time, but is still healthy and tasty, here you go. I hope you love it as much as my family does!


INGREDIENTS:

  • I package spaghetti noodles (you can use gluten free as well)

  • 1 can jackfruit in brine, or 2-3 easy vegan chicken breast

  • 1/2 onion diced

  • 1 can diced tomatoes, drained

  • 2 cups chopped white button mushrooms

  • 1/2 cup cashews soaked in hot water for an hour, or you can microwave them in some water for 3 minutes (you can also use sunflower seeds if you have a nut allergy or just don’t have any on hand)

  • 1 cup water

  • 2 tablespoon nutritional yeast

  • 2 teaspoons minced garlic

  • 2 teaspoons Italian seasoning

  • 2 1/2 cups vegetable broth

  • 1/2 teaspoon of salt

  • A splash of white wine (optional)

  • Fresh basil to garnish (optional)

IMG_8541.JPG

COOKING INSTRUCTIONS: 

  1. Start by adding your soaked and drained cashews, and 1 cup of water to a high speed blender or food processor. Blend until the mixture is completely smooth.

  2. Drain the jackfruit and break up the pieces between your finders, or using a fork. If using easy vegan chicken breast just dice them up into small bite size pieces!

  3. Now add a few teaspoons of oil to the bottom of a large deep skillet (a skillet that has a lid).

  4. Next add noodles, then the remaining ingredients on top of the noodles, adding the broth last.

  5. Turn pot on medium/low heat and let pasta cook with a lid on top for 20 - 25 minutes.

  6. You will need to stir several times during the cooking process to keep the noodles from sticking to the bottom on the pot.

  7. Serve topped with fresh basil and vegan parmesan.


Vegan Pimento Cheese Ball

IMG_8229.jpg

Vegan cheese balls are so easy to make, and pretty quick too.

Combining cashews, herbs, and some pantry staples, you can make a delicious vegan cheese ball at home in no time at all.

You can use a high speed blender or a food processor to make this recipe. You just need something powerful enough to completely break the cashews down until they are creamy and smooth.

You will actually get 2 -3 cheese balls out of this recipe and they will keep in the fridge for about a week. So even though you are using cashews, it is pretty affordable recipe for the amount of cheese you get in the end!

If you are allergic to cashews or are just not a big fan, you can also use sunflower seeds. Use the same quantity and follow the same instructions as you would for the cashews.

Also make sure to use filtered or refined coconut oil in this recipe. It is often labeled as has no coconut flavor unlike regular coconut oil. You can use regular coconut oil just be aware that it will alter the favor of the cheese ball.

This vegan cheese ball is one of my favorites because I love, LOVE pimento cheese!! So what better flavor to create in a vegan cheese ball than pimento cheese!!!

It’s everything I love about pimento cheese in a perfectly creamy, spreadable cheese ball! Seriously, I could live off these!

I spread this vegan cheese ball on crackers, on bagels, on veggies, you name it. It is good on anything really!

If you are a fan of pimento cheese, then this is the vegan cheese ball for you!


INGREDIENTS:

  • 1 cup cashews soaked in hot water for an hour, or microwaved for 3 minutes, then drianed.

  • 1/4 cup diced pimentos drained, and patted dry with a paper towel ( just try and remove as much liquid as you can from them)

  • 1/2 onion

  • 1/2 cup triple filtered coconut oil. Filtered coconut oil does not have a coconut flavor to it. If you use regular, your cheese ball will a slight coconut flavor to it.

  • 2 teaspoons light miso paste

  • 1 tablespoon apple cider vinegar

  • 1/2 teaspoon turmeric

  • 1 teaspoon garlic powder

  • 1 teaspoons smoked paprika

  • 1/2 teaspoon salt

  • 1/2 cup vegan shredded cheddar cheese. I prefer Follow your heart brand, or homemade

  • 1/4 cup nutritional yeast

  • 1/4 cup sliced almonds (optional)

  • plastic wrap


COOKING INSTRUCTIONS: 

  1. Cut onion into quarters, and pulse a few times in your high speed blender, or food processor.

  2. Now, add all of the ingredients, minus the sliced almonds, to a food processor or high speed blender. Process until completely smooth. You will likely have to scrape the sides down a few times to get all the cashew bits blended.

  3. Line 2 - 3 small bowls, or ramekins, with a pieces of plastic wrap. You want a piece big enough that it will hang a good bit over the sides.

  4. If using almonds, sprinkle some into the bottom the plastic wrapped bowls.

  5. Divide the cheese mixture between the bowls. Take the pieces of plastic wrap that are hanging over the sides, pulling them up, twisting them together at the top.

  6. Put the cheese balls in the fridge for 2-3 hours to firm up before serving. Store leftover in fridge for up to 5 days.


IMG_8227.jpg

Kale Salad with Lemon Tahini Dressing

IMG_8313.jpg

INGREDIENTS:

Kale salad

  • 2 bunches of kale

  • 1 lemon

  • 1/4 cup sliced almonds

  • 1 avocado diced

  • 1/2 cup diced cherry tomatos

Tahini dressing

  • 3 tablespoons tahini

  • 1/4 cup water

  • 2 teaspoons olive oil

  • juice from one lemon

  • 1 teaspoon garlic

  • 1/2 teaspoon salt

INSTRUCTIONS:

  1. Clean kale, and remove the leaves from the stems.

  2. Squeeze the juice from one lemon over the leaves, and massage the kale with your hands to help soften the leaves a bit.

  3. Mix up the dressing, and pour over the kale (use as much dressing as you like).

  4. Add sliced avocado, tomato, and almonds and toss.

You can easily add a protein to this salad if you want. Sauted tofu, or tempeh, or even some cooked quinoa will add some protein, and make this salad a very filling meal.

Savory Pumpkin Maple Soup with Smoky Tofu Scallops

IMG_8093.jpg

I love soup in the fall and winter.

I especially love all things pumpkin but have never been a fan of sweet soups.

This soup is savory with a little kick of maple just compliment the pumpkin, without being overly sweet.

The tofu scallops are a nice smoky touch and add some protein to make this soup a more filling and satisfying meal.

Serve with a side of crusty bread and you are all set for a quick, easy and delicious dinner! And those kinds of dinners are always my favorite!


INGREDIENTS:

Soup

  • 2 cans organic pumpkin

  • 1 medium onion diced

  • 2 teaspoons garlic

  • 4 cups vegetable broth

  • 2 teaspoon thyme

  • 1 teaspoon salt

  • 1/ 2 teaspoon pepper

  • 1 teaspoon liquid smoke

  • 2 teaspoons maple syrup

Tofu scallops

  • 1 block extra organic tofu

  • 1/4 cup coconut aminos

  • 1 teaspoon garlic powder

  • 1 teaspoon salt

  • 1 tablespoon maple syrup

  • 1 teaspoon liquid smoke


COOKING INSTRUCTIONS:

Soup

  1. In a large pot or dutch oven, add a few teaspoons of oil and heat.

  2. Add diced onions, and minced garlic, and cook until onions become translucent.

  3. Add onion and garlic to a blender or food processor, along with the pumpkin, and 2 cups of the vegetable stock. Process until completely smooth.

  4. Add mixture back to the pot with the rest of the ingredients, and remaining 2 cups of broth.

  5. Stir well, and let soup simmer for 20 minutes.

  6. Serve topped with tofu scallops.

Tofu scallops

  1. Wrap tofu in a clean kitchen towel, or a few paper towels. Place a few books on top of the tofu for 15 minutes to remove excess liquid.

  2. Mix aminos, garlic, salt, maple syrup, and liquid smoke in a 9x13 or other large shallow dish.

  3. Cut block of tofu in half length wise. If you have a a small circle cutter, begin cutting circles resembling scallops from the the two pieces of tofu. You will have scrap pieces left over. Save them, and toss in marinade as well. They will still taste good, just wont look as nice as the circles. You could also use the scraps for something else later.

  4. If you do not have a circle cutter, you can just cut 1 inch by 1 inch cubes from the tofu.

  5. Place tofu in the marinade, and let sit covered in the fridge for at least one hour.

  6. When tofu is ready, heat a large skillet over medium heat, adding a few teaspoons of oil.

  7. Add tofu pieces and some of the marinade to the pan. Cook until each side begins to brown and the scallops get a crispy edge.

  8. Add finished scallops to the pumpkin soup, and serve while hot.

If you like this recipe, try these:

Vegan Beer Cheese and Potato Soup

Smoky Tomato Bisque Soup

Jackfruit and Orzo Soup


Basic Aquafaba

IMG_8218.jpg

I get A LOT of questions concerning aquabfaba in our recipes.

Aquafaba quite simply is just the cooking liquid from beans. You can use canned aquafaba or liquid from dry beans you have cooked.

You can use liquid from any bean actually, but I prefer the mild flavor of the liquid from chickpeas or any white bean.

I like to use aquafaba in the whipped form. When the liquid from the beans is whipped with a stabilizer like cream of tarter or even salt, the result will be light and fluffy peaks like if you were to whip egg whites!

This means you can use whipped aquafaba in place of eggs in many recipes to add a nice airy lightness. I often use it in cakes, or even casseroles that normally call for many eggs. You will still need a binder like a starch in some cases, like in the instance of a casserole. For those recipes I will often use whipped aquafaba and a few starch eggs, or prepackaged egg replacer.

When referring to aquafaba on this website, I am referring the the whipped product not just the liquid, unless otherwise stated in the recipe.

So, if a recipe calls for 1 cup of aquafaba, it is calling for 1 cup of the fluffy white whip, not one cup of chickpea liquid, pre-whipped. This tends to be one of the biggest mistakes or misunderstandings I have had people encounter in reading the recipes. They tend to want to measure the liquid not the whip. You must first whip the entire can of liquid then measure out the whip.

You will typically have left overs, as one can of chickpea liquid will whip up a more than a few cups of aquafaba.

You can store any leftovers in you fridge. The aquafaba will deflate in the the fridge and turn back to its liquid from, but will easily whip back up, and should keep for a few days.


INGREDIENTS:

  • Juice from one can of chickpeas

  • 1/4 teaspoon cream of tartar or salt


INSTRUCTIONS:

You can use a stand mixer or a hand mixer for this. 

Add liquid from chickpeas, and cream of tartar to your bowl. Whip until the aquafaba is thick, and fluffy, resembling whipped egg whites. 

1/4 cup of aquafaba is equal to one egg in recipes 


Challah Y'all, Vegan Challah

IMG_8171.jpg

Have you ever had challah? Well if not, I can not urge you enough to try my most favorite bread on the planet. Challah Y'all , its delicious!

Traditional challah bread is often made with eggs, and braided. It is often served at shabbat dinner on Friday nights.

If you already love challah, but thought you couldn’t have it since going vegan or plant based, guess what, you sure can!


I used to actually make challah bread every week for our synagogue, and later began baking, and selling it weekly in our neighborhood. This was when we were vegetarian and we used eggs. It was old hat and I could bake it in my sleep.

But, once we went vegan the challah baking stopped. It didn’t have any clue how to make this bread without eggs .As a new vegan I was stuck thinking I could never bake like we once did! Let me tell you that is 100% false. Because once I discovered the magic of whipped aquafaba, my world was changed! And thank goodness because I couldn't imagine a world where I could not eat challah!

Whipping up the liquid from a can of chickpeas to form a vegan egg white substitute is truly brilliant. Seriously, I want to hug the genius who discovered this because it has been life changing in the vegan world! I would have never dreamed replacing 4 eggs in bread recipe with whipped pea liquid would have ever worked, but work it did, and it works very well, actually!

I often stuff the braids with various fillings, from savory vegan meatballs and marinara, to dessert challahs stuffed with things like chocolate and peanut butter. You name it, and I have probably tried to stuff it into challah over the years! The possibilities are endless!! I have several stuffed challah recipes on the site with instructions on how to stuff and braid your bread if you are feeling adventurous, and want to give it a go! I really urge you to try it once you get the hang of traditional challah!


But y’all, seriously nothing beats the smell and taste of a fresh loaf of warm traditional challah, just pulled out of the oven. Perfectly shiny and crisp on top, soft and fluffy in the middle. It really is beautiful loaf of bread. It is one of my favorite parts of shabbat and I so thankful I finally found a way to make it vegan!

This recipe will yield 2 nice big loaves of bread and let me tell you, day old challah is the best bread in world for making french toast! Trust me!!!

So what are you waiting for? It’t time to bake some perfect vegan challah, y’all!


  • 4 cups all purpose flour

  • 1 1/4 cup aquafaba (please follow link for recipe and instructions, as we are referring to the WHIPPED product in this recipes, and are measuring the product in its whipped state)

  • 1/3 cup sugar

  • 1/2 cup oil (I use grape seed but you can use any neutral oil you like)

  • 4 1/2 teaspoons dry active yeast

  • 1 tablespoon sugar

  • 1 tablespoon salt

  • 1 cup hot water. I just use hot water from the tap, you don't want it too hot or the yeast will die and it will not activate.


COOKING INSTRUCTIONS:

  1. In a large glass bowl mix hot water, yeast, and 1 tablespoon sugar.

  2. Let that sit for 10 minutes to activate, or until the mixture is super foamy at the top.

  3. In a stand mixer, add the yeast mixture, aquafaba, sugar, oil, salt, and 2 cups of flour. You can mix by hand, just mix the above, and add remaining flour slowly. You will need to knead it for the same amount of time. It's a good workout though!

  4. Mix until all of the ingredients are incorporated then add in the remaining flour. I typically will hand mix the first 2 cups of flour, or use my paddle attachment and replace with the dough hook when I add the remaining flour.

  5. The dough should come together and not be sticky. If it seems sticky, you can add 1/4 more flour, a little at at time, until the dough comes together. Your goal is smooth, and elastic-y dough, not sticky.

  6. Let the dough kneed in the mixer on low/medium speed for about 10 minutes. The dough should be smooth at this point and have a sort of bounce back if you poke it.

  7. Form dough into a nice ball, and place in a lightly greased glass bowl. Cover the bowl with a damp kitchen towel, and place inside your oven turned off, or on the bread proof setting if your oven has one.

  8. Bring a small pot of water to a boil and place in the bottom of the oven. The heat and steam from the water will help the dough to rise.

  9. Let dough rise about an hour, or until the dough has doubled in size.

  10. Remove dough from oven, and on a clean lightly floured work surface, divide the dough in half, and braid each loaf. Tori Avey has a wonderful guide on challah braiding that you can check out, or follow the pictures below for a 4 strand braid.

  11. Place both challah loaves on a cookie sheet, and cover with a damp towel. You may need two cookie sheets. You don't want the loaves touching or they will stick together as they bake. Place challah back in the oven and allow the loaves to rise again for about an hour.

  12. Once loaves have risen, remove from oven, and preheat oven to 350 degrees.

  13. You can either brush the loaves with vegan butter, or you can make an aquafaba wash with 3 tablespoons of the left over aquafaba, and a splash of maple syrup. This will help the loaves to brown. Whichever method you choose, brush the loaves before placing them in the oven, and brush a few more times throughout baking.

  14. Loaves will need to bake around 20 - 30 minutes, depending on the oven. Keep an eye on them and once they begin to brown all over, give them a tap with your finger. If they sound hollow, they are done!

  15. Let Challah cool on a wire cooling rack before serving.

IMG_8487.jpg

Separate your dough into 4 equal pieces and begin forming "ropes" with them. Let gravity help with this. The dough will stretch out as you work on lengthening the ropes.

IMG_8488.jpg

Begin on the far right, weaving your rope over, under, over...

IMG_8489.jpg

Now repeat starting at the far right again, always going over, under, over. ALWAYS start right. ALWAYS over, under, over.

When you are done tuck, the ends of the braid under the loaf.

Just a heads up, this bread will make THE BEST french toast you have ever made! Challah y'all!

IMG_8165.jpg


Lemon Tahini Dressing

IMG_8102.jpg

INGREDIENTS:

  • 3 tablespoons tahini

  • Juice from 1 lemon

  • 1/4 cup water

  • 1 teaspoon minced garlic

  • 1 teaspoon dill

  • 2 teaspoons olive or grape seed oil

  • 1/2 teaspoon salt

INSTRUCTIONS:

Wisk all ingredients together and store in an airtight container in the fridge 


Tofu Feta Cheese

I used to live off of feta cheese before going vegan.

I love a big pie of feta cheese on a salad, in a gyro wrap, in spanakopita.

So coming up with a decent vegan version seemed like a must.

This vegan feta recipe can be made with a block of tofu and vegan pantry staples you probably already have on hand, making this a really affordable vegan cheese to make!

I really do love how easy this recipes is. Just cube up the tofu, mix up the marinade, and let it hang out in the fridge to absorb all that delicious flavor.

Now I know there are now more brands of vegan feta out there than even a year ago. But I have not found one that I like anymore than this. Some brands have been extra oily so when using them to cook, I did not like the finished product. I am not going to name names but if you have tired making spanakopita with one popular vegan feta brands, you probably know what I am talking about. The end result it an oil mess.

So this vegan feta recipe will remain my cheap and easy go to!


INGREDIENTS

  • 1 block extra firm organic tofu

  • 1/4 cup apple cider vinegar

  • 1/4 oil cup olive or grape seed oil

  • 1/4 cup water

  • 2 teaspoons miso paste

  • 1 teaspoon salt

  • 1 teaspoon minced garlic

  • 2 tablespoons nutritional yeast

  • Juice from 1/2 lemon

  • 2 teaspoons Italian seasoning

  • 3 tablespoons chopped parsley


COOKING INSTRUCTIONS:

  1. Wrap tofu in a clean kitchen towel or a few paper towels and place a few heavy books on top for 15 minutes to press out excess liquid.

  2. Whisk remaining ingredients in a bowl

  3. Cut tofu into small cubes and mix into the bowl.

  4. Let tofu marinate in an airtight container in the fridge for a few hours before serving.

  5. Store in fridge.

Pita Bowl Falafel Salad

IMG_8112.jpg

I know there are a ton of tasty easy to make falafel mixes out there, but making you own is actually pretty easy and super delicious.

We are never without chickpeas in our pantry, so in a pinch I pretty much have what I need on hand for homemade falafel. You can bake or fry them, but in this recipe I just bake them. They still come out perfectly crispy!

As much as I adore a falafel wrap, I mostly prefer a falafel salad, I also love to fry up some pita for a perfect little edible bowl! If you are anti-frying, you can always drape a pita over an oven safe bowl, and bake at 350 degrees until the pita gets crispy!!

Either way this is a fun and healthy way to enjoy some easy homemade falafel!


INGREDIENTS:

  • 4 - 6 pitas

  • 2 heads romaine lettuce washed and chopped

  • 1/2 cup diced tomatoes

  • 1/2 red onion thinly sliced

  • Tofu feta (optional)

  • Oil for frying

Falafel

  • 1 can chickpeas drained and rinsed (15 oz)

  • 1 teaspoons garlic

  • 1/2 onion

  • juice from 1/2 lemon

  • 1 teaspoon paprika

  • 1 teaspoon cumin

  • 2 table spoons chopped fresh parsley

  • 1/2 teaspoon turmeric

  • 2 tablespoons flour

  • 2 teaspoons olive oil


COOKING INSTRUCTIONS:

Falafel and Pita bowls

  1. Preheat oven to 350 degrees.

  2. Add onion to a food processor and pulse until finely chopped.

  3. Next add chickpeas and remaining ingredients, and pulse until everything is blended together. You do not need to puree the mixture, just break it down well enough that you are able scoop up some and form a ball.

  4. Scoop out falafel mix with a small spoon or cookie scoop and form falafel balls.

  5. Place falafel balls on a greased or parchment-paper-lined cookie sheet, and bake for 20 - 25 minutes. You will need need to flip them once mid-baking to get them to brown all over.

  6. Prepare pita bowls while falafel bakes.

  7. Find a pot or deep bowl just slightly bigger than your pita.

  8. Fill pan with enough oil to cover the pita and heat on med/high heat until oil is good and hot.

  9. Prepare a cooling rack on top of a paper-towel-lined cookie sheet to place finished pitas on while you fry the rest.

  10. Put one pita in at a time. With a wooden spoon or set of tongs, press down into the middle of the pita while it is frying to form a dip in the middle.

  11. Fry until the pita begins to brown and gets crisp, then remove from oil.

  12. Repeat with remaining pita.

  13. Place lettuce, onion, tomato, and feta in finished bowls topping salad with falafel balls.

  14. Top with lemon tahini dressing, oil and vinegar, or any other dressing you like.

Summer Squash Tart

IMG_7855.jpg

I am always looking for new ways to use up the abundance of summer squash that we tend to have in the warmer months.

This savory tart recipe makes excellent use of all of that yellow squash and zucchini that summer has to offer.

It is so delicious, and perfect for a summer brunch or for taking to a bbq or get together, because it is just as good at room temperature as it is hot.

The recipe is actually really simple but turns out so impressively beautiful. It also reheats well, so Sunday dinner can easily become Monday's lunch!

Piled with layers of savory tofu ricotta and thinly sliced summer vegetables in a flakey pie crust, this is bound to become one of your new favorite summer recipes.


INGREDIENTS:

Tart Crust

If you are pressed for time, there is no shame in buying a pre-made pie crust, and rolling it out to fit your tart pan! Most store bought crusts in the refrigerator section are actually vegan. I have found that some organic brands are not, so just be sure to read the ingredients. But if you have the time, a homemade crust is super simple!

  • 1 and 1/2 cups all purpose flour

  • 1/2 teaspoon salt

  • 9 tablespoons cold vegan butter

  • 3-4 tablespoons ice water

Tart Filling

  • 1 batch tofu ricotta

  • 2 zucchini

  • 2 yellow squash

  • 1 red or orange bell pepper

  • 1/2 red onion

  • 1 teaspoon thyme

  • 1 teaspoon rosemary


COOKING INSTRUCTIONS:

Tart Crust

  1. Add flour, butter, and salt to your food processor and pulse until the butter and flour become crumbly.

  2. Add a tablespoon of water at a time, and pulse just until a ball of dough forms. You will likely not need all of the water, just add enough to form a dough that you can handle and isn't too sticky.

  3. Chill dough for half an hour in the fridge wrapped in some plastic wrap.

  4. Roll dough out to 1/4 inch thick circle and place in a 9 inch tart pan, cutting the excess away from the rim.

  5. Cover the tart crust in foil and pour some dry beans on top (this helps weigh down the crust while it bakes) bake for 20 minute at 350 degrees. Remove beans, and foil and bake for 5 more minutes.

Tart Filling

  1. Mix thyme and rosemary into the tofu ricotta, then spread the mixture evenly in the bottom of the tart crust.

  2. Using a mandolin, thinly slice the squash and pepper.

  3. With a knife, thinly slice the onion.

  4. Once all veggies are cut, begin assembling the tart by adding 2 slices of squash, then 2 slices of zucchini, one slice of pepper, then 2 slices of squash, 2 slices of zucchini, one slice of onion. Repeat this pattern going around and around in a spiral, until you reach the center of the tart. As you are assembling, use the veggies to scoop up a little of the ricotta from the bottom, and press into the veggies. It sort of acts as a glue to help them stay put.

  5. Spray the tart with some cooking oil (I use olive oil), and bake the tart at 350 degrees for 30 minutes.

Serve hot or at room temperature.


Tofu Ricotta

IMG_2328.jpg

INGREDIENTS:

  • 1 package extra firm tofu

  • 2 tablespoons nutritional yeast

  • 1/2 lemon

  • 2 teaspoons miso paste

  • 1 teaspoon minced garlic

  • 1/2 onion

  • 1/2 teaspoon of salt

COOKING INSTRUCTIONS:

  1. Wrap tofu in a clean kitchen towel or some paper towels and place a few books on top for 15 minutes to help remove excess liquid.

  2. Add onion to a food processor or high speed blender and blend until the onion is minced.

  3. Add the remaining ingredients to the onion and blend on high, scraping down the sides as needed, until the mixture is smooth.

  4. Store in the refrigerator in an air tight container for up to 5 days.


Alabama White Sauce Tofu Skewers

IMG_7948-2.jpg

If you have never had, or even heard of Alabama white sauce, let me introduce you!  Alabama white sauce is a mayo based bbq sauce that originated in, you guessed it, Alabama!

Alabama White Sauce (AWS) is a a tangy, vinegar and mayo based bbq sauce which originated it Northern Alabama at Big Bob Gibson’s Bar-B-Q.

Its tangy and creamy and perfect slathered all over some grilled tofu skewers, grilled veggies, or honestly, just about anything! 

Whip up a batch and let me know all the ways you found to use this delicious and easy summer favorite!


INGREDIENTS:

Alabama white sauce:

  • 1 cup vegan mayo

  • 1/2 cup giardiniera, just the veggies not the juice (this is and Italian condiment consisting for a variety of pickled vegetables, found in the pickle section of your grocery store)

  • Juice from 1/2 lemon

  • 1 teaspoon minced garlic

  • 1 teaspoon dijon mustard

  • 2 teaspoons vegan Worcestershire sauce

  • 1 teaspoon black pepper

  • 1/2 teaspoon salt

  • 1/8 - 1/4 teaspoon cayenne pepper


INSTRUCTIONS:

  1. For the Alabama White Sauce, add all ingredients to a blender or food processor, and blend until it is smooth.

  2. Store in a mason jar in the fridge.

  3. Fro the tofu, Wrap 1 block of extra firm organic tofu with a clean kitchen towel or some paper towels, and place a few cook books on top. Let sit for 10 - 15 minutes to press out the extra liquid.

  4. Once tofu is ready, cut in half length-wise, then cut those halves in half length-wise again. Now cut 1 inch wide strips to form the pieces.

  5. Place tofu strips in a 9x13 baking dish and pour half the Alabama white sauce over the top.

  6. Let tofu marinate for at least an hour in the fridge.

  7. Once done marinating, put 2 pieces of tofu through a wooden or metal skewer.

  8. Heat your grill and spray the grates with some oil before adding the skewers. Once the skewers are on, give them as spray as well.

  9. Let each side of the skewers grill for several minutes before turning. I use a metal spatula to turn them to help avoid having them stick to the grill and rip. You may need to keep turning them until they have some nice grill marks on each side. Use the marinade left in your dish to brush on each side as you turn.

  10. Serve finished skewers with remaining Alabama white sauce for dipping or drizzling.

Vegan Alabama White Sauce

IMG_8030.jpg

If you have never had, or even heard of Alabama white sauce, let me introduce you! Alabama white sauce is a mayo based bbq sauce that originated in, you guessed it, Alabama!

Alabama White Sauce (AWS) is a a tangy, vinegar and mayo based bbq sauce which originated it Northern Alabama at Big Bob Gibson’s Bar-B-Q.

Our AWS is a vinegar and mayo based sauce like the original, with a little kick and has just enough tang to work as a caesar dressing substitute. AWS is a staple condiment in our house because it is delicious and versatile, and not just for bbq!

Its tangy and creamy and perfect slathered all over some grilled tofu skewers, grilled veggies, as a salad dressing, or honestly, just about anything! Whip up a batch and let me know all the ways you found to use this delicious and easy summer favorite!

If there is one thing the south knows about, it’s BBQ, and this sauce is just a little bit of souther magic!! I am proud of my southern roots and the food the south is known for!


INGREDIENTS:

  • 1 cup vegan mayo

  • 1/2 cup giardiniera, just the veggies not the juice (this is an Italian condiment consisting of a variety of pickled vegetables, found in the pickle section of your grocery store)

  • Juice from 1/2 lemon

  • 1 teaspoon minced garlic

  • 1 teaspoon dijon mustard

  • 2 teaspoons vegan Worcestershire sauce

  • 1 teaspoon black pepper

  • 1/2 teaspoon salt

  • 1/8 - 1/4 teaspoon cayenne pepper


INSTRUCTIONS:

  1. Add all ingredients to a blender or food processor, and blend until it is smooth.

  2. Store in a mason jar in the fridge.

I found a non-vegan recipe similar to this years ago in an article in Cuisine Magazine. I used to make that recipe in the pre-vegan years and have since adapted it to this vegan version to enjoy with my Tofu Skewers and Tempe Tacos.

Guilt Free Chocolate Chip Cookie Dough Balls

IMG_8156.jpg

Edible cookie dough has become all the rage lately.

Regular and vegan versions are gracing grocery store shelves all over, along with dessert hummus these days.

But, why spend a ton of money on something you can make quickly and easily at home. Also you can make it much healthier and pretty guilt free!

These protein packed cookie dough bites are the perfect guilt free treat. Loaded with chickpeas, rolled oats, and nut butter, they come together in just a few minutes, making them the perfect solution when you are craving something sweet without any regrets.

You can roll them into perfect bite size portions, or even eat it right out of the bowl with no judgment and zero guilt!! Hooray for healthy desserts to help keep you on track that the whole family will love!


INGREDIENTS:

  • 1 can of chickpeas, drianed and rinsed (15 oz can)

  • 1 cup old fashioned rolled oats divided in half

  • 3 tablespoons maple syrup

  • 3 tablespoons nut butter (peanut, almond, cashew, sun butter)

  • 1/4 teaspoon salt

  • 1/3 cups vegan chocolate chips, like Enjoy Life brand


INSTRUCTIONS:

  1. Add chickpeas, 1/2 cup rolled oats, maple syrup, nut butter, and salt to a food processor.

  2. Blend until the mixture becomes mostly smooth. It will be a little gritty from the oats.

  3. Transfer mixture to a bowl and fold in the chocolate chips and remaining 1/2 rolled oats.

  4. Scoop out dough with small spoon or cookie scoop, and roll into bite size balls.

  5. Store in the refrigerator in an airtight container.

Fried Vegan Mozzarella Bites

IMG_8067.jpg

Oh mozzarella cheese, how I loved you in all of your many forms.

Soft, shredded, on pizza, in a caprese salad, in lasagna, any way at all. But most of all FRIED and dipped in marinara.

So once going vegan I had to, HAD TO, find a way to mimic soft mozzarella. It is the cheese I missed the very most and could not imagine a world where I would not longer eat mozzarella!

Honestly, hard cheeses are really easy, and coming up with a shreddable mozzarella wasn’t too hard, but what stumped me was a soft vegan mozzarella, one that I could make my favorite salad with!

This may not be my easiest cheese recipe, but it is certainly not difficult. Just a little more time consuming than some agar quick set cheeses. This cheese cooks up like a regular agar cheese, but instead of pouring it into a mold, you scoop the mixture and drop it into ice cold water, causing it to quickly set into soft vegan mozzarella cheese balls!

It’s brilliant really! Agar agar will begin to set at room temperature, so dropping this cheese mixture into ice cold water will have it set into a ball almost instantly! It still needs some time in the fridge to completely set, but over all, this recipe is really easy, quick, and pretty straightforward.

Now, before you glance at the ingredients and gawk at addition of sauerkraut, hear me out. It works! It adds a fermented briny-ness (is that a word, if not it is now on this blog if nowhere else) that a lot of vegan cheese recipes are missing. You will never even be able to taste it in the cheese, but I adds a kick that you would miss if you didn’t add it! You gotta trust me here!

So don’t be intimidated and try your hand at making this soft mozzarella!! I think you will be surprised at how easy it is and how close it mimics the real deal! And trust me when I tell you, you want to fry it up and dip it in your favorite marinara sauce ( or my fave is vegan honey mustard..sounds weird maybe but its soooo good)

Use 1/2 a batch of vegan mozzarella, or a whole batch if you are extra hungry. Just double the following recipe.


INGREDIENTS:

  • 1/2 batch vegan soft mozzarella

  • 3/4 cup all purpose flour

  • 2 flax eggs

  • 1/2 cup dairy free milk (I use unsweetened almond)

  • 1 1/2 cups panko bread crumbs

  • 1 tablespoon Italian seasoning

  • 2 teaspoons garlic powder

  • Oil for frying


COOKING INSTRUCTIONS:

  1. Cut 4 - 5 mozzarella balls into quarters.

  2. Add flour to a shallow dish.

  3. In a deeper dish, whisk together 2 flax eggs and 1/2 cup of non-dairy milk.

  4. In another dish mix Italian seasoning, garlic powder and panko.

  5. Start by dredging the mozzarella pieces first in flour, completely covering the pieces.

  6. Next, dip the bites in the flax egg mix, letting the excess drip off a little.

  7. Now, lay the pieces in the panko, gently pressing in the crumbs so they stick to all sides.

  8. Lay coated mozzarella on a plate.

  9. Fill a medium size skillet halfway with oil and heat on medium/high heat until nice and hot.

  10. Once oil is hot, add the mozzarella in batches. Just be careful not to over crowd the pan.

  11. Let the cheese bites fry on each side until brown and crispy before turning.

  12. Take a cooling rack, and place it on top of a paper towel line cookie sheet. Place finished mozzarella bites on the rack while you finish frying the rest.

  13. Serve with a side of marinara sauce.

Any leftovers can be reheated in a 350 degree oven for 10 - 15 minutes or until heated through.

Vegan Cajun Dirty Rice

IMG_7970-2.jpg

INGREDIENTS:

  • 4 cups cooked rice (white or brown)

  • 4 thawed Beyond Meat burgers or a bag of your favorite meatless crumbles

  • 1 large white onion diced small

  • 3 celery stalks diced small

  • 1/2 yellow or red bell pepper diced small

  • 3 - 4 teaspoons of cajun seasoning (if you do not have any cajun spice, you can add 1/2 teaspoon each of garlic, paprika, onion powder, thyme, salt, pepper, and 1/4 - 1/2 teaspoon cayenne). You can add more of the above if it is not seasoned to your liking.

  • 1/4 cup of water

  • 2 teaspoons vegan Worcestershire sauce

  • 1 teaspoon vegetable Better Than Boullion (they also make a reduced sodium version)

  • 1/4 cup chopped flat leaf parsley (optional)

  • sliced jalapeno (optional)

COOKING INSTRUCTIONS:

  1. Cook rice according to package instructions or in a rice cooker.

  2. Heat a large skillet, or a wok works well too, with 2 teaspoons of oil on medium high heat.

  3. Toss the chopped veggies into the pan, cooking until the onions are translucent and the peppers and celery have softened.

  4. Add your "meat" and dry seasoning to the veggies, and continue cooking until the Beyond Meat, or crumbles are cooked through.

  5. Whisk Better Than Boullion and Worcestershire sauce with the 1/4 cup of water

  6. Reduce heat to med/ low and add water mixture, and the 4 cups of cooked rice to the pan.

  7. Stir well and continue cooking for about 5 minutes. The rice will begin to stick to the bottom of the pan and get a little crispy. You want this! Just keep scraping the bottom of the pan with a wooden spoon while you stir.

  8. Taste a little of the rice to see if it has enough spice, or seasoning for your liking. You can always add extra heat by adding some extra cayenne or black pepper.

  9. Garnish with fresh parsley or jalapeño peppers.


Vegan Soft Mozzarella Cheese

IMG_7906.jpg

Oh mozzarella cheese, how I loved you in all of your many forms.

Soft, shredded, on pizza, in a caprese salad, in lasagna, any way at all.

So once going vegan I had to, HAD TO, find a way to mimic soft mozzarella. It is the cheese I missed the very most and could not imagine a world where I would not longer eat mozzarella!

Honestly, hard cheeses are really easy, and coming up with a shreddable mozzarella wasn’t too hard, but what stumped me was a soft vegan mozzarella, one that I could make my favorite salad with!

This may not be my easiest cheese recipe, but it is certainly not difficult. Just a little more time consuming than some agar quick set cheeses. This cheese cooks up like a regular agar cheese, but instead of pouring it into a mold, you scoop the mixture and drop it into ice cold water, causing it to quickly set into soft vegan mozzarella cheese balls!

It’s brilliant really! Agar agar will begin to set at room temperature, so dropping this cheese mixture into ice cold water will have it set into a ball almost instantly! It still needs some time in the fridge to completely set, but over all, this recipe is really easy, quick, and pretty straightforward.

Now, before you glance at the ingredients and gawk at addition of sauerkraut, hear me out. It works! It adds a fermented briny-ness (is that a word, if not it is now on this blog if nowhere else) that a lot of vegan cheese recipes are missing. You will never even be able to taste it in the cheese, but I adds a kick that you would miss if you didn’t add it! You gotta trust me here!

This vegan soft mozzarella will keep in the fridge for about a week and will work perfectly for a caprese salad, sliced on top of pizza, diced on a green salad, or in any recipe where you are missing soft mozzarella!

So don’t be intimidated and try your hand at making this soft mozzarella!! I think you will be surprised at how easy it is and how close it mimics the real deal!


INGREDIENTS:

  • 1 cup cashews soaked over night or microwaved for 3 minutes in 1 and 1/2 cups water, then drained.

  • 1/2 cup sauerkraut, without the juice

  • 1/4 cup plant based milk

  • 1 teaspoon minced garlic

  • 3 tablespoons tapioca starch

  • 2 tablespoons triple filtered coconut oil

  • 2 teaspoons nutritional yeast

  • 1 teaspoon of salt

  • 1/2 cup water

  • 2 teaspoons agar powder


COOKING INSTRUCTIONS: 

  1. Add drained cashews, and all other ingredients EXCEPT the water and agar to a high speed blender or food processor.

  2. Blend on high until the mixture is completely smooth. You may need to scrape the sides down a few times to make sure all of the cashew bits get processed.

  3. Fill a large bowl halfway with water and a cup of ice. Stir in a few teaspoons of salt and place next to your stove top.

  4. In a medium sized pot, bring water and agar powder to a boil.

  5. Once it is boiling reduce heat to med/low.

  6. Mix the cashew mixture into the water and agar, stirring continuously unit it becomes thick and stretchy. This will take just a couple of minutes, as it comes together pretty quickly. Just keep stirring and scraping the cheese from the sides of the pot. It will resemble a stretchy dough/ batter and scoop easily once it is ready.

  7. With a medium size cookie scoop (or you can use a large spoon or ice cream scoop) scoop out balls of mozzarella and drop them into the bowl of ice water.

  8. Once all of the mozzarella balls are formed and in the water, place the bowl in the fridge for about an hour, or until the mozzarella has firmed up a bit.

  9. Once firm, remove mozzarella and place in zip lock bags or a shallow storage container adding just a little of the liquid brine for storage. You don’t need to fully cover them. Just add a little of the liquid so they do not dry out.

Store in fridge for up to 5 days