Vegan Buffalo "Chicken" Dip

IMG_8233.jpg

Every time I make this buffalo “chicken” dip for a party, there is not a single bite left.

Non vegans can not believe this dip is actually vegan and aways marvel at how well the jackfruit mimics the texture of chicken. Jackfruit is the great meat mimicker, especially when trying to replace shredded meat in recipe. It has little taste on it’s own when its picked green and packed in brine. Once its drained and shredded it looks and feels like meat. It easy takes on the flavors you are cooking with, making it great for this recipe!

You can use any vegan cheddar you like. You can use store bough or even try your hand at one of our many cheddar style cheeses on the site.

We also use Franks buffalo sauce in this recipe because it is in fact vegan. The butter “flavor” in the sauce contains no dairy!! Hooray for small miracles, because I am an official Frank’s sauce groupie if that is even a thing!?! If not I am happy to head up an official fan club! You can use any vegan buffalo sauce you like, though!

This classic dip is spicy, cheesy, gooey, and always a crowd pleaser. I also like to whip up a batch of this tasty dip for sandwiches or for my Vegan Buffalo “chicken” bites, Buffalo Mac and Cheese, or Buffalo Stuffed Challah!!

So go make yourself a batch and try to make a few other thing with it too!! Those are my favorite kinds of recipes. The ones that just giving you some love in all kinds of new ways.


NGREDIENTS:

  • 1 can jackfruit in brine or 4 easy vegan chicken breast finely diced

  • 1 8oz container vegan cream cheese

  • 3/4 cups of buffalo sauce (I use Franks)

  • 1/2 cup vegan mayo

  • Pinch of salt

  • 1/4 teaspoon pepper

  • 2 tablespoons corn or tapioca starch

  • 1 plus 1/2 cups vegan cheddar shreds (like Follow Your Heart)


INSTRUCTIONS:

Pre-heat oven to 350 degrees.

  1. If using jackfruit, drain and chop the pieces, or shred them using you fingers into a medium sized bowl. The fruit pulls apart easily, and I find using my fingers easier than chopping. If using chicken prepare following instructions and dice after the seitan has rested.

  2. Add the remaining ingredients, except 1/2 cup of cheese, to the bowl and mix well.

  3. Transfer mixture to a small baking dish and top with remaining 1/2 cup of cheese.

  4. Bake for 20 - 25 minutes or until cheese on top is melty.

  5. Serve with bread, crackers, carrots, or celery sticks.


Southern Tofu Scallops and Grits

IMG_7883.jpg

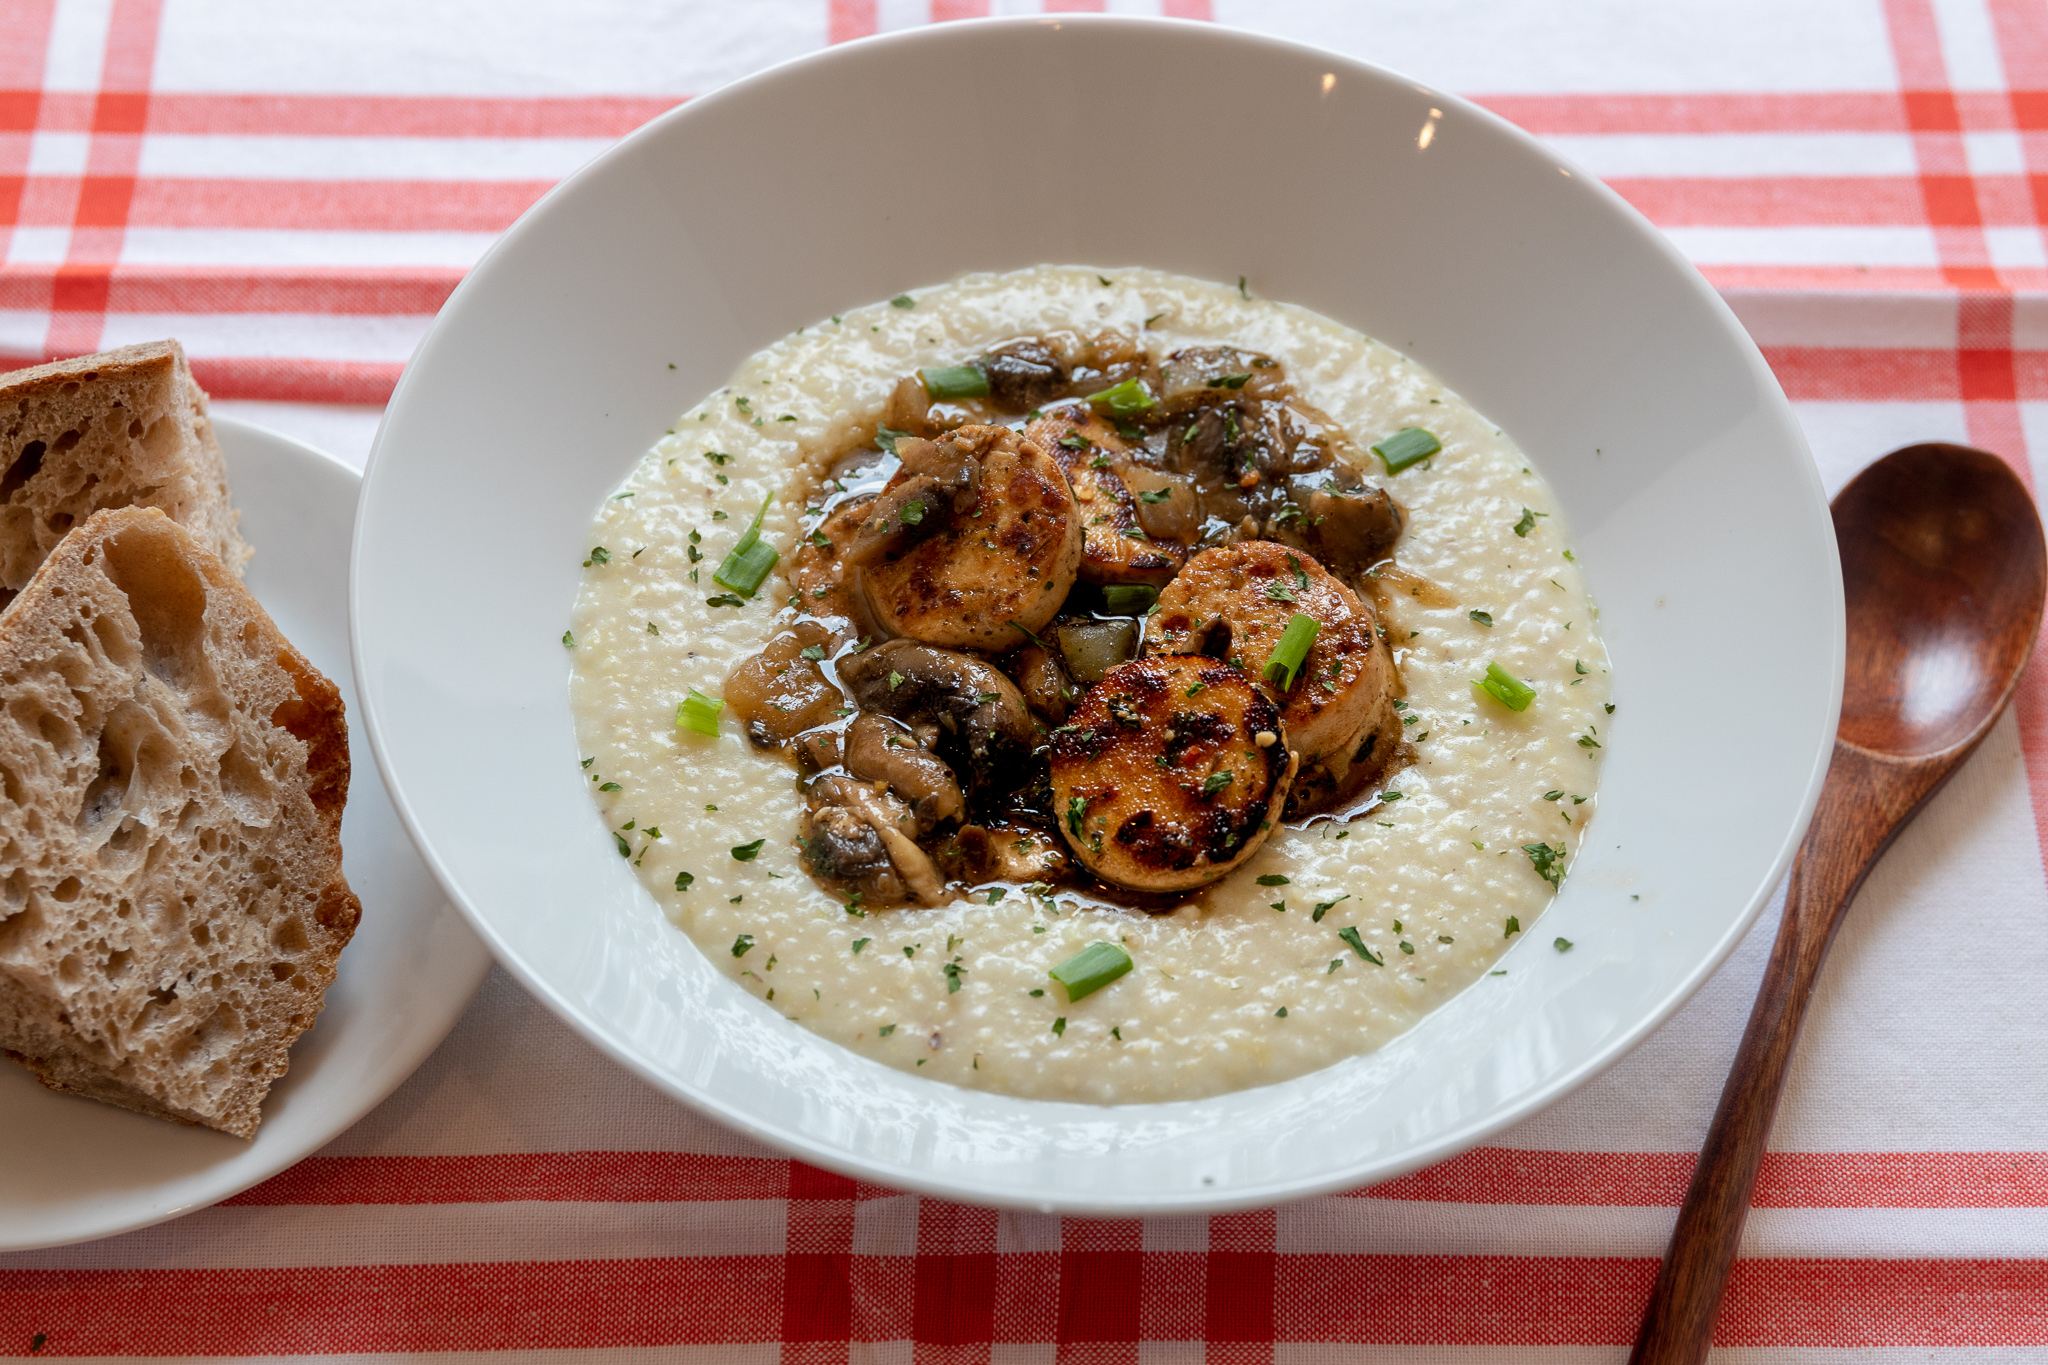
Growing up, shrimp and grits were a favorite of mine. I am from the south and in the south we eat grits with just about anything!

Once we went vegan I longed for a bowl of delicious shrimps and grits and knew there had to be a way to mimic the classic without the shrimp or other animal products.

I quickly learned tofu makes a great scallop substitute and decided tofu scallops would be a close enough second for my favorite dish!

Well it worked well enough to satisfy my craving and now its my husband and oldest daughters favorite dish! It cooks up pretty quick and is the perfect comfort food any time of year!

The tofu scallops are savory with a kick of citrus. The grits are prefectly creamy with a zest of lemon. We add cream cheese to the grits because cheese grits reign supreme over any other grit ever!!

So if you have had a hankering for some shrimp and grits since going vegan, maybe this dish will hit the spot. If you have never had a grit, my sincerest apologies, and may I urge you to try them! I am pretty sure if you eat them this way, you are gonea love them!


INGREDIENTS:

  • 1 Package extra firm tofu

  • 2 cups sliced mushrooms

  • 1 small diced onion

  • 1 teaspoon minced garlic

  • 3 tablespoons butter

  • 1 teaspoon Better Than Bouillon

  • 2 tablespoons water water

  • 1/3 cup plus 2 tablespoons white wine, like chardonnay

  • 1 tablespoon vegan Worcestershire sauce

  • 1 tablespoon coconut aminos

  • Juice from 1 lemon

  • 1 teaspoon parsley

  • 1 teaspoon all purpose seasoning, I use Trader Joes 21 season salute

  • 1-2 green onions or chives for garnish.

The Grits

  • 1 cups of dried grits (not instant)

  • 2 cups plant based milk

  • 3 cups water

  • 1 tablespoon vegan butter

  • 1/2 teaspoon salt

  • 1/4 cup vegan cream cheese

  • 1-2 teaspoons lemon zest

  • pepper to taste


COOKING INSTRUCTIONS:

  1. Drain tofu, and wrap up in a clean kitchen towel, or some paper towels. Place a few books on top and let sit for 5 minutes to press out the excess liquid.

  2. Cut tofu in half length wise, and using an 1 inch circle cutter, cut scallops from the 2 pieces tofu. You can use the scraps as well or save them to make something else later, like tofu ricotta.

  3. In a shallow dish mix 2 tablespoons of wine, Worcestershire sauce, and aminos. Add the tofu and let marinade for 15 mintues.

  4. In a large pot or dutch oven, bring the milk and water to a boil for the grits. Once the liquid is boiling, add in the grits, salt, and butter. Lower the heat to low, and allow the grits to simmer until thickened, stirring occasionally to avoid sticking. This takes about 15- 20 minutes. The grits can cook and thicken while you prepare the tofu.  Once the grits are thick, stir in the cream cheese, pepper, and lemon zest.

  5. In large high side skillet, melt 1 tablespoon of butter on medium heat. Add the tofu scallops along with marinade and cook on each side for 3-5 minutes, or until they begin to brown and crisp, and all of the liquid is absorbed. Once tofu is done, remove from the pan and set aside. Add 2 tablespoons of butter back to the pan, along with the mushrooms, and onions. Cook until the onions become translucent, then add the wine, Better Than Bouillon, water, lemon juice, minced garlic, and seasoning. Allow the wine to cook down for several minutes, then add the tofu back to the pan. Let the tofu simmer on low heat in the sauce for 10-15 minutes.

  6. To serve, scoop some grits into each bowl and top with tofu scallops and sauce. Garnish with chopped green onions or chives.

serves 4-6

Cinnamon Apple Vegan Pancakes with Candied Pecans

IMG_8007.jpg

INGREDIENTS:

Pancakes:

  • 1 1/4 cups all purpose flour

  • 2 tablespoons white sugar (Fl Crystals are vegan)

  • 2 teaspoons baking powder

  • 1/4 teaspoon salt

  • 1/2 teaspoon cinnamon

  • 1/2 teaspoon vanilla extract

  • 1 1/4 cup plant based milk

  • 1 tablespoon melted vegan butter

Apples:

  • 2-3 granny smith apples, peeled and thinly sliced

  • 2 teaspoons vegan butter

  • 2 tablespoons brown sugar

  • 1 tablespoon maple syrup

  • 1 teaspoon cinnamon

  • a pinch of salt

Candied Pecans:

  • 1/2 cup pecan halves

  • 1 1/2 teaspoons vegan butter

  • 1 tablespoon brown sugar

  • 1/4 teaspoon cinnamon

  • 1 teaspoon maple syrup

COOKING INSTRUCTIONS:

  1. For the apples, heat a small to medium skillet on medium heat and add butter. Once butter has melted, add apples, brown sugar, cinnamon, maple syrup, and salt and reduce heat to low. Allow apples to simmer, and soften while you prepare the pancakes, and pecans. Once apples are soft and a syrup has formed, this takes about 15 minutes, remove from heat and set aside.

  2. For the pecans, heat a small skillet on medium heat. Melt the butter, next adding the pecans, brown sugar, maple syrup, cinnamon, and salt. Lower the heat a bit and continue moving the pecans around the pan with a spoon while the sugar melts, and begins to get sticky. The nuts and sugar can burn quickly, so be sure to keep the pecans moving until the sugar becomes fully melted and looks like caramel. This can take between 5 and 10 minutes depending on the pan. Once pecans are done, pour them out onto a plastic cutting board or a piece of wax paper allowing them to cool, and the sugar to harden. Once they have cooled you can break them apart and into pieces.

  3. For the pancakes, whisk all dry ingredients in a large bowl.

  4. Add in the melted butter, and plant based milk and stir well.

  5. Heat a large skillet on medium heat. Add a 1/4- 1/2 teaspoon of vegan butter or spray the pan with cooking oil.

  6. Using a 1/4 cup measuring cup, scoop out batter into the skillet, 2 or 3 pancakes at time.

  7. Let pancakes cook until tiny bubbles begin to form and pop. Once this happens they are ready to flip. Cook on the other side for a few minutes, or until the pancakes seem cooked through.

  8. Repeat, adding more butter or oil to the pan as needed until all batter is used.

  9. Top finished pancakes with cinnamon apples, candied pecans, and maple syrup to serve.

serves 3-4, You can easily double the recipe for more servings

Vegan No Rise Hamburger Buns

IMG_7853.jpg

I am not sure why it is so hard to find vegan buns at the grocery store but it is!

Either they have egg or dairy in them, or if they are vegan, they are full of not so healthy ingredients.

It’s pretty frustrating to be perfectly honest!

So I adapted a no rise bun recipe that I used to make all the time, and made it vegan.

These buns take hardly any time and are so delicious. you can easily shape them into hot dog buns as well or even make them smaller and use them as dinner rolls!

They do not require a ton of ingredients, and you will know exactly what is going into your bread!! I am always amazed at just how many ingredients are in store bought bread and buns!!

These vegan no rise hamburger buns are cheap and easy to make, and freeze well, too! And for me, thats a perfect recipe!


INGREDIENTS:

  • 3 1/2 cups of all purpose flour

  • 2 tablespoons active dry yeast

  • 1 cup plus 3 tablespoons warm water (110 to 115 degrees)

  • 1/4 cup white sugar

  • 1 teapsoon salt

  • 1/3 cup neutral oil. I use refined coconut.

  • 1 flax egg


COOKING INSTRUCTIONS:

  1. In a glass bowl, add yeast, water, and 1 tablespoon of sugar. Let sit for 10 minutes until the yeast becomes foamy.

  2. If using a stand mixer, add flour, salt, and remaining sugar to the mixer bowl. Once yeast is ready, mix in flax egg, and oil to the the yeast mixture. Add the wet ingredients to the dry ingredients.

  3. Mix on medium speed for 5 minutes. If the mixture is too dry, you can add a tablespoon more of water. If it seems too wet add a tablespoon more flour. The dough should be soft but not sticking to the sides of the mixer.

  4. If mixing by hand, follow above instructions for combining ingredients. Once the dough is mixed, pour out on a clean counter top. and kneed by hand for 5 minutes.

  5. Once dough is ready, divide into 9 equal pieces. If you want smaller buns, divide into 12 equal pieces. Form a disk shape with each piece of dough, but do not flatten them out. Place on a parchment lined cookie sheet.

  6. Allow buns to rest for 10 minutes while you pre heat the oven to 425 degrees. Once the oven is ready, place buns inside and bake for 10 - 15 minutes. If the buns are not browning evenly, you can rotate the baking sheet halfway through baking. You can also brush them with some vegan butter to help them brown.

  7. Once buns are finished baking, allow to cool before serving.

  8. You can freeze any left over buns in a freezer zip lock bag for up to a month

yields 9-12 buns 

If you liked this recipe, try these:

Vegan Pretzel Buns

Vegan Garlic Challah Rolls

Easy Vegan Sandwich Bread


Triple Chocolate Vegan Pop-Tarts

When I was a kid, I lived off of pop-tarts. Cherry or chocolate being my faves, blueberry being the only one I never liked but would eat anyways.

It was the 80s-90s and pop-tarts were THE breakfast food, until Toaster Strudel came along and tried to steal pop-tart’s thunder.

We will just say my dad was a couponing, economical man, and there was no way he was going to buy us a box of 4 toaster strudels for the price of two boxes of pop-tarts, no matter how hard we begged! So we remained a loyal pop-tart eating and loving family forever more.

Then I grew up and had kids of my own and became semi health conscience. Even before we were vegan, I rarely bought my kids pop-tarts because “they are bad for you.” I mean its not a lie, but lets just say I have loosened the reigns over the years where letting my kids eat “junk” food is concerned.

That said I still prefer to make them homemade version of that junk food because I still want them eating the best possible version of the junk food they can. For starters it has to be free of animal products, high fructose corn syrup, and as many preservatives I can avoid. I won’t withhold sugar from my kids. You get one life and you have to live it! I feel like moderate sugar is ok and pop-tarts need to be consumed because they are delicious and sprinkles make everyone fricking happy! They already can’t eat so many things that they wish they could because we are vegan. Everything in moderation and all of that.

It is actually really easy to make a healthier, vegan version of pop-tarts at home and fill them with whatever you like, even if you like blueberries ( but seriously, there are way better choices than blueberry!) The dough is easy to make and work with, and they bake up really fast! If you have ever made easy pie dough, it’s basically that!

So if you have been without pop-tarts for far too long, the wait is over. And if you grew up eating them every day like I did, these will surely bring a smile to your face. I mean come on, who doesn’t want an excuse to eat chocolate for breakfast every now and again!


INGREDIENTS:

The Dough

  • 1 3/4 cups all purpose flour

  • 1/2 cup cocoa powder

  • 2/3 cups vegan butter

  • a pinch of salt

  • 2 tablespoons white sugar

  • 3 - 4 tablespoons ice water

  • sprinkles for topping (optional)

The Filling

  • 3 tablespoons brown sugar

  • 2 tablespoons cocoa powder

  • 1/3 cup of plant based milk

  • 3 oz vegan chocolate chips or chopped chocolate

  • pinch of salt

The Glaze

  • 1/4 cup powdered sugar

  • 1 teaspoon cocoa powder

  • a few drops of plant based milk

COOKING INSTRUCTIONS:

  1. Preheat oven to 350.

  2. Prepare your filling adding half of the chopped chocolate, and the remaining ingredients to a small sauce pan. Bring to a boil, then reduce heat to simmer. Cook for 5 minutes to allow sauce to thicken. Remove from heat, and stir in the remaining chopped chocolate. Set aside to cool.

  3. To make the dough, add flour, cocoa, butter, and salt to a food processor. Pulse until well combined.

  4. Add in the water one tablespoon at a time until a soft dough has formed. Pop dough in the fridge for 10-15 minutes.

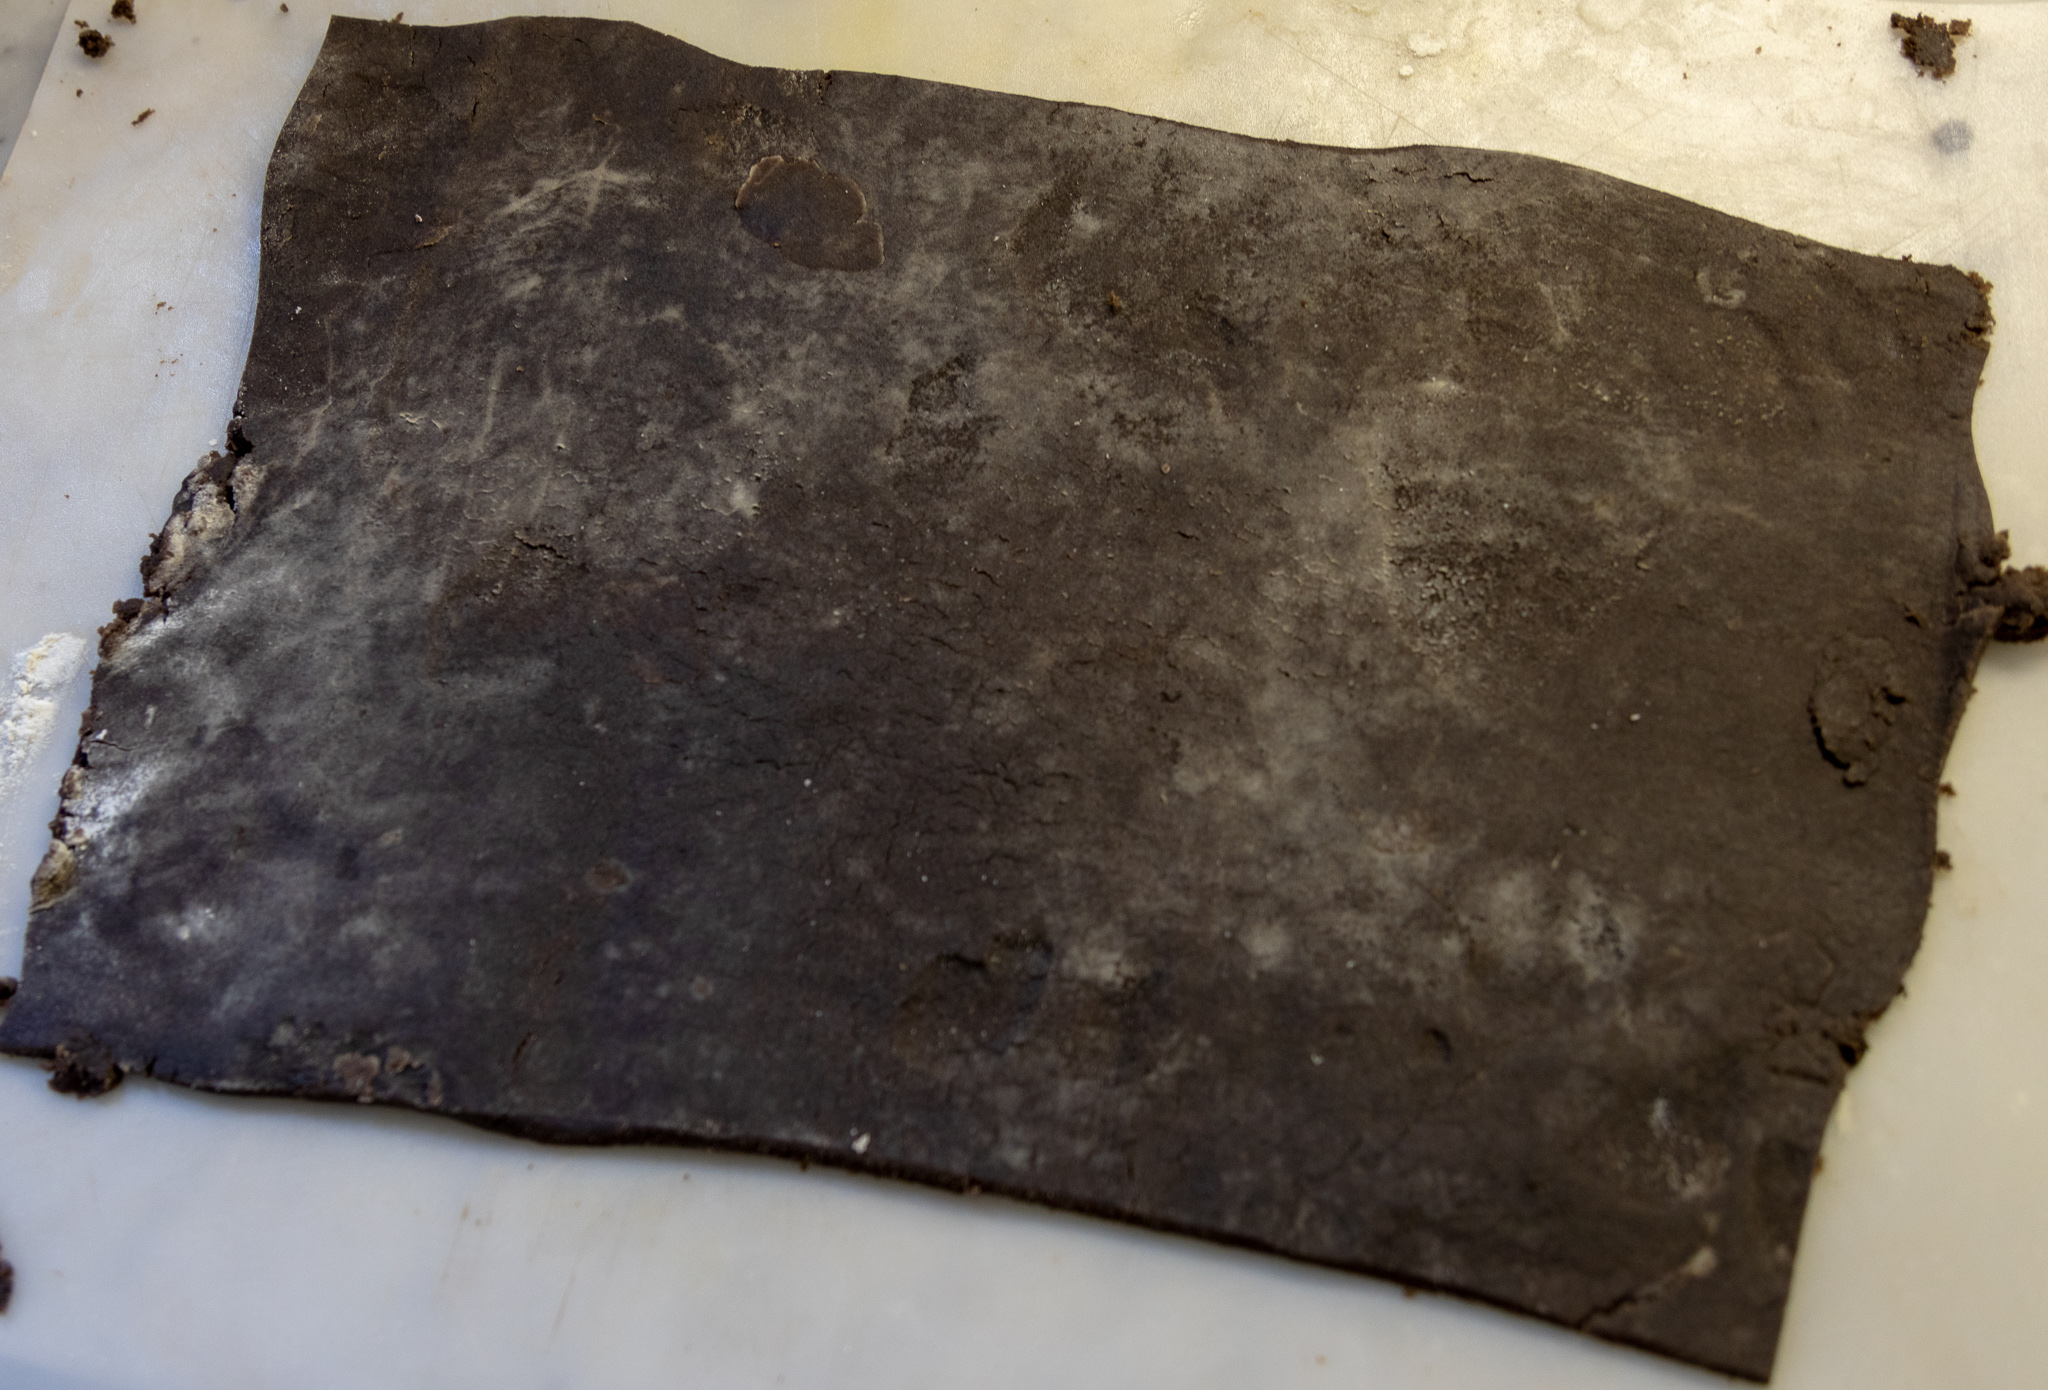
  5. Roll the dough out on a flour dusted, smooth surface to a 1/8 of an inch thick rectangle. You can trim up the edges with a sharp knife, and save the scrap dough.

  6. Once the dough is trimmed and even, cut 3 inch by 5 inch rectangles from the dough, give or take. Be sure when you are calculating how many you can cut, to have a even number. Each pop-tart needs 2 rectangles. Roll out any scrap dough and repeat the process.

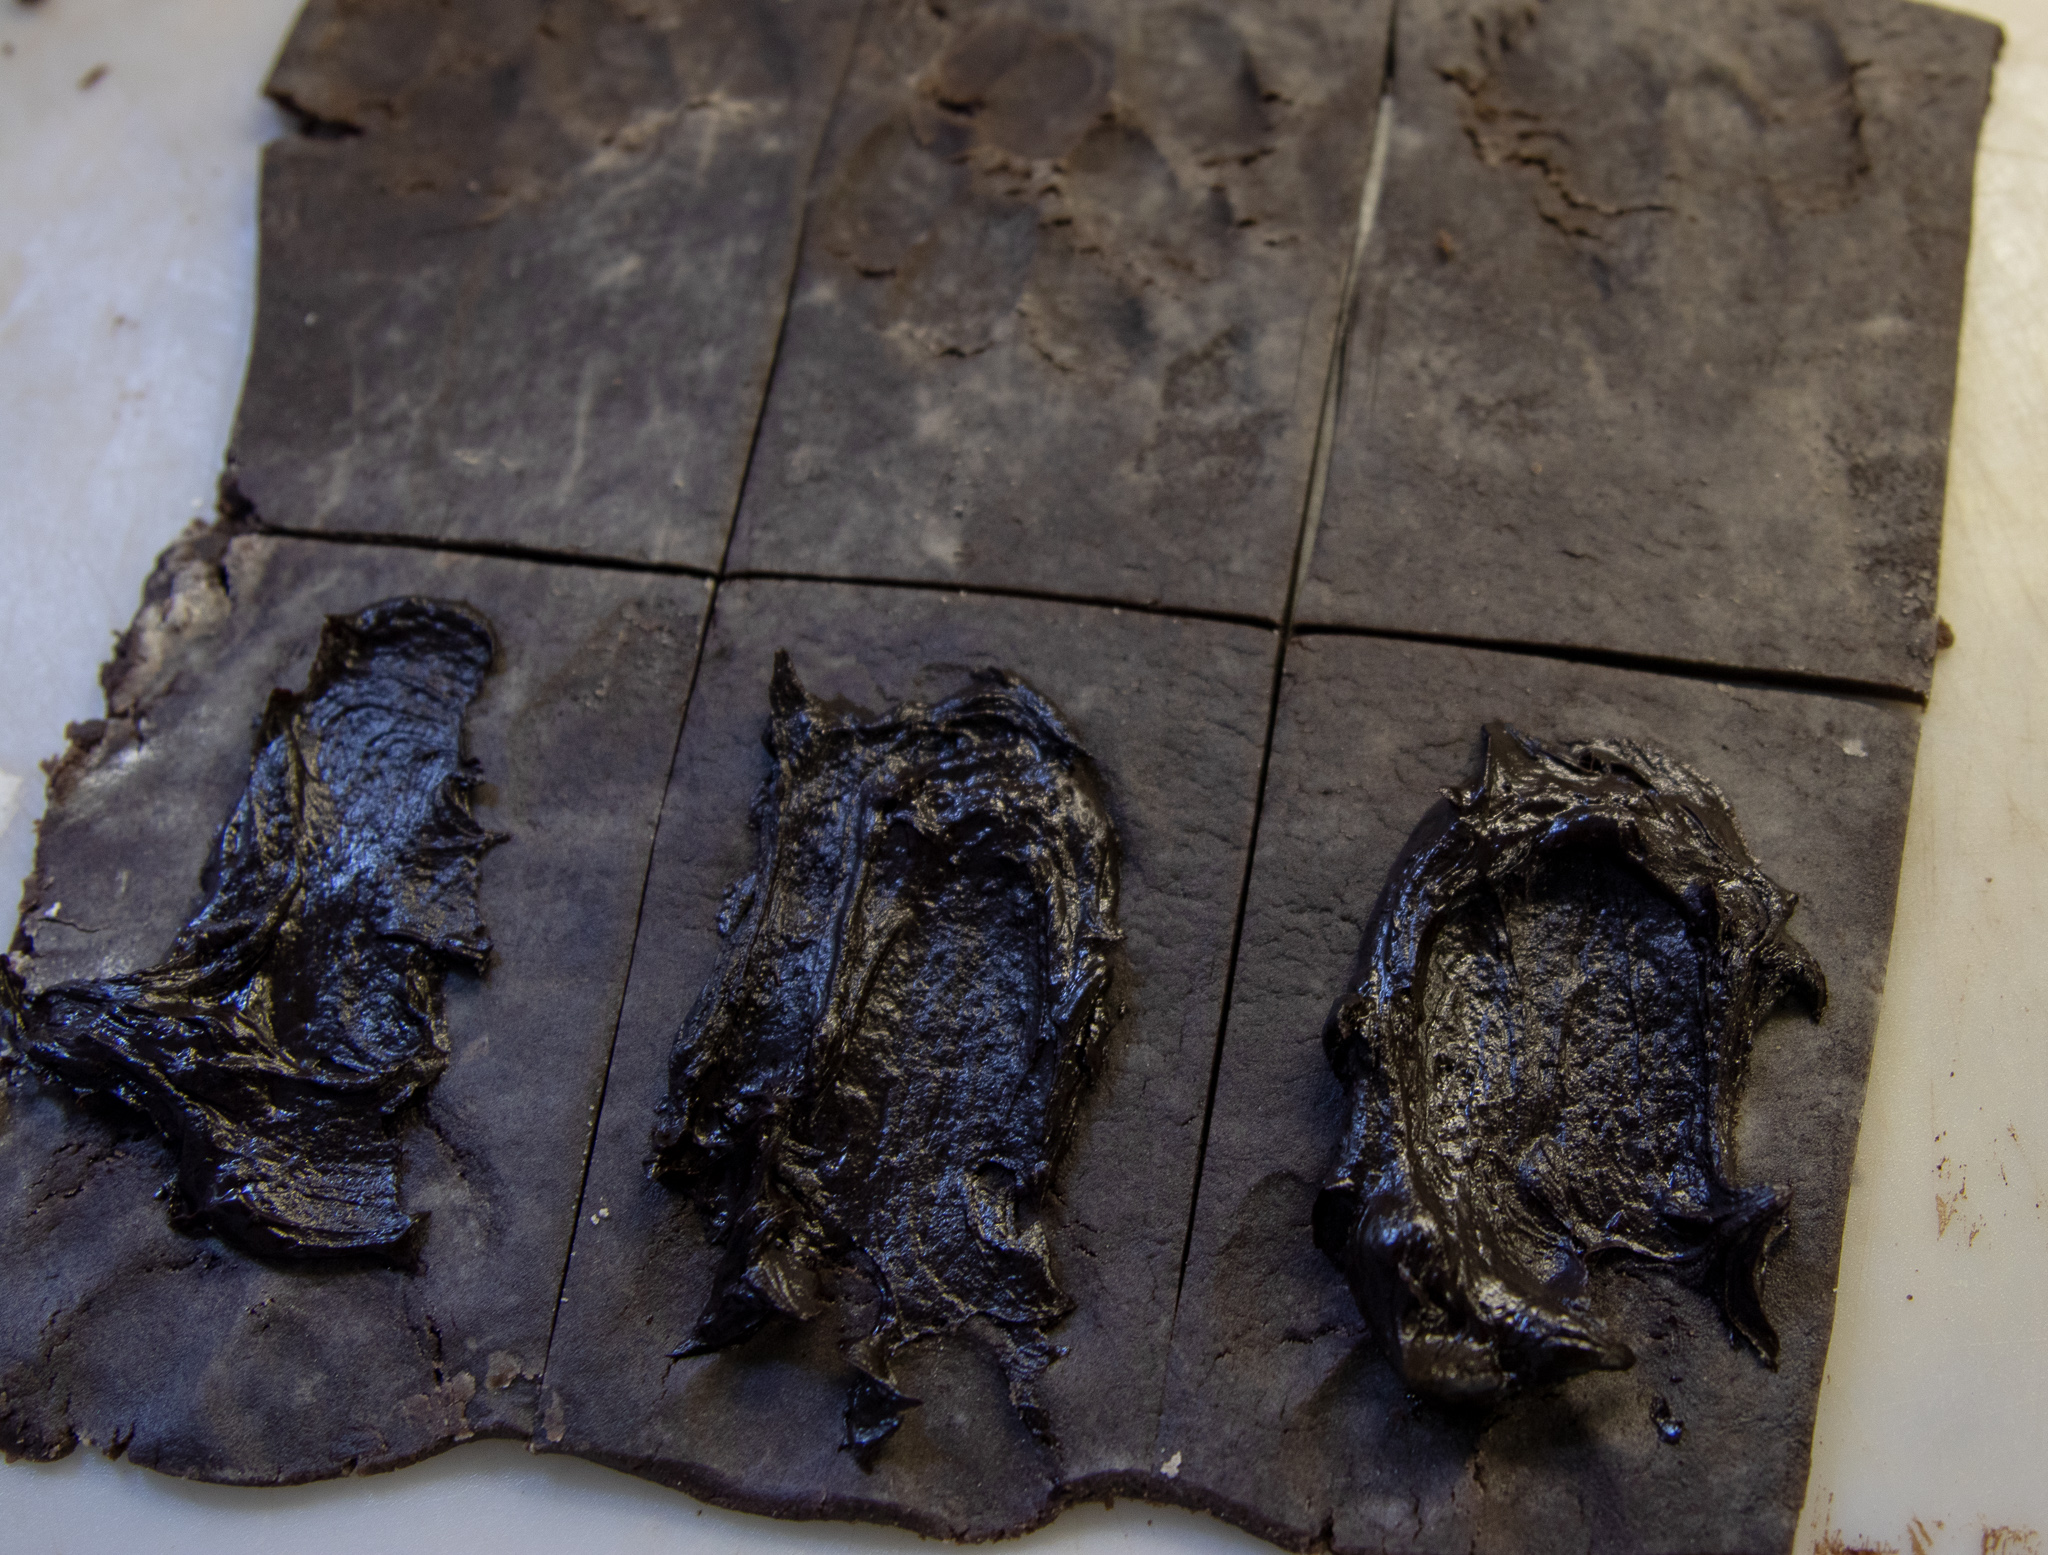
  7. Scoop a teaspoon of chocolate filling onto a rectangle, and smear it around a bit in the middle, careful to not get too close to the edges.

  8. Top the chocolate filled piece of dough with another rectangle of dough. I use a spatula to lift the rectangle and place on top. Use a fork to press, and seal the edges.

  9. Place pop-tarts on a parchment lined baking sheet, or lightly spray one with cooking oil and bake for 20 - 25 minutes.

  10. While pop-tarts are baking, mix together the glaze. If it is too thin you can add a little more powdered sugar to thicken it back up. You want a spreadable consistency.

  11. Once pop-tarts have cooled a bit, spread the icing and serve. You can also top with sprinkles.

Yields 8-10 pop-tarts

IMG_7870.jpg

Spicy Vegan Queso (nut free, allergy friendly)

IMG_2143.jpg

INGREDIENTS:

  • 1/2 cup raw sunflower seeds, and 1/2 cup pumpkin seeds, soaked in hot water for one hour, or microwaved covered in water for three minutes
  • 2 tablespoons nutritional yeast
  • 2 teaspoons of light miso paste (if you have a soy allergy skip the miso)
  • 1 tablespoon apple cider vinegar
  • 1 teaspoon salt
  • 4 tablespoons of tapioca starch, corn starch, or arrow root powder
  • 2 cups of water
  • 1 small can of green chili peppers
  • A few shakes of your favorite hot sauce

COOKING INSTRUCTIONS:

  1. Once seeds are done microwaving, drain and rinse with cold water.
  2. Add all ingredients, except the chilis and hot sauce, to a high speed blender or food processor.
  3. Process and blend on high until the mixture is completely smooth (no lumps at all).
  4. Transfer the mixture to a medium size pot and cook on medium heat, stirring with a whisk continually until the mixture thickens. This only takes a few minutes.
  5. Once the queso gets to a pudding like texture, remove it from the heat, and mix in the chilis and hot sauce. If you feel like it is too think, you can add a little more water to thin it out. 
  6. Store in the fridge for up to a week.


Vegan Chili and Cheese Loaded Baked Potatoes

IMG_0248.jpg

We eat a lot of baked potatoes in our house!

They are cheap, filling, and tasty. I mean after all carbs are my love language, and potatoes and bread top the list of favorite carbs!

So the only thing better than a buttery baked potato, is a baked potato covered the THE BEST VEGAN CHILI, a perfect vegan cheddar queso, sour cream, and onions!

Y’all!! This is one of my all time favorite easy comfort foods to throw together on a busy week night. I try and always freeze any leftover chili so I will have some on hand for an occasion such as this. I also like to bake up some potatoes on a weekend so they are ready to go on busy weeknights! Just reheat and top!!! Easy peasy.

So if loaded baked potatoes are your jam, you gotta make this loaded baked potato. Just know you are gonna want to pour that vegan cheddar queso on just about everything, so you might want to double the batch.


NGREDIENTS:

  • 4 - 6 russet potatoes

  • 2 cups The Best Vegan Chili

  • 2 -3 teaspoons vegan butter

  • salt and pepper to taste

  • garlic powder to taste

  • vegan cheddar queso

  • optional toppings, vegan sour cream, diced onions, chives

Vegan Cheddar Queso:

  • 1/2 cups cashews soaked overnight or covered in water and microwaved for 3 minutes, then drained

  • 1 cup water

  • 2 tablespoons corn starch or tapioca starch

  • 1 teaspoon light miso paste

  • 1/2 tablespoon apple cider vinegar

  • 2 tablespoons nutritional yeast

  • 1/2 teaspoon tumeric

  • 1 teaspoon smoke paprika

  • 1/2 teaspoon salt

  • 1/2 small can of green chilis

INSTRUCTIONS:

Preheat oven to 400 degrees

  1. Wash potatoes. You will also need 4 - 6 pieces of aluminum foil large enough to wrap around each potato.

  2. Add 1/2 teaspoon of butter to the middle of each piece of foil. Place potato on top of butter, and poke a sharp knife into each potato a few times. Sprinkle with garlic powder, salt and pepper, and tightly wrap foil around the potatoes.

  3. Place potatoes on a baking sheet, and bake for about 30-40 minutes, depending on size of potatoes. When you can easily poke a knife into the potatoes, they are done.

  4. While potatoes are baking, make the cheese sauce by adding all of the ingredients except the chilis to high speed blender or food processor, and blend until completely smooth.

  5. Transfer the cheese mixture to a medium pot, and heat on medium/ low heat, whisking continuously until the cheese begins to thicken to a queso constancy. This only takes a few minutes. If it gets too thick, you can add a little more water to thin it back out. Add the chilis and stir.

  6. Allow potatoes to cool a little before carefully unwrapping the foil (careful not to burn yourself.)

  7. Top the potatoes with 1/4- 1/2 cup vegan chili, some cheddar queso, and whatever toppings you like to serve.

serves 4-6


Coconut Milk Cheddar Cheese Shapes

IMG_0286.jpg

I love experimenting with different vegan cheese flavors and bases. I really love using coconut milk because it’s easy and affordable.

I am often asked if these cheeses have a strong coconut flavor and the answer is, not really. I always used refined coconut oil which has little to no coconut flavor at all, and all of the spices and other ingredients in the cheese mask the flavor of the milk very well.

I also love making my kids easy and healthy snacks that are a allergy friendly alternative.

What kid doesn’t love to get to play with their food, and with these vegan cheddar shapes it 100% encouraged.

You can make any shape you like using whatever cookie cutters you happen to have on hand.

You can also easily mold this cheese in small bowls and slice or shred it for any recipe calling for cheddar cheese.

Agar powder is simply a vegan gelatin made from seaweed and can be found at Asian markets or online.

It sets up once it cools off but will melt once you heat it.

So don’t be afraid to make your own dairy free cheese!! it’s so easy , cheap and actually really delicious. And in this case, pretty fun too!


INGREDIENTS:

  • 1 can full fat coconut milk

  • 2 tablespoons agar powder

  • 2 teaspoons light miso paste

  • 2 tablespoons lemon juice

  • 1 teaspoon salt

  • 1/4 cup plus 1 tablespoon nutritional yeast

  • 3 tablespoons tapioca starch

  • 1 teaspoon turmeric

  • 2 teaspoons smoked paprika

  • 1/4 cup refined coconut oil


COOKING INSTRUCTIONS:

  1. In a food processor or high speed blender, add all of the ingredients EXCEPT the milk, and agar.

  2. Pulse a few times to mix it all up.

  3. Now add the milk, and agar to a medium sauce pan and bring to a boil. Reduce heat and simmer until mixture thickens to the constancy of a thin pudding. This only takes a few minutes.

  4. Add the milk mixture to the ingredients in the food processor, and mix for about a minute. The mixture will quickly begin to thicken as agar begins to solidify at room temperature.

  5. Transfer to the mixture to a 9x13 pan, or high sided baking pan.

  6. Allow the cheese to harden in the refrigerator uncovered for about an hour.

  7. Once the cheese is set, cut shapes using your favorite cookie cutters. You use the scrap pieces for tacos, soups and chili, on salads, whatever! It will also remelt, so you could use it in quesadillas, nachos, or any other recipe that calls for melty cheese.

  8. Store in an airtight container in the fridge for up to a week.

Vegan Chili Cheese Fries

IMG_0273.jpg

How do I love fries, let me count the ways….

I love them any way you give them to me!! I love them plain, I love them waffled, curly, seasoned, and most of all, I love them loaded with chili and cheese.

I don’t mean to toot my own horn, but I make a mean chili! My mom makes the best non vegan chili so once I became vegan I just swapped the meat for cauliflower and really changed nothing else. (ok that’s a lie, I added cocoa powder, but thats it, I swear!)

I also make a crazy good cheddar cheese sauce using cashews. It’s great as a dip, a filling for quesadillas, or a grilled cheese, and 100% the best cheese for chili cheese fries. So flipping good!

You can buy frozen fries and I won’t judge you. You can normally find a few bags of Trader Joe’s frozen fries in my freezer. But for this recipe, I always make my own. If I am going to eat chili cheese fries, I want THE BEST chili cheese fries, so the requires homemade fries in my mind. They are really not hard to make and far superior to frozen every single time!!!

I also suggest making chili and freezing any leftovers specifically for future fries. I will make for a quick dinner! Just thaw the chili, reheat, whip up a batch of cheese and fry some potatoes! TA-DA, dinner is ready!! I always have leftover chili and freeze with visions of future chili cheese fries.

I love comfort food and fries are my favorite of all the foods!


INGREDIENTS:

  • 4 russet potatoes

  • 2 cups of The Best Vegan Chili

  • 2 cups vegan cheddar queso

  • vegan sour cream, diced onion, or green onions (optional toppings)

  • oil for frying, OR you can oven bake them

Vegan Cheddar Queso:

  • 1/2 cups cashews soaked overnight, or covered in water and microwaved for 3 minutes then drained

  • 1 cup water

  • 2 tablespoons corn starch or tapioca starch

  • 1 teaspoon light miso paste

  • 1/2 tablespoon apple cider vinegar

  • 2 tablespoons nutritional yeast

  • 1/2 teaspoon tumeric

  • 1 teaspoon smoke paprika

  • 1/2 teaspoon salt

  • 1/2 small can of green chilis


INSTRUCTIONS:

  1. Wash the potatoes, peels on.

  2. Cut potatoes into fries.

  3. FOR FRYING THE POTATOES, heat a few inches of oil in a deep skillet (I use a cast iron skillet)on medium heat.Once the oil is nice and hot, start adding small batches of the fries to the oil. Allow them to fry until nice a crisp, about 5 minutes. Once they are done frying, remove from oil and place on a wire cooking rack with some paper towels underneath. This will help them stay crispy while you finish frying the rest.

  4. FOR OVEN BAKING, preheat oven to 400 degrees, Lightly coat fries in a few teaspoons of oil and place them on a cookies sheet lined with parchment paper. Make sure the fries are not over crowded. Sprinkle with salt and bake for about 15 minutes or until the fries seem crispy on one side. Take the cookie sheet out of the oven, and turn the fries with a spatula or a pair of metal tongs. Put the fires back in the oven for another 15 minutes, or until the fries seem fully crisp.

  5. TO MAKE THE CHEESE SAUCE add all of the ingredients except the chilis to a high speed blender or food processor, and blend until completely smooth.

  6. Transfer the cheese mixture to a medium pot and heat on medium/ low heat, whisking continuously until the cheese begins to thicken to a queso consistency. If it gets too thick, you can add a little more water to thin it back out. Add the chilis and stir.

  7. Portion fries between 4 - 6 plates, top with chili, cheese sauce, and whatever toppings you like.

serves 4-6


The Best Vegan Chili

IMG_0211.jpg

Everybody claims to have the “best” chili, but I promise they are liars! They have to be, because this is hands down the best vegan chili you will ever eat!

I know, I know. I know. That is a lofty claim, but I stand by it.

My mom always has made the best chili. Like award winning quality chili. So when we went vegan I needed to find a way to veaganize her chili without changing too much about.

Well I did, and the only thing I did differently was add cauliflower in the place of ground meat to imitate the texture, and add cocoa powder because its my favorite secret ingredient in any chili!

This chili is packed with flavor, it’s easy to make and comes together quickly. It also freezes well making it perfect for meal prep!

Eat it on its own, on a baked potato, on some fries, over some chip, or on a carrot dog. I will eat chili any day of the week, any time of year! It has always been my favorite and I promise again you will be hard pressed to find a better version than this one!


INGREDIENTS:

  • 1 large 12 oz can crushed tomoatoes

  • 1 small can diced tomatoes, drained

  • 1 small can green chilis

  • 2 cans red kidney beans, drained and rinsed

  • 1 small to medium onion

  • 1 small head of cauliflower

  • 2 teaspoons minced garlic

  • 2 teaspoons chili powder

  • 2 teaspoons cumin

  • 1-2 teaspoons salt

  • 1/4 cup dark cocoa powder

  • 1-2 teaspoons liquid smoke (optional)

  • 1 teaspoon vegetable low sodium Better Than Bouillon

  • 1/2 to 1 can of beer, or 1/2 to 1 cup veggie broth ( this just depends on how thick you like your chili)


INSTRUCTIONS:

  1. Chop cauliflower to a fine chop, or put it in your food processor and pules until its good and broken down. We are using the cauliflower in place of ground meat, and are trying to get that sort of texture.

  2. Dice the onion into a fine dice.

  3. Heat a dutch oven or large pot on medium heat. Add a few teaspoons of oil. Once the oil is nice and hot, add the onion and cauliflower. Heat the onion and cauliflower until the onion becomes translucent.

  4. Next, add in the remaining ingredients. Add more or less of the beer or broth depending on how thick you like your chili. You can alway add more if it thickens up too much for your liking. Give it a good stir and reduce heat to simmer.

  5. A side not about the cocoa powder. I know for some people it will seem like an odd ingredient, but it really does make this chili special. I highly recommend you don't skip adding it! I promise you will never want to make chili without it again.

  6. Allow chili to simmer with a lid on for at least an hour, stirring occasionally. I typically start my chili in late afternoon and just let it simmer until dinner.

  7. CROCKPOT OPTION: You an easily make this chili in a crock pot. I normally just saute the onion and cauliflower first before adding it. Set your crock pot to medium heat, and allow to cook for 6-8 hours.

  8. This recipe makes a large pot of chili. If you are a small family, or single, you can freeze the leftovers for several months. I typically portion the cooled chili in freezer bags, in smaller portions. I will thaw the smaller bags of chili to use for toppings on loaded baked potatoes, chili cheese fries, carrot dogs, latkes, or nachos.


Roasted Red Pepper and Kale Knish

If you have had knish then you know just how delicious they are, and if you haven't, I promise you won't be disappointed. Knish originated as an Eastern European Jewish street food. Traditionally filled with mashed potatoes and minced meat, these da…

If you have had knish then you know just how delicious they are, and if you haven't, I promise you won't be disappointed. Knish originated as an Eastern European Jewish street food. Traditionally filled with mashed potatoes and minced meat, these days you can them filled with just about anything. Once again, I am southern, so I take every opportunity to smother almost everything in gravy, giving this traditional dish a southern twist. Feel free to omit the gravy! They are just as good without! 

INGREDIENTS:

The filling

  • 2 medium potatoes,  peeled and diced
  • 1 bunch of washed and trimmed kale, chopped
  • 1 small onion, diced
  • 1/4 cup copped roasted red peppers
  • 1 teaspoon minced garlic
  • 1 teaspoon salt
  • 1 teaspoon dried thyme
  • pepper to taste

Knish dough

  • 2 1/2 cups all-purpose flour
  • 1 teaspoon baking powder
  • 1/2 teaspoon table salt
  • 1 flax egg
  • 1/2 cup oil, I use grapeseed, but you could use vegetable or even coconut oil 
  • 1 teaspoon apple cider vinegar
  • 1/2 cup water 
  • vegan butter for brushing

Brown onion gravy

  • 3  cups of water
  • 3 tablespoons all purpose flour
  • 1 small onion, diced 
  • 1 teaspoon minced garlic
  • 2 teaspoons reduced sodium Better Than Bouillon
  • 1 tablespoon tomato paste
  • 2 teaspoons dijon mustard

COOKING INSTRUCTIONS:

Screen Shot 2018-08-13 at 7.55.15 PM.png

Knish Dough

  1. First prepare the dough by mixing the dry ingredients together in large bowl.
  2. In a smaller bowl mix the oil, water, vinegar and flax egg together, then add to the dry mix.
  3. Work the dough with your hands until it is well combined.
  4. Kneed the dough for a few minutes, just until smooth.
  5. Place dough back into the bowl, and cover with plastic wrap.
  6. Pop it in the fridge for one hour to rest.

The Filling

  1. Bring potatoes to boil in a large pot, and cook until you can poke a fork through them.
  2. Drain potatoes, and set aside in a bowl.
  3. Reheat the pot you used to boil the potatoes, adding a teaspoon of oil, begin sauting the onions and garlic. Once they are translucent, add the kale to the pot and allow to cook until wilted, and tender. Remove from the heat.
  4. Return the potatoes to the pot with the onions, and kale, and mash with a hand masher, or use an electric hand mixer.
  5. Mix in the roasted red pepper, and seasoning to the mash and allow to cool.

Making the Knish and gravy

pre-heat oven to 350 degrees

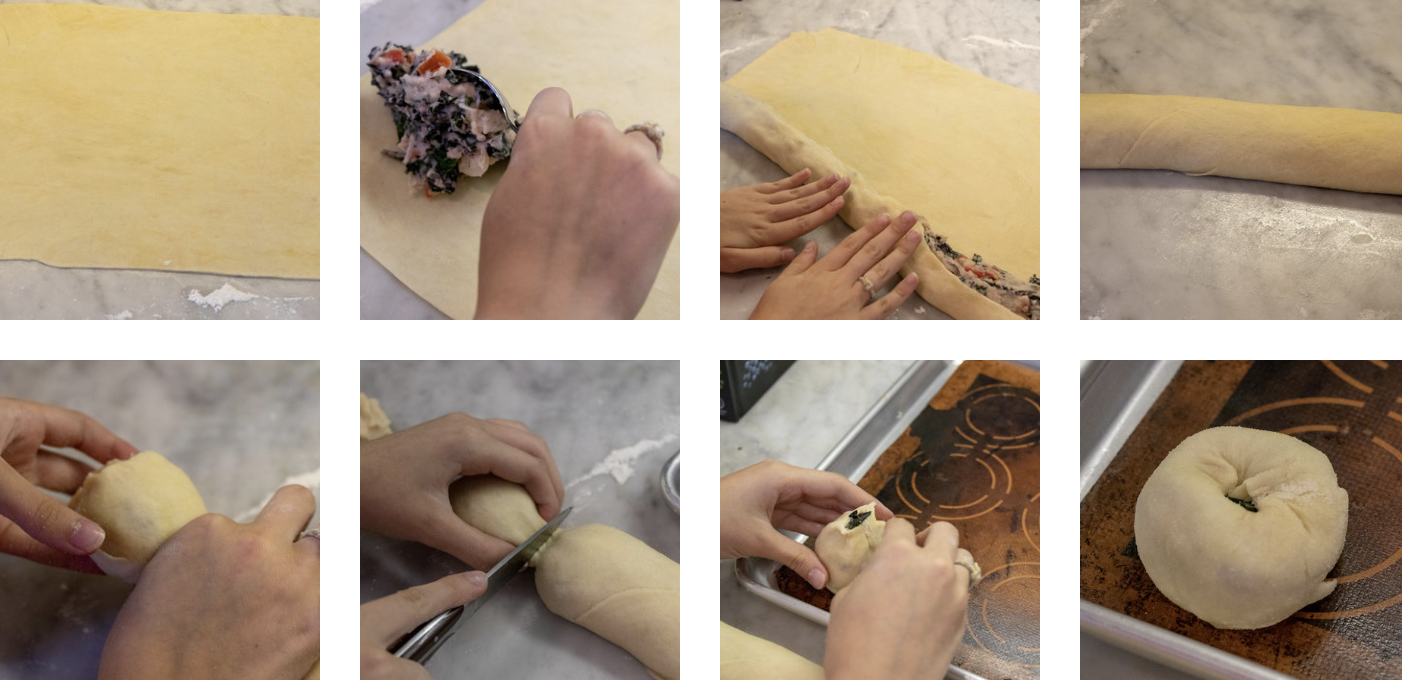
  1. Remove dough from the the fridge and roll it out on a big floured surface (a counter top works best, you need a lot of room) into a large rectangle. The dough should be about a 1/4 inch thick. It's ok if you cannot get it into a perfect rectangle, you can trim up the edges with a sharp knife to even it out. You can save the scrap dough and roll it back out, adding any left over filling you may have to yield a few more knish.
  2. Now at the edge of the dough closest to you, form a log 2 inches wide by 1 inch thick (give or take) with your filling, the length of the dough. 
  3. Once all of the filling is in place, start rolling the dough (starting on the filling end) trying to get the roll as tight as you can, without having the filling squish out the ends. Before you come to the end, brush some water along the edge  of the dough to help seal the seam.
  4. You now have a long log of dough. Starting at either end of the dough, measure in about 3 inches from the end and pinch, then twist the dough. Cut the dough on the twist, and place twist side up on a parchment-paper-lined baking sheet. Take your finger and poke the twist down into the center of the knish. Repeat with the remaining dough. You will get about 8 knish depending on the length of your original dough rectangle , and how big you make each knish. You may have some scrap dough, and extra filling that you can use to make a few more, as well.
  5. Brush the tops of the knish with some vegan butter and bake for 30 - 35 minutes. You can brush some more butter on mid bake if you like. This will help the knish brown a little better.
  6. As the knish are baking, prepare the gravy by sauteing the onions and garlic in the same pan you used for your filling, with a few teaspoons of vegan butter over medium heat. Once the onions are translucent, sprinkle on the flour and stir, letting it cook for a few minutes. Whisk the water, Better than Bouillon, tomato paste, and mustard together, then add to the pan. Reduce the heat to low, add salt and pepper, and let simmer, stirring regularly, until the gravy begins to thicken.
  7. Once knish are done, you can top with the gravy, and garnish with some fresh parsley.

The knish freeze and reheat really well. We often make a double batch, and freeze half. They should be good in the freezer for up to one month. 

Potato and Green Chili Taquitos

IMG_0150.jpg

INGREDIENTS:

  • 4 small/medium russet potatoes

  • 1 small can of green chilis

  • 1/2 onion, diced

  • 1 teaspoon cumin

  • 1 teaspoon chili powder

  • 1/2-1 teaspoon salt

  • 1 teaspoon garlic powder

  • 1/4 cup vegan plain yogurt, I like Kite Hill

  • 1 tablespoon nutritional yeast (optional)

  • 1 pack corn tortillas

  • oil for frying

Avocado Cream:

  • 1 avocado

  • Juice from 1 lime

  • 1/3 cup vegan plain yogurt

  • 1 teaspoon chili powder

  • 1 teaspoon garlic powder

  • 1/2-1 teaspoon salt

  • 2-3 tablespoons water

INSTRUCTIONS:

  1. Peel and dice potatoes. Bring a medium to large pot of water to a boil, and add the potatoes. Boil until potatoes are soft, and you can get a fork through them.

  2. Drain potatoes in a colander, and set aside still in the colander.

  3. In the pot you boiled the potatoes in, heat 1 teaspoon of oil. Add the onion, can of chilis, and spices. Let cook on medium heat until the onions are soft. Add the potatoes back to the pot and mash the potatoes, onions, and peppers with a hand masher, or an electric mixer. If using nutritional yeast, add it in and stir.

  4. Add a few tablespoons of the mashed potato mixture to a tortilla. Spread the mixture evenly over the surface of the tortilla then roll it up. Repeat with remaining filling and tortillas. * Tortilla Trick: I microwave my tortillas with a damp paper towel covering them for about 30 seconds before filling them. This tends to help them get a little more flexible and not crack when rolling!

  5. In medium skillet with high sides, heat 1/4 to 1/2 inch of oil on medium heat.

  6. Add a few tortillas at a time to the hot oil, SEAM SIDE DOWN. Let the taquitos cook for a few minutes before carefully flipping them. It works best to use a pair of metal tongs to flip them. Allow them to fry on the other side for a few minutes until crisp. Once done, remove from oil and allow to cool on a wire cooling rack, with some paper towels underneath. Repeat with remaining taquitos.

  7. To make the Avocado cream, add a peeled and pitted avocado, and the remaining ingredients to a food processor and blend until perfectly smooth. Use 2-3 tablespoons of water depending on how thin you want the cream.

  8. Serve taquitos with avocado cream, and some salsa, or pico.

serves 4-6

Crispy Tofu with Roasted Pepper Marinara and Quinoa

IMG_0094.jpg

Crispy tofu on a bed of savory quinoa, covered in a delicious red pepper marinara makes for a quick and filling weeknight dinner.

You can easily makes this recipe gluten free by using a gf flour blend, and gf panko. You could also use an air fryer to prepare the tofu if you have one, or try baking the tofu pieces if you prefer cooking without oil!

I like that this recipe because it comes together fairly quickly, its super flavorful thanks to the sauce, and can be a nice gluten free option for entertaining!

If you bake or air fry the tofu, it is a super healthy dinner as well. I would air fry by giving the tofu a little spray with oil and fry at 375 for 10-15 minutes or until crispy. If baking, I would bake on a parchment lined cookie sheet at 400, flipping the tofu pieces after 8-10 minutes to crisp up both sides.

No matter how you cook it, I think you will be just as big a fan of this tofu as our family is!


INGREDIENTS:

The Tofu

  • 1 block extra firm tofu

  • 1/3 cup all purpose flour

  • 1 flax egg

  • 1/4 cup plant based milk

  • 2 cups panko bread crumbs, regular or gluten free (not all are vegan, be sure and check)

  • 1 teaspoon each of salt, paprika, garlic powder, and thyme

  • oil for frying

The Marinara

  • 1 (14.5 oz) can diced tomatoes

  • 1/2 -1/3 cup roasted red peppers

  • 1/2 small onion cut in quarters

  • 2 teaspoons minced garlic

  • 1 teaspoon smoked paprika

  • 1 teaspoon salt

  • 1 teaspoon dreid thyme

  • pepper to taste

The Quinoa

  • 1 cup dried quino

  • 2 cups water

  • 1/2 small onion finely diced

  • 2 teaspoons minced garlic

  • 1 teaspoon salt

  • 1 teaspoon dried time

  • 1 teaspoon oil such as grape seed or olive oil

  • 2 tablespoons pine nuts (optional)


INSTRUCTIONS:

  1. Remove tofu from package, and wrap in a clean kitchen towel, or a few paper towels. Put a few books on top and let sit for about 15 minutes to remove the excess liquid from the tofu.

  2. While tofu is pressing, prepare quinoa by bringing 2 cups of water to a boil in a medium sized pot, then add the quinoa. Reduce heat to a simmer and put a lid on the pot. Let quinoa simmer, stirring occasionally until all of the liquid is absorbed.

  3. While the quinoa is simmering, heat a teaspoon of oil in a small skillet. Add the diced onion, and minced garlic, cooking until onions are translucent. Add in the pine nuts and cook just a few minutes. Pine nuts burn very quickly, so keep moving them around the pan until just until they are toasted, then remove from the heat. Once the quinoa is done cooking, mix in the onion, pine nut mixture, and seasoning. Put the lid back on and set aside.

  4. Drain the liquid from the tomatoes, and add them along with all of the other sauce ingredients to a blender or food processor. Blend for a few minutes, until the onion, peppers, and tomatoes are broken down. Heat the sauce in a medium sized pot on simmer while you prepare the tofu.

  5. Cut pressed tofu into 1/2 inch pieces, cutting from the ends of the tofu block. You will get around 8 or 9 pieces.

  6. In a shallow dish, mix 1 flax egg, and 1/4 cup of non dairy milk. Add flour to another shallow dish or plate. Then mix the panko in another dish, or plate with the seasonings.

  7. First coat each piece of tofu with flour, next the flax egg wash, and lastly the panko. Make sure to evenly, and fully coat the tofu with the flour, and flax egg wash. The panko will stick best if you press it into the tofu pieces, flipping the tofu to make sure both sides are covered.

  8. In a large skillet, heat about 1/4 to 1/2 inch of oil. You just need enough to fry each side of tofu, you do not need to cover the tofu in oil.

  9. Once oil is good and hot reduce heat to medium, add the coated tofu pieces and fry each side for 3 - 5 minutes. You want each side crispy and golden brown. Once tofu is finished frying, place on a wire cooling rack with some paper towels underneath for a few minutes.

  10. To serve, add a scoop of quinoa to each plate, top with 1 or 2 pieces of tofu, and a few spoonfuls of sauce.

Serves 4 - 6.

Bruschetta with Roasted Vegetables and Tofu Ricotta

IMG_0111.jpg

In the summer months I am not always in the mood for a big dinner.

Often I just want a salad and some bread on the side.

But if I am feeling a little extra, I whip up a batch of easy tofu ricotta, roast up some of my favorite veggies, and top some crusty bread.

This recipes also is great for entertaining, pot lucks, and get togethers.

Even at room temp these roasted veggies are just a delicious.

I used tomatoes, Brussels sprouts, and mushrooms. I think its a perfect combo, but you can easily eliminate any of those veggies you don’t like, or roast some that you do. Easy Peasy.

Carbs, vegan cheese, roasted veggies…is all you need.


INGREDIENTS:

  • 1 loaf of french bread (make sure the bread you choose does not contain milk or eggs)

  • 1/2 batch tofu ricotta

  • 2 cups sliced mushrooms

  • 2 cups quartered brussel sprouts

  • 1 cup halved cherry tomatoes

  • 2 teaspoons minced garlic

  • 1/2 teaspoon salt

  • 1 teaspoon dried thyme

  • pepper to taste

  • 1 tablespoon olive or grape seed oil

  • 2 tablespoons fresh chopped parsley (for garnish)

IMG_0104.jpg

COOKING INSTRUCTIONS:

Preheat oven to 400 degrees.

  1. Add all vegetables, oil, garlic, and seasoning to a large bowl and toss, making sure the oil coats all of the vegetables.

  2. Pour vegetables out on a parchment-paper-lined cookie sheet. Make sure they are spread out in a single layer, and not over crowded.

  3. Place pan in the preheated oven for 20 - 25 minutes to roast. You want the vegetables to be crisp around the edges, and brown but not burned. If they are not very crispy or browning after 25 minutes, leave them in for a few more minutes. Remove from oven and let cool a bit.

  4. Cut bread into 1 inch pieces and place on a cookie sheet, Put bread into the 400 degree oven, and allow to toast for just a few minutes. It will toast up quickly.

  5. Let bread cool, then spread a tablespoon of ricotta on each piece.

  6. Top each piece with a spoonful of roasted vegetables.

  7. Garnish with some fresh chopped parsley and serve.

Muffin Cup Vegan Lasagna

IMG_9391.jpg

If you have been looking for the perfect, cheesy, gooey, saucy, vegan lasagna, look no further! Layers of noodles, tofu ricotta, homemade marinara, and the perfect vegan mozzarella sauce make this lasagna the best vegan lasagna I have had, hands down!

It’s my go to dish to bake up for all of our non vegan friends and family, because no one ever even knows its vegan! We are house divided where lasagna is concerned, some preferring veggie lasagna, and others a classic “meaty” lasagna. So I have given instruction on making this lasagna 2 ways! Because two kinds of lasagna are always better than one!! Right?!?!?

You can always bake a lasagna in a 9x13 pan BUT how much cuter is it to make it in am muffin pan?! Everyone gets a little individual lasagna of their own. I love it! These also work great for pot lucks and parties since they are single serving. AND they freeze well for meal prep! Hooray for meal prep!!

I am telling you, you will never want to use store bought shredded mozzarella again after using this perfect cheese sauce. It’s super easy to whip up, and gets ooey gooey, bubbly, and browns. Its magic and it is staple in our house for so many recipes! Sometimes, like right now with this vegan lasagna, the secret is in the sauce!

So bake up a muffin tin for yourself, and one for a neighbor or friend. They will be so thankful for a night off from cooking and so impressed that this lasagna is actually vegan! I always say the way to convince someone that vegan food is just a delicious, if not more, than the non vegan version is by sharing it!! 


INGREDIENTS:

CHEESE SAUCE:

  • 1 cup of cashews (soaked in hot water a few hours, or microwaved in water for 3 mintues)

  • 2 cups of water

  • 2 teaspoons minced garlic

  • 1 tablespoon apple cider vinegar

  • 1 teaspoon salt

  • 5 tablespoons arrowroot or tapioca starch

  • 2 tablespoons nutritional yeast

COOKING INSTRUCTIONS:

  1. Drain cashews.

  2. Put all ingredients into a high speed blender, or food processor, and blend for several minutes until completely liquified. Totally Smooooooth!

  3. Heat on stove in a medium sauce pan, on medium heat, stirring with a whisk until it begins to thicken. It will thicken quickly so do not stop stirring! Once it thickens, remove from the heat!


SAUCE:

  • 1 large can crushed tomatoes

  • 1 small can diced tomatoes drained

  • 1 carrot diced

  • 1 onion diced

  • 1 cup diced mushrooms (optional)

  • 1-2 teaspoons crushed garlic

  • 1 teaspoon dried thyme

  • 1 teaspoon dried oregano

  • 1 teaspoon salt

  • pepper to taste

  • splash of red wine (optional)

“Meaty” option:

If you would rather have a "meaty” sauce, you could omit the carrot, pepper, and mushroom, and add a bag of meatless crumbles, or even use 2 Beyond Beef brand burgers. Simply thaw them, and cook as you would ground meat before adding to the sauce.


COOKING INSTRUCTIONS:

  1. In a large sauce pan, saute all of the veggies and garlic in a few teaspoons of oil until tender. If using meatless crumbles or Beyond Burgers, heat the faux meat, garlic, and diced onion together in a pan until cooked through.

  2. Add wine and let cook for a minute.

  3. Add both cans of tomatoes, and spices, and let the sauce simmer for 15 - 20 minutes.

IMG_9372-2.jpg


Lasagna

INGREDIENTS:

  • 1 box lasagna noodles, regular or gluten free

  • 1 batch tofu ricotta

  • White cheese sauce

  • Homemade veggie marinara, or you can use a jar of store bought to save time

COOKING INSTRUCTIONS:

Preheat oven to 350 degrees.

  1. Boil lasagna noodles according to package instructions.

  2. Once noodles are drained, and cooled, cut each noodle into 4 pieces.

  3. Once marinara, ricotta, white cheese sauce, and noodles are ready, you can begin building your lasagna cups.

  4. Prepare muffin tin by spraying with some oil.

  5. Start building the lasagna cups by first placing a piece of noodle into the bottom of the tins.

  6. Next add a tablespoon or so of ricotta, then marinara, then white cheese sauce. Repeat until cups are full. You should be able to fit 3 layers, ending with white cheese sauce.

  7. I like to place my muffin tin on a large cookie sheet while baking just in case any sauce bubbles over.

  8. Bake at 350 degrees for 25 - 30 minutes.

  9. Allow to cool some then sprinkle with fresh chopped basil and serve.


This recipes will yield around 12 lasagna cups. We typically serve 2 per adult, and 1 per child. They will freeze and reheat really well, so we normally just make a full batch and pop the leftovers into the freezer in an air tight container for up to one month. 

You can optionally cut this recipe in half pretty easily and make 6 - 8 cups. When halving the recipe I still make a full batch of marinara, and ricotta, then freeze half for next time. You can easily cut the cheese sauce recipes in half. I do not suggest making a full batch as the cheese does not freeze well. 

Soft Vegan Challah Pretzels with Vegan Cheese Sauce

IMG_9578.jpg

Bread, in any an all forms is my favorite food.

I had to do a brief stint gluten free when our last daughter was born and we were trying to sort out her allergies. I actually had to give up dairy, wheat, and soy and it was giving up bread that did me in. I never touched dairy again, but bread, she’s my love language.

So obviously I needed to sort out an easy and delicious vegan soft pretzels recipe pretty quickly because soft pretzels are in my top 5 favorite breads. I mean come on, they are buttery, salty, soft, warm perfection.

I decided our vegan challah dough would work perfectly for creating the perfect vegan soft pretzel and I wasn’t wrong.

Don’t be intimidated by the aquafaba. It’s just bean cooking liquid and if you whip it up it acts like egg whites, which works really well in place of eggs in baked good!! I typically just use a can of chickpea liquid but any canned bean liquid will work!

And the cheese sauce!! Don’t forget the cheese sauce! There are only two suitable pretzel dips as far as I am concerned, spicy mustard or cheese sauce. Period. No further discussion on the matter. So I have added a recipe for a really quick and easy vegan cheddar cheese sauce in case you are not in a mustard mood! You are welcome.

So go make some soft pretzels! I promise your friends or family will be happy to help you eat them, or you can hoard them for yourself. I won’t judge you!


INGREDIENTS:

  • 4 cups all purpose flour

  • 1 1/4 cup whipped aquafaba (measure the whipped product, not the bean liquid)

  • 1/3 cup sugar

  • 1/2 cup oil (I use grape seed but you can use any neutral oil you like)

  • 4 1/2 teaspoons dry active yeast

  • 1 tablespoon sugar

  • 1 tablespoon salt

  • 1 cup hot water. I just use hot water from the tap, you don't want it too hot or the yeast will die, and it will not activate

  • 2 tablespoons baking soda ( This is for the water you dip the pretzels dough in before baking)

Cheese Sauce:

  • 1/2 cup cashews

  • 1 cup water

  • 2 tablespoons nutritional yeast

  • 1/2 teapsoon tumeric

  • 1/2 teaspoon smoked paprkia

  • 1 teapsoon dijon mustard

  • 2 1/2 tablespoons tapioca starch

  • 1 teaspoons light miso paste

  • 2 teaspoons apple cider vinegar

COOKING INSTRUCTIONS:

  1. In a large glass bowl mix hot water, yeast, and 1 tablespoon sugar.

  2. Let the that sit for 10 minutes to activate, or until the mixture is super foamy at the top.

  3. In a stand mixer add the yeast mixture, aquafaba, sugar, oil, salt, and 2 cups of flour. (you can mix by hand, just mix the above, and add remaining flour slowly. You will need to knead it for the same amount of time. It's a good workout though!

  4. Mix until all of the ingredients are incorporated, then add in the remaining flour. I typically will hand mix the first 2 cups of flour in, or use my paddle attachment and replace with the dough hook when I add the remaining flour.

  5. The dough should come together and not be sticky, if it seems sticky you can add 1/4 more flour a little at at time until the dough comes together. Your goal is smooth, and elastic-y dough, not sticky.

  6. Let the dough kneed in the mixer on low/medium speed for 10 minutes. The dough should be smooth at this point and have a sort of bounce back if you poke it.

  7. Form dough into a nice ball, and place in a lightly greased glass bowl. Cover the bowl with a damp kitchen towel, and place inside your oven turned off, OR on the bread proof setting if your oven has one.

  8. Bring a small pot of water to a boil and place in the bottom of the oven. The heat and steam from the water will help the dough to rise.

  9. Let dough rise about an hour, or until the dough has doubled in size.

  10. Remove dough from bowl and split in half. Next, evenly divide each half into 8 equal pieces.

  11. Rolling the dough pieces between both hands, form ropes that are about 12 inches long with each piece of dough.

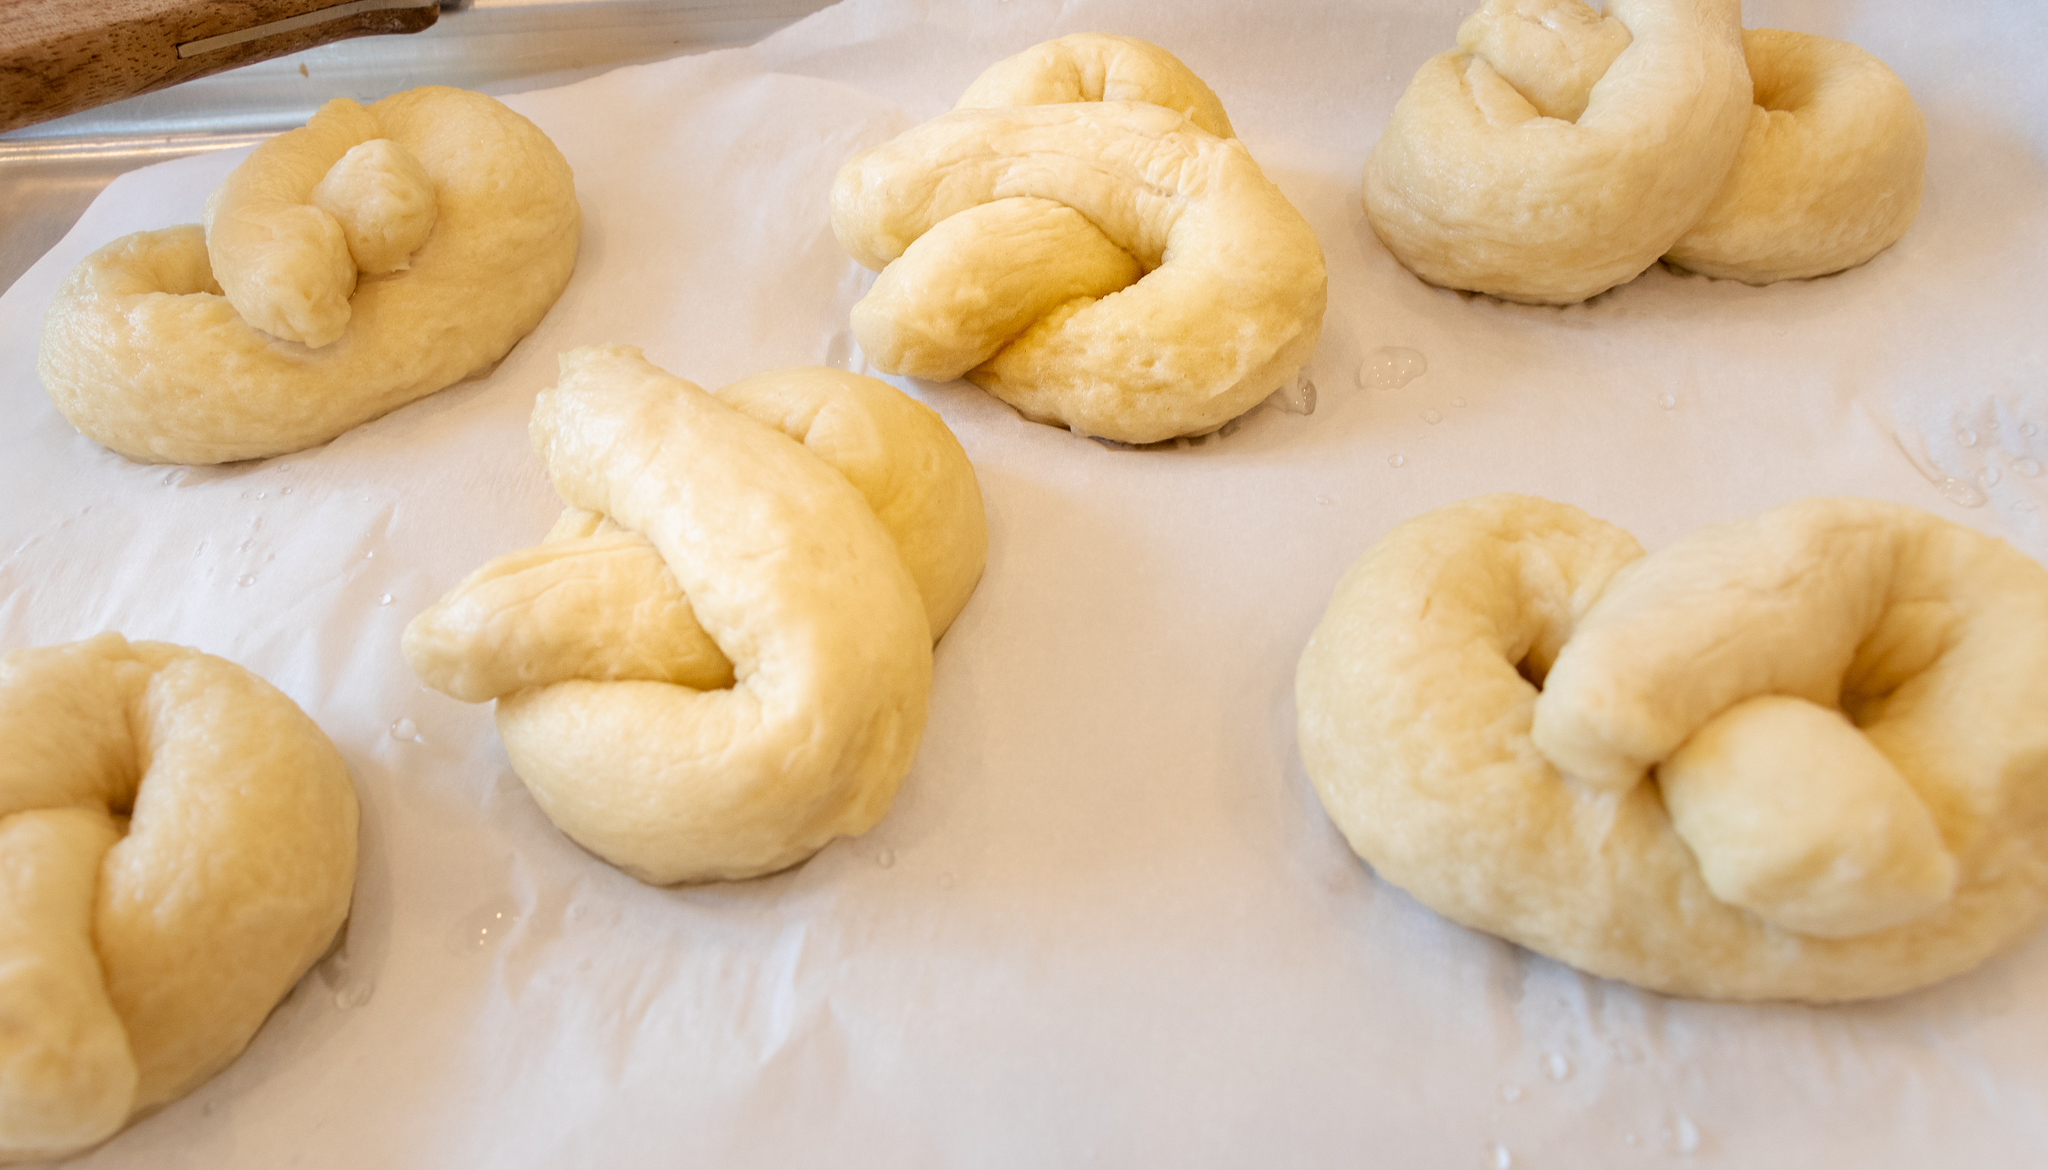
  12. Take each rope and make a U shape. Take the tops of the U, cross then twist them once. Now bring the crossed dough over the bottom of the U. ( the pictures will help if this is confusing.)

  13. Allow pretzels to rest for about 15 mintues. While this is happening bring a large pot of water to a boil. Preheat oven to 400 degrees. Once pretzels are done resting, add 2 tablespoons of baking soda to the water.

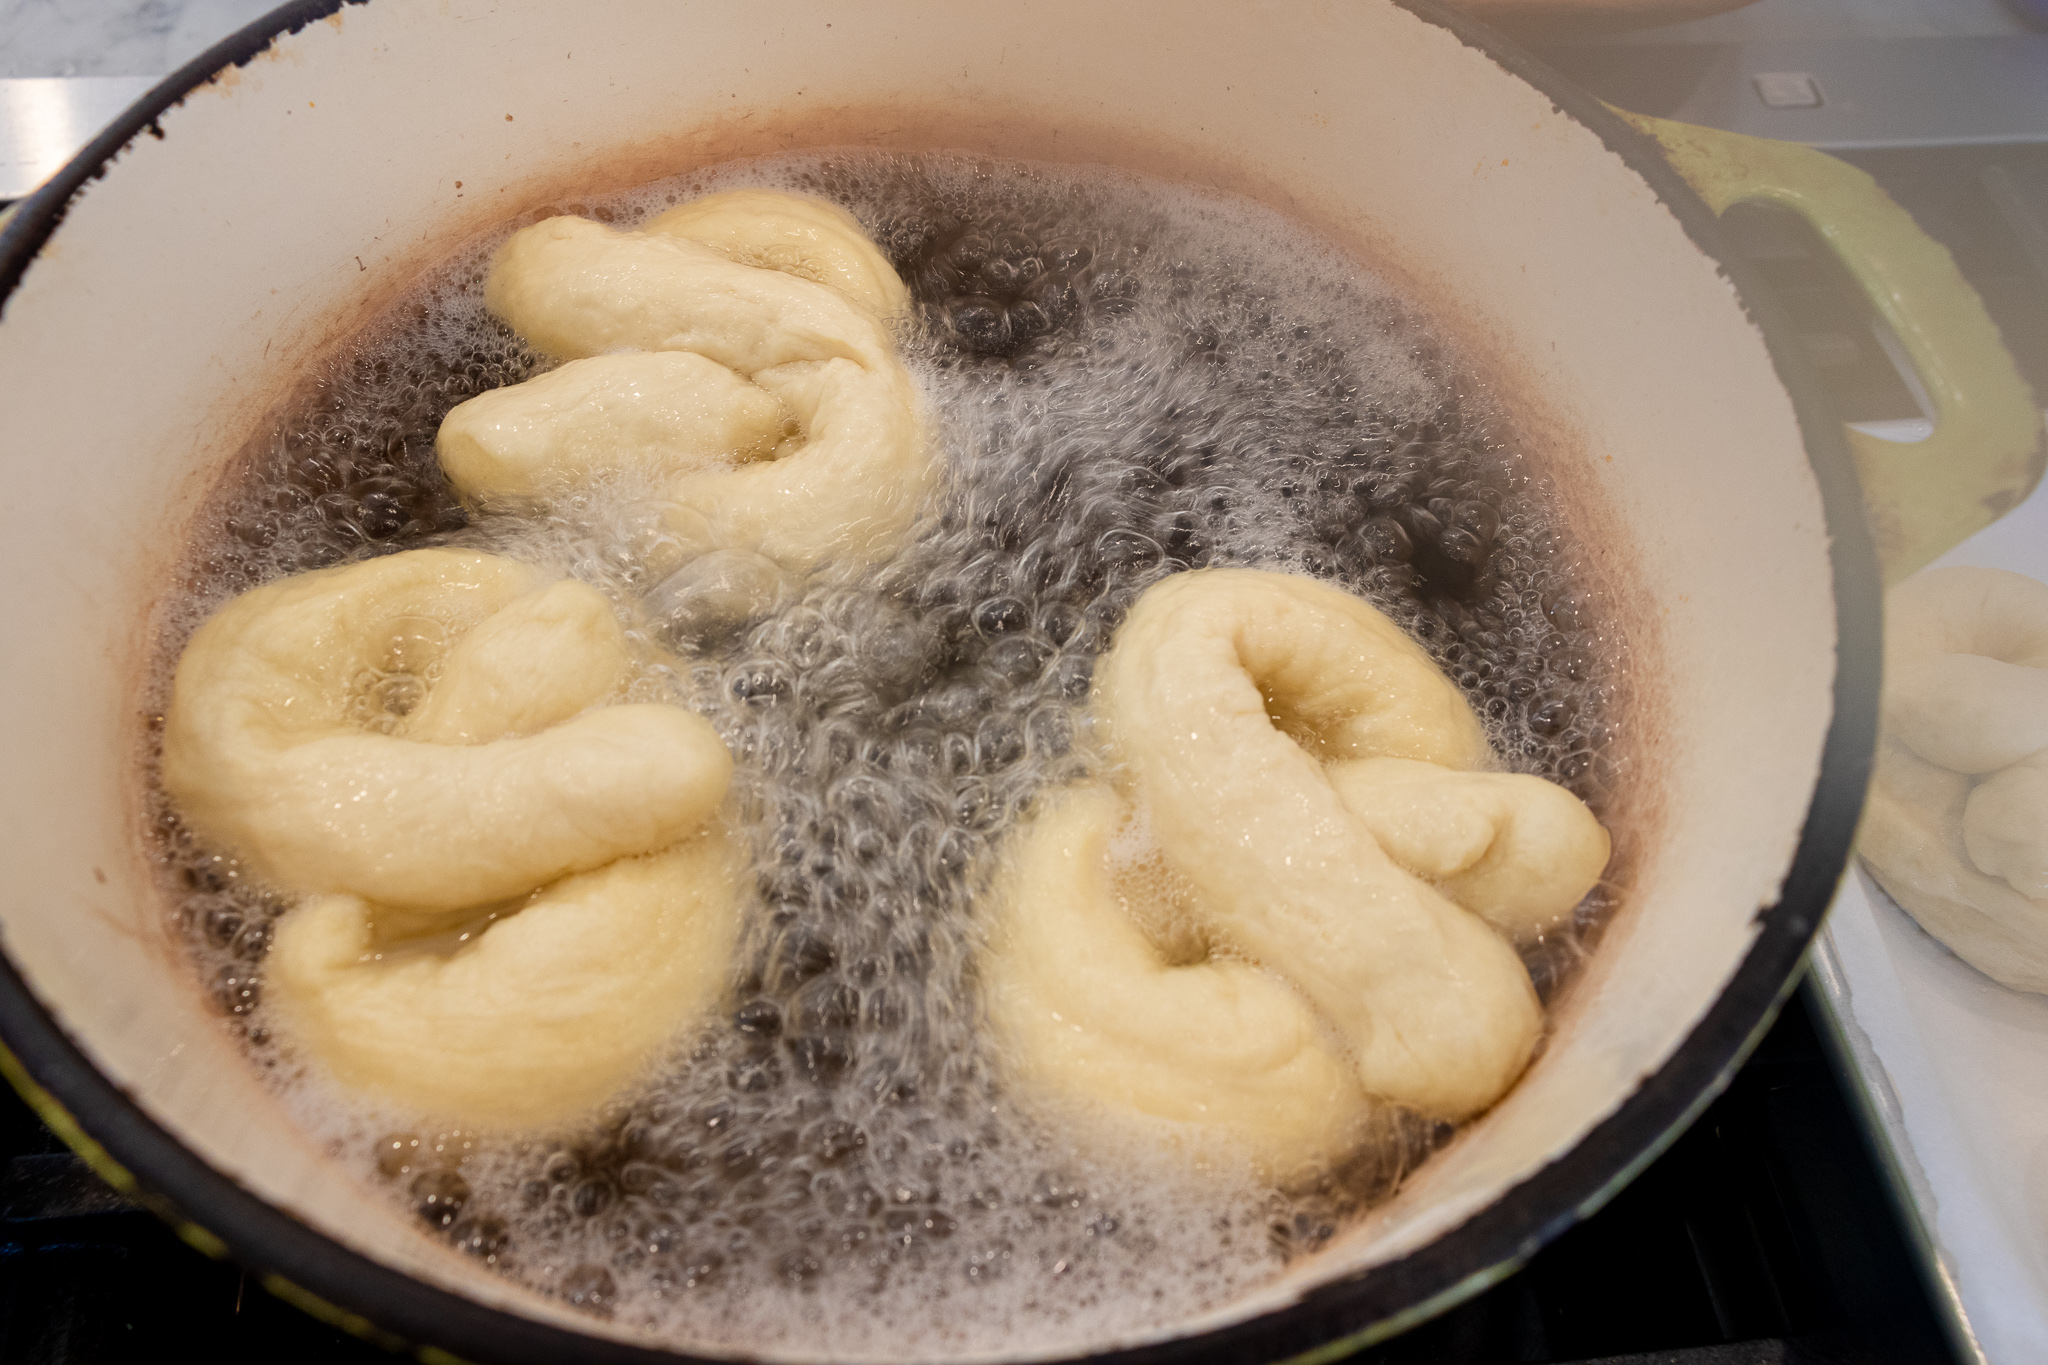
  14. Add pretzels 2-3 at a time into the water for about 30 seconds. You will need to flip them half way through. Just use a slotted spoon and gently turn them over in the water. Return them to a parchment lined cookie sheet once they come out of the water.

  15. Brush pretzels with leftover aquafaba, and sprinkle with some corse sea salt before putting in the oven.

  16. Bake pretzels for 15- 20 minutes. I normally move my top rack to the highest position for this. That way they get nice a brown. You will need to keep a close eye on them, and if they brown really quickly, move them to a lower rack for the remainder of the bake time.

  17. Once done allow to cool on pan while you prepare the cheese sauce.

Cheese sauce:

  1. Place cashews in microwave safe container and cover with water. Microwave for 3 minutes.

  2. Drain water from cashews, then add all ingredients to a high speed blender or food processor.

  3. Blend until completely smooth.

  4. Pour mixture into a pot, and cook on medium heat, stirring the WHOLE time with a whisk.

  5. As soon as the cheese starts to thicken remove from heat. If it gets to thick, add a little more water and it will thin back out.


Cheese sauce will last about a week in the fridge, pretzels can be stored in airtight container at room temperature.

Yields 16 pretzels 


Vegan Mozzarella Cheese Sticks

IMG_0067.jpg

Who doesn’t miss cheese sticks?! Half of my kids had never even had one, so I knew I needed to try and create a vegan cheese stick recipe so I could share this snack joy with them!.

These dairy free, vegan mozzarella cheese sticks are super simple to whip together.

They are made with coconut milk, making them more allergen friendly for kids to pack in their school lunches, because the last thing we want to do is exclude anyone with a nut allergy from this tasty treat!!!

They are also made with a vegan/plant based gelatin called agar agar powder. You can find agar at Asian markets or online at amazon. I prefer Living Jin brand but use whatever brand you can find or like.

Agar is activated when heated and will solidify pretty quickly once it begins to cool. So the result is a quick set vegan cheese. It only takes minutes for the mixture to come together, and a few hours for your cheese to set.

I am often asked if the oil can be left out, and in this recipe it can not. Agar solidifies and tends to have a gelatinous texture on its own. The filtered coconut oil helps get you a firmer cheese with a more palatable and cheese like texture. There are recipes out there for agar cheese without coconut oil, but they include extra starches and typically xanthan gum to help thicken and set the cheese.

If you are not into cheese sticks, you can mold this cheese in some small bowls and slice it for sandwiches or shred it for pizza.

So don’t be afraid to try and make your own vegan cheese at home. Its super easy, and really affordable. You know every ingredient that is going into it and can feel good about what you or your family is eating!

Happy cheese snacking, y'all!


INGREDIENTS:

  • 1 1/2 cups of full fat coconut milk or cream in a can (make sure it's at room temp, and shake the can very well first. You need the liquid as well as the creamy part, and since they tend to separate, a good shake will help mix it back up)

  • 1/3 cup vegan plain yogurt

  • 2 tablespoon of lemon juice

  • 2 teaspoons miso paste

  • 1 teaspoons of salt

  • 1/4 cup nutritional yeast

  • 1/4 melted cup triple refined coconut oil

  • 2 tablespoons agar powder

  • 1 teaspoon onion powder

  • 3 tablespoons tapioca starch


COOKING INSTRUCTIONS:

  1. In a food processor or high speed blender, add all of the ingredients EXCEPT the milk, and agar.

  2. Pulse a few times to mix it all up.

  3. Now add the milk, and agar to a medium sauce pan and bring to a boil. Reduce heat and simmer until mixture thickens to the constancy of a thin pudding.

  4. Add the milk mixture to the ingredients in the food processor, and mix for about a minute. The mixture will quickly begin to thicken as agar begins to solidify at room temperature.

  5. Transfer the mixture to an 8x8 pan.

  6. Allow the cheese to harden in the refrigerator uncovered for about 2 hours.

  7. Once the cheese is set, remove from the pan and cut into sticks. Store in an air tight container for up to week.

*You can also pour the mixture into small bowls to mold if you just want a shreddable, sliceable mozzarella that will melt!

Classic Vegan Cranberry Scone

I love to bake, but my 12 year old daughter love to bake more. One of our favorite things to do together is veganize our favorite old treats.

These scones are super simple to whip up. So simple that our daughter did the baking on these beauties.

We mixed in dried cranberries but you could mix in any dry fruit, nut, or even chocolate chips. You could also leave out fruit or nuts and add some almond or vanilla extract for a simple yet still delicious vegan scone.

If a 12 year old can bake up a perfect batch of these cranberry scones, so can you!

Ingredients:

  • 2 cups of all purpose flour

  • 8 tablespoons vegan butter

  • 1/3 cup sugar plus 1 teaspoon

  • 1/2 cup plain vegan yogurt, I used Kite Hill plain almond yogurt

  • 1 flax egg

  • 1 teaspoon baking powder

  • 1/4 teaspoon baking soda

  • 1/2 teaspoon salt

  • 1/2 cup dried cranberries

Optional Icing:

  • 1/3 cup powdered sugar

  • 1 tablespoon diary free milk

  • 1/8 teaspoon vanilla extract

Instructions:

Preheat oven to 400 degrees

  1. In a medium bowl, combine 1/3 cup of sugar, flour, baking soda, baking powder, and salt. Mix well.

  2. Add the butter, and using your hands, work in the butter until the mixture seem coarse and sort of crumbly. Add the cranberries to the mix.

  3. In a small bowl whisk the yogurt and flax egg.

  4. Add yogurt mixture to the dry mixture, and stir unitl combined. Knead until a smooth dough comes together. It will seem dry and crumbly at first, but it will come together as you keep kneading.

  5. Once it has come together, form a disk with the dough about 7-8 inches wide, and 3/4 of an inch thick. Sprinkle 1 teaspoon of sugar on the dough, then cut the circle into 8 triangles.

  6. Place scones onto a parchment paper lined baking sheet, and bake for 15-20 minutes. You can brush them with a little plant based milk before popping them into the oven to help them brown. We used oat milk, as it browns nicely, but you can use what you have. They are done once they are light brown on top, and firm in the middle.

  7. Allow scones to cool. You can optionally top them with an icing drizzle once cooled. Just whisk the sugar and milk and drizzle over the tops of the scones.

  8. Store in an airtight container at room temperature.

yields 8 scones 

Tofu Japchae (korean sweet potato noodles)

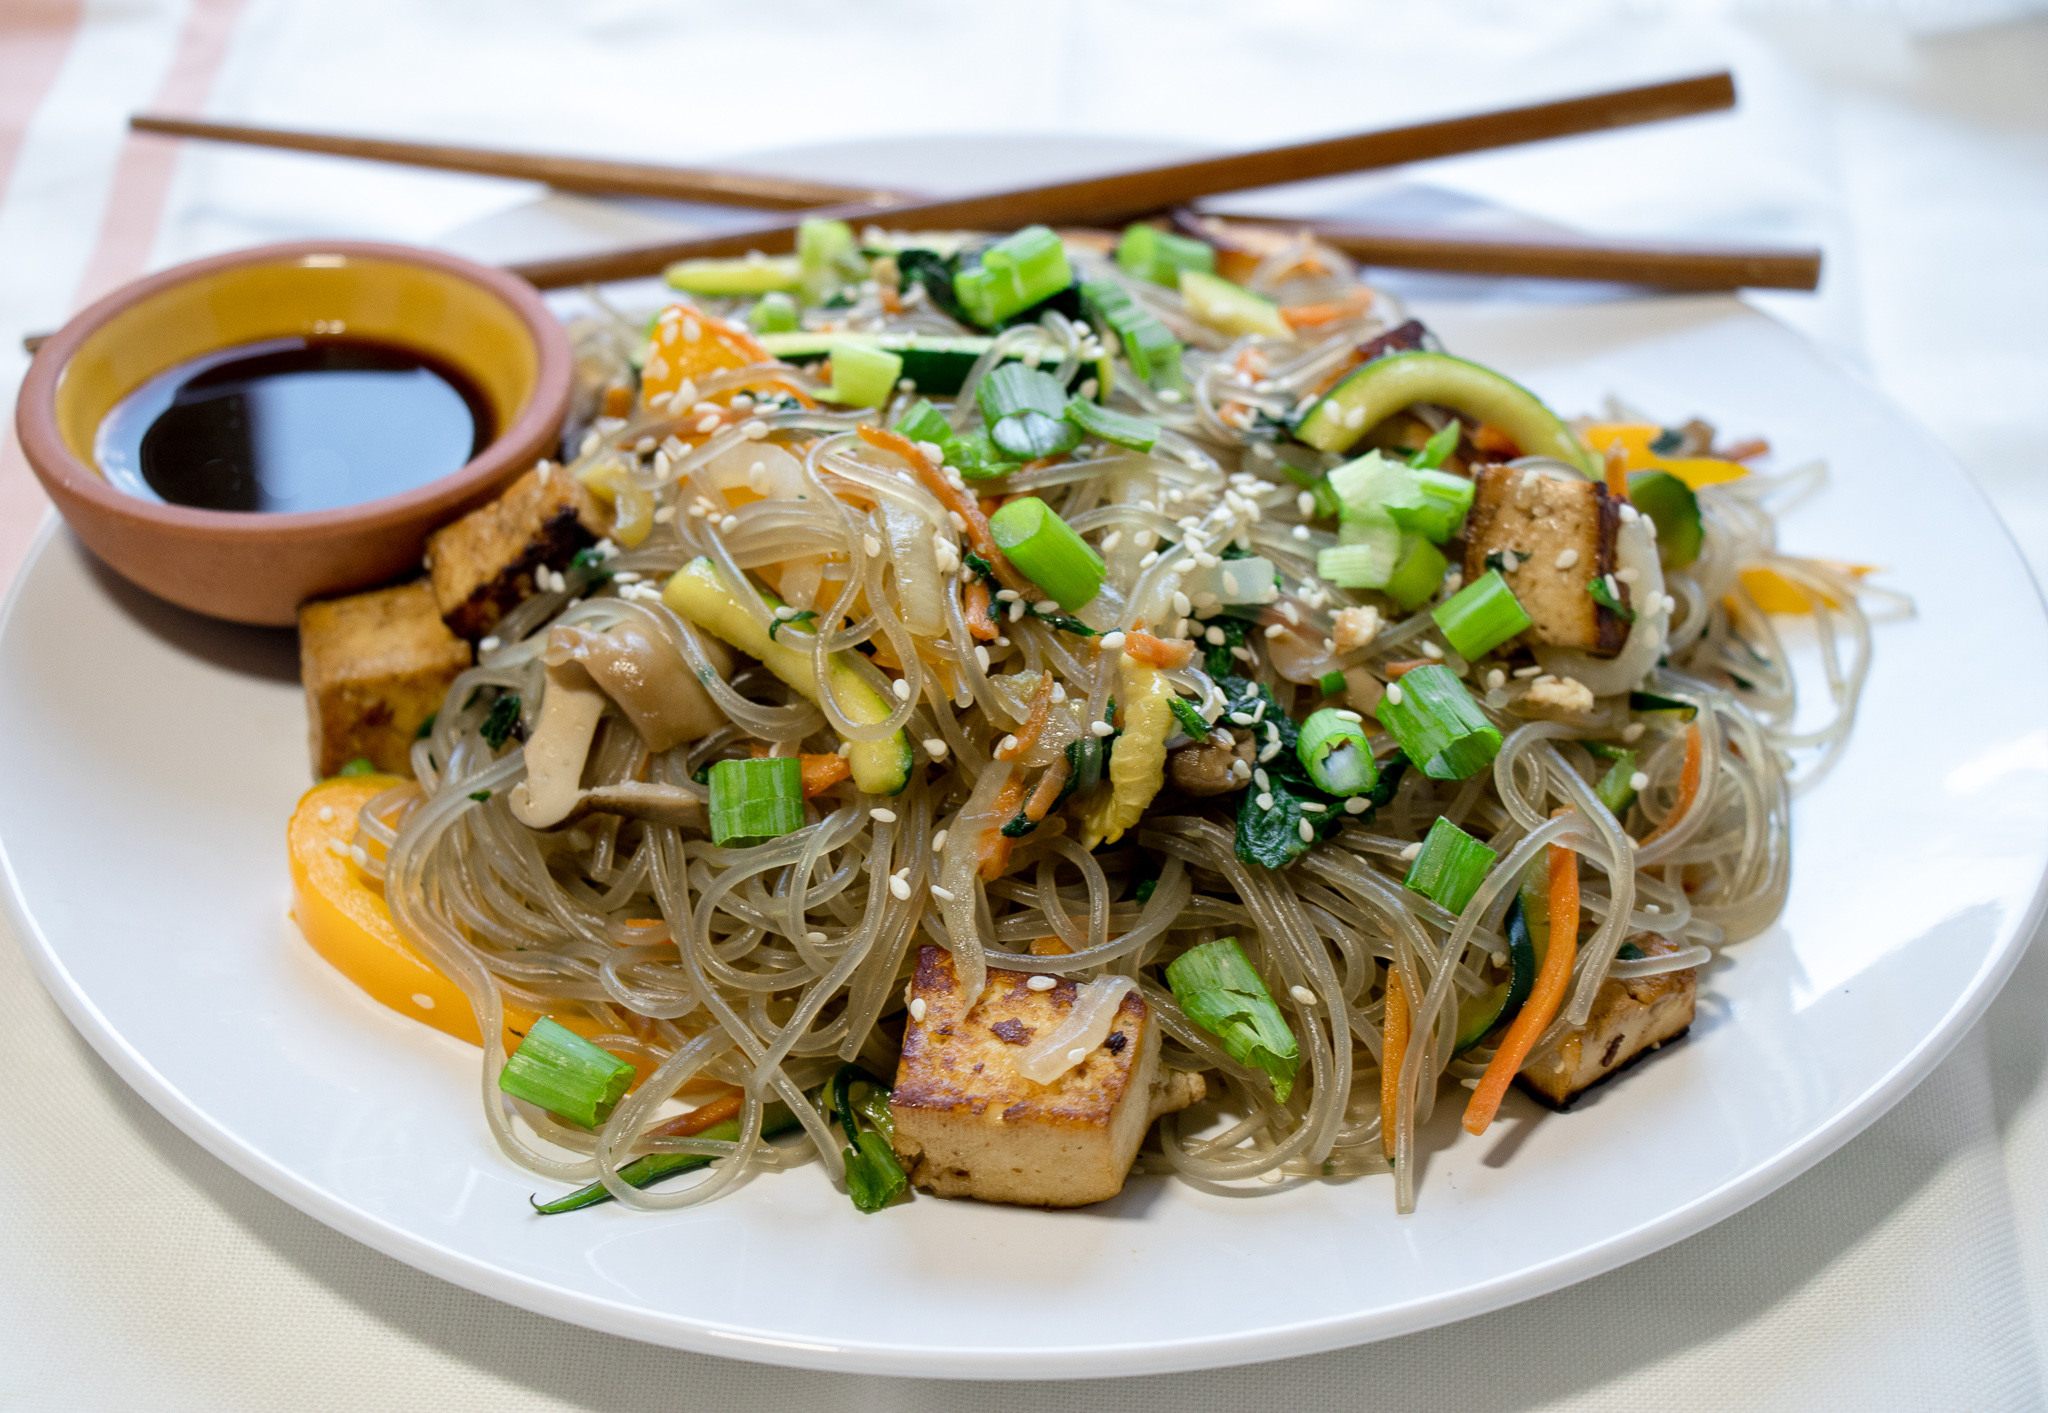
Japchae is a savory Korean noodle dish, made with sweet potato starch noodles. You can easily find these noodles at your local Asian market or online. This dish is pretty quick, and easy, making it a great week night dinner!

Japchae is a savory Korean noodle dish, made with sweet potato starch noodles. You can easily find these noodles at your local Asian market or online. This dish is pretty quick, and easy, making it a great week night dinner!

INGREDIENTS:

  • 1 package Japchae (sweet potato) noodles, available at asian markets.

  • 1 package extra firm organic tofu

  • 1 can straw mushrooms, or you can use a few cups of any fresh mushroom you like. I just love straw mushrooms.

  • 1 zucchini

  • 1 carrot

  • 4 cups baby spinach leaves

  • 1 small white onion

  • 3 green onions

  • 2 tablespoons sesame seeds

  • 3 tablespoons coconut aminos or soy sauce

  • 1 teaspoon minced garlic

  • A few teaspoons sesame oil cooking

The sauce

  • 1 teaspoon minced garlic

  • 1/4 cup coconut aminos or soy sauce

  • 2 tablespoons sugar

  • 1 teaspoon sesame oil

  • 3 tablespoons hot water

INSTRUCTIONS:

  1. Fill a 9x13 baking dish with hot tap water. Soak the noodles in the water for 20 - 30 minutes.

  2. Wrap the tofu in a clean kitchen towel or a few paper towels, and stack a few books on top for 15 - 20 minutes to remove the excess water.

  3. Once tofu is done being pressed, cut into 1 inch by 1 inch cubes.

  4. Cut all the vegetables, except the green onions into small matchstick sized cuts, including the mushrooms.

  5. Bring a large pot of water to a boil. Add all of the spinach and allow to cook just until wilted. Once wilted, move spinach to a colander and run cold water over it for a minute. Wrap the rinsed spinach in a clean kitchen towel then squeeze until no more liquid comes out. Remove the now ball of spinach from the towel and chop it up. Set aside.

  6. In a wok, or large skillet, heat a teaspoon of sesame seed oil and add the tofu, 3 tablespoons aminos, and a teaspoon of garlic. Cook until the tofu begins to brown. Remove from pan and place on a plate.

  7. In a small bowl whisk the ingredients for the sauce, first adding the sugar, then the hot water to help dissolve it, then the remaining ingredients.

  8. Drain the noodles, and with a clean pair of kitchen scissors, cut the noodles in half. They are very long and much easier to work with if cut.

  9. Add another teaspoon of sesame oil to the pan or wok you cooked the tofu in, along with all the vegetables except the spinach and green onions. Cook the vegetables for about 5 minutes over medium heat.

  10. Once the vegetables begin to soften, add the noodles and half of the sauce. Allow to cook for about 5 - 7 minutes, using tongs to move the noodles around the pan to avoid having them stick. Check the noodles after 5 minutes to make sure they are done. After the noodles seem done, add the tofu back in along with the chopped spinach, and remaining sauce. Heat for a few more minutes, just long enough to rewarm the tofu.

  11. Sprinkle with chopped green onions and sesame seed to serve.

Serves 4 - 6.

Vegan Lasagna Stuffed Peppers

IMG_9393.jpg


I love lasagna. Since I was a kid it was one of my top 5 favorite foods.

Cheese, sauce, veggie or “meat,” I will always gladly eat lasagna!

Not to talk myself up, but I make a pretty mean lasagna. I use our all purpose vegan cheese sauce in place of shredded mozzarella and it is truly amazing. Its gooey and extra cheesy, and creamy and perfect!

Depending on my mood, I alternate between craving a veggie or vegan meat lasagna. I give the option for both in this recipe in case you are the same way.

I typically make homemade sauce because it is easy, and I normally have the staple items to make it in my pantry. I often find jar sauce too sweet, or get annoyed at how many of them actually contain dairy (its weird to me the things they throw dairy in for no apparent reason) so it has become my habit to just make my own. You can always double the batch and freeze half for a quick weeknight dinner down the road as well.

Now how did we happen upon stuffing lasagna into a pepper you may ask?!?!? Well one day of of my kids told me they saw lasagna stuffed into peppers online and I got super excited!! Thank goodness my kids love food as much as I do and often find recipe ideas I have yet to stumble upon. So as quickly as she suggested it, I had them made and in the oven!

These stuffed peppers are really simple to make! Don't let the steps below discourage you. It is just as easy as making a big lasagna, you are just building it into a pepper!

These lasagna stuffed peppers are great for entertaining as well because they actually turn out really pretty. I used green peppers but you can use any variety of bell pepper you prefer!

So if you are a fan of lasagna but want to change it up a bit, give these a try! They are delicious, pretty and a fun spin on an original classic!


Lasagna:

  • 4 - 6 bell peppers

  • 1/2 box lasagna noodles, regular or gluten free

  • 1 batch tofu ricotta

  • White cheese sauce (recipe below)

  • Homemade veggie marinara (recipe below) or you can use a jar of store bought, you can also add cooked vagan sausage, ground “beef”, or seitan to the sauce if you like

White Cheese Sauce:

  • 1/2 cup of cashews (soaked in hot water a few hours, or microwaved in water for 3 mintues)

  • 1 cups of water

  • 1 teaspoons minced garlic

  • 1/2 tablespoon apple cider vinegar

  • 1/2 teaspoon salt

  • 2 and 1/2 tablespoons arrowroot or tapioca starch

  • 1 tablespoons nutritional yeast

Instructions:

  1. Drain cashews

  2. Put all ingredients into a high speed blender, or food processor and blend for several minutes until completely liquified. Totally Smooooooth!

  3. Heat on stove in a medium sauce pan, on medium heat, stirring with a whisk until it begins to thicken. It will thicken quickly so do not stop stirring! Once it thickens, remove from the heat!


The Sauce:

  • 1 large can crushed tomatoes

  • 1 small can diced tomatoes drained

  • 1 carrot diced

  • 1 onion diced

  • 1 cup diced mushrooms (optional)

  • 1-2 teaspoons crushed garlic

  • 1 teaspoon dried thyme

  • 1 teaspoon dried oregano

  • 1 teaspoon salt

  • pepper to taste

  • splash of red wine (optional)


This sauce will make more than you need. I often just freeze the other half and use the next time I am making this recipe, or need a marinara sauce.

“Meaty” option:

If you would rather have a "meaty” sauce, you could omit the carrot, pepper, and mushroom, and add a bag of meatless crumbles, or even use 2 Beyond Beef brand burgers. Simply thaw them, and cook as you would ground meat before adding to the sauce.

Instructions:

  1. In a large sauce pan, saute all of the veggies and garlic in a few teaspoons of oil until tender. If using meatless crumbles or Beyond Burgers, Heat the faux meat, garlic, and diced onion together in in a pan until cooked through.

  2. Add wine and let cook for a minute.

  3. Add both cans of tomatoes, and spices, and let the sauce simmer for 15 - 20 minutes.


COOKING INSTRUCTIONS:

Preheat oven to 350 degrees 

  1. Cut tops from bell peppers and hallow out the insides. Place peppers on a parchment lined cookie sheet turned upside down, and bake at 350 for about 15 minutes. Turning them upside down will allow the liquid in the peppers to drain out while cooking.

  2. While peppers are cooking, boil lasagna noodles according to package instructions.

  3. Once noodles are drained, and cooled, cut each noodle into 4 pieces.

  4. Begin stuffing the peppers by first adding 1 or 2 tablespoons of marinara to the bottom. Next add a piece of lasagna noodle, ricotta, marinara, cheese sauce, and repeat until the pepper is filled. Repeat with remaining peppers.

  5. Place stuffed peppers back on the cookie sheet you used to cook them the first time, and bake at 350 degrees for 25 minutes.


Serves 4 - 6.