Vegan Beyond Meatloaf Stuffed Twice Baked Potatoes

Vegan Beyond Meatloaf Stuffed Twice Baked Potatoes

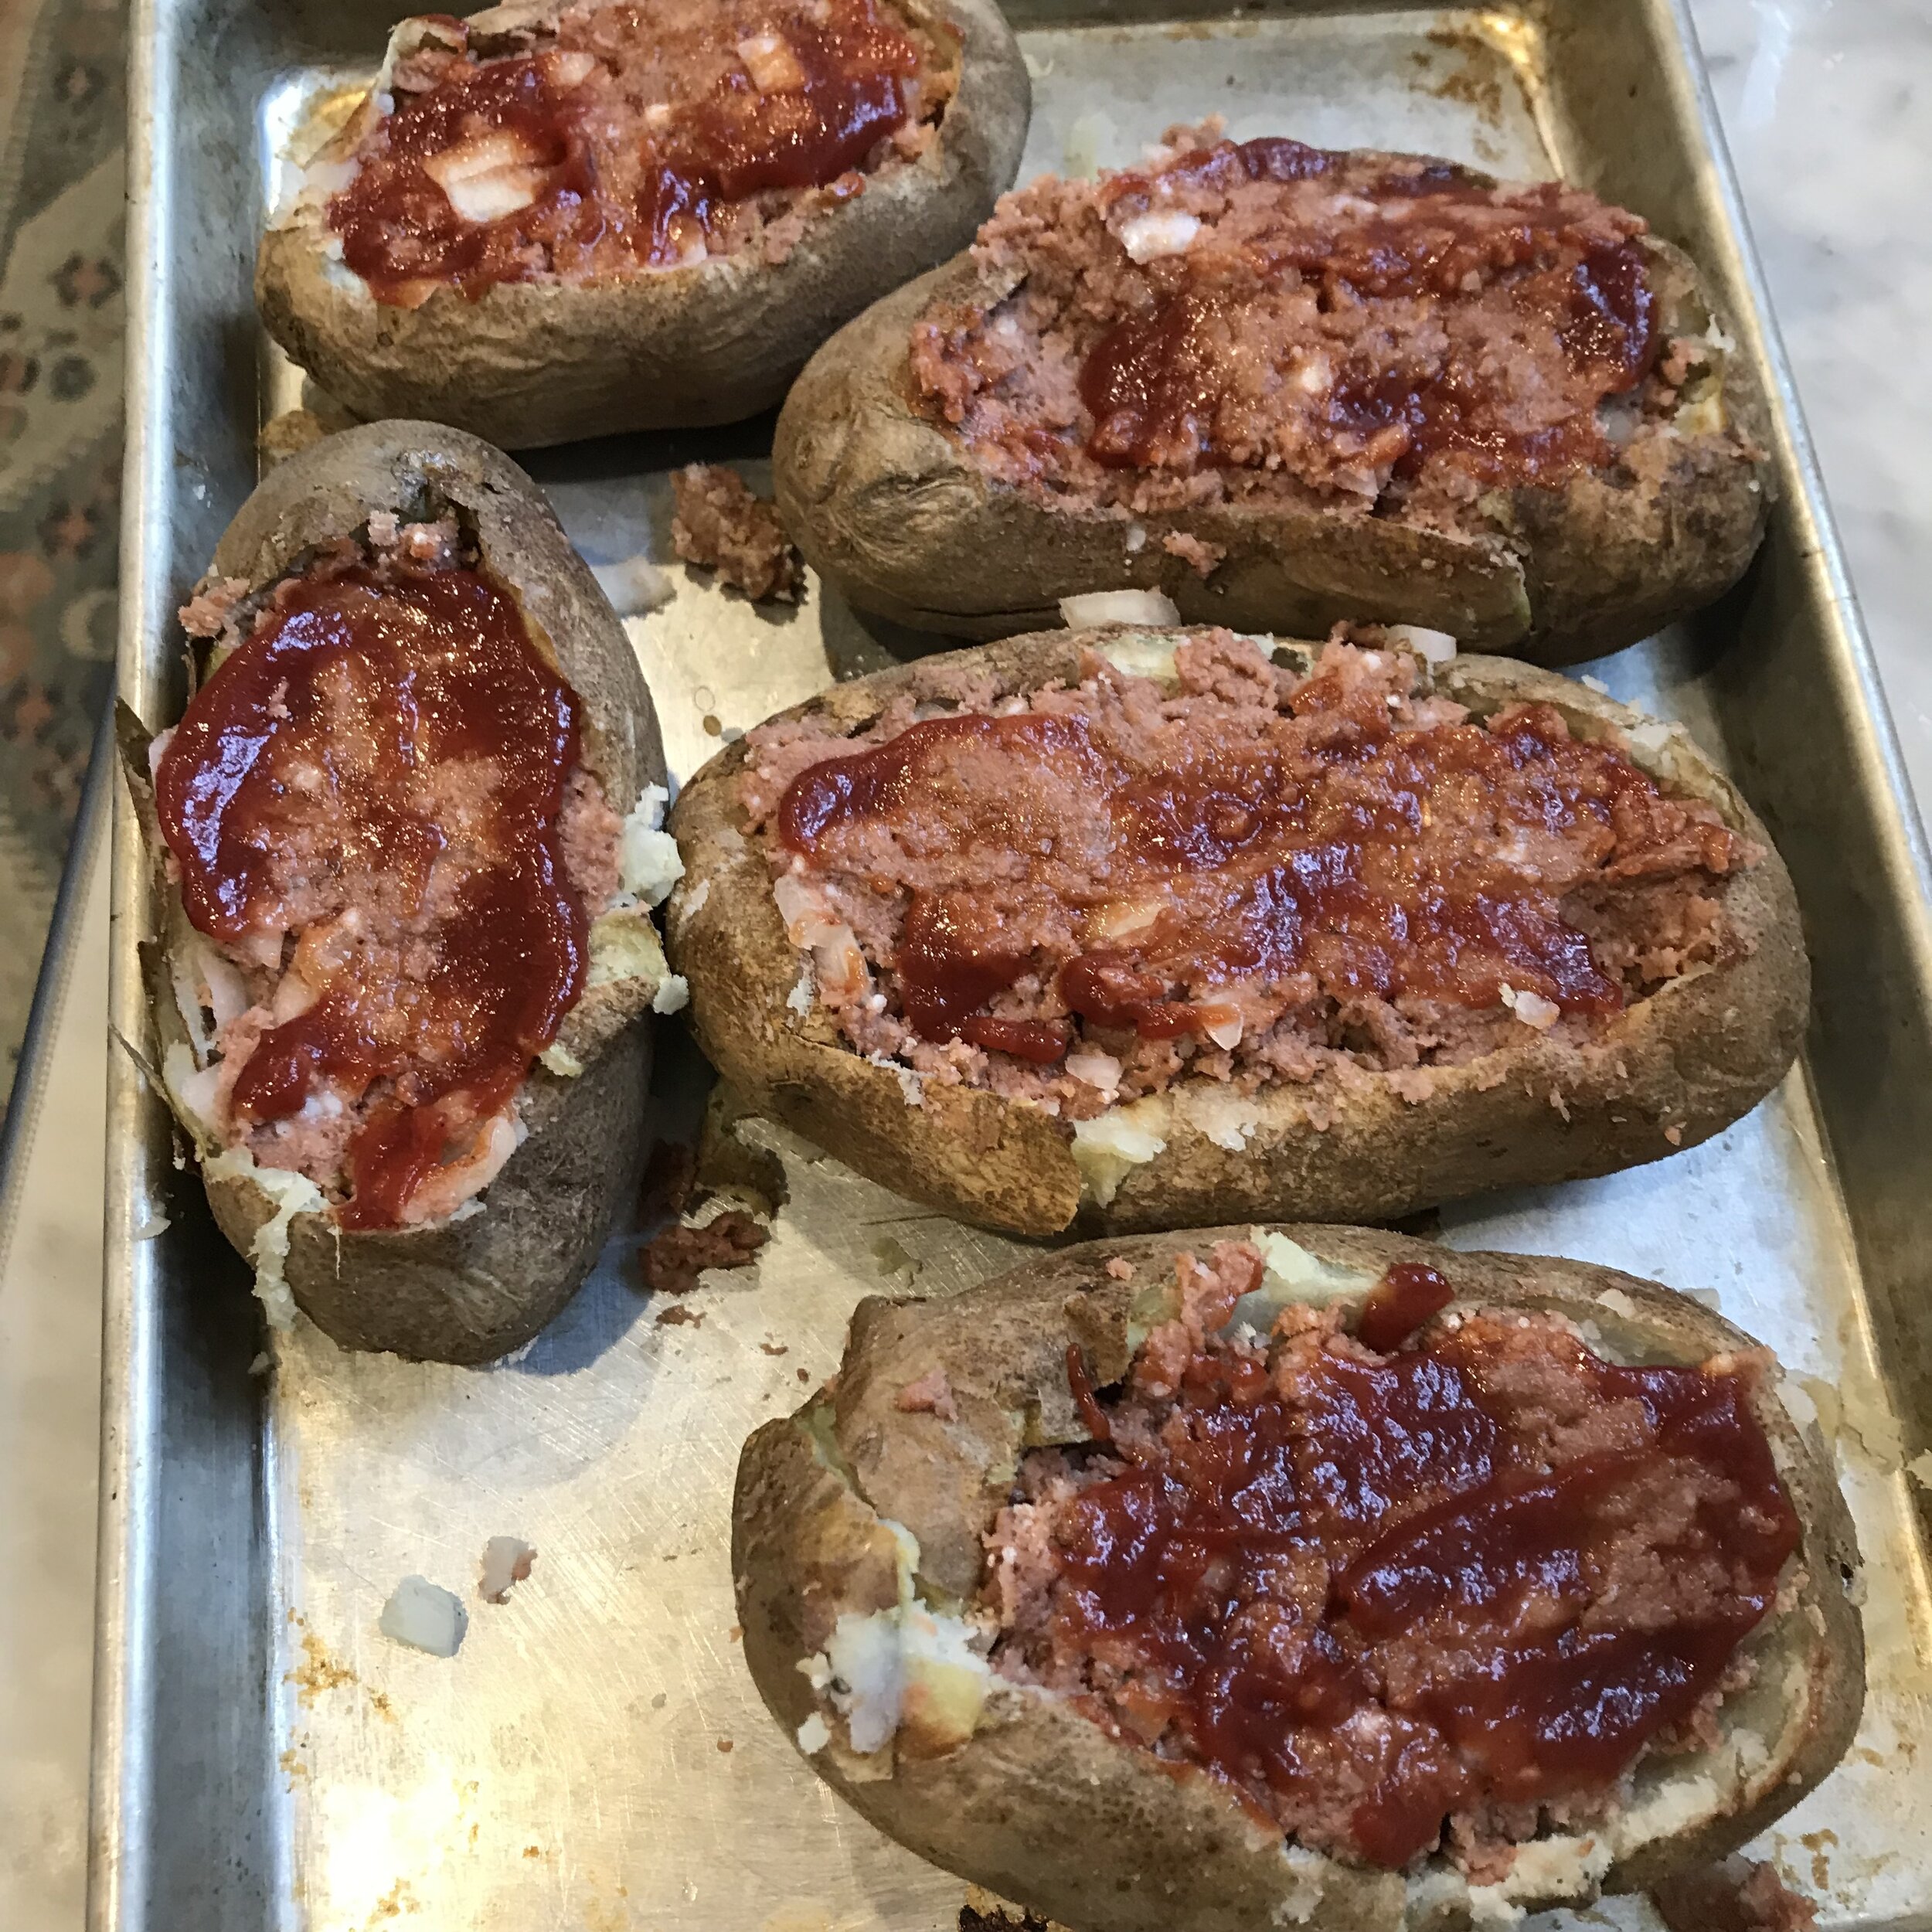
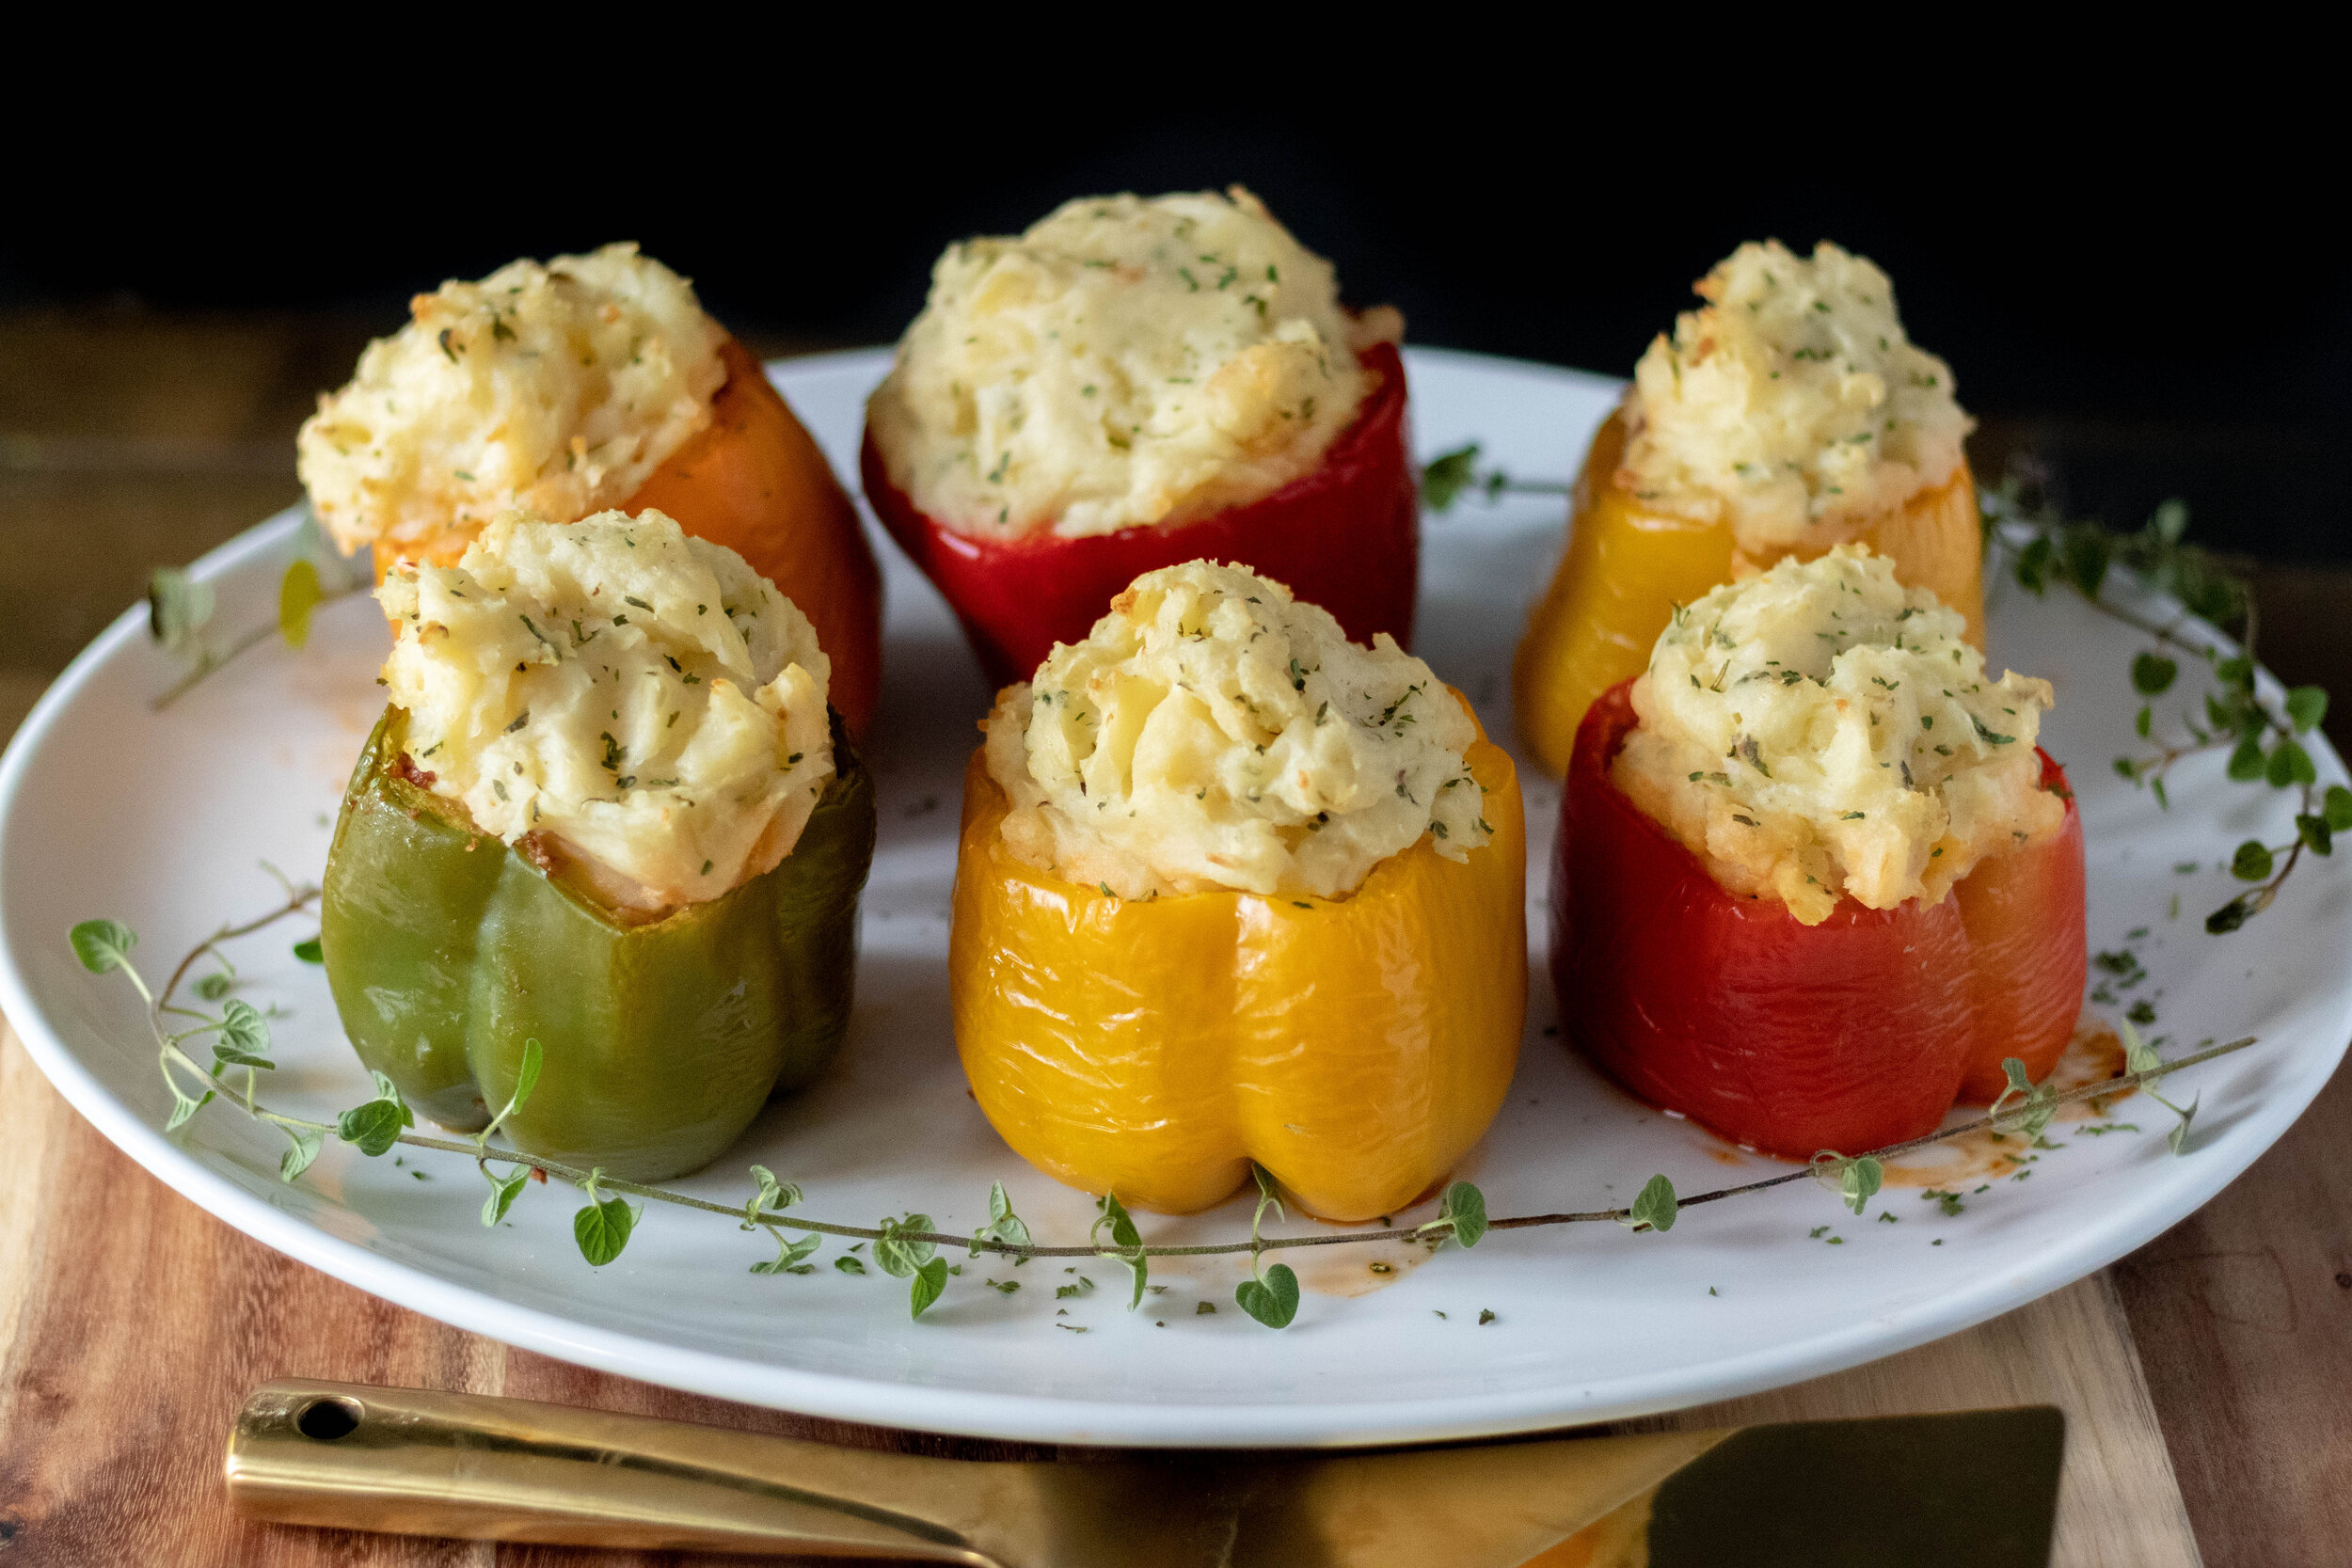
Here we go again, stuffing meatloaf into things. Not unlike our meatloaf stuffed peppers, except not everyone likes peppers, and who doesn’t love a potato!?

The other night there was debate in between our kids over what was for dinner. It was a house divided between Beyond Meat Meatloaf or vegan twice baked potatoes. So I just decided I’d put the meatloaf into the potato and top them with creamy, cheesy, vegan mashed potatoes. Problem solved. I should get some kind of trophy for this parenting win.

I mean, you are more than likely going to make mashed potatoes with meatloaf anyway, why not make it all in one and add some vegan cream cheese, and sour cream to the mash! Now you have cute little individual servings of meatloaf topped with the most glorious mashed potatoes.

We also do this with bell peppers, but not all of my kids like bell peppers. That means several of the kids are just scooping out the insides and wasting a perfectly good bell. This breaks my pepper loving heart, but I get it. So this solution works super well for any pepper haters out there. Nothing is being wasted in this recipe and I love that.

So the next time you go to make meatloaf and mashed potatoes, try making them all in one. I promise your family will think you are a genius, you will feel like a genius, plus they are just flipping delicious.

I make a pretty mean meatloaf if I do say so myself, and the creamiest mashed potatoes in all the land. So It’s really just a win win here! And we all need a win sometimes!

Vegan Beyond Meatloaf Stuffed Twice Baked Potatoes

INGREDIENTS:

  • 5 large russet potatoes

  • 1/2 cup vegan cream cheese

  • 1/2 cup vegan plain yogurt or sour cream

  • 2-3 teaspoons vegan butter

  • 1 teaspoon salt

  • 1 teaspoon garlic powder

  • 1/2 teaspoon black pepper

Beyond Meatloaf:

  • 1 pound vegan ground “meat.” You can also use 4 thawed Beyond Burgers

  • 1 cup panko breadcrumbs (gluten free bread crumbs work, too)

  • 2 tablespoons tapioca starch, plus 3 tablespoons water

  • 1/2 small yellow onion, finely diced

  • 2 teaspoons minced garlic

  • 2 tablespoons tomato paste

  • 2 teaspoons vegan Worcestershire sauce

  • 1/2 teaspoon salt

  • 1 teaspoons dried thyme

  • 1 teaspoon all purpose greek seasoning

  • 1/2 teaspoon black pepper

  • 1/4 cup ketchup

  • dried parsley, chives, or green onion for garnish

IMG_1824.JPG
IMG_1825.JPG

INSTRUCTIONS

preheat oven to 350 degrees

  1. Wash the potatoes, leaving the skin on. Pierce each one serval times with a sharp knife and place on a baking sheet. Bake for about 30 minutes or until the potatoes are soft on the inside. You can insert a knife or skewer through the top of one and if it goes through easily, they are done. Let the potatoes cool completely.

  2. Once potatoes are cool, carefully cut an oval around the perimeter of the top of the potatoes. Remove the tops and scoop out the insides (not the skin, unless you like the skin in your mashed potatoes) using a spoon, placing the insides into a medium sized bowl.

  3. Add the sour cream, butter, cream cheese, salt, pepper, and garlic powder to the potato bits in the bowl. Use a hand masher or electric mixer to mash them all up. You want them on the thicker side, if they seem too thick you can add a splash of plant milk to thin them out some, just don’t get them too thin. They need to sit nicely on top of the meatloaf.

  4. To prepare the meatloaf, add the ground meatless “meat” to a large bowl. If you are using thawed burgers then break them up with a spoon.

  5. Mix in the diced onion, garlic, tomato paste, and seasonings.

  6. Next, mix in bread crumbs, starch mixed with water, and Worcestershire sauce.

  7. Divide the mixture between the hollowed out potatoes, gently pressing it into the potato shells, careful not to break or tear the potatoes. Spread ketchup over each meatloaf potato.

  8. Place meatloaf filled potatoes back on the baking pan and place in the oven to bake for 25 minute. After 25 minutes, carefully remove. Divide the mashed potatoes evenly and top each potato with the mash. Place back in the oven for another 15 minutes or until a skewer poked all the way into the meatloaf comes out clean.

  9. You can garnish the potatoes with diced chives or green onions.

If you like this recipe, then try these:

A bite of Vegan Beyond Meatloaf Stuffed Twice Baked Potatoes

Vegan Cheese Grit Waffles

grit-waffles.jpg

I am southern and I love grits. Savory grits that is. I have never been a fan of sweet grits. I especially love cheesy grits!

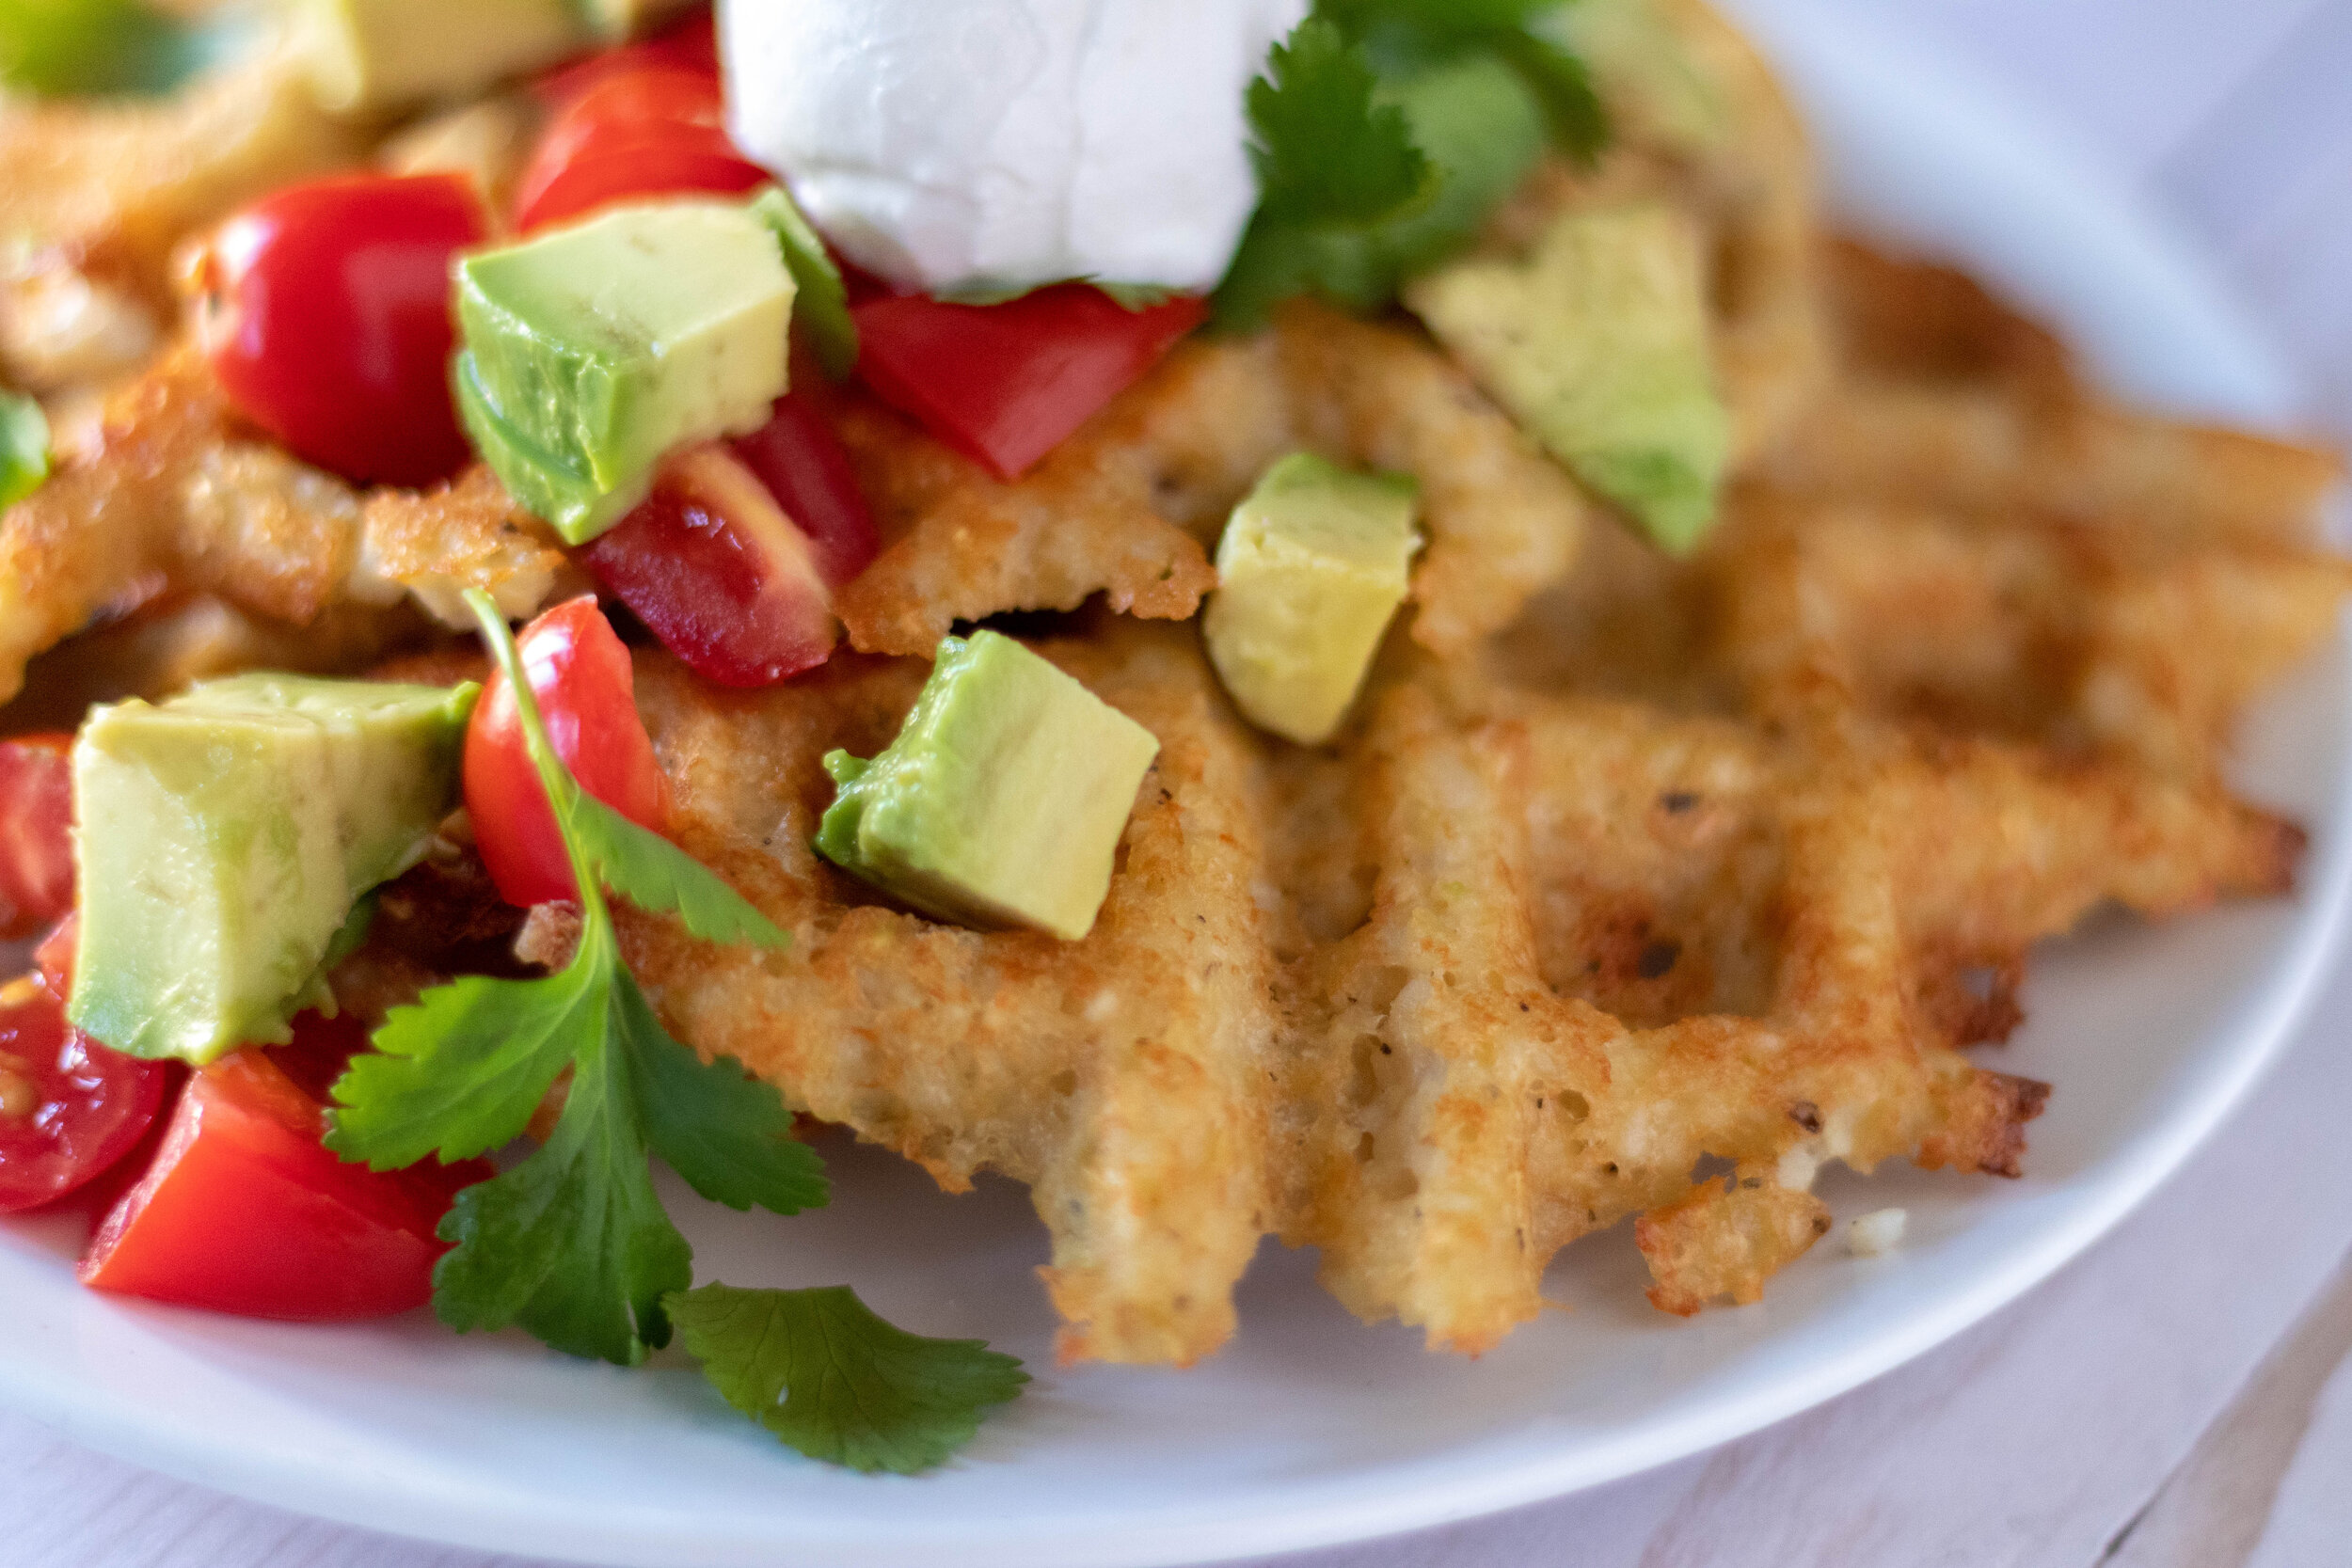
Over the years we have tried a ton of waffle iron hacks, but this might be my favorite by far! Vegan cheesy grit waffles! Crispy around the edges, but still creamy grit perfection on the inside. We used our Smoky coconut milk gouda in this recipe. You could use any shredded vegan cheese you like.

We also topped them with tomatoes, avocado, and some cilantro. You can top them with whatever you like! They are actually perfectly delicious on their own.

This recipe works best if you make the girts the night before. They need to be totally cooled and firmed up, so if you make the grits the night before and pop them in the fridge, they will be ready for waffle making in the morning.

This recipe works great for meal prep as well. The recipe yields enough girts to serve 4 - 6 but you can keep the grits in the fridge throughout the week, and just make a waffle or two for yourself for quick breakfast, lunch, or dinner! Easy, quick and tasty are always my favorite kind of recipes!


INGREDIENTS:

  • 1 cup stone ground grits

  • 3 cups water

  • 1 cup plant milk

  • 3/4 cups shredded vegan cheese, we used our Smoky Coconut Milk Gouda recipe

  • 1/4 cup nutritional yeast

  • 2 teaspoons vegan butter

  • 1 teaspoons salt

  • 1 teaspoon black pepper

  • 1 - 2 teaspoons minced garlic

  • 1 diced tomato

  • 1 diced avocado

  • A handful of chopped cilantro

  • vegan sour cream for topping, optional

  • Hot sauce, optional

vegan-cheese-grit-waffles.jpg

INSTRUCTIONS

  1. In medium sized pot, bring water, and plant milk to a simmer. Add the grits and butter and reduce heat to low. Allow grits to simmer for about 20 minutes or until thickened, stirring often.

  2. Once grits have thickened, stir in nutritional yeast, garlic, and shredded cheese.

  3. Pour grits out onto a sheet pan, and put them in the fridge to cool completely. This can take a while, so you can also put them in the freezer if you are in a hurry or make the grits the night before you intend use them.

  4. To make the waffles, heat a waffle iron on high. Spray with some cooking oil or brush with vegan butter. Scoop out about 1/4 cup of grits into the center of the waffle iron. Use a rubber spatula to flatten out the grits. Cook on high for 5 minutes or until the waffle is crispy around the edges. The waffle stay a little soft, so it is easiest to carefully (it’s hot) and gently turn over the waffle iron over a cookie sheet, letting the waffle fall out. Repeat with remaining grits. You can keep finished waffles warm in a 200 degree oven while you finish up the rest.

  5. Serve waffles topped with diced avocado, tomato, vegan sour cream, cilantro, extra cheese, or hot sauce if you like.

If you like this recipe, then try these:

grit-waffles-3.jpg

Vegan White Stilton with Peaches

Vegan White Stilton with Peaches

I make a lot of vegan cheese. It’s easier than most people think, fairly quick, and really affordable to make your own.

All you need are some basic ingredients that you can find at your local super market, plus some agar agar powder. Agar is a vegan gelatin make from seaweed and what is used to solidify the cheese. You can find agar on amazon, or your local Asian food store. It is also pretty inexpensive for the amount of cheese you will get from one bag!

Although vegan cheese options have come a long way over the years in super markets, I can still only find flavors like cheddar, mozzarella, and a few varieties of cheese slices.

If you are like me and miss more artisan style cheeses, you best bet is to start making your own! Like this vegan peach stilton!! I used to impatiently wait for Trader Joe’s to put out their seasonal stilton’s, peach being my most favorite. Traditional Stilton is a milder cheese and a little crumbly. It often is made with different fruits. I personally love the subtle sweetness of the peaches mixed with the tanginess of the cheese. Its perfect for snacking with crackers or adding to a salad.

Recently my friends Brad and Mike ( you will be learning more about them very soon as we have a super fun project in the works for the site) gave us a a jar or homemade spiced peaches. I think there was some kind of booze in the jar along with some delicious fall spices. I was told not to open them for several more weeks, so they found their way to the back of my pantry and were forgotten about. So when I finally found them again recently, I knew exactly what I was going to make with them!!

You can use any canned or jarred peaches you can find. You just need two halves. They are normally canned that way. You could also substitute the peaches with pears very easily if you are not a fan of peaches.

Listen, don’t let a new or unfamiliar ingredient intimate you! This cheese is so quick and easy to make and pretty fool proof! You will be so amazed at how easy it was to make and how delicious home made vegan cheese is! And if you are on the fence about making a fruity cheese, don’t be. It is soooooo good!! Hooray for Stilton and thanks Trader Joe’s for your never ending inspiration!

Vegan White Stilton with Peaches

INGREDIENTS:

  • 1 can of full fat coconut milk or cream

  • 2 tablespoons agar agar powder

  • 1 tablespoon lemon juice or apple cider vinegar

  • 2 teaspoons miso paste

  • 1 teaspoons of salt

  • 1/4 cup nutritional yeast

  • 2 tablespoons tapioca starch

  • 1/4 cup sauerkraut (no juice, just cabbage)

  • 1/4 melted cup refined coconut oil

  • 2 halves of jarred or canned peaches ( we used homemade canned spiced peaches)

Vegan White Stilton with Peaches

INSTRUCTIONS:

  1. In a food processor or high speed blender, add all of the ingredients EXCEPT the milk, agar, and peaches.

  2. Pulse a few times to mix it all up.

  3. Now add the milk and agar to a medium sauce pan and bring to a boil. Reduce heat and simmer until mixture thickens to the consistency of a thin pudding.

  4. Add the milk mixture to the ingredients in the food processor, and mix for about a minute. The mixture will quickly begin to thicken as agar begins to solidify at room temperature.

  5. Use a paper towel to pat off as much liquid from the peaches as you can. Finely dice the peaches and fold them into the cheese mixture with a rubber spatula. Don’t blend them! It will mince them up too much.

  6. Transfer to the mixture to a few ramekins or small bowls. You should be able to fill 2 or 3 small bowls.

  7. Place bowls uncovered in the fridge for a few hours, or until the cheese has fully hardened and is a sliceable consistency.

If you like this recipe, try these:

 
Vegan White Stilton with Peaches

Vegan Sausage Pancake Dippers

Vegan Sausage Pancake Dippers

Until I gave my official letter or resignation this year, I was in charge of costumes, along with my friend Cyd, for our city’s community nutcracker.

It was a lot of fun and a lot of work, but I have a family to take care of and blog that is growing, so I needed to manage my time a little better. It was bitter sweet to say goodbye, but a few of our kids will continue to dance. Because of this, I am sure I’ll be back in some shape or form next season, just not to the extent I was.

We performed six productions each December along with 2 dress rehearsals, and I was there for every one of them, nestled in the theater basement behind a sewing machine, drowning in tulle, sequins, and sweaty costumes. Glamorous, I know.

So, this year while trapped in the theater basement for a week, I was gabbing with one of my favorite volunteer moms about what our kids ate for breakfast. She told me that her kids love these freezer section sausages that are wrapped in pancakes. Ummmm what? At first was like, NO! But then I was like, MAYBE?! And then after giving it some more thought, I was like, actually GENIUS! Who thinks of this stuff? I deiced my kids were gonna love me so big time for making these. It’s brilliant conversations like these that I will miss most about working with the Nutcracker. Nonprofits take a village, and this village is pretty great one!

Anyways, after catching up on sleep and recovering from the holidays, I set out to made them. Y’all, they are soooo easy, and the whole family, even the husband who at first was like, “what the heck,” ate and liked them. Use any vegan sausage you like.

I originally made these with Trader Joe’s soy sausage to later learn (because I stupidly only read the front of the package and they are shelved with the other vegan options) that they contain egg. This is just one of those examples that even if a faux meat seems obviously vegan to READ THE BACK FOR ALL INGREDIENTS. I ALWAYS read packages and the one time I let my guard down and just read the front…. This was the result of shopping with many children, being in a hurry, and getting to comfortable with the shelving or packing of a certain brand. But, lesson learned, and I don’t beat myself up about mistakes like this. Neither should you if you happen to do the same. When the mistakes are unintentional, remind yourself that everyday you are making a difference for your health, animal welfare, and planet! Let the mistakes be lessons and forge forward! We can easily let something like this cause us guilt, anxiety, or anger, but that is not helping anyone or anything. Just be sure to always read the labels of unfamiliar products!

That said, Try Beyond Brand, Field Roast, Lightlife, or Tofurkey brand. I used our Light and Fluffy Pancake batter, and it was that easy! Just dip the sausage in the batter, fry them, then dip them in syrup. You could even use the little tiny vegan party sausage and make these as a party snack!

No matter the sausage you use, just make these! Seriously! If I learned nothing else this Nutcracker season, I learned this, and that is worth it’s weight in golden maple syrup!

Vegan Sausage Pancake Dippers

INGREDIENTS:

For The Pancake Batter:

  • 1 1/4 cups all purpose flour

  • 2 tablespoons white sugar (If vegan, not plant based, make sure the brand you use is in fact vegan, not all white sugars are. I use Florida Crystals)

  • 2 teaspoons baking powder

  • 1/4 teaspoon salt

  • 1/2 teaspoon cinnamon

  • 1/2 teaspoon vanilla extract

  • 1 1/4 cup plant based milk

  • 1 tablespoon melted vegan butter

The Rest of the Ingredients:

  • 4-8 vegan link sausage, or vegan homemade hotdogs will work too.

  • 1/3 cup flour

  • popsicle sticks

  • oil for frying, I use grapeseed

  • syrup for dipping

INSTRUCTIONS:

  1. Prepare the pancake batter by whisking all dry ingredients in a large bowl.

  2. Add in the melted butter, plant based milk, vanilla, and stir well.

  3. Pour the batter into a tall cup.

  4. Pour flour onto a plate

  5. Place a wire cooling rack onto a paper towel lined cookie sheet and place it near the stove.

  6. I cut my sausage links into thirds to make them more bite size, You can cut them in thirds, halves or even leave them whole. Just carefully poke a popsicle stick into the end of the sausage.

  7. Fill a small pot or deep skillet with enough oil to submerge the sausage. Heat over medium heat unit nice and hot. You can poke a popsicle stick or chop stick into the pot and touch the bottom. If tiny bubbles form around it, then the oil is hot enough and ready.

  8. Roll the sausage in the flour to lightly coat it, this will help the batter stick.

  9. Dip the sausage into the batter, making sure it is nice and coated.

  10. Drop sausage into the oil one at a time. When I made mine, the batter seemed like it was going to fall off of the sausage once I dropped in the oil. I just let it fry for a few seconds on the first side and carefully flipped it with some tongs to get the batter cooking on the other side. Let the sausage fry for about a minute then flip it again until the whole thing is golden brown. If they seem to be frying too quickly, reduce the heat on the stove.

  11. Transfer finished sausage dippers to wire rack to cool.

  12. Serve with maple syrup for dipping.

Vegan Sausage Pancake Dippers

If you like this recipe, try these:

 
Vegan Sausage Pancake Dippers

Vegan Banana Bread Waffles

Vegan Banana Bread Waffles

I love banana bread. My husband loves it more.

If we ever bake a batch, he and our kids normally eat the entire loaf before I ever even get any. True story.

I mean it’s delicious, so I don’t really blame them. But here’s the thing, mixing up the batter is quick, waiting for the bread bake is not. You get me, right? Like having to smell it bake while waiting over half an hour for it to finish, then waiting for it to cool enough to slice……near torture.

So the other morning I was mixing up a batch of banana bread batter, lamenting on how long it was going to take for me to be able to eat a slice, if I even got one before my husband and kids polished it off, and suddenly a light bulb went off! I could just make the batter into WAFFLES!!!

It would be quick and easy, and I would snag one before everyone else swopped in and gobbled them up!!

Well it worked, and I may never bake banana bread again. I will probably now always opt to just turn the bread into waffles!!

Seriously, I don't honestly even like regular waffles a whole lot. I am not a huge sweets for breakfast fan. But I loved these waffles. They are just the right amount of sweet that I didn’t even put syrup on them. If you love syrup, then by all means load em up!!! Either way, these nutty banana waffles are delicious. And if you don’t like nuts or are allergic you can skip them or just add some chocolate chips or dried berries!! Easy swap!

So here is the moral of this story. It is way faster to make banana bread waffles than to bake banana bread. So try it! I think its the perfect waffle hack!


INGREDIENTS:

  • 2 cups all purpose white flour

  • 3/4 cups brown sugar

  • 1/2 cup vegan butter, melted

  • 1 tablespoon baking powder

  • 1 teaspoon baking soda

  • 1/2 teaspoon salt

  • 1 teaspoon vanilla extract

  • 4 very ripe bananas

  • 3/4 cups chopped walnuts

  • 3/4 cup plant milk

  • 1 teaspoon vinegar

Vegan Banana Bread Waffles

INSTRUCTIONS:

Preheat oven to 350 degrees

  1. Mash bananas in a medium sized bowl. Stir in the melted butter and vanilla extract.

  2. In a large bowl, mix flour, sugar, salt, baking soda, and baking powder.

  3. Mix the vinegar with the milk and let it sit for a few minutes.

  4. Add the wet ingredients to the dry and stir until combined. Mix in the chopped nuts.

  5. Heat a waffle maker (iron) to high heat and spray with some oil. Fill the waffle maker with batter and cook according to your waffle makers directions. Repeat with remaining batter until all is used up.

  6. Sever with vegan butter, maple syrup, and sliced banana if you like.

This recipe will yield around 5-6 waffles if using a regular sized waffle maker, not a Belgium waffle maker,

If you like this recipe, try these:

 
Vegan Banana Bread Waffles

Vegan Chocolate Fudge Pie

IMG_5893.jpg

I don’t bake a lot of pies.

My middle daughter is actually a far better baker than I am, and she bakes all the pies around here.

I love to eat pie, but for whatever reason, I have never been a fan of baking them.

The problem is, she and I don’t love the same pies. I don’t like apple pie. As weird as that may seem, I just don’t like cooked apples. She and her dad adore apple pie, and that is what tends to get baked in our house.

I love chocolate everything, including pie. So when I recently stumbled upon a beautiful chocolate cream pie recipe in a non vegan magazine, I knew I wanted to try and make a vegan version. The recipe included 4 eggs so I decided I would try and substitute starch to bind it. I also decided to add some chocolate chips to bump up the chocolate in the recipe. I mean, the more chocolate the better I always say.

I did ask my daughter to make us a pie crust for this recipe, but many frozen pie crust are vegan. Just be sure to check the label. If it were up to me alone, I would have just gone and bought one. Just being honest here.

IMG_5857.jpg

So after cooking up the filling and letting it bake, I was actually really pleased with the outcome. The only thing is, it was more fudge like than silky, but I wasn't even mad about it! I love all things fudge! I will call it a happy accident! This pie is so easy to make, I think I will baking it up fairly often.

I also topped this pie with our sweet aquafaba whip recipe. You can use it as is, OR you can top the pie with the whip, and pop it in the oven on broil for a few minutes to toast up a perfectly golden meringue. If you are not in the mood to whip up some perfectly sweet aquafba, then use whatever vegan whipped topping you like. They even make a vegan cool whip these days, or use canned coconut or almond whipped cream, or you could whip up some coconut milk whipped cream if you like. I personally find making aquafaba whip the easier and tastiest option. One can of chickpea liquid will give you big, beautiful, fluffy batch of the tastiest vegan whipped topping around. If you have never made it before, I strongly suggest giving it a try! All you need is an electric hand mixer, or a stand mixer.

So If you are in the the mood for a simple, tasty, vegan chocolate pie recipe, this is the one. Bake it for yourself. Bake it for a friend. Bake it for a party. Bake it on a Monday because Monday’s are not the most fun day of the week, but pie would be help. I don’t care why you bake it, I just really think you will be happy if you do!

IMG_5891.jpg

INGREDIENTS:

  • 1 9 inch vegan pre-made or homemade pie crust

  • 1 1/4 cup granulated sugar

  • 1/2 cup all purpose flour

  • 1/4 cup dark cocoa powder

  • 1/4 cup tapioca starch

  • 2 cups almond or oat milk

  • 1/4 cup vegan butter

  • 1/2 cup vegan chocolate chips or chopped vegan chocolate

  • 1 teaspoon vanilla extract

  • 1 batch Sweet Aquafaba whip, or any other vegan whipped topping you prefer


INSTRUCTIONS:

Preheat oven to 325 degrees

  1. Pre-bake the pie crust for 10 minutes. Remove from oven.

  2. In a medium sauce pan add all of the dry ingredients and whisk together. Add the butter and milk and heat over medium low heat, whisking continuously until the mixture thickens and the chocolate has melted.

  3. Once the mixture is thick and silky, whisk in the vanilla extract and remove from heat.

  4. Pour the filing into the crust and place on the middle oven rack for 25-30 minutes. Bake just until the center seems set.

  5. Allow pie to cool at room temperature for a bit then transfer to the fridge to finishing cooling.

  6. Top with whipped sweet aquafaba or any vegan whipped topping you prefer to serve. You can also add shaved chocolate on top for garnish.

  7. Store leftovers covered in the fridge.

If you like this recipe, try these:

 
IMG_5865-Edit.jpg

Chocolate Covered Boozy Cherries

Chocolate Covered Boozy Cherries

Raise you hand if you like chocolate covered cherries!?!

Now raise your hand if you like Whiskey or Bourbon!?!

If you raised your hand to both, then man do I ever have a super boozy, super easy, super delicious treat for you!

I for one love whiskey. I love whiskey and ginger ale. I love an old fashioned. I love whiskey neat in a glass in my hand, headed toward my mouth. These days I don’t drink whiskey very often, except on the rare occasion my husband and I go out to dinner and cocktails are an option. Of all the booze, I’m a whiskey girl.

Growing up my dad and I shared an affection for cheap boxes of chocolate covered cherries. My dad always bought them around the holidays and he and I were the only ones in the house that liked them. Score for me because I didn’t have to fight my brother for them!

My daughter has since perfected making vegan chocolate cordials and I am ever so grateful, but she doesn't make them often enough!

Chocolate Covered Boozy Cherries

So when I recently ran across a recipe for something called a cherry bomb, I was like “WHAT?!?!?” In this non vegan recipe they cover them in white chocolate and suggested you soak them in any booze you like. So first of all white chocolate is not my fave. Secondly, as mentioned before, my go to is whiskey, so I naturally decided my vegan version would be soaked in nothing else. Also whiskey and chocolate are best friends. Everyone knows that, so I knew my version would be dipped in vegan chocolate and coated in festive sanding sugar!

Like a perfect adult only version of a chocolate covered cherry cordial!

Y'all! OH MY GOODNESS! These little boozy soaked bites are so good! So good that I took them to our local brewery the other night, where I go to play Mah Jong once a week, (don’t laugh, I’m old and I love game night!) and passed these treats out. Everyone, and I mean everyone, loved them! Am I surprised? No, no I am not. I basically made boozy chocolate candy and passed them out to patrons at a bar. Who’s gonna argue with that?

soaking-booze.jpg

Also whatever you do, SAVE THE SOAKING BOOZE. It can be used for delicious cheery infused cocktails later! Hello old fashioned, my old friend!

I am gonna say that these 100% need to be made for any holiday party you have coming up, or if you are lame like me, maybe make a batch for your game night or book club. They will 100% make it a little more lively and fun! Cherry bombs for everyone (21 and up obviously). Cheers y’all, and happy boozy snacking.

INGREDIENTS:

  • 2 (10 oz) jars maraschino cherries with stems

  • Whisky, or Bourbon of choice

  • 1/2 cup vegan chocolate chips or chopped vegan chocolate

  • 2 teaspoons coconut oil

  • sprinkles, optional

INSTRUCTIONS:

  1. Drain juice from cherries and pour them into a medium sized bowl.

  2. Pour enough whiskey or bourbon to cover the cherries and pop them into the fridge. Let the cherries soak for several hours, or overnight.

  3. Lay out a few paper towels and remove the cherries from the bowl, placing them onto the paper towels. This will help remove some of the liquid from the outside so the chocolate will stick.

  4. Place chocolate in a microwave safe dish along with the coconut oil. Heat in 30 second intervals, stirring in-between unit chocolate has melted.

  5. Dip the cherries into the chocolate and then into some sanding sugar If you like.

  6. Place cherries onto a parchment lined baking sheet and place in the fridge long enough that the chocolate can harden.

  7. Eat and be merry!

If you like this recipe, try these:

 
Chocolate Covered Boozy Cherries

Vegan Lasagna Soup with Beyond Meat

Vegan Lasagna Soup

I have a handful of lasagna recipes. Classic Vegan Lasagna, Lasagna in Muffin Cups, Lasagna Stuffed Peppers, and now vegan lasagna soup!

If you can’t already tell, I love lasagna. I love most saucy, “meaty,” cheesy dishes, actually. So it stands to reason vegan lasagna would be in my top 10 all time favorite foods.

I actually hardly ever ate lasagna growing up. I can not think of one time my mom or step mom ever made it, actually. My parents grew up in Alabama, and my mom grew up on a farm, so lasagna was not a dish my southern grandmama EVER made. Not that I am sad about that, because what she did cook was the best food on earth. But, if we ever ate out at a place that had lasagna, I ordered it, and I was in heaven.

Once I was grown and married it was the first thing I wanted to learn how to make and I could not turn to my mom for this one. I worked in a small town bank at the time, and decided I would turn to my nice southern co-workers for help. Well, lets just say I was given a recipe that involved Velveeta cheese (if you don’t know what that is, it’s a block of soft American cheese, and it does NOT belong in lasagna, even when I was not vegan!) and I, young and naive, made it how I was instructed with the Velveeta, despite never liking Velveeta to begin wit. At the time I knew how to cook like three things and clearly was not a vegan, and although this seemed off to me, I decided she was older and wiser and knew better than I did. Suffice to say my husband was kind about it, but I don’t think he ate it. I don’t blame him. I mean if you love Velveeta then maybe that lasagna is the best thing on the planet?!? And I adored the woman who gave me the recipe, and she swore her family loved it? To each their own, I suppose. Needless to say, that set in motion my mission to find and make the best lasagna recipe ever, Velveeta not included!

I have made a lot of lasagnas over the last twenty years, but a classic sauce, “meat,” and cheese lasagna is still my favorite, with a nice veggies lasagna coming in second. Once we went vegan it became a whole new task to make the perfect vegan lasagna and I truly think I nailed it. That said, I am always playing with the recipe, baking it into muffin cups for parties, bell peppers for something fun and different, and most recently soup. Vegan lasagna soup is so quick and easy, making it the perfect lasagna dish when you are in a hurry, or just want a warm, hearty, comforting soup on a cold day. It comes together quickly and easily and in a fraction of the time it takes to make regular lasagna!

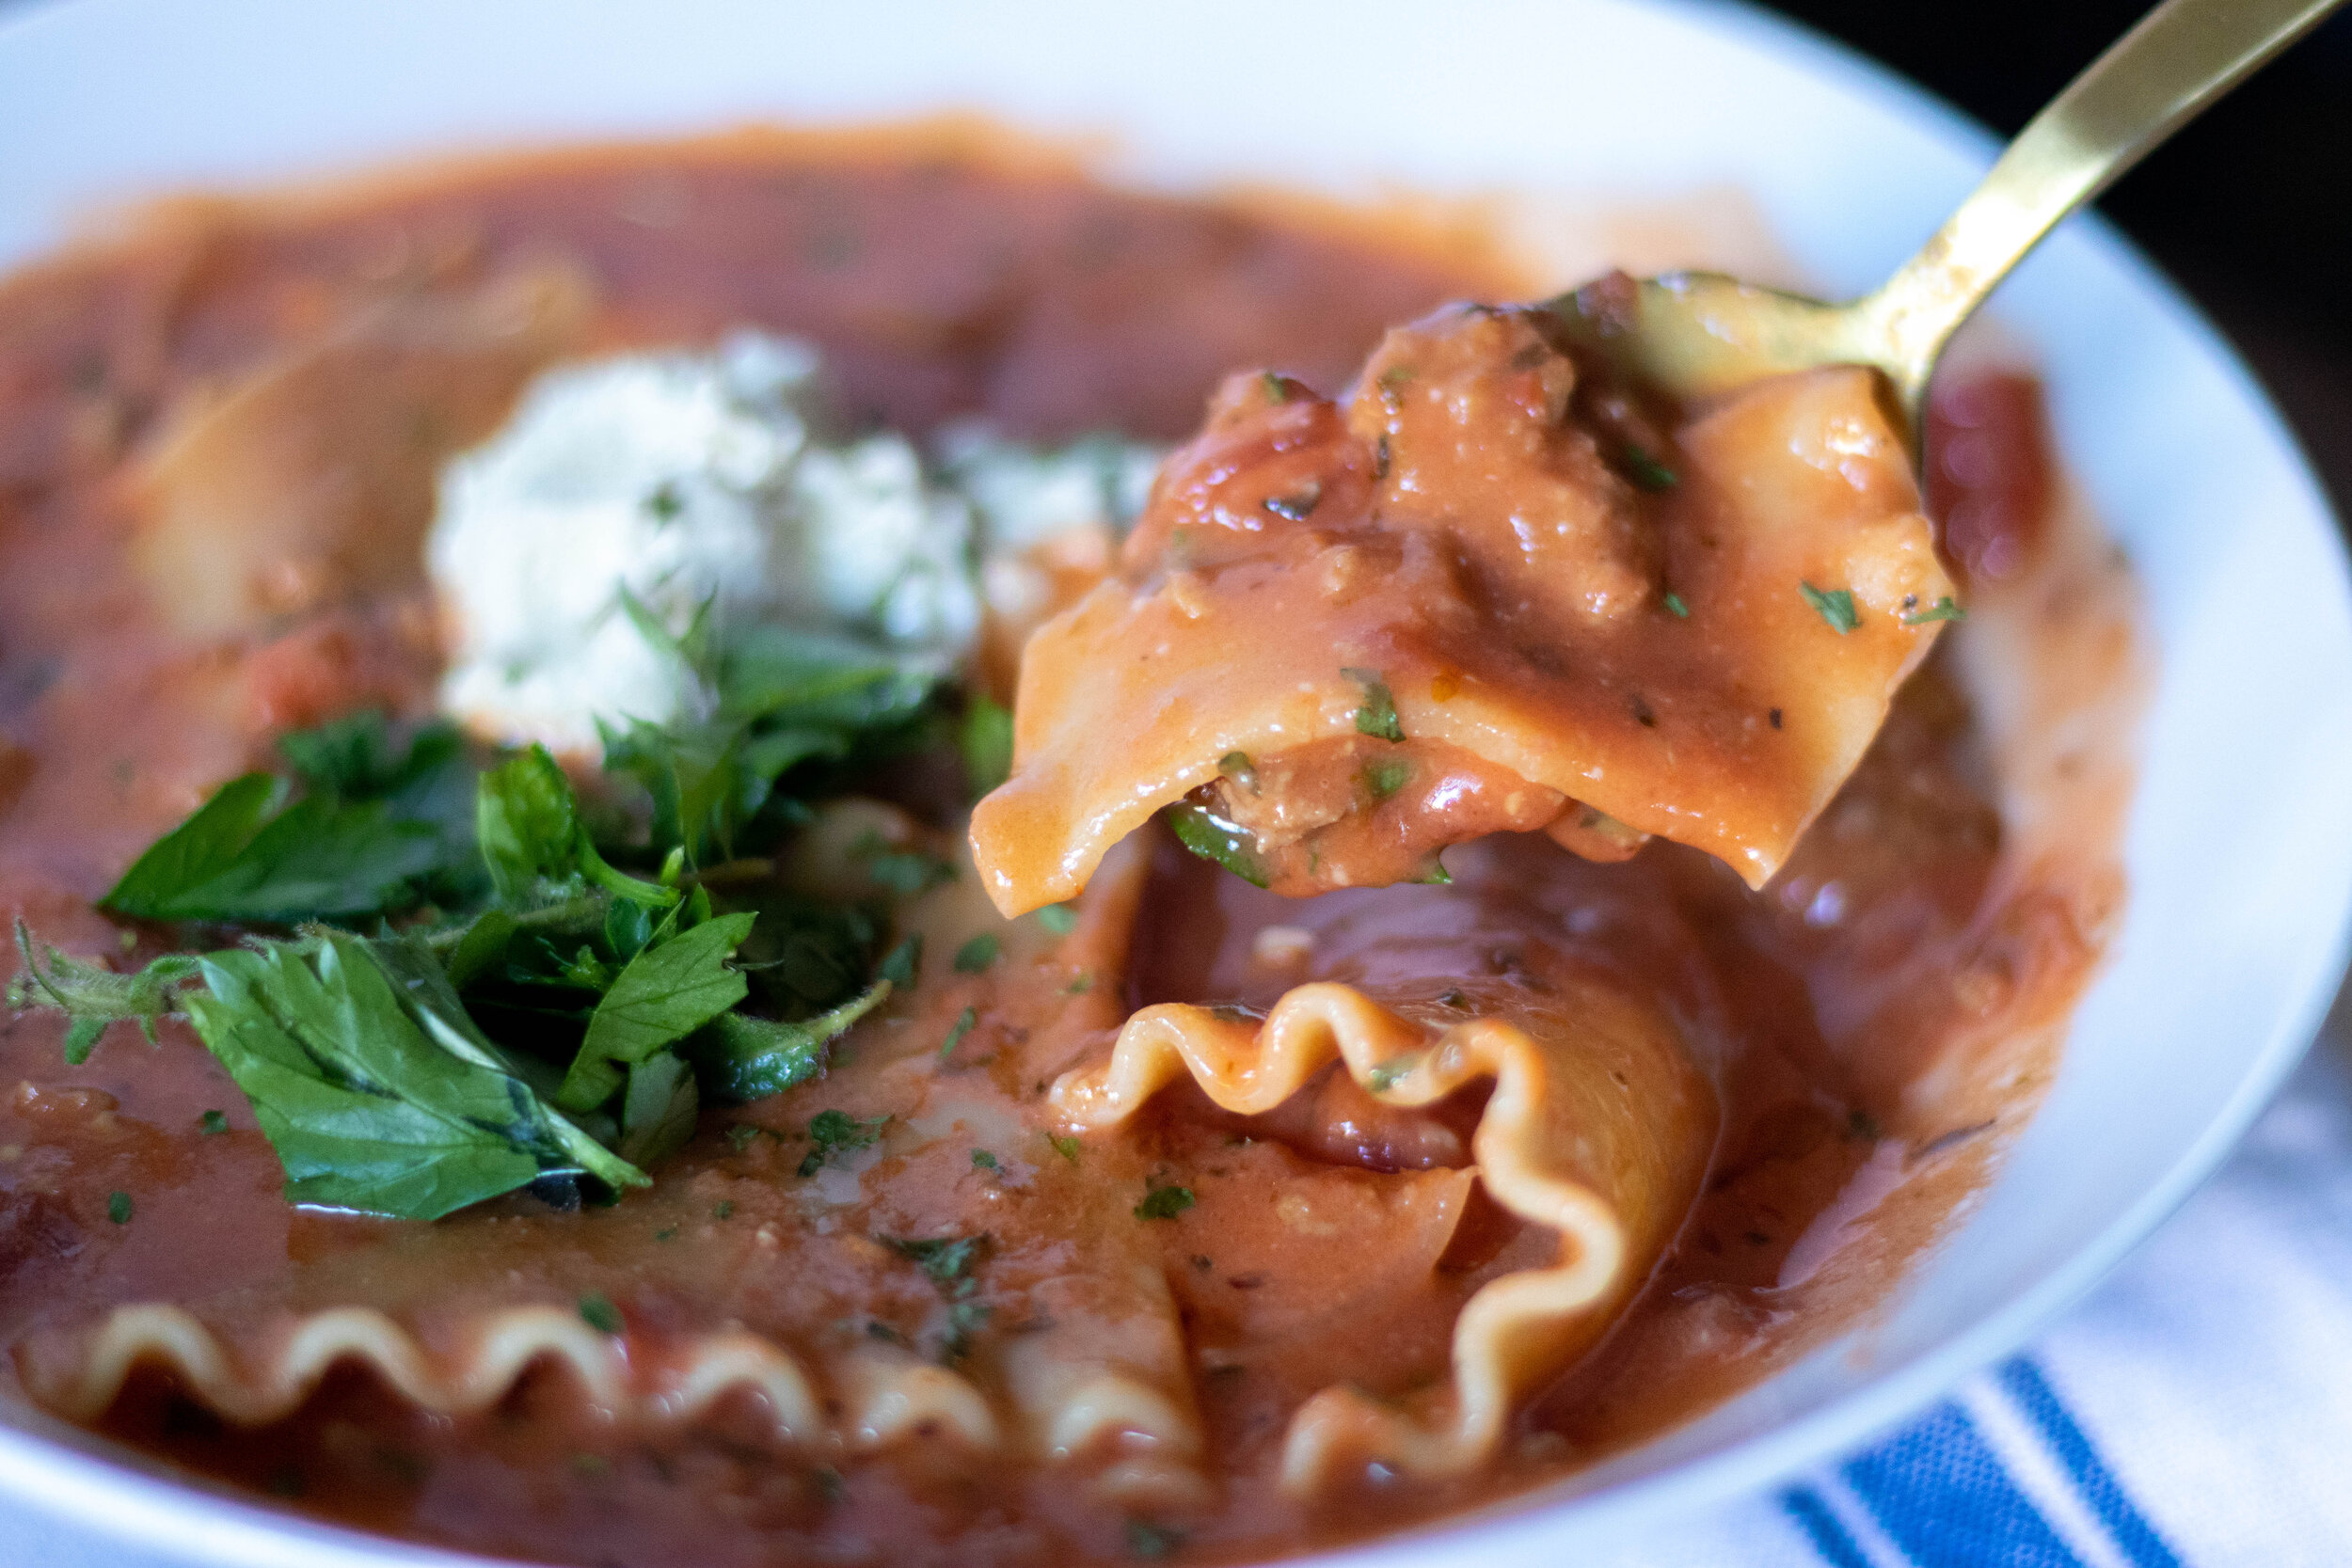
This soup is a full meal in a bowl and so delicious. Its saucy, creamy, flavorful, and filling. We added cashew cream right into the soup to make up for a lack of cheese, and topped with the perfect easy tofu ricotta! I think this soup would also freeze nicely for easy meal prep! It is also delicious sever with some Easy Homemade Garlic and Herb Artisan Bread or Garlic Challah Rolls So, if you love vegan lasagna as much as I do, try it as a soup! I don’t think you will be disappointed!


INGREDIENTS:

  • 1 lb vegan ground meat. I used Beyond Brand ground.

  • 1 large yellow onion, diced

  • 2 teaspoons minced garlic

  • 1 (14.5 oz) can diced tomatoes

  • 1 ( 28 oz can) crushed tomatoes

  • 8-10 lasagna noodles

  • 1 teaspoon dreid thyme

  • 1 teaspoon dried oregano

  • 1-2 teaspoons dried basil

  • 1 teaspoon salt

  • 1/2 teaspoon black pepper

  • 1/4 cup cashews, plus water for heating

  • 5 cups water divided

  • 2 teaspoons Vegetable Better Than Bouillon

  • 1-2 teaspoons olive of grapeseed oil

  • Tofu ricotta and fresh basil for topping

Vegan Lasagna Soup

INSTRUCTIONS:

  1. In large pot of dutch oven, heat 1-2 teaspoons oil over medium heat. Add the onion and garlic and cook until the onion is soft and translucent. Add the vegan ground “meat” to the onion and cook until the “meat” is cooked through.

  2. Add both cans of tomatoes, all of the seasonings, 4 cups water, and Better than Bouillon to the pot. Reduce heat to a simmer.

  3. Place cashews in a microwave safe container covered in water and microwave for 3 minutes. Drain the water. Add the cashews and 1 cup fresh water to a high speed blender and blend unit completely smooth. Add to the pot and stir in.

  4. Break up the noodles to fit in the pot. Let the noodles cook until they are soft, being sure to stir serval times while they cook to help avoid them sticking together or the bottom of the pot.

  5. Once the noodles are cooked through the soup is done. Top soup with a dollop of tofu ricotta or even vegan mozzarella, fresh parsley, or fresh basil to serve.

If you like this recipe, try these:

 
Vegan Lasagna Soup

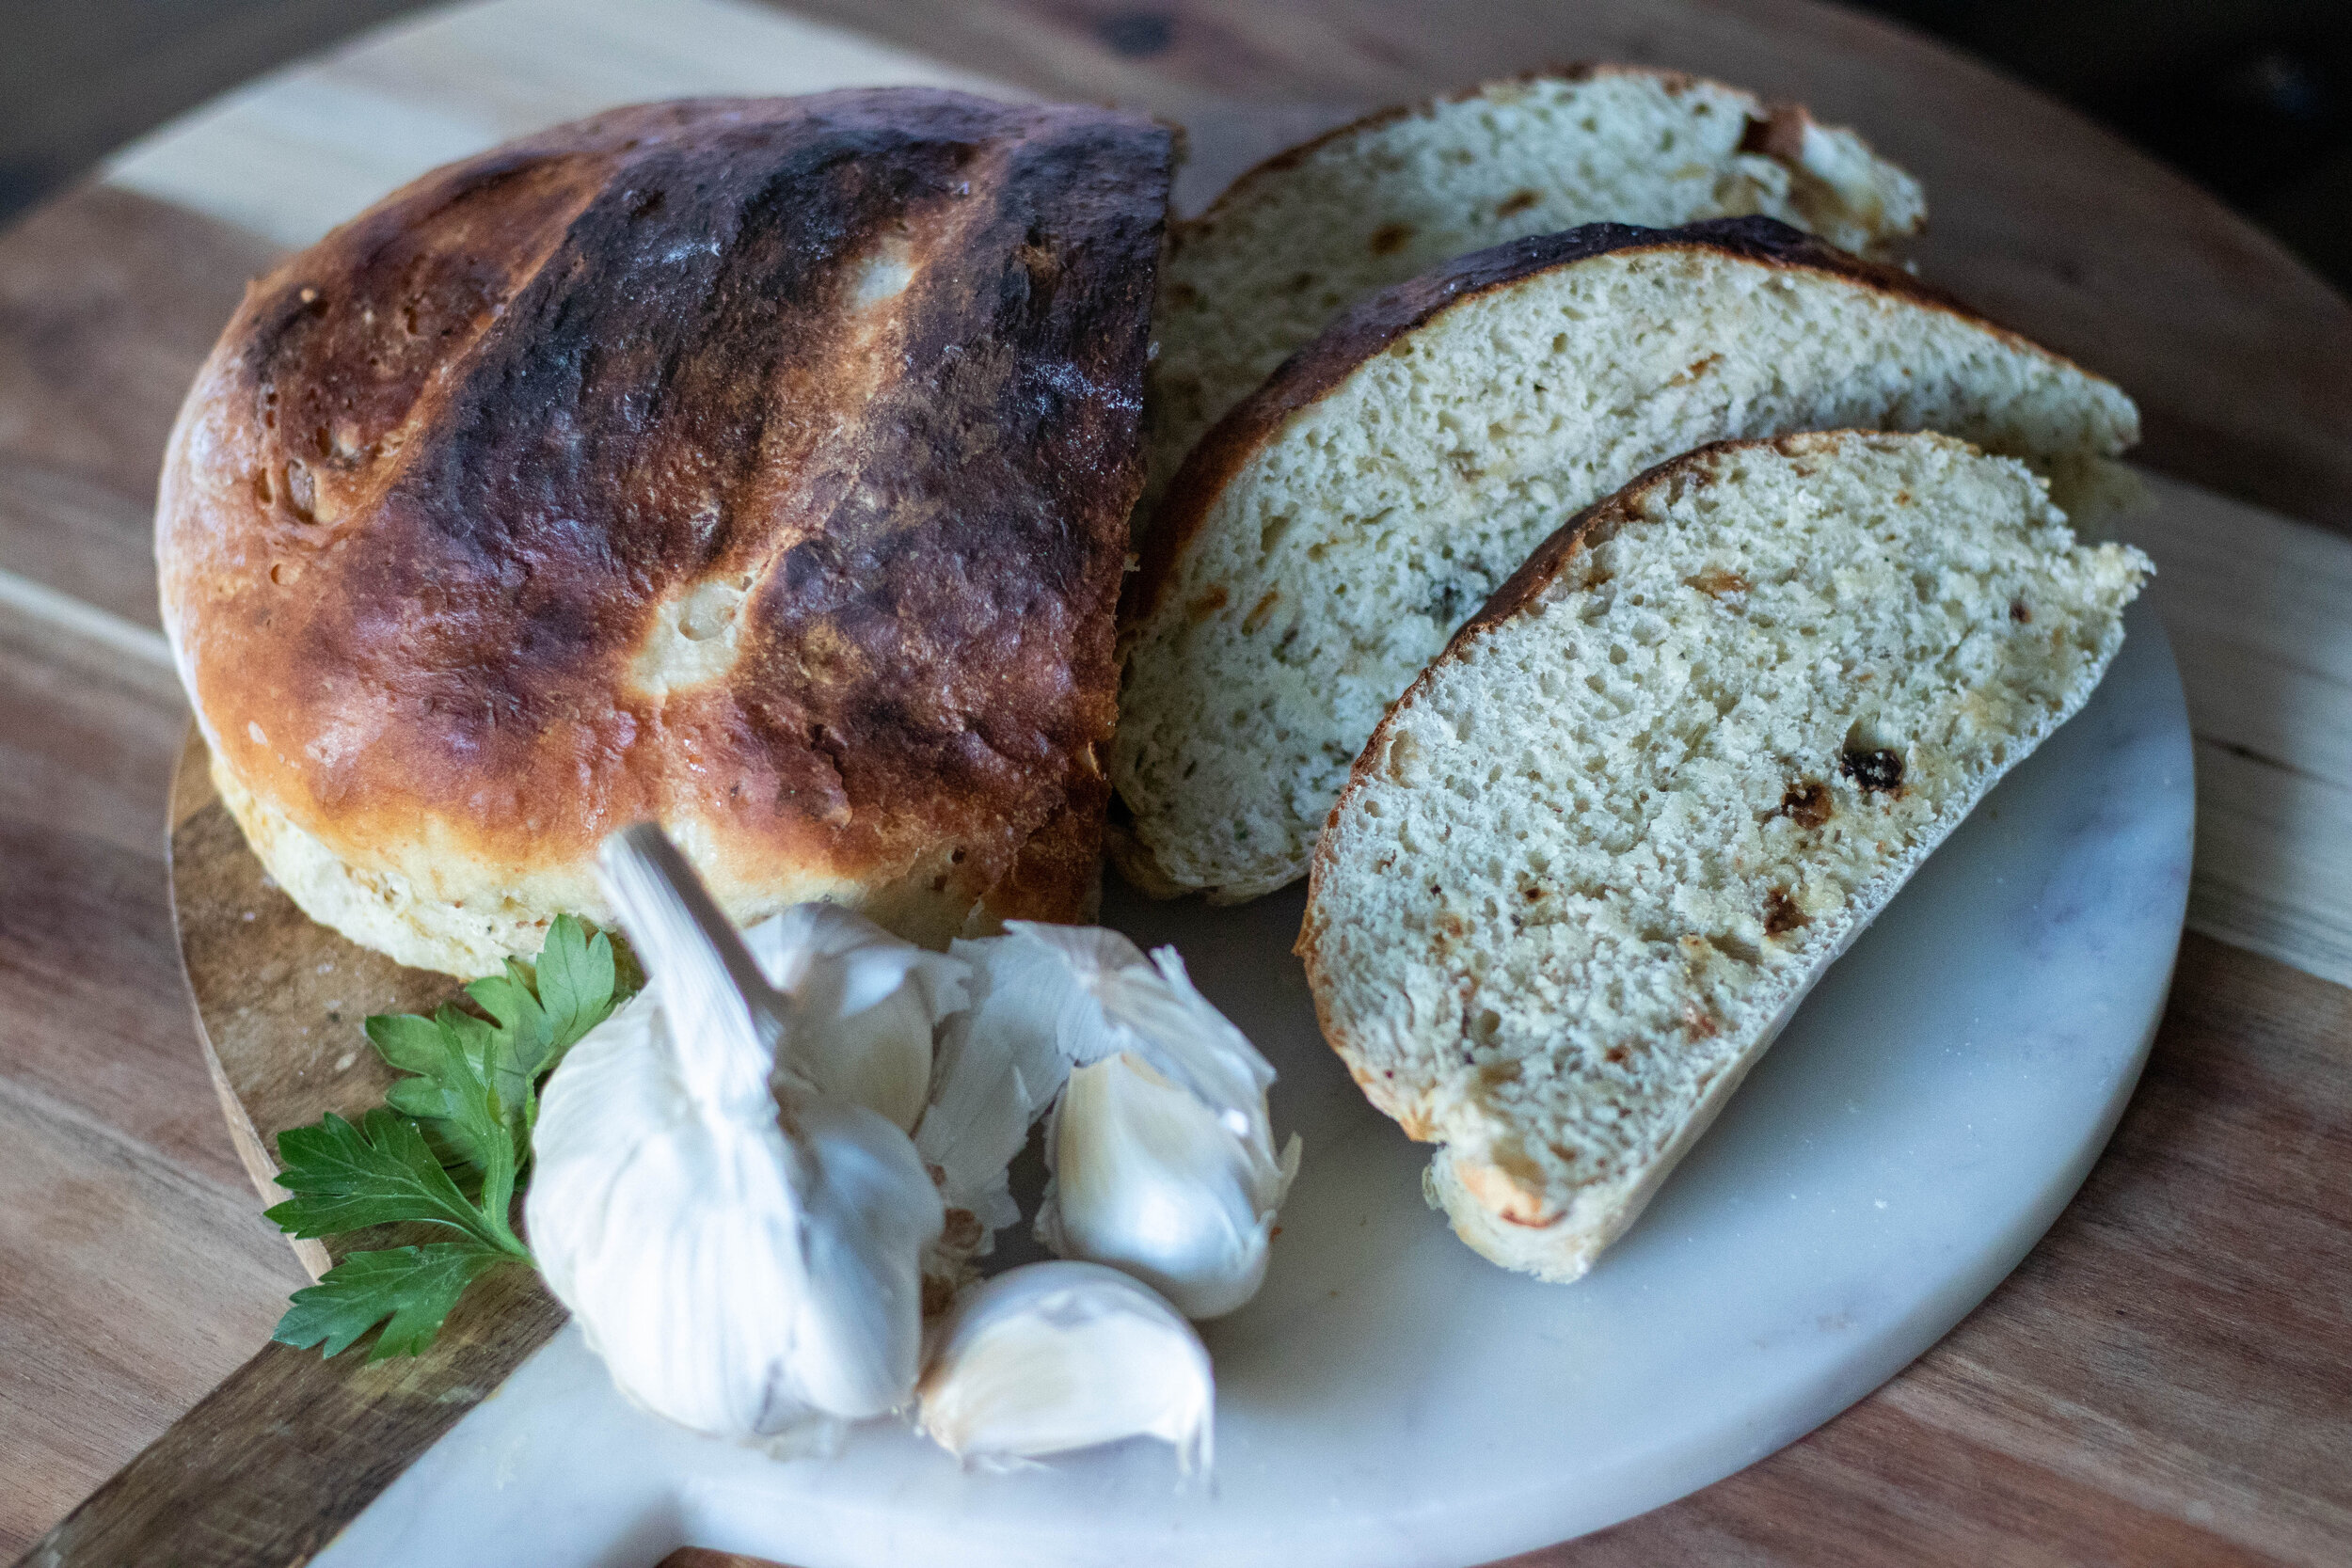
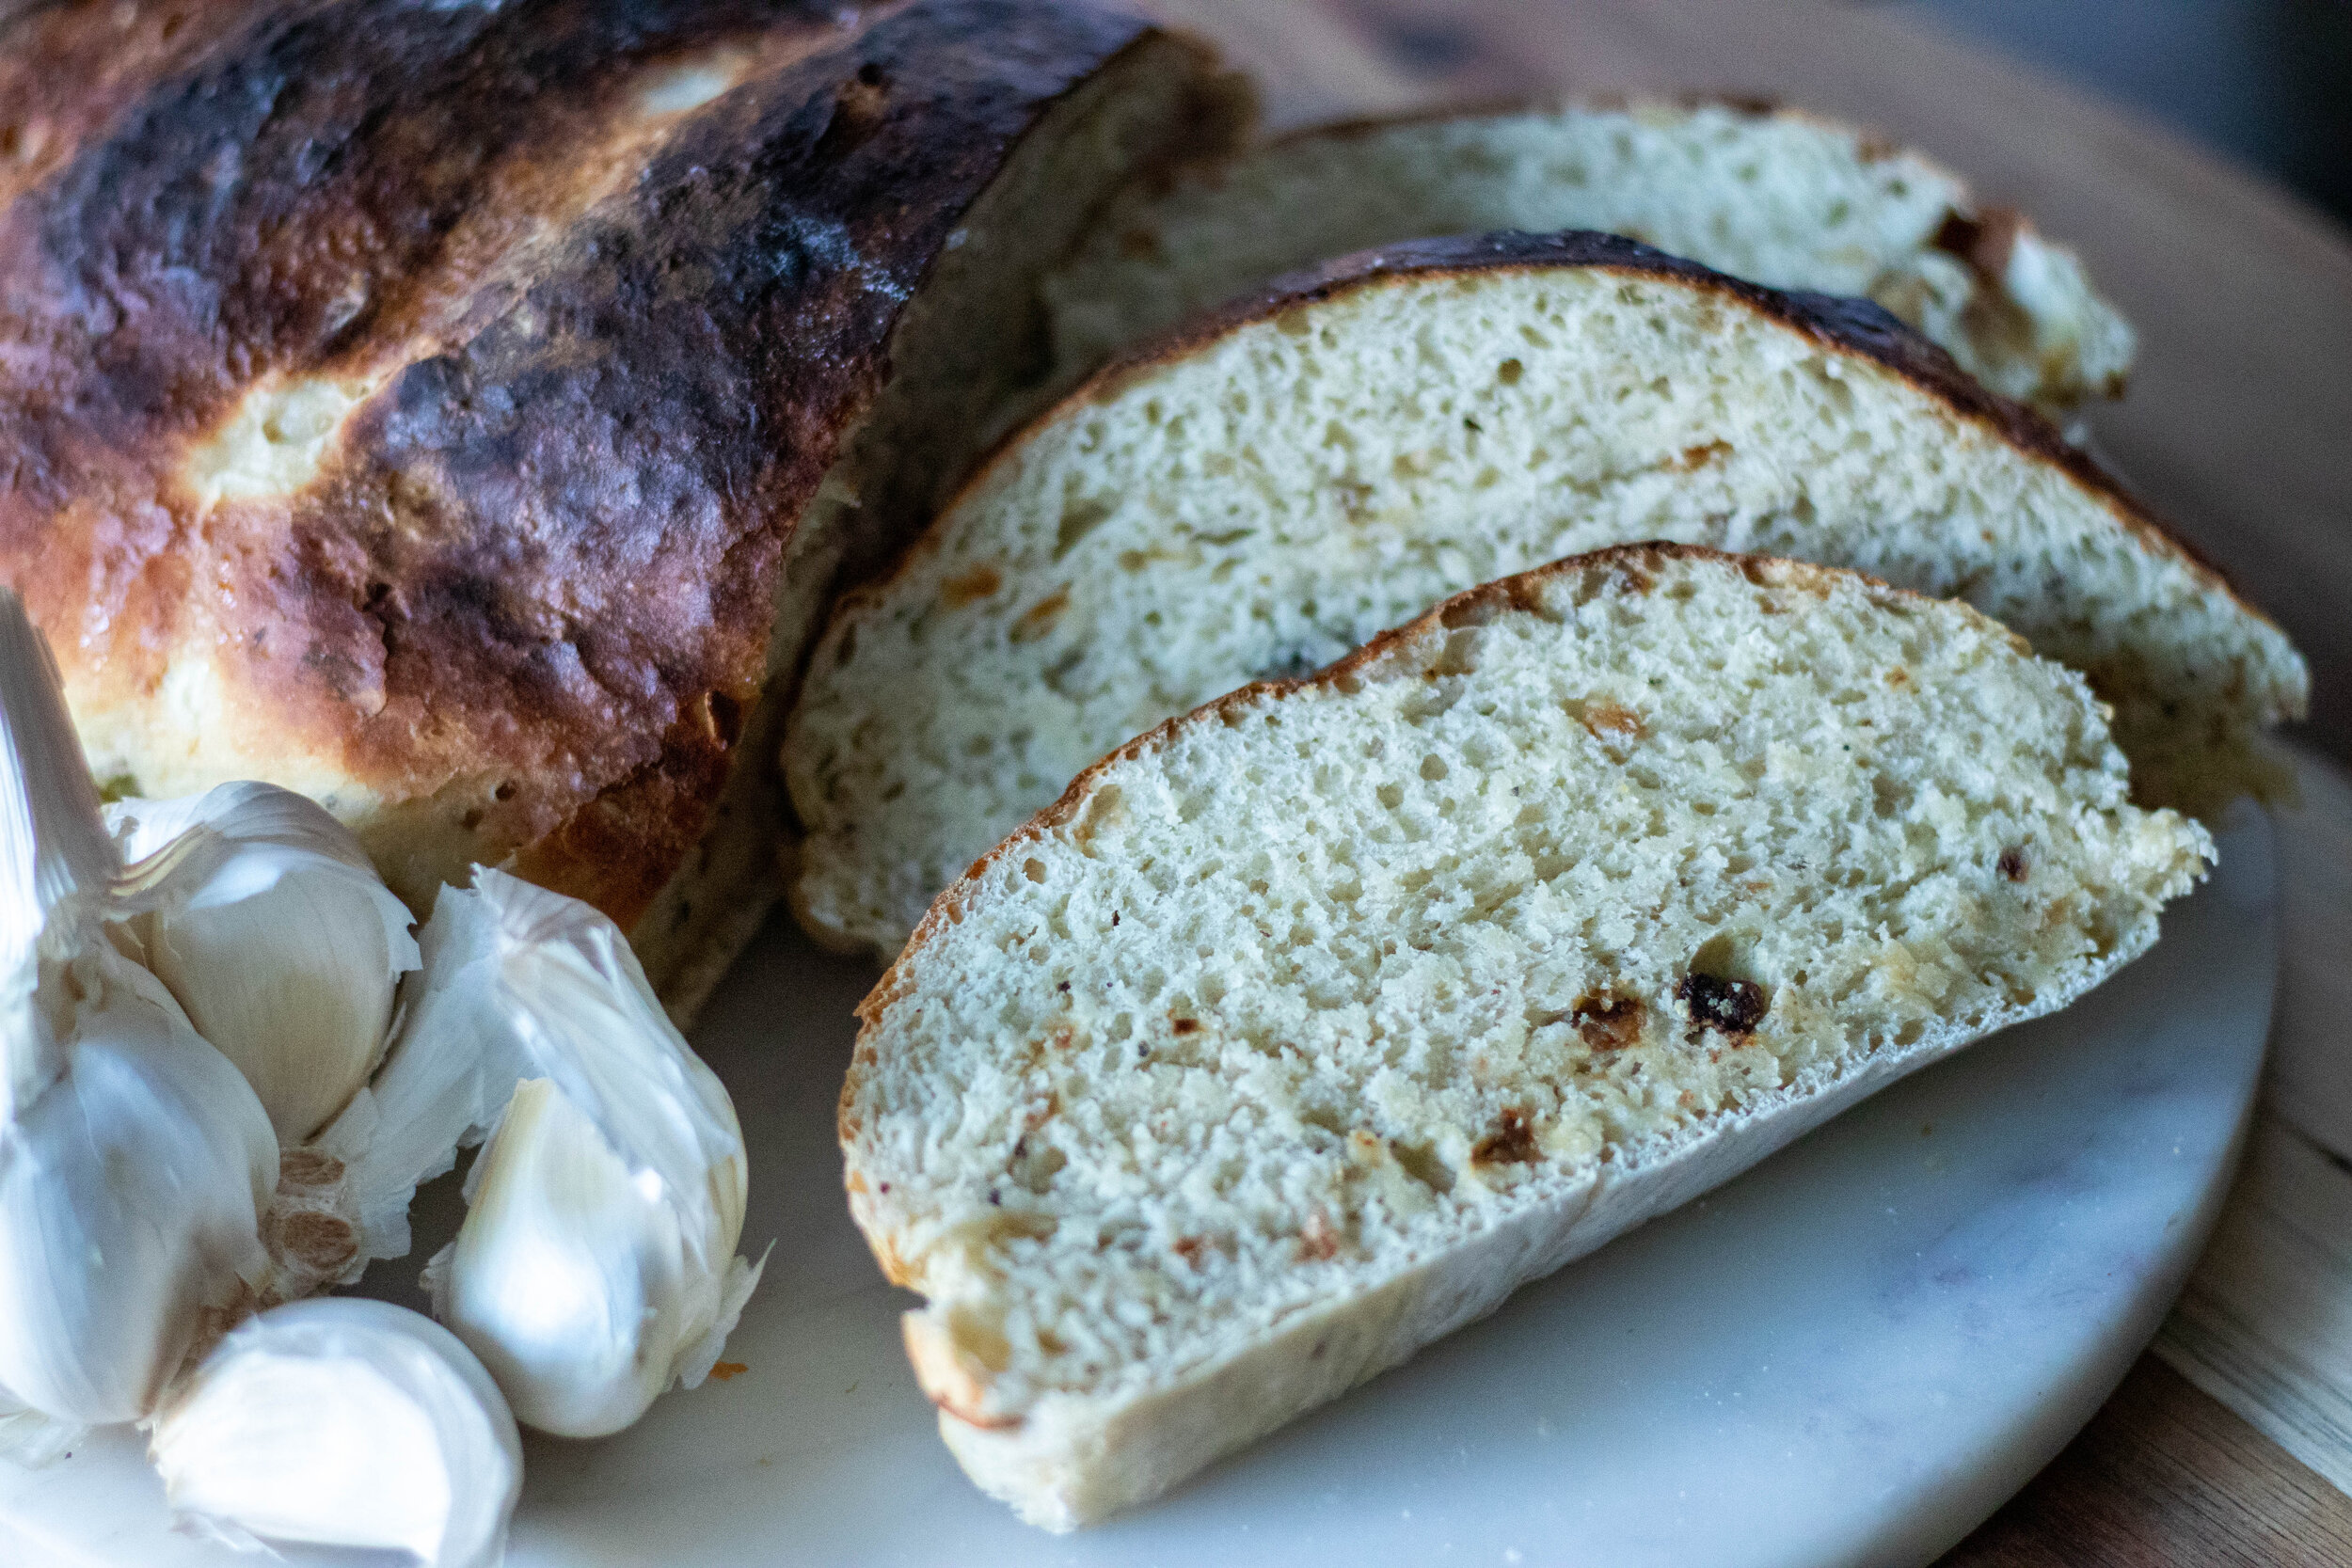
Roasted Garlic and Herb Artisan Bread

Roasted Garlic and Herb Artisan Bread

I love the smell of fresh bread baking, so tend to bake bread often. This bread in particular is so simple and yields 2 nice big loaves. I like to bake some up on the weekend and have fresh bread throughout the week. You can also easily freeze the loaves you don’t use for later.

We decided to add herbs and fresh roasted garlic cloves to the dough for a perfectly savory, flavorful, quick and easy artisan bread. If you are new to bread baking, this recipes is so simple, so don’t be afraid to give it at try. Once you start baking your own bread, there is no turning back!

You can either peel your own garlic (warming it’s a lot) or look for a bag of pre-peeled fresh garlic cloves in the produce section of you local grocery store. I can always find the 6oz bags and just to make it simple, I roast and add the whole bag. Roasting the garlic gives it a sweet flavor that is perfect for this bread.

For the herb blend we used Herbs de Provenc , which is just a blend of herbs including lavender, and I am a huge fan. if you don’t have any on hand, feel free to use whatever combo of herbs you like that will compliment the garlic. Thyme, rosemary, parsley, oregano, sage, fennel, whatever you are feeling! Or you can just use the garlic and noting else if you prefer. I promise it will still be delicious!

Don’t let bread baking intimidate you. Its actually very easy and this bread is one of the easiest! Nothing beats the taste and smell of fresh baked bread. Its far less expensive to bake your own as well so really you can’t lose.


Ingredients:

  • 7 cups all purpose flour, plus extra for dusting

  • 2 packets dry active yeast (or 5 teaspoons)

  • 3 cups of warm water , around 100 degrees Fahrenheit

  • 1 tablespoon salt

  • 2 teaspoons Herbs de Provence

  • 6 oz of peeled garlic cloves ( I buy a 6oz bag or already peeled cloves in my produce section)


Instructions:

  1. Heat oven to 400 degrees. Place the peeled garlic cloves onto a baking sheet and pop them in the oven on the top rack for 15-20 minutes or until the garlic begins to brown and becomes fragrant. Allow to cool while you prepare the dough.

  2. In the bowl of your stand mixer, or if mixing by hand, in a large mixing bowl, combine yeast, warm water, salt and flour, herbs, and garlic cloves. There is no need to allow the yeast to proof. If using a stand mixer, attach the dough hook and mix the dough for a few minutes. You do not have to allow it to knead for long. It will be a little stickier that other bread doughs you may have made. You may have to sprinkle the dough with a little extra flour to pull it out of the bowl. If mixing by hand, stir with a wooden spoon or your hands until the ingredients are well combined, then turn the dough out onto a clean, floured surface. Knead dough by hand for a few minutes.

  3. Form the dough into a ball (again you may need a little flour on you hands to do this) and place it in a large, lightly greased bowl. Cover with plastic wrap and place in a warm place to allow the dough to rise, and double in size. This should take about one hour. I typically place mine inside of my oven (tuned off or set to a bread proof setting if you have one)

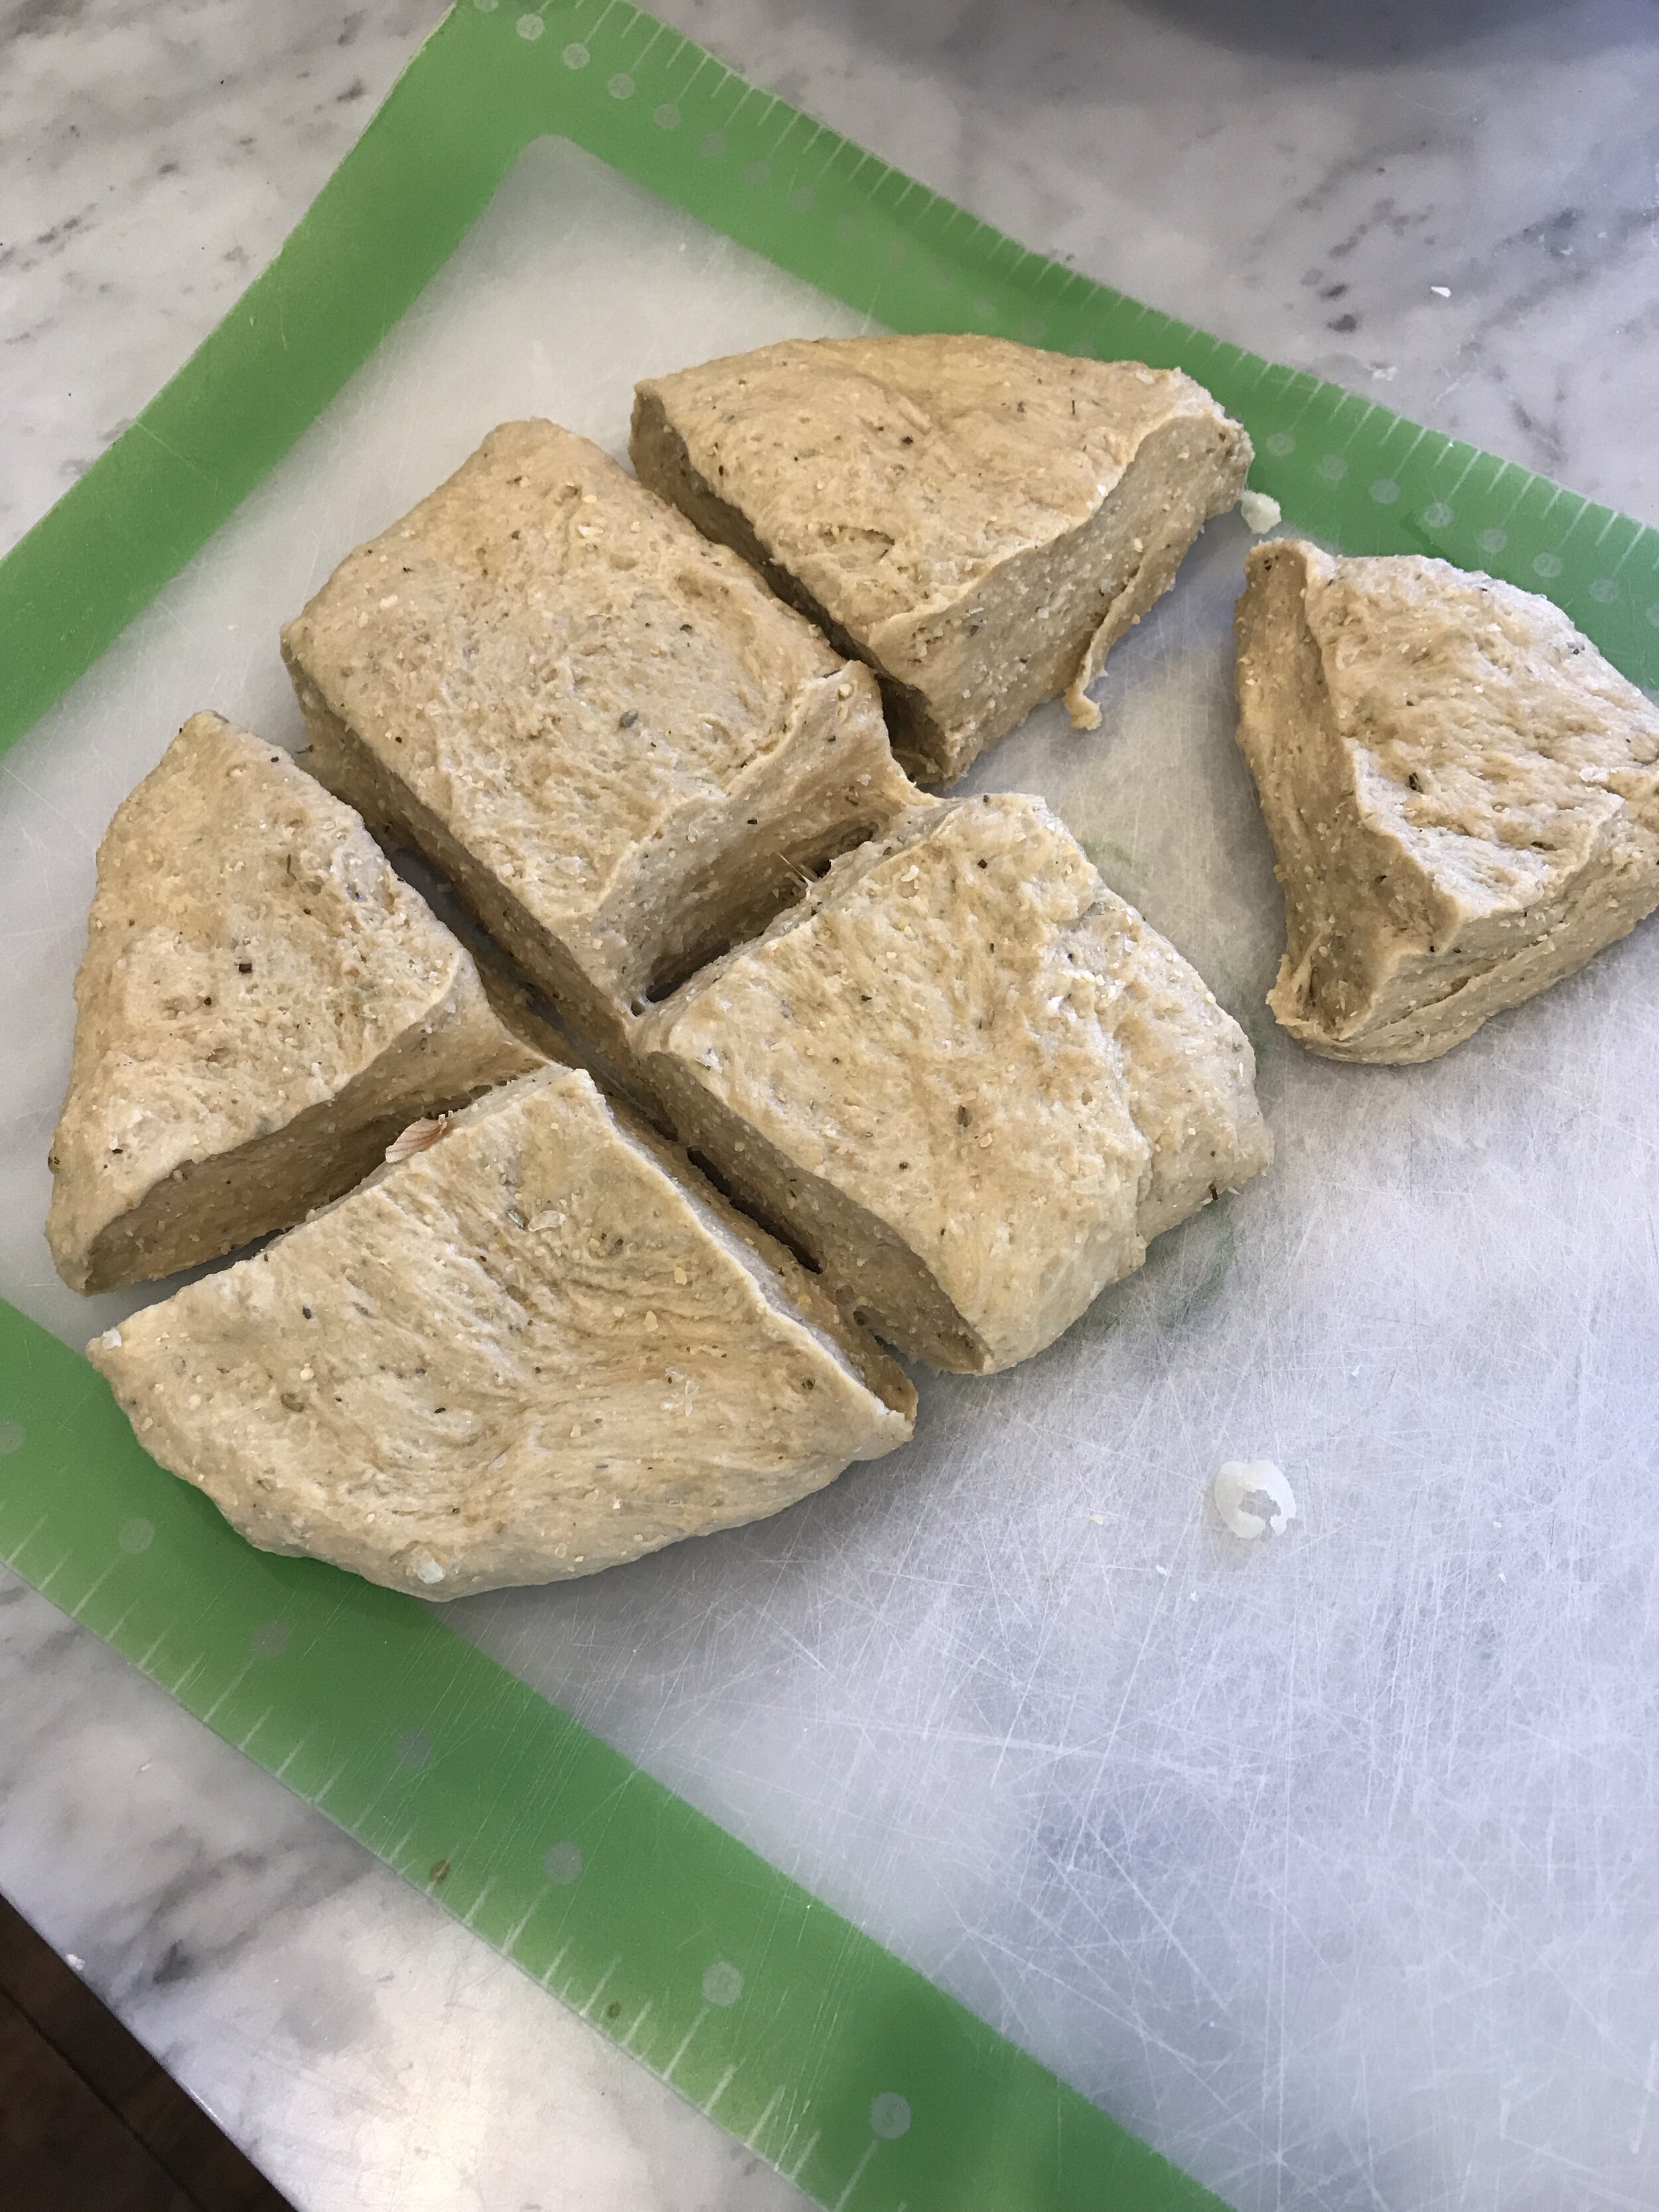
  4. Once the dough has doubled in size, divided it into two equal pieces. The dough will be sticky so you will need to dust it, and your hands in extra flour to be able to handle it. Holdng a portion of dough in your hands, form a ball while rotating the dough, pulling and tucking the dough to the underside of the ball to stretch the dough on top. The top should be smooth and even, while the underside will not be so pretty. It does not have to be perfect, you are just trying to make a nice smooth oval shape out of the dough. Dust more flour on the top, and using a sharp knife make three slashes across the top of the dough. The flour will make it easier to cut through the sticky dough. Place the finished dough on a piece of parchment paper on top of a cutting board. Repeat with the other 2nd portion of dough.

  5. Preheat your oven to 450 degrees with one rack in the center of the oven, and one rack at the bottom. Place a few baking sheets, or baking stones in the oven as it heats. You need to be able to fit the three loaves on whatever pans you choose, so keep that in mind. On the bottom rack place a shallow baking pan or jelly roll pan. It just needs to be deep enough to hold 1 cup of water.

  6. Once the oven is done heating, carefuly slide the dough and parchment paper off of the cutting board, onto the heated pans. Then carefully add 1 cup of water to the pan you placed on the bottom rack of the oven. Quickly close the oven. The steam from the water will help crisp the bread.

  7. Let the bread bake for about 30 minutes. Once it is browning on top, and sounds hollow when you tap the top, it’s done.

  8. Allow the loaves to cool. You can freeze the bread in a large freezer bags if not using right away.

IIf you like this recipe, try these:

 
Roasted Garlic and Herb Artisan Bread Sliced

Vegan Green Bean Casserole Cups

Vegan Green Bean Casserole Cups

Since I was a kid, green bean casserole has long been my favorite holiday side. My mom made it every holiday without fail.

Once we went vegan I was on a mission to recreate a convincing cream of mushroom soup so I could make vegan green bean casserole among other classic dishes that require the non vegan “soup” from a can. Cashews work really well for this. They are super creamy once broken down and with just a little starch and a few other ingredients and you are left with a delicious vegan homemade cream of mushroom soup.

This year I wanted to try something a little different with my green bean casserole. I am pretty obsessed with making single serving meals in muffin tins. I have made stuffing, lasagna, quiche, rice cups for Banh Mi filling just to name a few. You name it, and I have probably tried to turn it into a single serving cup.

I also love using crescent roll dough for all kinds of things. A lot of brands are vegan, you just need to read the label. More often than not it’s the non organic brands that are vegan. The organic brands tend to add butter. So it only seemed natural that I could use the crescent dough for the shell of these green bean casserole cups since they are another holiday meal favorite side. I would just marry the two and cross my fingers that it turned out.

Well, it really did! Not only are these vegan green bean casserole cups adorable, and a creative twist on the original classic, they are extra delicious nestled into a “buttery” crescent crust! So instead of making a traditional vegan green bean casserole this year, maybe try these, I think you may love them as much as we do!

INGREDIENTS:

You will need a muffin tin for this recipe. The recipe yields 12 cups

  • 1 lb fresh green beans

  • 1/2 cup finely diced button mushrooms (itty bitty pieces)

  • 2 tubes vegan crescent roll dough

  • 1 cup crispy fried onions (not all brands are vegan, read the label)

  • 1/2 cup cashews (plus water for soaking)

  • 1 cup water

  • 2 tablespoons tapioca or corn starch

  • 2 tablespoons nutritional yeast

  • 2 teaspoons apple cider vinegar

  • 1 teaspoon salt

  • 1 teaspoon onion powsder

  • 1/2 tesaspoon black pepper

Vegan Green Bean Casserole Cups

INSTRUCTIONS:

  1. Wash green beans, and snap or cut them into thirds. They have to fit in a muffin tin, so the pieces need to be pretty small.

  2. Fill a medium pot with water and bring it to a boil. Add the green beans and let them cook for about 5 minutes, just until they are tender. Drain and set aside.

  3. Cover cashews in water in a microwave safe container. Microwave them on hight for 3 minutes then drain. If you do not have a microwave you can soak them in hot water for a few hours, or even boil them in a small pot for several minutes.

  4. Add cashews, 1 cup of water, starch, nutritional yeast, onion powder, vinegar, salt, and pepper to a high speed blender or food processor. Blend on high until the mixture is COMPLETELY smooth and there are no bits of cashews left.

  5. Heat a large pot over medium heat. Add the mushrooms and a sprinkle of salt and let them cook for several mintues until cooked through. Pour the cashew mixture into the same pot with the mushrooms and heat, whisking continuously until the mixture thickens. You want the the mixture kind of thick , about the consistency of pudding. Mix in the drained green beans and 1/2 cup of crispy onions into the pot, and set aside to cool.

  6. Preheat oven to 350 degrees. Open up both cans of crescent rolls. On a clean surface roll out each can so the precut seams press together and seal, and you have on large square piece of dough (I do one can at a time, and aim for a square shape vs a rectangle) cut the square into 6 equal pieces. Kind of eyeball how big the squares will have to be to fit in the tin. Muffin tin sizes can vary, so you may have little dough left over, as you don’t want to over fill each cup with dough. You just want the piece of dough to fill the space of the cup. Spray a muffin tin with some cooking oil if things tend to stick. I have a ceramic muffin pan and typically don’t need to spray it. Fit a square of dough into each muffin cup, pressing it in to fit and making sure the dough goes all the way up the sides of the cup.

  7. Pop the dough filled pan into the oven for about 5 minutes, you just want the dough to pre cook a bit. Remove from the oven and using the back of a spoon, press the dough that has puffed up, back down into the cups. Divide the green bean mixture between each muffin cup. Sprinkle more crispy onions on top, and pop back into the oven on the middle rack for 20-25 minutes. Once you see the edges of crescent begin to brown, they should be done.

  8. Remove from the oven and allow to cool a bit before removing the green bean cups from the tin and serving.

If you like this recipe, try these:

 
Vegan Green Bean Casserole Cups

Vegan Sweet Potato Pancakes

Vegan Sweet Potato Pancakes

Once upon a time, a long long time ago, I would go visit my brother in North Carolina and he would make us sweet potato pancakes. He made them from a mix that he was able to find in his local grocery store, and I was never able to find in Florida (this was pre Amazon Prime being the norm, so basically the Ice Ages.)

This was long ago, and I am certain they were not vegan, but man, they were so delicious and I looked forward to eating them every visit. For whatever reason it NEVER occurred to me to try and make my own until about a week ago.

I often pre bake sweet potatoes for smoothies or for my husband to reheat for a quick week day lunch, but we had 8 that had yet to be eaten. Then, a light bulb went off and I finally decided to try and recreate the beloved sweet potato pancakes of my past. Well y’all, it worked. They are easy and delicious. You do need mashed sweet potatoes to make this recipe, so I highly recommend baking up some during the week and just popping them in the fridge for these pancakes, a sweet potato pie smoothie, or ever quick and easy sweet potato quesadillas. There are a ton of ways to use up baked sweet potatoes, but for now I think this recipe will be on constant rotation!

INGREDIENTS:

  • 2 1/2 cups all purpose flour

  • 4 tablespoons white sugar (If vegan, not plant based, make sure the brand you use is in fact vegan, not all white sugars are. I use Florida Crystals)

  • 4 teaspoons baking powder

  • 1/2 teaspoon salt

  • 2 teaspoon cinnamon

  • 1 teaspoon vanilla extract

  • 1/4 teaspoon nutmeg

  • 2 1/2 cups plant based milk

  • 2 tablespoon melted vegan butter

  • 1 cup mashed sweet potatoes ( baked, then removed from skin and mashed)

Vegan Sweet Potato Pancakes

INSTRUCTIONS:

  1. Whisk all dry ingredients in a large bowl.

  2. Add in the melted butter, plant based milk, vanilla, and stir well. Finally, stir in the mashed sweet potatoes.

  3. Heat a large skillet or electric griddle on medium heat. Add a teaspoon of vegan butter or spray the pan with cooking oil. Using a 1/4 cup measuring cup, scoop out batter into the skillet, 3-4 pancakes at time.

  4. Let pancakes cook until tiny bubbles begin to form and pop, once this happens they are ready to flip. Cook on the other side for another minute or two, until cooked through.

  5. Repeat, adding more butter or oil to the pan as needed, until all batter is used.

If you like this recipe, try these:


Vegan Cranberry Orange Cupcakes

Vegan Cranberry Orange Cupcakes

When I think about the holidays, I always think about all things cranberry and orange. I love sweet citrus and the bright tartness of cranberries together.

So when I recently made a batch of candied cranberries I knew I needed to come up with a delicious cake or cupcake to use them for garnish!! I mean I guess that is kind of working backwards, but this delicious cupcake was a result of that backward thinking so who cares.

These sweet orange cupcakes are filled with tart cranberry filing, topped with more orange flavor in the butter cream, and topped with a pretty little candied jewel of a cranberry. These cupcakes are so pretty and so tasty! They would be perfect on any holiday table this fall or winter, or as long as you can find fresh cranberries in season.

I used homemade cranberry sauce for the filling but canned will work just as well. I really do encourage you not to skip out on making the candied cranberries. They are great for garnishing desserts, using in cocktails, or just as at sweet and tart little snack.

Tis the season to make cranberry everything, while the getting is good so to speak!!! So go stock up on some fresh cranberries, and add these cupcakes to your holiday “to make” list! You won’t regret it!


INGREDIENTS:

  • 3 cups all purpose flour

  • 2 cups white sugar

  • 1 1/2 teaspoons baking powder

  • 1 teaspoon baking soda

  • 1/2 teaspoon salt

  • 2/3 cups fresh orange juice juice

  • zest from 1 large orange

  • 2 cups plant milk (I like to bake with oat milk)

  • 1/2 cup melted vegan butter

  • 1 teaspoons vanilla extract

CRANBERRY FILLING

  • 6 tablespoons Homemade or canned cranberry sauce

  • 1 tablespoon sugar

  • 2-3 tablespoons orange juice (use the orange you zest for the frosting)

VEGAN ORANGE FROSTING:

  • 1/4 cup vegan butter

  • 1/4 cup shortening

  • 3-4 cups powdered sugar

  • Zest from one orange

  • juice from orange to thin out the frosting

  • candied cranberries for garnish

Vegan Cranberry Orange Cupcakes Filling

INSTRUCTIONS:

Preheat oven to 350 degrees

  1. In a large bowl, whisk together dry cake ingredients. In a smaller bowl, whisk together the wet ingredients along with the zest.

  2. Combine the wet ingredients into the dry and mix until well combined.

  3. Line a muffin tin with 24 cupcake liners. We actually have a tin that holds 2 dozen cupcakes, but if yours holds 1 dozen, you will need to bake in batches.

  4. Fill the cups 3/4 of the way full. Bake for 25 to 30 minutes or until a toothpick inserted in the middle of one of the cupcakes comes out clean.

  5. Allow the cupcakes to cool completely.

  6. Make a small hole in the center of each of the cupcake. You can use a small knife or turn a large piping tip upside down, twisting it into the cupcake and puling out a perfect little bit of cake from the center. Mix the cranberry sauce, sugar and juice in a small blow. My homemade cranberry sauce is super thick. If the sauce you are using is kind of thin, you likely won’t need the juice or as much juice. You need the sauce just thin enough to pipe into the cupcake, but not too thin. Fill a piping bag, or zip lock bag with the corner cut with the cranberry filling and pipe a little into each cupcake.

  7. In a stand mixer, or using a hand mixer, cream together the butter and shortening. Add in the vanilla and orange zest. Begin adding the powdered sugar a little at a time and beat it in until the frosting is the desired stiffness. If the frosting is too thick you can use some juice from the orange to thin it out.

  8. Pipe or spread frosting onto cooled cupcakes and garnish with a candied cranberry

If you like this recipe, try these:

 
Vegan Cranberry Orange Cupcakes

Easy Candied Cranberries

Easy Candied Cranberries

Cranberry season makes me happy.

I love cranberry everything and these pretty little jeweled or candied cranberries are no exception.

These little beauties are so easy to make and add a little fancy sparkle and burst of flavor to so many holiday recipes. You can add them garnish cocktails, top desserts, or just snack on them.

They are sweet, and super tart, and pretty to look at. They store well in the fridge so if you are like me, once you make a batch, you will find as many ways as you can to use them. They are too pretty, and too tasty to let go to waste!

And if you are concerned about white sugar being vegan, just give the brand you use a quick google, or check this list . I use Florida Crystals brand and know they are for sure vegan but give the list a look and check your brand!


INGREDIENTS:

  • 12 oz fresh cranberries

  • 1/2 cup water

  • 1 1/2 cup sugar divided

  • optional, 2 large pieces of orange peel

INSTRUCTIONS:

  1. Bring 1/2 cup sugar, 1/2 cup water, and orange peel to a boil in a medium pot over medium heat, until sugar has dissolved. Remove from heat. Stir in the cranberries.

  2. Place a wire cooling rack on top of a cookie sheet. Transfer cranberries to the wire rack to dry for about an hour. Fill a large bowl with 1/2 to 1 cups of sugar and toss the cranberries in the sugar to coat. Transfer the cranberries back to to the cooling rack to dry for another half hour before storing in an airtight container in the fridge. You can optionally add half 1/2 orange worth of zest to the sugar for an extra citrus pop.

  3. Use cranberries as a garnish for cocktails, or desserts, or just as a tasty snack!

If you like this recipe, try these:

 
Easy Candied Cranberries

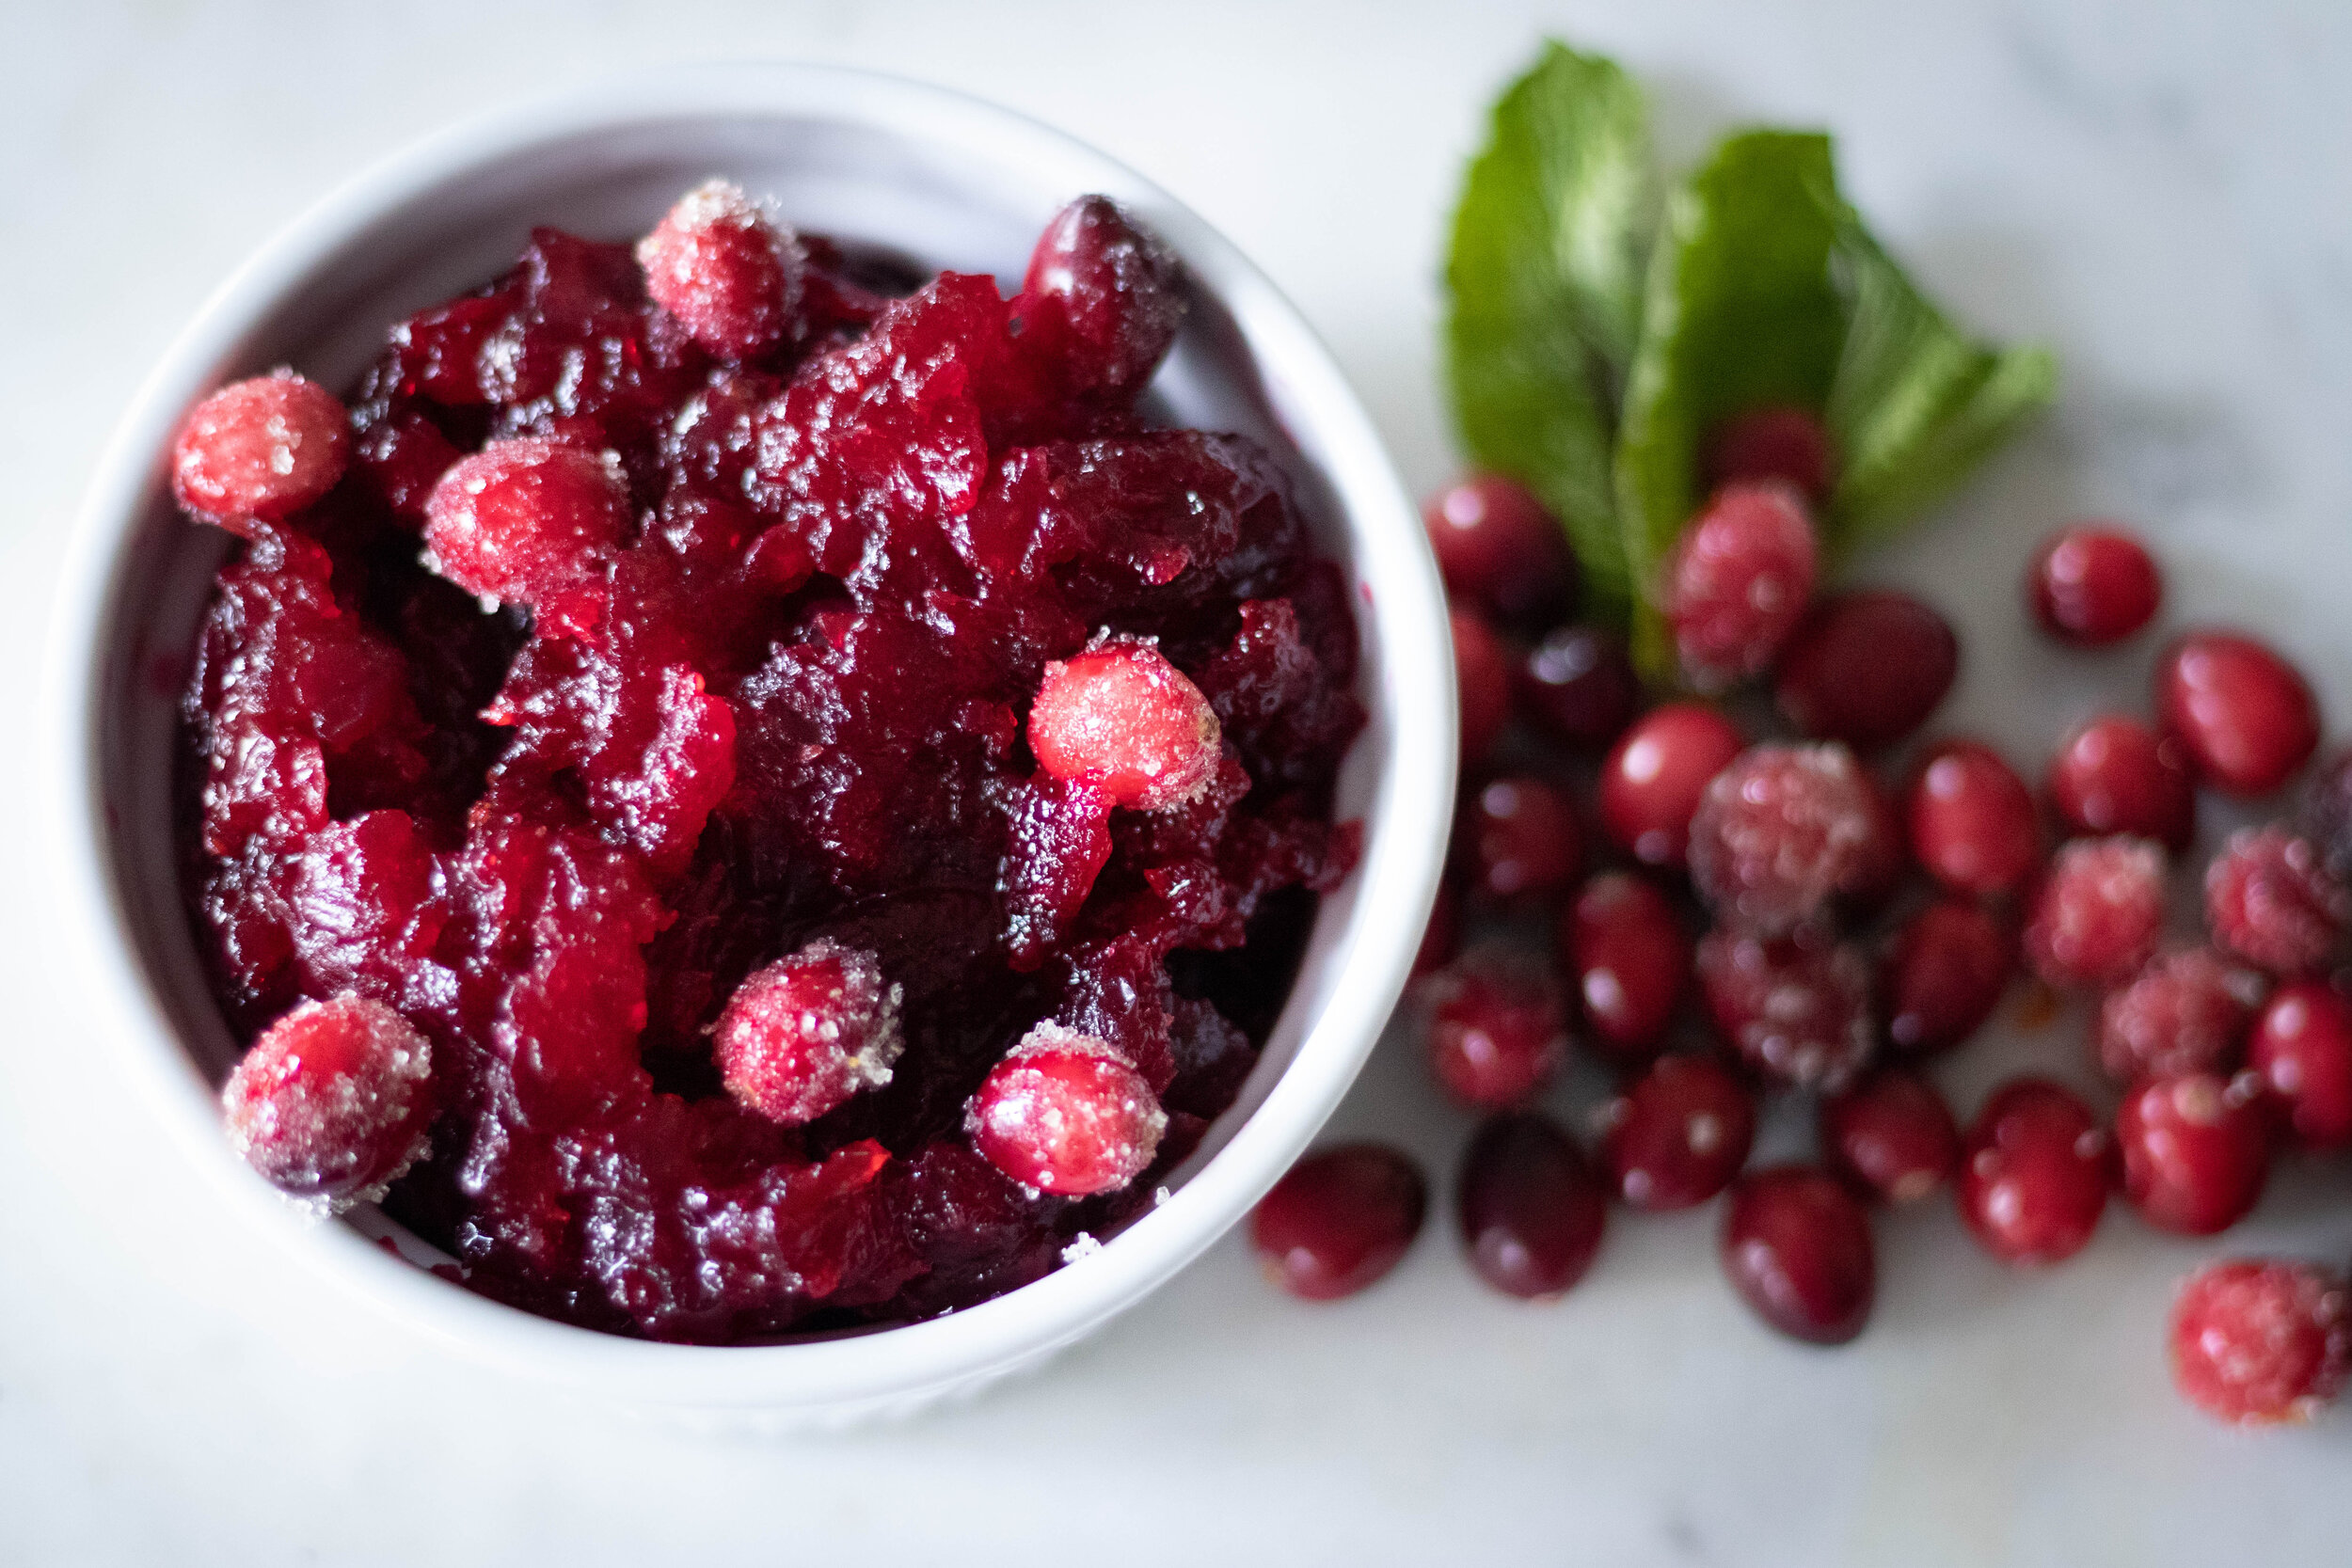
Easy Homemade Cranberry Sauce

Easy Homemade Cranberry Sauce

What would a Thanksgiving meal be without the cranberry sauce?!

I love cranberry sauce year round, but unfortunately fresh cranberries are only in season for a short time. My husband has long preferred canned cranberry sauce, and I have long gotten over letting that hurt my feelings.

But for the rest of the world that agrees homemade is superior, it could not be easier to make! I like mine on the the thick side so add less water so it is nice a jellied! If you like yours thinner, just add more water! Easy Peasy!

I also like mine with a kick or orange because I love orange and cranberry together! Again, you can skip the orange if you want, It’s no big deal.

I also like to serve mine garnished with some fresh candied cranberries just to be a little extra around the holidays. They are also super easy to make but add a nice touch if you are serving the sauce for a holiday meal! However you deiced to make it is up to you! Just whatever you do, pass the cranberry sauce, please!!!!!


INGREDIENTS:

  • 16 oz fresh cranberries, or about 2 cups

  • 1 cup water

  • 1 cup white sugar

  • optional, zest from one orange

Easy Homemade Cranberry Sauce on a Spoon

INSTRUCTIONS:

  1. Rinse and sort the cranberries, tossing out any squishy, or discolored ones.

  2. Add cranberrie , sugar, water, and orange zest to a large pot over medium heat.

  3. Let the water come to a simmer. The cranberries will begin to burst as they heat and you will here the sound as they pop. Once they begin to start popping, I take a hand potato masher and start mashing them in the pot to speed the process. You do not have to do this, as they cook they will burst on their own, I am just impatient. Reduce the heat and let the cranberries do their thing while stirring occasionally for about 20 minutes, or until the cranberries are all broken down and the sauce is thick and sticky.

  4. Transfer the sauce to an airtight container and store in the fridge. The sauce will firm up in the fridge as it cools. I like my cranberry sauce really thick. If you are a fan of thinner cranberry sauce you can add and extra 1/4 cup water to the recipe.

If you like this recipe, try these:


Zesty Green Pea Soup

Zesty Green Pea Soup

I have lived my whole life proudly declaring,” I HATE GREEN PEAS!” This is because my whole life I have actually hated English green peas. That is until I turned them into soup in an act of desperation to come with a new soup for my husband, and my mind was forever changed!

My kids were genuinely confused as to why I, me, the number one hater of little green peas, was serving up pea souping and going on and on about how good it was. Maybe I finally just got old enough to like the taste, maybe its because they are in soup form, and its more of textural thing that I didn’t like. Whatever, because as long as they are made into soup, I am all about it, and would eat this soup every single day!

Not only is it soooo ridiculously easy and affordable to make, its packed with protein, vitamins, and fiber. Also in the gloomy winter months, where cold season can leave you feeling like a bag of garbage, this bright, cheerful, zippy soup hits the spot and reminds you that spring is not so far off.

So, now I beg you fellow pea haters out there to try this soup. I can not understand the science, or mystery, or magic behind what makes the soup delicious when you actually do not enjoy eating peas in their whole form, but it is. It just is!


And for everyone else who has always loved little green peas, then I have no doubt you will be super into this soup, too (just know it took all I had not to actually say “souper” into this soup, because I am that much of a dork”

INGREDIENTS

  • 20 oz frozen green peas ( equal to 2 small bags of the brand I used)

  • 2 cups water

  • 1/2 yellow onion, finely chopped

  • 2 teaspoons minced garlic

  • 2 teaspoons dried dill

  • 1 teaspoon salt

  • 1/2 teaspoon black pepper

  • 1 teaspoon Vegetable or No Chicken Better Than Bouillon

  • 1 cup unsweetened plant milk (I used almond milk)

  • 1/2 lemon

Zesty Green Pea Soup

INSTRUCTIONS:

  1. Heat a large pot over medium heat, add the onion, garlic, and salt and sauté until the onion is translucent and soft.

  2. Add everything else BUT the milk to the pot and bring to a boil. Once the peas are soft, remove the pot from the heat.

  3. Carefully transfer the contents of the pot into a blender and process until creamy and smooth.

  4. Return the contents to the pot. Stir in the milk and juice from the 1/2 lemon, then turn the stove back to medium/low. Bring the soup back up to a simmer before removing from the heat once again. Ladle soup into bowls to serve. You can garnish with extra dill if you like and even an extra squirt of lemon juice if you like it extra zesty!

If you liked this recipe, try these:


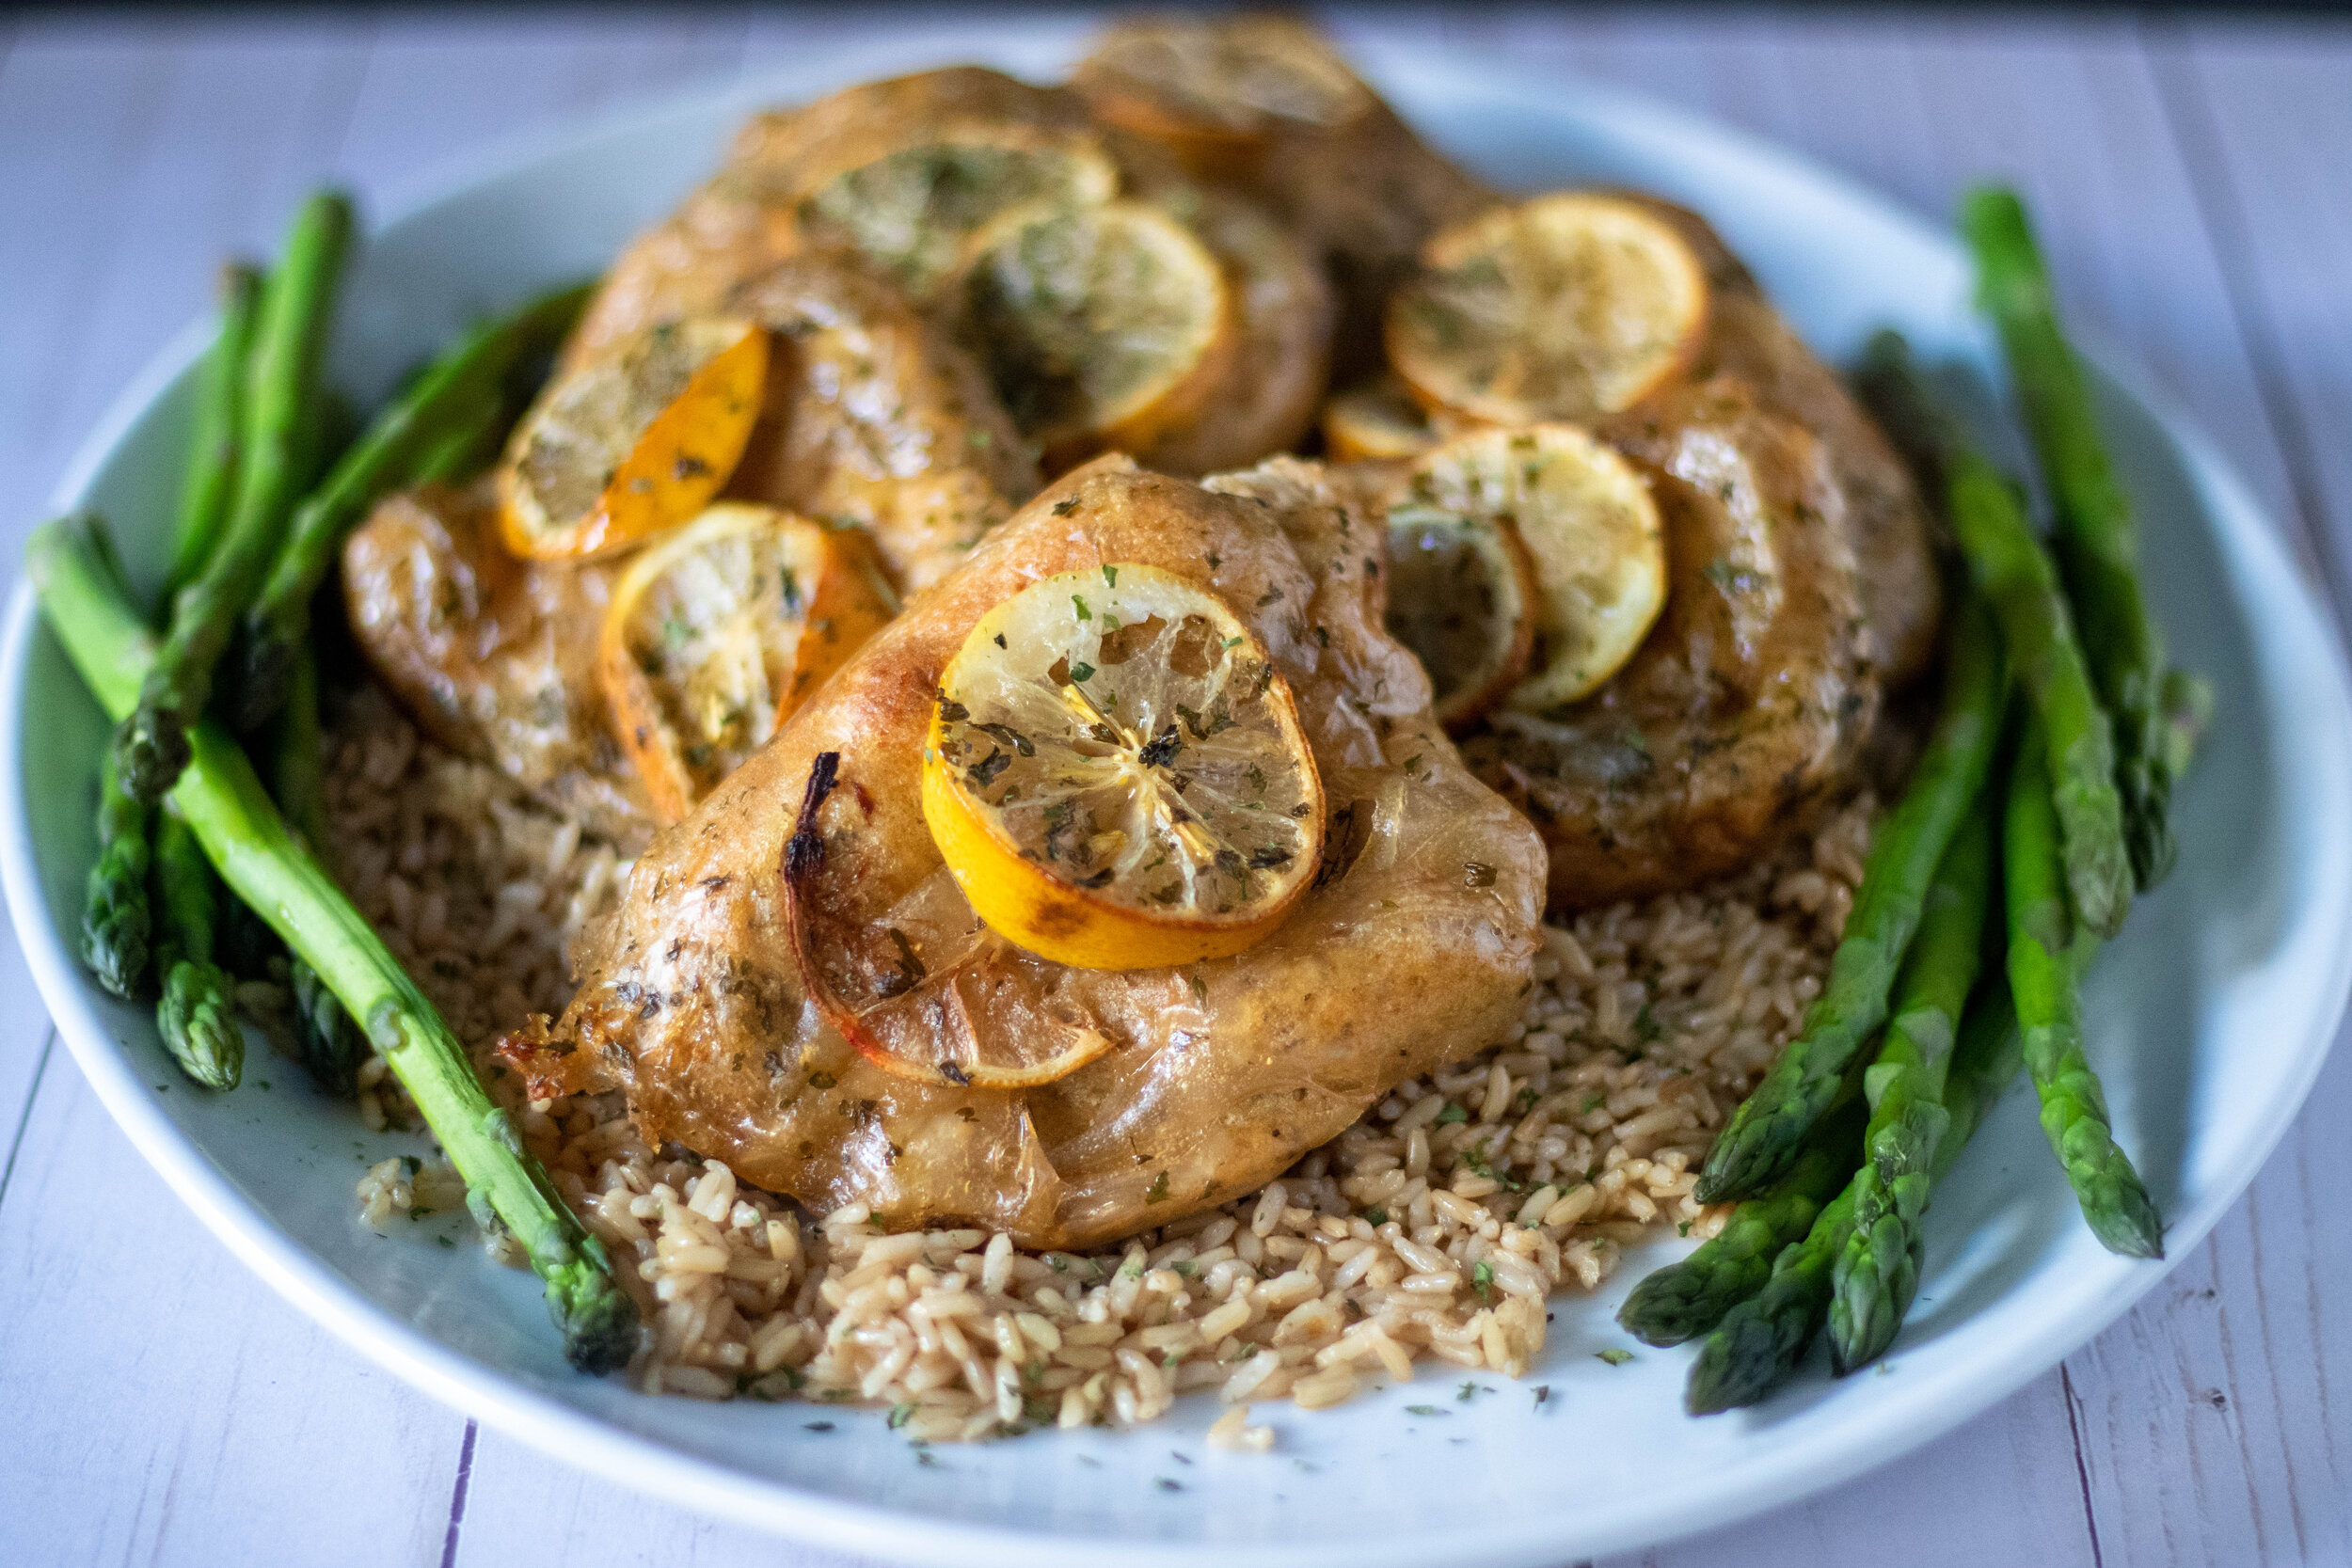
Garlic Lemon Vegan "Chicken" Breast with Crispy Skin

Garlic Lemon Vegan Chicken Breast with Crispy Skin

So, after I successfully managed to make a crispy “skinned” turkey style breast from setian, I decided to adapt the recipe to create a garlic lemon “chicken” breast with crispy rice paper skin.

This recipe is just as easy and delicious as the turkey style breast, but more sutible for a year round meal. This seitan “chicken” comes together fairly quickly and the rice paper makes the most delicious crispy skin. The lemon garlic flavor is wonderful for serving over rice, with mashed potatoes, or even over a healthy salad.

The “chicken” also reheats really well making it a great meal to prep on a weekend and reheat for quick weeknight dinners. Instead of using jackfruit like I did in the turkey style roast, I used chickpeas to give this recipe an extra punch of protein and substance. I really like how it turned out, and was happy to find a use for all the chickpeas I always have in my pantry.

If you have not worked with seitan before, don’t be scared. It is essentially just making and working with a simple dough! A serving of seitan actually has as much protein as a piece of lean chicken, and adding chickpeas to this recipe just increases the protein this meal has to offer!!

I happen to be one of those people who stopped eating meat for health reasons, and later began seeing the the importance of going vegan for animlas and the environment. That being said, I never disliked the taste of meat and often find myself craving the simplicity of a simple rice, chicken, and veggie dinner. If this is true for you as well, then I think this might be a recipe you will really enjoy!


INGREDIENTS:

  • 1 can chickpeas, drained, liquid reserved

  • 1/2 small yellow onion

  • 1 1/3 cup vital wheat gluten

  • 1/3 cup tapioca starch

  • 1/4 cup nutritional yeast

  • 1 teaspoon liquid smoke

  • 2 teaspoons minced garlic

  • 1 teaspoon onion powder

  • 2 teaspoons Herbs de Provence, or Poultry spice

  • 1 teaspoon salt

  • 1/2 teaspoon pepper

  • 1/3 cup chickpea liquid

  • 1/3 cup water

  • 2 teaspoons No Chicken Better Than Bouillon

RICE PAPER SKIN:

  • 2 tablespoons white wine

  • 1/3 cup water

  • 2 teaspoons Herbs de Provence

  • 1 teaspoon minced garlic

  • 1 -2 teaspoons No Chicken Better than Bouillon

  • 6 sheets rice paper

  • Juice from one lemon

  • zest from one lemon

  • lemon slices for garnish

Garlic Lemon Vegan Chicken Breast with Crispy Skin

INSTRUCTIONS:

Preheat oven to 350 degrees.

  1. In a food processor, add the drained and rinsed chickpeas, and the 1/2 onion. Process for a few minutes until the onion and chickpeas are good and broken down.

  2. Add in the remaining ingredients except the water. Process for several minutes. You want the mixture to come together into a dough you can handle. Allow the food processor to run for a full minute or two to knead the dough. If it seems too dry and is crumbly, add in some water until it comes together.

  3. After the dough has hung out in the food processor for several minutes, remove and place onto a clean dry surface. Continue to knead the dough while forming it into a smooth oval shape. Cut into 6 equal piece, shaping them into the shape of a chicken breast.

  4. Spray 6 pieces of aluminum foil with spray oil, or brush the foil with some oil. This step is important because the oil is going to prevent the “chicken” from sticking to the foil.

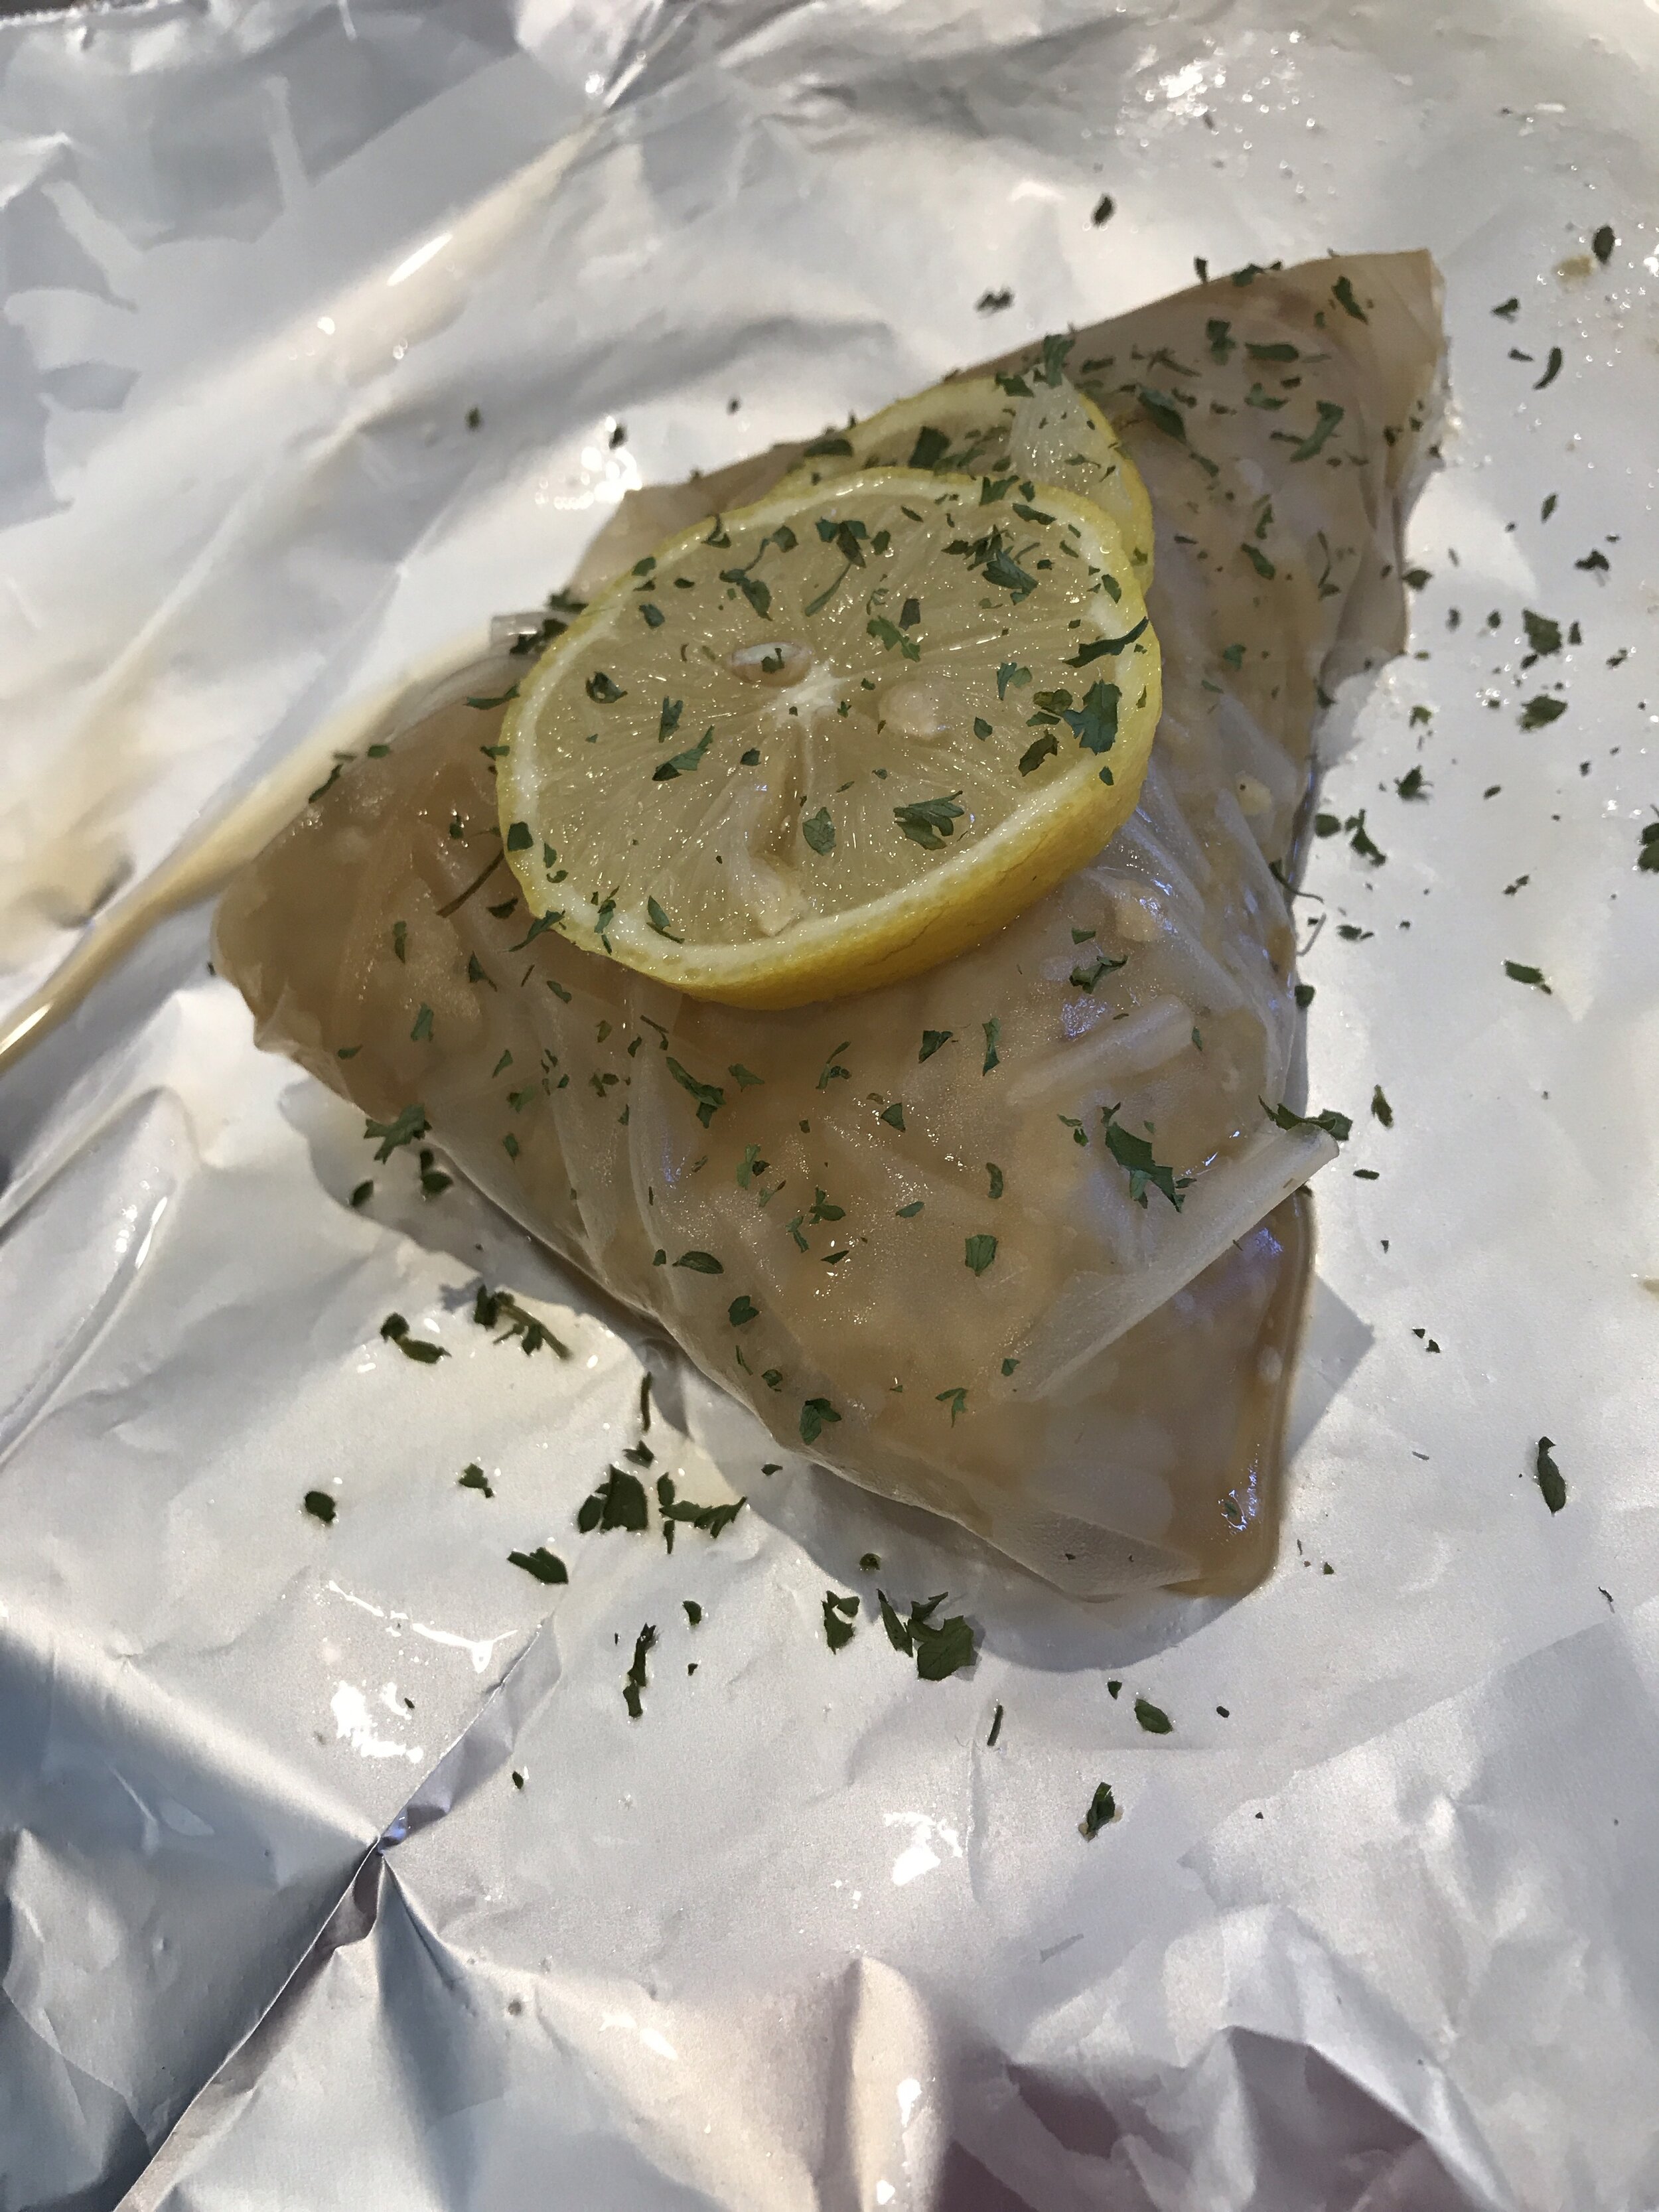
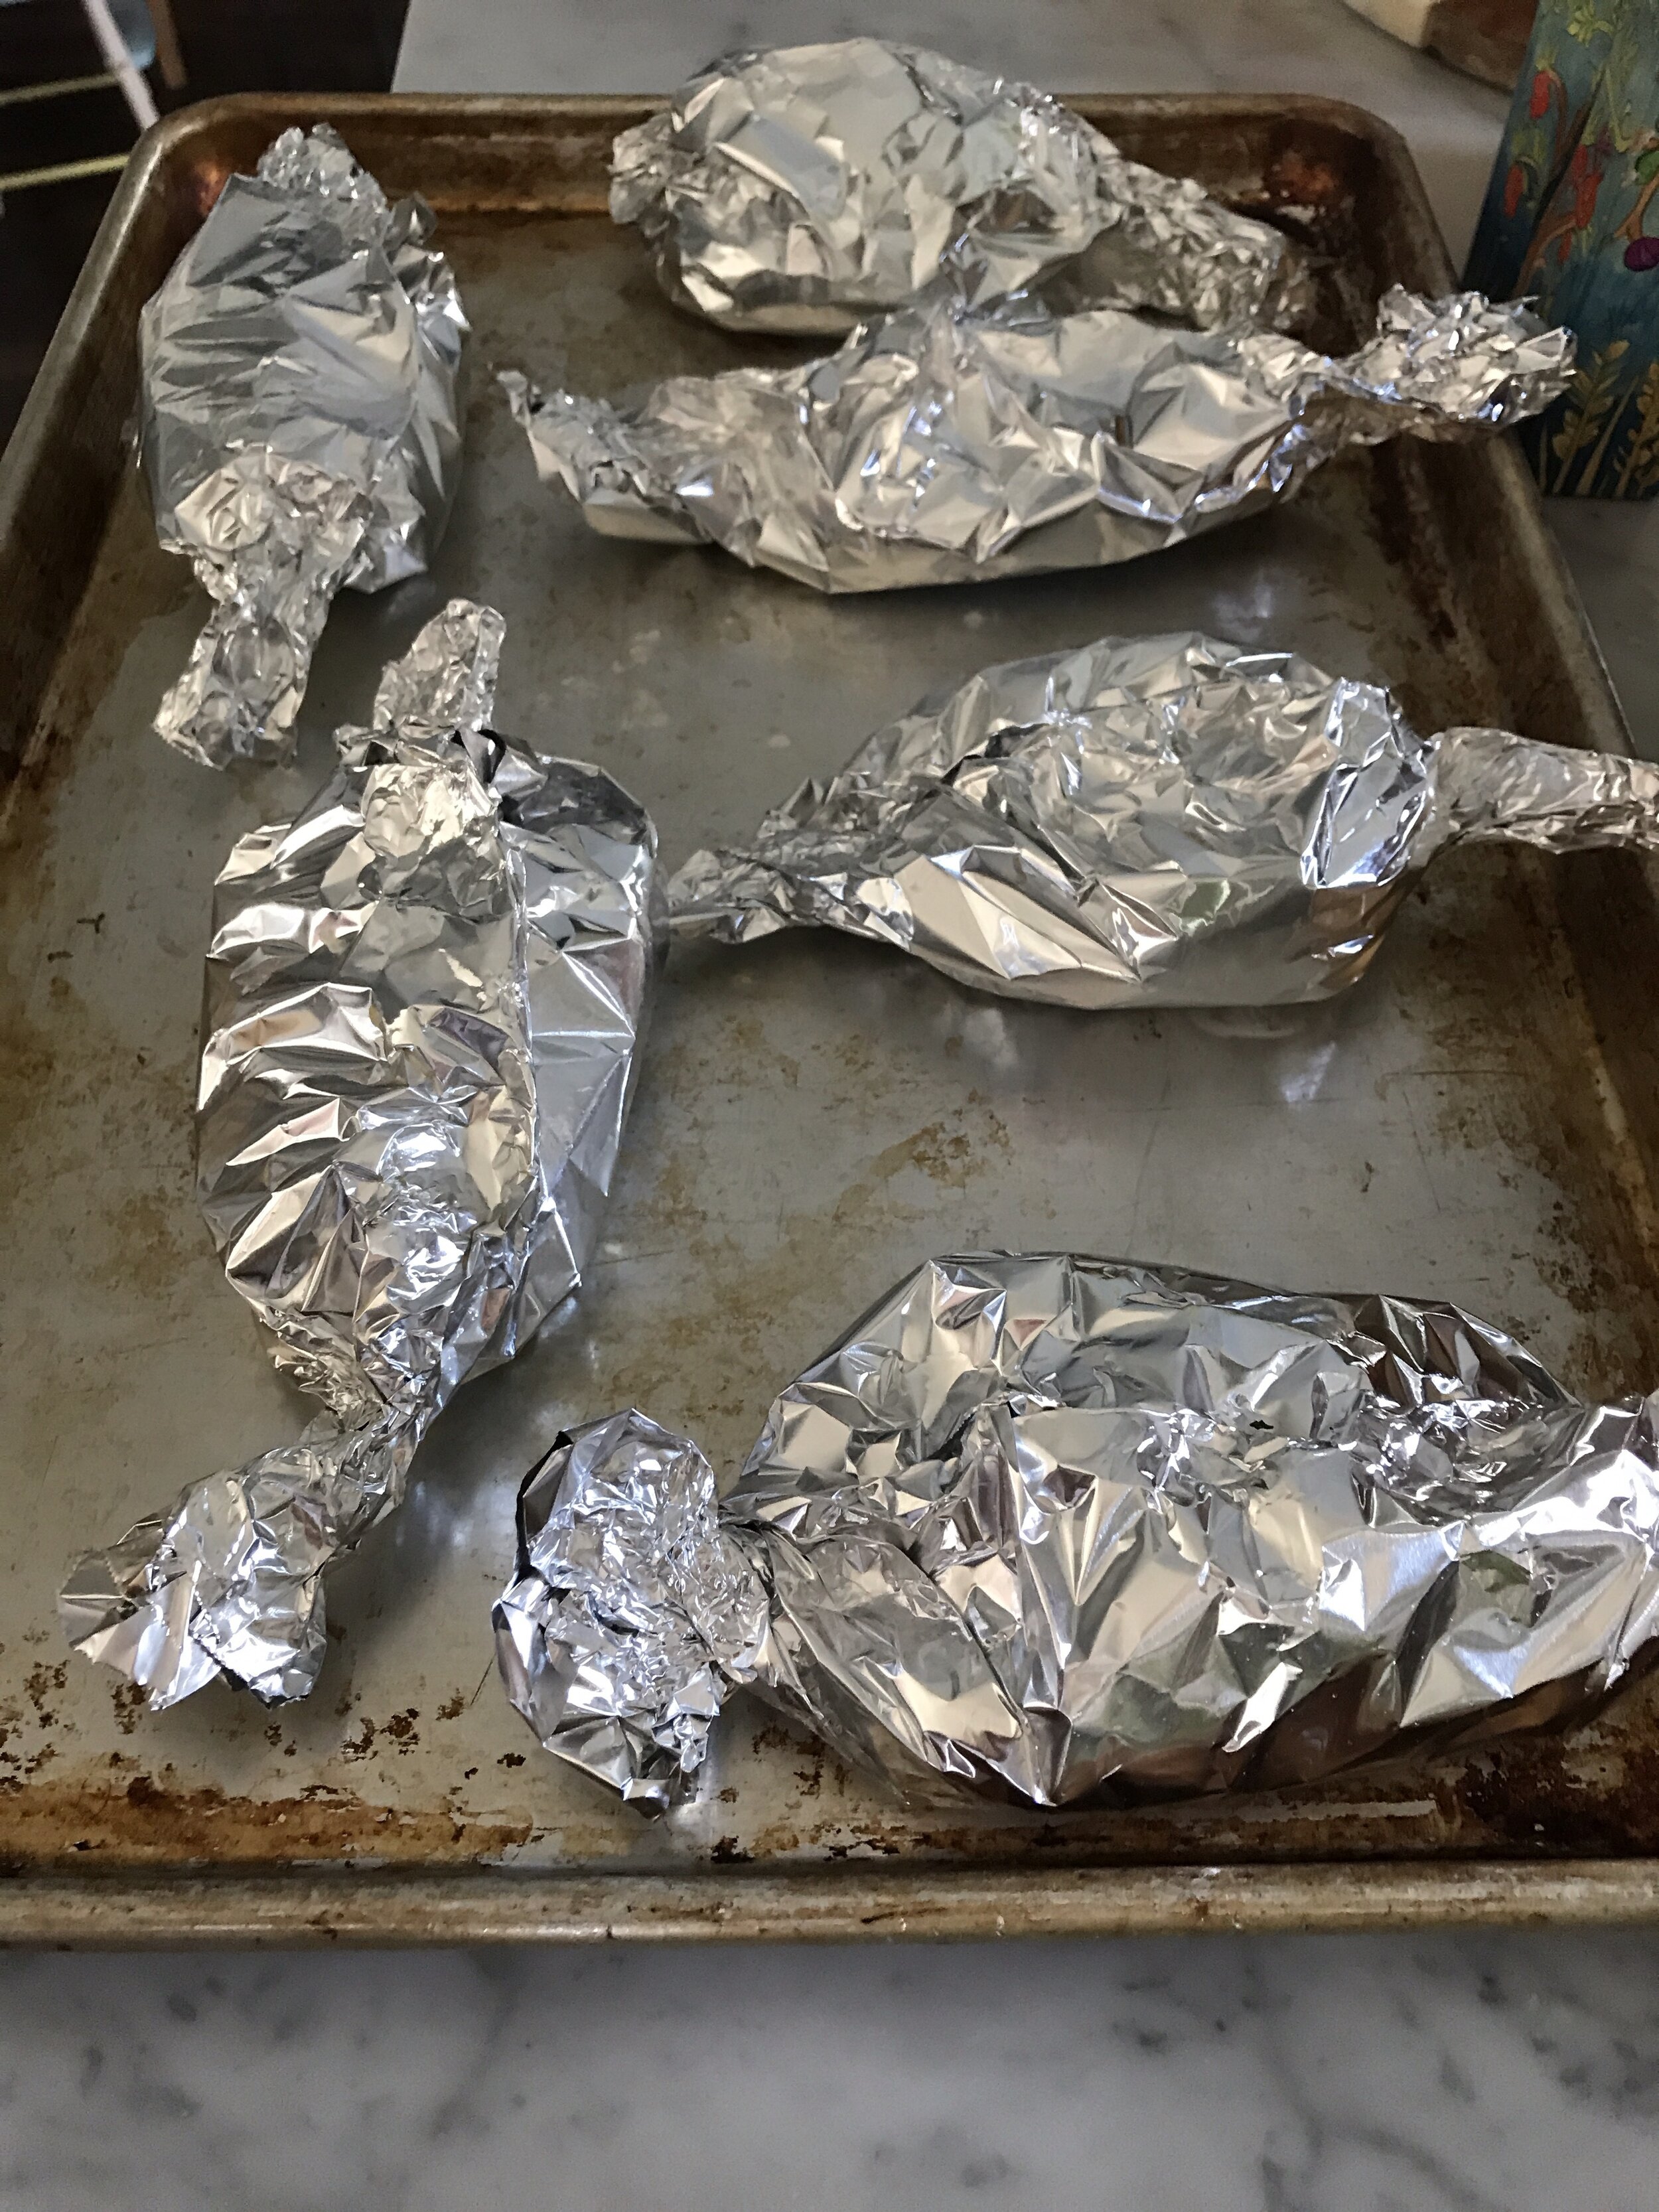
  5. Add all of the ingredients for the rice paper skin, except the rice paper ,to a shallow dish or pie pan and whisk. Place one sheet of rice paper into the liquid and let it sit there util it becomes completely soft. This takes several minutes. Lay the rice paper onto a sheet of foil and place one piece of “chicken” in the center of the paper. Fold up the sides of the rice paper around the piece of “chicken” and place a few lemon slices on top. Seal up the foil in the middle and twist the ends making a pouch. Repeat with remaining pieces of “chicken” and rice paper.

  6. Place the foil pouches on a baking sheet on the middle oven rack and bake sealed for about 25 minutes. After 25 minutes open up each pouch ( be carefully not burn yourself with the steam) and allow them to bake opened for another 30 minutes. This will crisp up the rice paper skin.

  7. You can serve this chicken right away but allowing it to rest for serval hours will greatly improve the texture and help it firm up. Just pop the breast in the fridge and allow them to rest 2-4 hours. Just pop them back in the oven (give them a mist with oil) at 350 for about 15-20 minutes or until the skin has crisped back up. Again you can serve them right away but I prefer the texture once they have rested.

  8. Serve with rice or mashed potatoes or even sliced and on a salad.

 
Garlic Lemon Vegan Chicken Breast with Crispy Skin

Buttery Vegan Pecan Bundt Cake

Butter Vegan Pecan Bundt Cake

I don’t hate any cake. That said, I don’t really love a ton of frosting on a cake and have always preferred more of a glazed bundt or pound cake.

I would almost say this cake is a cross between the two. It is light and buttery inside, not dense like a pound cake, but it sort of has that buttery thick pound cake exterior, which is my favorite part!

This cake is perfect with a hot cup of coffee or a glass of almond milk, just about any time of day. Yes, fine. I eat cake for breakfast if it’s here and staring at me. Don’t judge me.

This cake would also work great for any gathering or pot luck. It comes together pretty easily and always turns out pretty if you are asking me. You could always add some extra toasted pecans on top of the glaze if you like, I just tend to keep it simple. It is packed with pecans on the inside and has just the right amount of crunch

. If you are into bundt or pound cakes, and are a fan of butter and pecans, then you gotta give this one a try. I will also promise you that nobody will ever guess it’s vegan!


INGREDIENTS:

  • 2 cups vegan butter (I use Earth Balance)

  • 1 1/4 cups granulated sugar

  • 1 1/4 cups light brown sugar

  • 2 starch eggs (2 tablespoons tapioca starch, 6 tablespoons water)

  • 1 1/2 cups whipped aquafaba (measure the whipped product, not the liquid)

  • 2 teaspoons vanilla extract or vanilla bean paste

  • 2 teaspoons baking powder

  • pinch of salt

  • 4 cups all purpose flour, divided

  • 1 cup unsweetened almond or oat milk

  • 3 cups chopped, toasted pecans

GLAZE:

  • 1 cup powdered sugar

  • 1-2 teaspoons plant milk

  • 1/2 teaspoons vanilla extract or vanilla bean paste

buttery-vegan-pecan-bundt-cake-closeup.jpg

INSTRUCTIONS:

Preheat oven to 325 degrees.

  1. In the bowl of a stand mixer, or large bowl if using a hand mixer, beat the butter with both sugars for 3 - 5 minutes on high speed, until light and fluffy. Whisk the starch and water together to make the starch eggs, and add to the butter mixture. Beat in along with the vanilla.

  2. In a medium bowl mix 3 3/4 cups flour, baking powder, and salt. Begin by adding 1/3 of the flour and then 1/3 of the milk at a time to the mixing bowl, alternating between the two, mixing in each addition at a low speed. Mix until all ingredients are well incorporated.

  3. Toss the pecans in the reserved 1/4 cup of flour to coat. Add them to the batter and beat them in.

  4. Carefully fold in the 1 1/2 cups of whipped aquafaba with a rubber spatula. You just want to fold it in until it is well incorporated. Be careful not to over mix!

  5. Prepare a bundt pan by giving it a good spray with some cooking oil, or a good wipe down with some vegan butter. Toss a few tablespoons of flour into the pan and shake it around really well, making sure the pan is fully coated. Shake out excess flour. Fill the pan with batter. Place the bundt pan on a cookie sheet and onto the middle rack of your oven. Bake for 1 hour and 15 minutes. Check to see if the cake is done by inserting a cake tester or wooden skewer into the cake. If it comes out clean, its done, if not, let it bake another 10 - 15 minutes or util the skewer comes out clean.

  6. Let the cake cook in the pan on a wire cooling rack. Once cake is completely cool, turn it over onto a serving plate and tap the bottom to release the cake from the pan. As long as you greased and floured the pan well, it should come out pretty easily.

  7. For the glaze, whisk powdered sugar, milk and vanilla together. Drizzle over the cooled cake. If the glaze seems too thin, you can whisk in a little more powdered sugar. Slice cake and serve.

  8. Store any leftovers in an airtight container at room temperature.

Buttery Vegan Pecan Bundt Cake Glaze

If you like this recipe, try these:
 
Buttery Vegan Pecan Bundt Cake

Creamy Vegan Cheddar Mac and Cheese

Creamy Vegan Mac n Cheese

Who doesn’t love Mac and Cheese?!?!? If you don’t, then maybe this is not the recipe blog for you after all, and you should move on. Ok, I’m kidding, please don’t leave, just maybe you should give vegan Mac and Cheese another try.

Maybe you just tried a bad recipe. This recipe is not bad. This recipe is creamy, smoky, and gooey. It’s vegan Mac and Cheese perfection. It’s quick and easy too.

If you happen to have an allergy or aversion to cashews, you can sub them out for 1 cup of sunflower seeds. If you don’t like a smoky cheddar as much, just cut back a bit on the paprika and skip the liquid smoke. I love smoky cheddar so I always add the smoke!

You can also pour this Creamy Vegan Cheddar Mac and Cheese into a casserole dish, top it with some vegan butter and bread crumbs and bake it at 350 for a about 20 minutes for the perfect baked Vegan Mac and Cheese.

Trust me, leave the boxed macaroni and cheese right on the grocery shelf where you found it, and go home and make this. its almost just a quick and about 10,000 times more tasty! I promise! Pinky promise, cross my heart, and all that jazz!


INGREDIENTS:

  • 1 cup cashews (plus water for heating)

  • 2 cups water

  • 1/3 cup sauerkraut, cabbage not juice

  • 2 teaspoons light miso paste

  • 1 tablespoon apple cider vinegar

  • 1 teaspoon salt

  • 1/4 cup tapioca or corn starch

  • 1/4 cup nutritional yeast

  • 1 1/2 teaspoons turmeric

  • 1-2 teaspoons smoked paprika

  • optional 1 teaspoon liquid smoke, if you want a smokier mac

  • 16 oz package macaroni noodle, I like to use the fatter ones with ridges to help hold the cheese

  • 1 tablespoon vegan butter

  • splash of plant milk, optional

Creamy Vegan Mac n Cheese

INSTRUCTIONS:

  1. Cook noodles according to packing instructions in a large pot. Drain, return to pot and mix in the butter. Set aside.

  2. Cover cashews in water and microwave on hight for three minutes or soak in hot water for serval hours. Drain.

  3. Add cashews and all remaining ingredients, including 2 cups of water, to a high speed blender or food processor.

  4. Process and blend on high until the mixture is completely smooth (no lumps at all).

  5. Transfer the mixture to a medium size pot and cook on medium heat, stirring with a whisk continually until the mixture thickens.

  6. Once the cheese sauce gets to a thick, almost stretchy, gooey consistency, remove it from the heat and pour over the mac. Mix well. If it seems too thick you can add a splash of plant milk. Reheat the mac and cheese on the stove top to heat the noodles back up and serve.

Creamy Vegan Mac n Cheese

If you like this recipe, try these:
 
Creamy Vegan Mac n Cheese

Baked Vegan Brie in Puff Pastry with Cranberries and Almonds

Baked Vegan Brie in Puff Pastry with Cranberries and Almonds

Brie baked in bread, or Brie En Croute, is one of my favorite ways to eat vegan brie! I mean seriously, it’s cheese baked inside of flakey puff pastry.

Carbs and cheese are my love languages, so this recipe speaks to me on all the levels. The vegan brie is cashew based and comes together rather quickly. It does however take some time to firm up in the fridge, so I suggest making the brie a day or two in advance if you are planning on making and serving this dish.

I used raspberry jam in this recipe but you can use whatever jam you like or even cranberry sauce.

This dish is beautiful and so tasty. This brie gets rather creamy and gooey once baked inside or the pastry and is delicious served with fruit or crackers. I like to just eat it with a fork, but maybe that would be frowned upon if serving at a party. Bwahahhaha, I’ll try to keep my manners in check.

I think this recipe would be beautiful and impressive for any holiday party or any gathering, or you can just make it for yourself, fork in hand and zero judgment!


INGREDIENTS:

VEGAN BRIE:

  • 1 cup unsalted, unroasted cashews (plus water for soaking)

  • 1 cup water

  • 1/3 cup refined coconut oil

  • 1/3 cup sauerkraut, without the juice

  • 1 tablespoon apple cider vinegar

  • 2 tablespoons tapioca starch

  • 2 teaspoons agar powder

  • 1 teaspoon salt

  • 2 tablespoons nutritional yeast

  • cheese cloth

BRIE IN PUFF PASTRY:

  • 1 puff pasty, Pepperidge Farm brand is vegan

  • 1 six inch round of vegan brie

  • 3 tablespoons raspberry jam

  • 1/4 cup dried cranberries

  • 1/4-1/3 cup sliced almonds

  • 2 tablespoons plant milk mixed with 1 tablespoon maple syrup

Baked Vegan Brie in Puff Pastry with Cranberries and Almonds

INSTRUCTIONS:

  1. For the Brie: Place cashews in a microwave safe container and cover in water. Microwave for 3 minutes. You can also cover in hot water, and let them soak for a few hours if you do not have a microwave.

  2. Drain cashews, and add them along with remaining ingredients to a high speed blender or food processor. Blend until COMPLETELY smooth. If you are using a food processor, add the nuts first and try to break them down a bit before adding everything else.

  3. Transfer mixture to a medium size sauce pan, over medium heat, and stir continuously until the mixture becomes thick and bubbly. This will only take a few minutes.

  4. Line a 6 inch cake pan, or similarly sized shallow bowl, with a piece of cheese cloth that is large enough that it hangs a good bit over the sides of the bowl. Pour the mixture into the bowl and cover with the excess cheese cloth that is hanging over the sides. Place in the refrigerate for at least 4 - 5 hours to allow cheese to firm up.

  5. Once the Brie is done, thaw puff pastry according to package instructions.

  6. Preheat oven to 350 degrees

  7. Roll puff pastry out into a 12 inch x 12 inch square on a floured surface.

  8. Smear the jam in the middle of the puff pastry square and place the wheel of brie on top of the jam.

  9. Place the dried cranberries and almonds piled up on top of the brie.

  10. Carefully take each corner of the puff pastry dough and fold it over the top of the brie. Just one corner at a time until the cheese is covered. Brush the top with the milk/maple mixture. This will help the puff pastry to brown. You could also just give it a light spray with some cooking oil.

  11. Place the brie on a baking sheet and into the preheated oven for about 25 minutes or until the pastry is golden brown and flakey.

  12. Allow the the brie to cool some before cutting into it . Serve with crackers and or fruit.

If you like this recipe, try these:

 
Baked Vegan Brie in Puff Pastry with Cranberries and Almonds

Beyond Sausage with Cabbage and Cider

Beyond Sausage with Cabbage and Cider

I am always looking for new ideas for using vegan sausage beyond the obvious, grill it, and put it on a bun, which is our norm.

So while searching for recipes recently I ran across a few that seemed ok, but not really what I was looking for. So I took the parts I liked, mixed them together, and here is what we got. I knew I had sausage and I knew I wanted to use cabbage and veggies. I had seen a different recipe using cider as kind of a glaze/ sauce for grilled sausage. So I decided to slow cook the sausage and veg in the oven, in a cider sauce and serve it up with soft pretzels!

It was a winner y’all! This meal was 100% comfort food, deliciously full of favor, and super filling.

We always use Beyond brand sausage but you can use what we you like or have on hand, or make your own Seitan sausage!

I’m often asked what people can use in the place of beer or wine in my recipes, and in this one I suppose you could use 12 oz of sparkling nonalcoholic cider, or even just apple juice and get a similar, but probably way sweeter outcome, but probably still just as delicious!


INGREDIENTS:

  • 4 Beyond brand sausages or homemade

  • 1 small to medium head of green cabbage

  • 2 cups carrots cut into bite size pieces

  • 2 cups cubed red potatoes

  • 1 red bell pepper, sliced

  • 1/2 yellow onion, sliced

  • 2 teaspoons Vegetable Better than Bouillon

  • 5 slices vegan bacon (I used Lightlife)

  • 1 bottle cider beer, I used rosé cider

  • 2 tablespoons stone ground mustard

  • 3 teaspoons brown sugar

  • 2 tablespoons apple cider vinegar

  • 1 teaspoons dried thyme

  • 1 teaspoon dried parsley

  • 1/2 teaspoon black pepper

  • 1 teaspoon minced garlic

  • 1/2 teaspoon salt

  • 1/4 cup water

Beyond Sausage with Cabbage and Cider

INSTRUCTIONS:

  1. In a medium pot add the bottle of cider, brown sugar, mustard, garlic and vinegar, Allow the mixture to simmer and reduce for about 20 minutes over medium/low heat.

  2. Finley dice the vegan bacon. Heat a dutch oven or any large oven safe pot over medium heat on the stove top. Cook bacon until crisp. Cut each sausage into 5-6 pieces and add them along with sliced onion to the pot. You may need a bit of oil to keep it from sticking. I just give the pot a quick spray with cooking oil. Let cook until the onions are cooked through and the sausage is browning.

  3. Remove the onions and sausage from the pot, placing on a plate and setting aside. Cut the cabbage into 8 wedges and add them to the pot. Add 1/4 cup of water to the pot along with the cabbage and let it cook for about 10 minutes, stirring several times. You want to just cook the cabbage long enough for it to soften and cook down, making room in the pot.

  4. Preheat oven to 350 degrees. Add the carrots, potatoes, peppers, sausage, and onions to the pot with the cabbage. Whisk the better than bouillon into the beer mixture, and add to the pot with the vegetables and sausage. Add the thyme, salt, pepper, and parsley. Bring everything to a simmer before removing from heat.

  5. Place the pot in the oven with the lid on for 25 minutes. After 25 minutes remove the lid and give it a stir. Let bake for another 45 minutes. Remove from oven and serve. We like to serve this with soft vegan challah pretzels.

Beyond Sausage with Cabbage and Cider