Vegan Caesar Salad Nachos with Fried Soy Curls

IMG_8266.jpg

Lets talk nachos.

Chips, a protein, normally something cold and crunchy like lettuce, some cheese. Nachos.

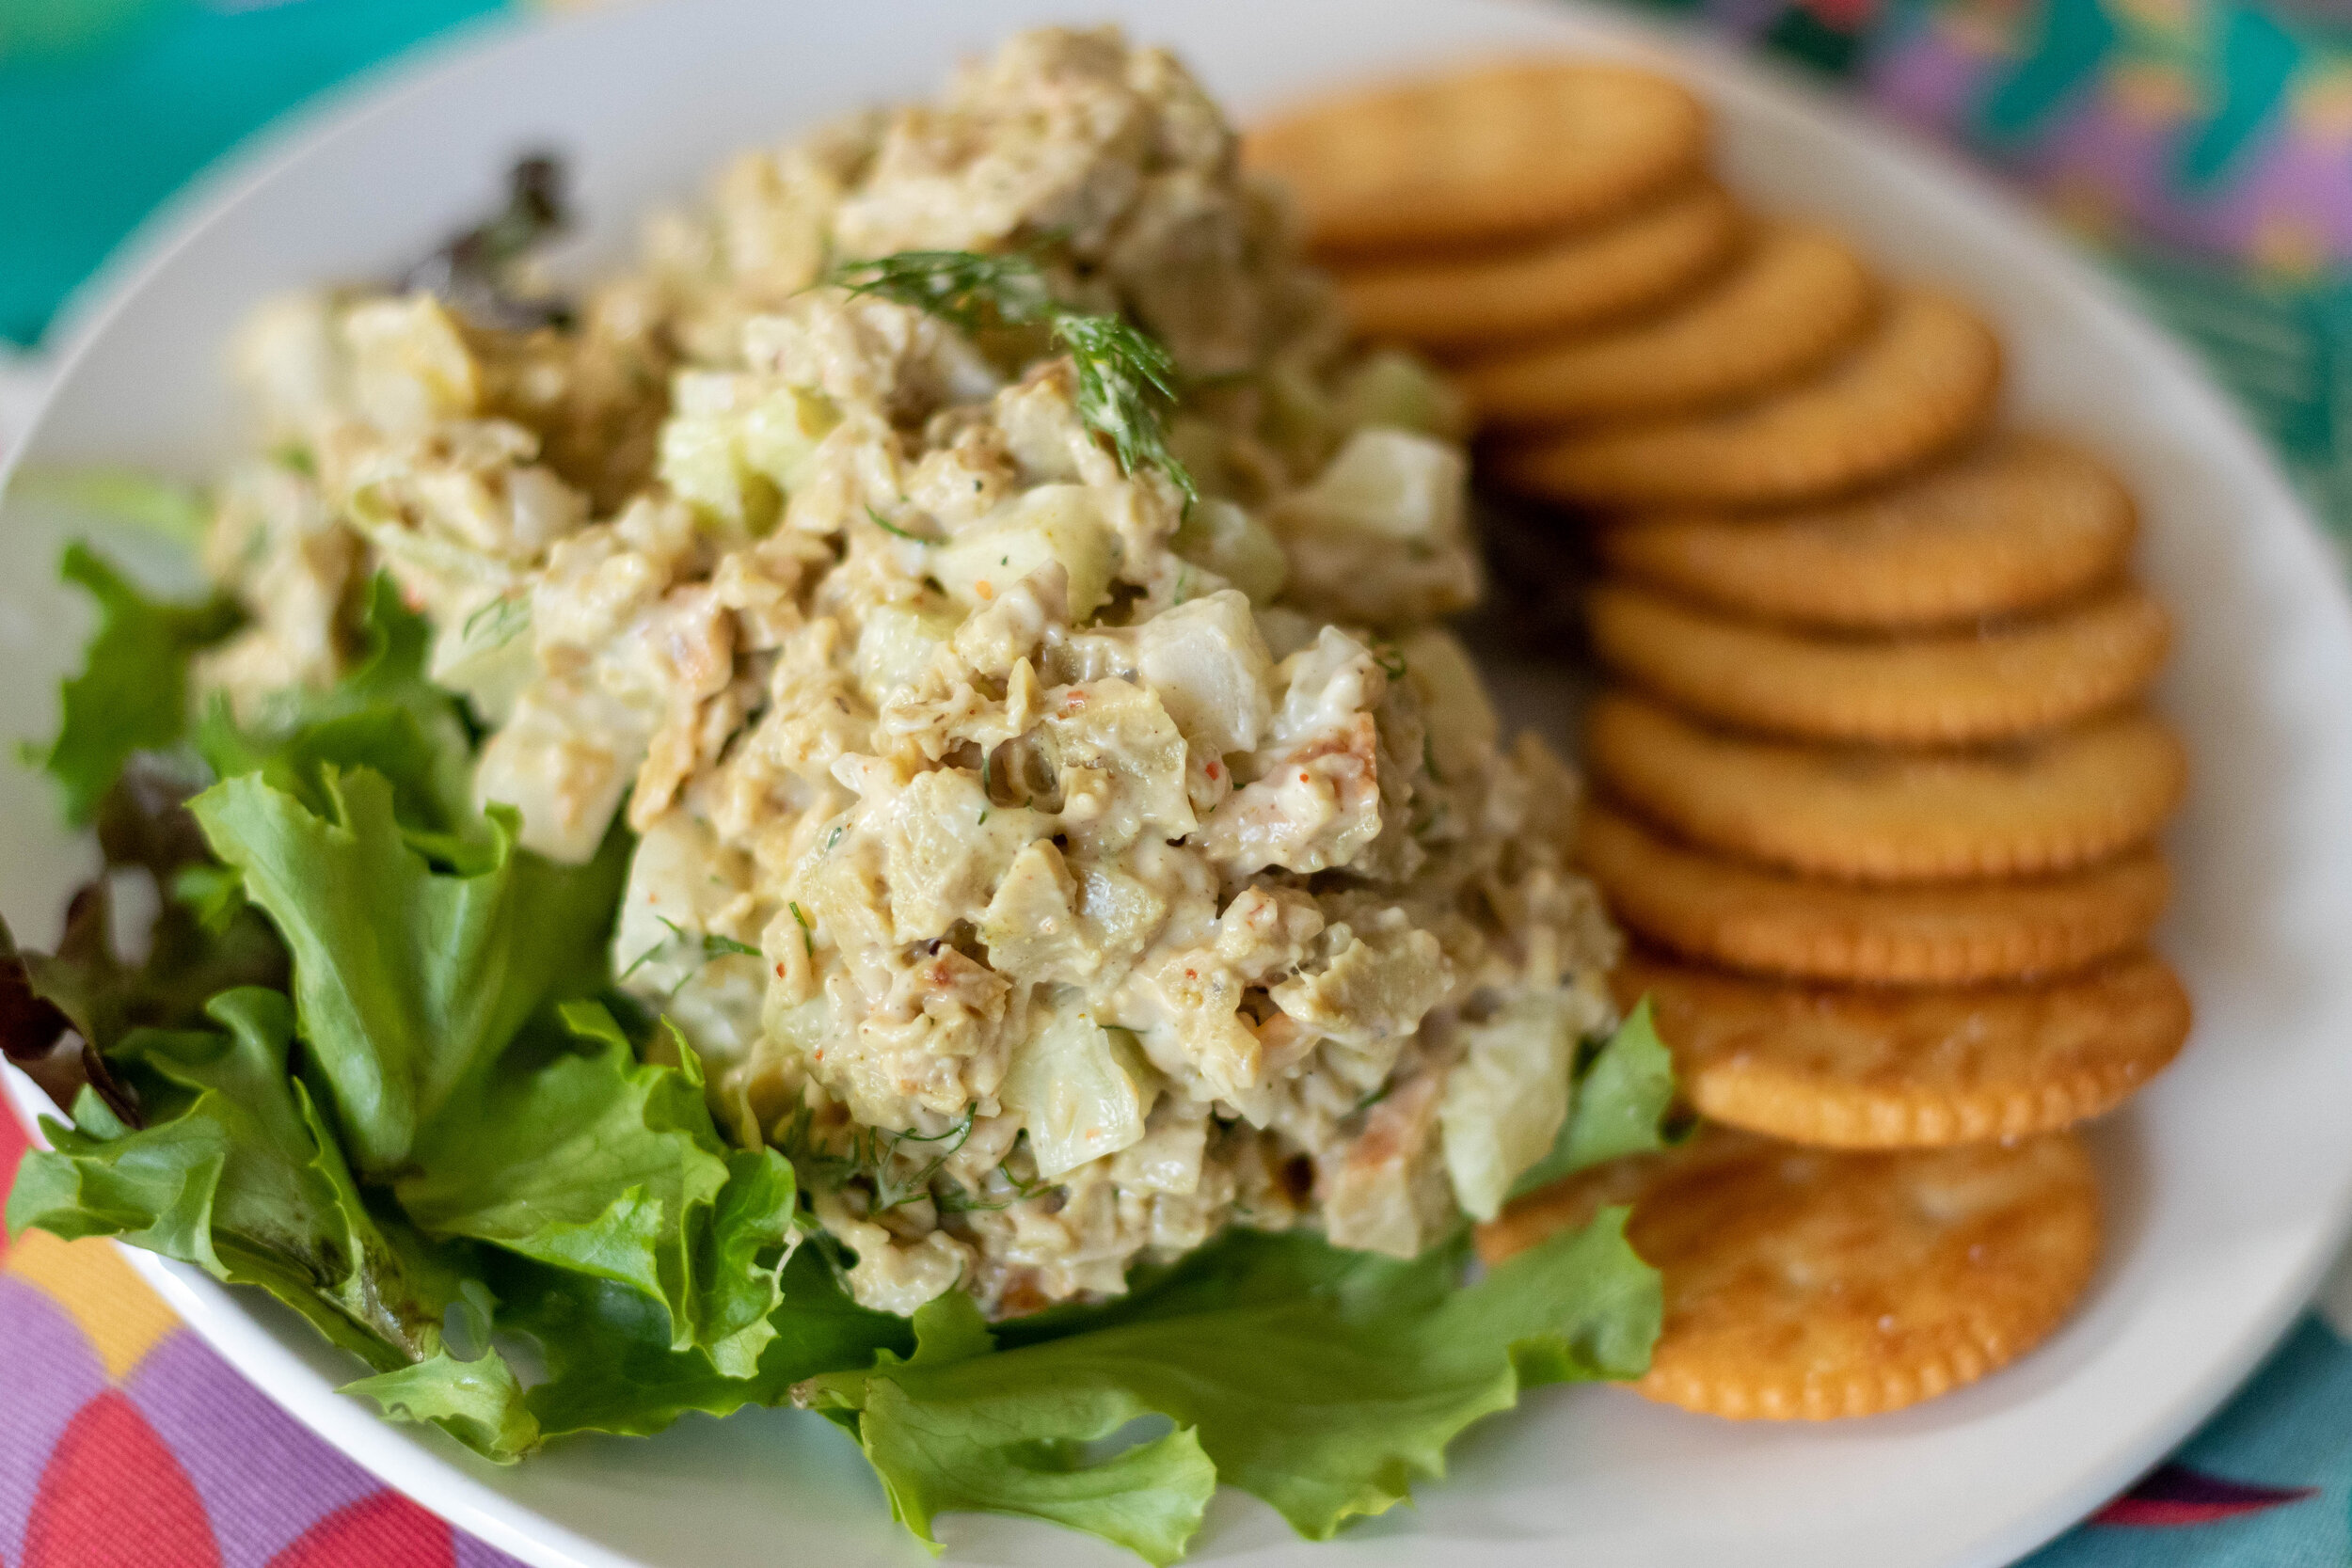
So when I saw a recipe in some magazine for some grilled chicken caesar salad nachos, at first I was confused, but then intrigued. And then it all made sense that one could make a caesar salad nacho and it probably be delicious.

I don’t really know what all was going on in that non vegan recipe version, I didn’t really look past the pic, but I knew I could take my favorite vegan caesar salad recipe and add some kind of vegan protein, and probably find my new favorite summertime dinner!

IMG_8260.jpg

I have tried a ton of vegan caesar salad recipes, and dressings over the years, and until now none have been a winner.

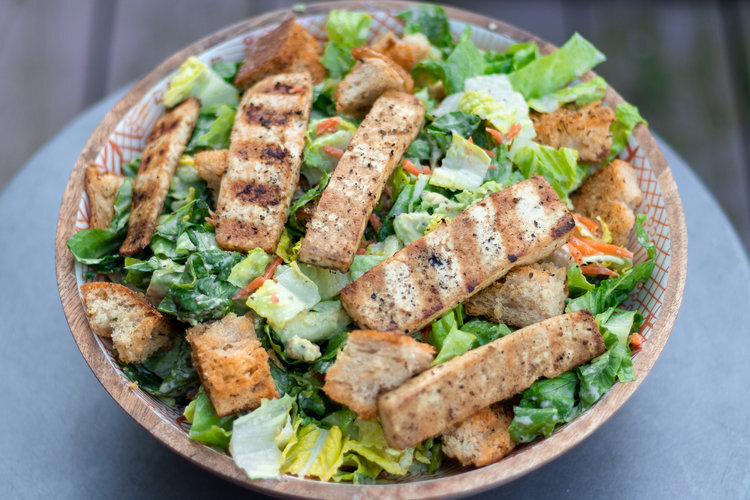
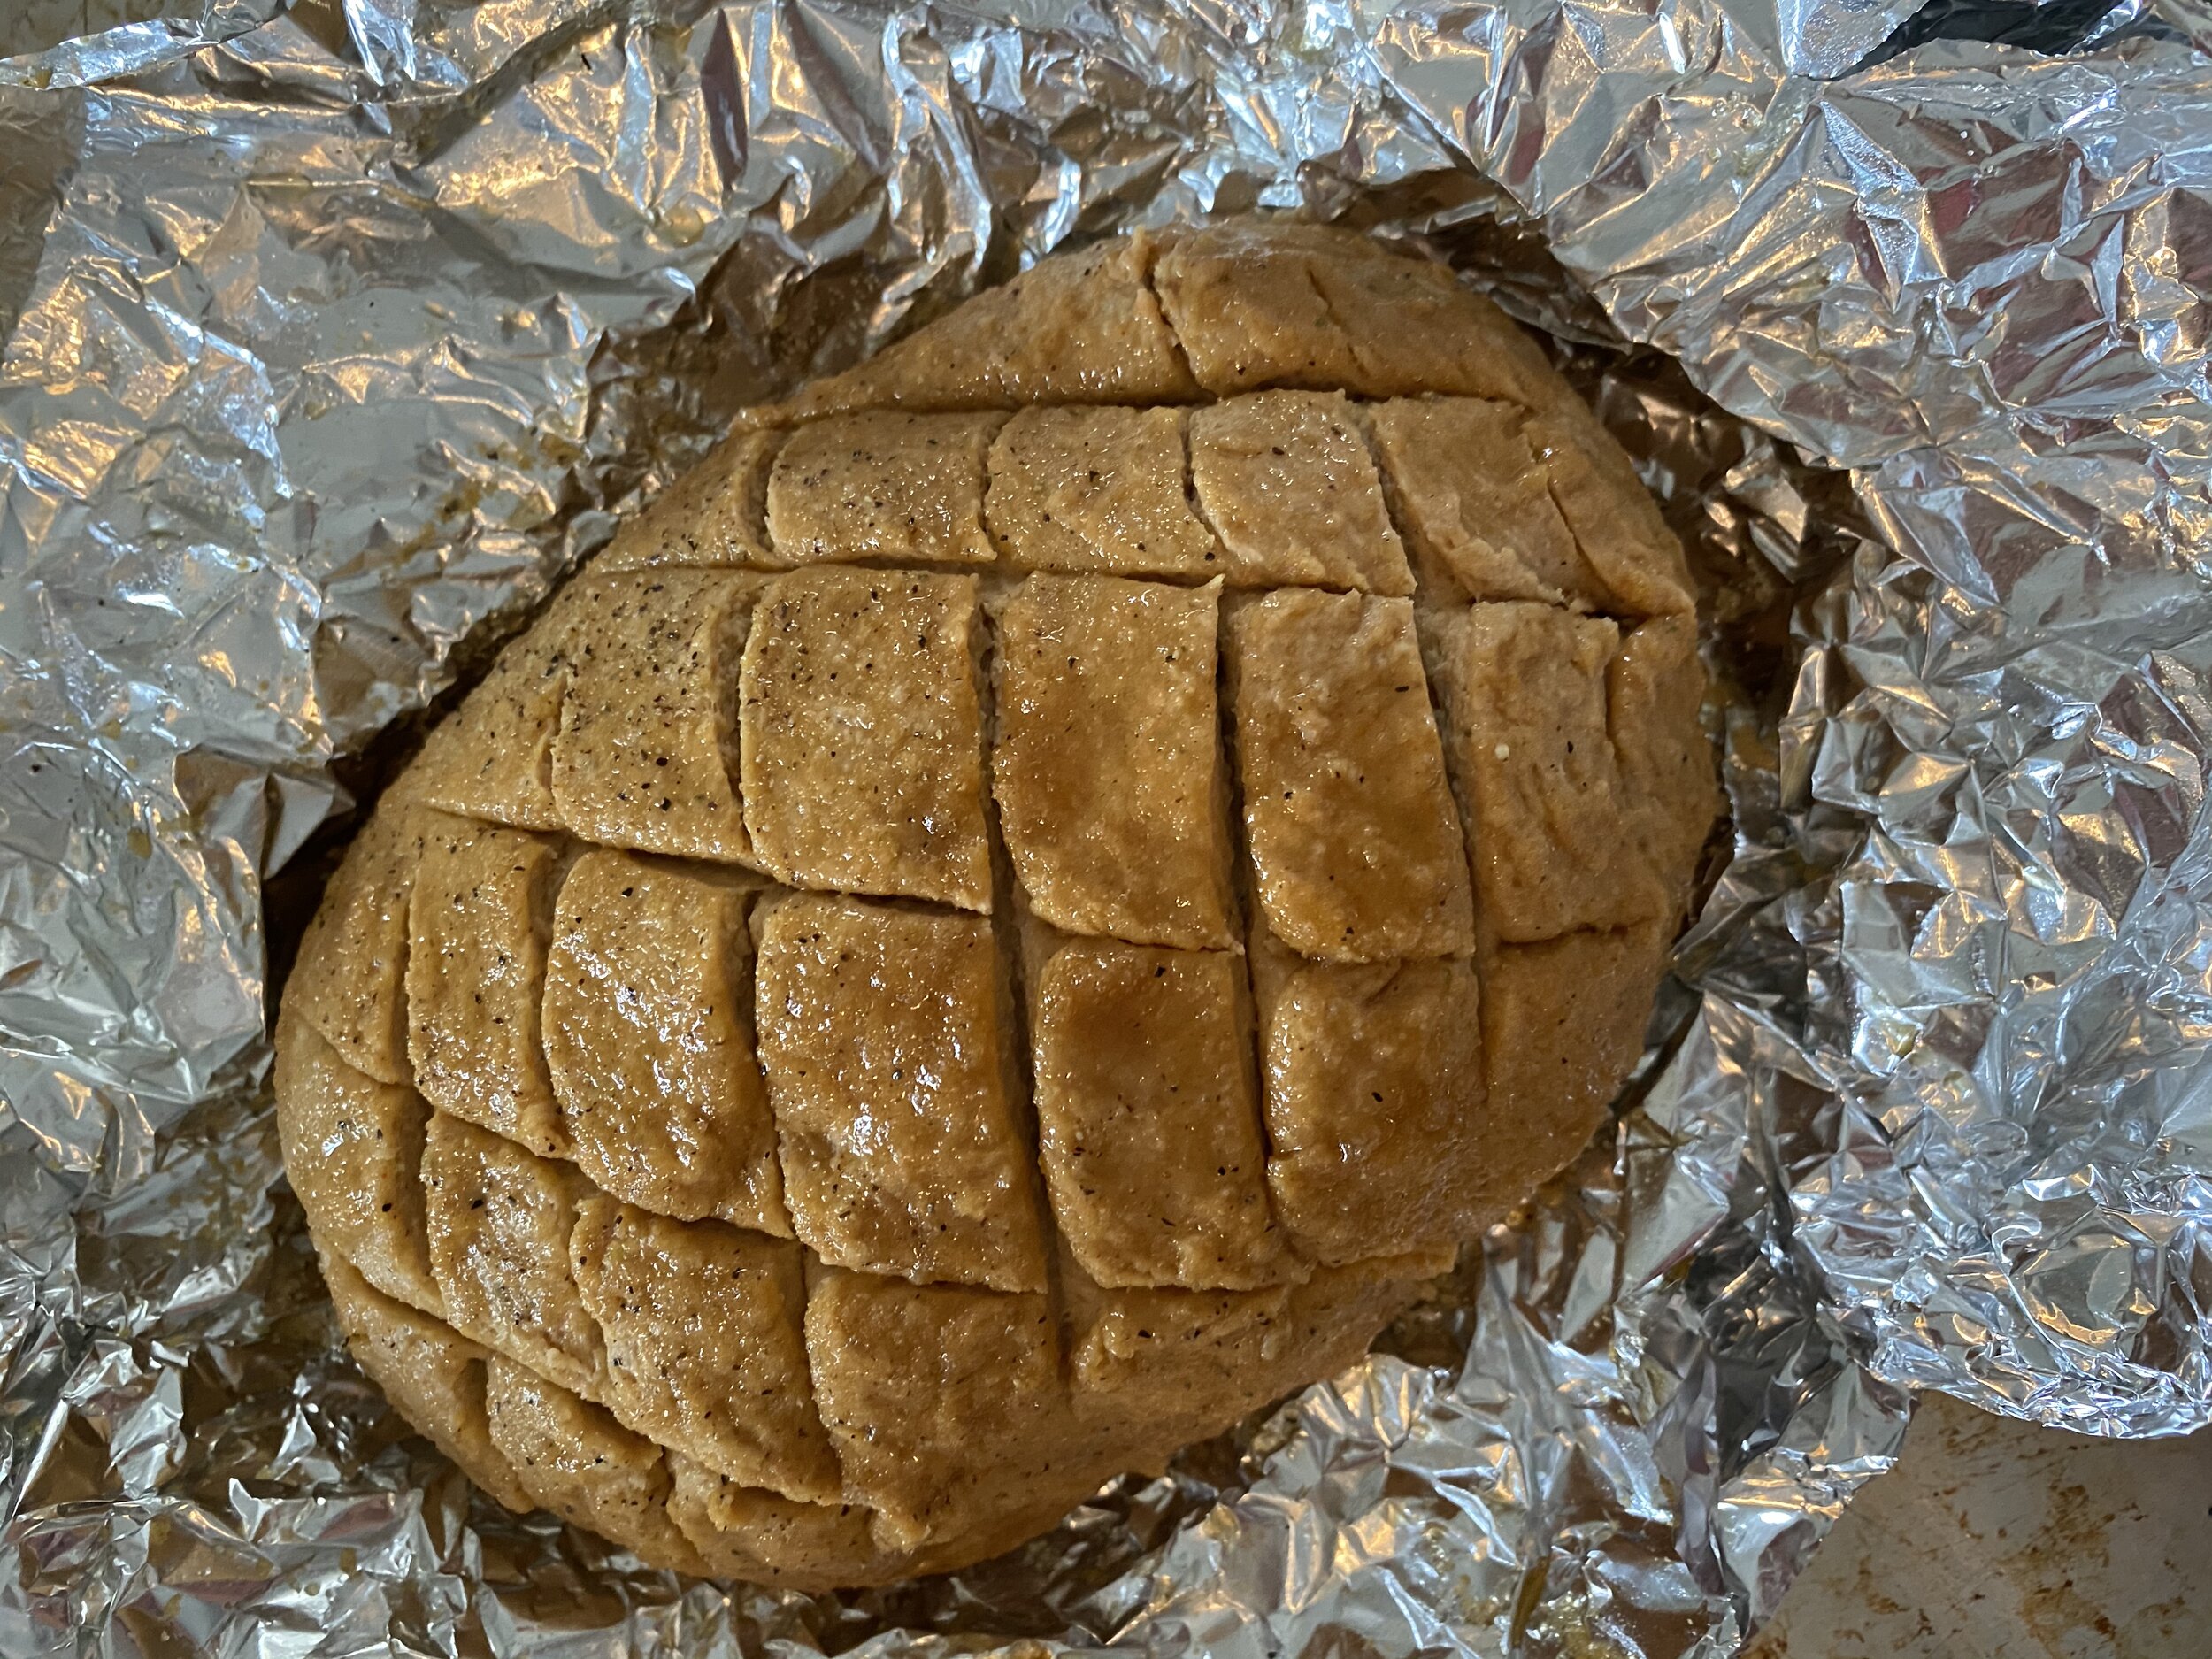
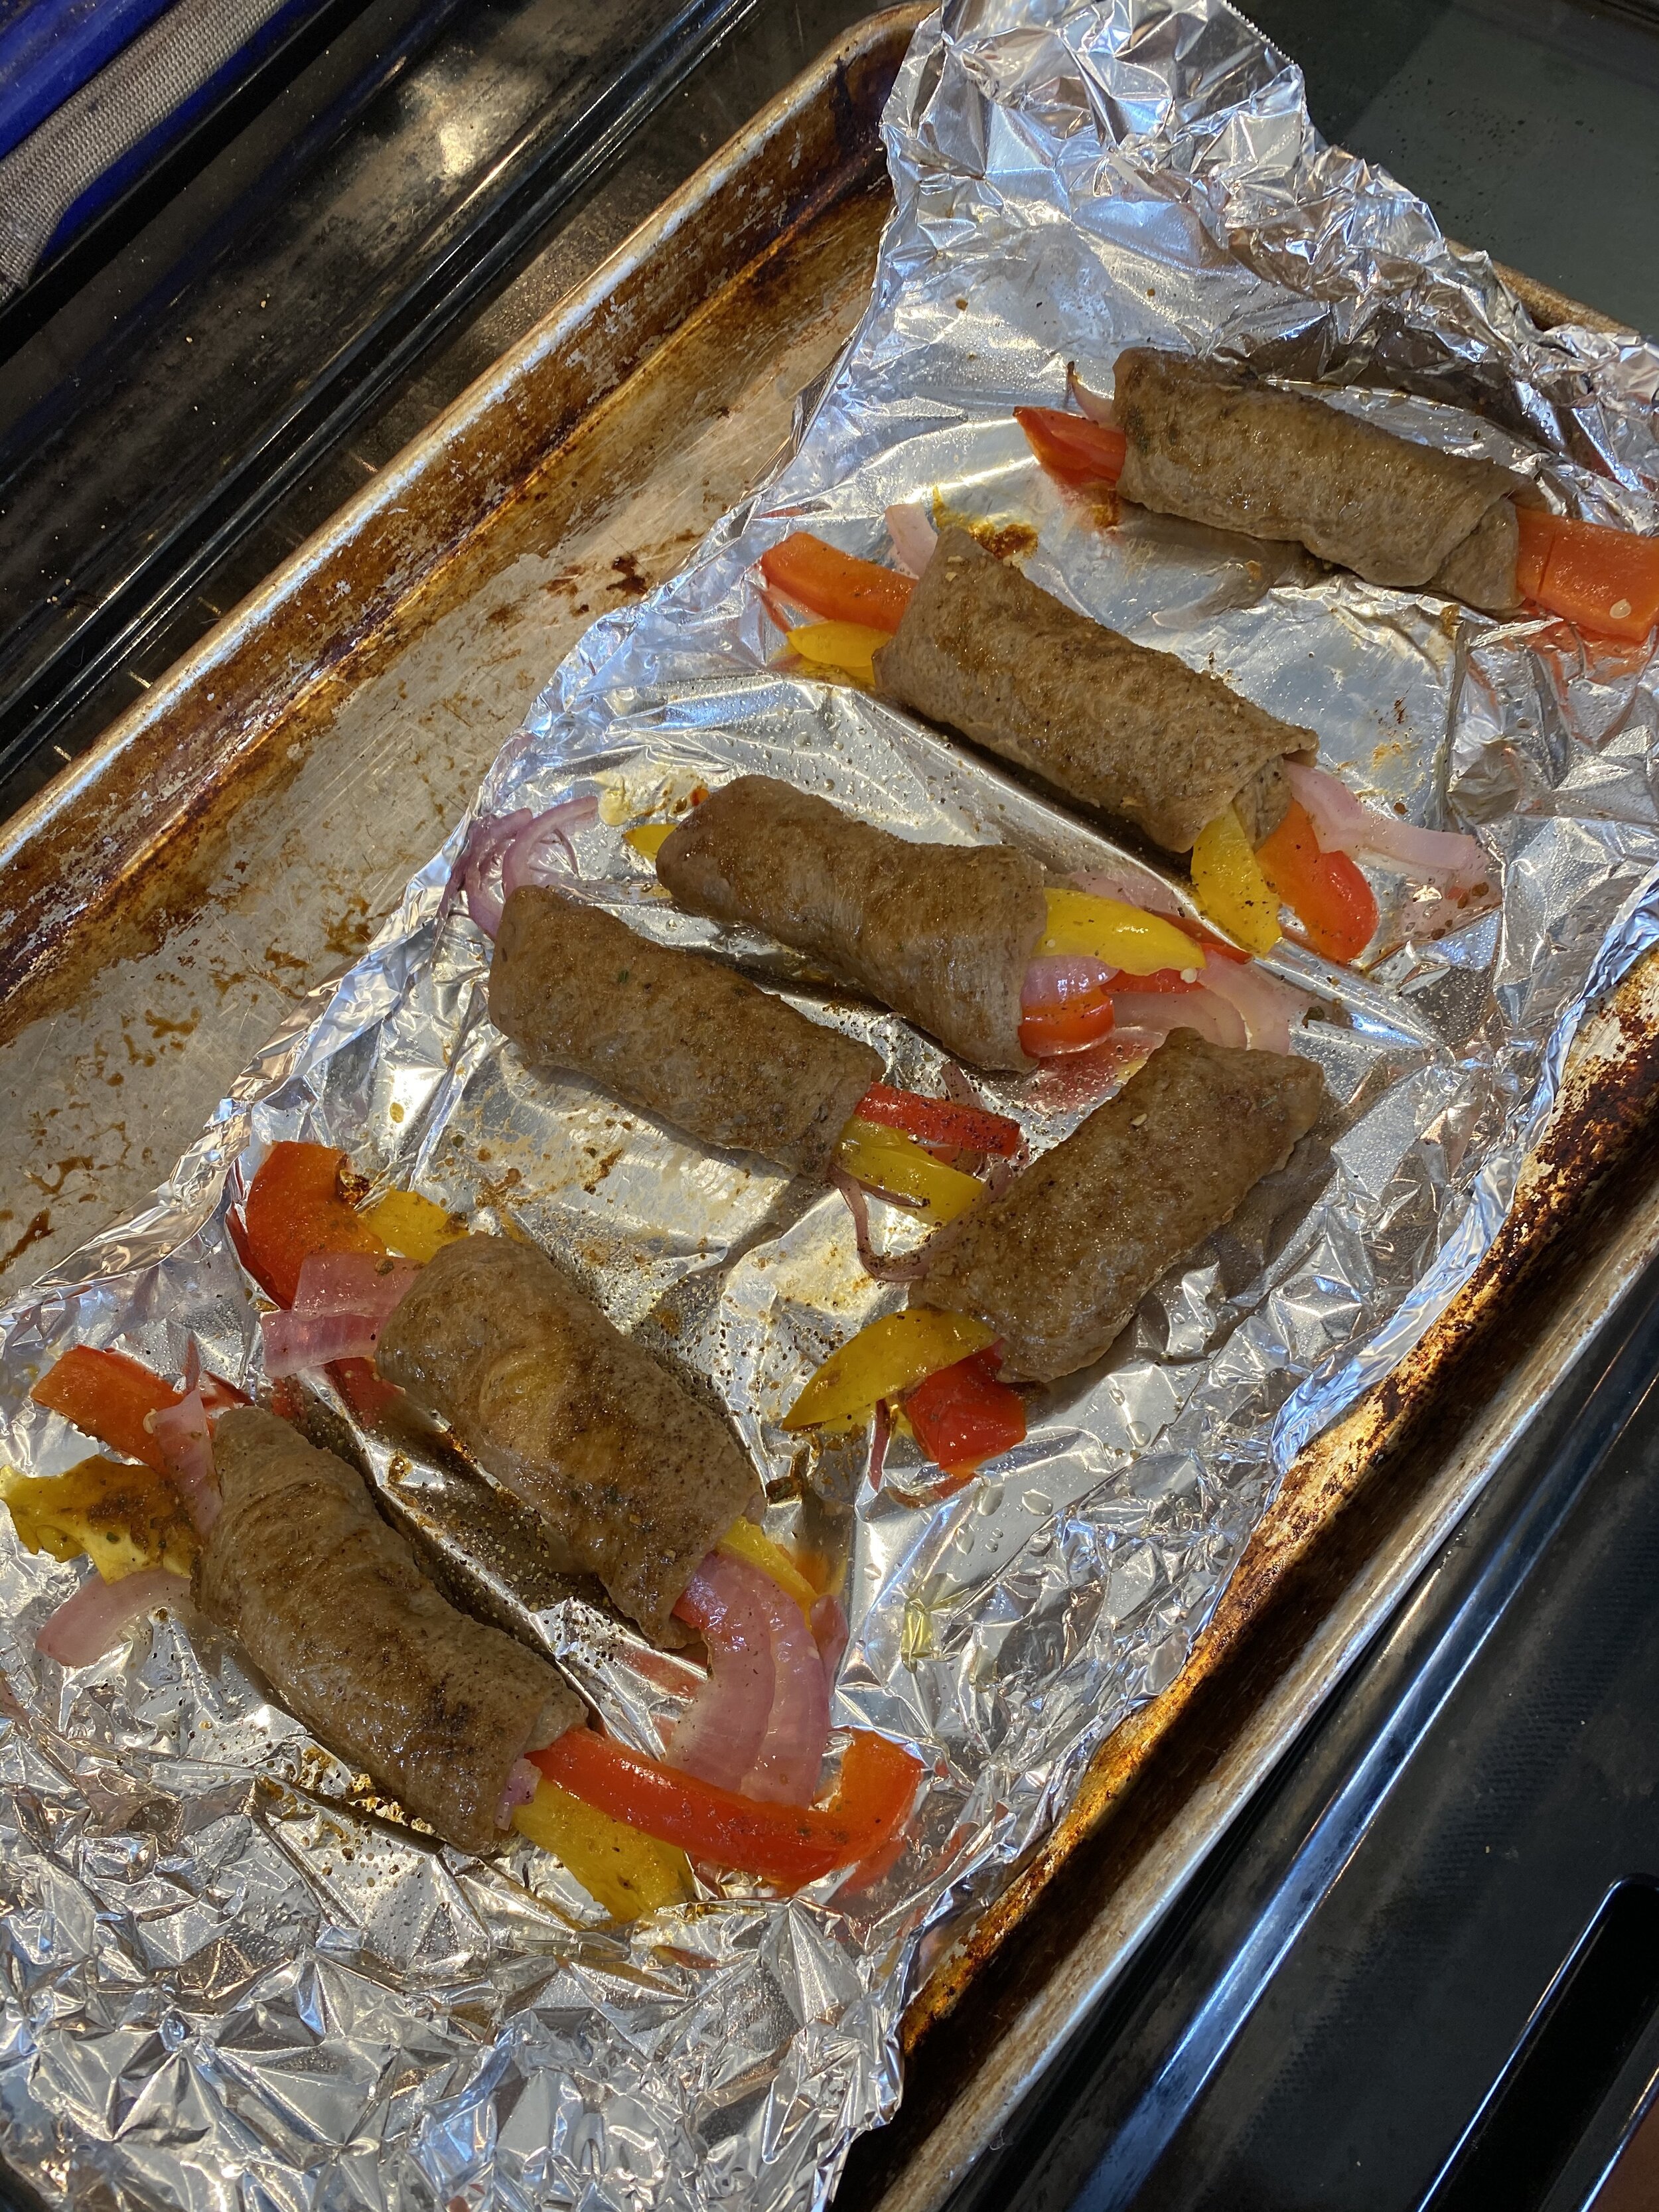
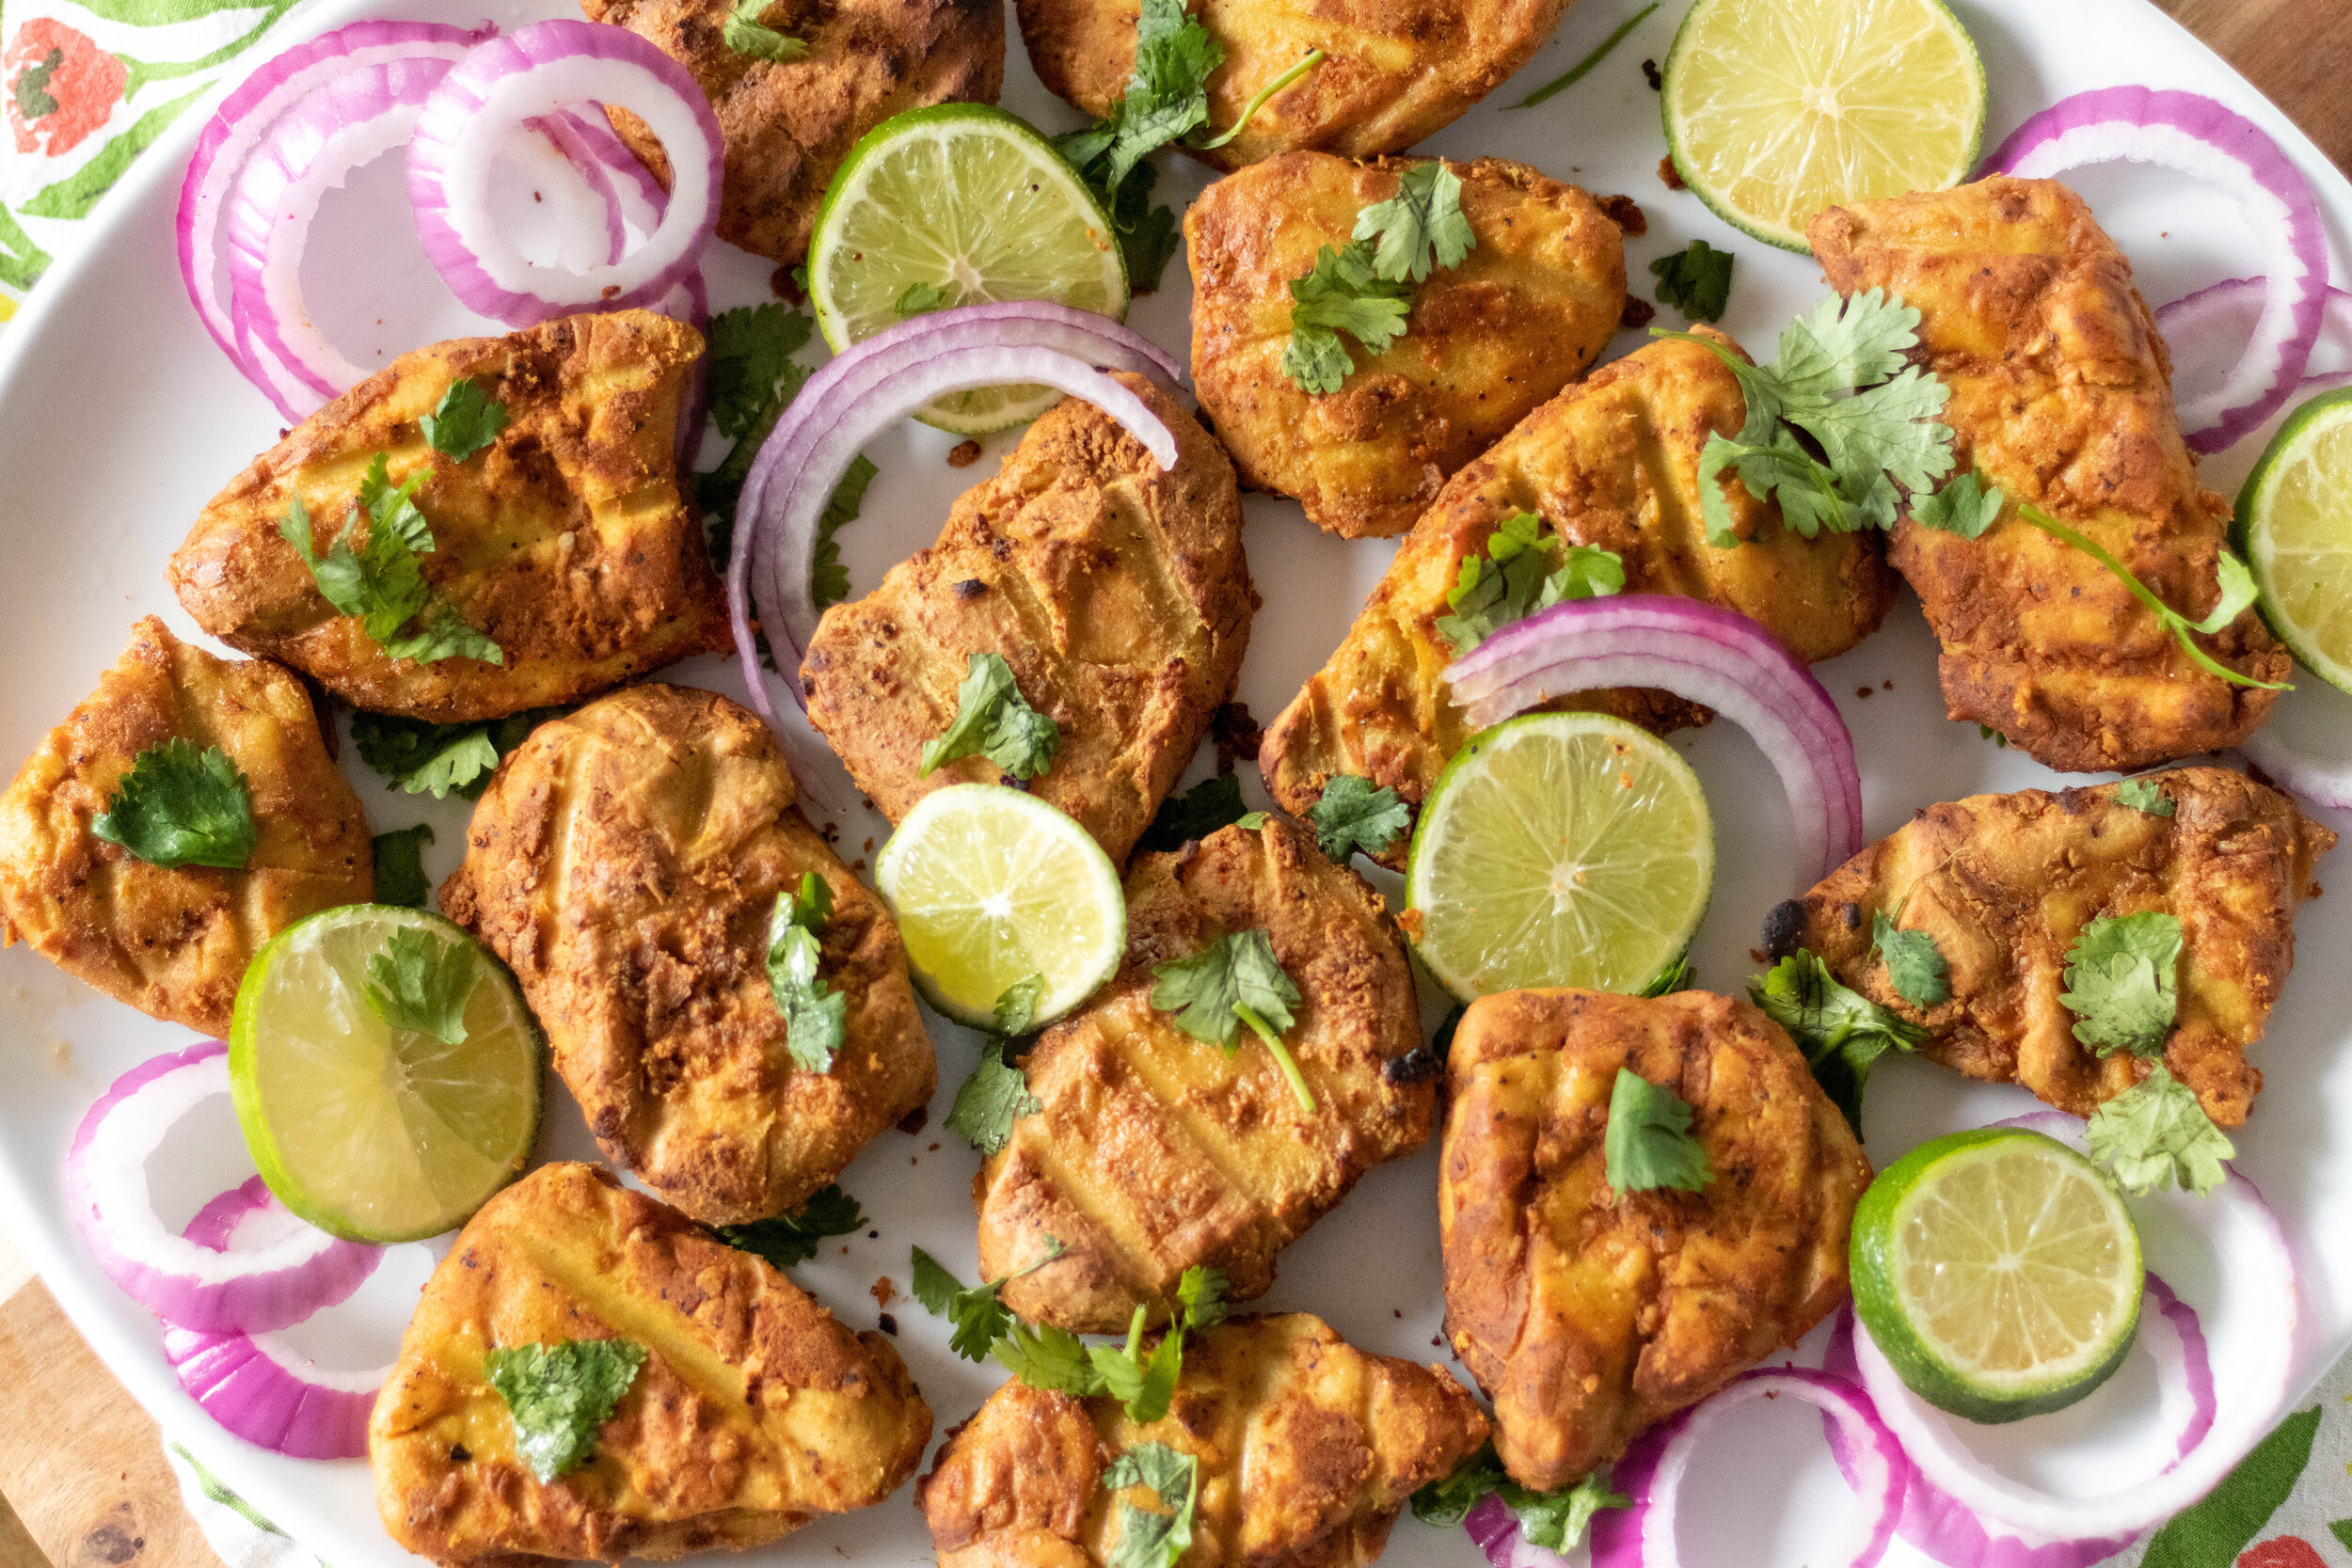
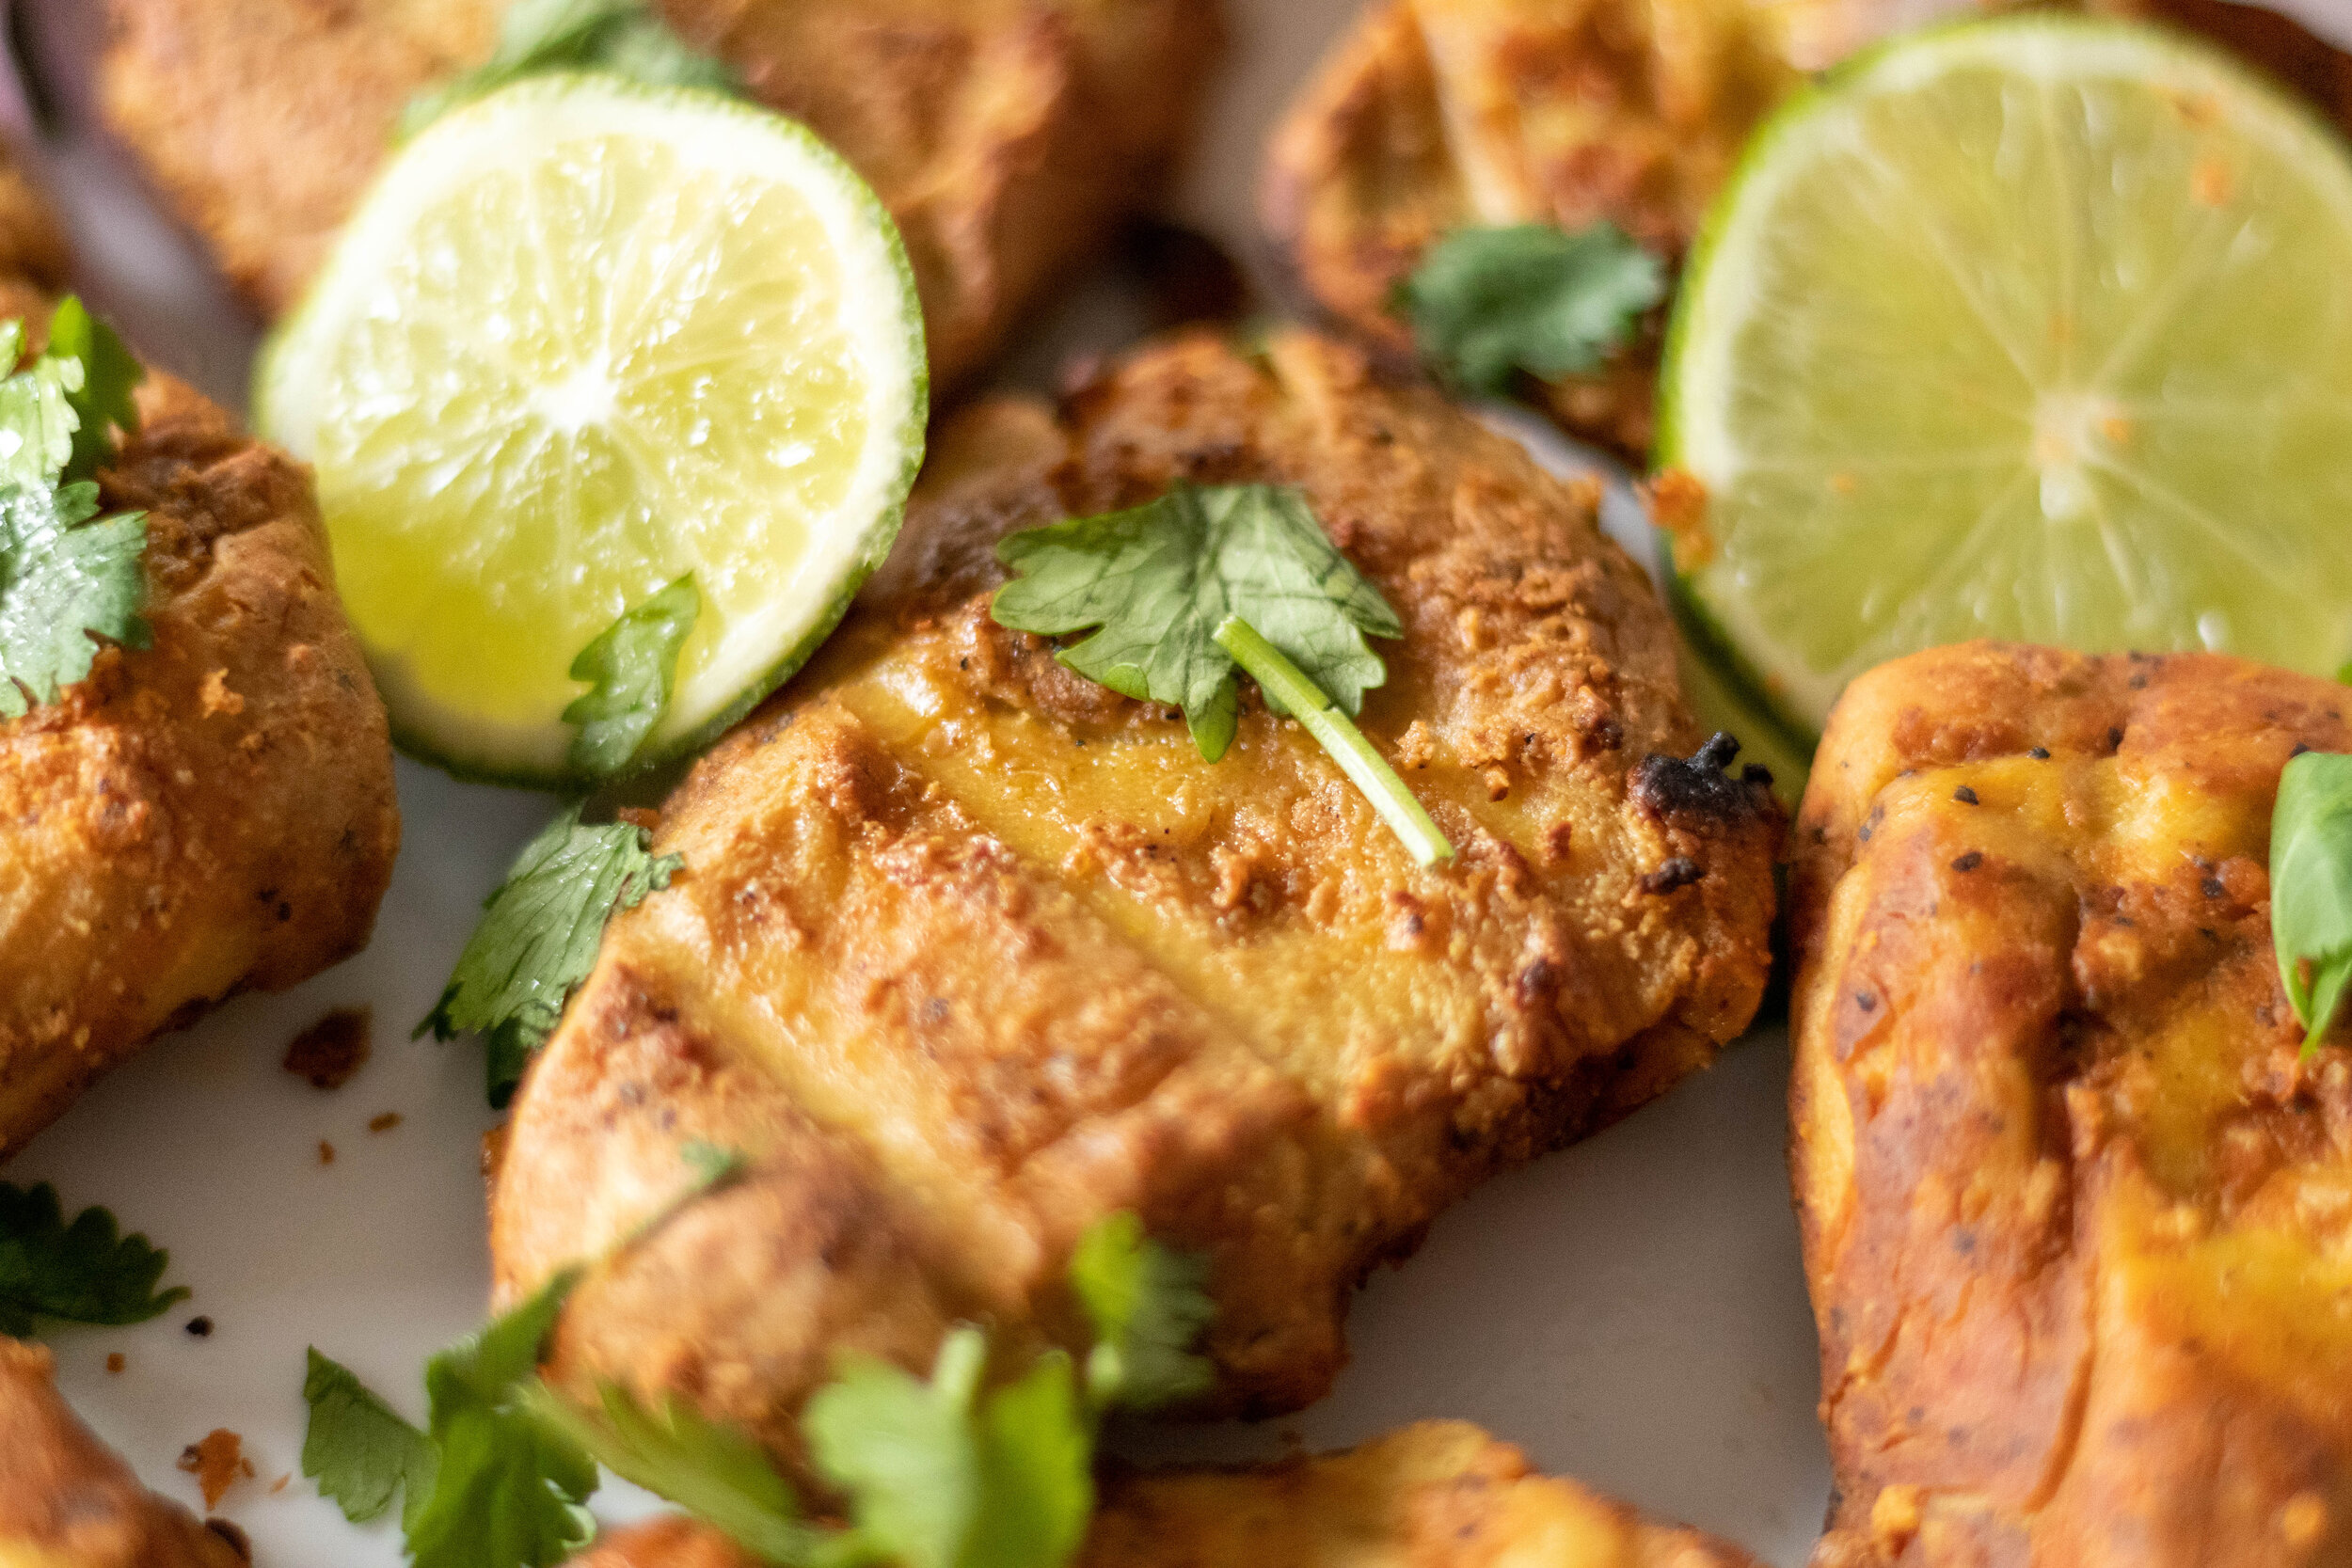
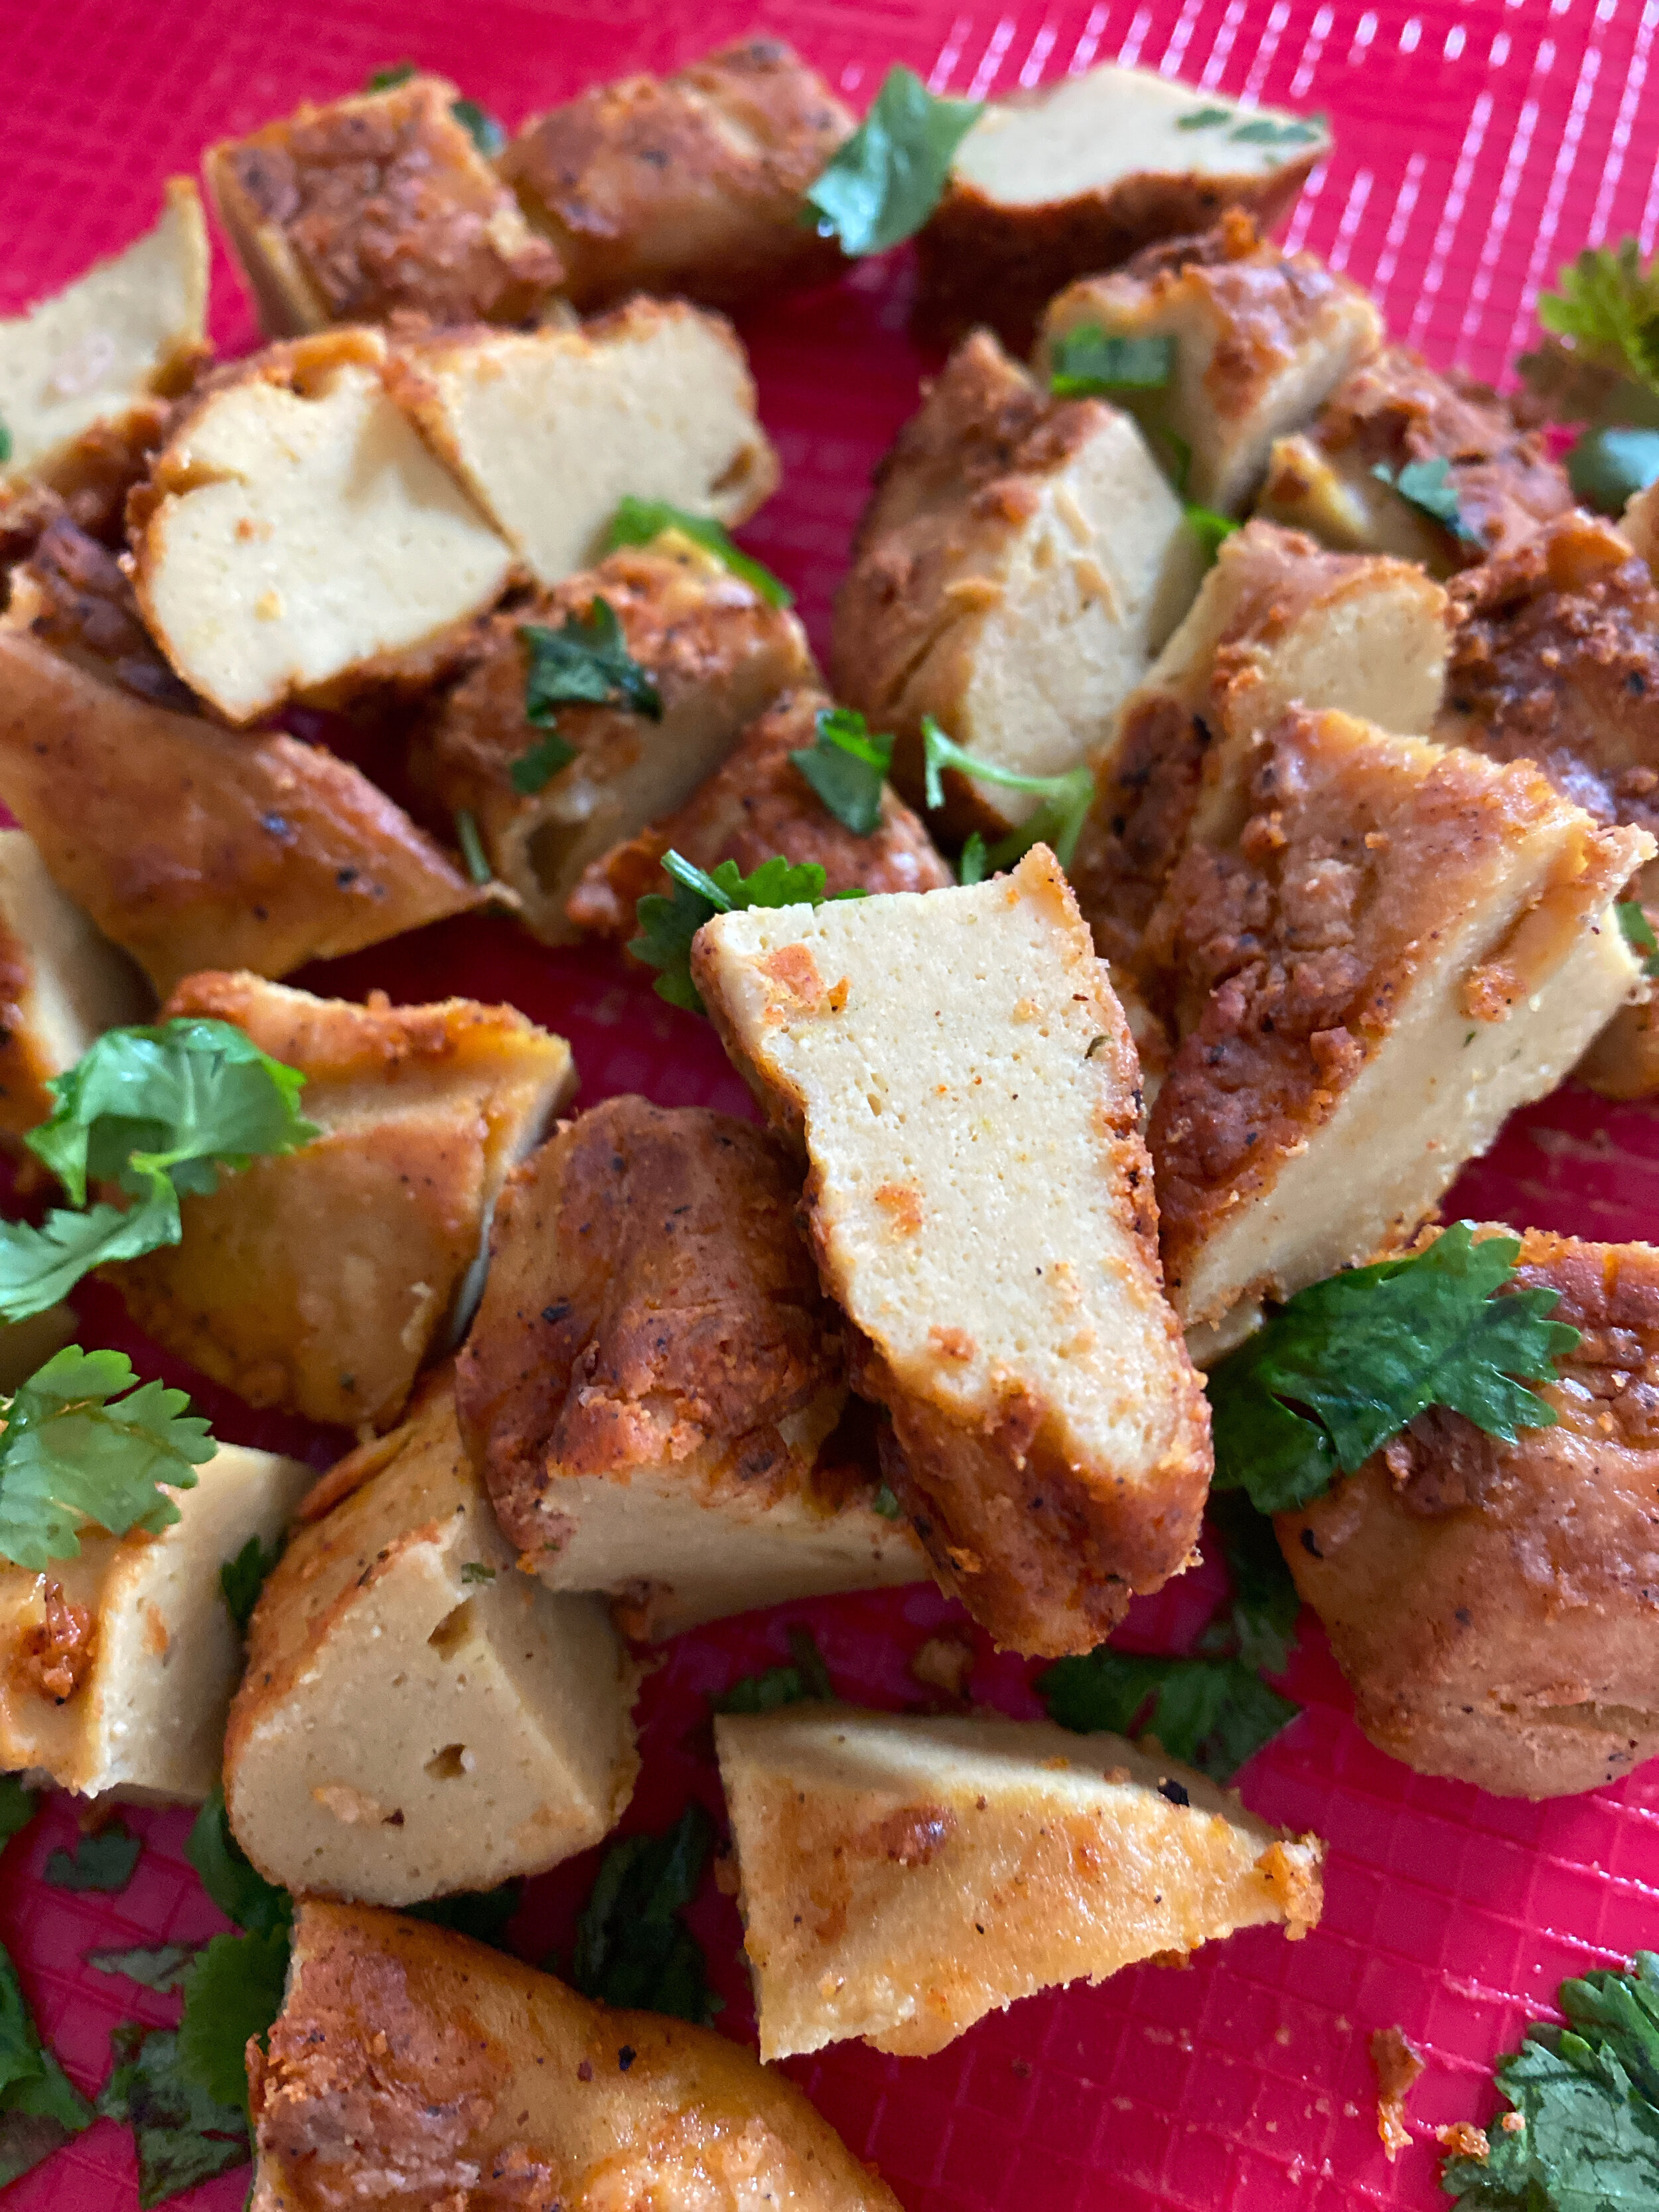
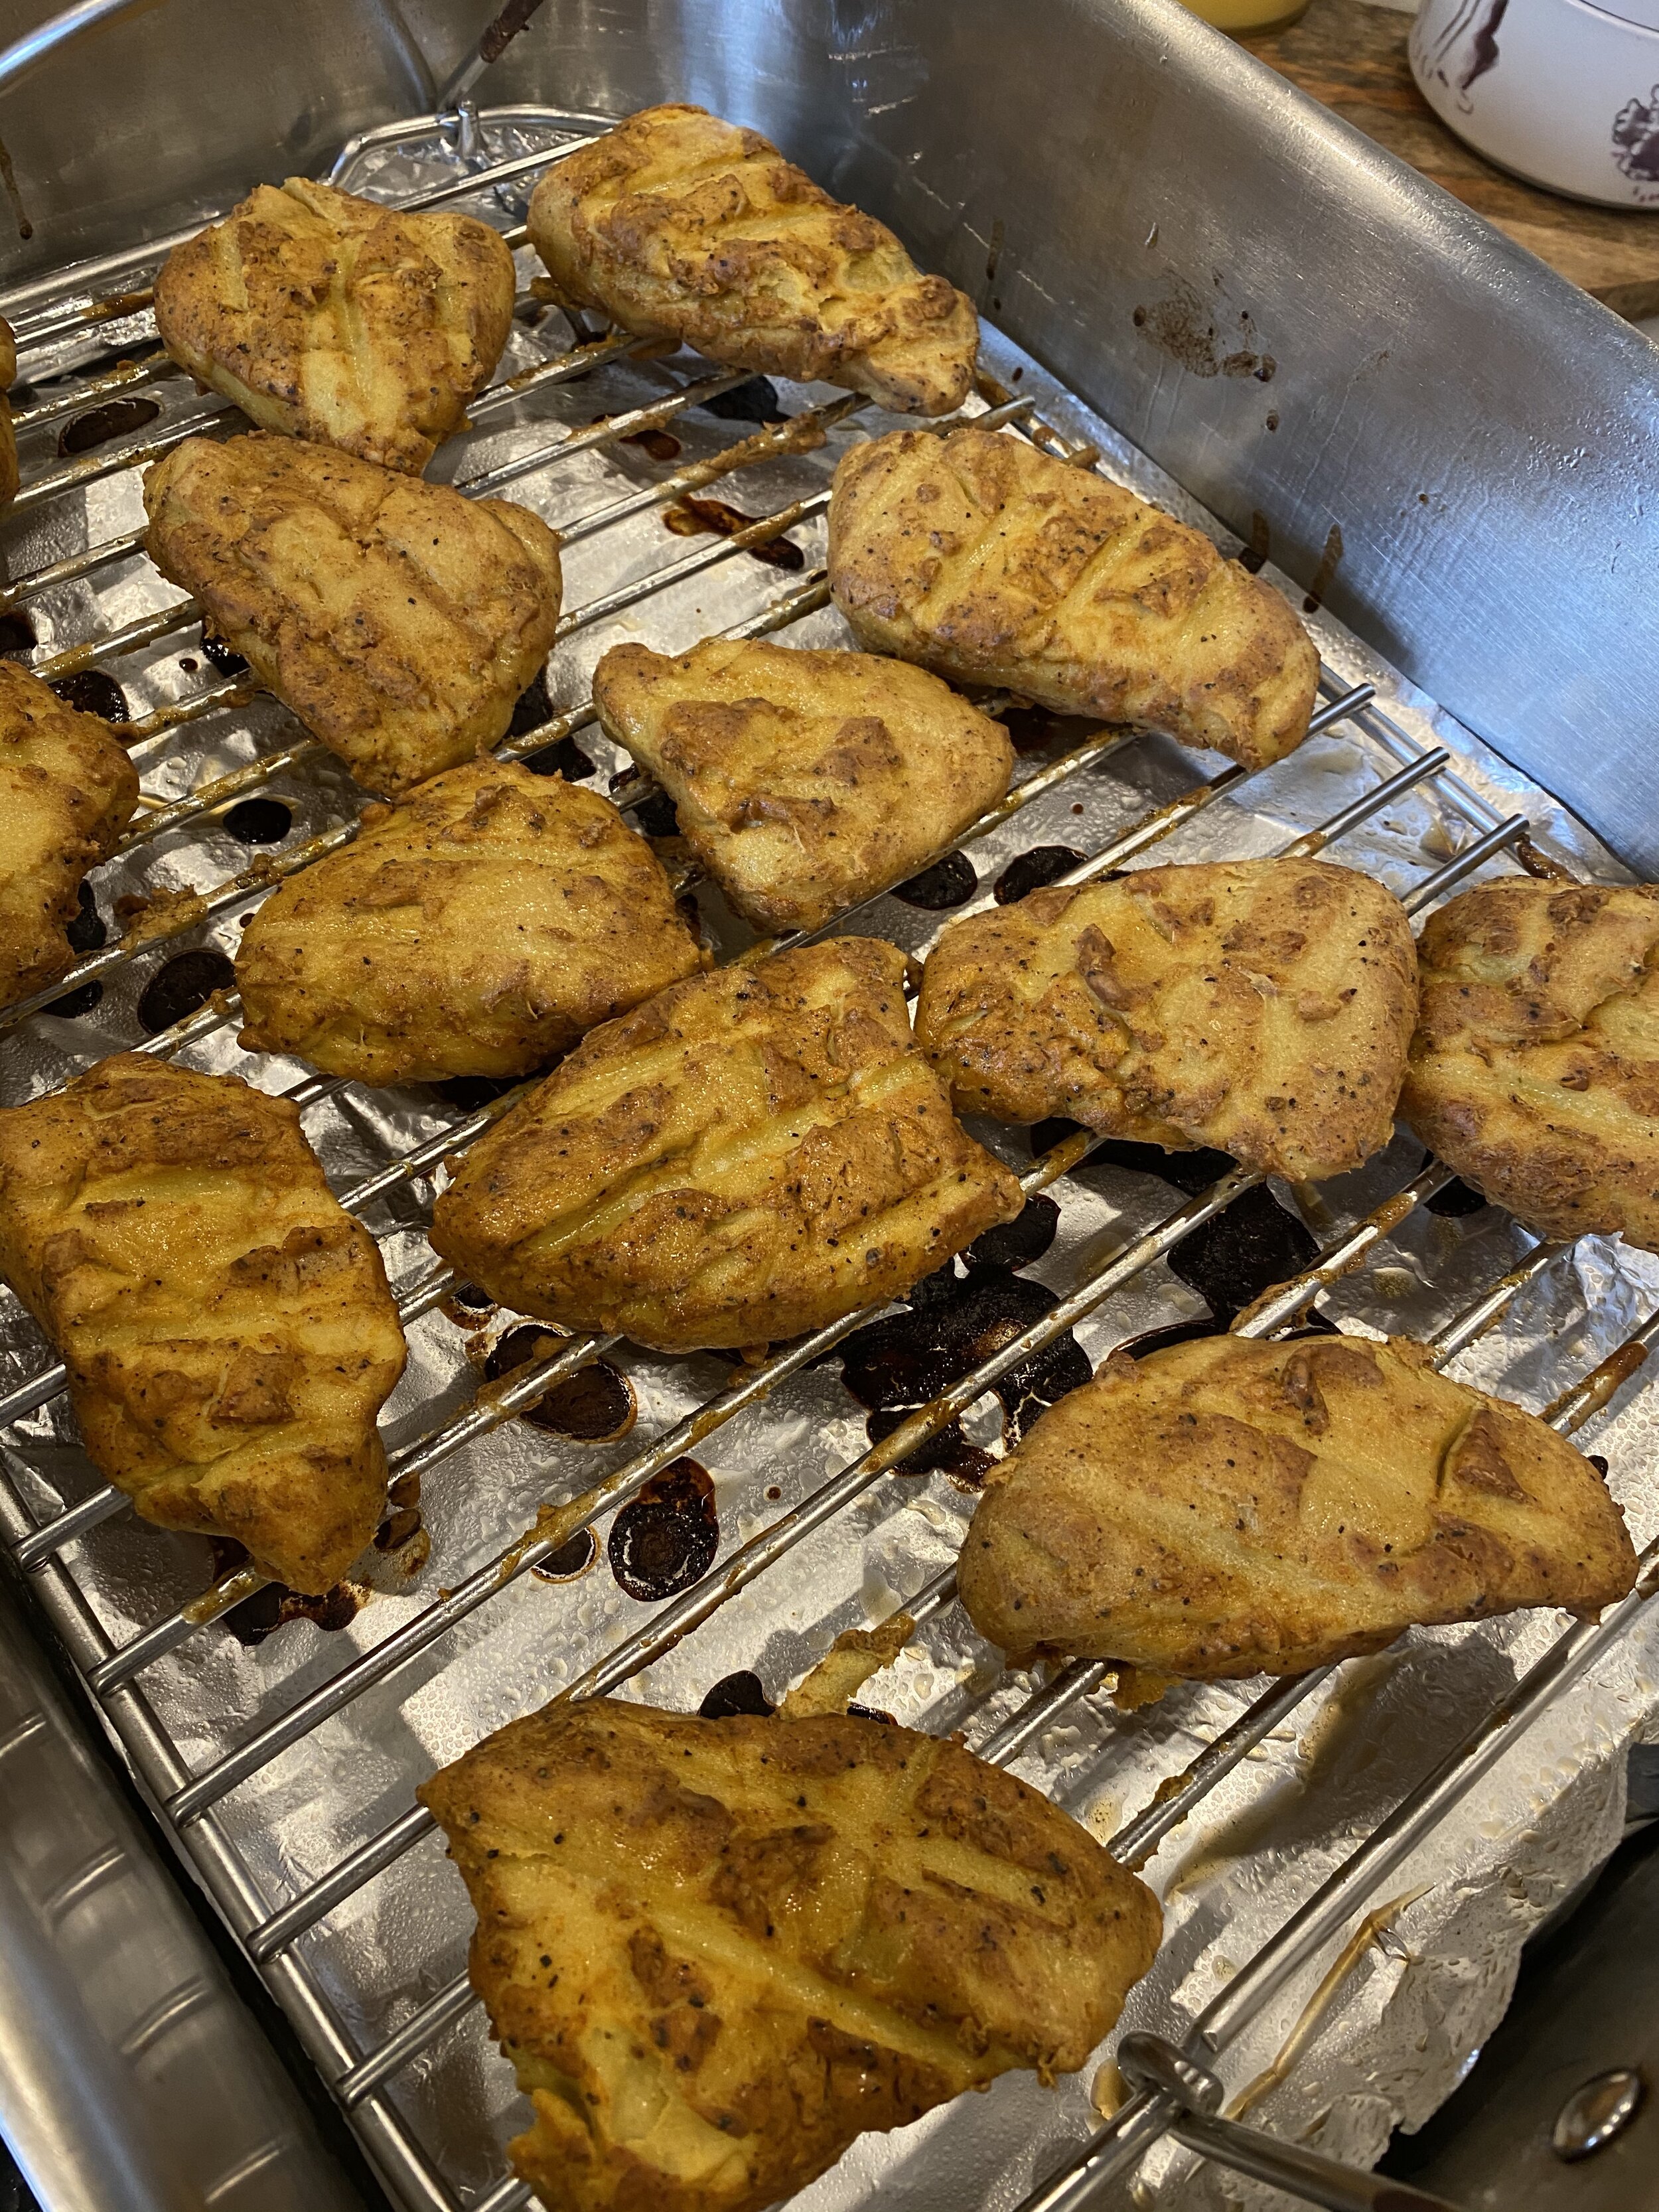
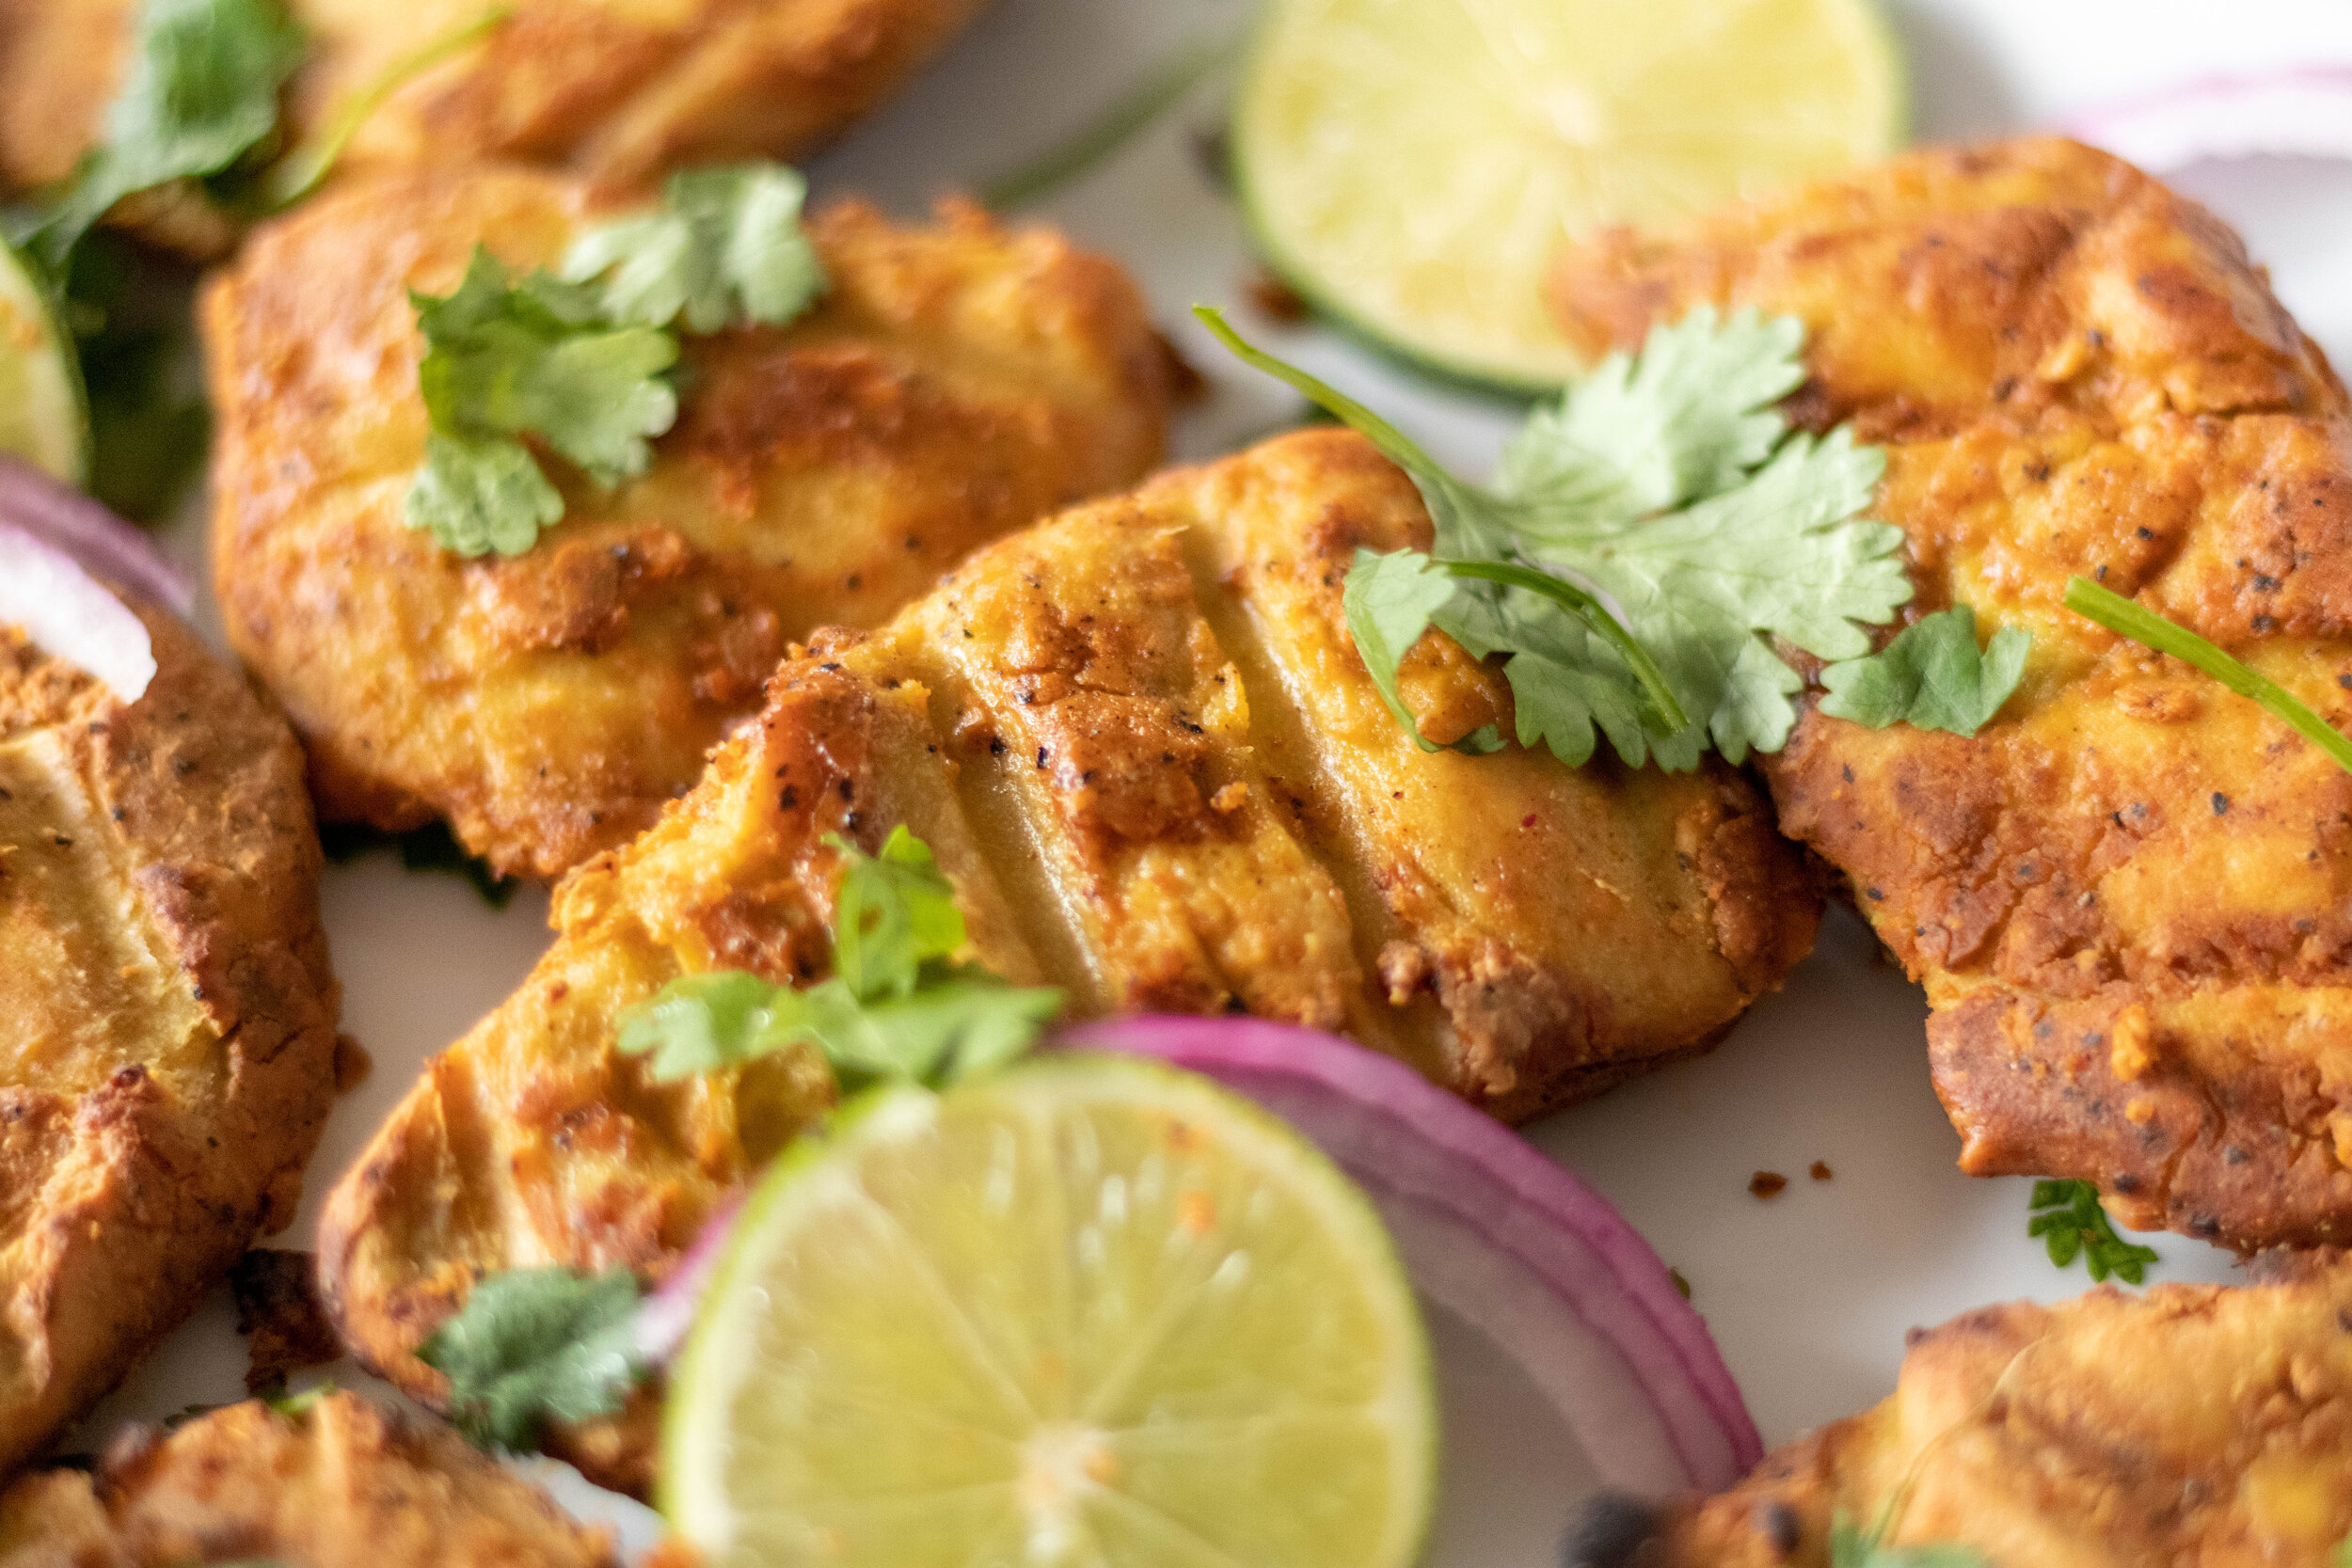
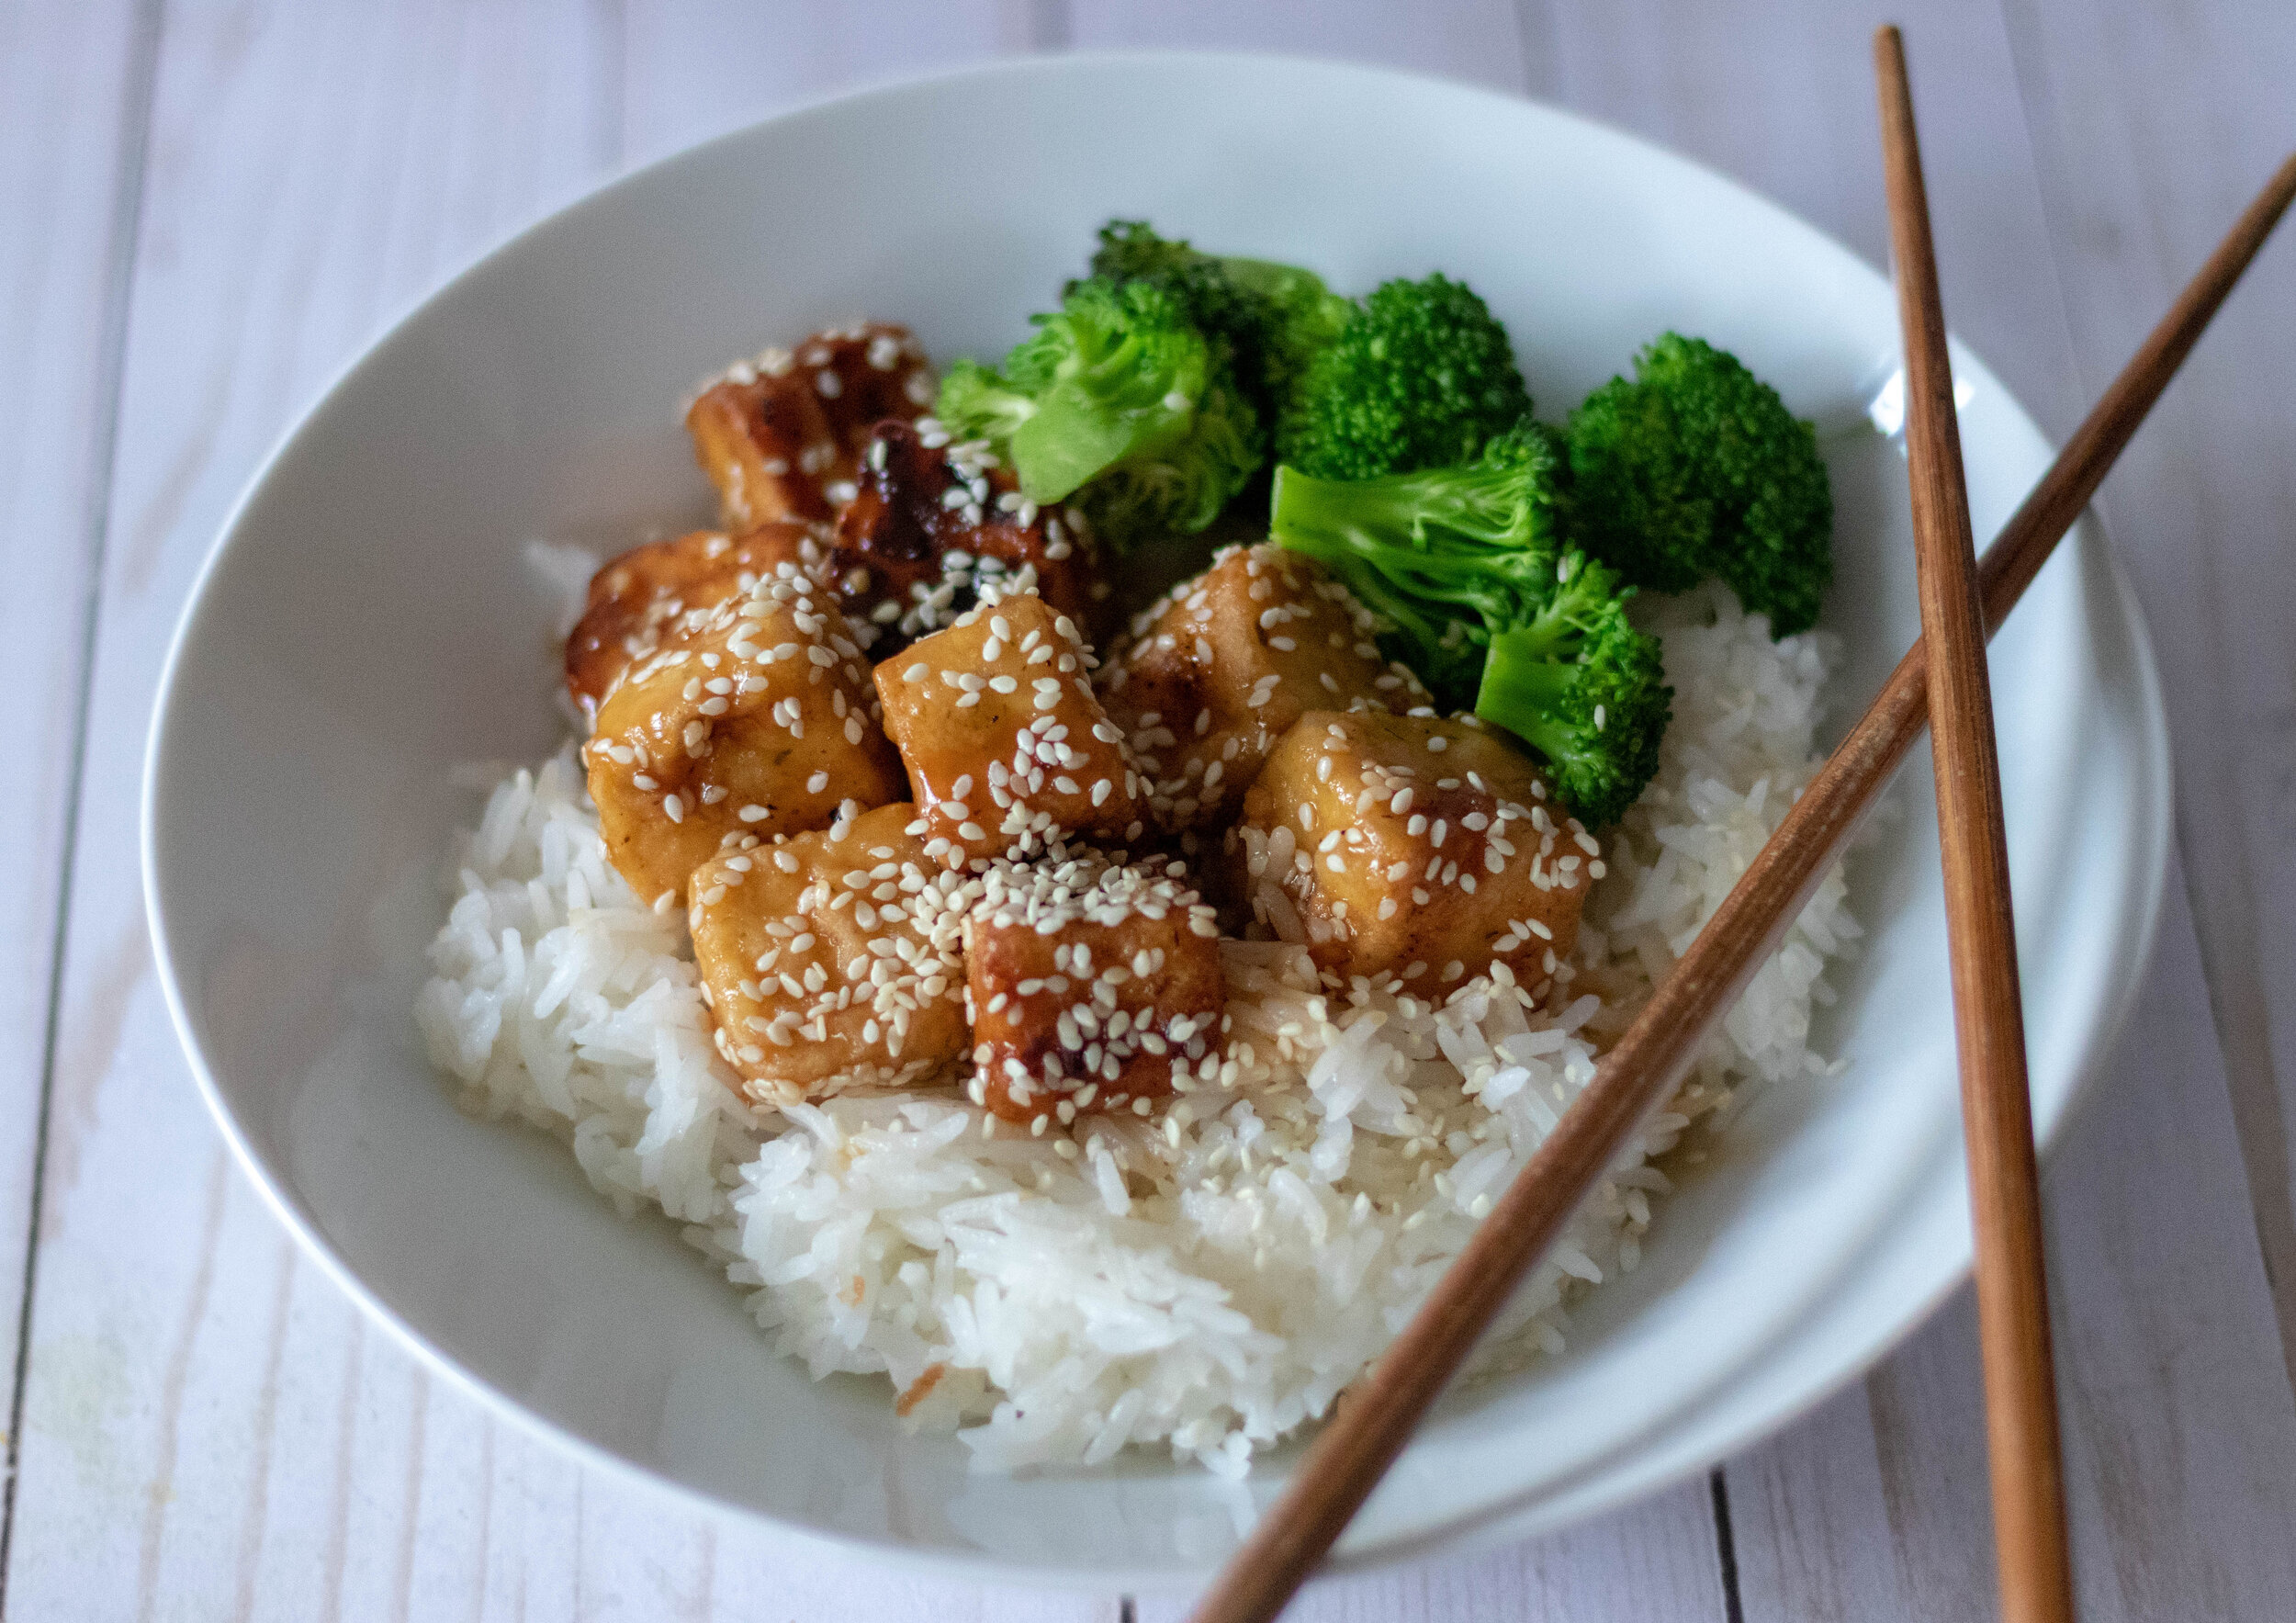
So when recently I was making a caesar salad, and contemplating the protein I would add, I decided on Alabama White Sauce Grilled Tofu, and a light bulb went off.

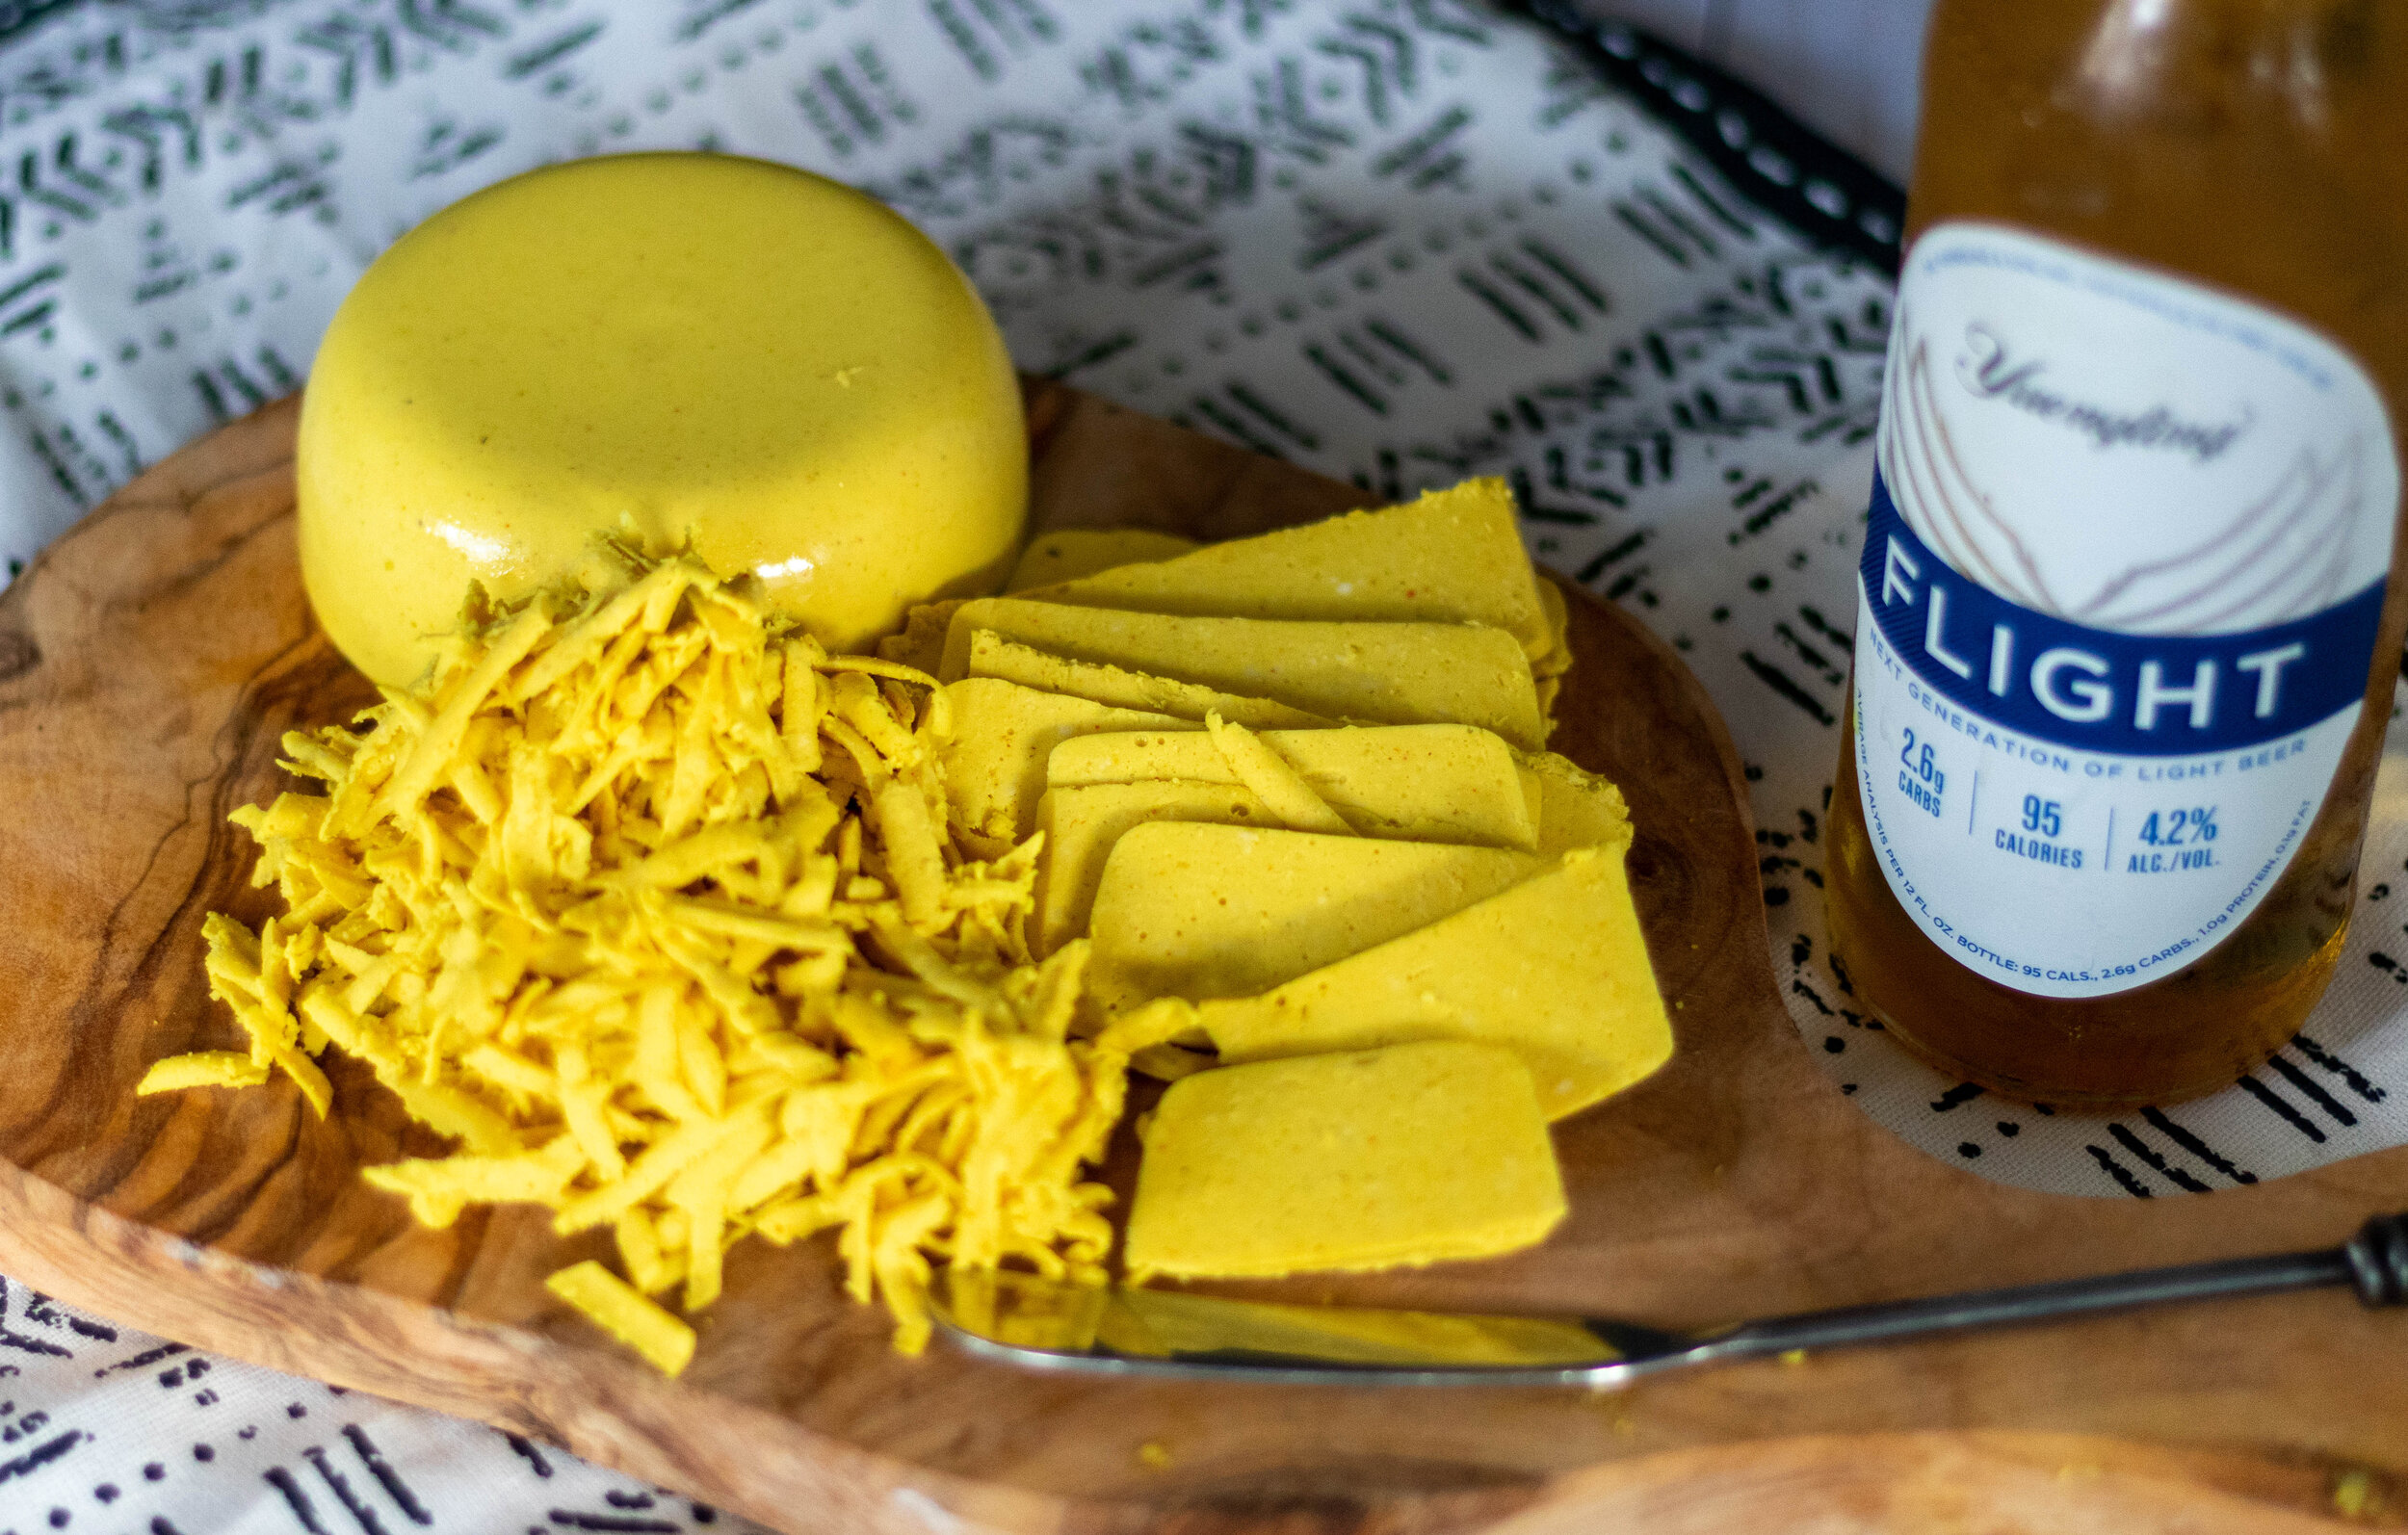
Alabama White Sauce (AWS) is a a tangy, vinegar and mayo based bbq sauce which originated it Northern Alabama at Big Bob Gibson’s Bar-B-Q.

Our AWS is a vinegar and mayo based sauce like the original, with a little kick and has just enough tang to work as a caesar dressing substitute. AWS is a staple condiment in our house because it is delicious and versatile, and not just for bbq!

So after I grilled up the tofu, it occurred to me to take the leftover sauce and turn it into the dressing for this salad .

IMG_1659.JPG

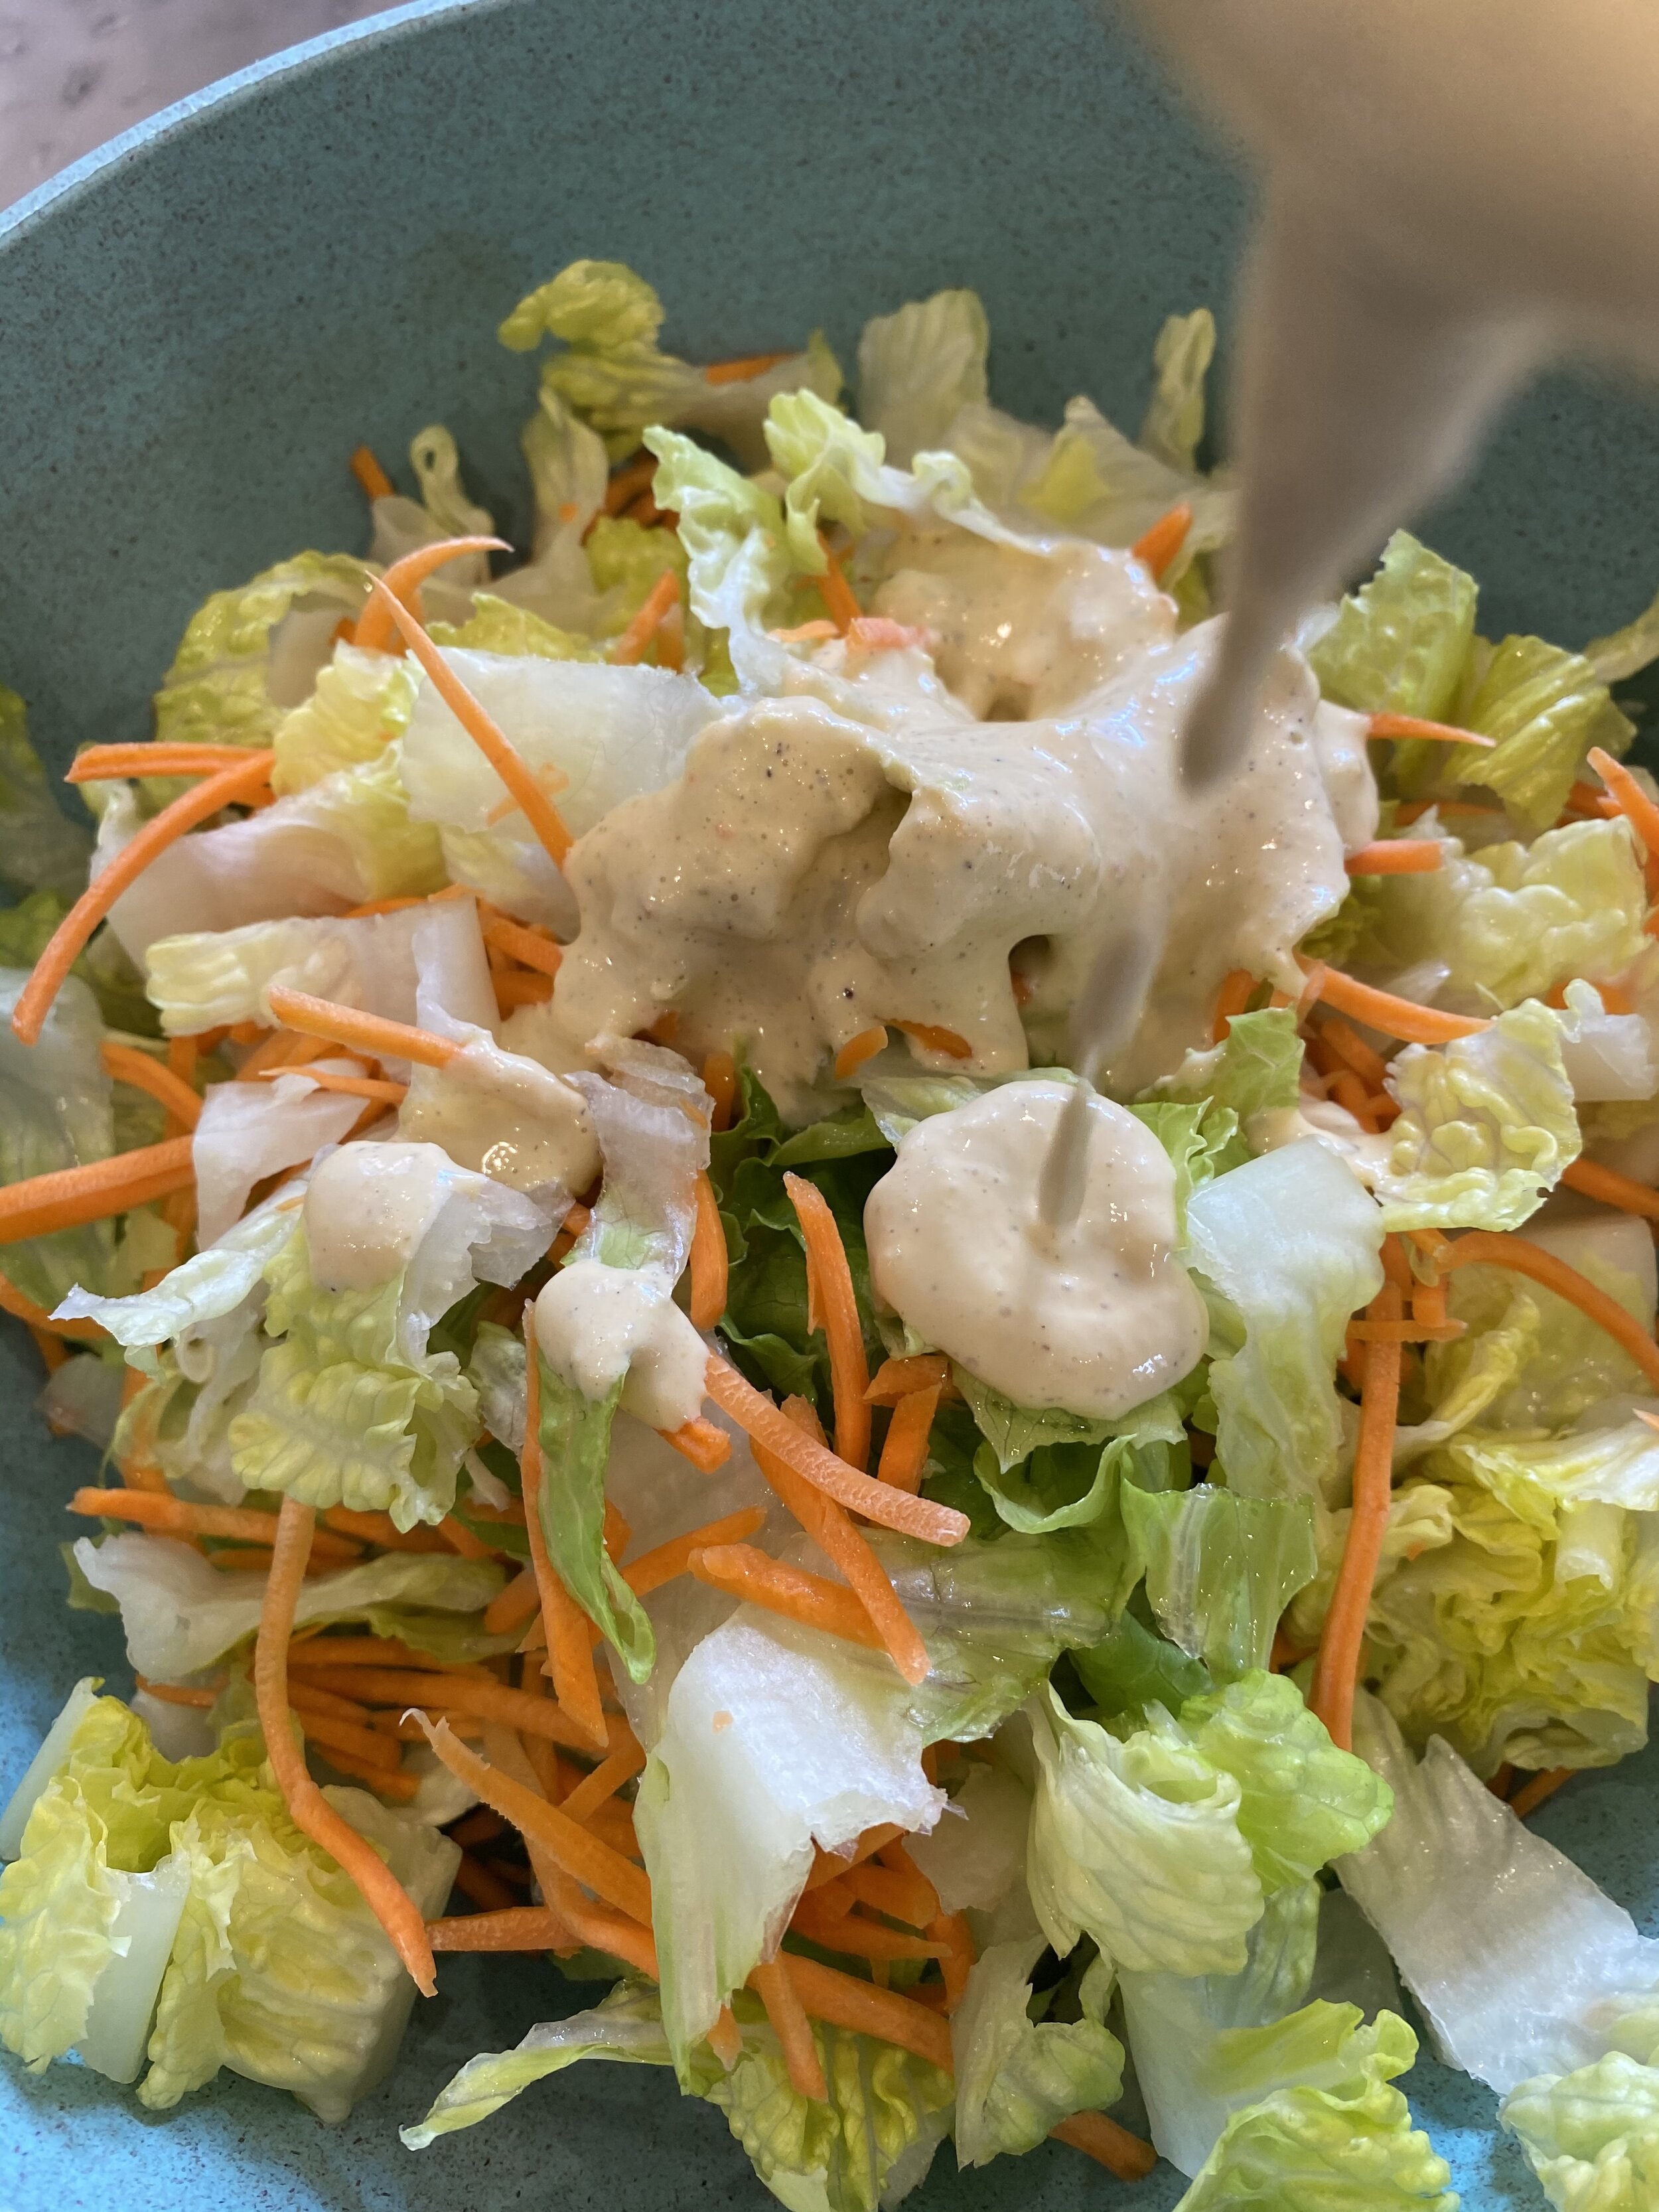
PURE JOY! It was so good that I will never attempt another “caesar” dressing recipe again.

I also added some carrots to the salad because I’m adult and I can do what I want..right?? And what I want is carrots on everything, even if it's not the norm, who cares if it tastes good.

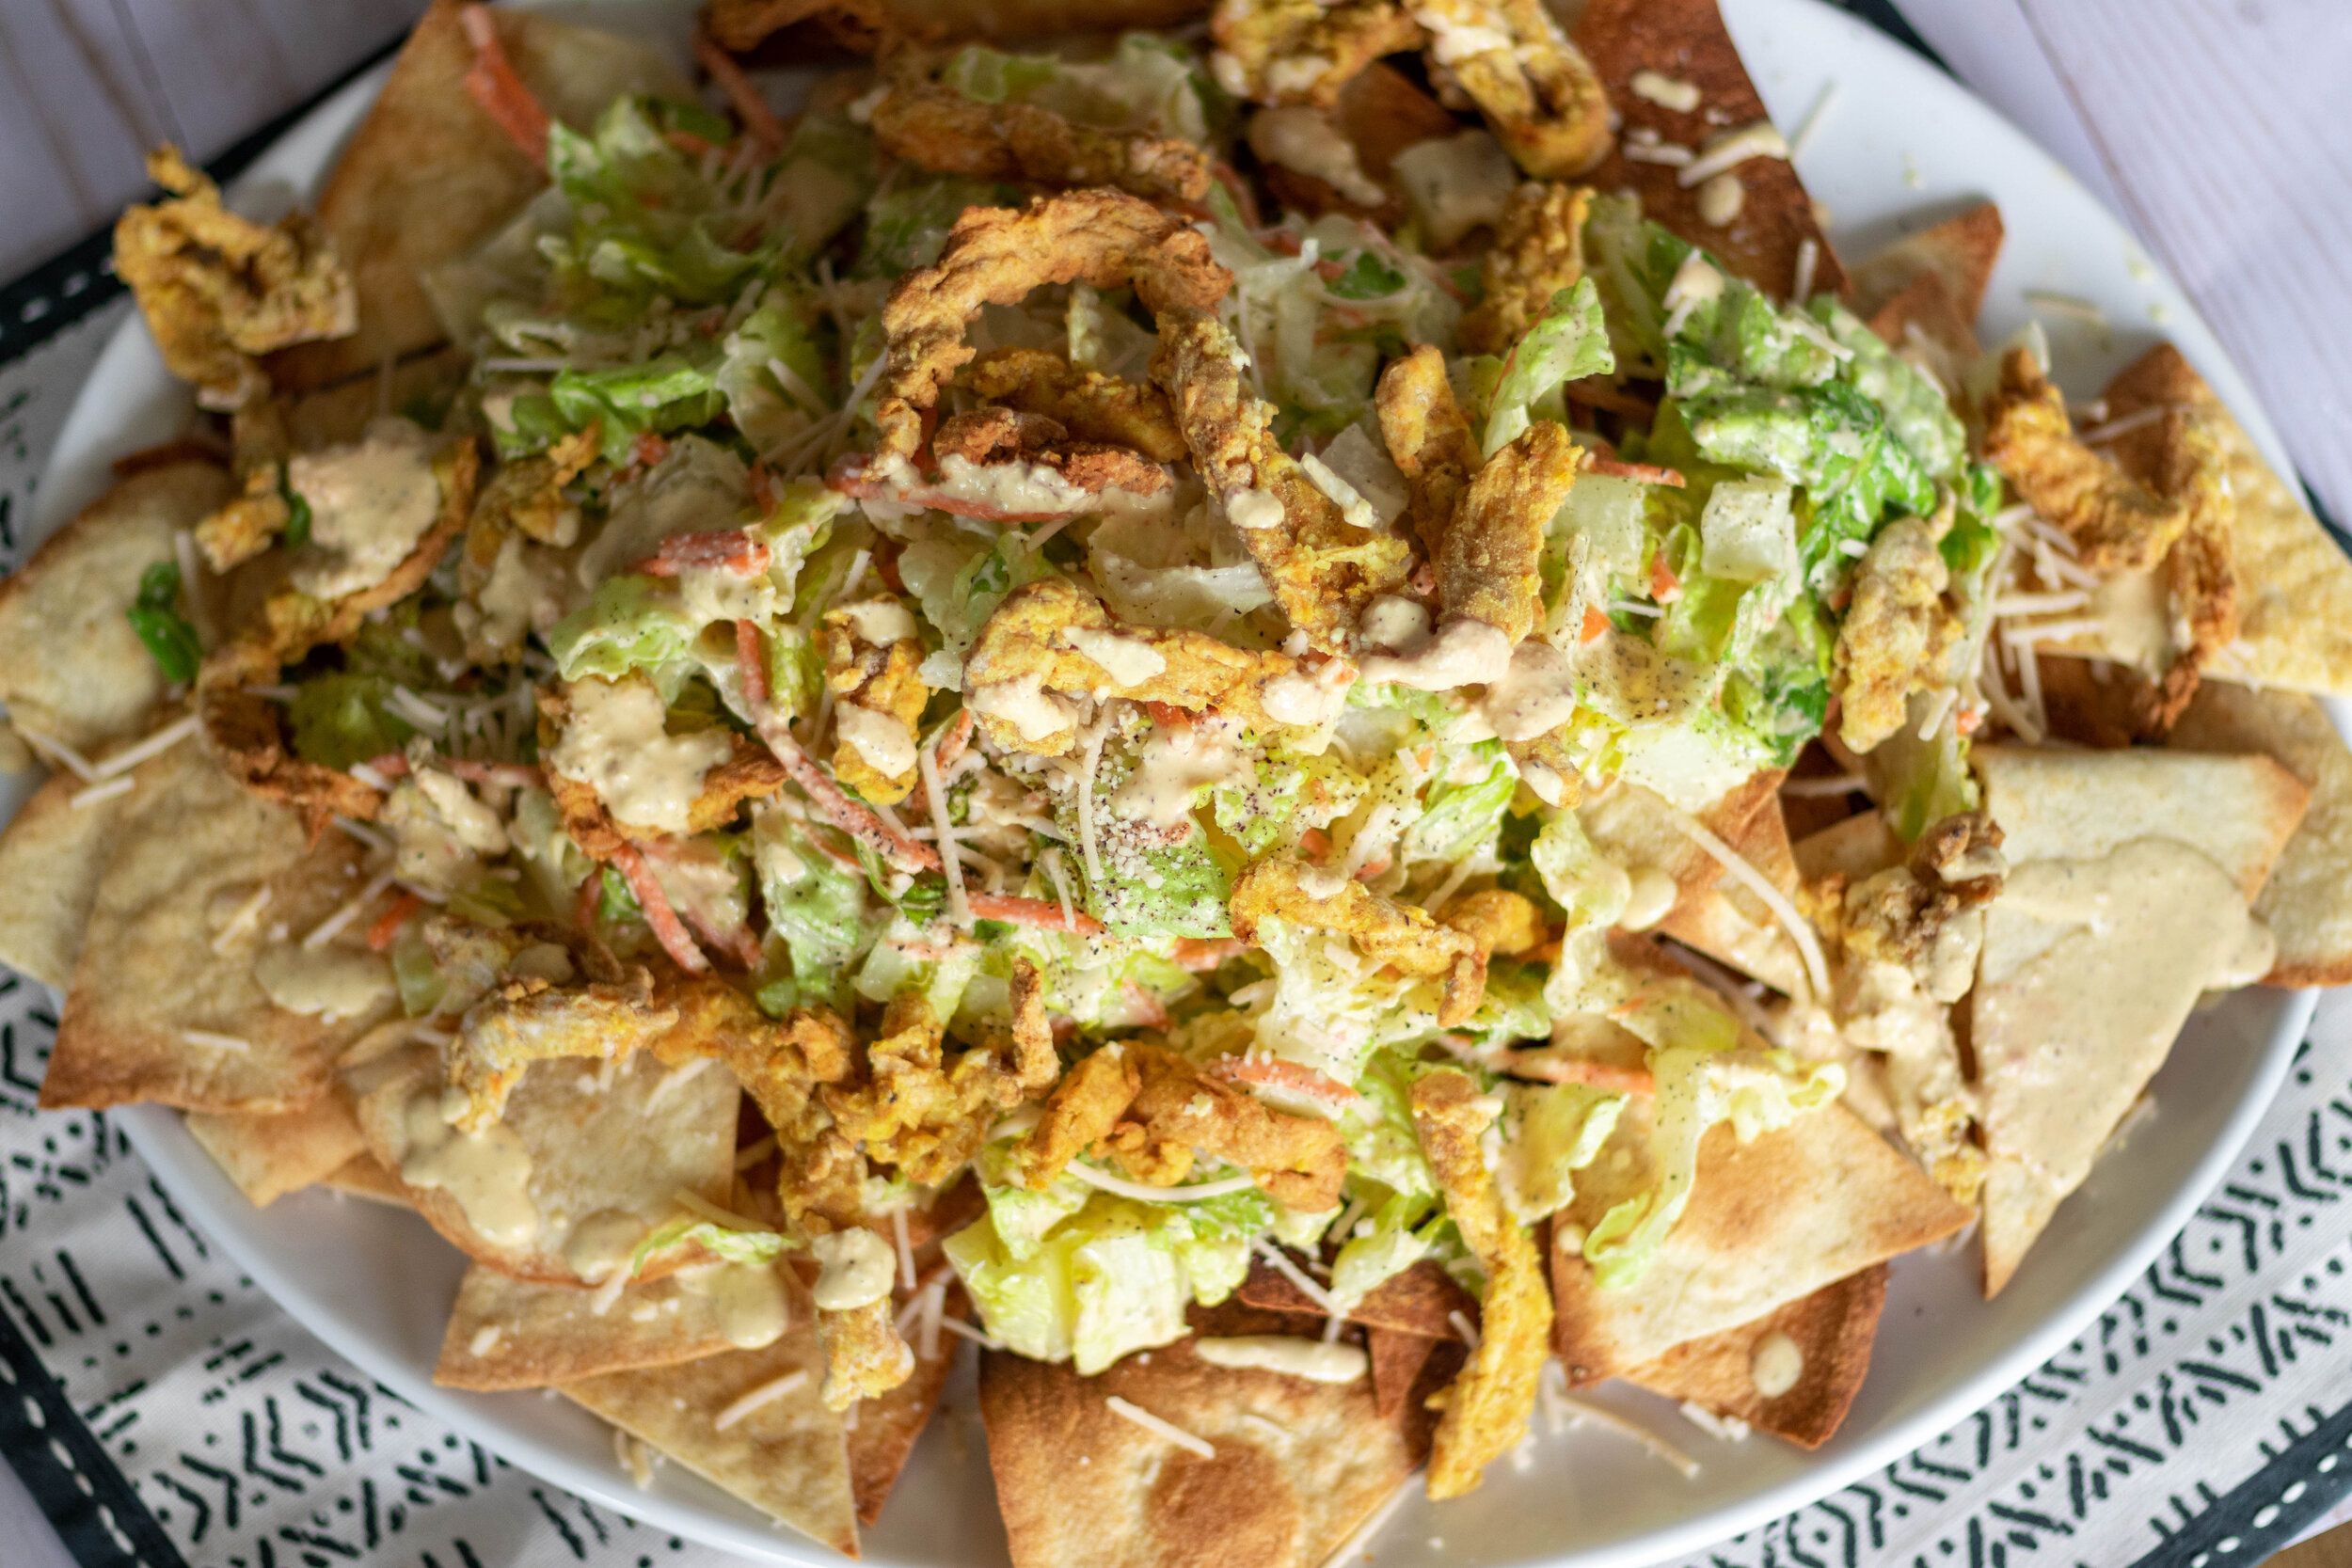
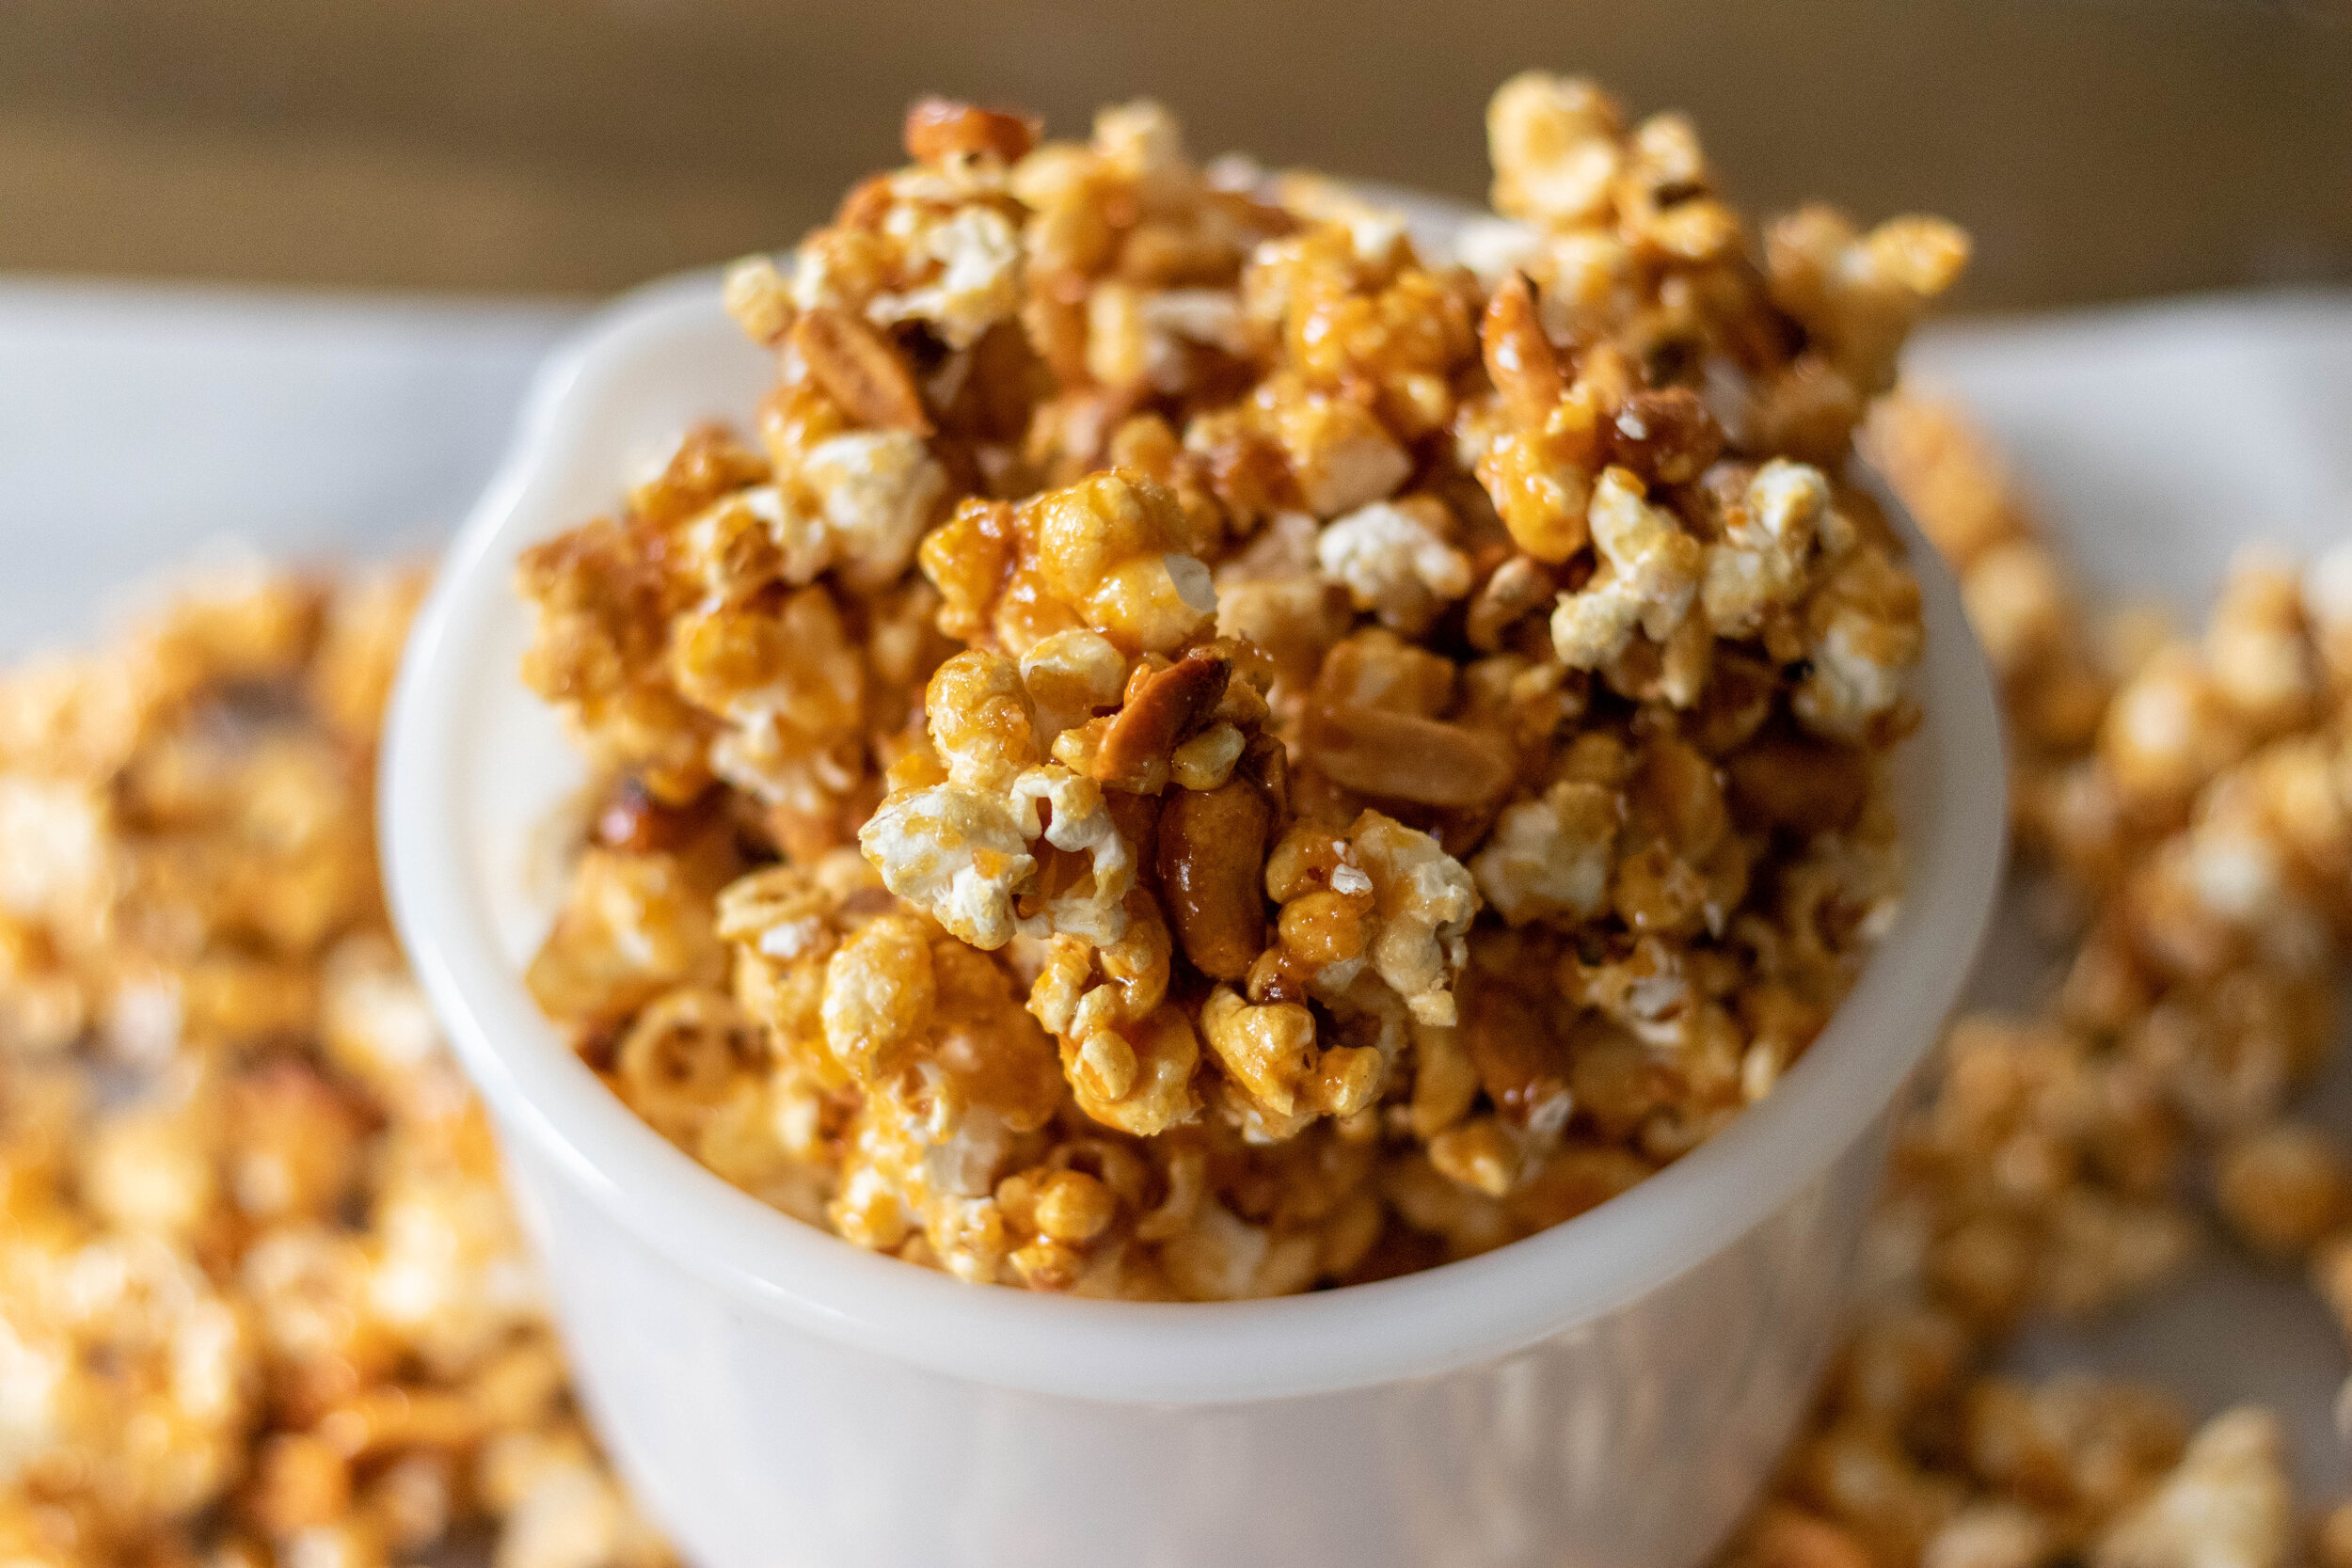
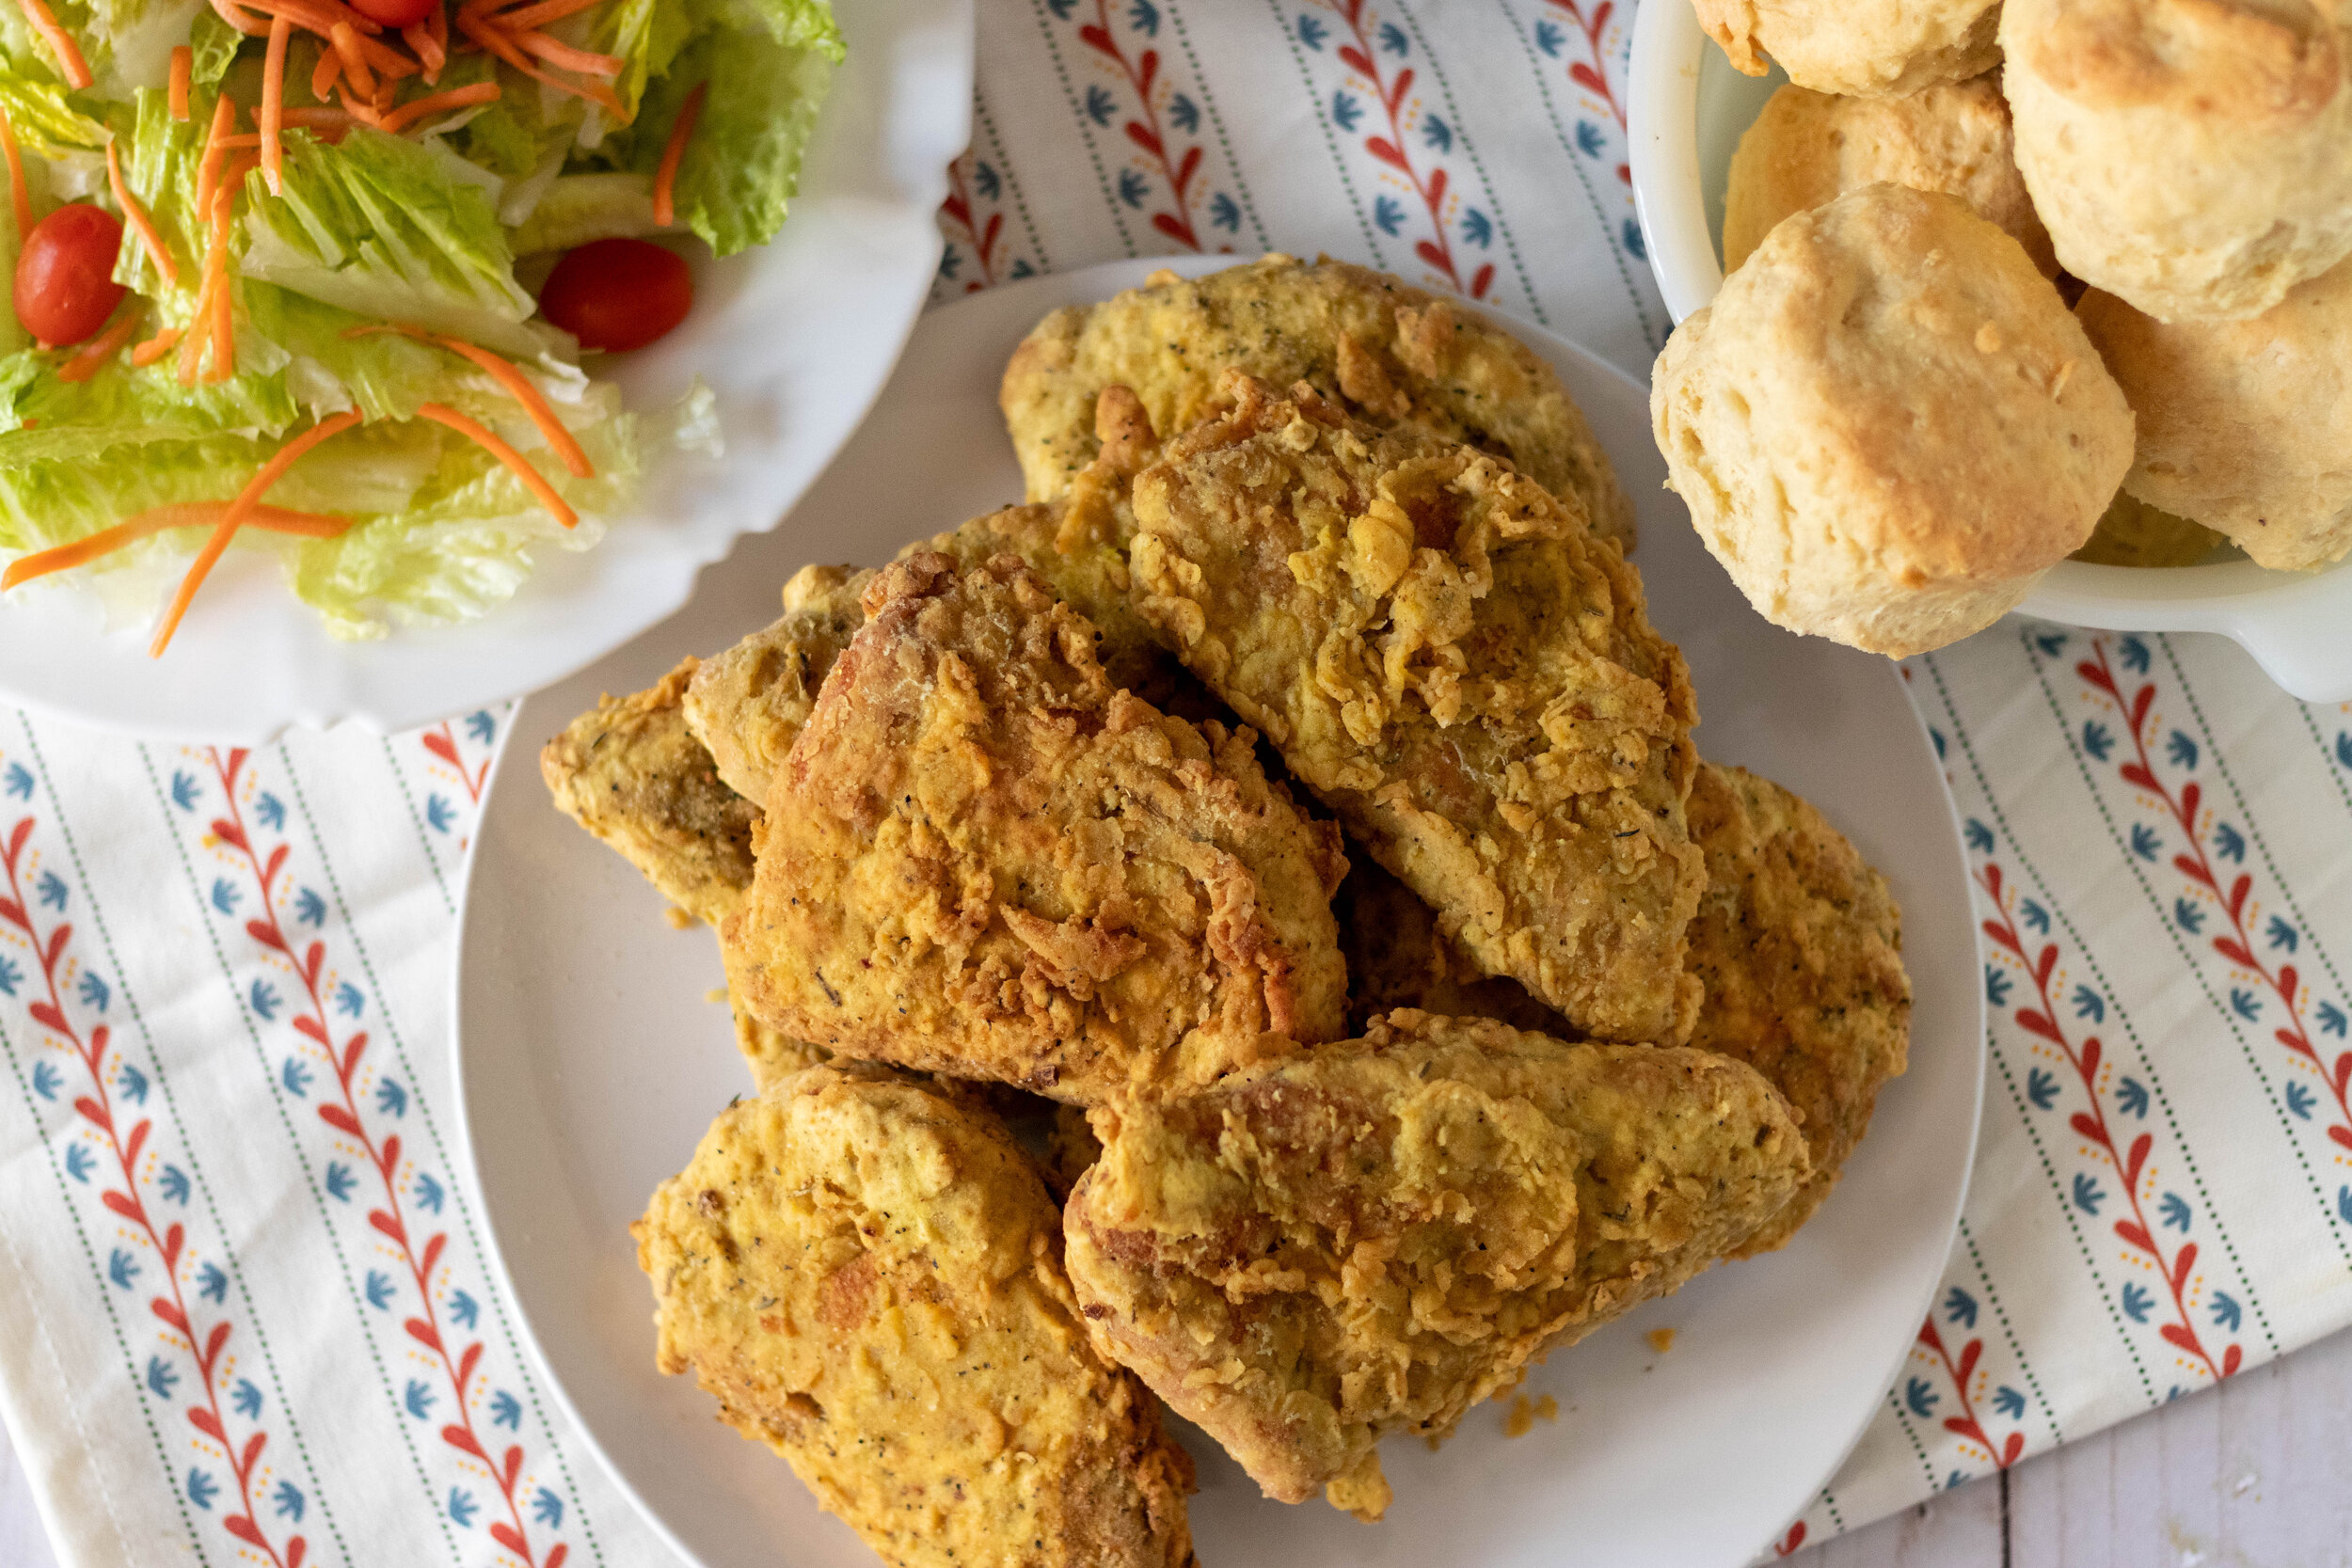
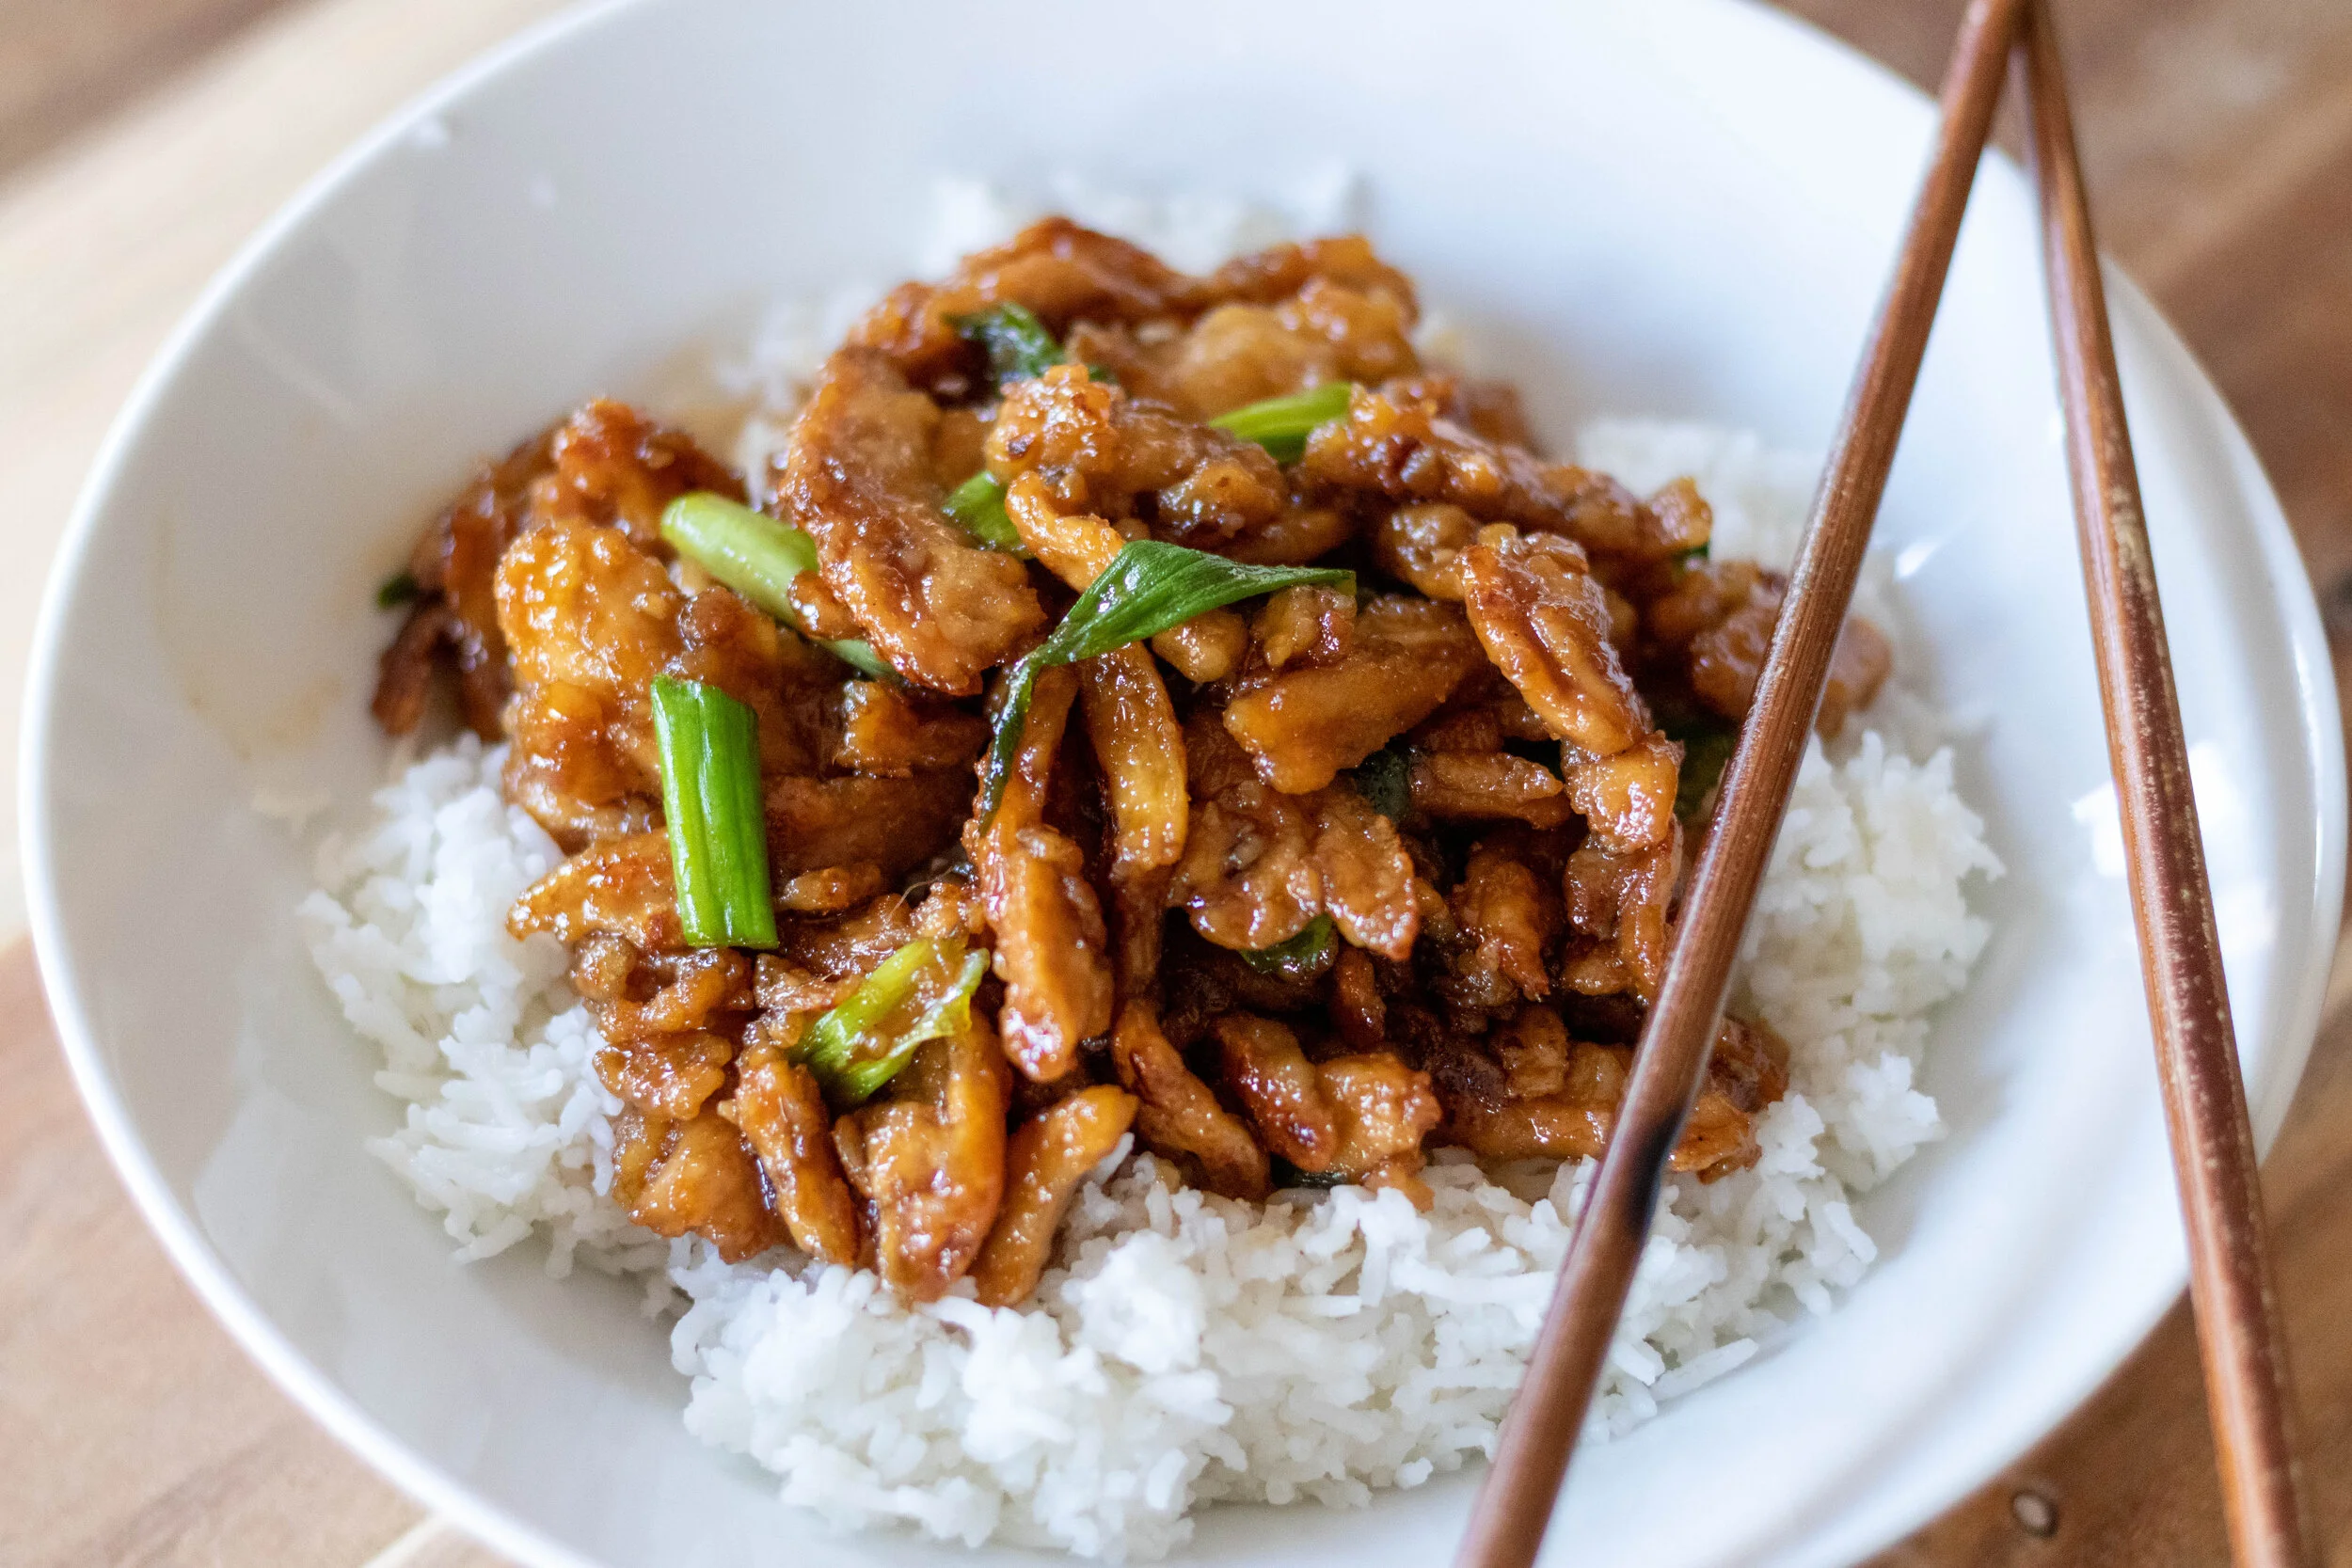
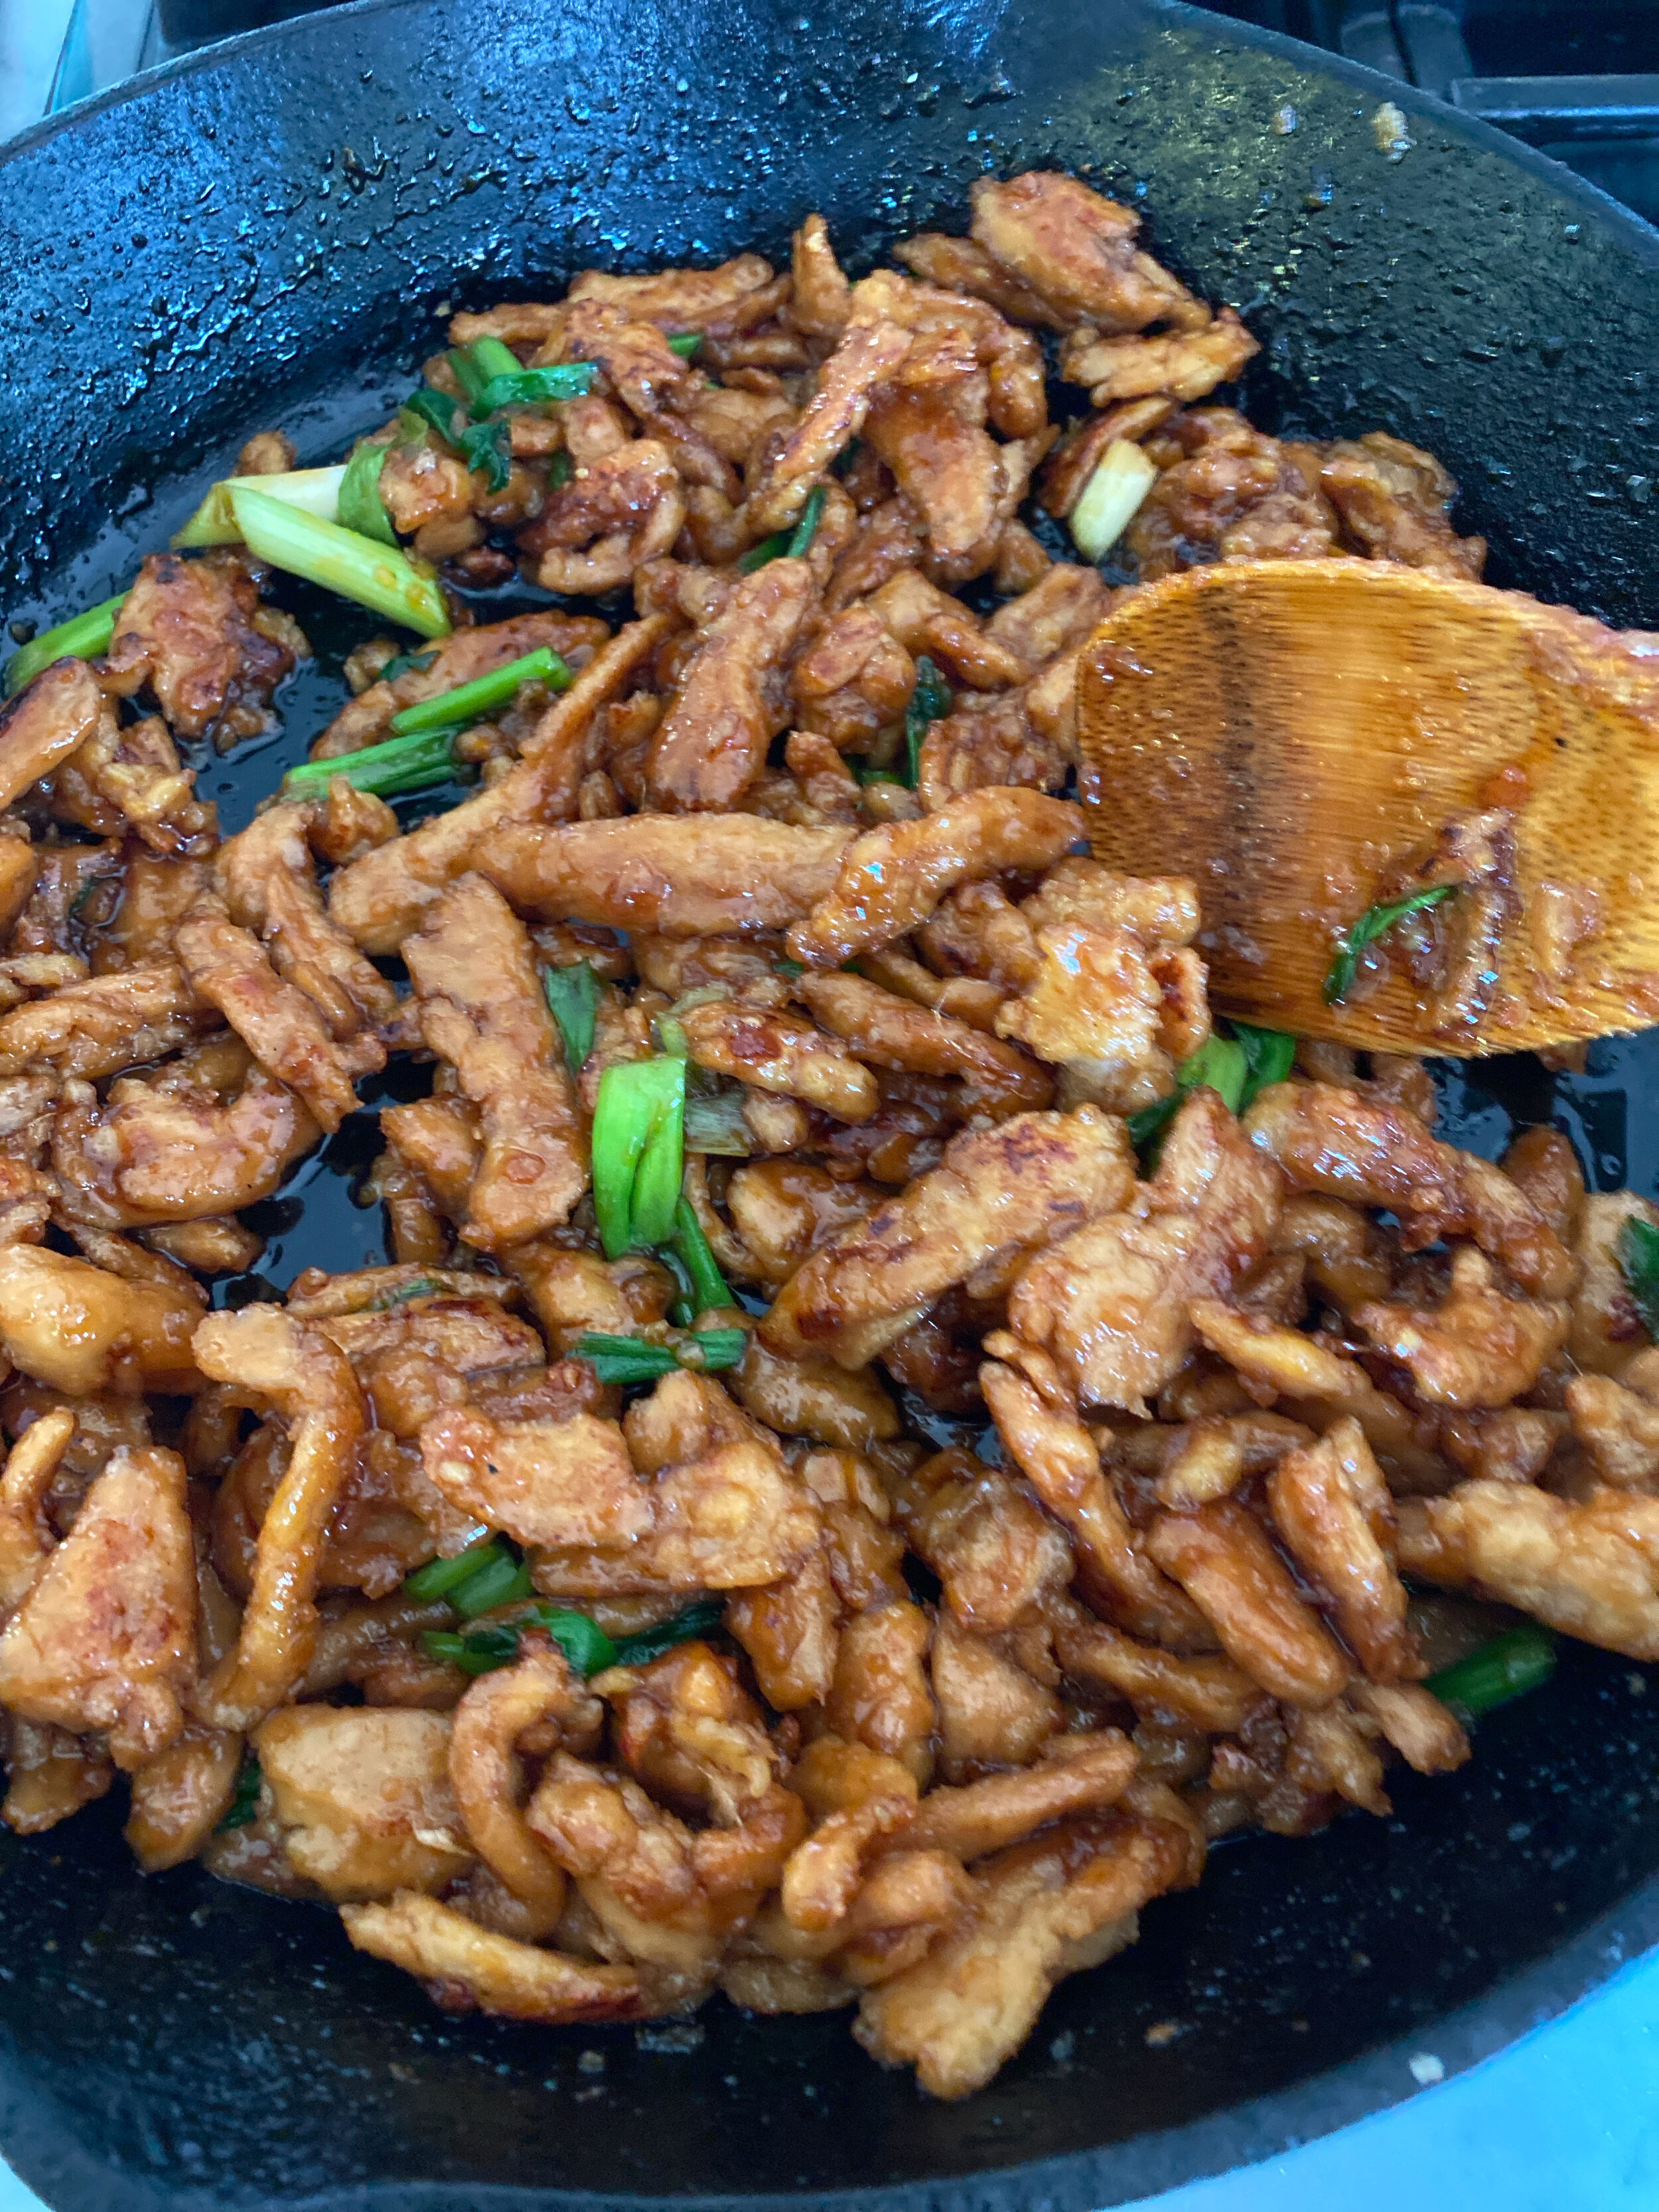
When making the nachos I first considered adding my grilled Alabama White Sauce Grilled Tofu, and honestly I think that could be delicious too, but I had a bag of Butler Soy Curls staring at me and I was in the mood for some fried soy curl goodness. So that is what I did and I am glad I did because fried soy curls are one of my favorite things.

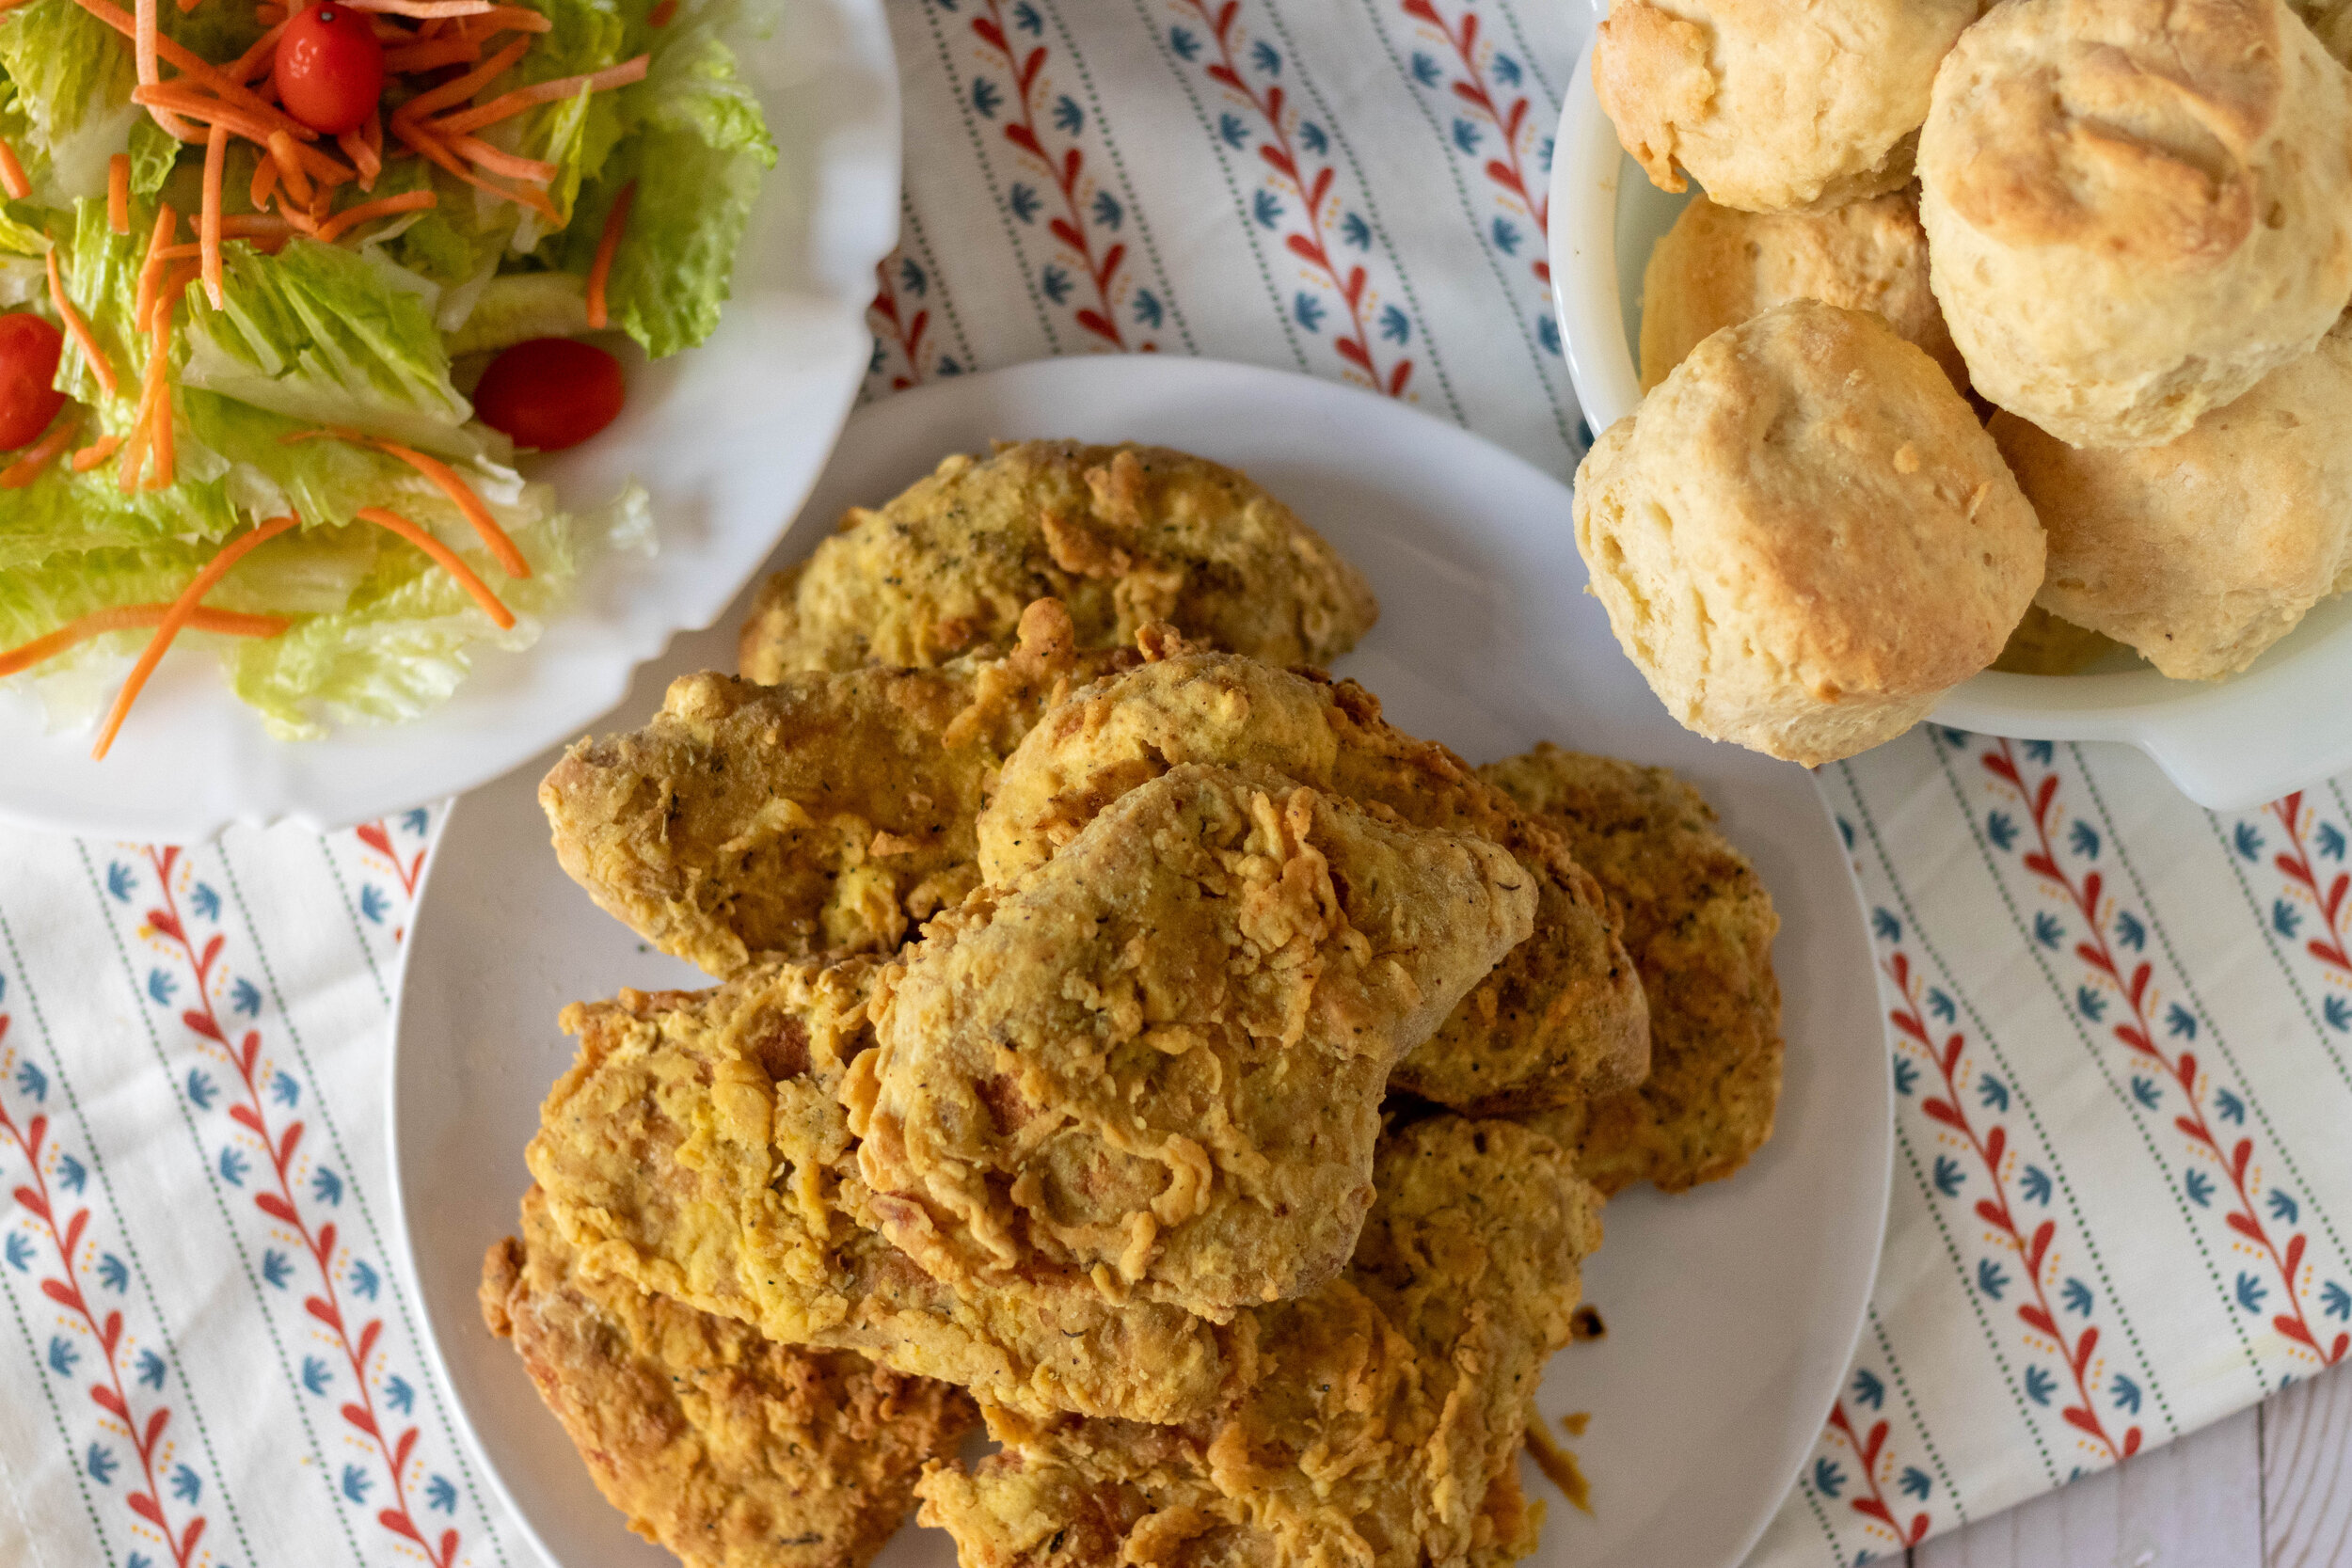
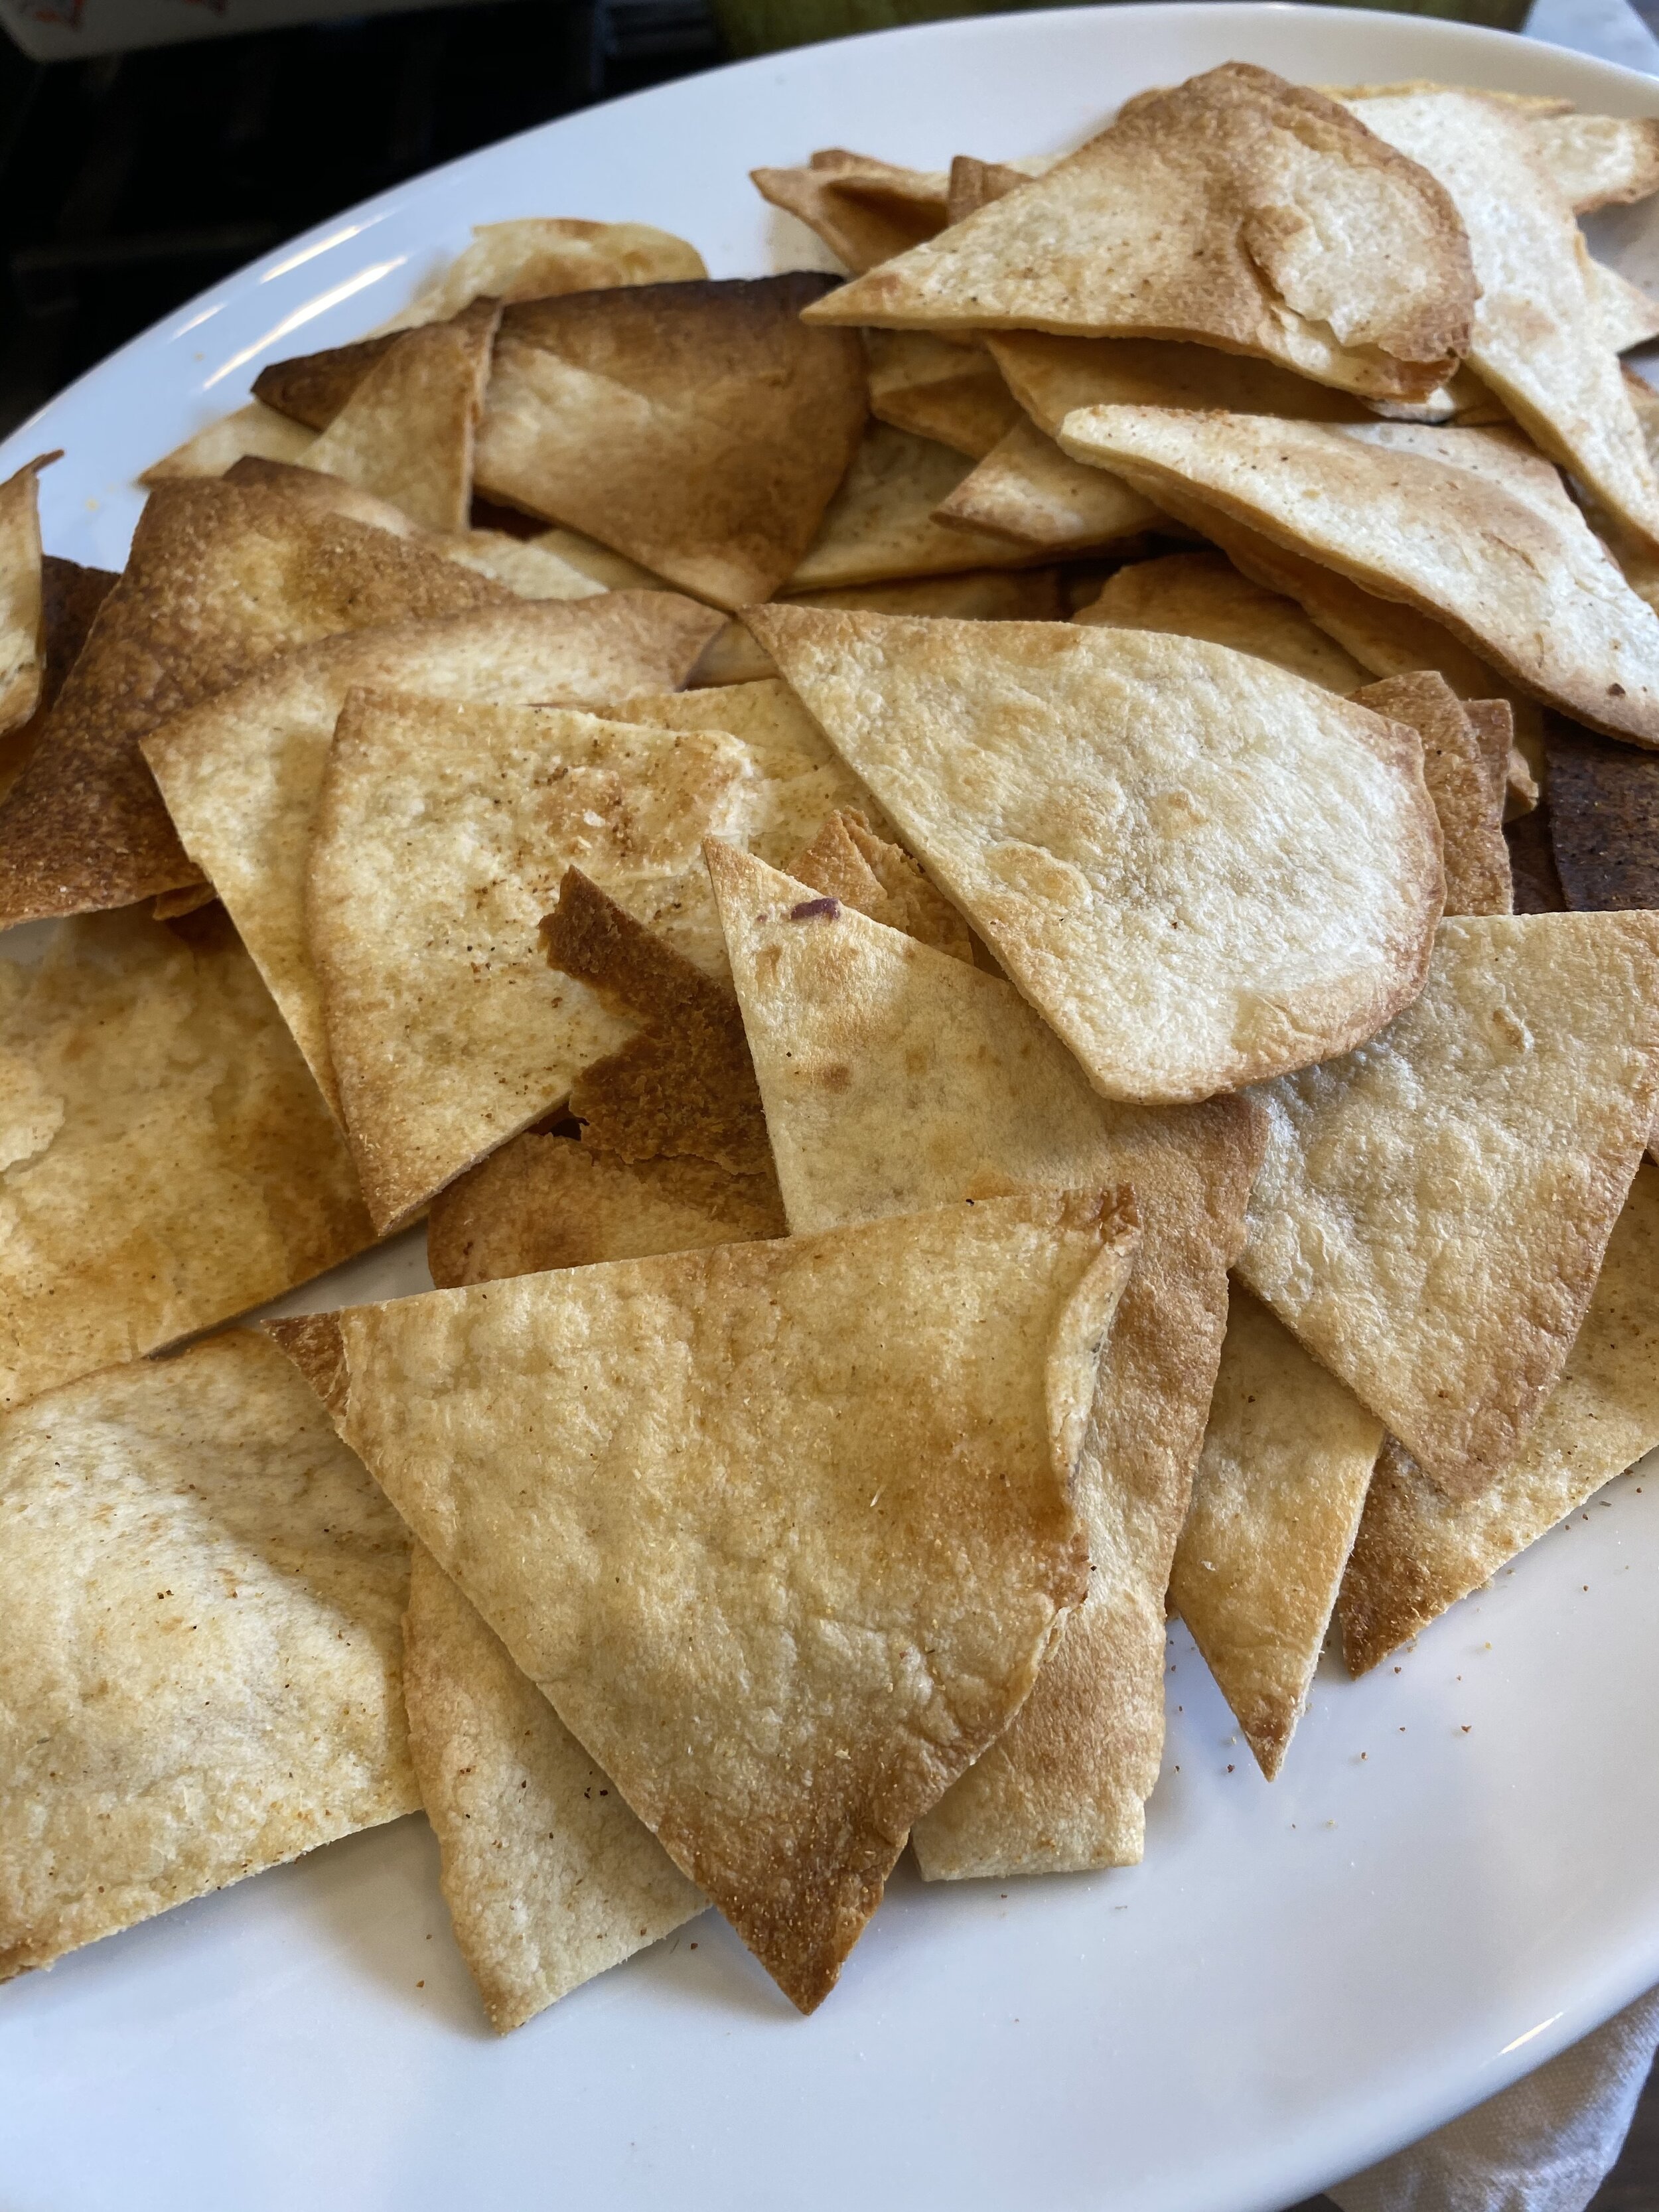
The chips act as a crouton crunch without adding croutons!!! I imagine you could also toast up some pita bread as well If you didn’t want to sue tortillas, and if you are gluten free you could use corn tortillas!

I served these nacho on a big ol plate and let everyone dig in. I think this recipe would work great for a BBQ or gathering, game night or movie night. It’s light but filling and pretty fun to scoop up that salad and crispy soy curls on a garlicy chip.

This might be how we eat caesar salad in our house for the foreseeable future!

INGREDIENTS:

  • 2 heads romaine lettuce

  • 1/3 cups shredded carrots

  • 1 package flour tortillas (you could use corn if GF)

  • A few teaspoons garlic powder or garlic salt

  • spray oil

  • A few tablespoons vegan parmesan cheee

For The Soy Curls:

  • 1 (8 oz) bag Butler soy curls

  • 3 cups boiling water

  • 1 teaspoon Vegetable or Chickenless Better than Bouillon

  • 1 cup all purpose flour

  • 2/3 cups tapioca starch

  • 1 teaspoon garlic salt

  • 1 teaspoon onion powder

    ( you could also use the 86eats easy seitan chicken breast, grilled or fried and cut into strips)

Alabama White Sauce Caesar Dressing:

  • 1/2 batch Alabama White Sauce

  • 2 tablespoons apple cider vinegar

  • 1 teaspoon minced garlic

  • 2 teaspoons lemon juice

IMG_8271.jpg

INSTRUCTIONS:

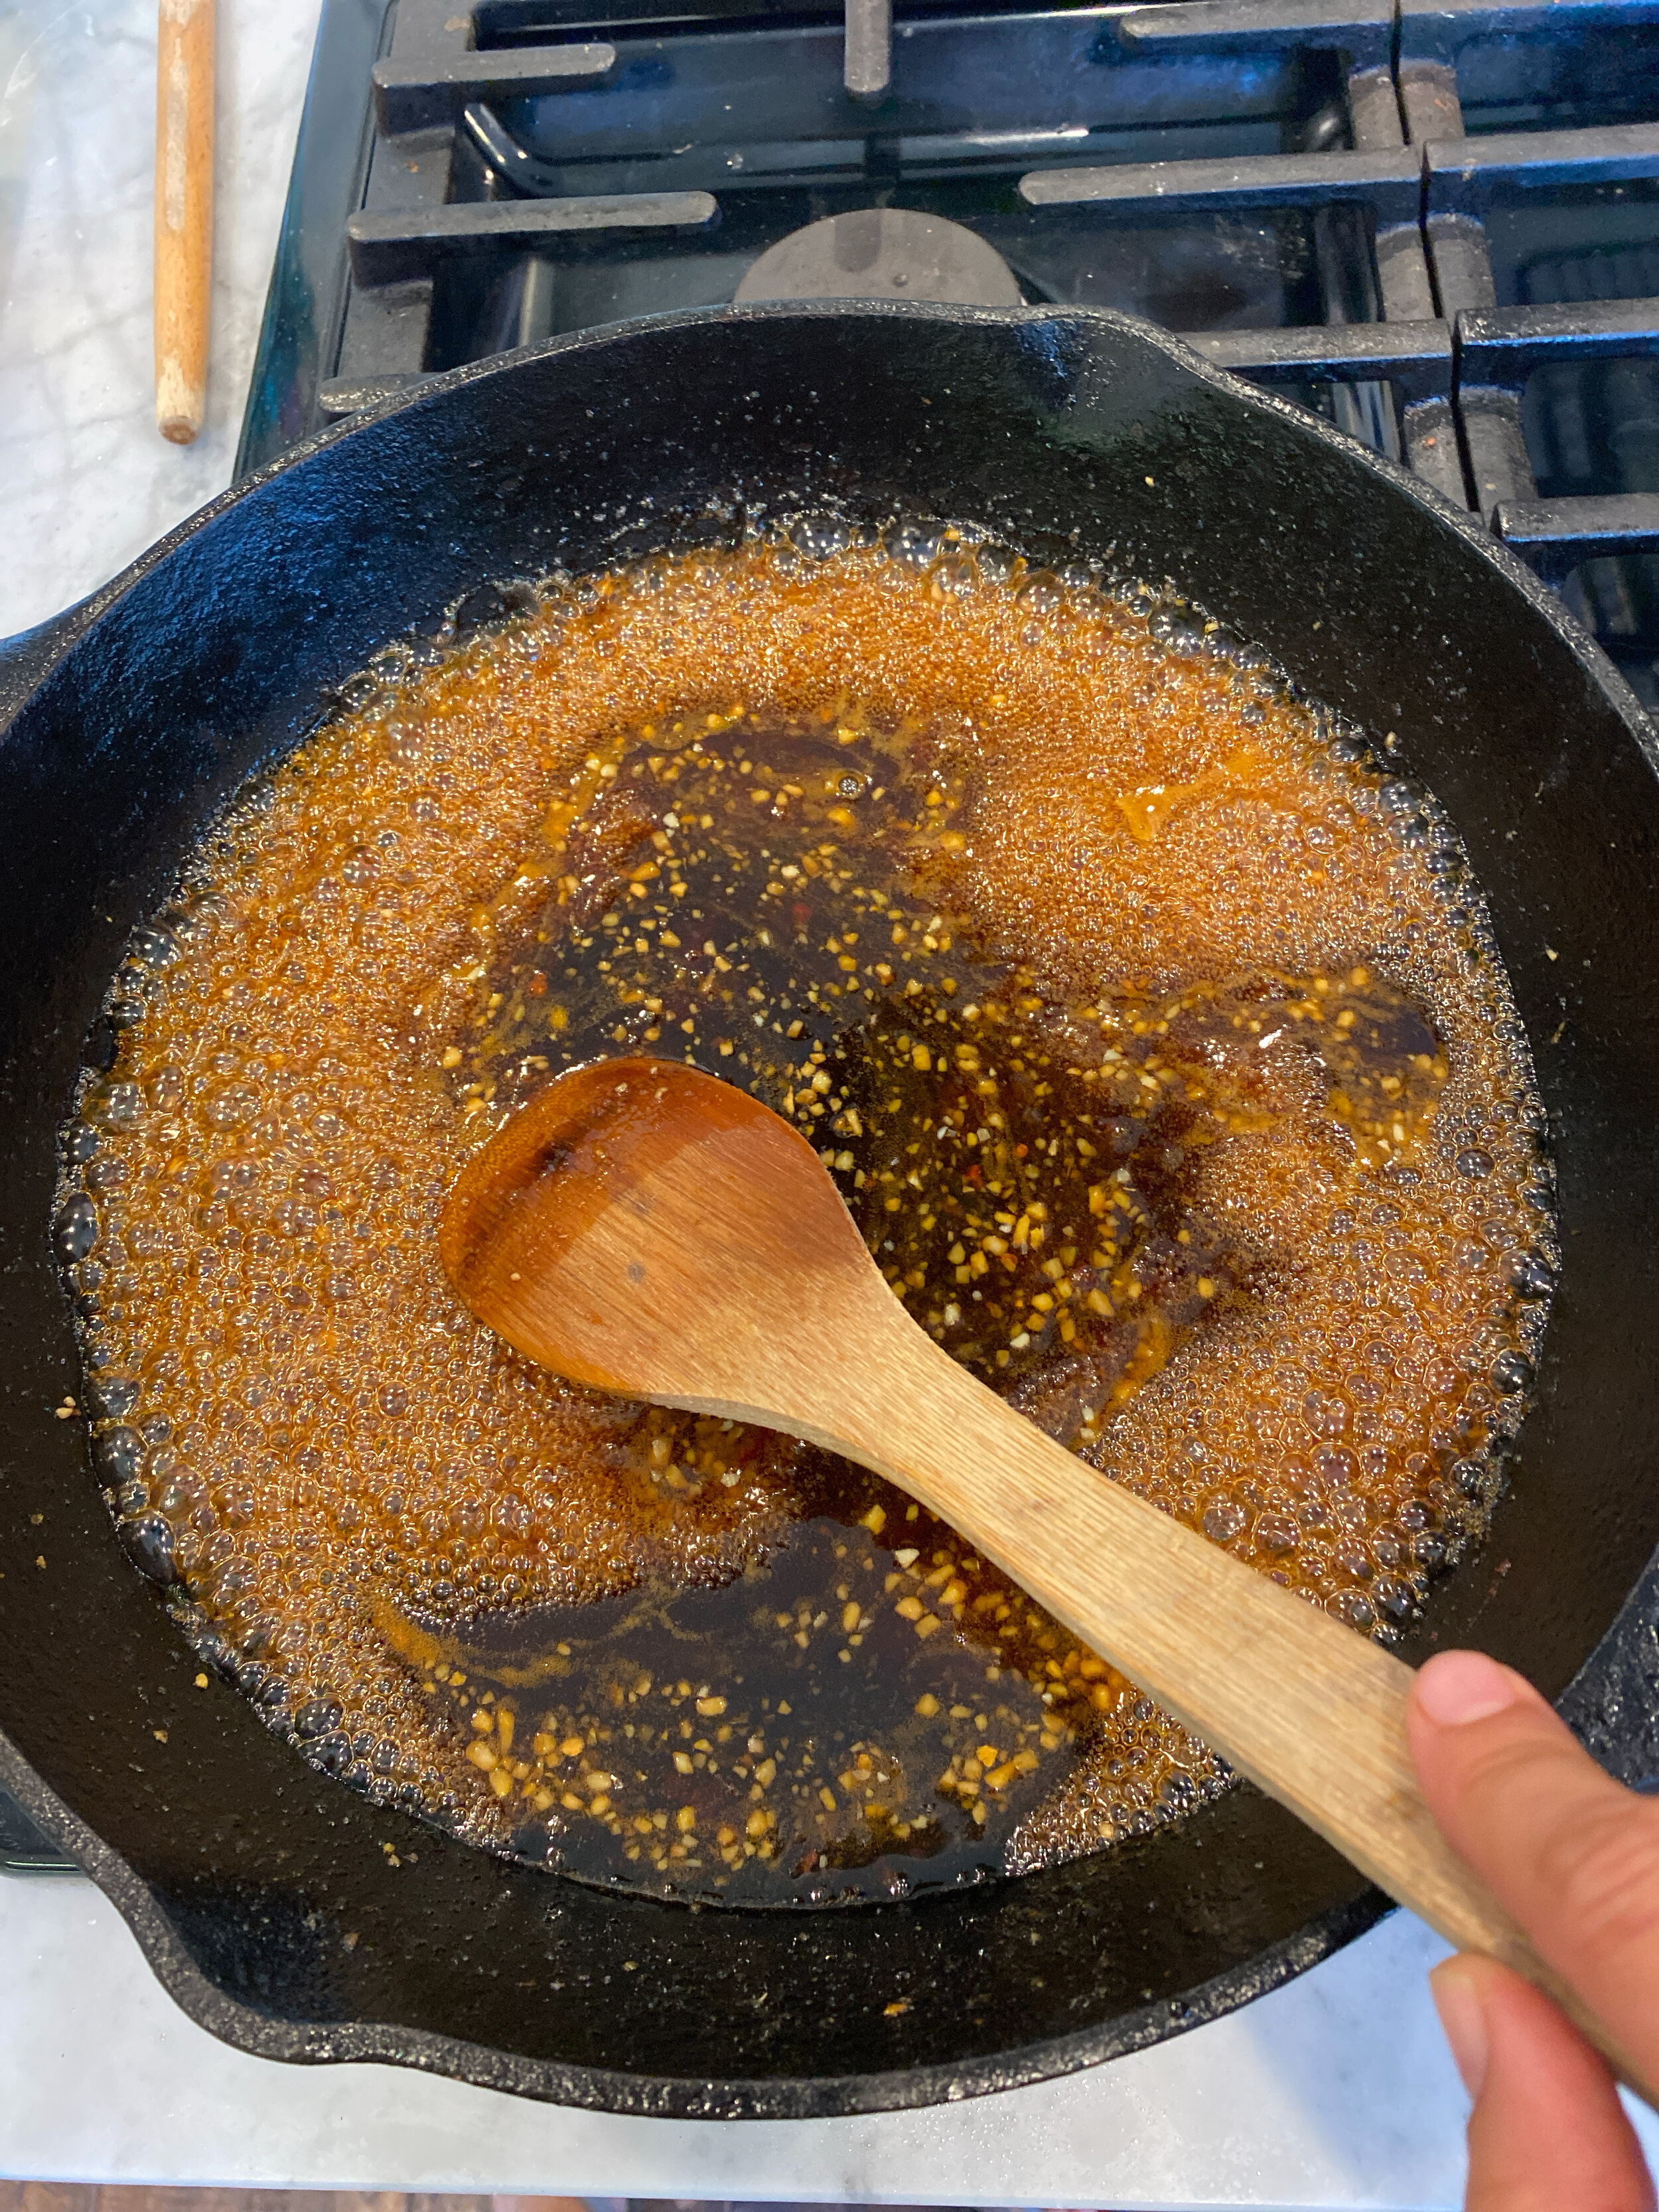
  1. Prepare the Alabama White Sauce according to instructions. Whisk in the remaining dressing ingredients with 1/2 of the sauce. The other half of the Vegan Alabama White Sauce can be used as a dip for veggies, used to make grilled tofu, or even Alabama white sauce tempe tacos.

  2. Cut the entire pack of tortillas into triangle shapes. Arrange them on two baking sheets in a single layer and give them a light mis of oil and good shake with some garlic salt or powder. Bake them at 350 degrees until they begin to brown and get crispy. (about 10 minutes but keep an eye on them.) Remove from oven and allow to cool. Set aside.

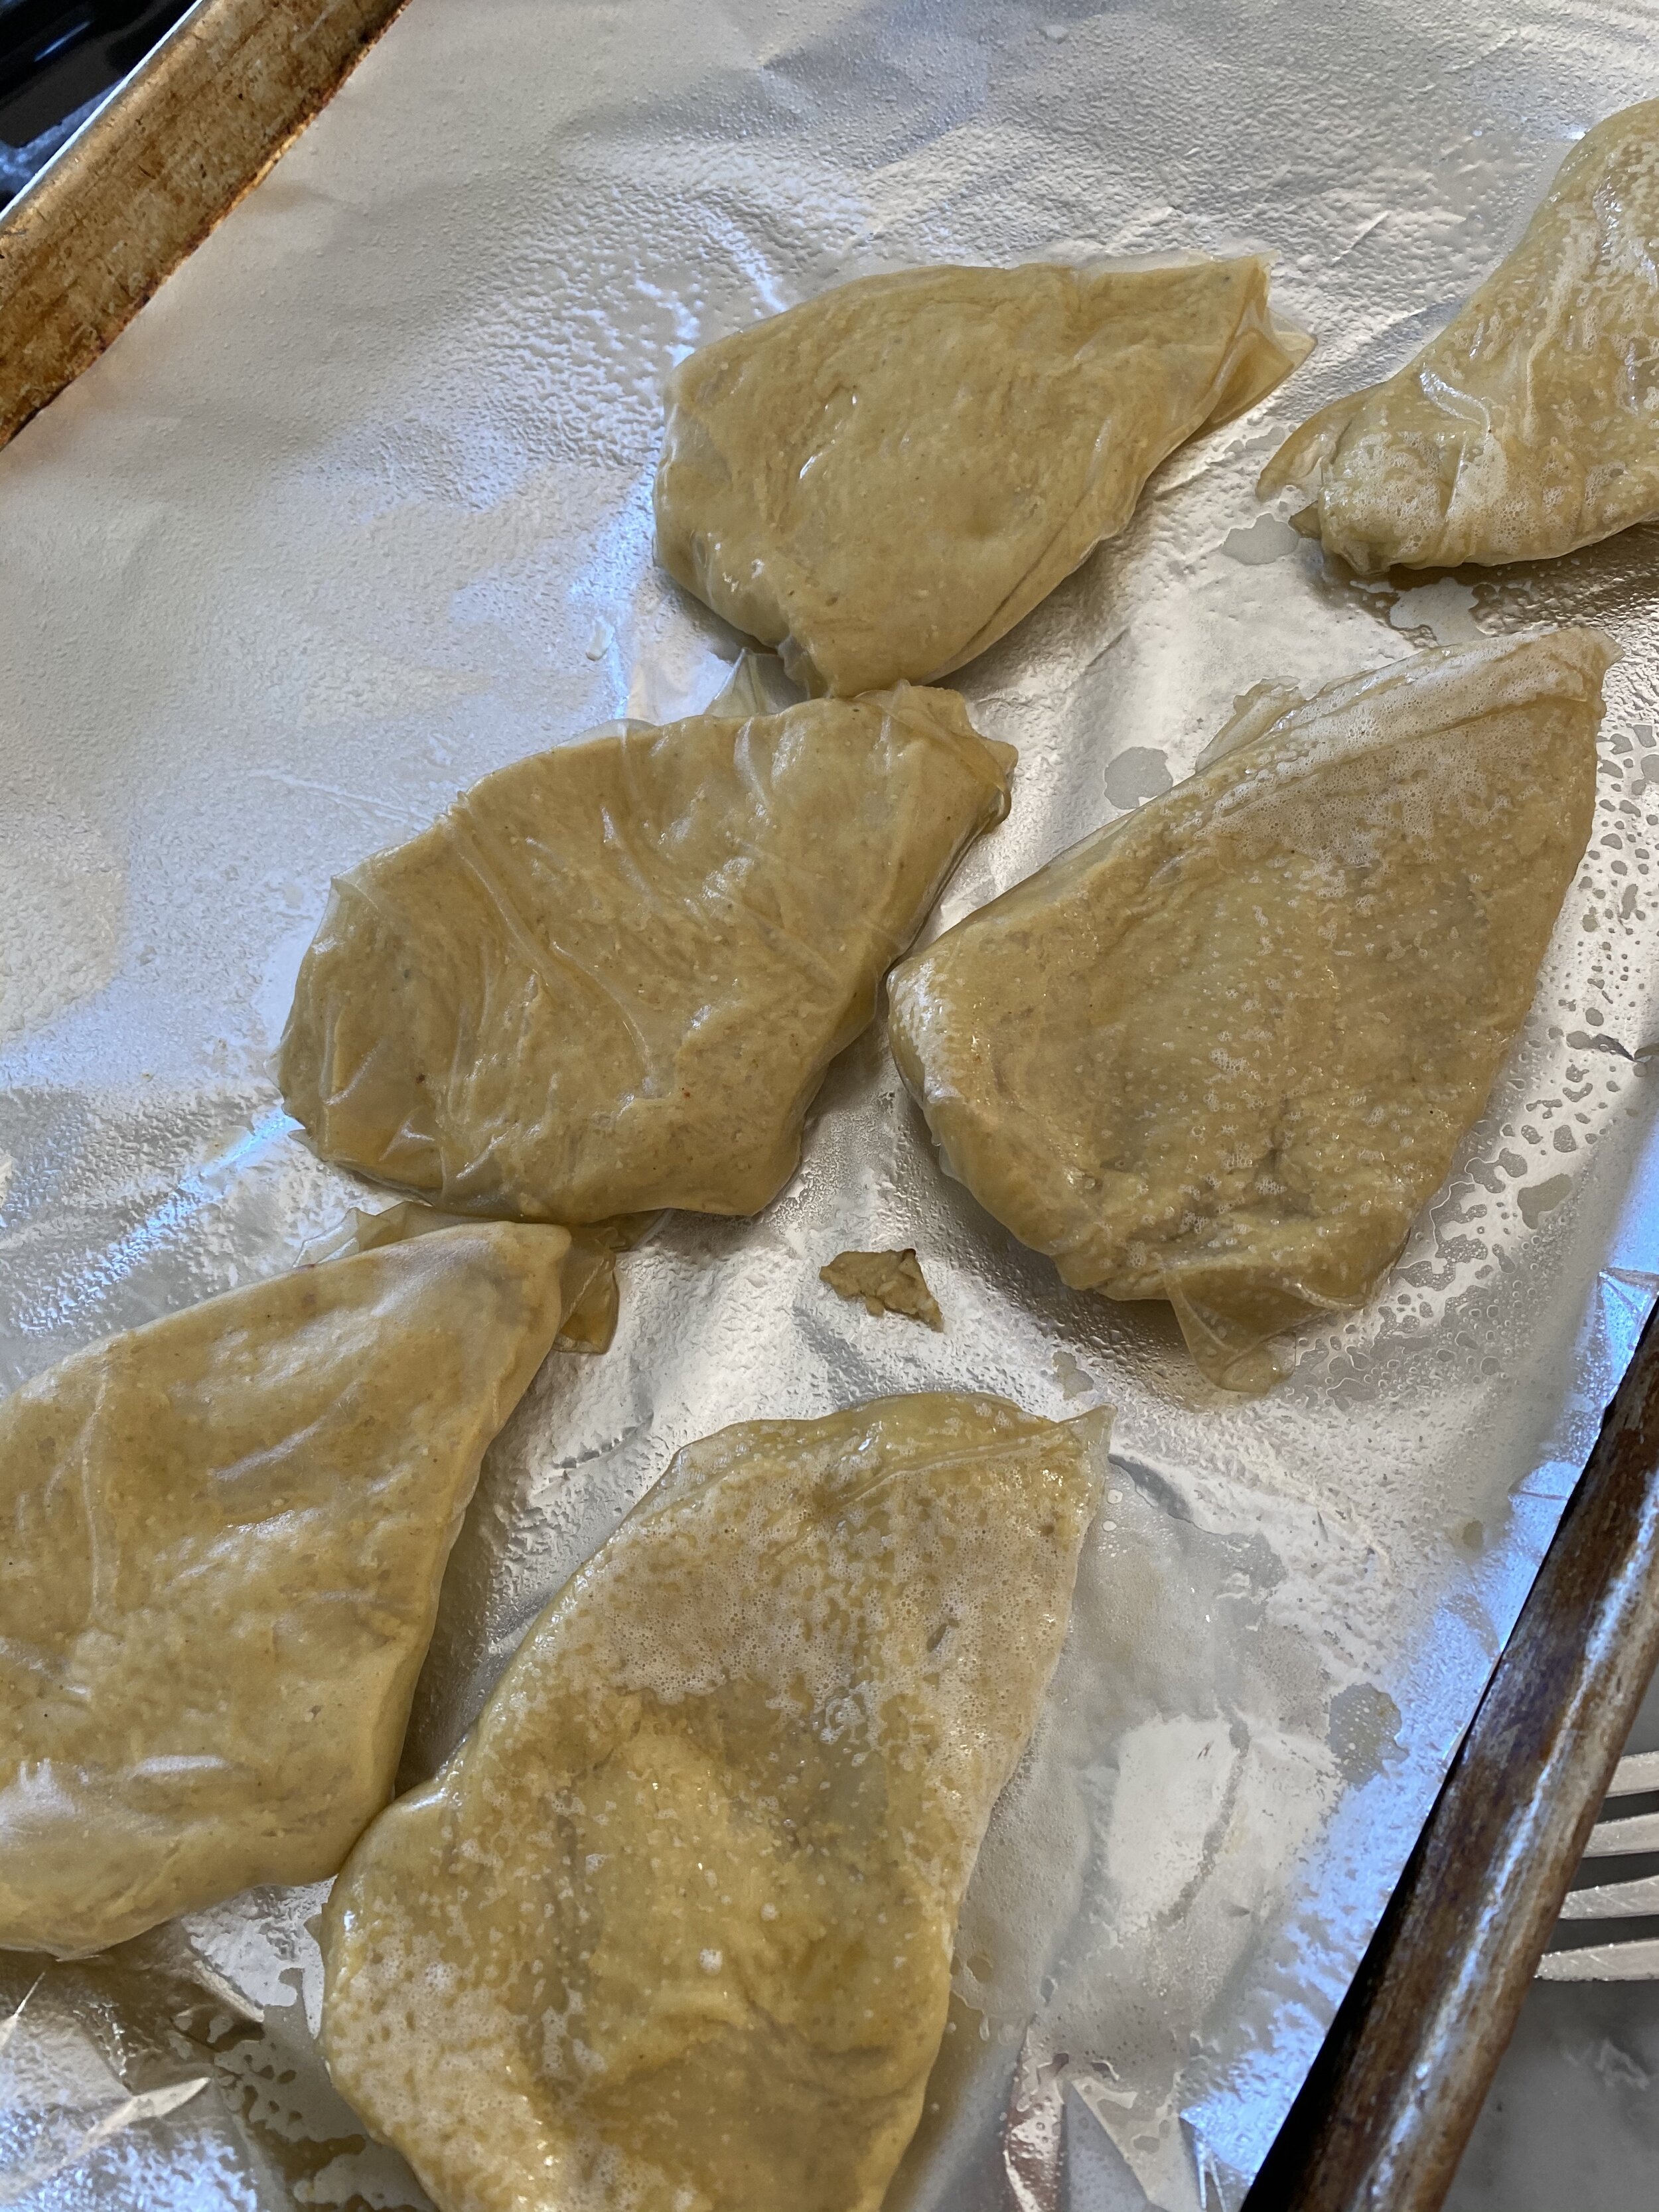
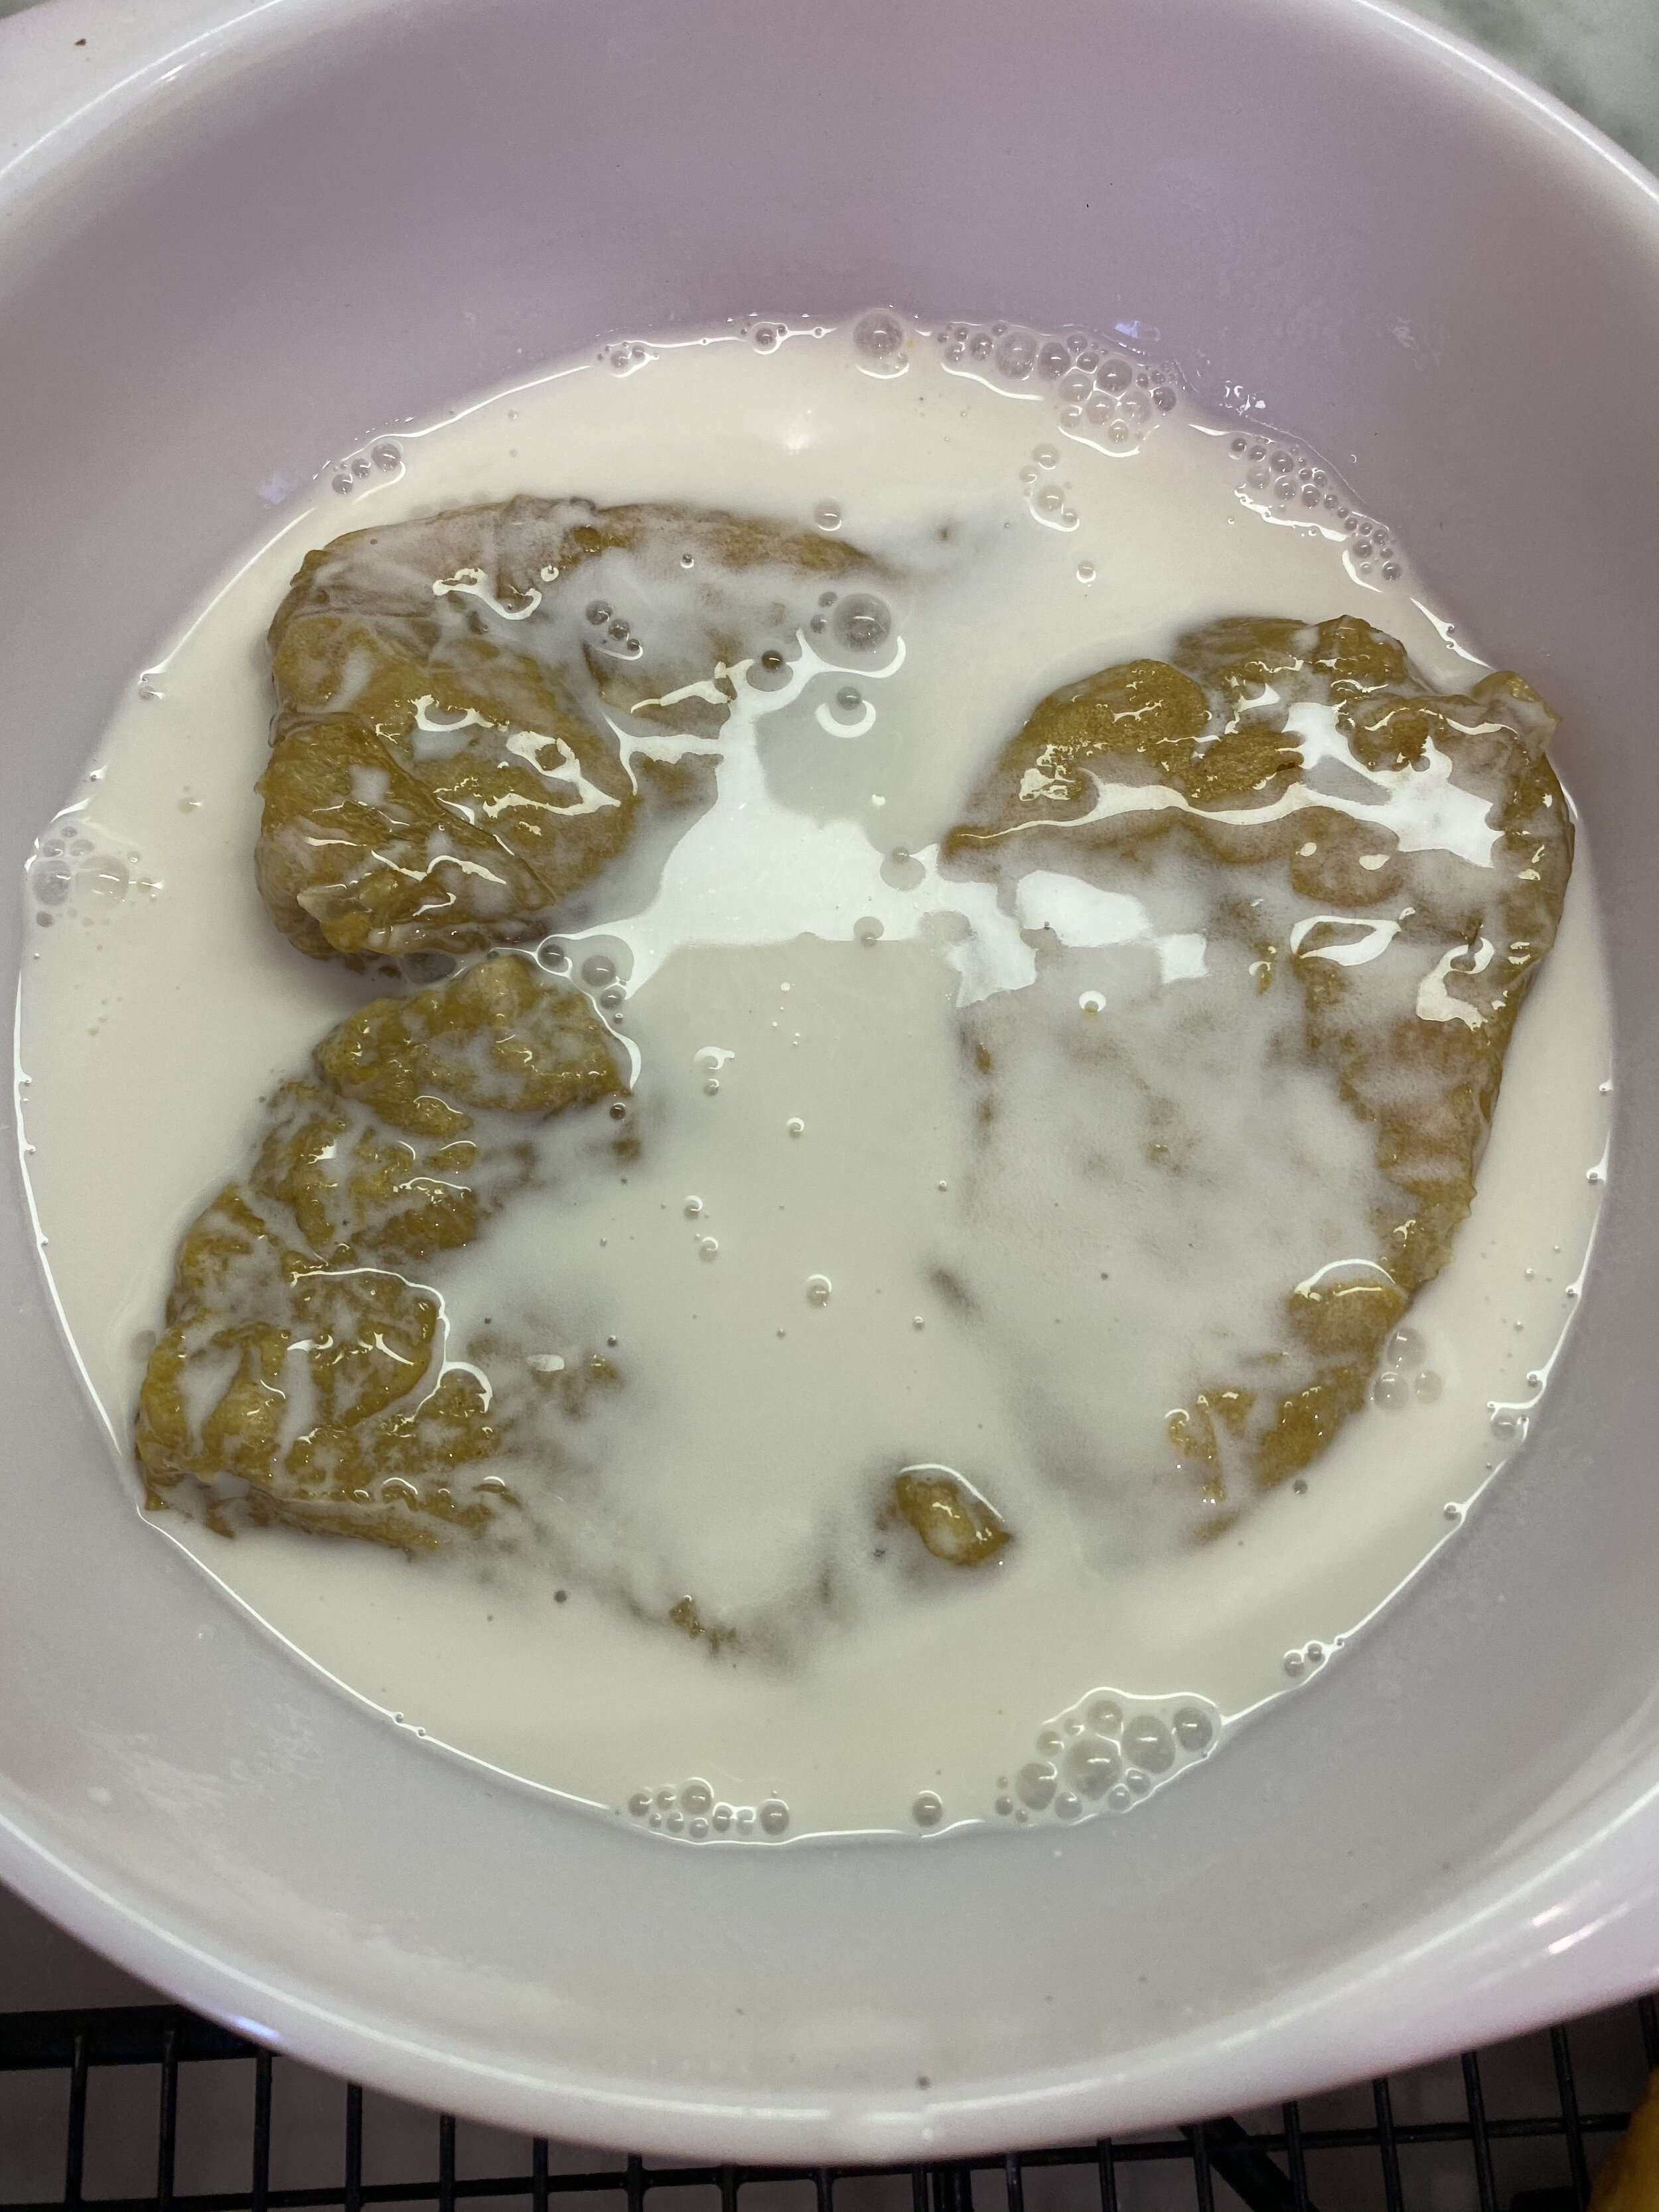
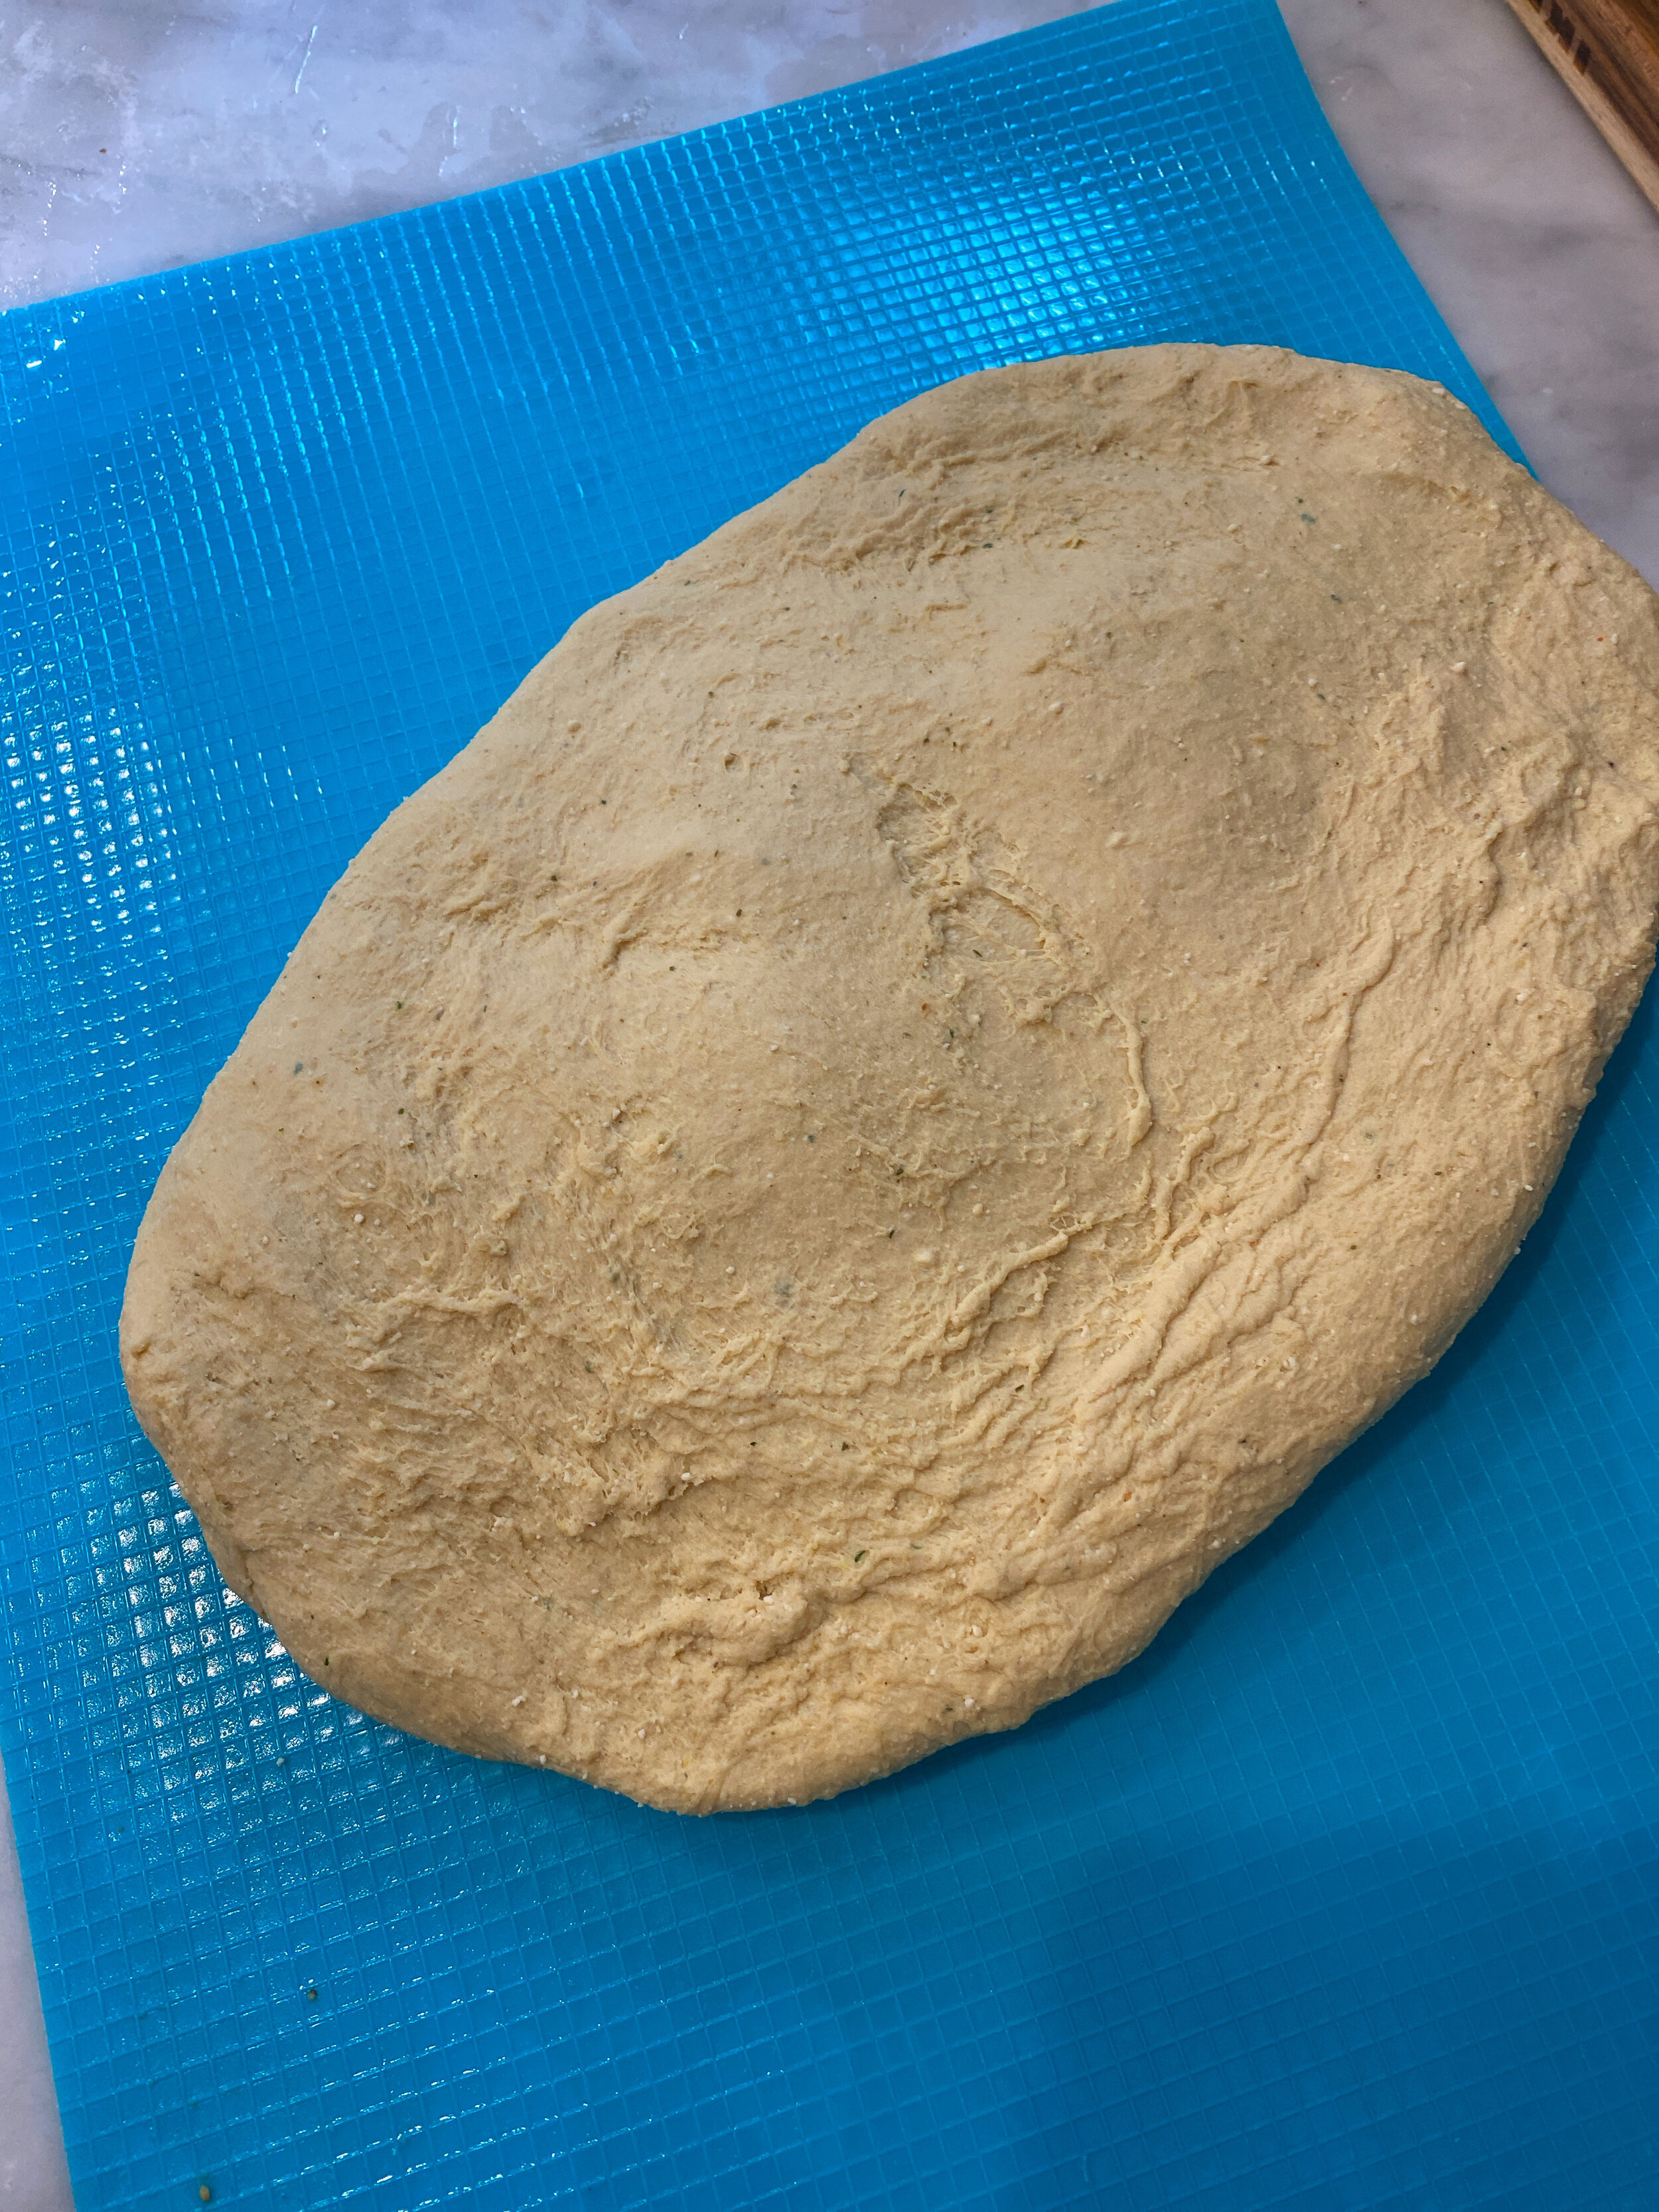
  3. Pour hot water along with Better than Bouillon into a large bowl, whisking in the bouillon until it has dissolved. Add the soy curls and let them soak for 10 minutes.

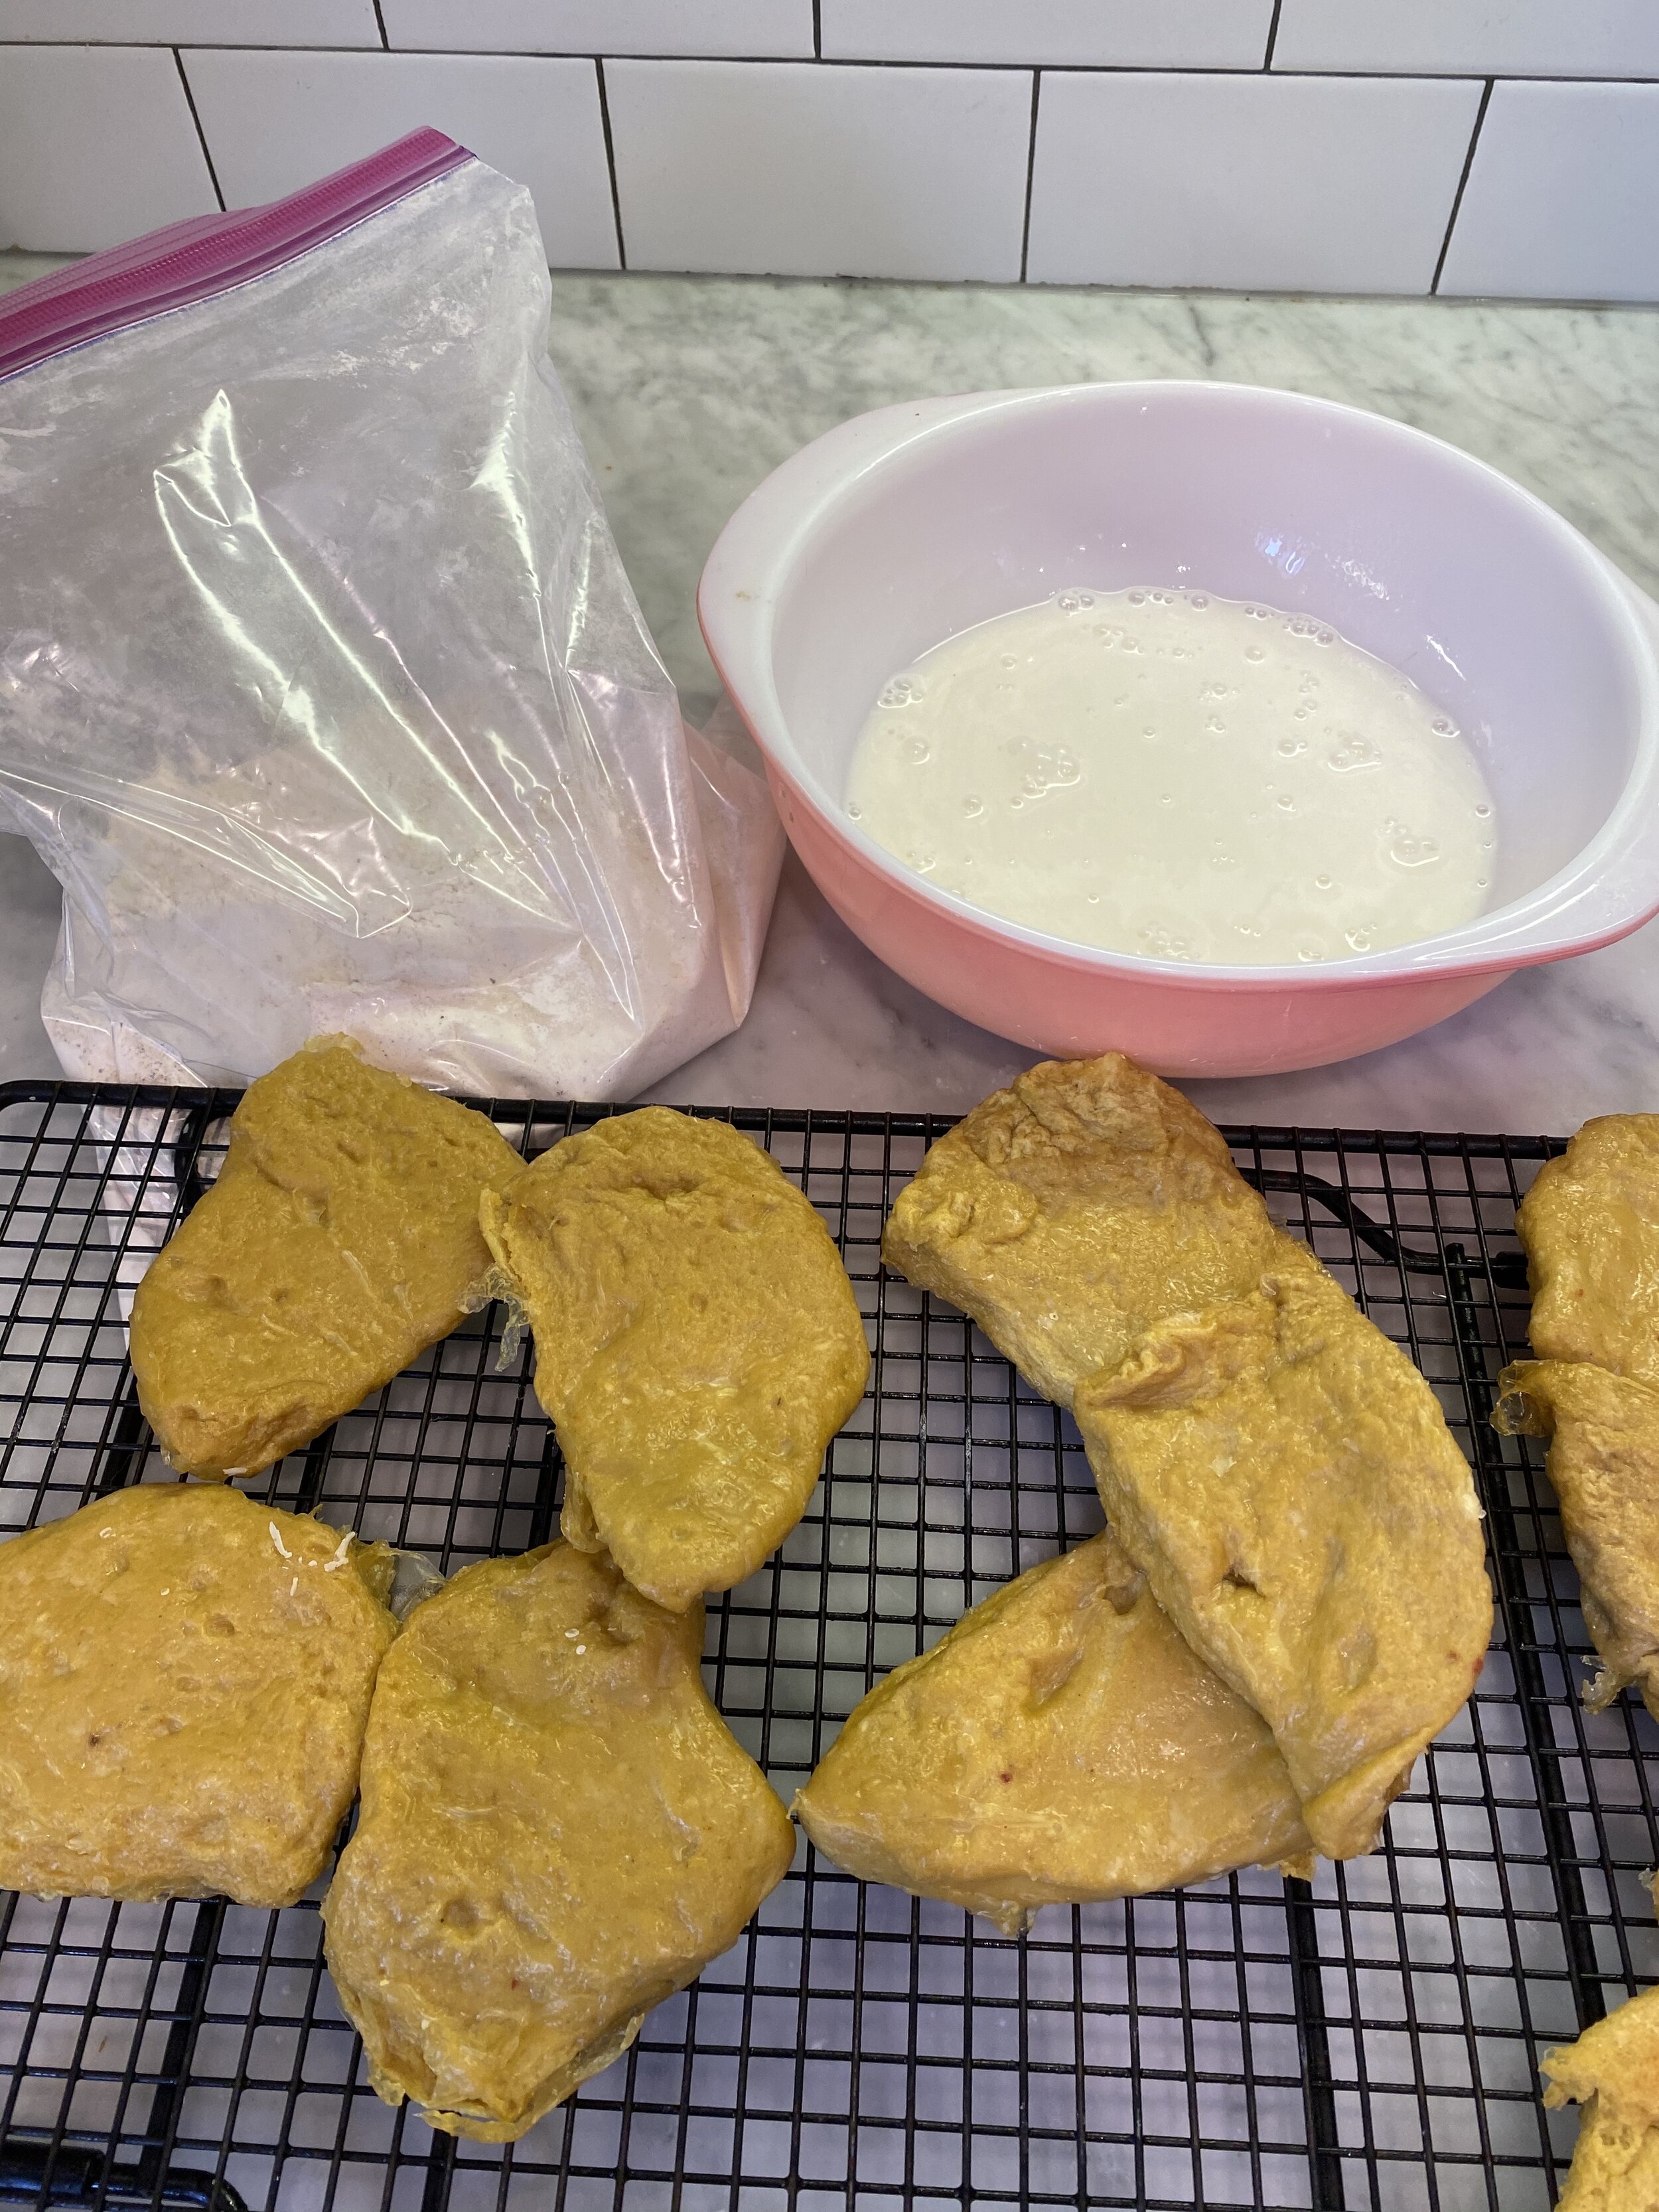
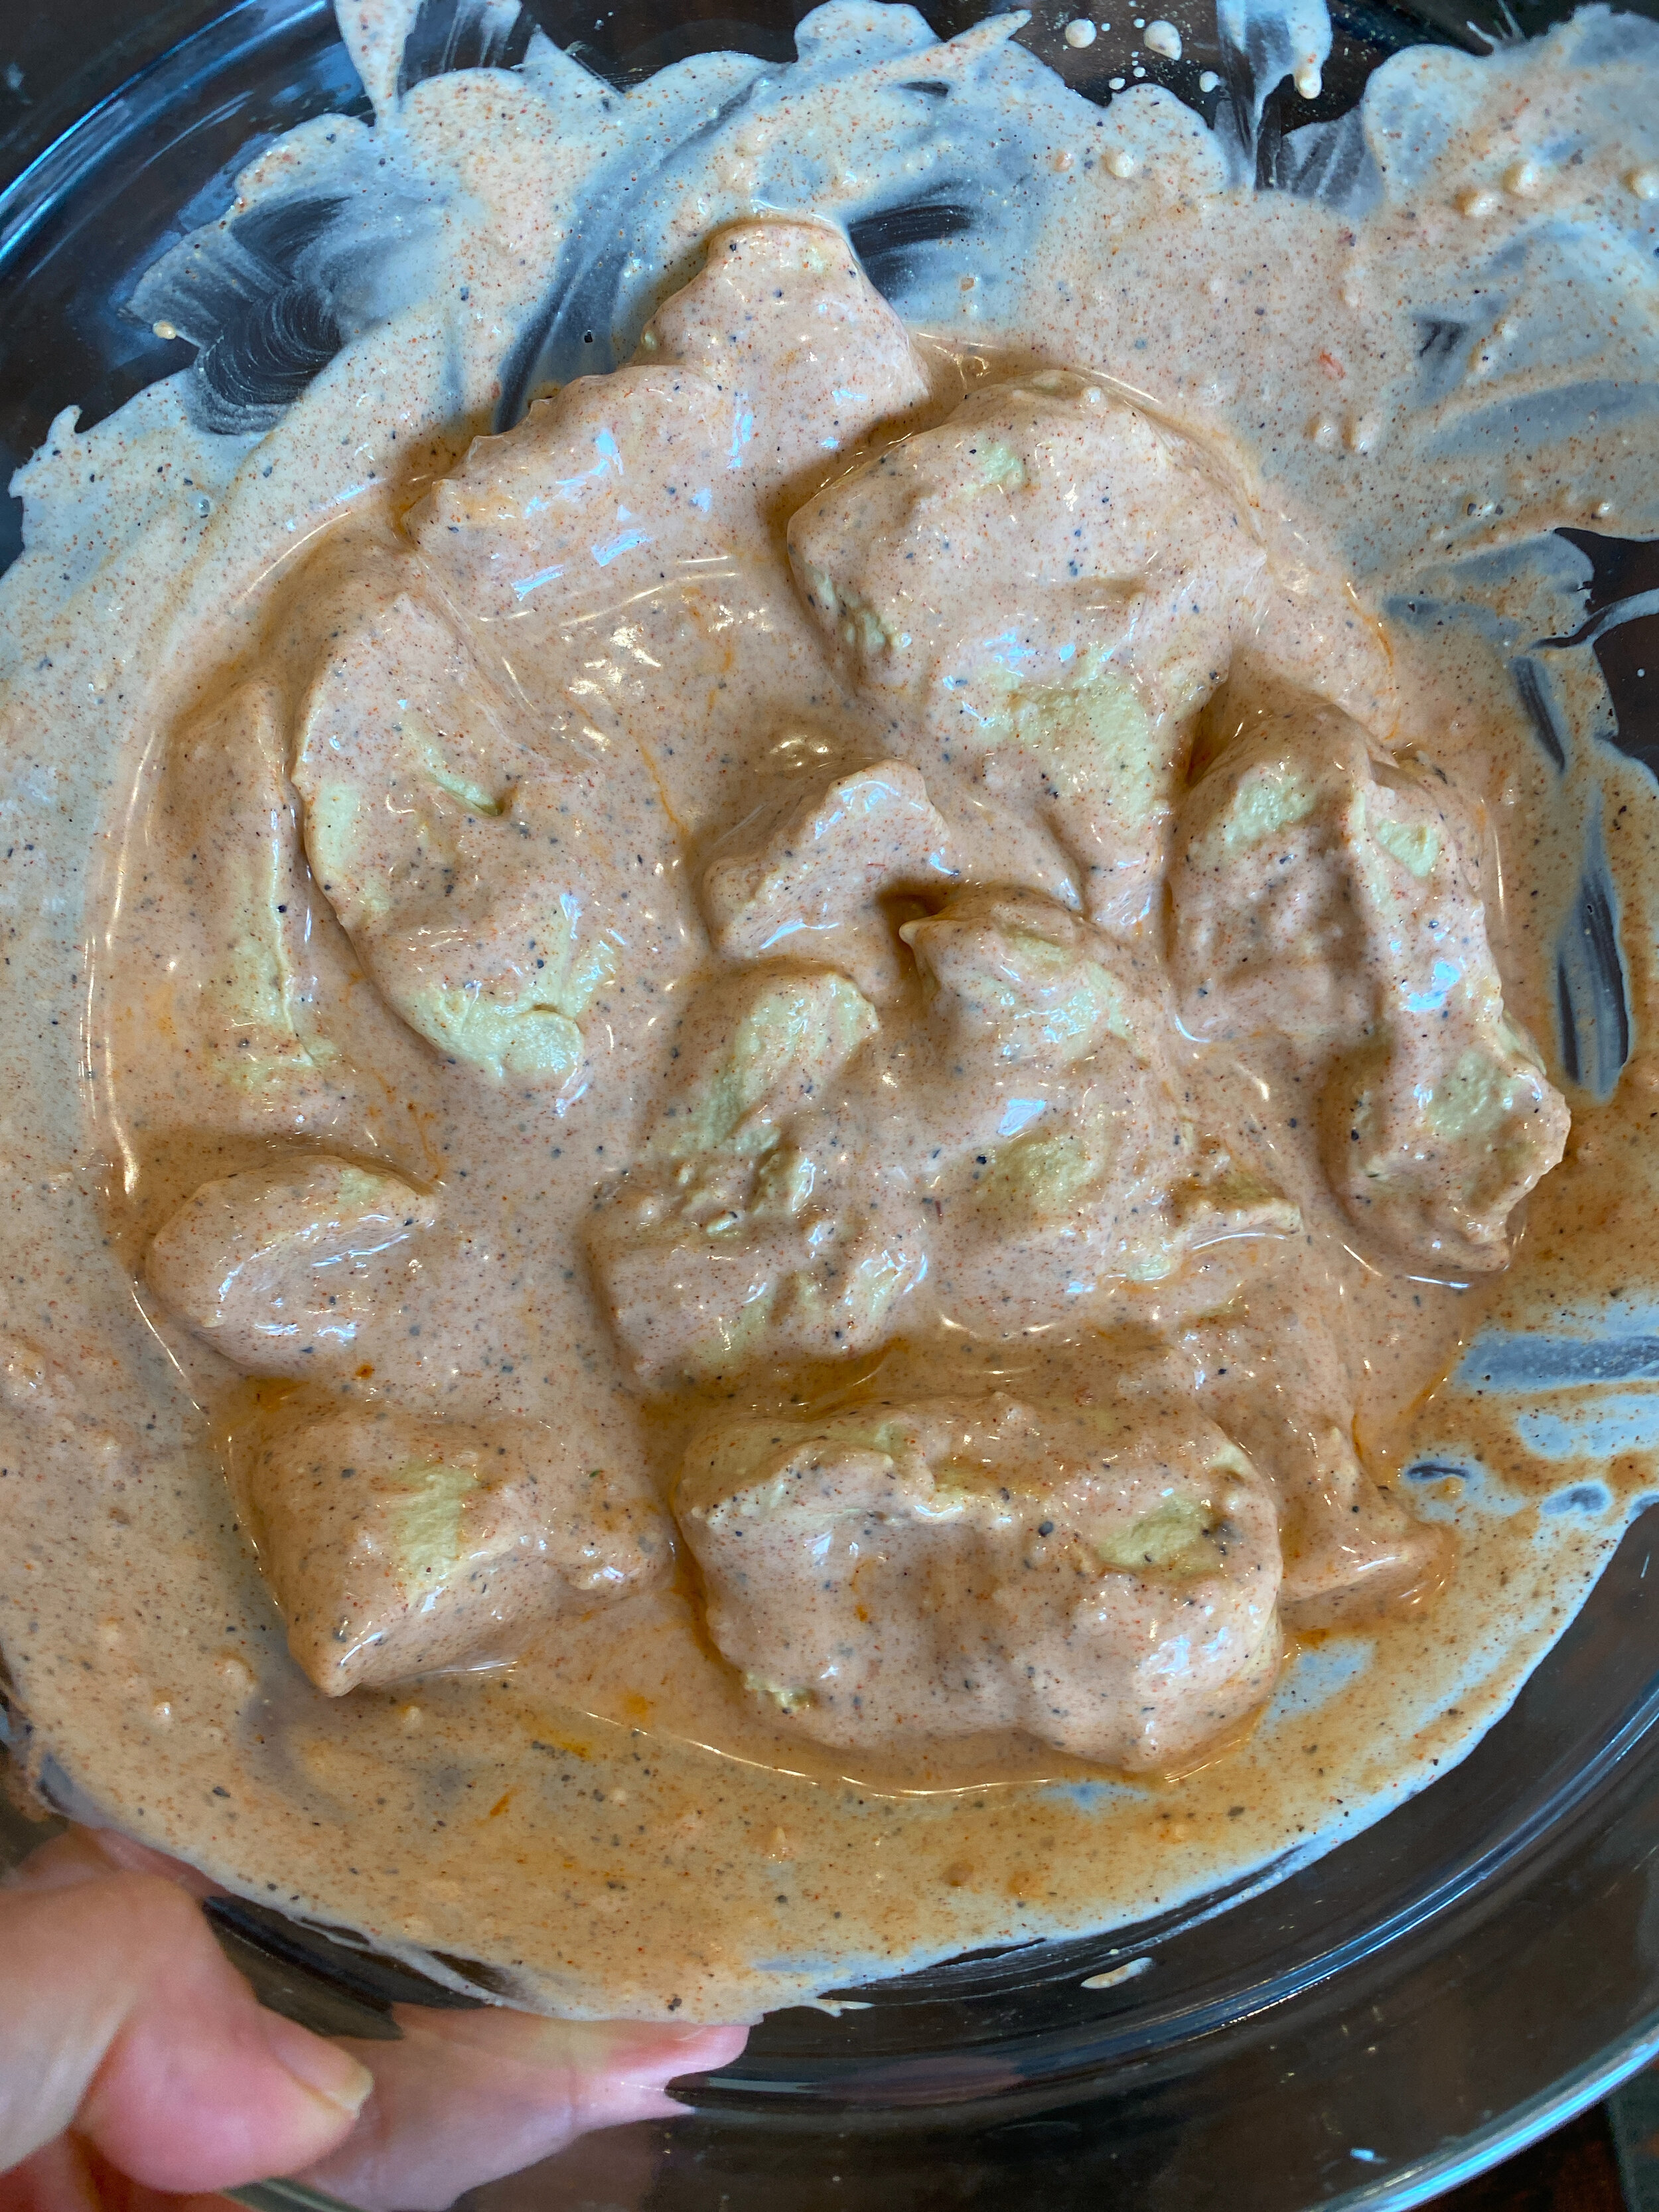
  4. While the curls are soaking, whisk together the flour, starch, and seasoning in a large bowl.

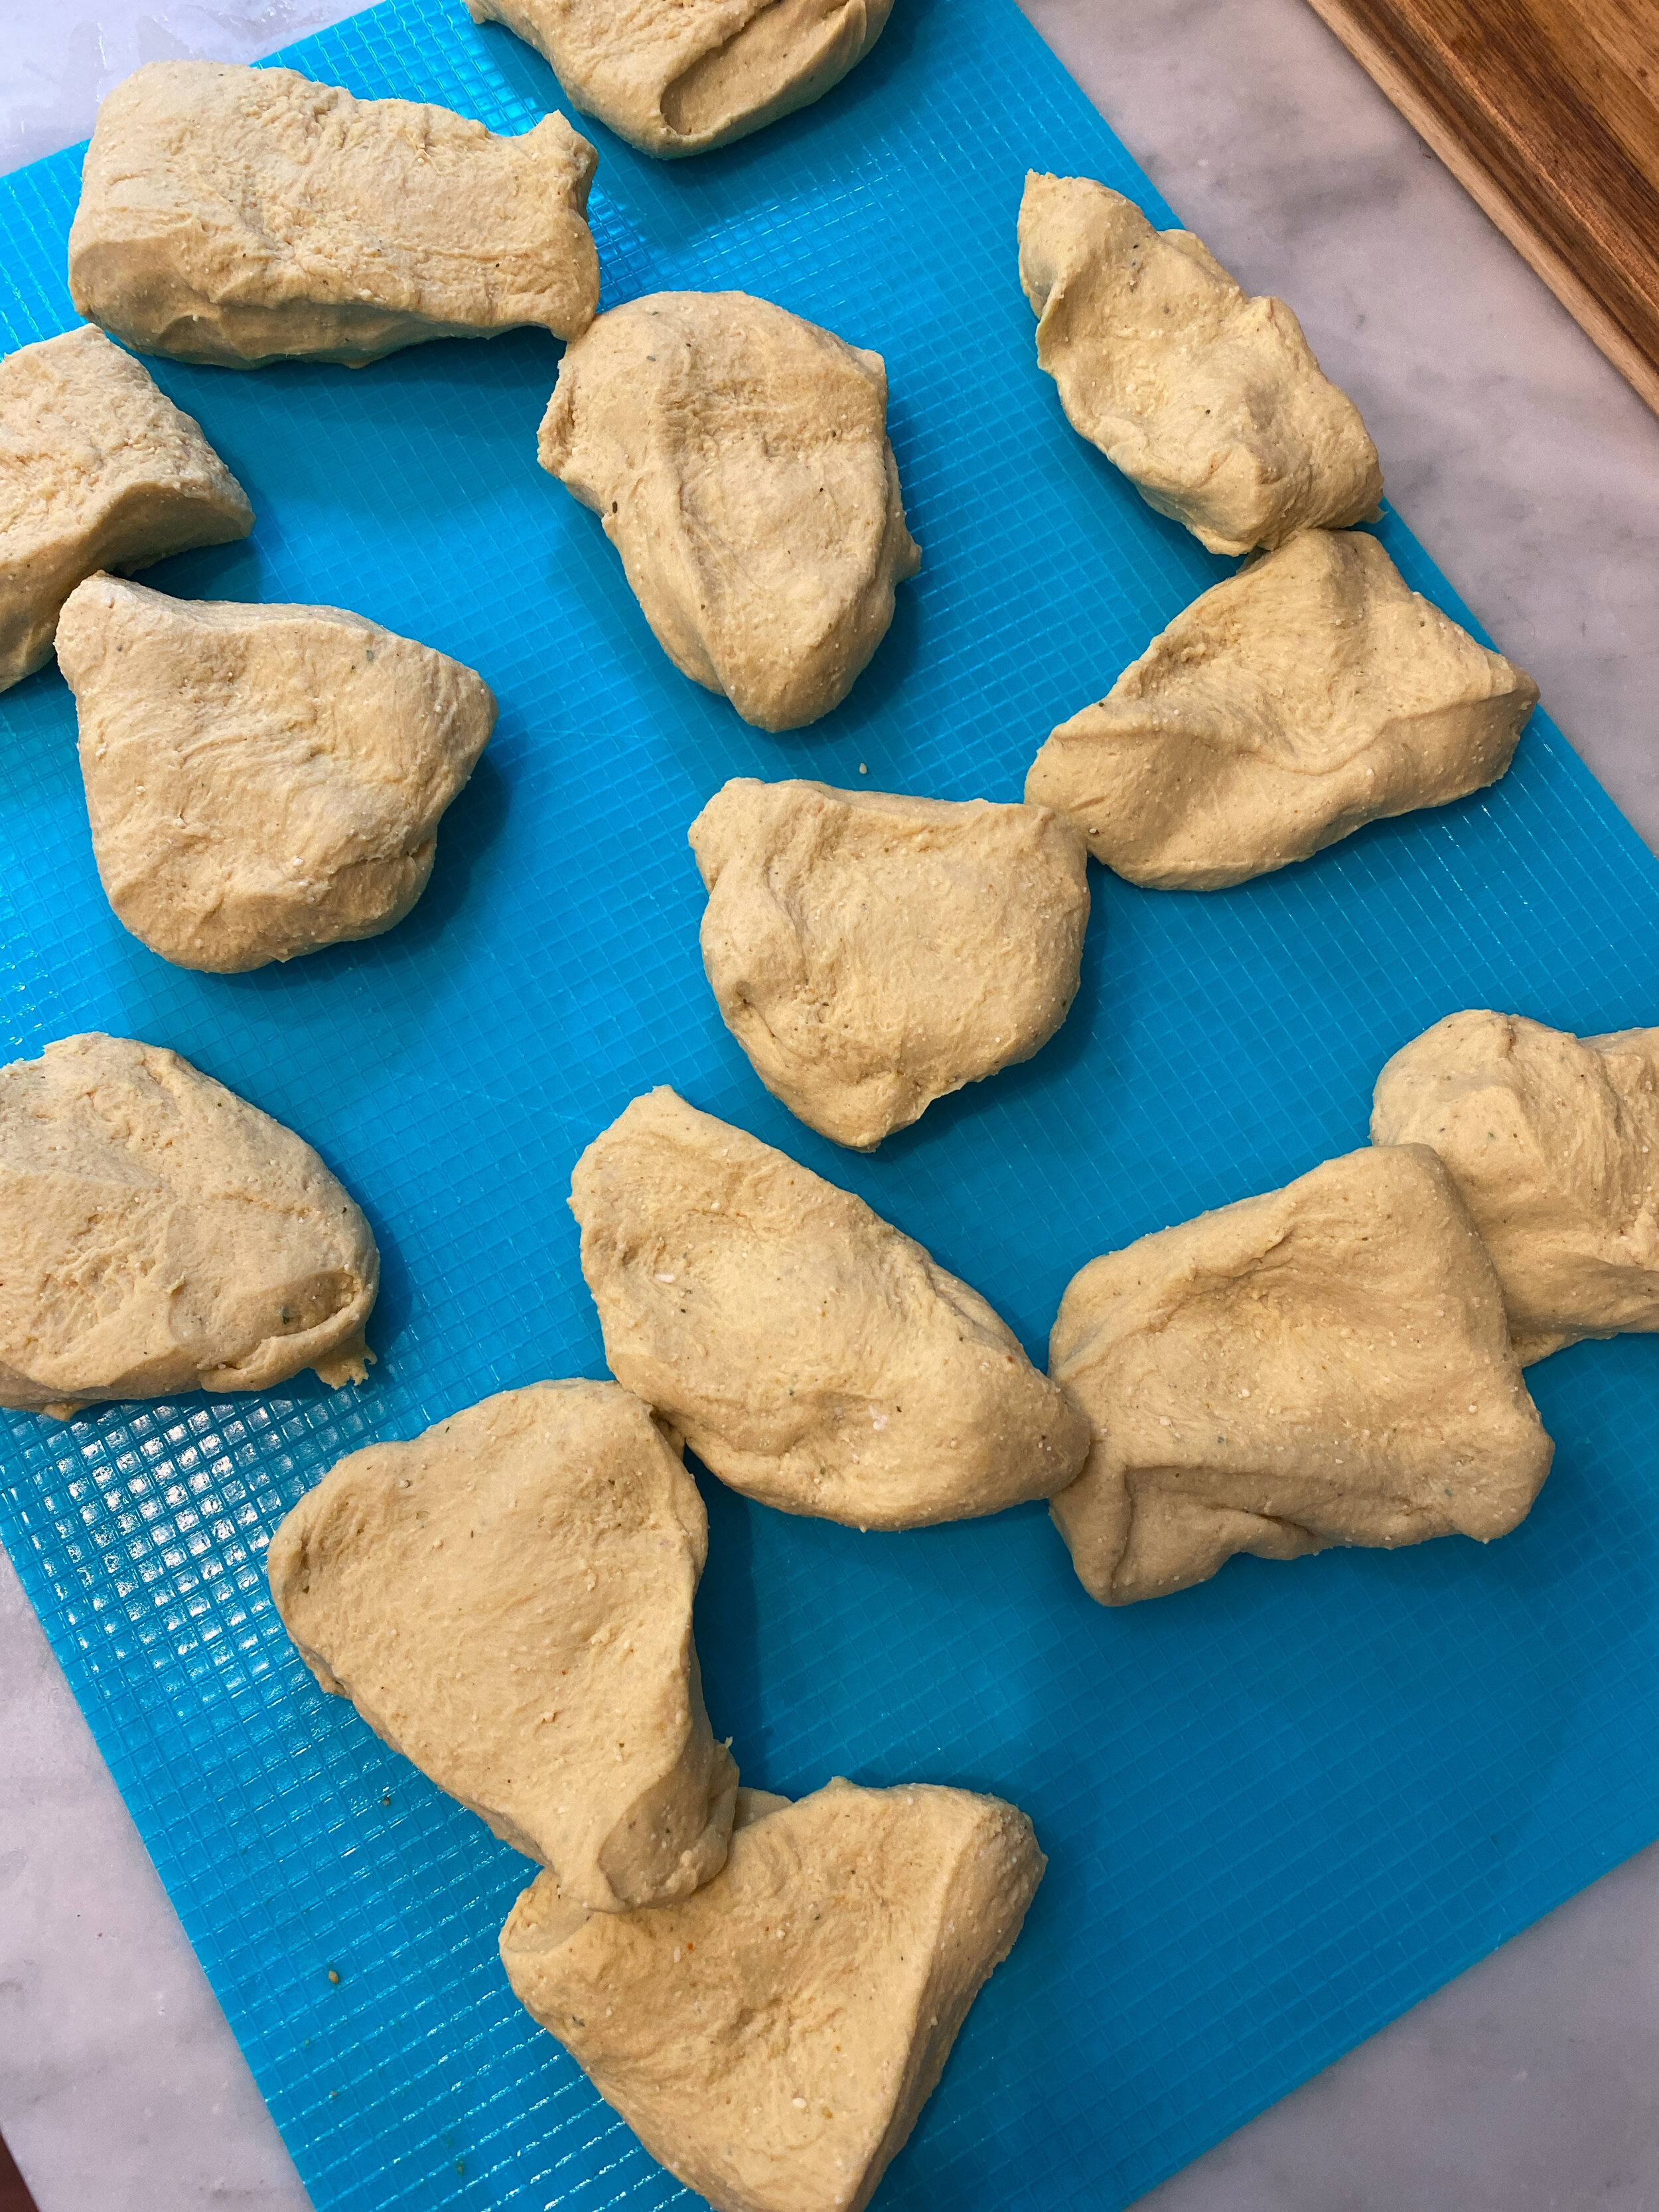
  5. Drain the soy curls in a colander over the sink, return the curls to the bowl they were soaking in.

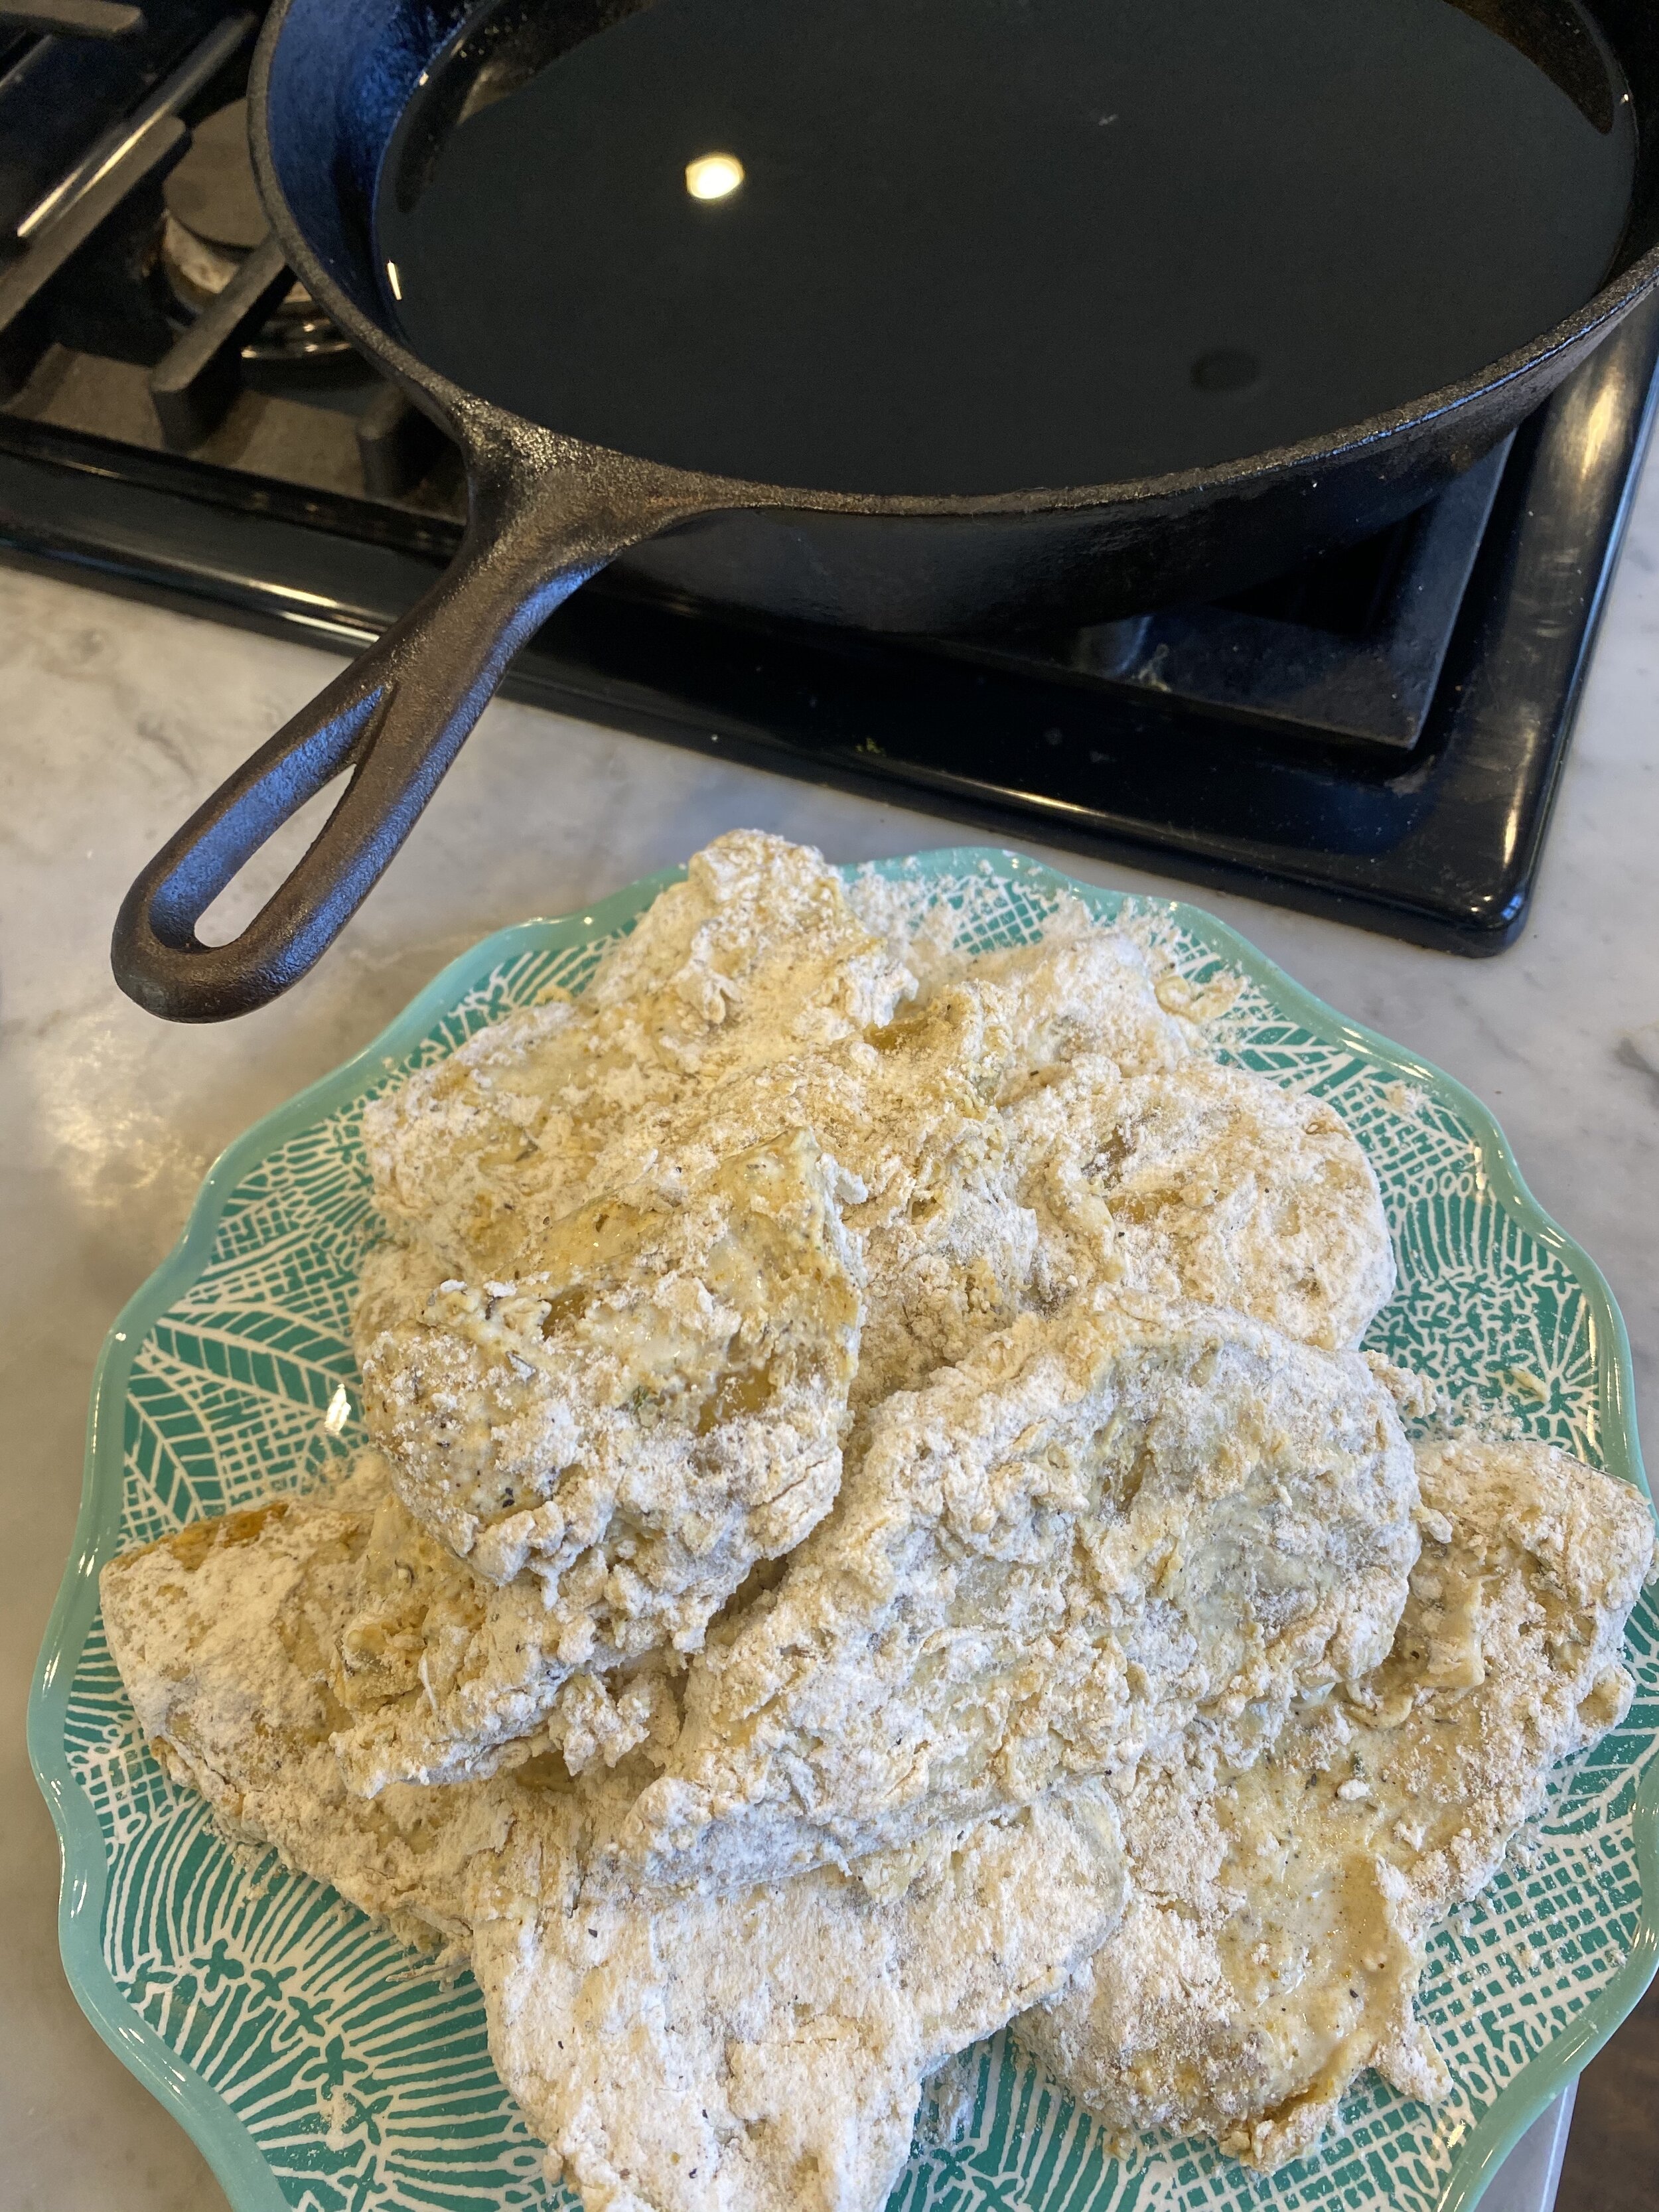
  6. Begin adding a handful of curls at a time to the flour mixture, making sure to fully coat the curls. Place coated curls on a baking sheet pan, and repeat with remaining curls.

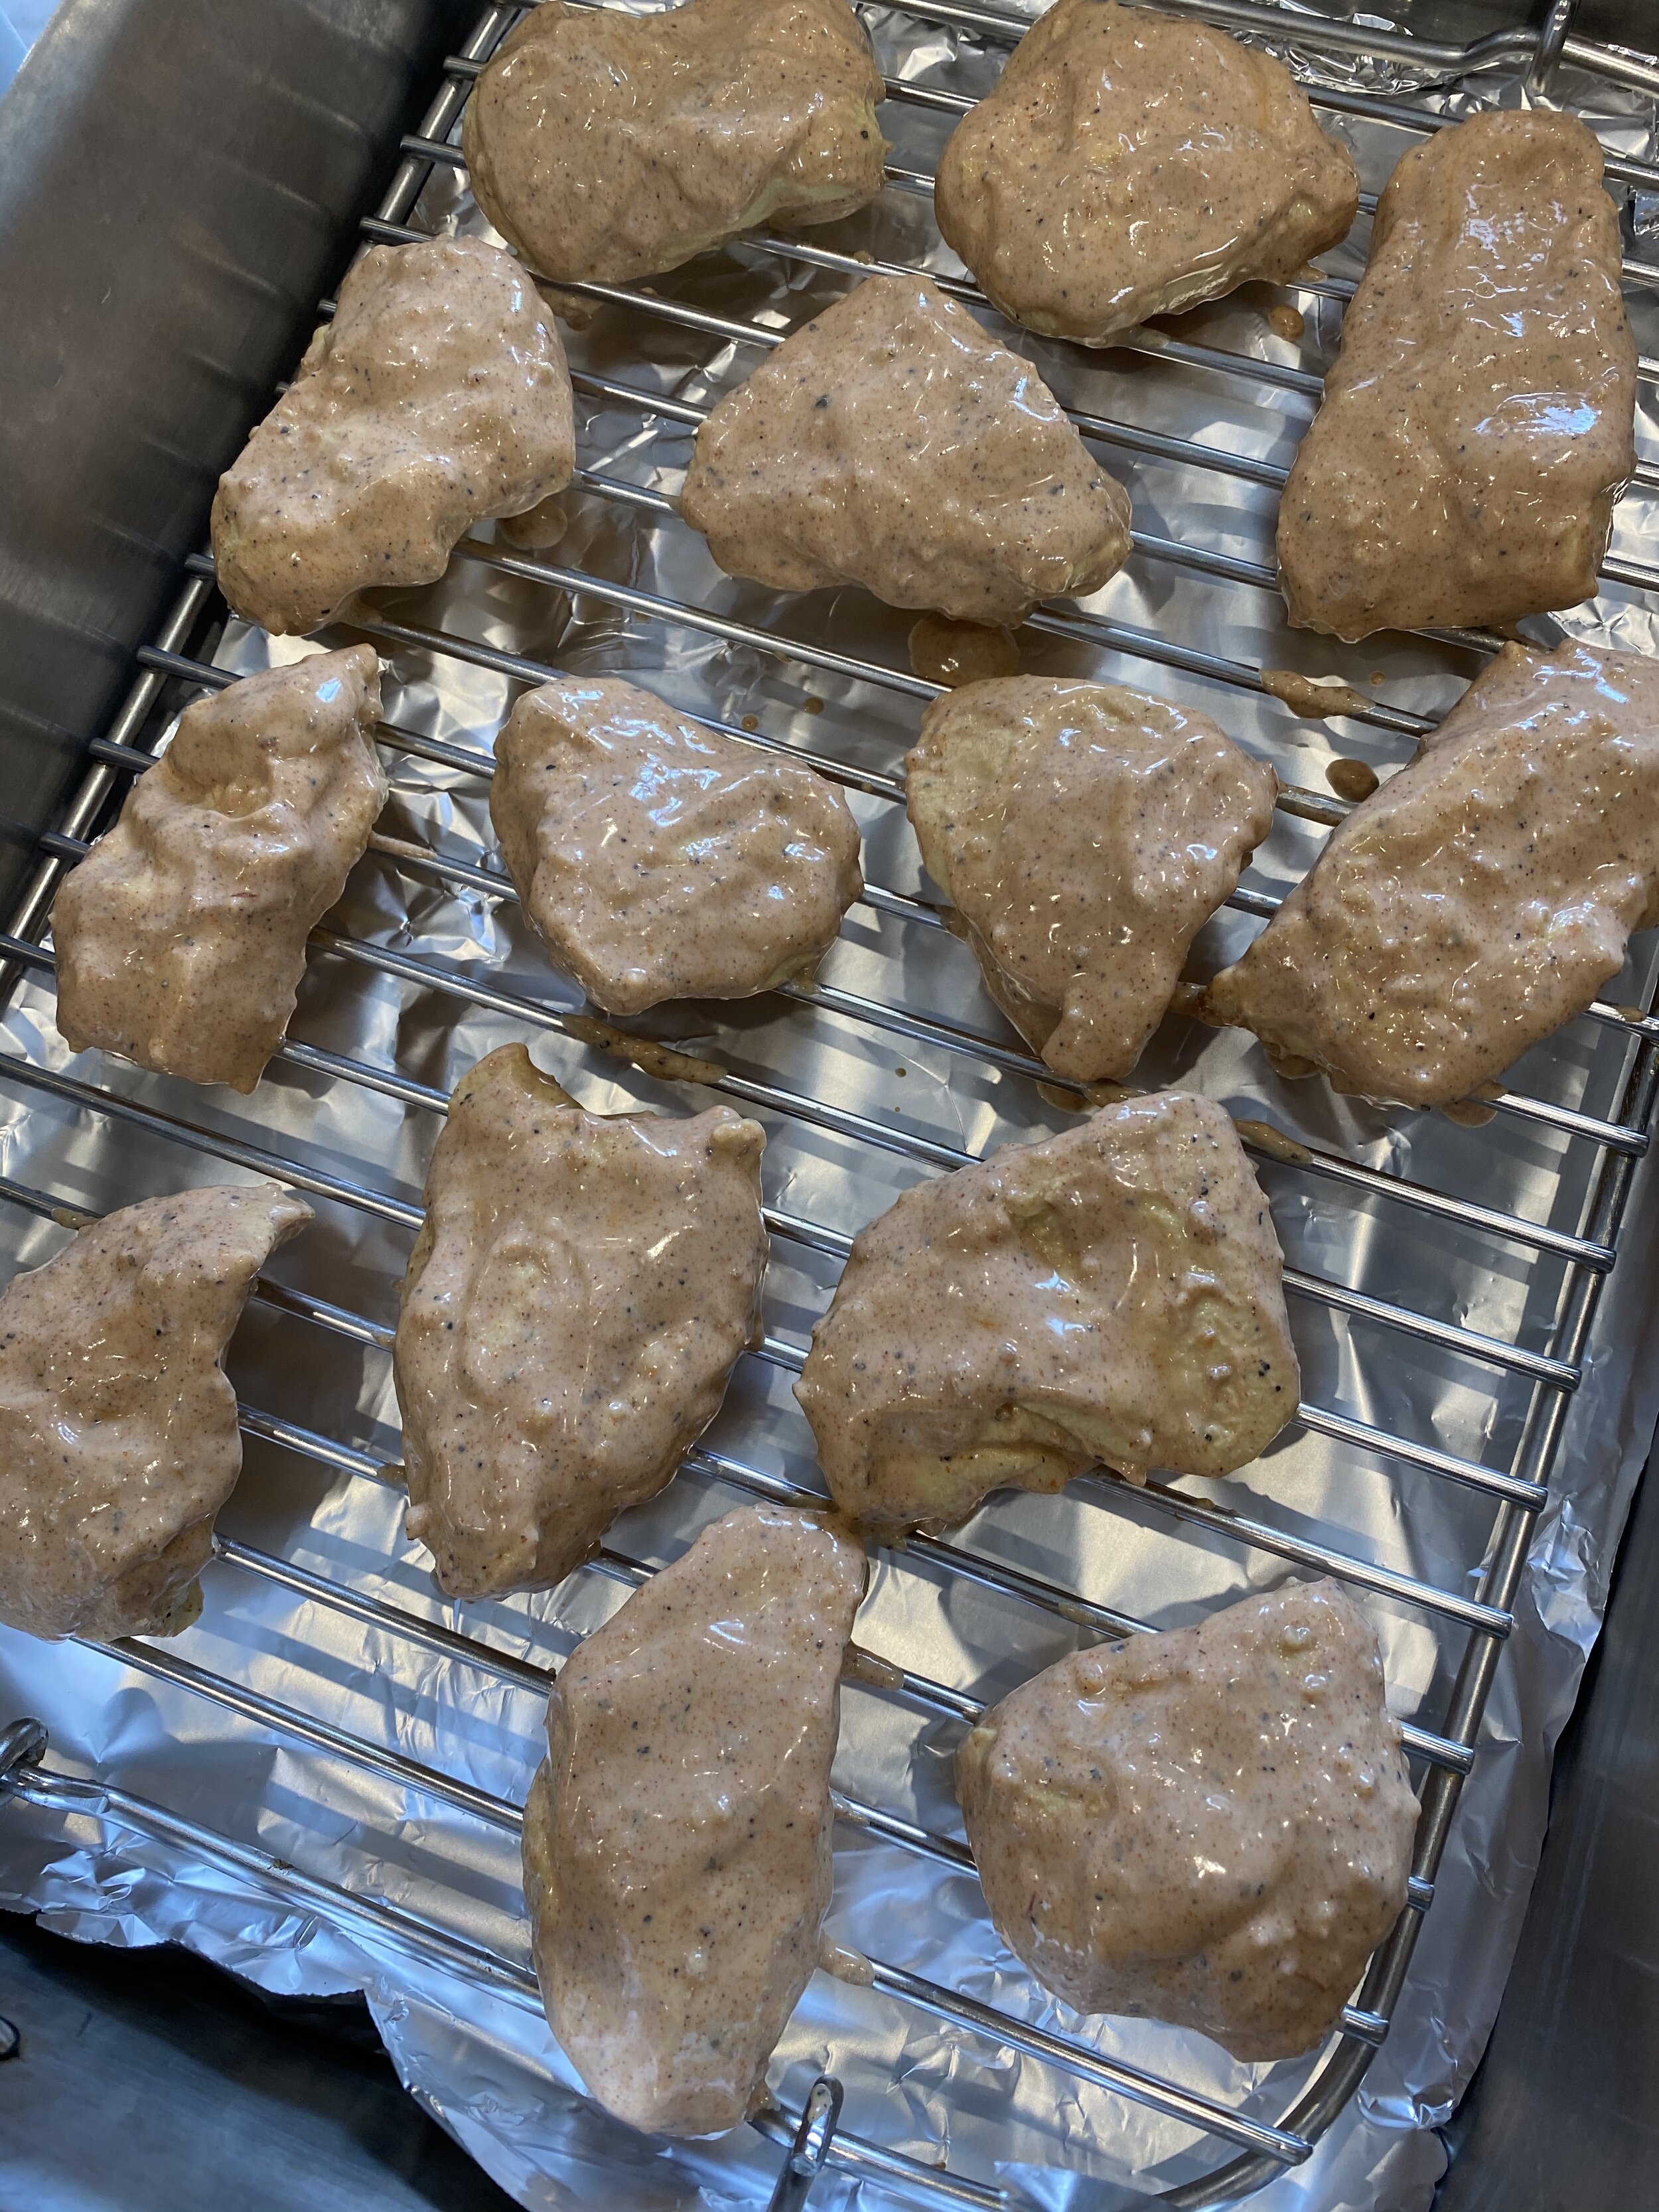
  7. Line another baking sheet pan with paper towels and place a wire cooling rack on top.

  8. HOT OIL COOKING METHOD: Heat a large deep skillet or dutch oven with a few inches of oil, over medium heat. You can poke a chop stick or wooden skewer into the pan, if small bubbles form around the stick the oil is ready. Once the oil is nice and hot begin adding batches of curls to the pan, making sure not to over crowd them. Using a pair of metal tongs, keep the curls moving around in the pan so they cook evenly. Allow the curls to fry for several minutes until golden brown and crispy. Place finished curls on the wire rack and repeat with remaining curls. I like to sprinkle a little extra salt and old bay on the finished curls

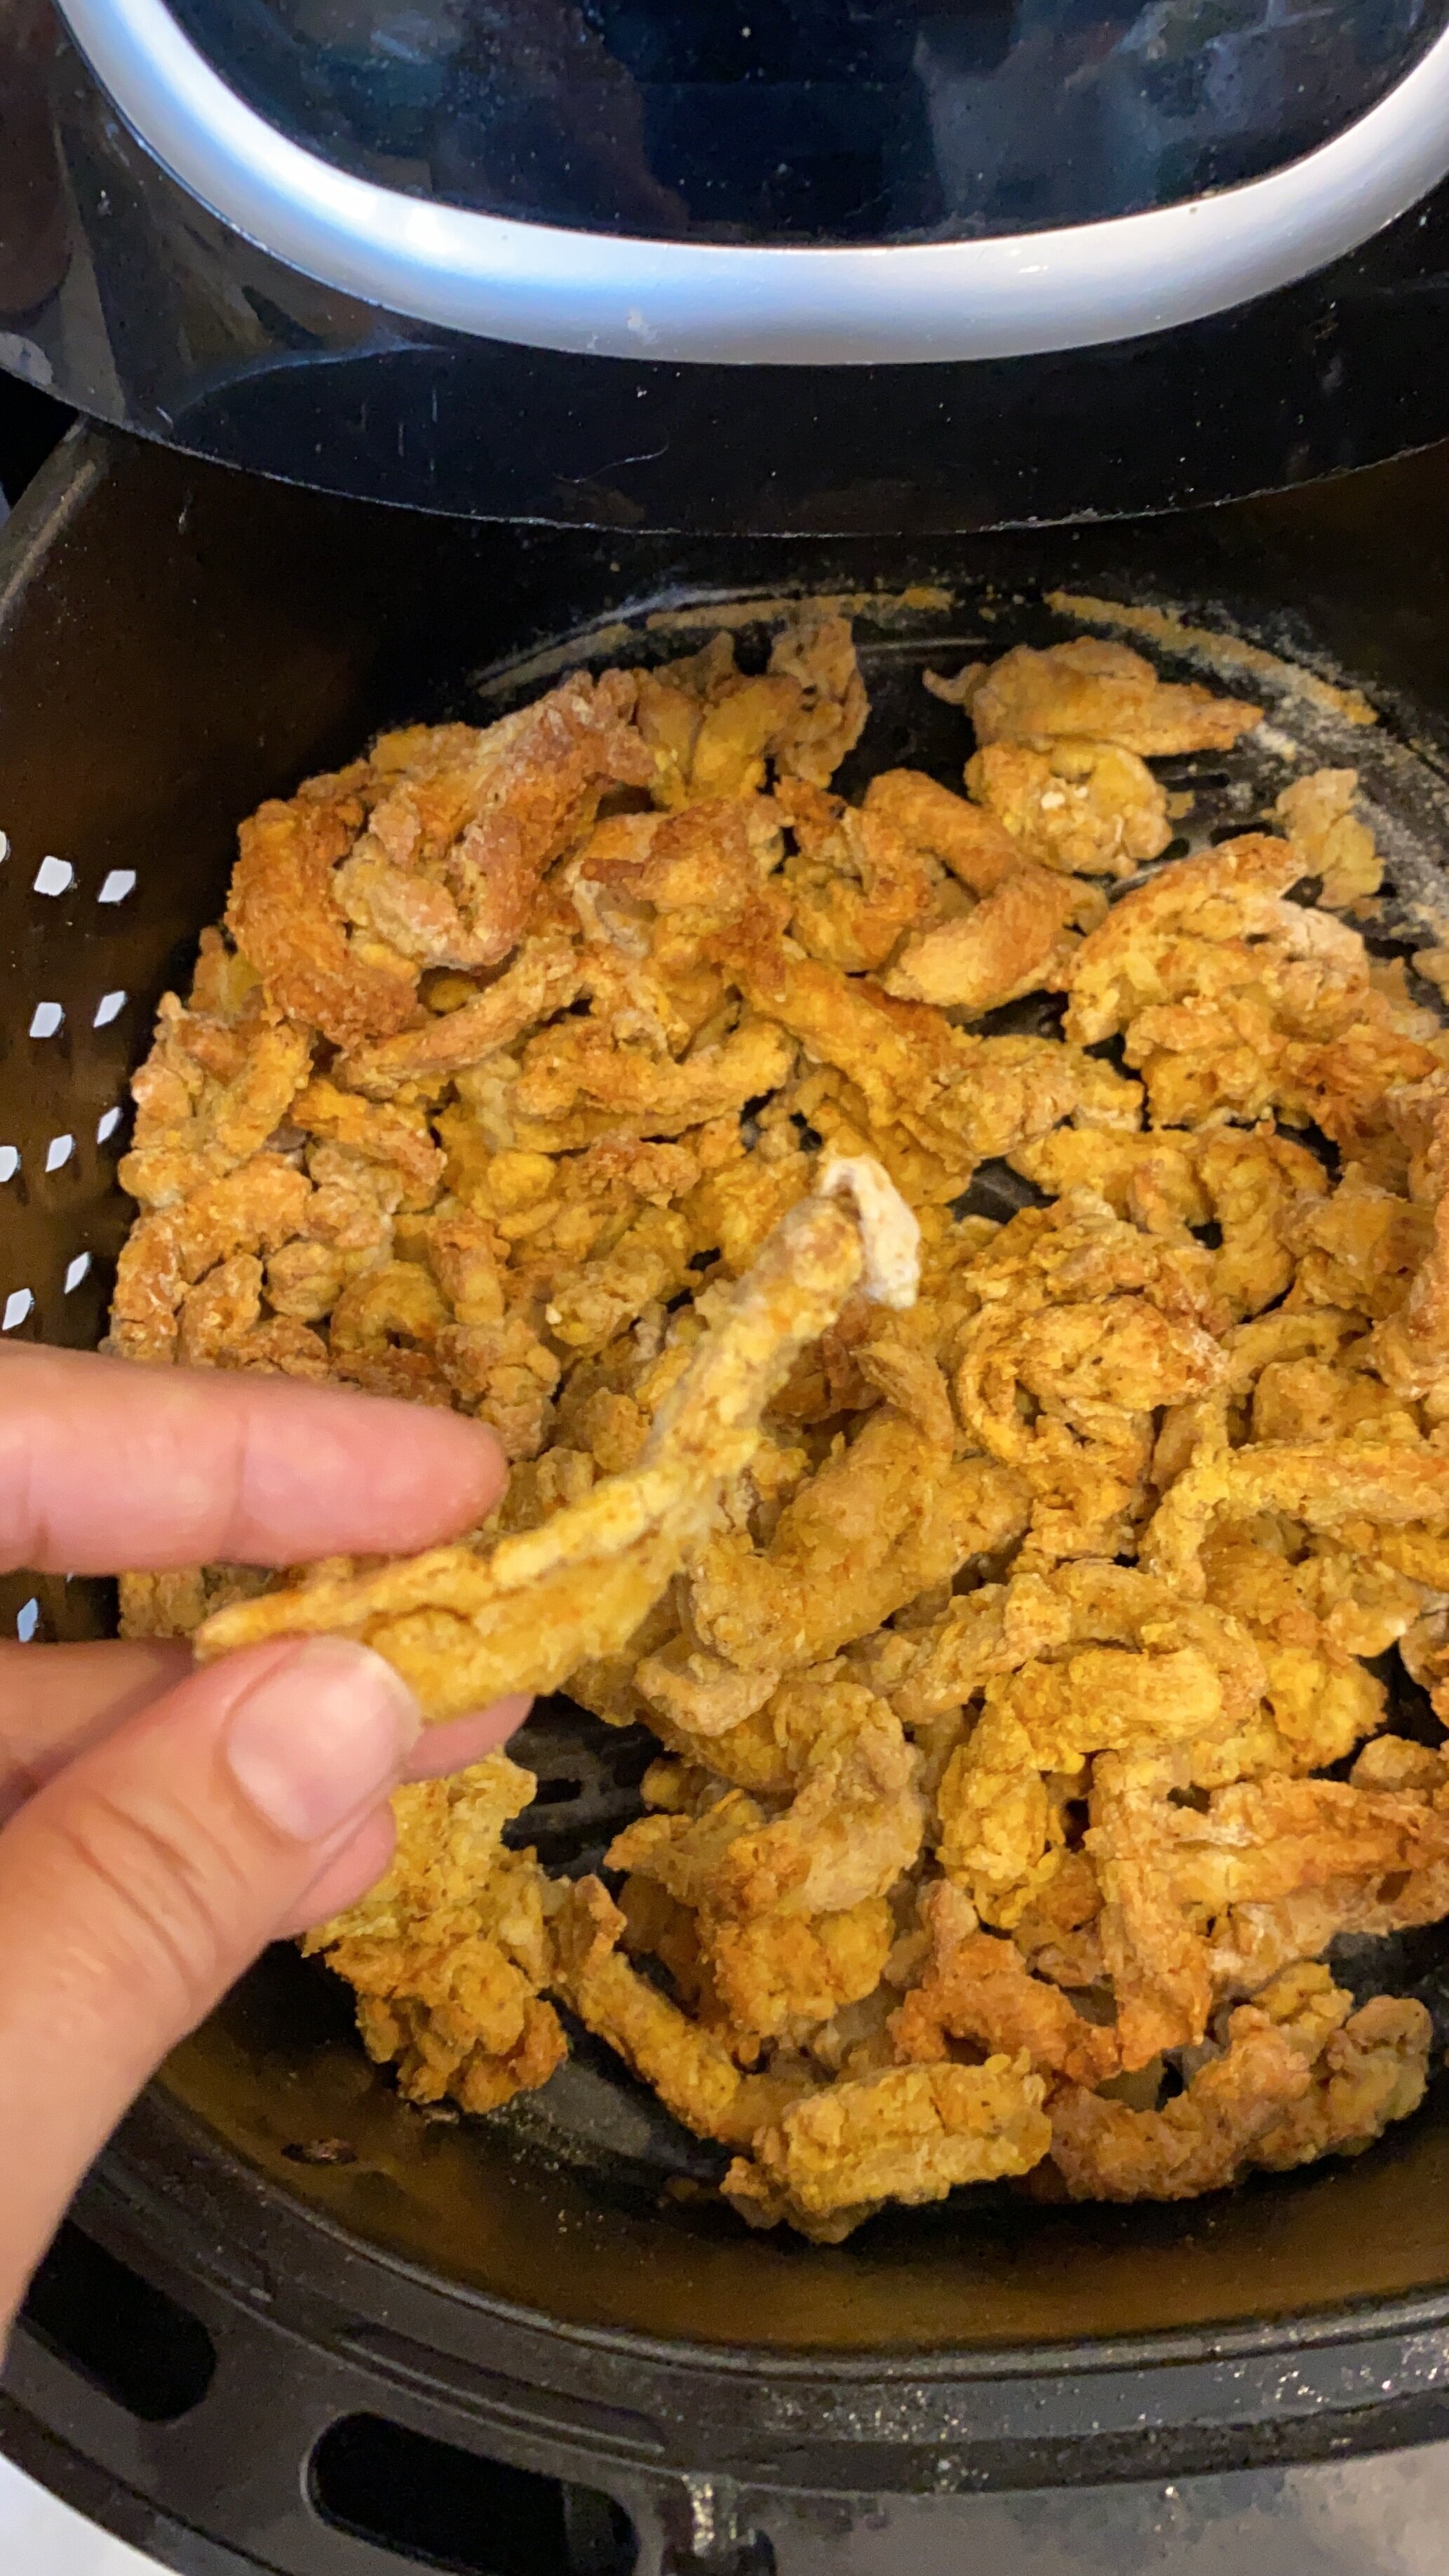
  9. AIR FRYER COOKING METHOD: Depending on the size of your air fryer, you may have to cook the curls in batches. I have a 7 quart air fryer and can fit them all in at once. Place the coated curls in the air fryer and give them a light spray with some oil. Fry at 375 for 10 minutes, opening and shaking the basket a few times throughout their cooking. I often use tongs and stir them around to keep them from sticking. You may need another 5 minutes on the fry. Just make sure they fry long enough that they are all crispy. You may also want to give them another mist of oil when you open the basket to shake and stir them around.

  10. Wash and chop the lettuce. In a large bowl toss the lettuce, carrots, and 2/3 of the dressing.

  11. To serve, arrange the chips on a large platter (or if you want individual servings, arrange on single plates) top with salad, some crispy soy curls (I don’t use the entire batch, but my kids always just snack on the leftovers with dip, or I save a reheat what I don’t use later) , sprinkle with vegan parmesan cheese, and drizzle with remaining dressing. Serve right away.

Serves 4- 6 (you can half this recipe easily for less nachos)

If you like this recipe, then try these:

IMG_8269.jpg

Sliceable Vegan Beer Cheddar

IMG_8242.jpg

I love vegan cheese. All kinds of vegan cheese.

I also love beer. All kinds of beer.

In the summer months when I am too hot and lazy to cook, I could live off of vegan cheese and crackers, and maybe some raw veggies and fruit for good measure. Ya know, just so I don’t feel guilty and all that.

In the past I have made a beer cheese dip, and a beer cheese and potato soup so that I could combine my two of my favorite things. But its far too hot right now in Florida for soup.

So that got me thinking, why not just make a sliceable vegan beer cheese so I could eat it as a summer meal or snack, with a nice cold beer. Like, seriously, what took me so long for this one.

So I did just that. I made an easy quick set, agar cheddar, with cashews and my favorite light lager, Yuengling Flight. And don’t judge my love of light beer, at 95 calories, I’ll take it. It’s crisp and delicious, AND it’s still swimsuit season, so gotta watch it. I eat a TON so can’t be drinking all my calories.

This vegan beer cheese is good on cracker, nachos, in beer cheese soup if its not summer and as hot as the surface of the sun where you live, it would make a tasty quesadilla, grilled cheese, and would probably be good on pizza, too.

Agar firms up starting at room temp and will firm up more once cold. It also melts back down once it gets warm as does coconut oil, and that’s why we use it. I am often asked if another oil will work in these cheese recipes, and they will not. You need an oil that solidifies once cold to help the cheese set up nice an firm. Agar on its own has a more gelatinous texture. So it needs a little help from its coconutty friends. If you use filtered or refined coconut oil, there will be NO coconut flavor. So make sure you do that.

Also if you can not eat cashews or want to save a few bucks, sunflower seeds will work in this recipe as well. Same measurements, same instructions!

So if you love cheese and beer, then just go ahead and make yourself a batch of this magic! And just go ahead and drink the leftover beer while you wait for the cheese to set up. No judgments here!!

IMG_8233.jpg

INGREDIENTS:

  • 1/2 cups plus 2 tablespoons dry cashews (or sunflower seeds)

  • 1/4 cup nutritional yeast

  • 1/2 teaspoon garlic powder

  • 2 teaspoons paprika

  • 1 teaspoon ground turmeric

  • 1 teaspoon salt

  • 1 cup lager beer

  • 3/4 cups unsweetened plant milk

  • 2 tablespoons agar powder

  • 1/4 cup triple filtered coconut oil

  • 2 tablespoons sauerkraut

IMG_8232.jpg

INSRUCTIONS:

  1. In a food processor add the cashews and pulse until broken down. Next add the nutritional yeast, salt, garlic, paprika, sauerkraut, oil, and turmeric. Blend until the ingredients are combined. DO NOT OVER PULSE. You don’t want to end up with cashew butter.

  2. In a medium sized sauce pan, combine beer, milk, agar, and bring to a boil. Reduce heat and simmer for 5 minutes. You want the mixture to thicken to a thin pudding like consistency. Because of the beer, the mixture is going to pretty foamy and bubbly. Thats ok. As long as it simmers for about 5 minutes it will be fine. Just keep stirring with rubber spatula.

  3. Add the liquid mixture to the nut mixture in the food processor and blend. Mix for a few minutes until all of the ingredients are well incorporated, and smooth.

  4. Pour the cheese mixture into 2 - 3 ramekins or small bowls, and let cool uncovered in the refrigerator for serval hours to firm up.

  5. Store in an air tight container for up to one week in the refrigerator.

If you like this recipe, then try these:

IMG_8247.jpg

Vegan Glazed Deli Ham

IMG_8116.jpg

I make a lot of seitan based vegan meats. So bare with me while I talk turkey for a minute. The ham talk will follow.

I have recipes for a holiday roast, holiday turkey style breast with crispy skin, chicken breast, pastrami, brisket, and even pepperoni. But until our turkey recipe, I had never added tofu to the mix.

If there was ever a sandwich I missed since going vegan it is a regular old turkey sandwich. I used to love a good deli carved turkey sandwich more than almost anything. So I decided I would try to add tofu to my regular turkey style breast recipe to see if I could get it to a more deli sliced texture.

Y’all, the answer is YES! I have seen other people adding tofu to seitan recipes, and obviously Tofurkey lunch slices are a mix of tofu and vital wheat gluten so I decided to give it a go. It only took one experiment and it came out pretty perfect the first time. I was elated.

So once I realized how easy the turkey was, I went on to make a vegan roast beef using the same method!

Ham was my next stop on the vegan lunch meat deli tour, and I knew if I made it the same way as the turkey but changed a few wet ingredients and spices, I would get the same successful results I got with the turkey and roast beef.

Oh and a glaze. Whats a ham without a glaze?!?!

IMG_8115.jpg

Growing up I LOVED when my parents bought a Honey Baked Ham for the holidays. I was never a fan of packaged deli ham but I lived for leftover Honey Baked Ham sandwiches on a Hawaiian roll with mayo. So that was the kind of ham I was looking to recreate.

You can slice this ham extra thin if that is your preferred texture, or leave it a little on the thick side to mimic more of a holiday ham. And because I loved a glazed ham the most, I gave this one a nice sweet brown sugar glaze with a hint of soy for the salt and to add a little color to the top.

My kids love our easy vegan deli turkey recipe so when I offered them this ham (2 of my kids have only ever had ham once at a friends how when they were really young, the other two, never) they announced “I don’t think I liked ham that one time I ate it.” But since we were out of turkey and they wanted and sandwich, they gave in and made a vegan ham sandwich for lunch.

We were out and about and my 14 year old daughter was super reluctant to eat said sandwich, but y’all, if I could have videoed her face when she took that first bite…priceless. Lets just say she is now a big fan of vegan ham non white bread with mayo and vegan American cheese.

So if you have made any of other vegan deli meat recipe and looking to switch it up, try the ham. Its just as good as the turkey, roast beef, or brisket, just more, well, ham like!

IMG_8108.jpg

INGREDIENTS:

  • 1 block super firm tofu, 14-16 oz

  • 1 cup vital wheat gluten

  • 1/4 cup ketchup or tomato sauce

  • 1/4 cup nutritional yeast

  • 2 tablespoons neutral flavored oil ( you can replace with water if you are oil free)

  • 2 tablespoons tapioca starch or corn starch

  • 1 tablespoon white sugar

  • 2 teaspoons onion powder

  • 1 teaspoons garlic powder

  • 1 teaspoon smoked paprika

  • 1/2 teaspoon black pepper

  • 1 teaspoon coriander

  • 1/8 teaspoon nutmeg

  • 1/8 teaspoon allspice

  • 1 teaspoon salt is you think it needs more (the bouillon and soy add a bit of salt as is)

  • 1 tablespoon Garlic or Vegetable Better Than Bouillon (I used garlic)

  • 2 teaspoons liquid smoke

  • 1 tablespoon coconut aminos or soy sauce

  • 2 tablespoons water if need (add last)

Glaze Coating:

  • 2 tablespoon brown sugar

  • 2 teaspoons dry mustard

  • 1/2 teaspoons salt

  • 2 teaspoons soy sauce or coconut aminos

TROUBLE SHOOTING THIS REICPE:

*I used high protein tofu in a vacuum sealed package and this what I strongly advise using. It is much firmer than regular firm tofu and has less moisture and a more chewy texture. If you opt to use regular firm tofu you will need to press it first and remove as much liquid as possible. You may need to adjust the amount of water in the recipet as well. Add the water last, adding just enough to accomplish a firm dough.

  • *If you find your turkey has A LOT OF LITTLE HOLES, and a more BREAD LIKE TEXTURE this can be caused from under kneading the dough, BUT more likely cooking the seitan at too high of a temperature, or for too long. Check your ovens temperature with an oven thermometer. Your oven may just be cooking hotter than it registers. Also gas and electric ovens tend to cook differently. If you do not have an oven thermometer you can reduce the heat in your oven by 25 degrees, and keep the seitan covered for 50 minutes and open for 10.

INSTRUCTIONS:

Preheat oven to 350 degrees

  1. Break up the tofu and place it into a food processor with the regular metal blade. Run the processor for around a minute until the tofu is broken down.

  2. Add all of the remaining ingredients and let the food processor run for a couple of minutes. You want the mixture to form a dough. Letting the processor run will help knead the dough. We want this seitan to be firm so we need it to knead for a bit. If you dough seems a bit too dry, you can add another few tablespoons of water, just don’t add too much more! This dough came out stickier than the turkey because of the consistency of the ketchup and I did not have to add ANY water to mine. If your dough seems too sticky, then add 2 more tablespoons of starch.

  3. Once you have a smooth but firm dough, remove it from the food processor and place on a clean counter. Knead the dough with your hands for about a minute, forming a kind of oval shaped loaf with the dough. Using a very sharp knife, score crisscross marks across the top of the loaf about an eighth of an inch deep.

  4. Take a piece of aluminum for about 3x bigger than the loaf of dough, and lay it out flat. Coat the foil in spray oil or wipe it down with any oil you have. Sprinkle the brown sugar, mustard, and salt in the middle of the foil and give a little mix. Place the loaf on the seasoning and roll it around. The goal is to fully coat the loaf in the seasoning!

  5. Place the loaf back in the center of the foil and fold up the sides, pinching at the top to seal it up, then twist the ends to fully seal the foil.

  6. Place on a baking sheet and put in the oven on the middle rack. Bake sealed for 30 minutes. After 30 minutes carefully open up the foil and brush the top with a teaspoon or two of soy sauce, and continue baking for another 30 minutes.

  7. Remove finished “ham” and let cool at room temp. Seal the foil back up and place the “ham” in the fridge over night to rest. This step is important to get the texture we are trying achieve. If you try and serve it before it rests it will not be nearly as firm.

  8. Once the “ham” has been in the fridge over night, you can remove it and slice it to serve. It should at this point be firm enough to slice using a mandolin or a sharp knife. Store in an air tight container in the fridge for up to 10 days.

If you like this recipe, then try these:

Vegan Dry Rubbed Brisket

Vegan Dry Rubbed Brisket

Vegan Deli Sliced Turkey

Vegan Deli Sliced Turkey

Vegan Deli Sliced Roast Beef

Vegan Deli Sliced Roast Beef

IMG_8125.jpg

Vegan Pineapple Coconut Scones

IMG_8091.jpg

I love baking scones.

For starters they are super easy to make, and bake up pretty quickly, making them a solid choice for a quick but tasty breakfast.

I also love that depending on my mood they can be sweet or savory. But even a sweet scone is not that sweet and I appreciate that, especially bright and early for a quick breakfast.

Normally we make a vegan scone with cranberries, chocolate, or blueberries, but recently I wanted something different, and a little more summer tropical themed.

So I opted for pineapple and coconut with a little cruch from some walnuts.

We were seeing off some friends for their 3 week summer vacation and I made them breakfast that morning. I I figured they would be honest with me about the new vegan scone flavor, and the empty plate spoke volumes.

These vegan scones perfect. The perfect texture, the perfect sweetness, with the perfect crunch, and a perfect pineapplely glaze.

IMG_8089.jpg

If you are reading this and are English and are asking yourself what in the world have I made, and claimed as a scone…this is an American scone. I believe our biscuits are what you call a scone and our cookies are what you call a biscuit. It becomes all very confusing when putting a recipe out on the internet and remembering people form everywhere will see it and read it and most definitely question it.

I think our scones are a bit. “busy” and are normally not topped with anything, cream, butter, jam, and most often just eaten on their own as they are full of this and that, and normally have a glaze on them.

So my apologies to all English readers who can not get behind the American scone. I personally just love all bread type foods, no matter what you call them, just get them in face, ASAP.

So in conclusion, iIf there was ever a scone that screamed SUMMER TIME, this is it. So go make yourself a batch, and call it whatever you like!I just hope most importantly, you enjoy it!

IMG_8099.jpg

INGREDIENTS:

  • 2 cups of all purpose flour

  • 8 tablespoons vegan butter

  • 1/3 cup sugar plus 1 teaspoon

  • 1/2 cup plain vegan yogurt, I used Kite Hill plain almond yogurt

  • 1 flax egg or starch egg ( 1 tablespoon flax mill or starch + 3 tablespoons water whisked together)

  • 1 teaspoon baking powder

  • 1/4 teaspoon baking soda

  • 1/2 teaspoon salt

  • 1/4 cup crushed pineapple, from the can

  • 1/4 cup shredded coconut

  • 1/4 cup chopped walnuts, pecans or almonds

Optional Icing:

  • 1/3 cup powdered sugar

  • 1 tablespoon Pineapple juice from the can of crushed pineapple

  • extra coconut for spinkling

IMG_8101-Edit.jpg

Instructions:

Preheat oven to 400 degrees

  1. In a medium bowl, combine 1/3 cup of sugar, flour, baking soda, baking powder, and salt. Mix well.

  2. Add the butter, and using your hands, work in the butter until the mixture seem coarse and sort of crumbly. Add the pineapple, coconut, and nuts.

  3. In a small bowl whisk the yogurt and flax egg.

  4. Add yogurt mixture to the dry mixture, and stir unitl combined. Knead until a smooth dough comes together. This dough seemed a little wetter than my normal scone dough so I need to flour my hands well to form it.

  5. Once it has come together, form a disk with the dough about 7-8 inches wide, and 3/4 of an inch thick. Cut the disc into 8 equal triangles.Place scones onto a parchment paper lined baking sheet, and bake for 15-20 minutes. You can brush them with a little plant based milk before popping them into the oven to help them brown. We used oat milk, as it browns nicely, but you can use what you have. They are done once they are light brown on top, and firm in the middle.

  6. Allow scones to cool. You can optionally top them with an icing drizzle once cooled. Just whisk the sugar and pineapple juice and drizzle over the tops of the scones. Sprinkle with extra coconut.

  7. Store in an airtight container at room temperature.

yields 8 scones 

If you like this recipe, then try these:

Vegan Philly Cheese Steak Roll-Ups

IMG_7923.jpg

I am a big fan of a vegan Philly Cheese Steak, but sometimes all that seitan and all that bread doesn’t make my stomach as happy as it makes my brain.

So the simple solution was to just make Vegan Seitan Philly roll ups, no bread required.

Just perfectly seasoned seitan, veggies, and the best vegan cheese sauce, hands down.

This way I feel like I can eat more of all good stuff, and a nice big side of fries with a little less guilt.

And let me tell you that cheese sauce makes some dang good cheese fries while you are at it….you might just want to go ahead and double that recipe.

This seitan recipe is easy and comes together quickly, and bake up pretty fast too. Since the pieces are thin, they really don’t need to rest like a big piece of setian would. So This recipe is perfect for a fairly quick weeknight dinner.

But by all means, you could bake them the night before, and reheat them the following day for a super quick supper.

We use jackfruit in this recipe for a nice meaty texture, plus its low fat and full of fiber so a nice healthy bonus to bulk up the recipe and use less vital wheat gluten.

So if you are into Philly cheese steaks, then I can not recommend trying this recipe enough! Its easy, filling, and super delicious!

IMG_7932.jpg

INGREDIENTS:

  • 2 bell peppers

  • 1 medium yellow or white onion

Cheese Sauce:

  • 1/2 cup cashews or sunflower seeds (plus water for soaking)

  • 1 cup fresh water

  • 2 tablespoons tapioca starch

  • 3 tablespoon nutritional yeast

  • 1 tablespoon apple cider vinegar

  • 1/2-1 teaspoons salt

  • 1 teaspoon turmeric

  • 1/2 -1 teaspoon smoked paprika

IMG_7949.jpg

Setian:

  • 1 can jackfruit in brine, drained and rinsed (20 oz can)

  • 1 and 2/3 cups vital wheat gluten

  • 1/4 cup tapioca or corn starch

  • 1/4 cup nutritional yeast

  • 2 tablespoons soy sauce or coconut aminos

  • 3 teaspoons vegan Worcestershire sauce

  • 1 teaspoon garlic powder

  • 1 teaspoon onion powder

  • 1/2 teaspoon black pepper

  • 2 teaspoons vegetable Better Than Bouillon

  • 1/4 cup water

IMG_7929.jpg

INSTRUCTIONS:

Preheat oven to 350 degrees

  1. Cut the peppers into matchstick, long pieces. Cut the onion into rings, then cut the rings in half. Set aside.

  2. Drain and rinse the jackfruit. Chop the jackfruit in your food processor by pulsing a few times.

  3. Add the remaining ingredients to the food processor and mix for a minute, until a sort of dough forms.

  4. If you do not have a food processor, finely chop the jackfruit using a sharp knife. In a medium bowl add the jackfruit and remaining ingredients. Using your hands, (I promise its just easier) mix all of the ingredients together until a dough forms. Knead the dough by hand for a few minutes.

  5. Flatten the dough into a disc shape. Divide the dough into 14-16 equal pieces. Flatten and stretch each piece into a flat rectangular shape (see picture, just do the best you can.)

  6. Lay 4 pepper pieces and 2 or 3 onion pieces in the middle of each flattened piece of seitan. Roll each piece up and pinch the seam closed.

  7. Line 2 baking sheets with foil. Spray or brush some oil on the foil and place the rolled seitan pieces on the pan spaced out an inch or so apart. Give each roll up piece a spray with oil as well. You can sprinkle the rolls with an all purpose seasoning or more garlic and onion powder if you like or give them a brush of soy and Worcestershire sauce. Take a piece of foil bigger than the pan and place on top of the rolls, pinching and tucking the foil around the pan so it is sealed up best you can. We want the seitan to steam inside the pan so try and not leave any gaps or holes when covering the pan.

  8. Bake the seitan Philly rolls for 20 to 25 minutes covered. Uncover the rolls, and allow to bake for 10 more minutes.

  9. While the the rolls are cooking prepare the cheese sauce. Place the cashews or sunflower seeds in a microwave safe container and cover in water. Heat on high for 3 minutes. You can do this in a small pot on the stove if you do not have a microwave. Just let them boil about 3 minutes. Drain. Add the nuts or seeds and remaining cheese sauce ingredients to a high speed blender or food processor. Blend until there are no more pieces of cashews or seeds and the mixture its totally smooth. Add the mix to a medium sauce pan. Whisk continuously over medium heat until the sauce is a thick queso consistency. If the sauces gets too thick you can whisk in more water and thin it back out.

  10. Once the Philly rolls come out of the oven you can serve them by drizzling the cheese sauce over them. We eat our with a side of fries. You can garnish with some chives or diced green onions if you like.

If you like this recipe, then try these:

IMG_7935.jpg

Vegan Orange Creamsicle Pie

IMG_8028.jpg

Flinstone’s push up pops. That was my all time favorite frozen treat growing up.

I love all things orange creamsicle, actually. Orange is one of my favorite fruit flavors and I will choose it every time.

So, the other day after my daughter had made some lemon curd for some little vegan lemon meringue pies, I asked her if she thought she could make a curd with oranges so we could attempt an orange creamsicle pie.

In my mind it was going to be orange creamsicle dreamy deliciousness. She decided it needed a graham cracker crust and I had not arguments with that idea.

IMG_8042.jpg

So just as quickly as the pie was dreamed up, she had whipped it up and I was shoving it in my face.

The best part about this vegan creamsicle pie is the it is technically a no bake vegan pie. You do have to bake the crust but the pie filing is quickly cooked in a pan, then it just has to cool and set!

We piled our pie high with the best sweet aquafaba whip ever! You can use store bought vegan whipped topping but I am telling you this one is so cheap to make and soooo tasty! All you need is some sugar, a can of white beans, and a pinch of cream of tater to stabilize it. Thats it!! Its so fluffy and sweet and perfect!

IMG_1495.jpg

So if you love orange creasicle things too, and you love easy vegan pies, then by all means, make this one ASAP. I don’t think you will be disappointed. And once again, lets give Peyton all the high fives for her amazing baking abilities and always humoring my many pie and cakes ideas.

I am pretty sure our powers combined are responsible for that extra 5 lbs that seems impossible to lose, and thats ok. I’ll take it for the sake of pie.

IMG_8050.jpg

INGREDIENTS:

The Crust:

  • 2 sleeves of graham crackers (make sure the brand is vegan)

  • 6 tablespoon vegan butter, melted

The Filling:

  • 2 cup coconut cream, divided ( heavy coconut cream in the can, shaken well)

  • 4 tablespoons coconut oil

  • 2/3 cup fresh squeezed orange juice

  • 1 cup white sugar

  • 1/2 cup corn starch

  • pinch of salt

  • zest from 1 orange

INSTRUCTIONS:

Preheat oven to 350 degrees

  1. Place 2 sleeves of graham crackers in a food processor and pulse until you have achieved a crumb consistency. If you do not have a food processor you can place the crackers in a large zip lock bag. Make sure all the air is out of the bag and using a rolling pin, roll over the bag crushing up the crackers to a crumb.

  2. If using the food processor, add the melted butter and pulse to mix. If using a bag, pour the crumbs and butter into bowl and mix to incorporate. Spray a 9 inch pie plate or pan with a light coating of oil and press the crumb mix into the pan and up the sides. Place in the middle oven rack and bake for about 20 minutes. Remove and allow to cool.

  3. In a medium sauce pan, whisk together 1 cup coconut cream and remaining curd ingredients over medium/low heat until the mixture thickens (about 5-10 minutes.) Just make sure it has thickened before removing from the heat. It will thicken more as it cools but it needs to simmer and thicken in the pot before removing it from the heat.

  4. Remove from heat and stir in the remaining 1 cup coconut cream. Pour the curd into a bowl and pop it into the fridge for about an hour.

  5. Pour the cooled orange curd filling over the pie crust and place back in the fridge allowing the filling to set up (it should be ready to slice in about half an hour.)

  6. While the pie is in the fridge, prepare a batch of sweet aquafaba whip according to directions. Once the pie is set you can top it with the whip and serve. I always wait to top the pie with the whip right before serving. Aquafaba whip will begin to weep once it gets warm or sits in the fridge for a day or two so keep that in mind for serving.

  7. If you are feeling fancy, you can add some orange slices, or zest to the top of the pie for garnish.

If you like this recipe, then try these:

IMG_8041.jpg

Vegan Mason Jar Lemon Meringue Pies

IMG_7857.jpg

I am sucker or anything lemon.

I am a sucker for anything lemon meringue.

I am sucker for all desserts served in single serving portions, like a mason jar.

I learned a long time ago that I could make some of my favorite desserts in mason jars to make them easier to serve and easier to travel with.

This includes and is not limited to pies! Especially vegan lemon meringue pie.

All you need is a solid lemon curd recipe (and we have that for sure) some vegan pie dough, and super simple vegan meringue (again, we got you covered.)

I know everyone doesn’t feel like making pie dough from scratch, so I have suggested for this recipe you buy pre-made. There are several vegan pre-made vegan pie doughs available. It is easiest to pie the box of 2 rolled pie crust, but if you can not find that, you can buy a vegan frozen pie in the pan, let it thaw and roll it out. (I have done this in a pinch.) You can also get adventurous and make your own from scratch. I have not included a recipe for dough here, but there a lot of good ones out there that are pretty simple to make, if you have the time and willingness.

For this curd we use corn starch to achieve the thickness we want. You can use tapioca but I urge against it just because it will yield a stretchy curd that I am not a huge fan of in this application. In some recipes I prefer the stretchiness of the curd for keeping it put (pop tarts, donuts) but for this recipe we want a silky, creamy, thick curd that is more palatable since its the main attraction!

As for the meringue, we use our delicious sweet aquafaba whip, all toasted up. It is just as good if you don’t toast it, but I love a toasty brown meringue on my pie. It is just up to you and your preference.

IMG_1495.jpg

If you have never made aquafaba meringue before, don’t be intimidated! Its actually really easy and really, really, really, tasty! It works very well in place of whip cream in recipes, or toasts up beautifully to mimic meringue, or even a marshmallow fluff!

So if you are looking for a solid lemon meringue pie recipe that is a little different and definitely fun, then try making these vegan mason jar lemon meringue pies! They are adorable and delicious and just what summer called for!

IMG_7829.jpg

*You will need six, 6 oz mason jars for this recipe

INGREDIENTS:

THE CURD:

  • 2 cups coconut cream, divided ( heavy coconut cream in the can, shaken well)

  • 4 tablespoons coconut oil

  • 2/3 cup lemon juice

  • 1 cup white sugar

  • 1/2 cup corn starch

  • pinch of salt

  • Optional: 2-4 teaspoons lemon zest for extra lemon flavor

  • 1/4 teaspoon turmeric for color

REMAINING INDREDIENTS:

IMG_7835.jpg

INSTRUCTIONS:

  1. In a medium sauce pan, whisk together 1 cup coconut cream and remaining curd ingredients over medium/low heat until the mixture thickens (about 5 minutes.) The curd will continue to thicken as it cools.

  2. Remove from heat and stir in the remaining 1 cup coconut cream.

  3. Allow curd to cool.

  4. Preheat oven ot 350 regress

  5. Roll out pie crust on a floured surface, and cut circles in dough that are roughly the size of your jar lid. We used a small glass to do thiS. They will shrink up when you bake them a little bit, so its ok if the cutter is a tiny bit bigger than the lid, but try to get it about the same size. You will need 3 circles per jar. Place the dough circles onto a parchment paper lined baking sheet, add another layer of parchment on top. Place another baking sheet on top of parchment, so it is sitting on top of the pie dough circles. This is going to help the crust to not puff up, but stay flat and crisp which for this recipe is what we want. Pop the trays in your preheated oven on the middle rack for about 20-25 minutes (or they are brown and crisp.) When the crusts are done, remove from oven and allow to cool.

  6. While the crust is baking, prepare the sweet aquafaba whip according to instructions.

  7. Begin building your vegan lemon meringue pies by first placing one circle of pie crust in the bottom of the jar. Fill half full with curd, then place another circle of pie crust, curd, then one more crust. Top with a big scoop of sweet aquafaba whip meringue.

  8. You can server the meringue as is or use a kitchen torch or brown the tops. (originally I suggested toasting them in the oven as baking in mason jars seems to be a common practice. However most brands are not tempered glass, and advise against baking in them. That said, I don’t want to suggest you do something that is going to cause glass to shatter in your oven, regardless if it is commonly done or not)

  9. We like to serve these right aways as aqufaba meringue will begin to weep over time, plus the freshly toasted meringue is most delicious when still warm. These do however hold up pretty well in the fridge for a day or so. If you are taking these to an event or get together, I suggest torching the tops right before you serve them.

If you like this recipe, then try these:

IMG_7843.jpg

Vegan Chicken Parmesan Sandwiches

I know I have mentioned my love for all things covered in marinara and cheese sauce, and vegan chicken parmesan is no exception.

This recipes takes a little extra time because you have to make the vegan chicken breast, but it is really not hard! It just needs some time to rest, so you can make the vegan chicken breast in the morning or the night before you would like to make these vegan chicken parmesans sandwiches.

Vegan Fiddle Faddle (Caramel Corn with Peanuts)

vegan fiddle faddle

vegan fiddle faddle

I am guessing that not everyone knows what Fiddle Faddle is. So incase you don’t know, I’ll tell ya!

It’s the most delicious caramel popcorn and peanuts all mixed together and it taste like my childhood.

My dad always, ALWAYS, had a box of Fiddle Faddle in our pantry and I loved it as a kid. It was sweet, and salty and crunchy, and sticky, and peanutty perfection!

After not thinking about fiddle faddle in probably 25 years, I suddenly began craving it the other day. This is especially odd because I am not a big popcorn eater. Movie theater popcorn has made me sick to my stomach my whole life. I have either myself been in braces, or 2 of my 4 kids have been in braces at some point over the last 7 years, so we don’t eat a lot of popcorn in this house. ( popcorn is a big NO when wearing braces)

vegan fiddle faddle

vegan fiddle faddle

But, as of last month nobody is wearing braces (hallelujah!!! but we still have 2 kids to go) and I decided my kids needed to learn the joy of box of Fiddle Faddle. But, like most tasty treats from my childhood, Fiddle Faddle is not vegan. And like most tasty treats from my childhood, it was my responsibility to try and veganize them so my kids could know the same happy joy.

I would love to claim I made this, but it was actually my super talented 14 year old daughter who played with a caramel recipe until it was just right. She takes charge where all things vegan baking and sweets are concerned. She is beyond gifted and a natural in the department! I was pretty much just in charge of popping the corn and not starting a fire. That is a story for another day.

This caramel is perfect. Not gritty (like the first attempt) but crunchy and chewy, and just right. The peanuts make this caramel corn extra special and they are my favorite part. Again, I don’t love popcorn on its own that much, but add peanuts and salty, sweet buttery caramel, and I’m all in.

So if you are a long time Fiddle Faddle fan who has also been craving a box, or you just happen to love caramel corn and needed a vegan recipe, this Vegan Fiddle Faddle recipe should be just the fix you are looking for.

vegan fiddle faddle

vegan fiddle faddle

INGREDIENTS:

  • 2 1/4 cups white sugar

  • 6 tablespoons water

  • 6 tablespoons vegan butter (we used Earth Balance)

  • 1 teaspoon vanilla extract

  • pinch of salt

  • 1 to 1 1/4 cups shelled peanuts

  • 10 cups popped popcorn ( 1/2 cup pre popped kernels)

INSTRUCTIONS:

vegan caramel corn

vegan caramel corn

  1. Begin by popping the popcorn. I heat a large dutch oven over medium heat with the teaspoons of a neutral flavored oil. Add two or three pop corn kernels to the pot and wait for them to pop. Once they have popped add the 1/2 cup of kernels to the pot and reduce the heat to medium/low. Place a lid over the pot and wait until you hear no more popping. I often shake the pot around while it’s popping to avoid burning the pop corn. Remove the pot from the heat but leave the lid on so any stray kernels that may still pop stay put. (you could also just pop a few bags of microwave popcorn if you are not into loose kernels or use whatever popcorn popping machine you may have….we are pretty old school poppers in this house)

  2. In a medium sized pot, over medium heat add sugar and water. Once the sugar has dissolved, add the peanuts to the pot.

  3. Increase the heat to medium/ high and let cook until the mixture turns an amber/brown color, stirring occasionally. Be careful not to let the mixture get too dark, as this will mean you burned the sugar. Depending on the kind of pot you are using, this could take 5-7 minutes.

  4. Remove the pot from the heat and add the butter, vanilla, and pinch of salt and stir well. It might look separated and like its not going to come together, but once the butter heats up, it will mix together.

  5. Carefully pour the mixture over the pot of popcorn. Using a large spoon, stir the best you can, trying to evenly coat all the popcorn.

  6. Lay a large sheet of parchment paper out on your counter top and pour the popcorn out to cool.

  7. Store cooled caramel corn in an airtight container at room temperature.

If you like this recipe, then try these:

vegan fiddle faddle

vegan fiddle faddle

Vegan Dill Chicken Salad (seitan)

Vegan dill chicken salad

Vegan dill chicken salad

If you have made or regularly make the 86eats vegan deli sliced turkey or Easy vegan chicken breast , then you have to try this easy vegan dill chicken salad with your next batch.

I call this vegan chicken salad even though you can also use the turkey breast. But that is because I actually use vegan chicken seasoning in the deli turkey, so I think the name is acceptable…and who makes turkey salad anyways. (and now I wait for all the comments of people who do in fact make turkey salad.)

IMG_8671.jpg

A lot of people ask me if the turkey breast or chicken can be frozen because they can not eat the entire turkey breast or 8 pieces of chicken them selves in a reasonable amount of time …..and it in fact can be frozen! But, now if you don’t want to only eat turkey sandwiches, you can mince it up for some delicious vegan chicken salad and add it to salads, wraps, stuffed tomatoes, or on a cracker for a late night snack. More uses for that turkey breast may mean you don’t have to freeze it after all.

The vegan deli sliced turkey recipe and chicken are really easy and yield about a pound and a half or turkey or chicken breast. Both slices super thin making it perfect serving cold on a sandwich or even warmed with gravy and mashed potatoes.

vegan deli sliced turkey breast

vegan deli sliced turkey breast

So if you are feeling adventurous and want to make the most versatile and convincing turkey/chicken seitan breast, trust me when I say you will love these, and can use it so many ways. But, this easy vegan chicken salad is one of my personal favorite ways to use it!

INGREDIENTS:

  • 1/2 batch Vegan Deli Sliced Turkey Breast , or 4 Easy Vegan Chicken Breast

  • 1/3 to 1/2 cup vegan mayo

  • 2 celery stalks, finely diced

  • 1/4 cup white onion, finely diced

  • 1 teaspoon minced garlic

  • 1/2 teaspoon salt

  • 1/4 teaspoon black pepper

  • 1/2 teaspoon greek seasoning, like Cavender’s brand

  • Optional: 1/2 teaspoon of chickenless seasoning, like Trader Joe’s brand

  • tablespoon of fresh dill, minced

vegan dill chicken salad

vegan dill chicken salad

INSTRUCTIONS:

  1. Cut the deli turkey breast into 1 to 2 inch cubes. Pop them in the food processor and pulse until the deli meat is minced up. If you do not want to use a food processor, you can mince up the turkey breast using a very sharp knife.

  2. Add the minced turkey breast and remaining ingredients into a medium sized bowl and mix. You can use more or less mayo and seasoning depending on taste. I like a lot of dill some tend to be heavy handed with it.

  3. Serve on a sandwich, with crackers, or on a salad.

  4. Store leftovers in an airtight container in the fridge for up to a week.

If you like this recipe, then try these:

vegan dill chicken salad

vegan dill chicken salad

Vegan Stuffed Bagel Bites

vegan stuffed bagel bites

vegan stuffed bagel bites

Dear Starbucks, make more vegan things to eat, but thank you for all the coffee you have filed me with for the last 25 years. Sincerely, Kat

I mean, I don’t even pretend I am not addicted to coffee. I drink it all day, unless I am feeling fancy and then I might have a dirty chai tea latte. And I drink a lot of Starbucks because it is what is convenient, especially when on the road. I have 4 kids and need a drive thru.

I know where every Starbucks is on I-75 between Florida and Atlanta, or 1-4 between Jax and Orlando and will plan my drives around town based on where there is a Starbucks drive thru. So yeah, I love coffee. But I love to eat just as much as I love coffee and Starbucks comes up short in that department . Props for the efforts to add vegan milk options, even though they want to charge me more for almond milk, seriously, why…I drink my coffee black anyways so it’s not often I am enraged by said upcharge on a personal level…but on behalf of all you who need a milk in your coffee, I shake my fist at the powers that be.

Why am I going on and on about Starbucks you may wonder?!?! Well, when I am often gazing hangerly into the baked goods case wishing they had something I could eat, I mostly wish I could eat those cute little stuffed bagel bites they have. Have you seen them?!?! I mean come on, its genius. Little balls of bagel stuffed with cream cheese. Now mess, not fuss, just a little bite of seeming heaven.

vegan stuffed bagel bites

vegan stuffed bagel bites

But again, how would a vegan know unless they go home and make their own. This is the story of our lives, right. Wishing popular establishments would come around and offer more vegan, allergy friendly options. But in the mean time, we order the coffee, maybe a banana, and dream about the things we wish were vegan or our allergic selves or kids could eat.

Well, we deiced to just make our own y’all. We already have a solid bagel recipe on the site, so it was just a matter of making them bite size and stuffing them full of vegan cream cheese. Its actually pretty easy. Is it easier than walking into a Starbucks and ordering one with your coffee?!? Nope, but you can make yourself 24 of these cuties and take one with you on your way to work, and maybe even though a Starbucks drive thru. Plus you will feel accomplished in making them yourself (maybe) and you can making them any flavor you want!!!

vegan stuffed bagel bites

vegan stuffed bagel bites

If you don’t have a favorite vegan cream cheese brand, trying making your own. Our recipes uses cashews and tofu and is hands down better than store bought brands. It makes a lot and you need 1 and 1/2 cups for this recipe. If you don’t want 24 bagel bits you could half the recipe or make a full batch and freeze half after they are baked.

So until more places start making more things for vegans, I will keep trying to make the things I wish I could eat right at home. And although it is not a convenient as grabbing a treat wth your coffee, taking the extra time to make a batch of these on the weekend will keep your belly happy and full throughout the week!

vegan stuffed bagel bites

vegan stuffed bagel bites

Ingredients:

  • 4 cups all purpose flour

  • 1 tablespoon dry active yeast

  • 1 and 1/2 cups warm water

  • 1 tablespoon white sugar

  • 3 teaspoons salt

Filling:

  • 1 and 1/2 cups cream cheese

  • optional: green onions, everything bagel seasoning, cinnamon, sugar

Boiling liquid:

  • Enough water to fill a large pot

  • 2 teaspoons baking soda

Instructions:

  1. In a large bowl add water, yeast, and 1 tablespoon of sugar. You want the water warm but not too hot. It needs to be around 100 degrees. Much hotter and it will kill the yeast. I just use hot water from the tap. Let the mixture sit for about 10 minutes until it is nice and foamy.

  2. Add the yeast mixture along with the remaining ingredients to a stand mixer. You can either use the paddle attachment to get everything mixed up, or mix it by hand before attaching the dough hook. Allow the dough to knead on medium speed for about 10 minutes. It needs to knead for this long! I promise. If you do not have a stand mixer then you can mix the ingredients by hand and knead for about 15 minutes. Baking and a workout at the same time! Heck yes! Look at you burning those bagel calories before you even eat one!

  3. Pull off a piece of dough and stretch it. You want it to make a “windowpane” that you can see through, but does not rip. That’s when you are done kneading!

  4. Place dough in large bowl and cover with plastic wrap or a damp kitchen towel. Allow dough to rise for about an hour. It will grow but not quite double in size.

  5. While the dough is rising, prepare the cream cheese filling. If making savory bites you can keep the cheese plain or mix in diced green onions or chives. If you want to make a sweet cinnamon bagel bite, you can mix in a few tablespoons of sugar and a teaspoon or so of cinnamon into the cream cheese. We normally do half sweet and half savory. Either way, once you have added your mix ins to the cream cheese, prepare a baking sheet covered with parchment paper. Using a tablespoon sized small scoop, scoop cream cheese balls onto the pan and pop them in the freezer while you wait on the dough. Having the cream cheese firmed up and slightly frozen will make it easier to work with.

  6. Once dough has risen, divide into 24 equal pieces. On a clean floured surface form a ball with each piece. Flatten each ball into a round circle, about 2 inches in size.

  7. Preheat your oven to 375 degrees.

  8. Bring a large pot or dutch oven full of water to a boil.

  9. Place a firm/frozen ball of cream cheese in the center or each dough circle. Pinch up each side of the circle into the center making sort of a fortune cookie shape. Next fold the four corners into the middle making sure to pinch them in well and that they are all sealed up so the cream cheese doesn’t ooze out out once they begin to bake! (see photos above)

  10. Add the baking soda to the boiling water and drop a few bagel bites in at a time for about 30 seconds. Using a slotted spoon, turn the bagel bites to make sure they get wet on all sides. Remove and place on a parchment lined baking sheet, keeping a few inches between each bite.

  11. Sprinkle bagel bites with desired toppings while the bagel are still wet and the toppings will stick. If making cinnamon sugar bagels, just mix a few tablespoons of sugar with a few teaspoons of cinnamon. You can use sesame seeds, sea salt or everything bagel seasoning if making savory bagel bites.

  12. Bake bagels for 25 - 30 minutes. You can brush the bagels with a 1/2 cup whipped aquafaba mixed with 2 tablespoons of maple syrup, or melted vegan butter. This just helps the bagels brown. You do not have to brush them with anything.

  13. Allow bagels to cool on a the baking pan before storing in an airtight container at room temperature or in the fridge. You can reheat in the microwave, toaster oven or oven or eat at room temp.

You can freeze the vegan bagel bites for up to a few months.

vegan stuffed bagel bites

vegan stuffed bagel bites

If you like this recipe, then try these:

vegan stuffed bagel bites

vegan stuffed bagel bites

Vegan Spinach and Artichoke Lasagna

vegan spinach and artichoke lasagna wth jackfruit

vegan spinach and artichoke lasagna wth jackfruit

I love lasagna. Regular ol saucy, cheesy, vegan meaty lasagna.

Growing up it was not a thing my mom ever made. She grew up on a farm in Alabama so lasagna was never on the menu.

I remember the first time I ever made lasagna I was grown and married and was given a recipe that included a block of Velveeta Cheese. This was pre vegan and clearly mistakes were made. I think my husband ate it, but I am also certain it was just because he was not about to tell his new wife that she had not actually made lasagna but some weird third cousin to lasagna that nobody actually likes. I mean to sum it up, it was gross.

Now days I make a mean lasagna. Its my pot luck, meal train, go to, and I have a whole group of Ukrainian Rabbis that visit our synagogue often that will vouch for it. On their last visit it seems everyone had the same idea to bring them lasagna, but it seems my vegan version was the favorite, and they had no idea it was even vegan!

So deciding to make a spinach and artichoke lasagna was never a thought in my mind. I like marinara sauce…on everything….but my daughter suggested I make it and I decide it might be a welcome change for the rest of the family. It seemed easy enough to whip up a batch of spinach and artichoke dip, add some vegan all purpose cheese and some crunchy panko topping and call it done.

I know that chicken lasagna is a thing so decide to add a can of jackfruit to mimic the texture of chicken and add a boost of healthy fiber to the dish. It worked great but you can skip the jackfruit if you want and just add another can of artichoke hearts as well.

Well, it worked and the kids and husband all loved it. I liked it too. I might not like it more that regular lasagna but it was good for sure and I think 3 out of the 6 of us would choose this one over a traditional lasagna. I have come a long way since that tragic Velveeta lasagna, y’all!

So the next time the Ukrainian Rabbis come to visit I think I will make them this lasagna and see what they think! If they like it, I will know its actually good and my family isn’t just being nice.

INGREDIENTS:

  • I package lasagna noodles

  • 1/4 cup of panko bread crumbs

  • 1/4 cup vegan parmesan cheese, homemade or store bought

  • I/2 batch All Purpose Vegan Cheese sauce

  • 1 container of plain vegan cream cheese, or 8 oz of homemade cream cheese

  • 1 (14 oz) can of artichoke hearts, drained and diced

  • 1 (20 oz) can young green jackfruit in brine

  • 9 oz container of fresh baby spinach

  • 1 small/medium yellow onion, diced

  • 1/4 cup vegan mayo

  • 2 teaspoons of minced garlic

  • juice from 1 lemon

  • 2 teaspoons all purpose seasoning ( I use Trader Joes 21 season salute)

  • 1 teaspoon of salt

  • 1/2 teaspoon pepper


INSTRUCTIONS:

Preheat eat oven to 350 degrees

  1. Prepare cheese sauce according to instructions. If you can’t or don’t eat cashews you can use the same measurement of sunflower seeds in the recipe. Set aside.

  2. Drain the jackfruit and rinse. You can chop the jackfruit with a knife or shred it between your fingers.

  3. In large skillet add a few teaspoons of oil and add jackfruit and the diced onion. Sauté over medium heat until the onions are translucent. Remove the onion and jackfruit from the pan and place in large bowl. Set aside.

  4. In the same skillet add the spinach with a few teaspoons of water and cook until the spinach has fully wilted. If the spinach will not all fit in the pan, you can add a handful at a time as it will cook down very quickly making room for more. Let the spinach cool completely.

  5. Placed cooled spinach in a clean kitchen towel making a pouch. Using the towel, ring out as much liquid as you can from the spinach.

  6. In the same bowl with the onions and jackfruit, mix the spinach, artichokes, cream cheese, mayo, garlic and seasoning.

  7. In a 9x13 pan, smear about 1/4 cup of the spinach mixture on the bottom of the pan. Next add a layer of uncooked lasagna noodles ( I use regular lasagna noodles, not the no boil kind. They will not need to be boiled.)

  8. Next begin building your lasagna by adding about 1/4 of the spinach mixture over then noodles the evenly spread about 1/4 of the cheese sauce over the spinach. You should be able to get 4 layers of noodles depending on how deep your pan is. You can do 3 layers if you prefer. On the final layer sprinkle the vegan parmesan cheese and panko.

  9. Bake for 45 minutes to 1 hour on the middle oven rack. If the top begins to brown too quickly, cover with foil unit the last 15 minutes of the bake. Slice and serve.

If you like this recipe, then try these:

IMG_7526.jpg

Vegan Mini Pineapple Upside Down Cakes

Vegan Pineapple upside down cake

If you follow this blog at all, you may have noticed my affection for making things in muffin tins.

Desserts, breakfast, dinner, you name it, if it fits in a muffin tin, I have put it in a muffin tin.

I have recipes for muffin cup quiche, lasagna, sausage tater tot cups, green been casserole, tacos, Banh Mi. serious sooo many things.

So it was only a matter of time before we made one of our all time favorite desserts in a muffin cup. Vegan pineapple upside down cake!

I think we were originally inspired by Disney for this one. We live near Disney World and are pass holders. So whenever we are there we hardly ever skip grabbing a Dole Whip. If you do not know about Dole Whip then please google now!!! Seriously!!! One Dole Whip option is getting the pineapple soft serve (vegan) on top of a little baby pineapple upside down cake (not vegan.) So not wanting to be left out of that fun, we came home and our super talented 14 year old daughter, Peyton, baked up our own version. Now all we need to do is blend up a batch of some Dole Whip and we are good to go.

vegan pineapple upside down cake

These vegan pineapple upside down cakes are good with or without pineapple soft serve. They are super good with a scoop of vegan vanilla ice cream or just as is. They mix up quickly and easily and are just super cute. Again, this is the reason for my affections towards muffin tin foods. The cute factor.

If you are not into cute foods, you can bake this into one big vegan pineapple upside down cake. The cook time will change since it’s a bigger, and you will just have to check on it and expect it to take a little longer. I would bake it in a round 8 inch cake pan if that was the route I was going.

How ever you choose to bake it, and top it, this vegan pineapple upside down cake is delicious and taste like tropical summer! Which is basically my favorite flavor of anything.

vegan pineapple upside down cake

INGREDIENTS:

You will need one 12 cup muffin tin for the is recipe

The Cake:

  • 1 1/2 cups all purpose flour

  • 1 1/2 teaspoons baking powder

  • 1/4 teaspoon salt

  • 1/2 cup vegan butter at room temperature

  • 1/2 cup white sugar

  • 1/4 cup brown sugar

  • 2 starch eggs (2 tablespoon tapioca or corn starch, plus 6 tablespoons water whisked together)

  • 1/4 cup vegan sour cream or plain yogurt

  • 1/4 cup oat milk (you can use almond or coconut but we find oat best for baking)

  • 1/4 cup pineapple juice (Juice from the can you get the pineapple rings from)

  • 1 teaspoon vanilla extract

Topping:

  • 1/4 cup melted vegan butter

  • 1/2 cup brown sugar

  • 20 oz can pineapple rings (rings used for topping, juice used in cake)

  • 12 maraschino cherries without stems

INSTRUCTIONS:

Preheat oven to 350

  1. Spray muffin tin with oil or lightly brush oil in each cup.

  2. Prepare the topping by mixing the melted vegan butter and brown sugar in a small bowl. Cut 6 pineapple rings into quarters. Cut 12 cherries in half. Arrange 2 pieces of pineapple and 2 pieces of cherries in the bottom of each muffin cup. Evenly divide and scoop the sugar butter mixture into each muffin cup over the pineapple and cherries.

  3. In large bowl or the bowl of your stand mixer add the butter, white, and brown sugars. Beat on medium speed in the stand mixer or with a hand mixer if mixing in a bowl. Add the starch eggs and mix until well combined.

  4. Next add the vanilla and sour cream or yogurt.

  5. In a separate medium bowl, mix together the remaining dry ingredients.

  6. Add 1/3 of the flour into the butter sugar mixture and and mix, next add the milk, then 1/3 of the flour, then the pineapple juice then the remaining flour, beating between each addition.

  7. Divide the batter evenly between the muffin cups. Place the muffin tin of a cookie sheet and place on the middle rack of your oven. Bake for 35-45 minutes, until a toothpick inserted into the cake comes out clean.

  8. Let the cakes cool for about 20 minutes and gently turn the tin over onto a baking sheet. Store the cakes in the fridge in an air tight container. S

vegan pineapple upside down cake

If you like this recipe, then try these:

Vegan Key Lime Filled Donuts

IMG_7419.jpg

We love donuts and make a lot of donuts because of said love.

Where we live there are not a lot of vegan donut options, so if we want them, we need to make them.

Once we perfected a vegan yeast glazed donut recipe, we were able to get creative and start making all kinds of flavors to suit our mood.

Recently one of our kids saw that Krispy Kreme had put out a limited time key lime filled donut and requested we make vegan version. Who am I to say no to such a logical request. I mean I love donuts and key lime anything so I didn’t even hesitate to say yes.

We took our vegan lemon curd recipes and replaced the lemons with limes. Now, I did not use key limes. This is beause I could not find key limes at this time, and I live in Florida where the key lime hails from.. And in case you don’t know, key limes are smaller and a little less tart than Persian limes. But for this, a regular ol lime works fine. In the event I can find key limes the next time I make this, I will use them. Key limes are small and that means juicing more limes to get the amount you need.

Fun fact, probably more often than not a key lime pie you are served somewhere outside of Florida is not made with key limes…just regular ol persian limes. This drives my step dad bananas and if you serve that man a key lime pie, by golly it better be made with key limes. Here in Florida you might get smacked trying to pass off a regular lime pie for a key lime pie…you have been warned.

IMG_7426.jpg

We used tapioca starch to make this curd…just an FYI, before you think it has all gone wrong. It is going to be stretchy and in all honestly kind of slimy. It gets thick when it cools . You will need to stir it well as it will be pretty gelatinous. We want it extra thick so it won't all ooze out of the donuts. So before the comments start rolling in about said curd’s appearance, I wanted to give this disclaimer. It taste good, but might now look super appetizing before it goes in the donut.

Lastly you just need to glaze and give the donuts a green stripe if you are 100% trying to rip off Krispy Kreme with your vegan version. Plus the green indicates there might be something limy inside…I don’t know why a green stripe says “must be lime in there” but it does…so now that we have covered that, its time to make the donuts, the vegan key lime donuts!

INGREDIENTS:

The Donuts:

  • 4 cups all purpose flour

  • 3/4 cups aquafaba (whipped. click link for easy recipe)

  • 1/2 cup plus 2 tablespoons melted vegan butter

  • 1/4 cup sugar

  • 2 and 1/4 teaspoon dry active yeast

  • 1 cup plus 2 tablespoons plant based milk

  • 1/2 teaspoon salt

  • Lime curd for filling

  • 3-4 cups of oil for frying, I use grape seed but you could use whatever oil you normally fry with

IMG_7449.jpg

Lime Curd Filling:

  • 1 cup coconut cream, divided ( heavy coconut cream in the can, shaken well)

  • 2 tablespoons coconut oil

  • 1/3 cup lime juice

  • 1/2 cup white sugar

  • 1/4 cup tapioca starch

  • pinch of salt

  • Optional: 2 teaspoons lime zest for extra lime flavor

The Glaze:

  • 3 cups powdered sugar

  • 1/4 cup melted vegan butter

  • 1/4 cup lime juice, give or take

  • splash of plant milk if needed

IMG_7418.jpg

INSTRUCTIONS:

  1. Heat milk in microwave for 30 - 45 seconds. You want it warm, but not boiling hot. In the neighborhood of 100-110 degrees but not hotter than that. It will kill the yeast.

  2. Add the warm milk, yeast, and sugar to the bowl of your stand mixer. If you do not have a stand mixer, add the contents to a large bowl. Let sit for 5 minutes to activate the yeast.

  3. After 5 minutes add the aquafaba, and melted butter to the mix. Next add the flour, and salt, and mix for 5 minutes on medium speed if using the stand mixer. If not using a stand mixer, then mix the ingredients together well in a bowl, then transfer to a floured counter top, and kneed the dough by hand for 5 minutes. The consistency of the dough should be soft, but not sticky.

  4. After the dough has been kneaded, place it in a lightly greased bowl and cover with plastic wrap. Pop it in the oven. You are NOT turning the oven on, just leaving it there to rise. If your oven has a dough proof setting you can turn that on. Leave dough to rise for one hour, or until it has doubled in size.

  5. While the dough is rising prepare the curd : In a medium sauce pan, whisk together 1/2 cup coconut cream and remaining ingredients over medium/low heat until the mixture thickens (about 5 minutes.) The curd will continue to thicken as it cools.

  6. Remove from heat and stir in the remaining 1/2 cup coconut cream. Place curd in fridge to cool. It will get pretty thick and gelatinous once cooled. Give it a good stir to get to a place it will pipe once ready. Never mind the seemingly off putting texture ( I am really selling this curd hunh?!?!) it needs to be thick to stay in the donuts. It taste great so just stir and move on;)

  7. Once the dough has finished rising, transfer to a lightly floured countertop. I like to divide the dough in half and work it in two batches. It makes it easier to roll out. Roll out one half of the dough to about 1/4- 1/2 inch thick. Using a 3 inch circle biscuit or cookie cutter (or donut cutter if you have one) begin cutting circles. Repeat with other half of dough. You should have a total of about 2 dozen donuts.

  8. Place donuts on cookies sheets, and let rest for about 15 - 20 minutes. They will become bigger as they rest.

  9. While they are resting, heat 2 - 3 inches of oil in a deep skillet or medium sized pot.

  10. Once oil is hot, begin adding the donuts to the oil, 2 or 3 at a time. Fry the donuts for about 20 second on each side then flip. Repeat one more time. This helps them cook though and not burn. If you don't have enough oil in the pan, and they are hitting the bottom, they will easily burn. So make sure to use enough oil!

  11. Allow donuts to cool on a wire cooling rack, placed on top of a paper-towel-lined cookie sheet. Once donuts are cooled, use a chop stick or skewer to poke a hole into the donut on one side. You can kind of turn the chop stick or skewer inside the donut to widen the hole. This is making room for the curd. You want to make sure you have created enough room for a good amount of filling .

  12. Once all donuts are done frying, mix all of the ingredients for the glaze. If you find the glaze too thick, you can always thin it with some more milk. Reserve a little glaze if you want to add green stripes. I added a tad of green food color and some more powdered sugar to thicken it up. The stripe gaze will need to be more of an icing constancy.

  13. Dip one side of the donut in the glaze and place back on the wire rack to allow the excess glaze to drip off.

  14. Once the glaze has set, fill a piping bag, set with a jelly tip or larger frosting tip, with the curd . Begin piping the curd into the holes you made in the donuts with the chop stick.

  15. Once all the donuts are filled with curd you can serve as is, or add green stripes with extra glaze along the tops by placing the green icing in a piping bag with a tiny tip, or you can place in a zip lock and cut a tiny hole in a corner to pipe out the frosting.

If you like this recipe, then try these:

IMG_7433.jpg

Vegan Deli Sliced Roast Beef

I want to give credit where credit is due, and this recipe idea gets all it’s credit from a person named J Sweeney! J left me a comment recently about taking our vegan deli sliced turkey recipe and adapting it to make a roast beef.

It maybe took me 2 minutes from the time I read the comment until I was standing over my food processor making this recipe happen.

J had asked for suggestions on turning the turkey to vegan roast beef and I had ideas but needed to test them out. I knew it need a beet for color and a change of spices and seasoning. I have brisket and pastrami recipes where I use jackfruit instead or tofu and that works very well to accomplish the textures I am trying to accomplish there. But tofu would be better suited for deli sliced vegan roast beef. So I that’s what I did, and thanks to J for sparking me to even try to make this recipe, it worked and is delicious.

Vegan deli meats are actually really easy to make at home and way cheaper than buying per made versions. You can control the seasoning, and you know every single ingredient that is going into you vegan deli meats.I love knowing what my family is eating and I love saving a ton of money because with a house full of kids and few teenagers, we go through a LOT of sandwiches!

IMG_7404.jpg

Now, when I say let this recipe rest, I mean it! If you bake this roast beef and decide to slice it right away, DO NOT COME SASSING ME WHEN THE TEXUTE SEEMS OFF!! It needs to rest. That is what will help the “roast beef” to firm up and slice deli thin. Sorry, I didn’t make the rules about seitan, and I don’t really love rules, but this is one I always follow. It’s for the good of the vegan roast beef, y’all!

If you are not a fan, or never have been a fan of roast beef, try one of our other deli meats, they are linked at the bottom of this recipe. I would go as far as to say you would be hard pressed to find a better vegan turkey recipe anywhere. That’s a bold statement, but seriously, for as easy as it is to make, and for how convincing and delicious it is, you will probably never look for another vegan turkey lunch meat recipe, again. And maybe the same will be true for this vegan roast beef, as well.

So thanks J Sweeney for the inspiration, and I hope y’all are happy with this vegan roast beef effort. I know I was, and am so glad you reached out and that this was the result!

IMG_7398.jpg

*This recipe calls of super firm tofu, the kind vacuum sealed and not sitting in a tray of water. If you choose to use extra firm tofu packed in water, the results will vary. Too much liquid will alter the texture of this vegan roast beef. I highly suggest looking for the super firm tofu.

INGREDIENTS:

IMG_7806.jpg
  • 1 block super firm tofu, the kind in a vacuum sealed pack

  • 1 cup vital wheat gluten

  • 1/4 cup raw beet, cubed (one small beet)

  • 2 tablespoons - 1/4 cup brown sugar

  • 2 teaspoon vegan Worcestershire sauce

  • 2 teaspoons dried thyme

  • 2 teaspoons dried rosemary

  • 2 teaspoons garlic powder

  • 1 teaspoon black pepper

  • 1 tablespoon No Beef, or Vegetable Better Than Bouillon

  • 2 tablespoons soy sauce

  • 1/4 cup nutritional yeast

  • 2 tablespoons corn or tapioca starch

  • 2 tablespoon neutral tasting oil

Spice Coating:

  • 2 tablespoons brown sugar

  • 1 teaspoon dried thyme

  • 1 teaspoon dried rosemary

  • 1 teaspoon smoked paprika

  • 1 teaspoon garlic powder

  • 1/2 teaspoon salt

  • 1/4 teaspoon black pepper

INSTRUCTIONS:

Preheat oven to 350 degrees

  1. Add the peeled and cubed beet to the food processor. Let it run for a minute and get the beet good and broken down.

  2. Break up the tofu and place it into a food processor along with the beet. Run the processor for around a minute until the tofu is broken down.

  3. Add all of the remaining ingredients and let the food processor run for a couple of minutes. You want the mixture to form a dough. Letting the processor run will help knead the dough. We want this seitan to be firm so we need it to knead for a bit. If the dough seems too dry, you can add water, just a teaspoon at a time until the dough comes together. I added NO water to my dough. The other liquid ingredients and the beet added enough moisture to mine.

  4. Once you have a smooth but firm dough, remove it from the food processor and place on a clean counter. Knead the dough with your hands for about a minute, forming a kind of oval shaped loaf with the dough.

  5. Take a piece of aluminum for about 3x bigger than the loaf of dough, and lay it out flat. Coat the foil in spray oil or wipe it down with any oil you have. Sprinkle half of the spice coating in the center of the foil. Place the loaf on the seasoning and roll it around. Sprinkle the remaining seasoning over the top and press it in. The goal is to fully coat the loaf in the seasoning!

  6. Place the loaf back in the center of the foil and fold up the sides, pinching at the top to seal it up, then twist the ends to fully seal the foil.

  7. Place on a baking sheet and put in the oven on the middle rack. Bake sealed for 30 minutes. After 30 minutes carefully open up the foil, and continue baking for another 30-40 minutes.

  8. Remove finished vegan roast beef and let cool at room temp. Seal the foil back up and place the vegan roast beef in the fridge over night to rest. This step is important to get the texture we are trying achieve. If you try and serve it before it rests it will not be nearly as firm.

  9. Once the vegan roast beef has been in the fridge over night, you can remove it and slice it to serve. It should at this point be firm enough to slice using a mandolin or a sharp knife. Store in an air tight container in the fridge for up to 10 days.

TROUBLE SHOOTING THIS REICPE:

*I used high protein tofu in a vacuum sealed package and this what I strongly advise using. It is much firmer than regular firm tofu and has less moisture and a more chewy texture. If you opt to use regular firm tofu you will need to press it first and remove as much liquid as possible. You may need to adjust the amount of water in the recipet as well. Add the water last, adding just enough to accomplish a firm dough.

  • *If you find your turkey has A LOT OF LITTLE HOLES, and a more BREAD LIKE TEXTURE this can be caused from under kneading the dough, BUT more likely cooking the seitan at too high of a temperature, or for too long. Check your ovens temperature with an oven thermometer. Your oven may just be cooking hotter than it registers. Also gas and electric ovens tend to cook differently. If you do not have an oven thermometer you can reduce the heat in your oven by 25 degrees, and keep the seitan covered for 50 minutes and open for 10.

If you like this recipe, then try these:

IMG_7402.jpg

Vegan Southern Fried Chicken

Vegan fried chicken with crispy skin

My mom can fry the heck out of some chicken. Pre-vegan, pre-vegetarian, fried chicken was my favorite food.

We are from the south, my parents are from Alabama, so frying foods is something you are basically born doing. My mom taught me young.

I have tried all sorts of vegan fried chicken variations over the years, using tofu, and basic seitan. I have seen people using jackfruit to mimic the shredded texture. But I decide to take my turkey seitan recipe, change a few things and fry that up.

It is by far the most convincing vegan meat recipe I have made to date, and surely it would work well for a vegan fried chicken. And it did!

The basic recipe for this chicken is pretty similar to the turkey, with some changes to certain spices, and the addition of adding rice paper skin when baking to add another element of crunch to the whole thing.

I am always preaching about letting setian rest, and it does need to rest. I did find this recipe did well when I baked it in morning and fried it that night. The pieces are thin enough that a 6 hour rest seem sufficient. I do think it would have been even better if I gave it overnight but 6 hours works.

I like to add the coating to a large zip lock bag, although you can use a clean brown grocery bag as well. It just makes for less mess when getting the pieces coated. I also like to double coat them so they are good and crispy. Thats what you want, a nice crispy “skin". You can also cut the pieces once they have rested and make chicken fingers pretty easily.

I have not tried this recipe in the air fryer. It should work just fine, it just won’t be nearly as goo. If you give the pieces a spray with oil, I think you could cook them on 375 for 10 minutes but check on them to see how they are doing. I have reheated the pan fried pieces in the air fryer and that works great.

So if you are looking for a crispy, flavorful, vegan fried chicken, this is my favorite, and now my go to recipe! My only other suggestion is be sure you also bake up a batch of fluffy southern biscuits when you deiced to make this recipe. Every southerner knows you can’t have one without the other.

Vegan fried chicken with crispy skin

INGREDIENTS:

RICE PAPER SKIN:

COATING:

  • 1/2 cup plain unsweetened vegan yogurt

  • 1 cup milk

  • 2 1/2 cups all purpose flour

  • 1/2 cup tapioca or corn starch

  • 2 teaspoons each, garlic powder, dried thyme, salt, onion powder, sugar

  • 1 teaspoon each turmeric, cinnamon, black pepper, smoked paprika

  • 1/4- 1/2 teaspoon cayenne pepper

INSTRUCTIONS:

Preheat oven to 350 degrees

MAKING THE SEITAN CHICKEN BREAST:

*If you attempt this recipe with REGULAR EXTRA FIRM TOFU you will need to press it well, and reduce the water added to the recipe. Add the water last only a tablespoon at time until the dough resembles the picture. This will cause varying results and I really do suggest finding the super firm, vacuum sealed, high protein tofu if you can. It gives the seitan a far better texture.

  1. Break up the tofu and place it into a food processor with the regular metal blade. Run the processor for around a minute until the tofu is broken down.

  2. Add all of the remaining ingredients and let the food processor run for a couple of minutes. You want the mixture to form a dough. Letting the processor run will help knead the dough. We want this seitan to be firm so we need it to knead for a bit. If you dough seems a bit too dry, you can add another few tablespoons of water, just don’t add too much more! I start at 1/2 cup and work from there.

  3. Once you have a smooth but firm dough, remove it from the food processor and place on a clean counter. Knead the dough with your hands for about a minute, forming a kind of oval, flattened out shaped with the dough. Cut the dough into 10 triangles. Using your hands, form the triangles into a chicken breast shape.

  4. In a shallow dish or pie plate, add the warm water, bouillon and seasoning for the rice papers. Stir well until the bouillon is mixed in. Place one rice paper at a time in the mix until it is super soft and pliable. Lay the rice paper flat on a cutting board. Place one piece of chicken seitan in the middle and wrap the rice paper skin around the seitan. Repeat with process with remaining rice paper and seitan pieces.

  5. Line a baking sheet in parchment paper or foil, spray with oil. Evenly space out the seitan chicken pieces making sure they are not touching. They will expand as they bake. Spray the tops with oil and tightly cover the entire pan in foil, tucking the edges tightly around the edges of the pan. We want the seitan to steam inside the pan. Place the pan on the middle rack of the oven and bake for 20 minutes.

  6. Open up the foil and allow the seitan chicken to bake for another 20 minutes uncovered. These chicken seitan pieces are thin, if you know your oven cooks hot or the temp is off, you may need to adjust your cook time by 5-10 minutes. If the seitan over cooks it tends to form tiny holes that look like bread. That is often an indication you oven temp is off and you may need a oven thermometer to check the actual temp.

  7. Let the seitan cool at room temp them transfer to the fridge for at least 6 hours to rest. I often bake the seitan the night before I wish to fry it. But you could also bake it in the morning and it would be fine to fry by dinner. Seitan requires a nice long rest to firm up and achieve a more meaty texture. The longer you can let it rest, the better!

Vegan fried chicken with crispy skin

FRYING THE SEITAN CHICKEN BREAST:

If you want chicken fingers, you can slice the chicken breast into 3 pieces now that it has rested.

  1. In a medium bowl or pie plate, whisk the plant milk and yogurt together.

  2. In a large zip lock bag combine the flour, starch, and spices. Shake it up really well to get it all mixed together

  3. Take a piece or seitan chicken breast and first dip it in the milk mixture, next shake it in the bag of flour, shake off any excess flour and dip it in the milk again, then back in the bag for another shake. Place on a plate and repeat with remaining pieces.

  4. Place a wire cooling rack onto of a paper towel lined baking sheet. This is where the fried seitan chicken will go once its cooked. This helps it stay crispier than if you just placed it on a paper towel lined plate. This method works for all fried foods.

  5. Heat a large, deep skillet with 2-3 inches of neutral flavored oil good for frying like canola or peanut, over medium heat. You will know the oil is hot enough if you place a chopstick or wooden skewer in the bottom of the pan and little bubbles form around the tip.

  6. Place 3 or 4 pieces of seitan chicken in the pan, careful not to over crowd and let it fry on each side until golden brown. Place the finish pieces on the cooling rack. Fry remaining pieces.

  7. Serve with southern vegan biscuits, mashed potatoes, or whatever side you like.

Vegan fried chicken with crispy skin

If you like this recipe, then try these:

Vegan Naan

IMG_7310.jpg

I think I have mentioned I live for carbs. A side of bread is my favorite part of dinner, always.

Naan might be on my top 5 favorite breads list, actually.

This recipe is basically yeast dough cooked in a pan with butter, and brushed with more butter. It’s crispy and soft and just perfect as far as I am concerned. Normally, naan is cooked in a tandoori oven, but since I am lacking said oven, a cast iron did the trick.

Also, I won’t even consider eating Indian food without a giant pile of vegan naan to go along with it!

Sadly, a lot of times naan is not vegan as it is made with milk , egg or yogurt. At least what I find pre-packaged in the store. So when you are vegan its best just to learn how to make it so you never miss out! Its actually not hard to make. In fact our 14 year old veganized this recipe and made what is in these pictures.

You do have to make a yeast dough but it is an easy yeast dough. You can use a stand mixer or mix and knead by hand. You do have to wait for the dough to proof, which is just how yeast bread works, but you don’t have to wait for it to bake since you fry it up in a pan!

You don’t have to being making Indian cuisine to make vegan naan! Since it is a flat yeast bread, it also makes a really good pizza base. You can fry up a batch of this naan, then use the pieces throughout the week to make quick and easy vegan pizzas! If you have kids you know these are the kind of recipes that are golden.

You can also use this vegan naan for sandwiches, eat at it with breakfast, or just eat it on its own because any dedicated carb lover knows, bread can stand alone. It is perfect and needs no help from other food!!

You can make this vegan naan plain or you can brush it with garlic butter or any spices you make like. It’s really versatile and oh my gosh, it’s so good!

So go, make vegan naan, then make it again, and again, and again, because it is so delicious, pretty easy, and the perfect food!

IMG_7311.jpg

INGREDIENTS:

  • 1/4 cup warm water. Around 110 degrees

  • 4 cups all purpose flour

  • 1 tablespoon sugar

  • 2 1/4 teaspoon dry active yeast

  • 3/4 cups room temperature vegan milk. I suggest almond or oat

  • 3/4 cups vegan plain unsweetened yogurt

  • 3 teaspoons salt

  • 1/4- 1/2 cup melted vegan butter

INSTRUCTIONS:

  1. In a medium sized bowl add warm water, yeast and sugar. Let the mixture sit for about 10 minutes or until the top is nice and foamy and frothy. If it does not get very bubbly or frothy, your water could have been too hot and killed the yeast. If that happens, start over.

  2. Whisk the flour and salt together in bowl of your stand mixer or in a large bowl if mixing by hand.

  3. Add the milk and yogurt to the yeast mixture and whisk until combined. Add the mixture to the flour. If using a stand mixer, let mix with the bread hook on medium speed for just a few minutes until the dough has formed and is smooth. If mixing in a bowl, mix all ingredients until combined. Turn the dough onto an clean floured surface and knead by hand for 4 or 5 minus until the dough is smooth.

  4. Place dough in a lightly oiled bowl and cover with a damp kitchen towel or plastic warp. Place the bowl inside a tuned off oven for one hour, or until the dough has doubled in size.

  5. Once dough has doubled, remove from the bowl and place on a clean floured surface. Press the dough out and cut 12 equal sized pieces and roll them into a ball.. You can just eyeball this or use a kitchen scale. I eyeball it.

  6. Roll each ball out into an oval-ish shape that is about 1/4 of inch thick and about 6 inches wide.

  7. Heat a large skillet (I like to use a cast iron) over medium heat. Brush the dough with melted butter and cook on piece of naan at a time until bubbles form in the dough. Flip and cook on the other side until golden brown. It should only have to cook a few minutes on each side. Repeat with remaining dough.

  8. If you would like garlic naan you can add a few teaspoons of minced garlic to 1/4 cup melted butter. Brush finished naan with garlic butter to serve, or serve as is.

If you like this recipe, then try these:

IMG_7316.jpg

Vegan Chicken Tikka Masala with Tandoori Seitan

Vegan chicken tikka masala with tandoori seitan

Indian food is something my husband and I have never seen eye to eye on. I adore it. I would eat it all the time and be so very happy. My husband will not.

So going out to eat Indian food is something I just stared going to do with my girlfriends. There is no need to drag Dave out and make him eat a food he doesn't like. I am a nice wife. Here is my proof if ever there was any question.

Before we were vegan or even vegetarian, I would go to Indian restaurant near us that served tandoori chicken tikka masala. It was tandoori chicken with a side of the sauce for dipping. I always loved this more than having the chicken simmered in the sauce. The chicken was so delicious and flavorful on its own, that I only wanted a little sauce with it. I have always been one to order sauces, dressing, condiments on the side. I have not found another restaurant near me that serves it this way, and that was always my favorite thing to order.

You can simmer this recipe in the sauce which I did here since it is more the norm. Or you can serve the vegan tandoori chicken with the sauce on the side. You can decide for yourself how you would prefer to eat or serve this dish! Oh the power of choice….its glorious.

Making Indian food at home is also something I hardly ever do since 2 out of 6 people in my house actually enjoy it. The handful of times I actually have made Indian food, I have had a ton of leftovers to give away. I also am no expert at Indian cuisine but have always enjoyed trying new Indian recipes.

But the other day I was thinking about how much I miss chicken tikka masala and how I really wanted to make it with seitan vs tofu which is what I have done in the past. I also knew I could make it and share it with my friends next door, Yanira and Dustin, because they also love Indian food! I was confident I could try and make a vegan tandoori chicken that would be super flavorful on its own or could be turned into vegan chicken tikka masala as well. I basically just researched oven tandoori chicken recipes and decided how I could adapt that to work with seitan.

Vegan tandoori chicken

And being that the vegan oven tandoori chicken turned out so well, the next obvious step was tikka masala!!

This sauce is super simple to whip together and really flavorful. I keep the spice heat low so that at least a few of my kids will eat it, but feel free to kick it up if you like it HOT!

Since the chicken takes a day to make and allow to rest, I make the chicken the day before I want this dish. You can even make several days in advance. I tend to make seitan chicken or turkey when I have a few hours of free time, and then its ready and rested when I need it! The resting part is super important or optimal texture so you have to trust me when I tell you it is so much better when it rests.

The sauce its pretty quick and If the vegan tandoori chicken is already made and ready to go, this dinner can be done in less than an hour! You could also use any pre-made vegan chicken you can find or like for this dish, although it will not be as flavorful as the vegan tandoori chicken. You could also marinade some tofu in the tadoori seasoning and cook it up to add this recipe if you are at a place where you want to attempt seitan. It would probably still be really good!

Fry up a batch of vegan naan and you have a really delicious, and pretty easy vegan Indian dinner at home. And if your family doens’t love Indian food either, find a friend or neighbor that does and share :)


INGREDIENTS:

  • 1 batch Vegan Oven Tandoori Chicken

  • 1 14 oz can of tomato sauce

  • 1/4- 1/2 cup water

  • 2 tablespoons vegan butter

  • 1 large onion, finely diced

  • 2 tablespoons minced garlic

  • 1 tablespoon grated ginger or ginger paste

  • 2 teaspoons garam masala

  • 1 1/2 teaspoons cumin powder

  • 1 teaspoon chili powder

  • 1 teaspoon ground turmeric

  • 1 teaspoon ground coriander

  • 2 teaspoons brown sugar

  • 1 1/4 cups vegan plain unsweetened yogurt or sour cream

  • handful of chopped cilantro

5BACC9E9-CCD2-4B8F-A2F7-933B48F8CC78.JPG

INSTRUCTIONS:

  1. In a large deep skillet, add the vegan butter over medium heat. Add the onion and garlic and cook until the onion is translucent.

  2. Add the dry spices and let them cook for minute with the onion and garlic. Next add in the the remaining ingredients, EXCEPT for the sugar, water, and yogurt, stirring well, and reducing the heat to low. Let the sauce simmer for about 20 minutes.

  3. Dice the tandoori vegan chicken pieces. Stir in the yogurt, sugar, and 1/4- 1/2 cup of water depending on how thick or thin you would like the sauce. Add in the cubed vegan tandoori chicken pieces and let them simmer in the sauce for another 20-25 minutes.

  4. Serve vegan chicken tikka masala over basmati rice and garnish with fresh cilantro.

Vegan chicken tikka masala with tandoori seitan

If you like this recipe, then try these:

Vegan Oven Tandoori "Chicken"

Vegan oven tandoori chicken

Indian food is something my husband and I have never seen eye to eye on. I adore it. I would eat it all the time and be so very happy. My husband will not.

So going out to eat Indian food is something I just stared going to do with my girlfriends. There is no need to drag Dave out and make him eat a food he doesn't like. I am a nice wife. Here is my proof if ever there was any question.

Before we were vegan or even vegetarian, I would go to Indian restaurant near us that served tandoori chicken tikka masala. It was tandoori chicken with a side of the sauce for dipping. I always loved this more than having the chicken simmered in the sauce. The chicken was so delicious and flavorful on its own, that I only wanted a little sauce with it. I have always been one to order sauces, dressing, condiments on the side. I have not found another restaurant near me that serves it this way, and that was always my favorite thing to order.

Making Indian food at home is also something I hardly ever do since 2 out of 6 people in my house actually enjoy it. The handful of times I actually have made Indian food, I have had a ton of leftovers to give away. I also am no expert at Indian cuisine but have always enjoyed trying new Indian recipes.

But the other day I was thinking about how much I miss chicken tikka masala and how I really wanted to make it with seitan vs tofu which is what I have done in the past. I also knew I could make it and share it with my friends next door, Yanira and Dustin, because they also love Indian food! I was confident I could try and make a vegan tandoori chicken that would be super flavorful on its own or could be turned into vegan chicken tikka masala as well. I basically just researched oven tandoori chicken recipes and decided how I could adapt that to work with seitan.

Vegan oven tandoori chicken

So I made my favorite seitan recipe and did just that. You really do need a roasting pan for this recipe or need to figure out a way to fashion something similar. Air needs to be able to circulate around the pieces of seitan while it bakes and also it needs to be wrapped in foil so it cooks all the way through without drying out. Truth be told, I had to borrow a pan from my neighbor, Fran. I will now be buying one because I will be making this all the time.

Despite my husbands feeling of Indian food, he actually seemed to like this vegan tandoori chicken. I tried to keep the heat down with the spices in hopes that he would actually eat it.

So if you loved tandoori chicken pre vegan, and have wanted to try you hand at making it at home, I think this recipe is a winner! It does take some time to cook it and allow it to rest. Trust me when I tell you to let it rest, as seitan firms up and the texture gets far more meat like if you let it rest!!! Just make this chicken a day or two before you actually want to eat it! Good things come to those who wait and all that jazz!

*You will need a roasting pan with a rack and aluminum foil for this recipe. This recipe will also take some time. Marinating and cook times equal 2 hours. There is also a need for the “chicken” pieces to rest to firm up after cooking. It is best to prepare this dish the day before you wish to eat it.

INGREDIENTS:

  • 1 block super firm tofu (the kind that is vacuum sealed in little water)

  • 1 cup vital wheat gluten

  • 1/2-3/4 cups water

  • 2 tablespoons tapioca starch

  • 1/4 cup nutritional yeast

  • 2 tablespoons neutral flavored oil

  • 1 teaspoon salt (optional if they Bouillon isn’t enough for you)

  • 2 teaspoons onion powder

  • 1-2 teaspoons garlic powder

  • 1 tablespoon No Chicken Better Than Bouillon

  • 1 teaspoon liquid smoke

  • 2 teaspoons poultry seasoning or Trader Joe’s Chickenless seasoning

TANDOORI MARINADE:

  • 1 cup plain vegan yogurt

  • juice from 1 small lemon

  • 1 teaspoon allspice

  • 1 teaspoon black pepper

  • 2 teaspoons salt

  • 1 teaspoon ground cinnamon

  • 2 teaspoons ground ginger

  • 2 teaspoons smoked paprika

  • 3 teaspoons minced garlic

  • 1-2 teaspoons Thai chili paste/ garlic chili sauce (its super spicy so add according to your tolerance)

  • 1/2 teaspoon cayenne pepper (optional)

INSTRUCTIONS:

  1. Break up the tofu and place it into a food processor with the regular metal blade. Run the processor for around a minute until the tofu is broken down.

  2. Add all of the remaining ingredients and let the food processor run for a couple of minutes. You want the mixture to form a dough. Letting the processor run will help knead the dough. We want this seitan to be firm so we need it to knead for a bit. If you dough seems a bit too dry, you can add another few tablespoons of water, just don’t add too much more! I start at 1/2 cup and work from there.

  3. Once you have a smooth but firm dough, remove it from the food processor and place on a clean counter. Knead the dough with your hands for about a minute, forming a kind of flatned oval shaped loaf with the dough. Cut the dough into about 12 chicken breast triangular shapes.

  4. In a large bowl or baking dish, whisk the marinade ingredients together. Add the the seitan pieces to the marinade . Place in the fridge for about an hour.

  5. Preheat oven to 425 degrees once the seitan is almost finished marinating. Spray the pan rack with some cooking and place the seitan pieces in the roasting pan on the rack spacing the pieces, making sure they are not touching. Brush the pieces of seitan with any leftover marinade from the bowl, covering any bare spots on the seitan.

  6. Using 3 or 4 large pieces of foil, completely cover the pan, trying to seal it up the best you can. We are trying to create a makeshift tandoori oven and also make sure the seitan steams inside the pan so it cooks through but doens’t dry out. Place the pan on the middle rack of the oven and bake for one hour. Do not open the foil to peek! It’s gonna be fine in there, I promise. After one hour remove the foil (Save for wrapping the seitan piece to let them rest later.) Give the seitan pieces a little spray with some oil and flip the pieces. Let it bake uncovered for 30 more minutes.

  7. Let the “chicken” pieces cool at room temperature. Once they have cooled off, wrap them in the reserved foil and place in the fridge for at least 6 hours. I normally make this the day before I want to eat it.

  8. To reheat the “chicken” preheat oven to 350 degrees. Place “chicken” pieces on a baking sheet and heat until warmed through. Serve as is with rice or you can prepare and serve as Vegan Chicken Tikka Masala.

IMG_9406.jpg
Vegan oven tandoori chicken

If you like this recipe, then try these:

Vegan Mongolian Beef with Soy Curls

IMG_7265.jpg

Before we were vegan, my husbands favorite Chinese takeout meal was Mongolian beef.

If you have never had Mongolian beef vegan or otherwise, and you are a fan of garlic, gingery, sweet, sticky sauces, then this is one you need to try!

I was never a big beef eater pre vegan but could appreciate my husbands love for this dish. My go to was always garlic chicken. Being that both of those dishes are a thing of the way back past, I needed to find a way to make my husbands old Chinese takeout favorite a thing of the vegan present.

When it comes to soy curls I have always felt inclined to fry them in to vegan clam strips, or fry them like a “chicken” tender with dip. I LOVE soy curls. They are one of my favorite vegan meat alternative, because they are so tasty, have the perfect chewy texture, are easy and quick to cook, and pretty affordable. But I really never have used them in a saucy recipe. So when pondering what to do with the three bags I had just gotten in from Amazon, Mongolian beef popped into my head.

I knew I wanted to make a Chinese style dish with at least one bag of the curls and knew Dave, my husband, would be thrilled if I attempted to recreate his old fave!

Well y’all, this recipe is just as easy as any other of my go to soy curl recipes and my entire family liked it. That is 6 people y’all, all in agreement. Two teenagers, a super picky 9 year old by and a toddler. Let me tell you something, this says a LOT!! My kids live to be contrary and I am pretty convinced conspire to push me to the edge where dinner likes and dislikes are concerned. I have just resolved to know that at least 2 of us are going to leave the dinner table hungry upon refusal of the dinner placed before them. Its exhausting and frustrating, so when I find a meal everyone likes, it gets put on a regular rotation.

Vegan Mongolian Beef is now on regular rotation! Hallelujah for small miracles!

IMG_7270.jpg

INGREDIENTS:

  • 8 oz package soy curls

  • 4-5 scallions (green onions)

  • 3 cups hot water

  • 1 teaspoons vegetable Better Than Bouillon

  • 1 tablespoon soy sauce or coconut amnions

  • 1/3 cup all purpose flour

  • 1/3 cup corn or tapioca starch

  • neutral flavored oil for frying

IMG_7278.jpg

SAUCE:

  • 1/2 cup light brown sugar

  • 1/4 cup low sodium soy sauce or coconut amnios

  • 1 teaspoon Vegetable Better Than Bouillon

  • 2 teaspoons grated ginger

  • 3 teaspoons minced garlic

  • 1-2 teaspoons rice vinegar

  • 1/3 cup water

INSTRUCTIONS:

  1. In a large bowl add the bag of dried soy curls, along with 3 cups of hot water, 1 tablespoon soy sauce, and 1 teaspoon better than bouillon. Let the curls soak for 10 minutes.

  2. In another large bowl, whisk flour and starch. Drain all of the liquid from the soy curls and add them to the flour and starch. Toss to coat the curls. The curls will still be a little wet so the coating can get kind of of sticky. Thats ok!

  3. Prepare a wire cooling rack by placing it on a paper towel lined baking sheet. Placing the curls or the rack after frying, vs just a paper towel lined plate helps them to stay a bit more crispy. This is true with any pan fried food.

  4. Heat a large skillet over medium heat with a tablespoon or two of oil. Add the coated soy curls in batches to the hot pan, frying on each side until they begin to brown and get a little crispy. Place finished curls on the cooling rack and continue frying all remaining. Add extra oil to pan as needed.

  5. You can use the skillet you fried the curls in if its deep enough or use a sauce pan to cook the sauce. I use a large iron skillet and wipe it clean after frying the curls. Add all all of the ingredients for the sauce into the pot/ pan and whisk . Heat the sauce on medium/low util it comes to a simmer. Reduce heat to low, regularly stirring the sauce unit it has thickened some and seems sticky.

  6. Slice the green onions on a diagonal into 1/2 inch to 1 inch pieces. Toss the curls into the sauce and add the onions. Serve vegan Mongolian beef over rice.

If you like this recipe, then try these:

IMG_7293.jpg