Meat Substitutes

Vegan Dry Rubbed Brisket

3.jpg

When we used to eat meat, smoked brisket was on the top of my meat favorites list!

Brietet Sandwichs, brisket knish, brisket slathered in bbq with side of baked beans and potato salad. Now I am super hungry!!

Obviously its been a LONG time since we have eaten brisket, but from what I remember, this vegan brisket is a close second!

We added some jackfruit to the jazzed up seitan recipe to add some extra meaty texture and it worked great. This vegan brisket is perfectly seasoned and coated in a savory, sweet dry rub.

If you have a food processor this recipe could not be easier. Just dump everything in there, let it mix and knead. Wrap it, bake it, and LET IT REST. Really, head my warning, it must rest to firm up. Don’t come at me if you cut right into yours and its not firm. I warned you!!

You can serve it as is, or pop it on the grill with some BBQ sauce and sliced up for the most delicious BBQ brisket sandwich. I have added a drool worthy picture below of said magnificent sandwich!!!

It firms up nicely and can be sliced extra thin using a mandolin, if you let it rest as stated above!

So if you have been missing smokey, savory, dry rub crusted brisket, hopefully this recipe will do the trick! I for one know what’s going to be on our grill this summer!

! Glory Glory! Brisket is back, baby!!!


INGREDIENTS:

You will need aluminum foil, and a 9x13 baking dish for this recipe

  • 1 can jackfruit in brine

  • 1 cup vital wheat gluten

  • 1/4 cup tapioca starch

  • 1/4 cup nutritional yeast

  • 1 teaspoon Vegetable Better than Bouillon

  • 2 tablespoons water

  • 2 tablespoons soy sauce or coconut aminos

  • 2 tablespoons oil ( I used grape seed)

  • 2 teaspoons liquid smoke

  • 2 teaspoons minced garlic

  • 2 teaspoons onion powder

  • 2 teaspoon vegan Worcestershire sauce

  • 2 teaspoons cumin

  • 2 teaspoons smoked paprika

  • 1 teaspoon dried thyme

  • 1 teaspoon each salt and pepper

DRY RUB:

  • 3 tablespoons smoked paprika

  • 2 tablespoons brown sugar

  • 2 teaspoons onion powder

  • 1 teaspoon salt

  • 1 teaspoon pepper

  • 1 teaspoon thyme


INSTRUCITONS:

preheat oven to 350 degrees.

  1. Drain and rinse the jackfruit. Chop the jackfruit in your food processor by pulsing a few times.

  2. Add the remaining ingredients to the food processor and mix for a minute, until a sort of dough forms.

  3. If you do not have a food processor, finely chop the jackfruit using a sharp knife. In a medium bowl add the jackfruit and remaining ingredients. Using your hands, (I promise its just easier) mix all of the ingredients together until a dough forms. Knead the dough by hand for a few minutes.

  4. Form the dough into a sort of oval shape, mimicking a brisket. Tear off a piece of foil that is about 3 times the size of the dough.

  5. Mix up the ingredients for the dry rub in a bowl.

  6. Pour dry rub into the middle of the foil. Take the “brisket and roll it in the rub to cover all sides.

  7. Spray the brisket and the foil with some cooking spray and wrap the brisket in the foil, sealing it up. Just make sure it is going to be easy to open.

  8. Place the foil covered brisket into a 9x13 pan and place in the oven on the top rack. Bake sealed for 30 minutes. After 30 minutes open up the foil pouch and continue baking for another 30-40 minutes.

  9. Allow the brisket to cool and rest in the fridge overnight. The brisket should slice easily once cooled. It should even be firm enough to thinly slice on a mandolin.

You can also baste the brisket it BBQ sauce and grill to reheat. I normally place brisket on a piece of foil on the grill to avoid a mess. I let it grill with the lid closed just until its heated through, then slice for sandwiches.

2.jpg

Vegan Casey's Corner Slaw Dog

IMG_2007.jpg

Our family LOVES Disney!. We are lucky enough to live in sunny Florida, only a few hours from the park, and have the additional perk of discounted residence season passes. I

f you are fan, or frequent visitor of Disney’s Magic Kingdom as well, then you probably know all about Casey’s Corner.

For those not familiar, it is a quick serve restaurant that serves hot dogs and fries. In the last couple of years Disney has really stepped up their vegan game, adding lots of vegan options including beyond burgers, and sausages to all of their parks.

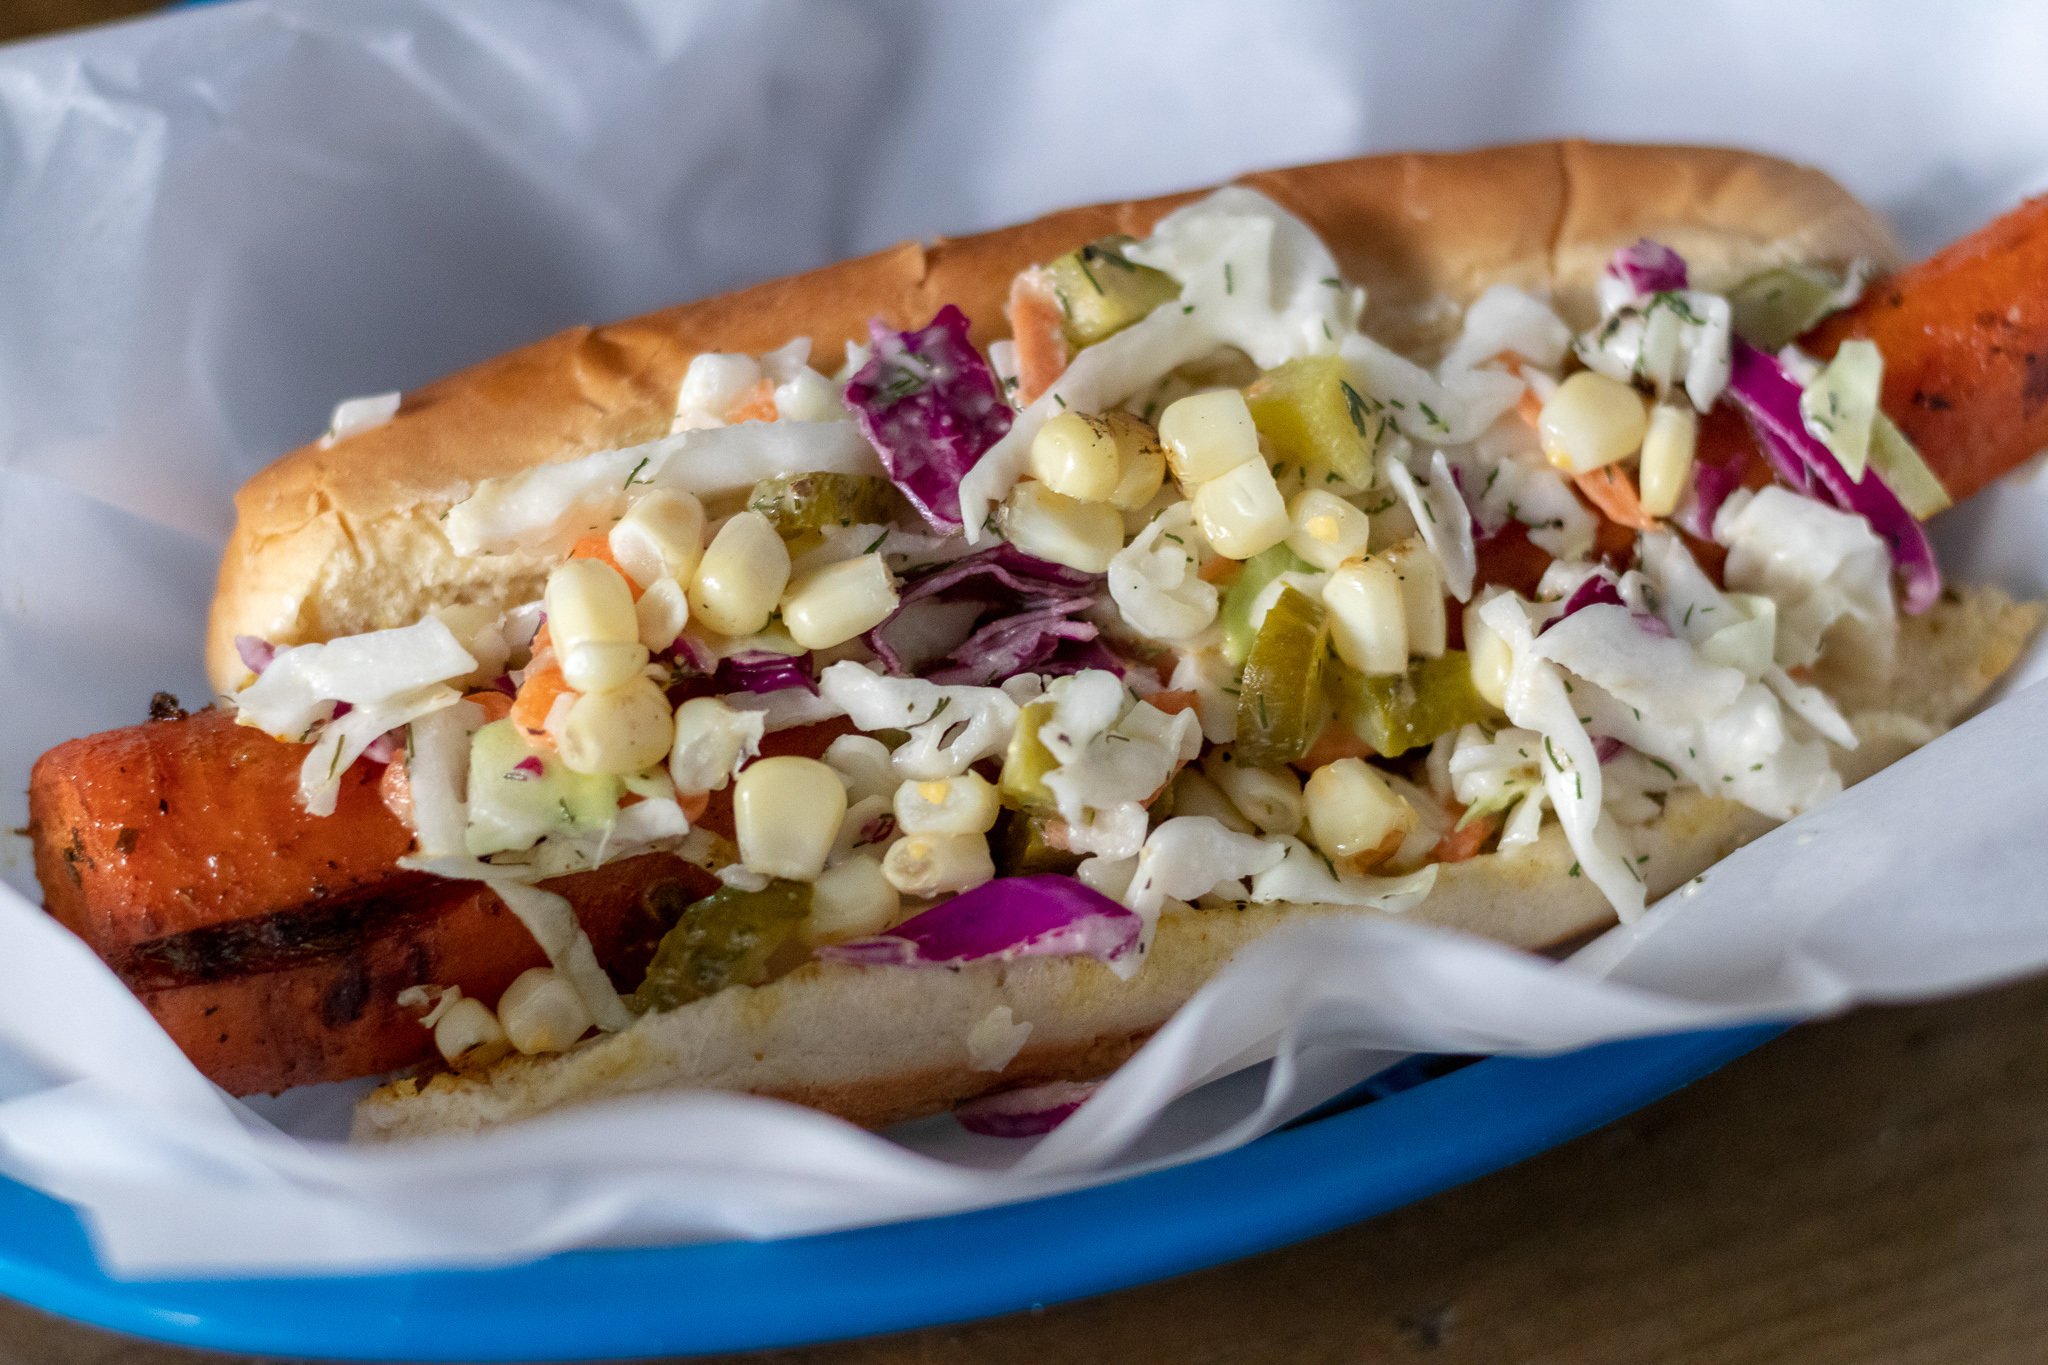
Thanks to these new offerings, Casey’s Corner now has a vegan hot dog that is so crazy good! It is actually a beyond sausage topped with pickle slaw, grilled corn and a special sauce.

I not only ate mine, but half of one of my kids, and wished I had another.

So when we came home from our last Disney day, I decided we could easily recreate this tasty treat, but maybe make it a bit healthier, and more budget friendly using carrot dogs.

I have never been a big fan of faux meat hot dogs, and although I love the Beyond brand sausage, we can not always easily find them, and they are not nearly as cheap as a bag of carrots!

You could 100% use any vegan sausage or hot dog you like for this recipe you like if you are not a carrot dog fan. I can tell you first hand it is just as delicious as a sausage, or a carrot dog!!

So if you have been to the park, had this hot dog, and are still craving more, it’s so easy to make yourself one or 3 (I’m not judging) at home.

If you have never had this hot dog, then you really have try it!! And if you ever get over the the Magic Kingdom, just know your biggest issue finding something vegan to eat, is actually just deciding on WHICH vegan thing to eat! Not a bad problem to have at a theme park!


INGREDIENTS::

  • 1 batch carrot dogs, or store bought vegan hotdogs or sausage

  • 1 pack hot dog buns

  • 2 cups slaw mix or shredded cabbage

  • 2 tablespoons apple cider vinegar

  • 2 tablespoons vegan mayo

  • 1/4 cup finely diced dill pickles

  • salt and pepper to taste

  • 2 ears of corn

THE SAUCE

  • 2 tablespoons mayo

  • 2 tablespoons bbq sauce


DIRECTIONS:

  1. Prepare carrot dogs according to instructions. They are best if marinated over night, but I often will start a batch in the morning and grill them at dinner time.

  2. In a medium bowl add the cabbage, pickles, mayo, vinegar, salt and pepper to taste, and stir. Store in the fridge covered until ready to use.

  3. You can grill the carrot dogs (my preference) or also heat them in a skillet. If using the grill, lightly spray the grill surface with some spay oil. Grill the carrots for about 10 minutes or until you have some nice grill makes on all sides. If heating in a pan, spray pan with some oil, and heat carrot dogs for about 5 minutes to make sure they are cooked through.

  4. Shuck and clean both ears of corn. If using a grill, lightly spray the corn with some oil or brush with vegan butter, and place on the grill along with the carrot dogs. Grill for about 10 minutes turning the corn serval times to avoid burning. If you do not have a grill you can boil the corn for 5 to 10 minutes just to heat through.

  5. Allow the corn to cool. Using a sharp knife, carefully cut the corn off of the cob.

  6. Whisk together 2 tablespoons of mayo and bbq sauce in a small bowl.

  7. To serve, top the carrot dog with slaw, some corn, and a drizzle of sauce.


Seves 6-8

If you like this recipe, try these:

Carrot Dogs

Carrot Corn Dogs

Vegan Pigs in a Blanket (carrot dogs)

IMG_1994-2.jpg

Vegan Pepperoni

IMG_1910.jpg

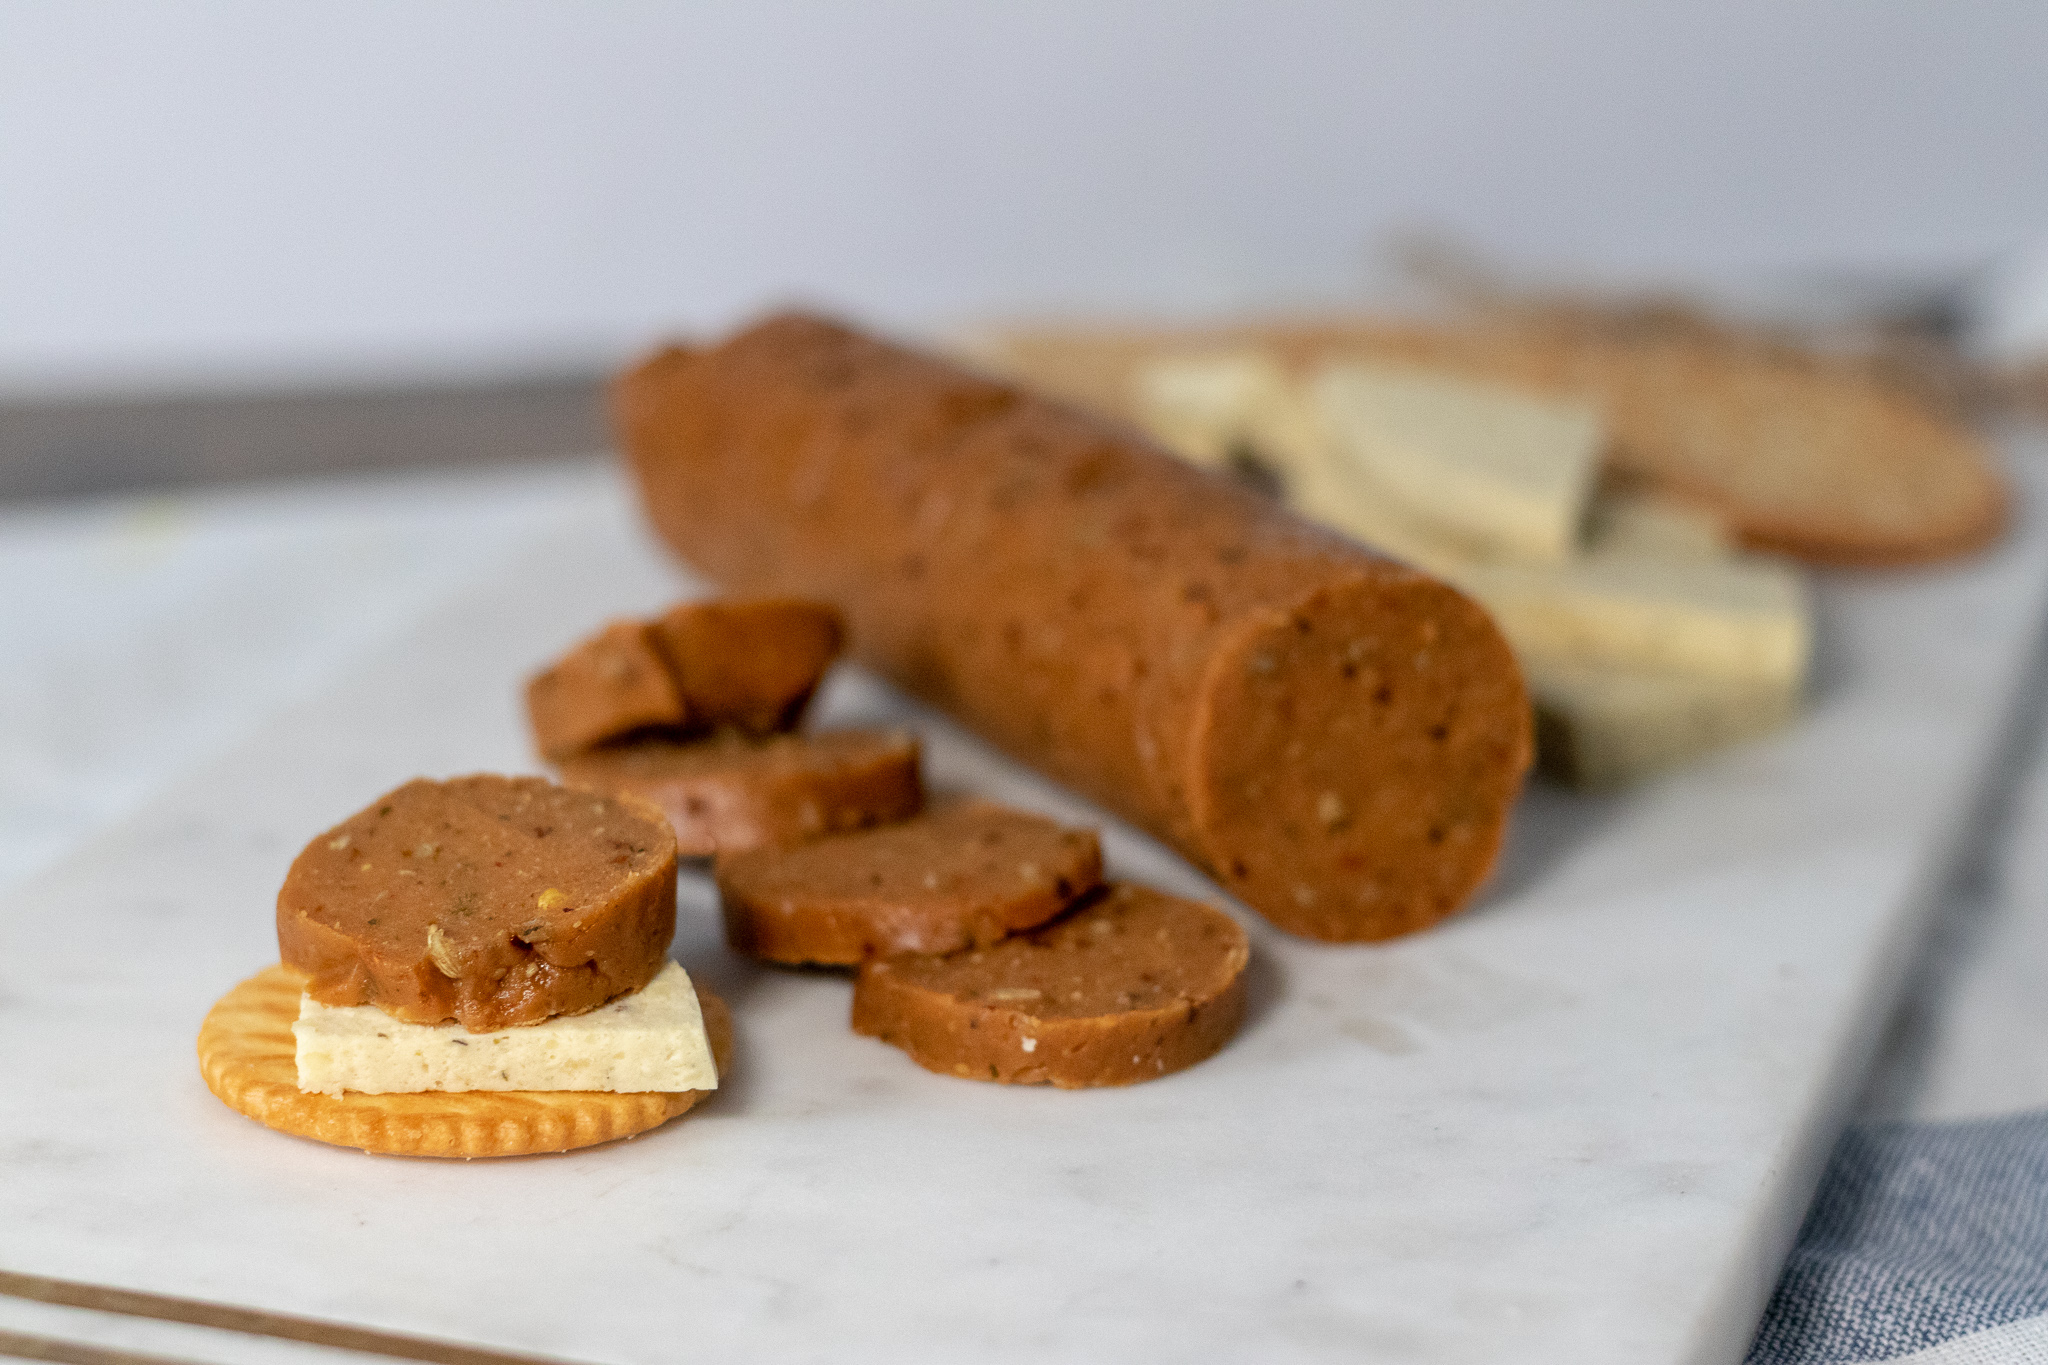
I just want to let y’all know how super easy making a batch of vegan pepperoni can actually be. Seriously! Mix the ingredients, roll it up in some foil, bake, and you are eating delicious homemade vegan pepperoni before you know it! Put it on a cracker, put it on a pizza, eat it all by itself because its that good!!

Don’t be intimidated by making seitan if you have never tried you hand at it. Working with vital wheat gluten is as easy as working with regular flour. Making seitan is really just making dough! You can steam it, boil it, or bake it. For this recipe we are steaming it in foil to achieve a pepperoni like texture!

I often make vegan pepperoni when making a cheese plate for parties, or for just snaking on with vegan cheese and crackers for my kids. I have over 30 cheese recipes on the site, so find one you love and make up a batch to go along with your vegan pepperoni!

This recipe makes two logs of pepperoni, so if you don’t think you will use both very quickly, you can freeze the second for up to a a few months. Just drop it in a freezer bag and thaw when you are ready to use it.

I often top our vegan stuffed crust pizza with this pepperoni! Its made with an easy vegan homemade mozzarella cheese sauce and is so easy and so tasty!! Its one of my kids favorite dinners.

INGREDIENTS:

  • 1 cup vital wheat gluten

  • 1/4 cup nutritional yeast

  • 2 teaspoons minced garlic

  • 2 teaspoons smoked paprika

  • 2 teaspoons onion powder

  • 2 teaspoons dijon mustard

  • 2 teaspoons fennel seeds

  • 1 teaspoon oregano

  • 1/2 teaspoon salt

  • 1/2 teaspoon black pepper

  • 1 teaspoon red pepper flakes

  • 1/4 cup tapioca or corn starch

  • 1 tablespoon soy sauce or amnios

  • 1 teaspoon liquid smoke

  • 2 teaspoon light miso paste

  • 1 teaspoon vegetable Better than Bouillon

  • 3/4-1 cup water


INSTRUCTIONS:

Preheat oven to 350 degrees

  1. Food processor instructions: Add all ingredients to the food processor and mix for about a minute to allow a dough to form and knead.

  2. Hand mixing instructions: Add all ingredients to a bowl and mix until a ball of dough has formed. Transfer the mixture to a clean countertop or cutting board and knead the dough for a few minutes. Start with 3/4 cups water but If the dough seems too dry or isn’t coming together, add a few tablespoons more until you have a soft, but well formed dough.

  3. Divide the dough in half and form each half into a 10 inch log shape.

  4. Spray a good sized piece of foil, maybe 7 tot 8 inches long, with some cooking spray. Place a log of pepperoni at one end and begin rolling the pepperoni into the foil. Twist the ends and repeat with a second piece of foil. You need the foil nice and tightly wrapped and the ends good and sealed. The pepperoni will bake in a water bath so you don’t want any liquid getting in.

  5. Repeat the same processes with the second pepperoni.

  6. Fill baking dish with about a half inch of water and place both foil wrapped pepperonis into the water.

  7. Bake for 30 minutes then turn each pepperoni and bake for another 30 minutes.

  8. Carefully remove foil wrapped pepperonis from the baking pan and transfer to a plate. Leave pepperonis wrapped in foil and allow to cool for about 20 minutes before attempting to unwrap them. Once they have cooled and you can handle them, unwrap the foil and let pepperoni cool uncovered in the fridge for an hour. The pepperoni will firm up more and slice easier if you leave it over night to rest! I typically make a batch the day before I want to use it! But it can be eaten as soon as it cools.

  9. Store in an airtight container or zip lock bag in the fridge.

  10. Serve on pizza, with vegan cheese and crackers, or by itself!

*giving credit where credit is due…Pepperoni was the first vegan meat I ever made using the recipe by Robin Robertson from Veganize It! cook book. I have adapted and changed the recipe over the years to suit my taste and pantry staples, as most seitan pepperoni recipes are pretty similar…but I woulnd’t know know the first thing about most things vegan cooking if not for this particular woman’s cookbooks when we first became vegan. I can not recommend her cookbooks enough! She’s a vegan genius.

IMG_1915.jpg

Vegan Beer Battered Fish Tacos

IMG_1875-2.jpg

The magic of battering and frying up banana blossoms is mind boggling. It looks like, feels like, and tastes like fried fish!

So aside from eating a giant plate of vegan beer battered fried fish fillets(which I will gladly do with some fries and tarter sauce) fish tacos are my next favorite way to enjoy this magic!

Now, I know most people serve fish tacos on a flour tortillas, but the fact is, if you know how to prepare corn tortillas, they reign supreme over flour all day! I was pretty anti corn tortillas until someone (my brother in law, Dan) showed me if you cook them in a hot pan with a little oil and seasoning, they are seriously the best thing.

We also made the slaw with sauerkraut instead of fresh cabbage for this recipe. We make our own quick dill kraut, and it is the perfect amount of briny tang, mixed with creamy vegan mayo, and little sugar to round out these tacos. If you have never made a slaw from kraut, as my mom always says, don’t knock it til you try it! It’s also a convenient option if you do not have any fresh cabbage on hand. I normally have a jar of sauerkraut in the fridge making a quick slaw that much quicker.

And lets not forget the '“fish” is beer battered, so as far as I am concerned, there is nothing not to love about these tasty vegan fish tacos!


INGREDIENTS:

  • 1 can of banana blossoms in brine

  • 3/4 cups all purpose white flour

  • 1/2 teaspoon salt

  • 1 teaspoon old bay

  • 1 teaspoons dulse flakes

  • 1 1/2 teaspoons baking powder

  • 1/2 can of cold beer, any beer is fine as long as it’s not a dark, thick beer

  • Oil for frying (I used peanut)

  • 8-10 corn tortillas

  • 1 lime

  • 1 avocado

  • 1/2 teaspoons garlic powder

  • 2-3 tablespoons plain vegan yogurt or sour cream

The Slaw:

  • 1 cup quick dill sauerkraut (or any sauerkraut you have)

  • 1/4 red onion thinly sliced

  • 1/4 cup shredded carrots

  • 2 tablespoons vegan mayo

  • 1-2 tablespoons sugar, or agave

  • A few shakes of dried parsley or cilantro

  • black pepper to taste

IMG_1882.jpg

INSTRUCTIONS:

  1. Mash the avocado and mix it with juice from half of the lime, sour cream or yogurt, garlic powder, salt and pepper to taste until it is nice and creamy. You can also drop all of the ingredients into a bullet blender or food processor. Set aside.

  2. Mix the sauerkraut (not the juice, just the cabbage) and remaining slaw ingredients together in a medium sized bowl. Set aside.

  3. Drain can of banana blossoms and carefully remove the blossoms, laying them out on a paper towel to remove some liquid. They can easily fall apart so be careful. I found that only a few blossoms in the can that were fully in tact. I simply took all of the loose leaves and stacked them back together to resemble full blossoms. I have only been able to find one brand of blossoms on Amazon. I am uncertain if this is an issue with all canned banana blossoms, but stacking the leaves back together worked just fine for me.

  4. Transfer the blossoms to a shallow baking dish and sprinkle with the 2 teaspoons of dulce flakes and a dash of salt.

  5. For the batter, whisk together the flour, baking powder, teaspoon salt, old bay, and 1/2 can of cold beer (oh well, guess you have to drink the rest) in a medium sized bowl. The batter will be thick.

  6. Heat a deep skillet with a few inches of oil over medium/ high heat.

  7. While the oil is heating, begin carefully dipping the blossoms into the batter. For any blossoms that you had to reassemble, place them into the batter, and using a spoon, cover the top in batter. This will help keep the blossom in tact vs attempting to dip them. Carefully transfer the blossoms to the hot oil. TIP: if you are not sure if the oil is hot enough, place a chopstick into the oil, if tiny bubbles form around the chopstick, the oil is ready!

  8. Fry each blossom for a minute or two on each side, or until they are golden brown. If they seem to be browning too quickly, reduce your heat a bit. Transfer the finished blossoms to a wire cooling rack that has been placed on top of a paper towel lined cookie sheet.

  9. Heat a large skillet and spray with some cooking oil. Heat tortillas on each side, sprinkling them with a little all purpose seasoning, or any seasoning you like, and a squirt of lime juice. You just need to let them heat for a minute or two on each side, just until they get a little brown and crisp. This will help the tortillas taste amazing and not rip.

  10. Cut fish fillets into bite size pieces. Place a few “fish” pieces in each tortilla, along with some slaw, and a drizzle of avocado cream to serve.


IMG_1862.jpg

Tarragon Almond "Chicken" Salad with Jackfruit

IMG_1657-2.jpg

Jackfruit is an easy and popular substitute for shredded meat. It mimics the texture of any shredded meat, and takes on the flavor of whatever you season it with. It is also low in fat and high in fiber making it a win win.

You can find jackfruit at a lot of regular super markets now, at Asian markets, and online retailers like Amazon. It is also really inexpensive, which is awesome! Just be sure to find young jackfruit packed in brine. It often comes canned in syrup as well and that is not what you want for this recipe!

It works especially well in this chicken salad substitute, and is perfect for this tarragon and almond “chicken” salad recipe.

This jackfruit salad is savory, creamy, and has just the right amount of crunch from the onion and almonds.

I love it on crackers, or on top of a nice green salad, but it also makes a pretty tasty sandwich!

It also works well as a party appetizer severed with fresh cut veggies, vegan coconut milk gouda and crackers.


INGREDIENTS:

  • 1 can jackfruit in brine, drained and rinsed

  • 1/4 small yellow onion, finely diced

  • 1/4 cup vegan mayo

  • 2 teaspoons dried tarragon

  • 1 teaspoon onion salt

  • 1/2 teaspoon black pepper

  • 1 teaspoon fresh or dried parsley

  • 1/2 teaspoon garlic powder

  • 2-4 tablespoons sliced almonds


INSTRUCTIONS:

  1. Drain the jackfruit and rinse well. Shred the pieces of jackfruit over a medium sized bowl using your fingers. You can also chop the jackfruit, but I find it easier to just use my hands.

  2. Add the remaining ingredients to the bowl with the jackfruit and mix well.

  3. Serve with crackers, veggies, on a salad, or sandwich. Store leftovers in an airtight container in the fridge for 2 to 3 days.

IMG_1660.jpg

Vegan Philly Fries with Beer Cheese Sauce

IMG_1474.jpg

What do you get when you mix a Philly cheese steak and a plate of fries, then top it off with vegan beer cheese sauce.

The best thing you have ever eaten?!?!?! That is probably a stretch BUT, these fries are really, really, really good!

Trust me when I tell you that you do not want to skip the vegan beer cheese sauce. Any other cheese sauce is a sad second.

Also if you have never made homemade easy basic seitan, now is your chance! Its super easy to make and can be used a gazzilion different ways. You an also use any seitan you like in this recipe. Flank steak, chicken, whatever!

We even have a video on the site to help you see the process of making homemade seitan! Just look under the video section!

You only need half a batch for this recipe, so pop the rest in the freezer for another nights dinner! Look at you meal prepping without even trying!!

So lets hear it for Philly fries and beer cheese!! You many never use a bun for your Philly again! You may never use another cheese sauce again, either. But honestly, who could blame you!


INGREDIENTS:

  • Half batch of basic seitan, seitan chicken, or flank steak (around 3 cups sliced, refer to video if you are new to seitan)

  • 2 cups sliced mushrooms, white or baby portabello are fine

  • 1/2- 1 red or orange bell pepper

  • 1 small yellow onion

  • 1-2 teaspoon vegan Worcestershire sauce

  • 2 teaspoons tomato paste

  • 1 teaspoon minced garlic

  • 3-4 tablespoons coconut aminos

  • 1 teaspoon smoked paprika

  • 1 teaspoon onion powder

  • Salt and pepper to taste

  • 1 -2 cups vegan beer cheese sauce

  • 4 medium russet potatoes

  • Diced scallions (optional as garnish)


INSTURCTIONS:

  1. Wash the potatoes, peels on

  2. Cut potatoes into fries.

  3. FOR FRYING THE POTATOES, heat a few inches of oil in a deep skillet (I use a cast iron skillet)on medium heat.Once the oil is nice and hot, start adding small batches of the fries to the oil. Allow them to fry until nice a crisp, about 5 minutes. Once they are done frying, remove from oil and place on a wire cooking rack with some paper towels underneath. This will help them stay crispy while you finish frying the rest.

  4. FOR OVEN BAKING, preheat oven to 400 degrees. Lightly coat fries in a few teaspoons of oil and place them on a cookies sheet lined with parchment paper. Make sure the fries are not over crowded. Sprinkle with salt and bake for about 15 minutes or until the fries seem crispy on one side. Take the cookie sheet out of the oven, and turn the fries with a spatula or a pair of metal tongs. Put the fires back in the oven for another 15 minutes, or until the fries seem fully crisp.

  5. USING AN AIR FRYER: Lightly spray potatoes with some cooking oil, sprinkle with salt and place in the air fryer basket. ( you may have to fry in batches if you have a smaller air fryer) cook on 400 for 15 minutes, taking the basket out and shaking it around a few times during the cooking process. If the fries are not crispy after 15 minutes, put them back in for 5 more minutes or until they have reached the desired crispness.

  6. FOR THE PHILLY, Slice seitan into thin strips. Thinly slice onions and peppers. Heat a large skillet over medium heat with a few teaspoons of oil. Add onions, garlic, and pepper and sauté until the onions begin to get soft. Add the mushrooms and let them cook for a few minutes. Add the seitan, all of the seasonings, tomato paste, Worcestershire sauce, liquid aminos, and cook for another 5 minutes, until the liquid is absorbed and the seitan is beginning to brown.

  7. To serve, stack fries on a plates, topping with Philly mixture and drizzled with Beer Cheese. You can also sprinkle some diced scallions if you like extra kick of onion.

    Serves 3-4

IF YOU LIKED THIS RECIPE, TRY THESE!

Vegan Chili Cheese Fries

Vegan BBQ Cheddar Fries with Slaw

Vegan Gorgonzola and Balsamic Glazed Chips

Funnel Cake Fries

IMG_1468.jpg

Vegan Buffalo Chicken Stuffed Challah

IMG_1428.jpg

If you have not noticed my affection for challah bread by now, then let me reiterate that I LOVE challah, LOVE IT!!!

I used to bake and sell challah each week actually, until I started this site and life got too busy.

I have t-shirts expressing my challah love, socks too. Challah at ya! Challah y’all! Challah day, celebrate! I ain’t no challah back girl. I could go on and on with my challah puns.

I love it start to finish, dough to bread. I love the act of preparing challah on shabbat, and I love finding new ways to stuff it so it becomes a total meal.

Challah takes some time to make, but it is 1,000% worth it!

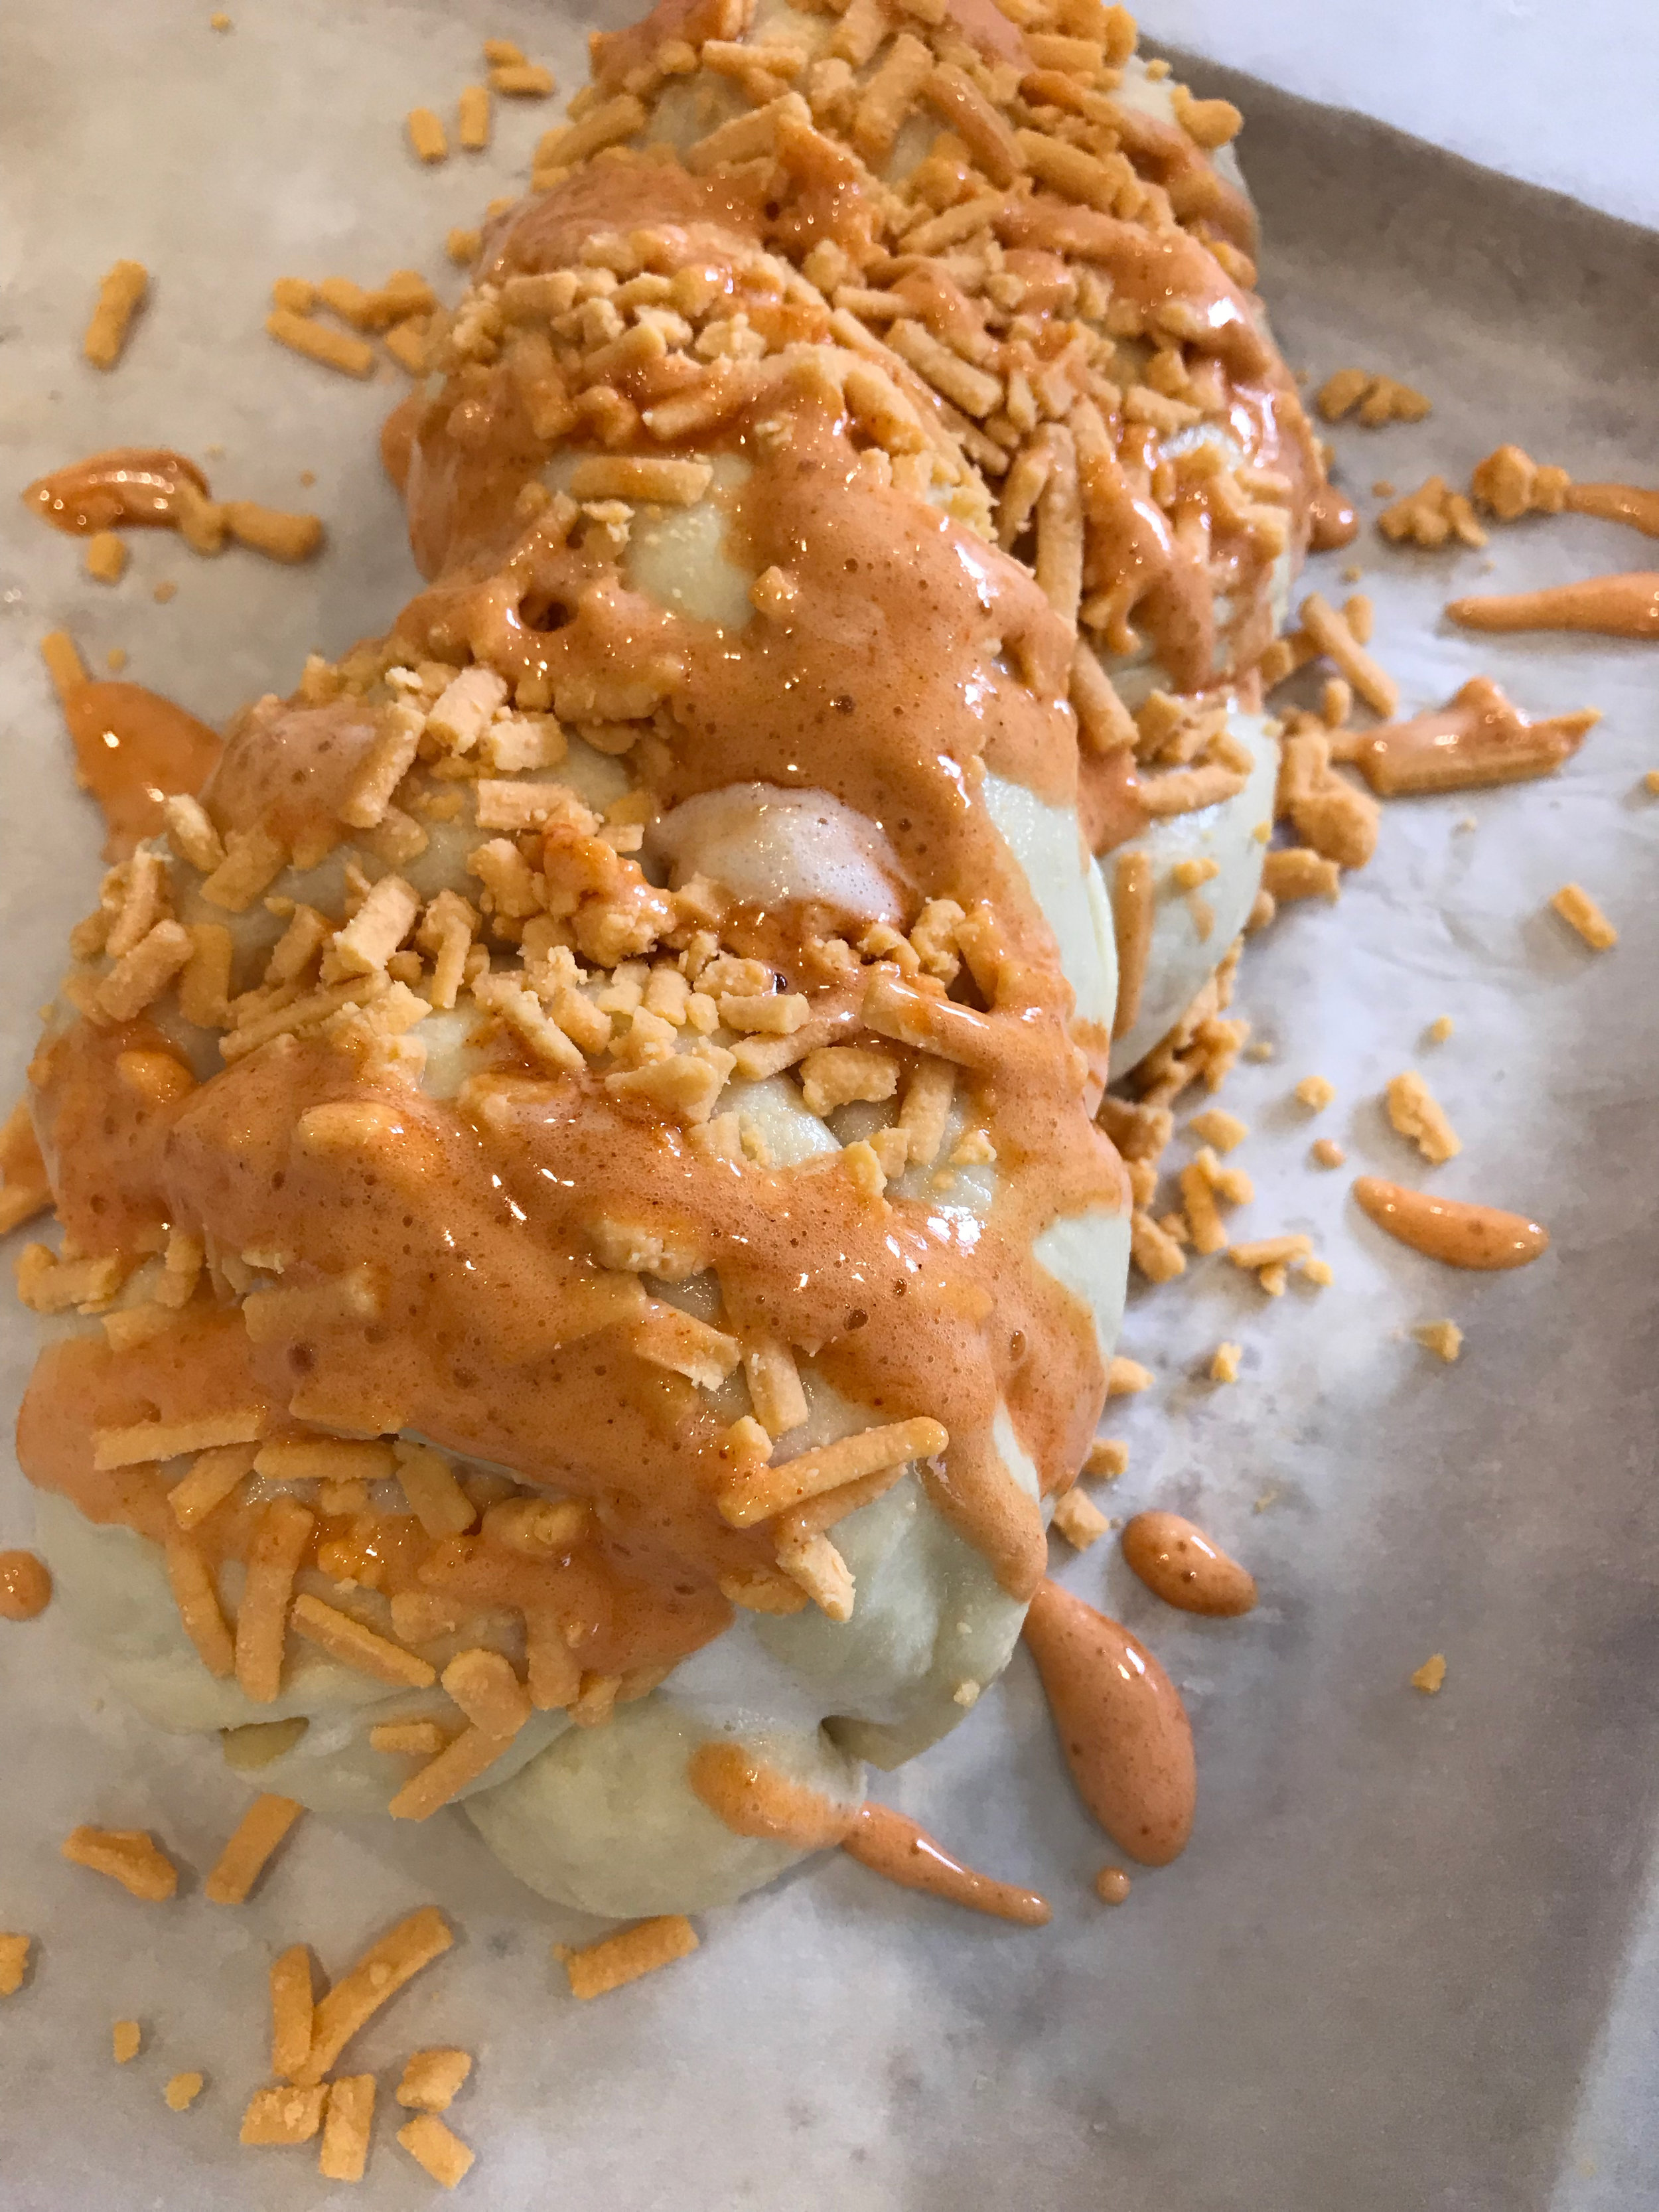
This vegan challah was the request of our 13 year old daughter. She loves our Buffalo “chicken” dip with jackfruit and stuffing that magic into warm, soft, fluffy challah seemed like a no brainer to me! Covered in melted vegan cheddar and drizzled with hot sauce glaze, its now on my top 5 favorite stuffed challah list!

So bake up a batch of our Vegan Buffalo “chicken” dipand stuff your own vegan challah. Then challah at me and let me know how much you loved it!


Challah:

Follow the recipe for my basic Challah Y'all, Vegan Challah. You will follow the instructions through the first rise, then follow the below instructions for stuffing and braiding.

  • 1 batch of Vegan Buffalo Chicken Dip, baked and cooled

  • 1 cup leftover aquafaba

  • 2 tablespoons maple syrup

  • 3 teaspoons buffalo sauce (I always use Franks)

  • 1 cup shredded vegan cheddar (I always use homemade or follow your heart cheddar shreds)

Stuffing the Challah:

  1. Once Challah has completed its first rise, remove from oven and separate dough in half. This recipe will yield 2 stuffed challah loaves.

  2. Cut each half into thirds. (each loaf will have three pieces of dough. Work with one loaf at a time, leaving the other three pieces of dough covered in a bowl until you are ready to use them)

  3. Take one piece of dough in your hand and begin to stretch it both length wise, and width wise and the same, time, letting gravity help with the length. You want a rectangle of dough that is about 5 inches wide and about 6-7 inches long. Once your dough is the correct size, Add a few scoops of dip to the center of the dough. Do not get too close to the edges, if the dip wets the dough it will not seal together.

  4. Once stuffed, bring the outside edges together, and pinch to seal. Once dough is sealed, pick it up and start to gently stretch the dough into a fat rope. You will have to kind of squeeze and pull at the same time, just do not squeeze so hard that the filling comes out. You just need the rope long enough to braid, 10-12 inches.

  5. Repeat with the other two strands.

  6. Once all three strands are stuffed, and formed, carefully braid the three pieces together. If the seams begin to open, pinch them back and continue braiding. Tuck both ends of the loaf under when done braiding. Once again I will refer you to Tori Avey's challah braiding guide if you are unfamiliar with braiding challah! She does a fantastic job showing all the different ways to braid your bread, plus she has some really great recipes on her site.

  7. Repeat with the second loaf, and place both stuffed loaves on a baking sheet, and back in the oven to rise again for about 45 mintues. Once they have risen, remove from oven and pre-heat to 350.

  8. Mix 1 cup of left over aquafaba, maple syrup and buffalo sauce. Brush each loaf of challah with the mixture and sprinkle with vegan cheddar shreds. You can also add a little extra hot sauce to the aquafaba mix and drizzle it over the challah before you bake it.

  9. Bake both loaves for about 35 - 45 minutes. You can tap the tops to see if they sound a little hallow. It is hard to tell when stuffed challahs are done when there are wet ingredients inside, so if they do not seem cooked through after 35 minutes, let them keep cooking for 5 - 10 more minutes.

  10. Remove challah from the oven, and allow to cool some before cutting.


*Follow us on Instagram @86.eats and check out step by step challah making in our highlights. This shows making aquafaba, and the stages of the dough!

IMG_1437.jpg
IMG_1429.jpg

Open Faced Vegan Roast "Beef" Sandwich with Jackfruit

Our oldest daughter used to order an open faced roast beef sandwich any chance she could get. Once we went vegetarian and eventually vegan, it was a dish she often mentioned missing. While it was not something I ever craved, I decided I would try to…

Our oldest daughter used to order an open faced roast beef sandwich any chance she could get. Once we went vegetarian and eventually vegan, it was a dish she often mentioned missing.

While it was not something I ever craved, I decided I would try to make a vegan version of an open faced roast beef sandwich that would hopefully satisfy her craving.

Although the jackfruit does not mimic the usual thinly sliced beef, the flavor is rich and convincing. This recipe takes a while to cook, but the prep time is fairly short. So if you are hanging around the house on a weekend, you can easily prep a batch of this vegan roast jackfruit, and let it cook while you go along your merry way!

I add red wine to this recipe and it truly makes all the difference in the rich, savory flavor, so I strongly suggest not skipping that ingredient. If you choose to skip out on the wine, I can not account for what that will do to the flavor of the jackfruit. I would suggest adding extra water or maybe some mushroom broth if you do decide to skip it!

This recipe is warm, savory, delicious, comfort food that has now become a regular on our families winter dinner rotation and hopefully yours, as well!

Ingredients:

  • Sliced sourdough or french bread

  • Vegan cheese slices

  • 2 cans of jackfruit in brine

  • 3 teaspoons low sodium Vegetable Better than Bouillon

  • 1 and 1/2 cups water

  • 1/2 cup red wine

  • 1 tablespoon tomato paste

  • 1 larger yellow onion, thinly sliced

  • 1 teaspoon dried thyme

  • 1 teaspoon black pepper

  • 2 tablespoons coconut aminos or soy sauce

  • 1 teaspoon minced garlic

For the Gravy

  • 1 yellow onion thinly sliced

  • 3 tablespoon all purpose flour

  • 2 teaspoons Vegetable Better Than Bouillon

  • 2 cups water

  • 1 teaspoon dried thyme

  • salt and pepper to taste

  • 1 teaspoon minced garlic

  • 2 teaspoons vegan butter

Instructions:

Preheat oven to 350 degrees.

  1. Heat a dutch oven, or another large OVEN SAFE pot, over medium heat on the stove top. Add a little oil, and the sliced onion, and cook until the onions are translucent. While the onion are cooking, drain the jackfruit, and using your fingers, shred the jackfruit apart into the pot with the onion. Add the Better than Bouillon and let the onion and jackfruit continue to cook for a few minutes to help remove the brine flavor the jackfruit tends to have.

  2. After about 5 minutes, add the water and remaining ingredients to the pot. Stir well and allow the mixture to come to a simmer. Once it is simmering, put the lid on the pot and carefully transfer it to the oven.

  3. Allow the jackfruit to cook in the oven with the lid on for about 1 hour. After an hour, remove the lid and cook for another hour, or until all the liquid has been absorbed. Check on the jackfruit and give it a stir a few times while it’s in the oven. Once all the liquid has been absorbed, carefully remove the pot from the oven and place the lid back on. Set aside while you prepare the gravy.

  4. For the gravy: In a medium deep skillet (I use my cast iron) add a few teaspoons of vegan butter over medium heat. Once the butter has melted, add the onions and garlic and sauté until translucent. Sprinkle the 3 tablespoons of flour over the onions and allow the flour to cook for a few minutes. Reduce heat to low. Whisk the Better Than Bouillon into the water and carefully pour the mixture into the pan. Add the remaining seasonings and stir well. Continue to stir the gravy until it has thickened.

  5. Place enough slices of bread on a baking sheet and top with cheese. Place in the oven until bread is toasty and cheese has melted (if you do not want cheese, just put the bread in until toasted).

  6. To make the sandwiches, top toasted bread with jackfruit roast “beef”and gravy.

Yields 6 - 8 open faced sandwiches.

Popcorn Tofu

Popcorn Tofu

Popcorn chicken used to be a serious weakness of mine! My kids even used to beg me to get them a box from our grocery store deli every time I went shopping.

After we went vegan we were all so excited to find the most delicious popcorn tofu at Costco! Imagine my joy! But in true Costco fashion, I was able to buy it maybe twice before they stopped selling it, despite my long, pleading notes in the suggestion box.

Eventually, I decided I could just start making our own. Sometimes I truly wonder what has happened to my brain, then I remember I have 4 kids, enough said.

So when it FINALLY occurred to me to make my own, it was game on. And I promise this recipe is way better than what I got at Costco! You could just as easily make this recipe in your air fryer if you are avoiding oil. I would try it at 375 degrees for 15 - 20 minutes, but check half way to see if they are getting too crispy.


This recipe is quick and easy, perfect for a quick dinner, a salad topper, filling for wraps, party appetizer, or a tasty snack! This popcorn tofu also works well for meal prep. Just fry up a batch and store it in the fridge. When you are ready to use it, just pop it in a 350 degree oven for 10 minutes and you are good to go!

And if you were ever a fan of honey mustard, I highly suggest making our Sweet No Honey Mustard dip for these tasty nuggets!


Ingredients:

  • 1 block extra firm tofu

  • 3/4 cups corn or tapioca starch

  • 2 cups bread crumbs

  • 1/2 cup vegan plain yogurt (I use Kite Hill)

  • 1/2 cup non dairy milk

  • 1 teaspoons salt

  • 1 1/2 teaspoons each, garlic, smoked paprika, and all purpose seasoning (we use a greek seasoning)

  • 1/2 teaspoon each chili powder, thyme, black pepper

  • oil for frying

Sweet No Honey Mustard Sauce:

  • 1/3 cup vegan mayo

  • 3 tablespoons yellow mustard

  • 2 tablespoons agave

  • 1/2 teaspoon all purpose seasoning (we use an all purpose greek seasoning)

  • pinch of salt


Instructions:

  1. Remove tofu from package and drain. Wrap the tofu in a clean kitchen towel or some paper towels and place a few books, or a heavy pan on top. Let the tofu sit for 15 minutes to press out any extra water.

  2. Cut the tofu block in half, then cut halves into 1/2 inch strips. Using your hands, break off pieces of the strips to form little tofu nuggets.

  3. In a medium bowl, whisk together the yogurt and milk.

  4. In another, bowl whisk 1/2 cups of the starch and all of the seasonings.

  5. In another bowl, add the bread crumbs.

  6. First toss the tofu into the starch and seasoning mixture

  7. Next add the tofu to the milk and yogurt and stir. All of the liquid should be absorbed by the tofu, although it will be a sticky mess. Now sprinkle the remaining 1/4 cup of starch over the tofu and toss.

  8. Using your hands (I promise, it’s just easier) pick up a small handful of tofu and toss it around in the breadcrumbs until fully coated. You can use your hands to separate any tofu that got clumped together, sifting it though your fingers. Place coated tofu into a dish, and repeat until all of the tofu is coated.

  9. Heat a few inches of oil in a high sided skillet. I use my cast iron for this. While the oil is heating, place a wire cooling rack on top of a paper towel lined baking sheet. This is where you will place the finished tofu to cool.

  10. Once the oil is nice and hot, carefully add the tofu in small batches to the pan (you can poke a chopstick into the oil, and if tiny bubbles form around the stick, the oil is ready). Using a slotted spoon, keep the tofu moving around for a few minutes to make sure all of the sides get nice and crispy. Once tofu is browned and crispy, remove and place on a wire cooling rack. Repeat with remaining tofu.

  11. If making the Sweet No Honey Mustard, whisk all ingredients together and store in an air tight container in the fridge. Serve tofu hot, or even room temp with sweet mustard, or any dip you like.

If you like this recipe, try these:


Cilantro Avocado Tofu Wraps

IMG_0463.jpg

Easy weeknight dinners are a must in our busy house.

So, I always make sure to have some extra firm tofu in my fridge for quick dinners like these cilantro avocado tofu wraps.

The marinated tofu, creamy avocado, crispy lettuce, and tangy sauce make for a perfectly delicious, healthy filing meal!

These gluten free wraps are packed with plant protein ,and healthy fats to keep you full and fueled!

Feel free to add extra veggies like match stick carrots, radish slices, sliced onion, or anything else you may like.

These wraps are easy, healthy, delicious, and low carb! Perfect!


Ingredients:

  • 1 - 2 heads romaine lettuce

  • 1 block extra firm tofu

  • 1 - 2 avocados

  • 1/2 cup coconut aminos

  • 1 teaspoon agave

  • 1 teaspoon garlic powder

  • 1 teaspoon smoked paprika

  • 1 teaspoon oil (olive or grape seed)

  • juice from 1 lime

  • 1/3 cup chopped cilantro


Smokey lime cream sauce

  • 1/3 cup vegan sour cream, or plain unsweetened vegan yogurt (I use Kite Hill plain yogurt)

  • Juice from 1/2 lime

  • 1 teaspoon garlic powder

  • 1/2 teaspoon smoked paprika

  • salt and pepper to taste


Instructions:

  1. Drain tofu and wrap in a a clean kitchen towel or a few clean paper towels. Place a few cookbooks on top for 10 - 15 minutes to press out as much liquid from the tofu as you can. Once pressed, dice tofu into 1/2 inch cubes.

  2. In a shallow 8x8 dish, whisk together the aminos, oil, agave, garlic, paprika, and lime juice. Add the cubed tofu to the dish and allow it to marinate for 10 - 15 minutes.

  3. While tofu is marinading, wash and pat dry the lettuce, and trim the ends. Slice avocado into thin strips. Wash and chop 1/3 cup of cilantro.

  4. Prepare the smokey lime cream sauce by whisking all of the ingredients together in a small bowl and set aside.

  5. Heat a large skillet on medium heat. Spray with some cooking oil or add a few teaspoons of oil to the pan as it heats. Add the tofu AND the marinade to the pan. Allow the tofu to cook until all of the liquid is absorbed and the tofu has started to brown and get a little crispy around the edges.

  6. To build the wraps, line each lettuce leaf pieces of tofu, a few slices of avocado, drizzle with sauce, and sprinkle with cilantro.

Serves 4 - 6.

Savory Cranberry Vegan Meatballs with Mashed Potatoes

IMG_0264.jpg

I often make meatballs wth thawed Beyond Meat Burgers.

They work very well as a meat substitute in all kinds of recipes other than just using them as burgers.

Once thawed, they can be used just as you would ground meat. This particular recipe is sweet, tangy, and savory.

The sauce screams holidays, and would make a perfect alternative to a traditional holiday meal.

The cranberries, onion, and savory spices make such a beautiful sauce for the meatballs, and wonderful topping for the mashed potatoes.

You can just as easily use a bag of frozen plant based meatballs, but I really encourage you to try a batch using the Beyond Burgers! Or use whatever homemade seitan meatball you already make!


Ingredients:

  • 1 batch plant based meatballs (Use frozen or follow recipe below)

  • 1 can whole cranberry sauce

  • 1 cup water

  • 1 yellow onion

  • 2 teaspoons Vegetable Better Than Bouillon

  • 2 tablespoon balsamic vinegar

  • 1 teaspoon dried thyme

  • 2 teaspoons minced garlic

  • 2 teaspoons tapioca or corn starch

  • salt and pepper to taste

Mashed Potatoes:

  • 4 - 5 medium russet potatoes, peeled and diced

  • 2 tablespoons vegan butter

  • 2 tablespoons vegan cream cheese or plain vegan yogurt

  • salt and pepper to taste

  • a few splashes of plant based milk

Meatballs:


Instructions:

Preheat oven to 350 degrees.

  1. For the meatballs: If using frozen, bake to package instructions. If making meatballs with Beyond Meat Burgers, put sliced bread into a blender or food processor, and break them down to crumbs. Combine bread crumbs, thawed Beyond Beef patties, flax egg, and dried thyme in a bowl. Mix well. Form meatballs with a small scoop or spoon and place them on a parchment lined baking sheet. Bake for 25 minutes or until meatballs are cooked through.

  2. While meatballs are baking, thinly slice the onion. Heat a large pot or dutch oven over medium heat. Add a few teaspoons of oil or vegan butter. Drop the onions in and sprinkle with a little salt. Let onions cook until they become translucent and soft. Add the cranberry sauce, balsamic vinegar, thyme, salt and pepper. Stir well and reduce heat to low.

  3. In a bowl, whisk together the water, Better Than Bouillon, and starch. Add to the pot of cranberry sauce and stir. Allow sauce to simmer and thicken while the meatballs finish baking. Once the meatballs are done baking, add them to the pot of cranberry sauce and let them simmer along with the sauce while you prepare the mashed potatoes.

  4. Bring another large pot of water to a boil, then add the diced potatoes. Let potatoes boil until they are soft enough to pierce with a fork. This should take about 10 - 15 minutes. Drain the water from the potatoes and return them to the pot you boiled them in. Using a hand masher or an electric hand mixer, begin to mash the potatoes. Add the butter, cream cheese or yogurt, salt and pepper. Begin adding milk, just a few tablespoons at a time, until the potatoes are your desired consistency.

  5. To serve, scoop some potatoes onto a plate and top with meatballs and sauce. Garnish with fresh time or parsley flakes.

Serves 4 - 6.

Vegan Chicken Divan

IMG_9813.jpg

To be honest, I had never even heard of Chicken Divan until I was married and my husband introduced me to this southern classic.

It was a staple and favorite in his house growing up! It is traditionally a creamy, cheesey, chicken, and broccoli comfort food that is often served with rice.

Since going vegan we haven’t been able to have this dish in years, so naturally it was one that needed veganizing! Using jackfruit in place of the chicken works very well as long a you cook the brine flavor out of the jackfruit first.

I took the suggestion of my friend Mike who said his grandmother always added curry powder, and he was right! It is a delicious addition!

So if you have never heard of this dish, or have had it in the past and miss it, go ahead and try this vegan version. I think you will be pleasantly surprised!

And thanks to my mother in law, Debbi, for introducing me to this southern classic!! We wouldn’t have this vegan version with you!


Ingredients:

  • 2 cans of jackfruit in brine, or 4-5 easy vegan chicken breast diced

  • 1 head of broccoli

  • 1 cup vegan sour cream or plain yogurt (I use Kite Hill plain almond milk yogurt)

  • 1 cup vegan mayo

  • 1 cup vegan cheddar shreds

  • 1 teaspoon Better than Bouillon, plus 3 tablespoons water

  • 1/2 cup cashews

  • 1 cup water

  • 2 tablespoons tapioca starch

  • 2 tablespoon nutritional yeast

  • 1/2 of a small yellow onion

  • 2 teaspoon curry powder

  • salt and pepper to taste

  • 1/2 cup soft bread crumbs (use whatever bread you have laying around, gf works fine too)

  • 2 tablespoon melted butter

  • 1 tablespoon lemon juice


Instructions:

  1. Drain jackfruit. Chop or use hands to break up the pieces to resemble shredded meat. if using the chicken, dice into small pieces.

  2. Heat a large pot or dutch oven over medium heat. Add the Better Than Bouillon and 3 tablespoons of water. Next, add in the jackfruit, and allow to cook until all of the liquid is absorbed (about 5 minutes). Cooking the jackfruit like this will help cut down on some of the brine flavor it has.

  3. Wash and chop up the head of broccoli. Add it to the pot with the jackfruit, and allow the broccoli to cook for 3-5 minutes, or until it begins to soften. Once it’s done remove the pot from the heat, set aside.

  4. Put the cashews in a microwave safe container. Cover them in water and microwave for 3 minutes. Place the 1/2 onion into a high speed blender or food processor and blend until it is broken down. Drain the water from the cashews and add them, plus the 1 cup of fresh water, nutritional yeast, starch, and lemon juice to the blender with the onion. Process until the mixture is completely smooth. Transfer mixture to a sauce pan and heat on medium/low heat, whisking the whole time, until the mixture begins to thicken into a thin pudding consistency.

  5. Pour the cashew mixture over the jackfruit, or chicken and broccoli. Add in the sour cream, mayo, curry powder, cheddar shreds, salt and pepper to taste, and stir until combined. Transfer mixture to a 9x13 baking pan.

  6. In your blender or food processor, break down the soft bread into crumbs. Stir in the melted butter and spread the mixture evenly over the casserole. Bake the casserole for 35 - 45 minutes on the middle rack of your oven.

  7. Serve “chicken” divan as is, or over rice, and sprinkle with vegan parmesan cheese.

IMG_9799.jpg

Unstuffed Vegan Cabbage Rolls

IMG_9214@0,5x.jpg

Cabbage rolls are one of my favorite comfort meals, however they are not quick. That’s why I love this recipe for “unstuffed” cabbage rolls. It’s so much faster, and just as delicious, and comforting.

I seriously love cabbage rolls, but my kids are not huge fans so there is no way I am going to take all that time rolling them up if only a few people in the house are going to enjoy them. And seriously this taste just the same as the rolled version but WAY faster, and WAY easier!!!


This recipe makes a lot and freezes well, so it’s also perfect for meal prep, or even a pot luck.

I use Beyond rand meat, either the crumbles, 1 lb block of groud, or 4 thawed burgers. You can use any vegan ground you like, though.

So if you have 0 time to mess around with rolling cabbage rolls, but love them like I do, then this is the answer!! A super delicious, quick, and easy answer!


Ingredients:

  • 1 medium to large head of green cabbage; cored, and cut into strips

  • 1 bag meatless crumbles, or 4 Beyond Meat Burgers thawed

  • 1 large yellow onion, diced

  • 1 28 oz can crushed tomatoes

  • 1 14.5 oz can diced tomatoes

  • 2 tablespoons tomato paste

  • 2 cups cooked brown rice

  • 2 tablespoons brown sugar

  • 1/2 cup water

  • 1 teaspoon each dried thyme, dill, garlic powder, and salt

  • 2 teaspoons smoke paprika

  • pepper to taste

  • juice from 1 lemon

  • fresh, or dried parsley for garnish


Instructions:

  1. In a large, deep skillet, heat a few teaspoons of oil medium heat. Add diced onion, and meatless crumbles, or Beyond Burgers to the pan. Cook until the crumbles have cooked through.

  2. Next, add the cabbage, and water. Allow the cabbage to cook for about 5 minutes, just long enough for it to cook down a bit. Add the remaining ingredients, and give every thing a good stir.

  3. Once it begins to come to a simmer, reduce heat to low, and cover with a lid.

  4. Allow to cook for 30-35 minutes, stirring occassinsaly to keep anything from sticking to the bottom of the pan.

  5. Serve garnished with some fresh, or dried parsley.

This recipe will serve 6 - 8 people. If you are single, or a small family, you can easily freeze any leftovers portioned in freezer bags. I often freeze half for a quick week night dinner. Just leave out to thaw, and reheat in a pan on the stove top.

Southern Tofu Scallops and Grits

IMG_7883.jpg

Growing up, shrimp and grits were a favorite of mine. I am from the south and in the south we eat grits with just about anything!

Once we went vegan I longed for a bowl of delicious shrimps and grits and knew there had to be a way to mimic the classic without the shrimp or other animal products.

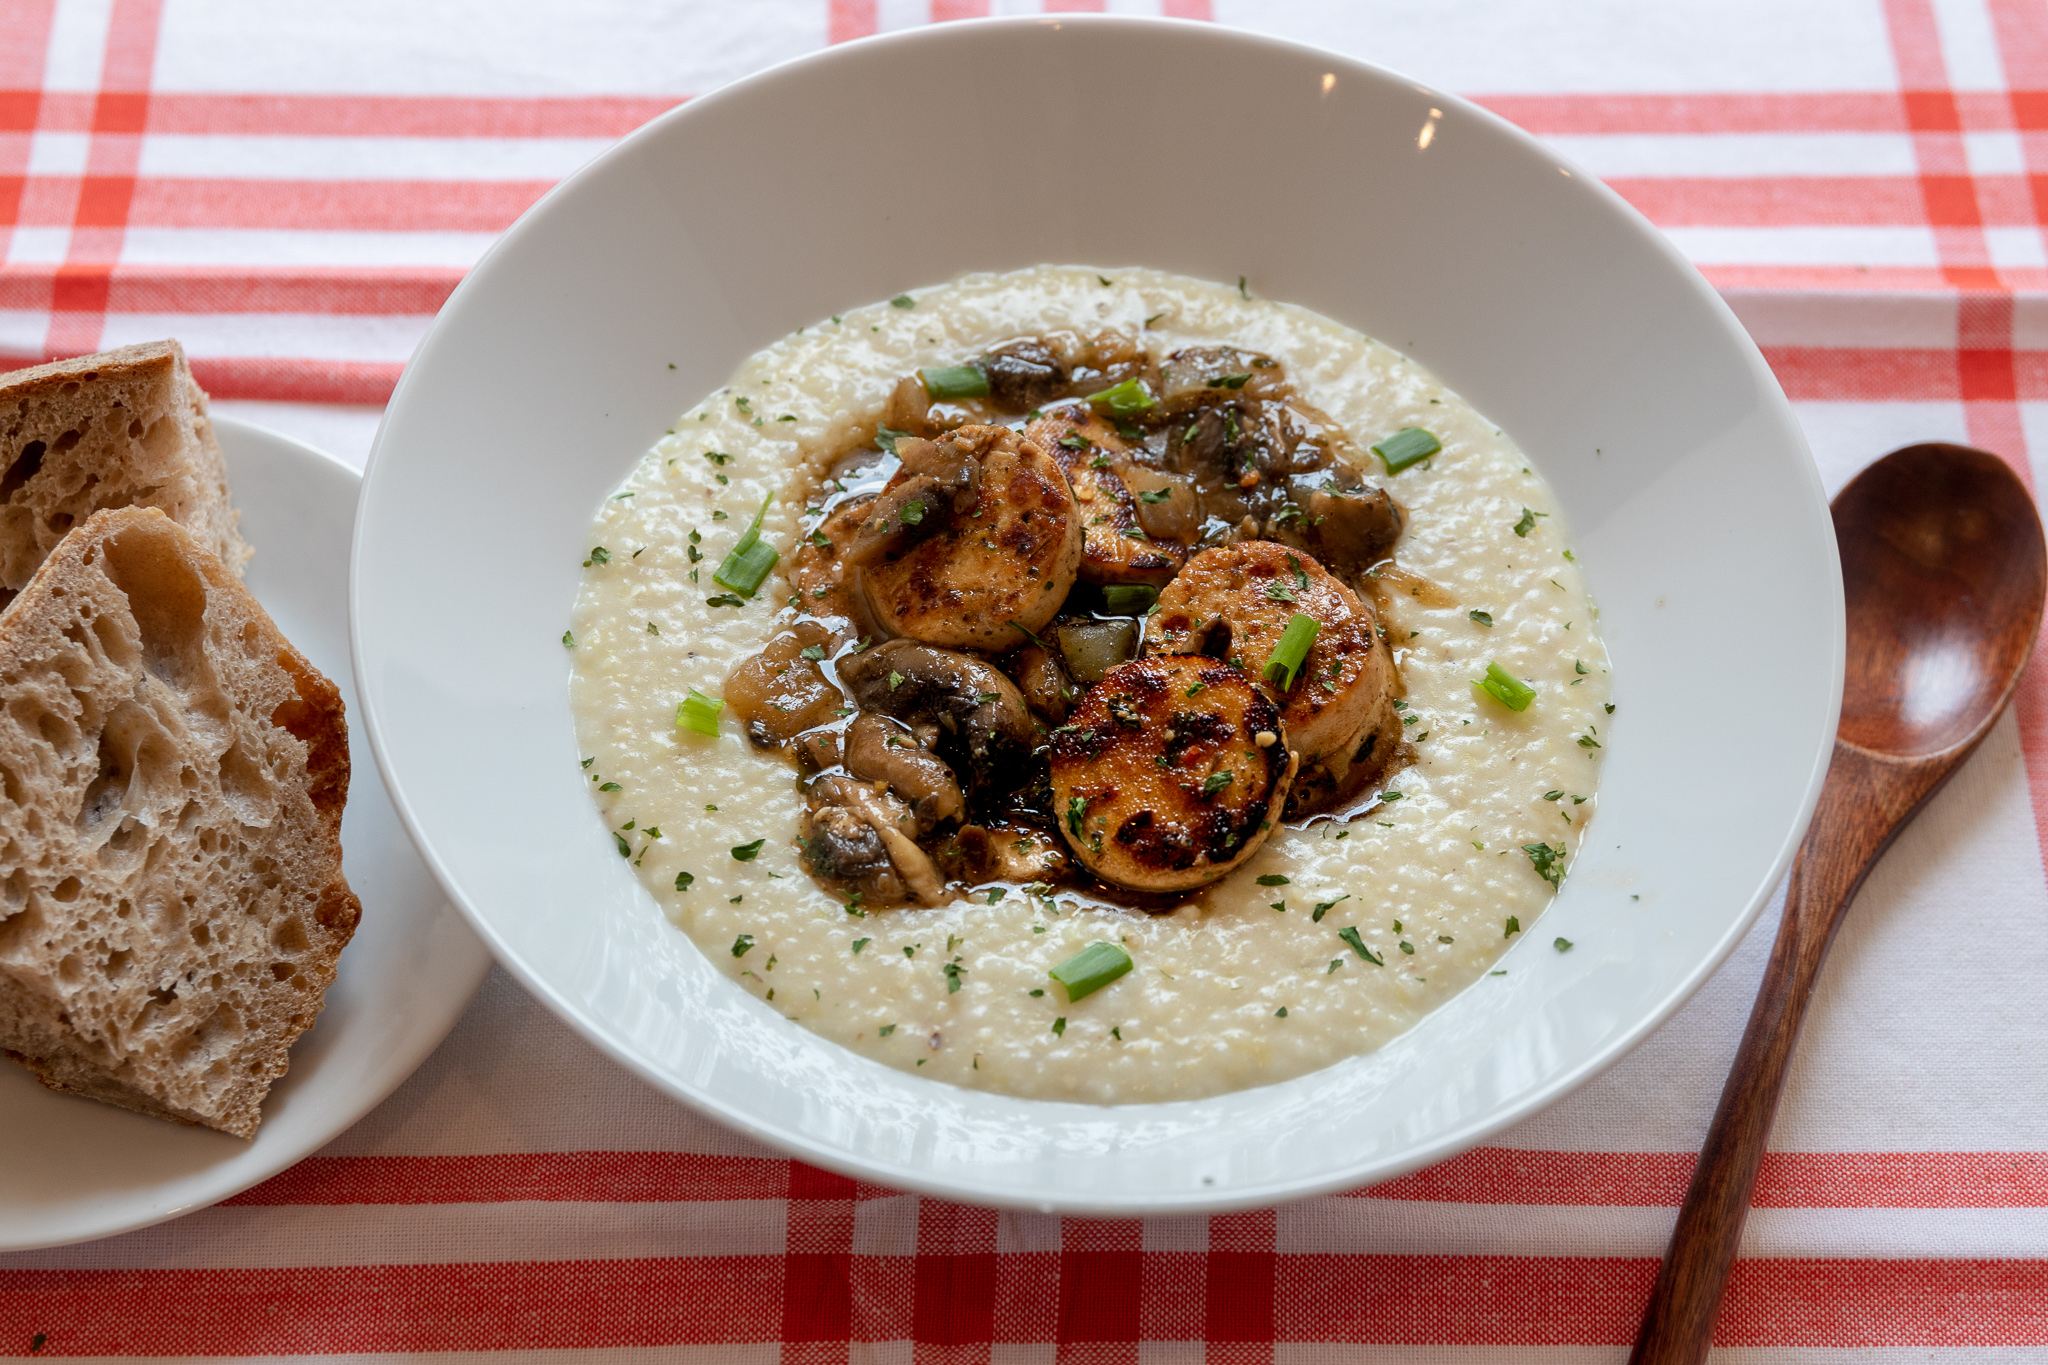
I quickly learned tofu makes a great scallop substitute and decided tofu scallops would be a close enough second for my favorite dish!

Well it worked well enough to satisfy my craving and now its my husband and oldest daughters favorite dish! It cooks up pretty quick and is the perfect comfort food any time of year!

The tofu scallops are savory with a kick of citrus. The grits are prefectly creamy with a zest of lemon. We add cream cheese to the grits because cheese grits reign supreme over any other grit ever!!

So if you have had a hankering for some shrimp and grits since going vegan, maybe this dish will hit the spot. If you have never had a grit, my sincerest apologies, and may I urge you to try them! I am pretty sure if you eat them this way, you are gonea love them!


INGREDIENTS:

  • 1 Package extra firm tofu

  • 2 cups sliced mushrooms

  • 1 small diced onion

  • 1 teaspoon minced garlic

  • 3 tablespoons butter

  • 1 teaspoon Better Than Bouillon

  • 2 tablespoons water water

  • 1/3 cup plus 2 tablespoons white wine, like chardonnay

  • 1 tablespoon vegan Worcestershire sauce

  • 1 tablespoon coconut aminos

  • Juice from 1 lemon

  • 1 teaspoon parsley

  • 1 teaspoon all purpose seasoning, I use Trader Joes 21 season salute

  • 1-2 green onions or chives for garnish.

The Grits

  • 1 cups of dried grits (not instant)

  • 2 cups plant based milk

  • 3 cups water

  • 1 tablespoon vegan butter

  • 1/2 teaspoon salt

  • 1/4 cup vegan cream cheese

  • 1-2 teaspoons lemon zest

  • pepper to taste


COOKING INSTRUCTIONS:

  1. Drain tofu, and wrap up in a clean kitchen towel, or some paper towels. Place a few books on top and let sit for 5 minutes to press out the excess liquid.

  2. Cut tofu in half length wise, and using an 1 inch circle cutter, cut scallops from the 2 pieces tofu. You can use the scraps as well or save them to make something else later, like tofu ricotta.

  3. In a shallow dish mix 2 tablespoons of wine, Worcestershire sauce, and aminos. Add the tofu and let marinade for 15 mintues.

  4. In a large pot or dutch oven, bring the milk and water to a boil for the grits. Once the liquid is boiling, add in the grits, salt, and butter. Lower the heat to low, and allow the grits to simmer until thickened, stirring occasionally to avoid sticking. This takes about 15- 20 minutes. The grits can cook and thicken while you prepare the tofu.  Once the grits are thick, stir in the cream cheese, pepper, and lemon zest.

  5. In large high side skillet, melt 1 tablespoon of butter on medium heat. Add the tofu scallops along with marinade and cook on each side for 3-5 minutes, or until they begin to brown and crisp, and all of the liquid is absorbed. Once tofu is done, remove from the pan and set aside. Add 2 tablespoons of butter back to the pan, along with the mushrooms, and onions. Cook until the onions become translucent, then add the wine, Better Than Bouillon, water, lemon juice, minced garlic, and seasoning. Allow the wine to cook down for several minutes, then add the tofu back to the pan. Let the tofu simmer on low heat in the sauce for 10-15 minutes.

  6. To serve, scoop some grits into each bowl and top with tofu scallops and sauce. Garnish with chopped green onions or chives.

serves 4-6

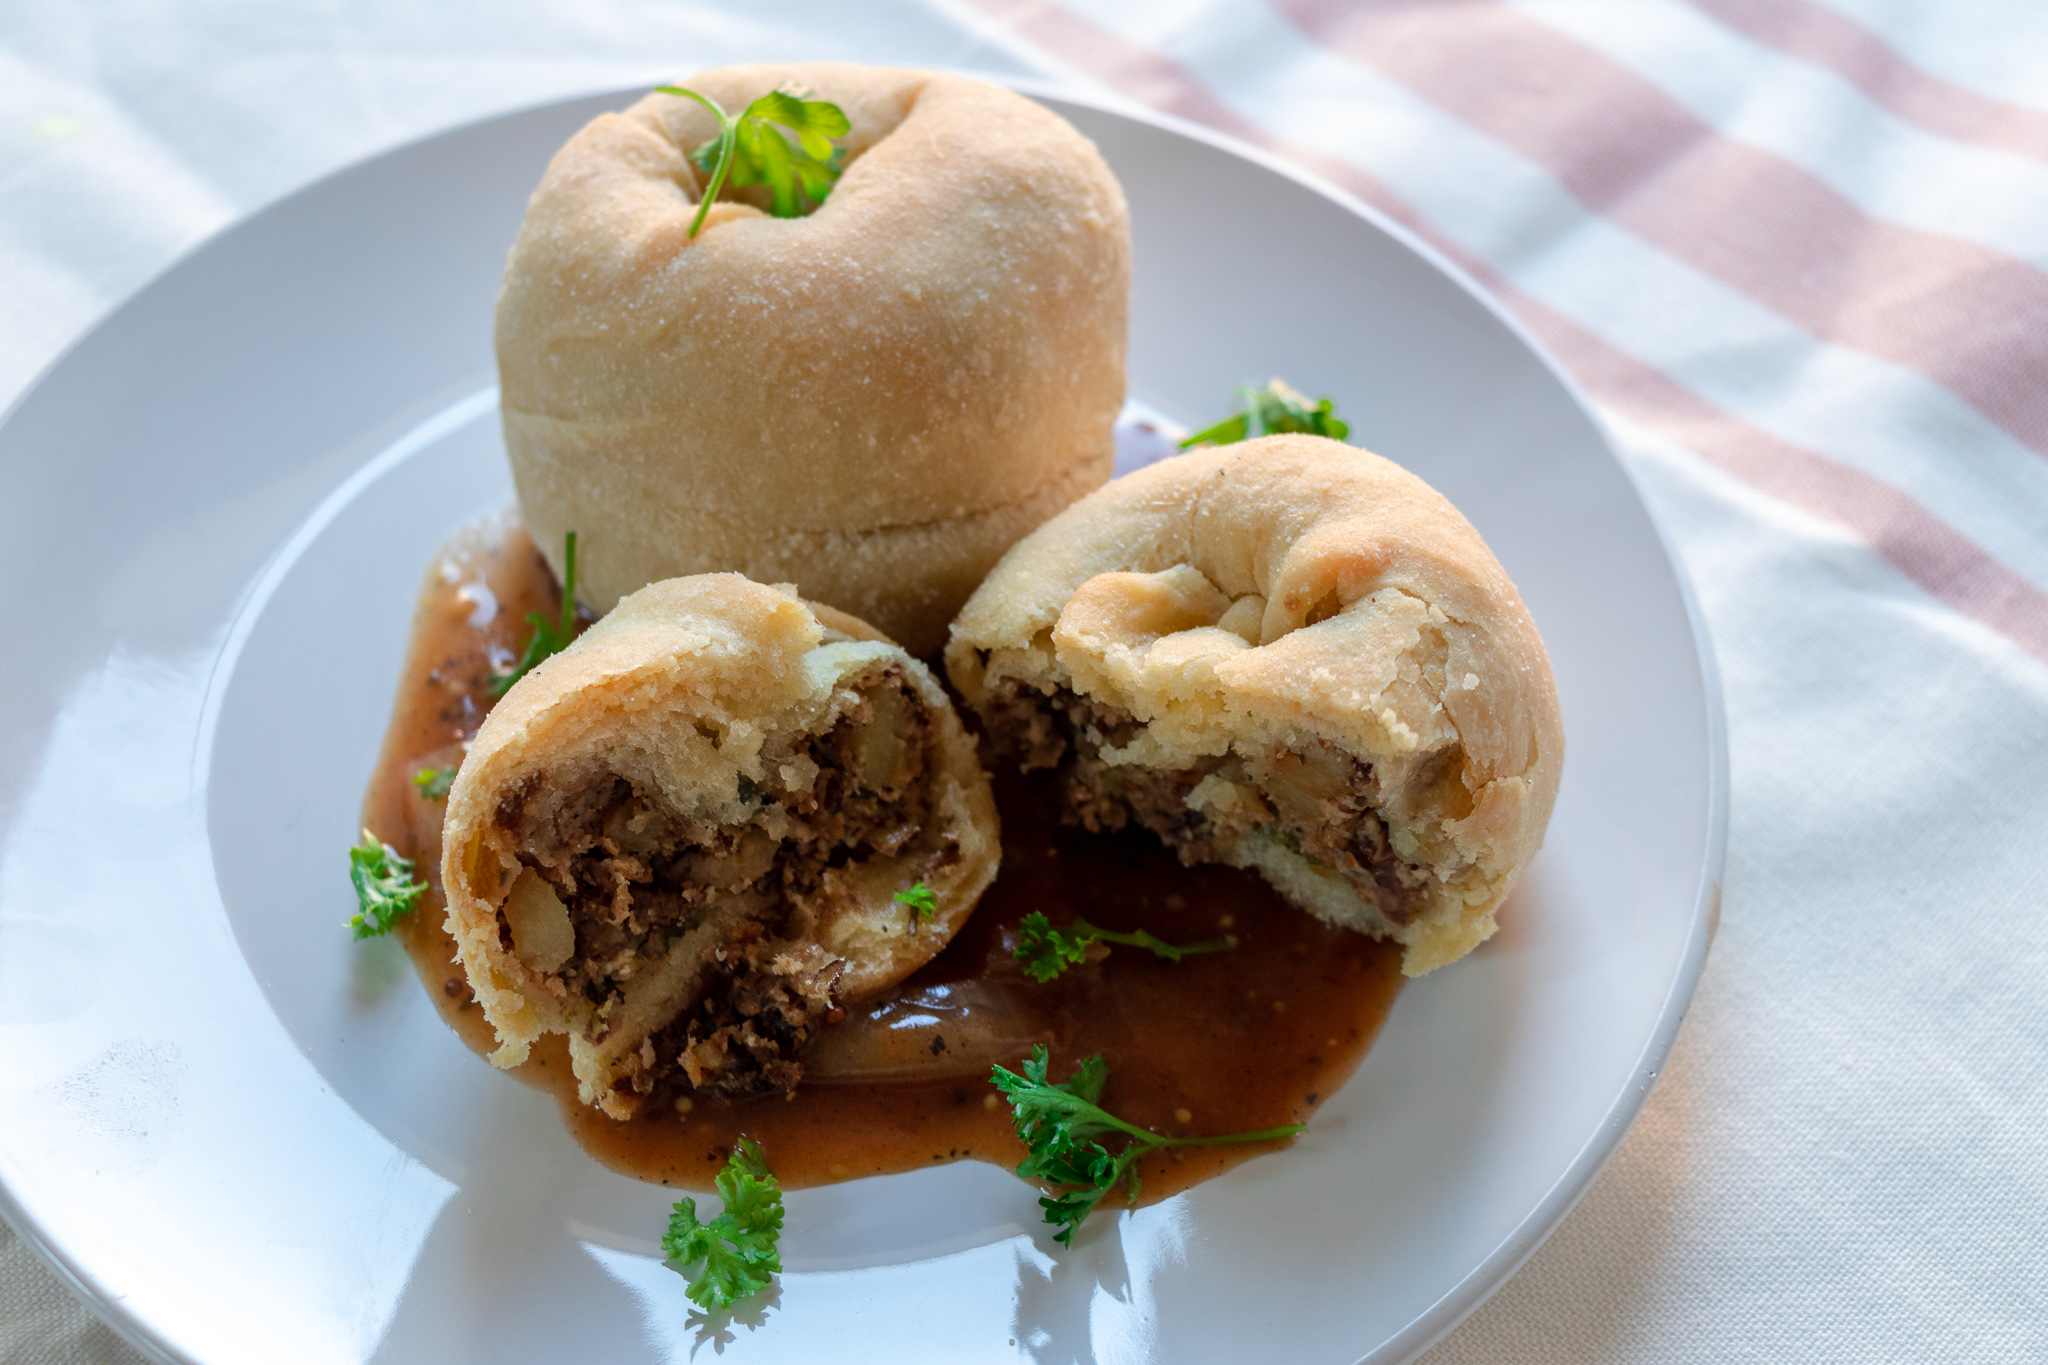
Meaty Vegan Potato Knish

IMG_9157.jpg

If you have had knish then you know just how delicious they are, and if you haven't, I promise you won't be disappointed.

Knish originated as an Eastern European Jewish street food. Traditionally filled with mashed potatoes and minced meat, these days you can them filled with just about anything.

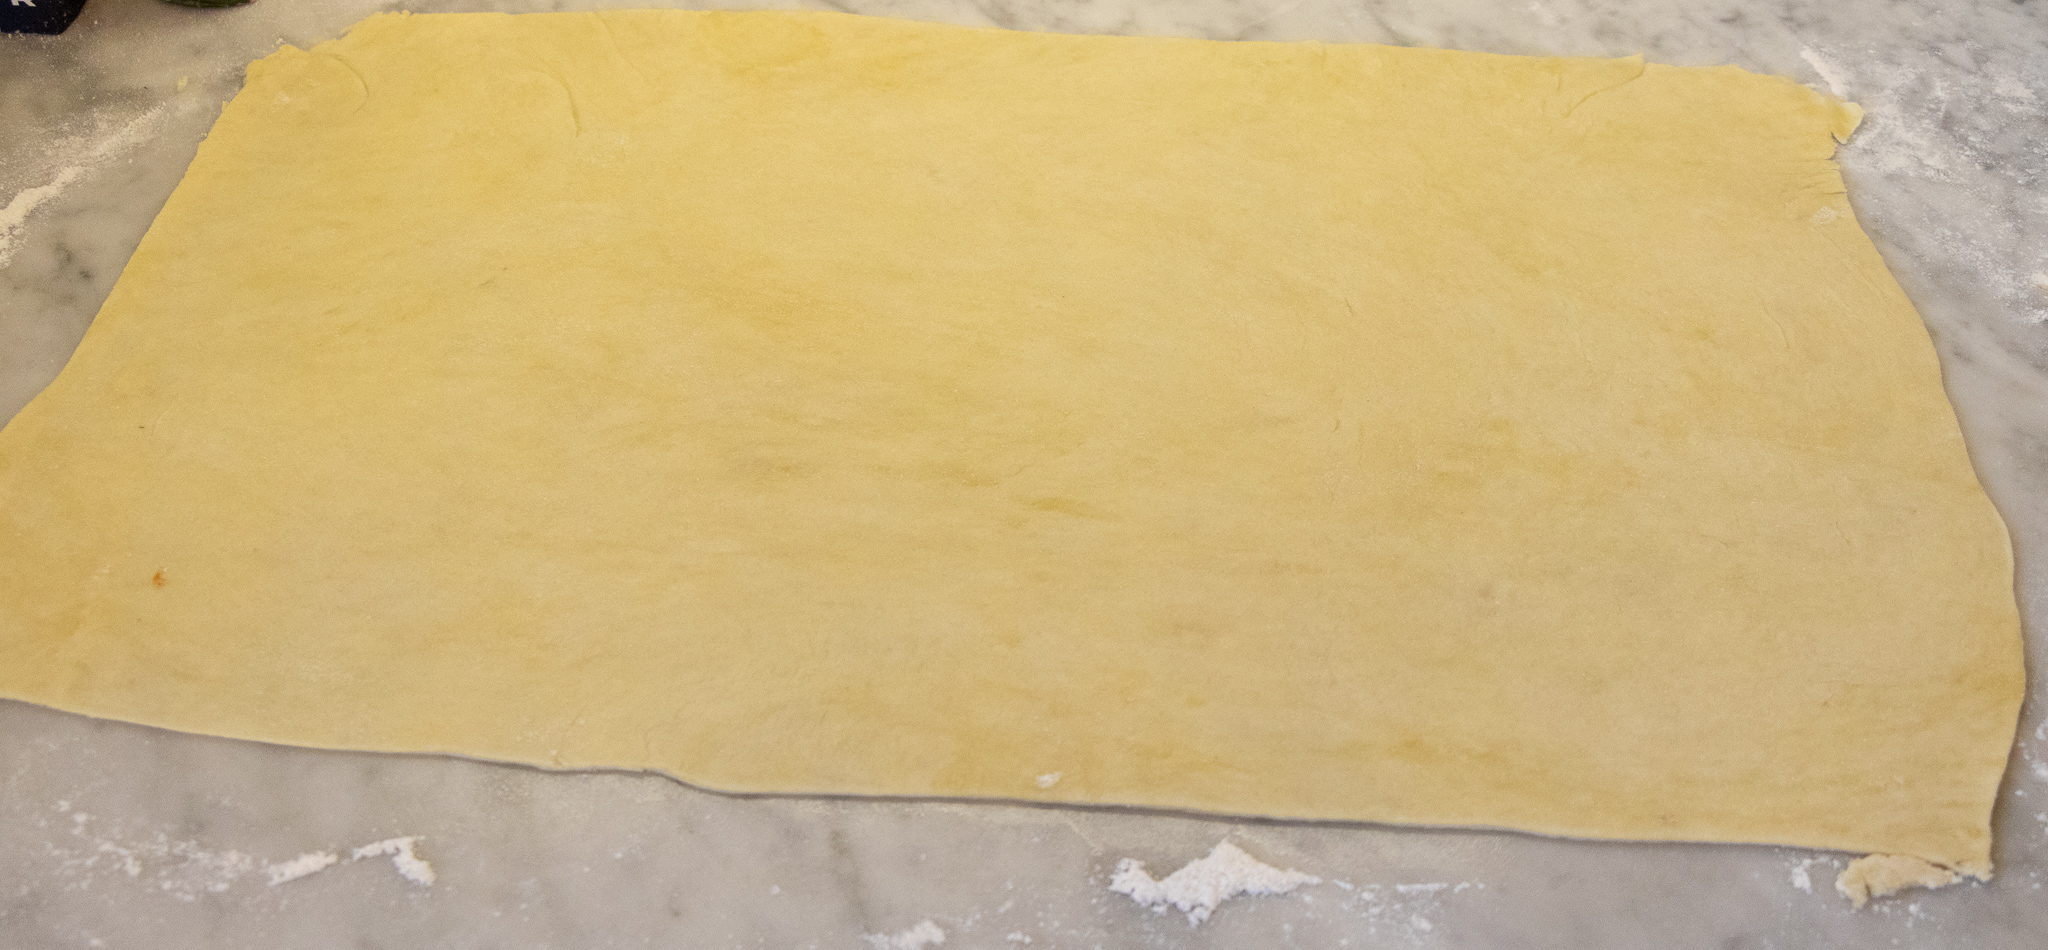
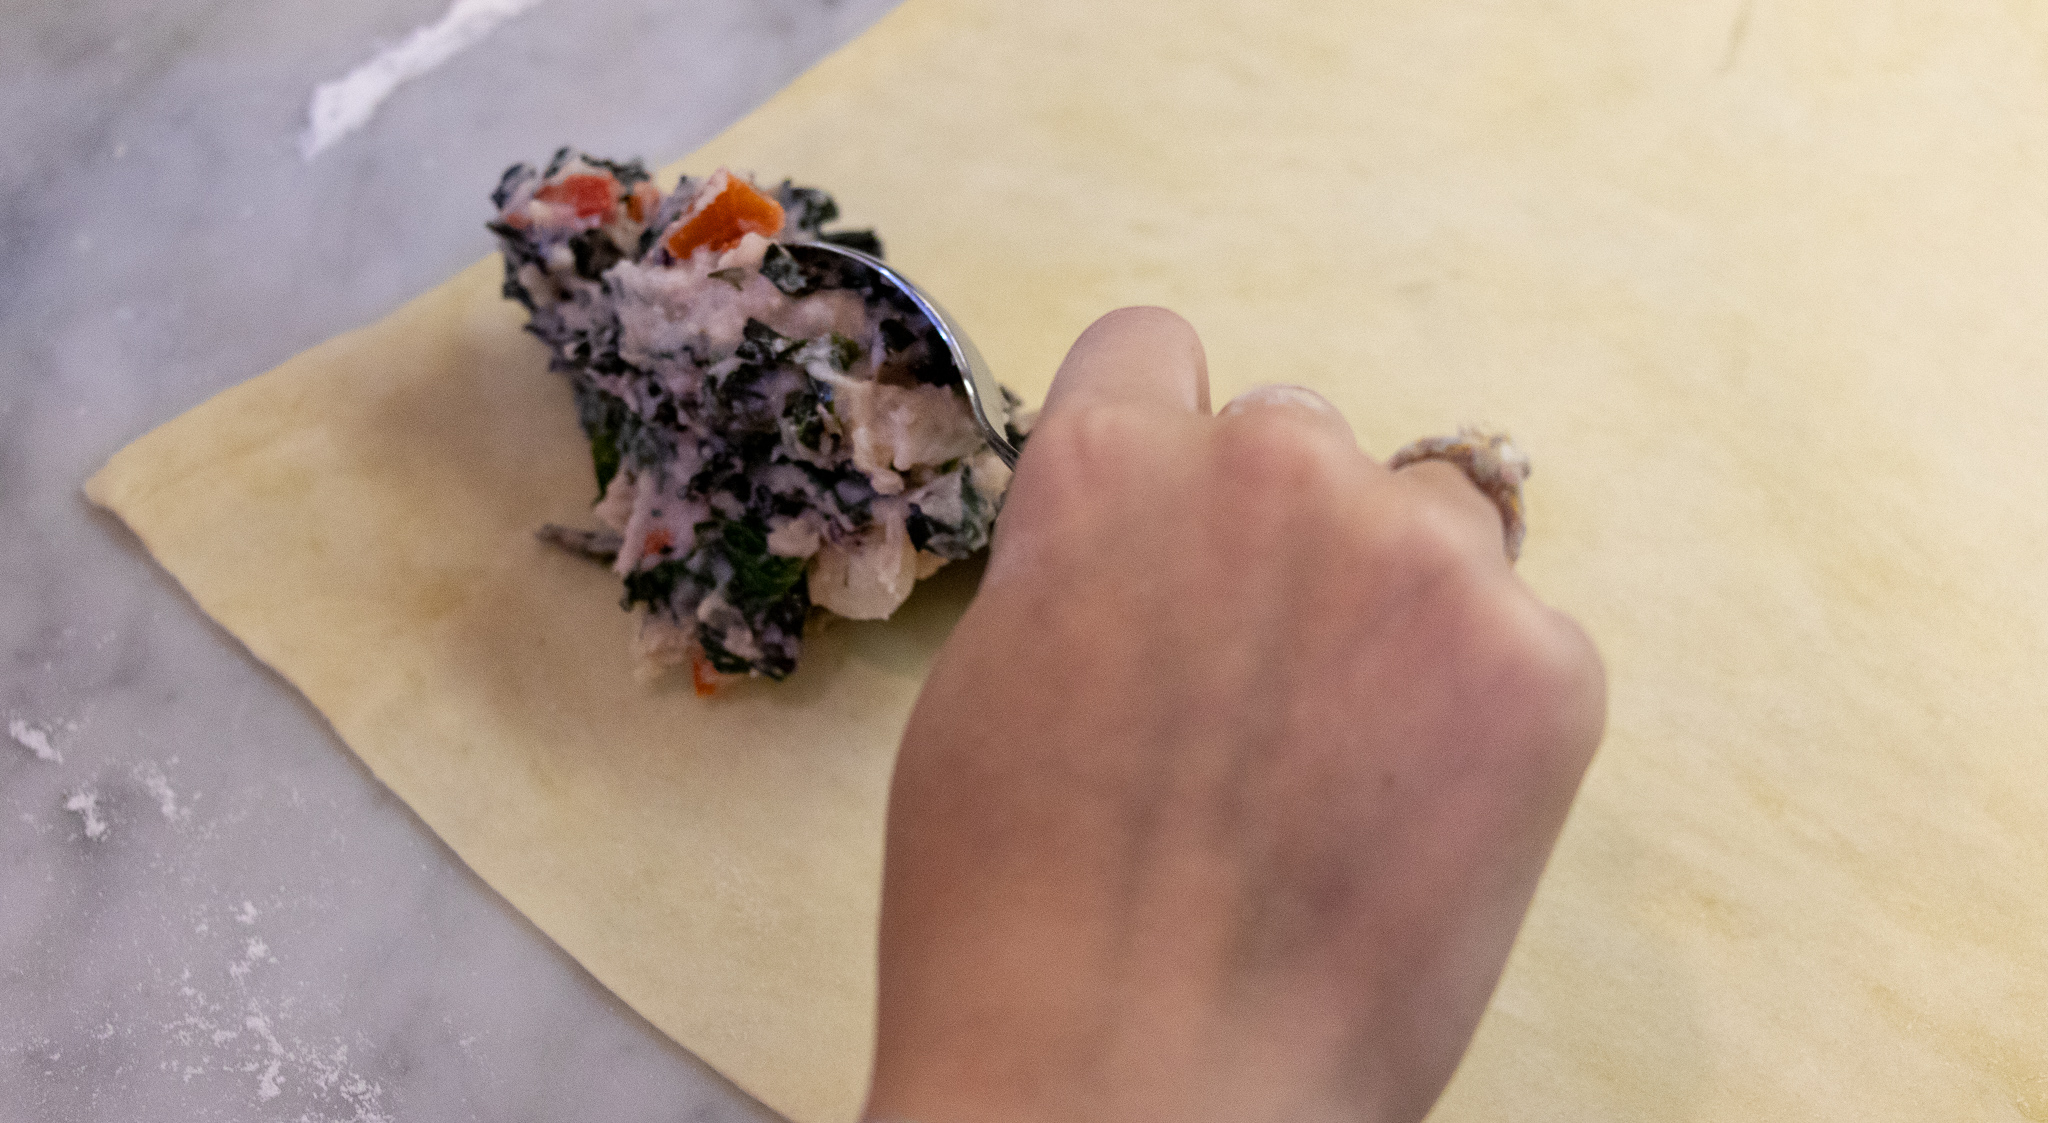
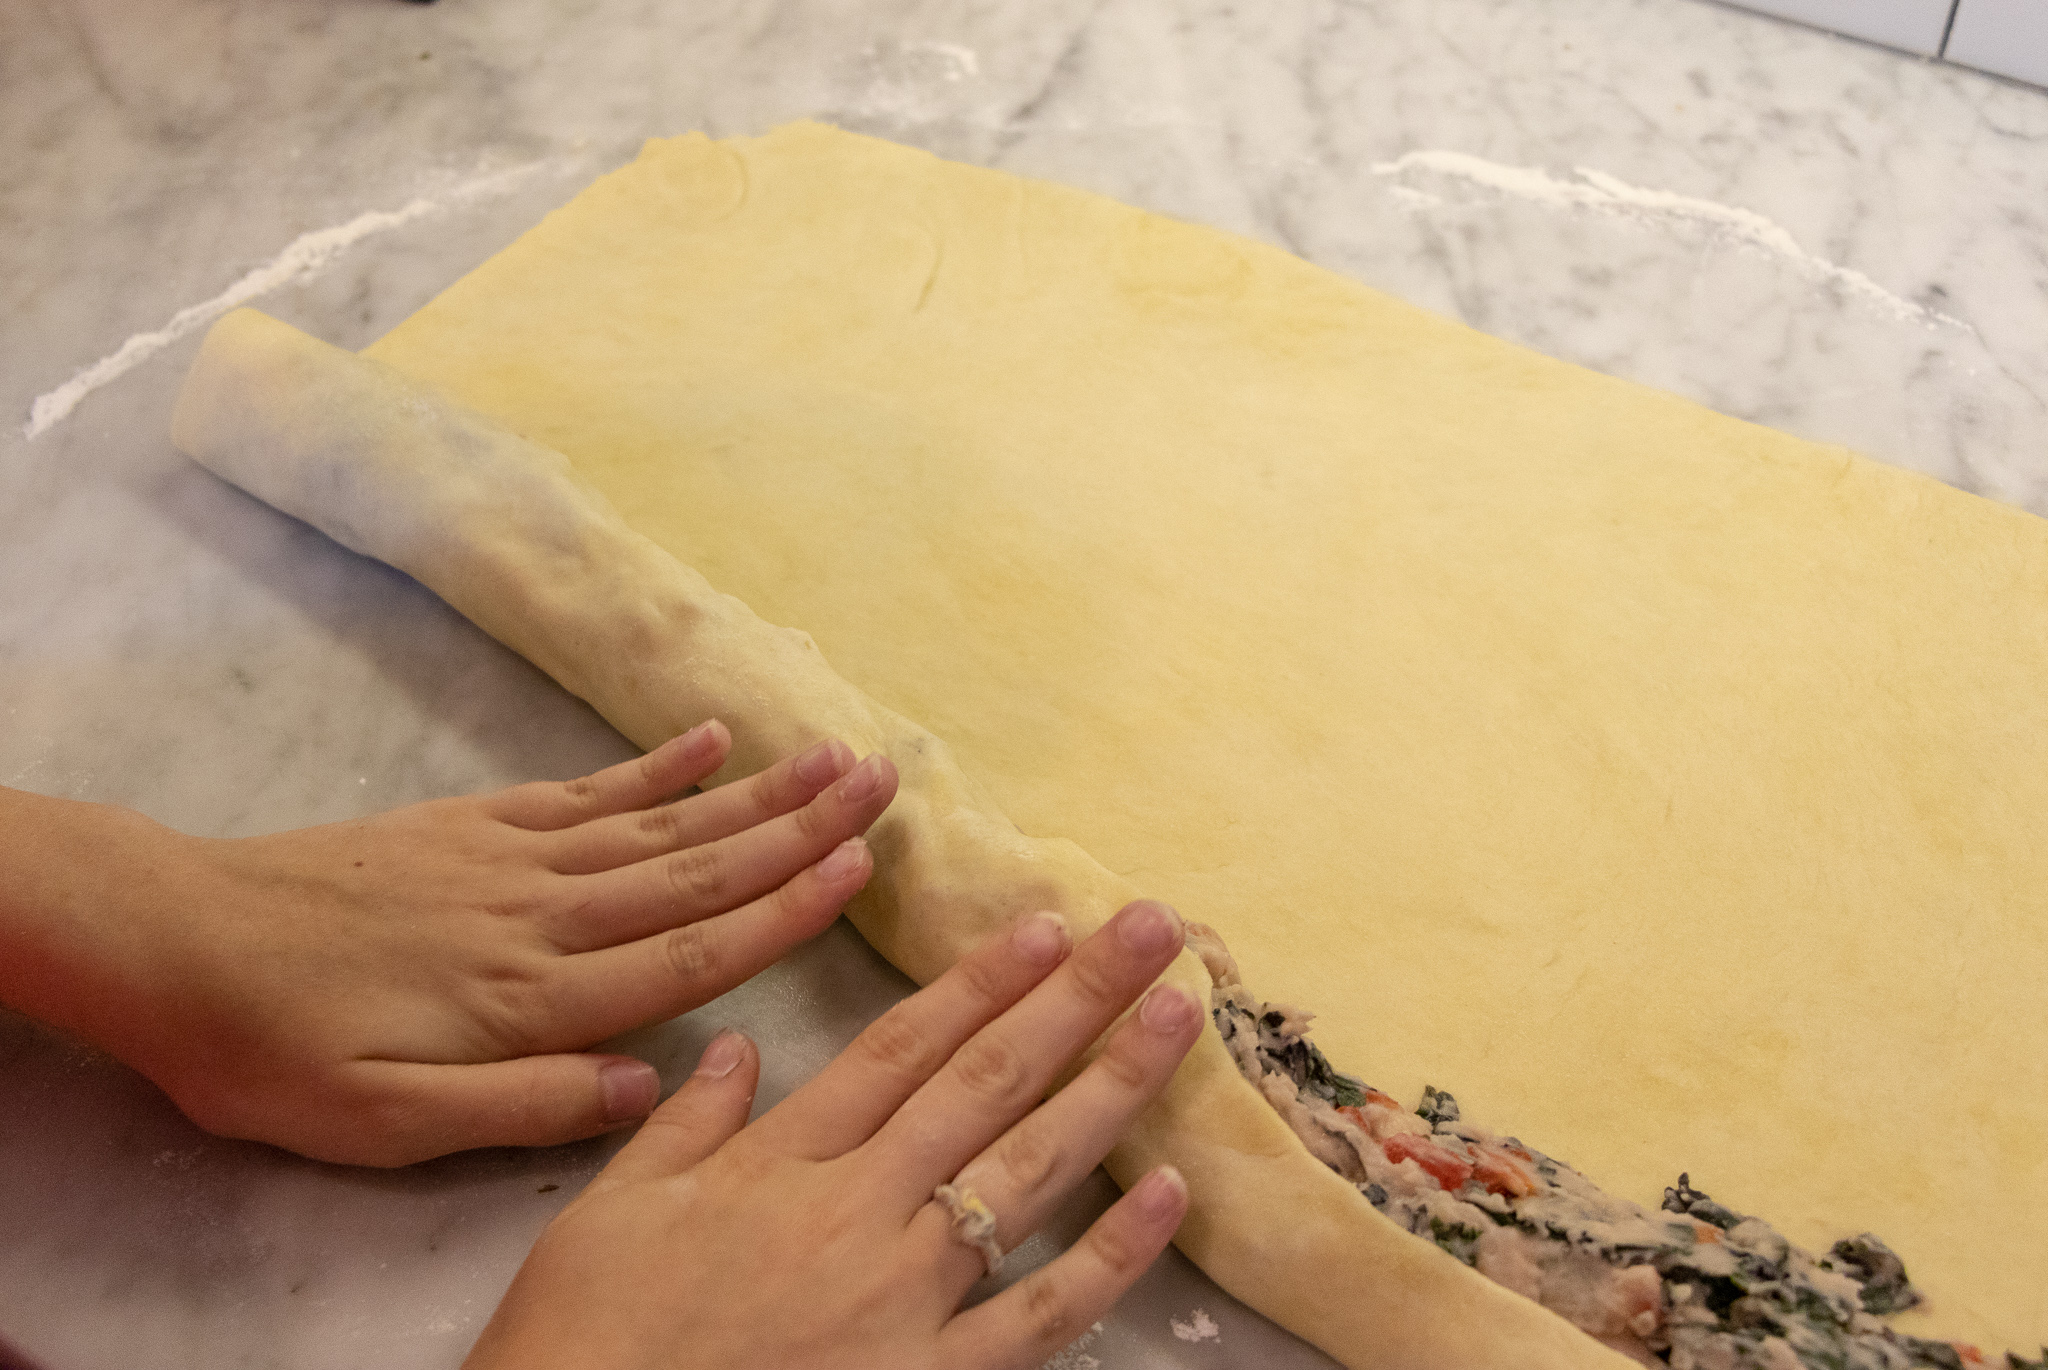
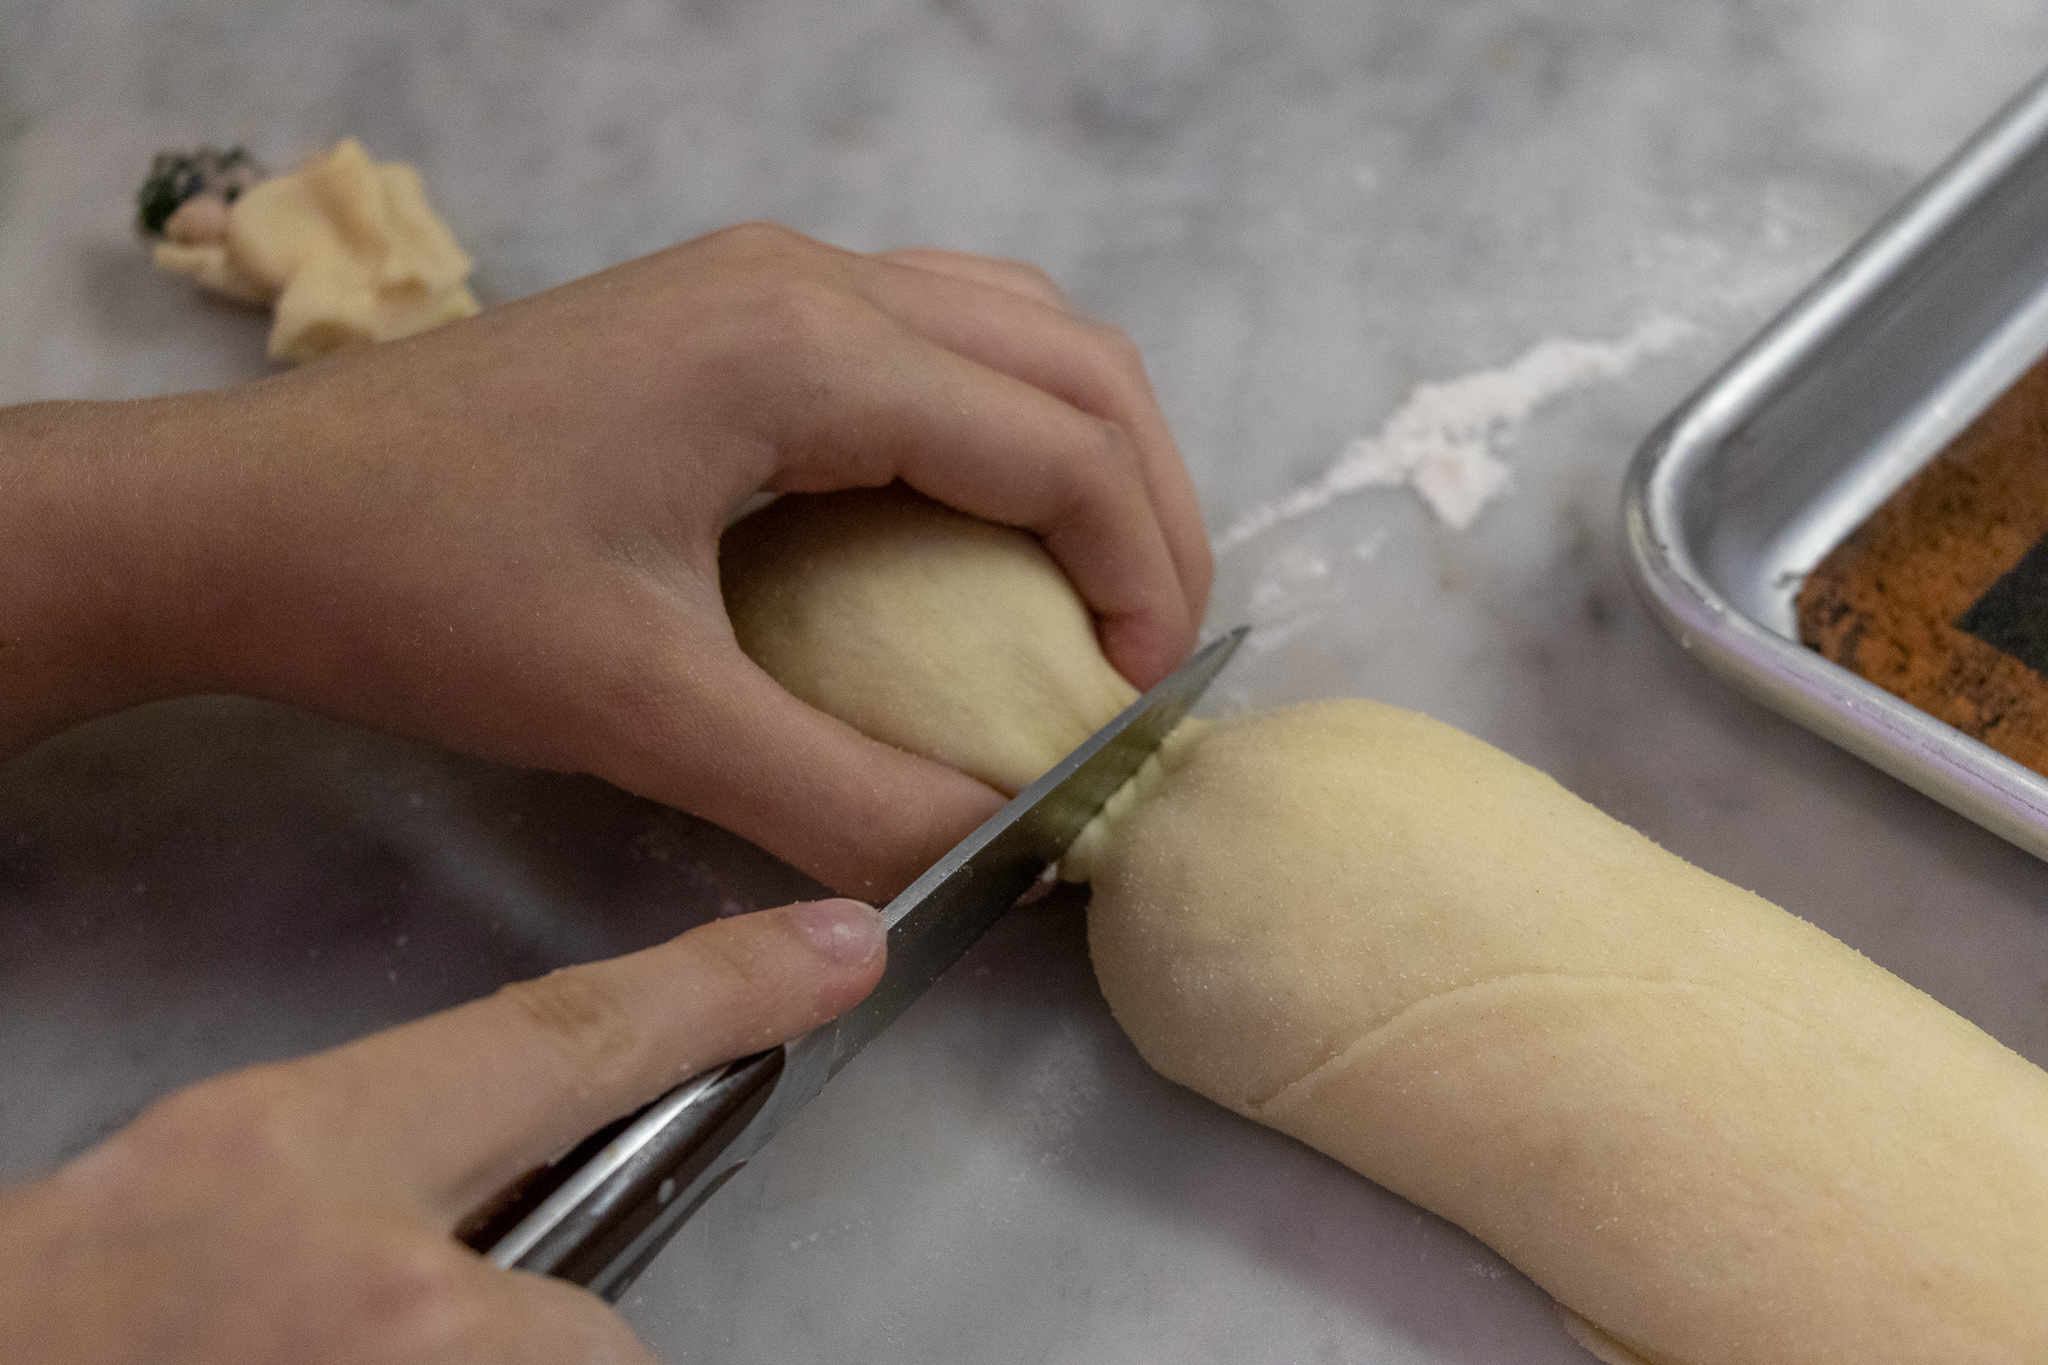
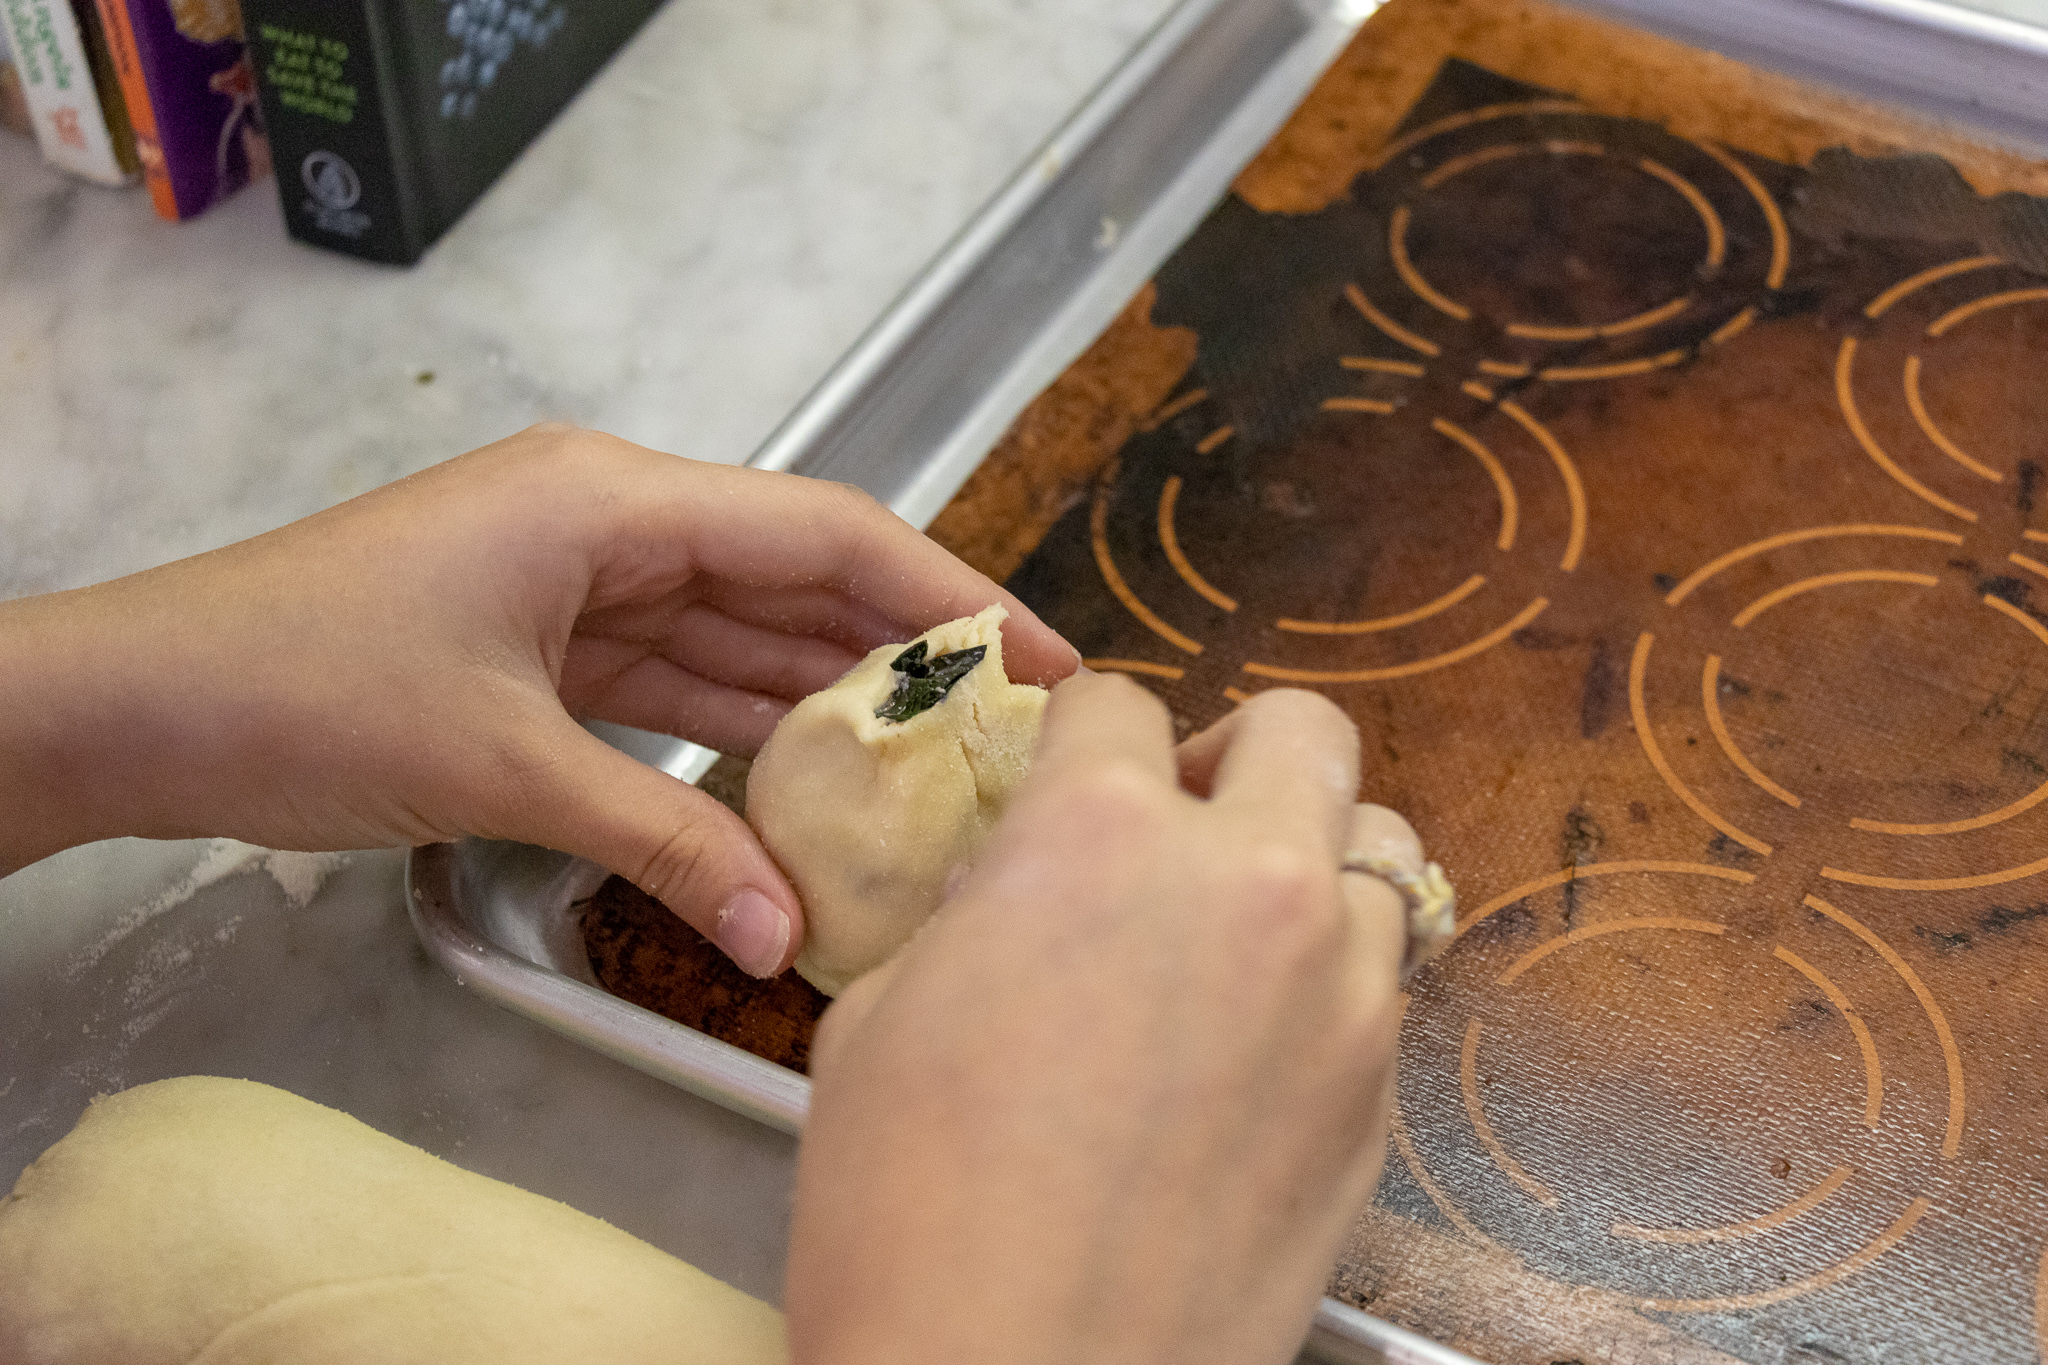
We often fill them with meat and potatoes, or sautéed veggies and cheesy potatoes. The dough is actually really easy to make. The rolling and cutting of the dough is also easy once you understand the process, so we have added step by step pics to help!

Don’t worry if your first batch or two are not super pretty! They will still taste delicious. I think this is just one of those recipes that practice makes perfect. And once you make them once, ou will likely want to make them all the time. So you will be a knish pro before you even know what happened.

Once again, I am southern, so I take every opportunity to smother almost everything in gravy, giving this traditional dish a southern twist. Feel free to omit the gravy! They are just as good without!

Knish also freeze really well, making them a great meal prep item. We normally double our batch and freeze half. Just thaw and reheat in the oven. Cook once, eat twice is my favorite!

Finally, if you are not a fan of faux meat, feel free to replace it in this recipe wth some minced and sautéed mushrooms, or walnut meat. Both would be just as tasty!


INGREDIENTS:

The Filling

  • 2 Thawed Beyond Meat burgers, or half a bag of meatless crumbles, or 1 cup minced seitan flank steak

  • 2 medium sized potatoes

  • 1/2 onion

  • 1/3 cup vegan cream cheese

  • 1 teaspoon of thyme

  • 1/2 teaspoons salt

  • pepper to taste

  • 2 teaspoons cooking oil

Knish dough

  • 2 1/2 cups all-purpose flour

  • 1 teaspoon baking powder

  • 1/2 teaspoon salt

  • 1 flax egg

  • 1/2 cup oil, I use grapeseed, but you could use vegetable or even coconut if you want

  • 1 teaspoon apple cider vinegar

  • 1/2 cup water

  • vegan butter for brushing

Brown onion gravy

  • 3 cups of water

  • 3 tablespoons all purpose flour

  • 1 small onion, diced

  • 1 teaspoon minced garlic

  • 2 teaspoons reduced sodium Better Than Bouillon

  • 1 tablespoon tomato paste

  • 2 teaspoons dijon mustard

  • salt and pepper to taste

COOKING INSTRUCTIONS:

Knish Dough:

  1. First prepare the dough by mixing the dry ingredients together in large bowl.

  2. In a smaller bowl mix the oil, water, vinegar and flax egg together, then add to the dry mix.

  3. Work the dough with your hands until it is well combined.

  4. Kneed the dough for a few minutes, just until smooth.

  5. Place dough back into the bowl, and cover with plastic wrap.

  6. Pop it in the fridge for one hour to rest.


The Filling:

  1. Begin preparing the filling by peelinig, and dicing the potatoes to a very fine dice.

  2. Dice onion to a very fine dice as well.

  3. In a large skillet on medium heat, add a teaspoon or two of oil, onions, and potatoes. Cook the veggies until the potatoes are cooked through. It wont take too long since they are cut so small.

  4. Now add the thawed burgers (breaking them up with a spatula,) or meatless crumbles, and seasonings to the pan with the potatoes. Continue cooking until the "meat" is cooked through.

  5. Transfer mixture to a medium sized bowl, and let cool for 5 minutes. Mix in the cream cheese until well combined. Set pan aside to use later for the gravy. Don't wash the pan.


Making the Knish

pre-heat oven to 350 degrees

  1. Remove dough from the the fridge and roll it out on a big floured surface (a counter top works best, you need a lot of room) into a large rectangle. The dough should be about a 1/4 inch thick. It's ok if you cannot get it into a perfect rectangle, you can trim up the edges with a sharp knife to even it out. You can save the scrap dough and roll it back out, adding any left over filling you may have to yield a few more knish.

  2. Now at the edge of the dough closest to you, form a log 2 inches wide by 1 inch thick (give or take) with your filling, the length of the dough.

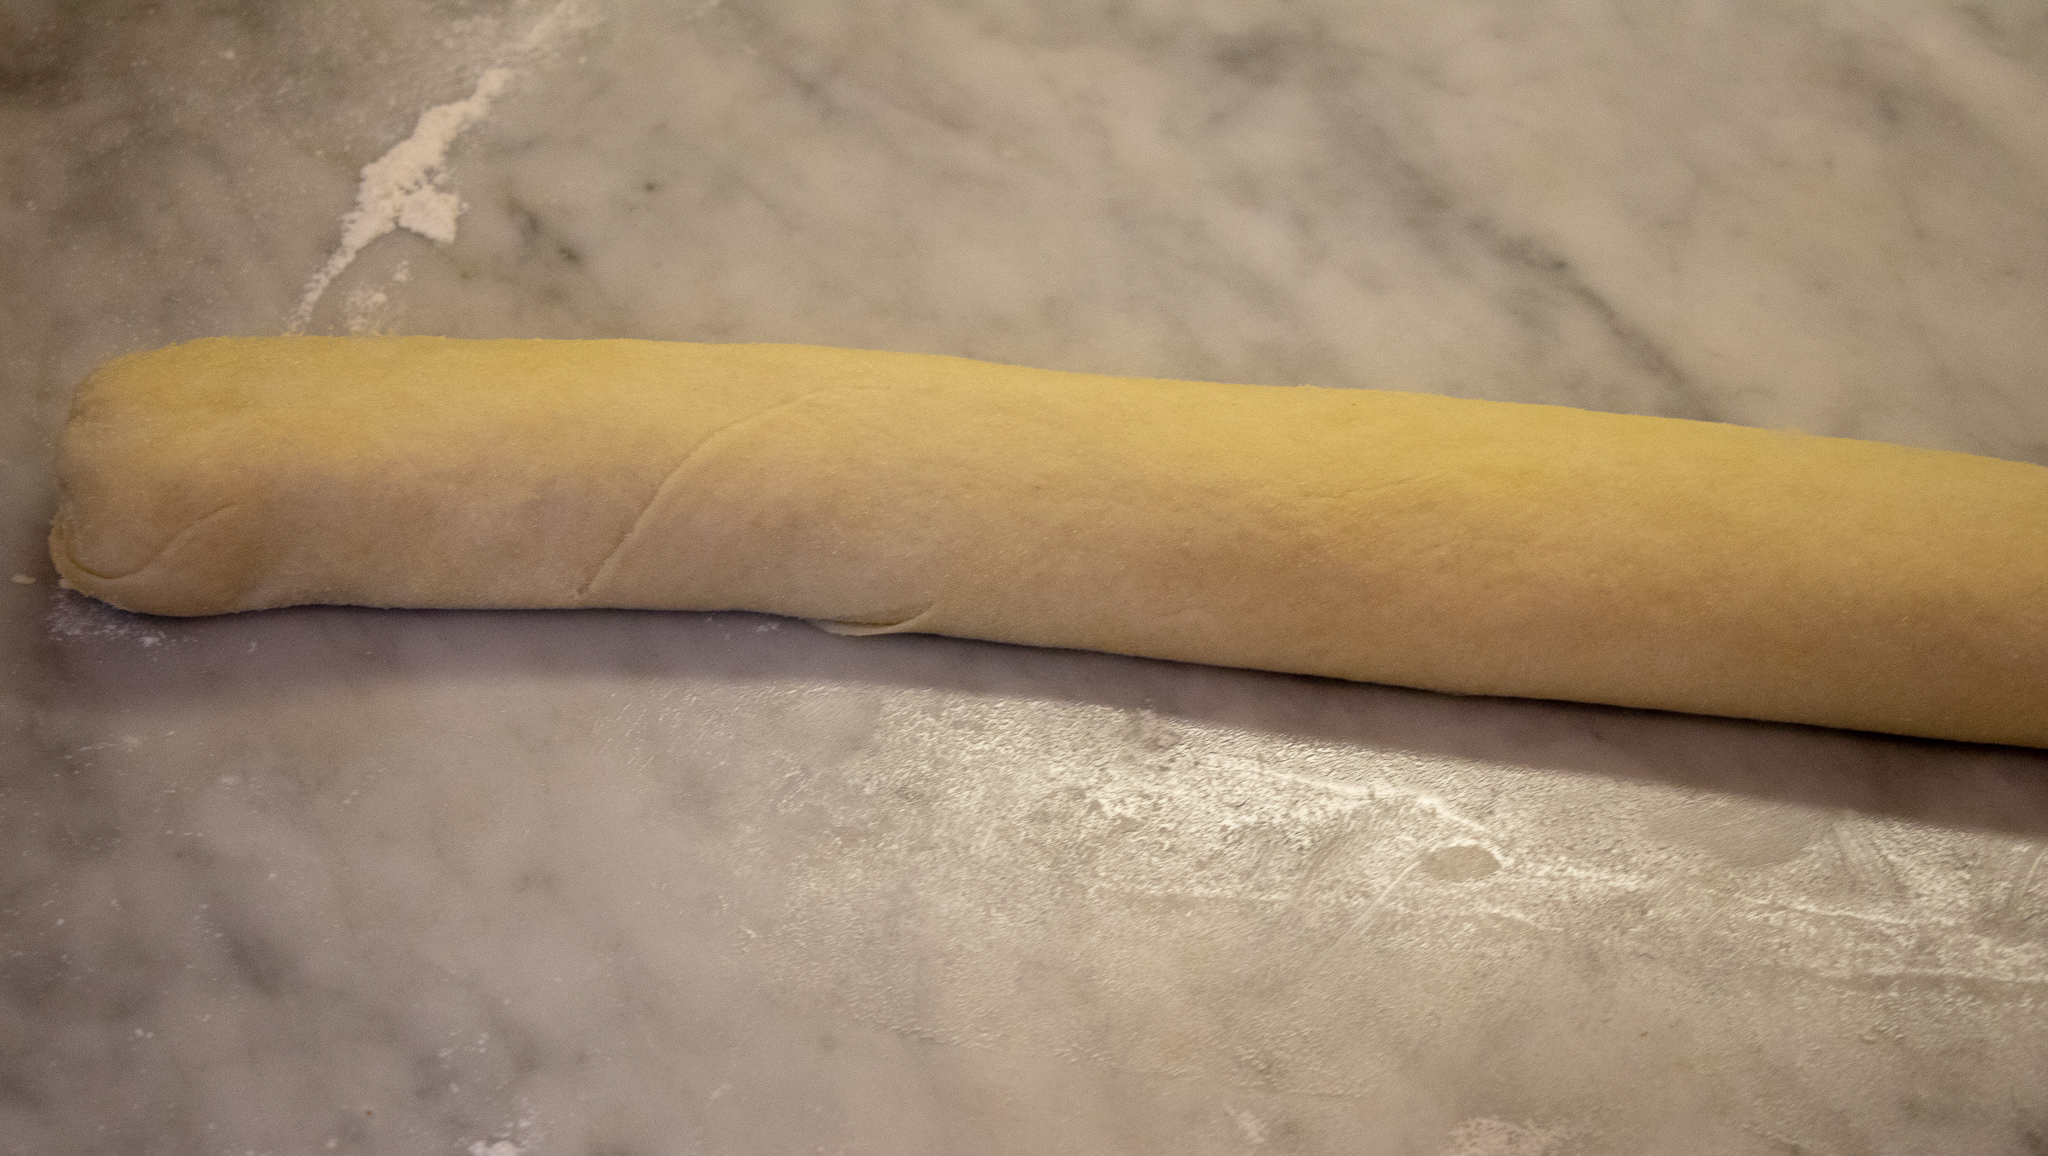
  3. Once all of the filling is in place, start rolling the dough (starting on the filling end) trying to get the roll as tight as you can, without having the filling squish out the ends. Before you come to the end, brush some water along the edge of the dough to help seal the seam.

  4. You now have a long log of dough. Starting at either end of the dough, measure in about 3 inches from the end and pinch, then twist the dough. Cut the dough on the twist, and place twist side up on a parchment-paper-lined baking sheet. Take your finger and poke the twist down into the center of the knish. Repeat with the remaining dough. You will get about 8 knish depending on the length of your original dough rectangle , and how big you make each knish. You may have some scrap dough, and extra filling that you can use to make a few more, as well.

  5. Brush the tops of the knish with some vegan butter and bake for 30 - 35 minutes. You can brush some more butter on mid bake if you like. This will help the knish brown a little better.

  6. As the knish are baking, prepare the gravy by sauteing the onions and garlic in the same pan you used for your filling, with a few teaspoons of vegan butter over medium heat. Once the onions are translucent, sprinkle on the flour and stir, letting it cook for a few minutes. Whisk the water, Better than Bouillon, tomato paste, and mustard together, then add to the pan. Reduce the heat to low, add salt and pepper, and let simmer, stirring regularly, until the gravy begins to thicken.

  7. Once knish are done, you can top with the gravy, and garnish with some fresh parsley.

The knish freeze, and reheat really well. We often make a double batch, and freeze half. They should be good in the freezer for up to one month. 

Vegan Seitan Ribs

IMG_8310.jpg

In college I worked at Chili’s. You know the place with the song about the ribs.

At the time I ate meat and I loved ribs, so other than the annoying song I was often asked to sing by customers, it was a pretty sweet gig. Never mind the fact that I still have nightmares to this day, 20 plus years later, about being the only person working and waiting on a full restaurant. I mean It actually happened once 5 minus before close when a convention of people came in and I was the last server there to close…..needless to say I have some PTSD about ti.

So once going vegan and learning all of the wonders of vital wheat gluten, I knew I wanted to learn to make ribs. And I did.

Once again I turned to Robin Roberson and the Veganze it cookbook (buy this book..trust me) and internet to investigate vegan ribs. What I learned is that most recipes I looked at, including the vegan queen Robin’s, were all pretty much spot on, so I married several of the recipes that seemed very much the same, and made adjustment according to what had on hand and made ribs. I was not disappointed.

I would say this is one the easiest seitan recipes I make! Mix, baked, then grill. Its not hard at all y’all and I have even watched a non vegan 9 year old boy tear a plate of these up.

Vital wheat gluten can be found in most health food stores or on line. If you have never worked with it, it’s just the gluten part stripped from the wheat. It is like making any kind of bread, as you are just making a dough out of the wheat gluten. Once you add liquid and knead it, It becomes stretchy and that texture is what give seitan its remarkable ability to mimic meat.

So fire up the grill and get ready to be wowed! And just as friendly suggestion, never ever ask me to sing that rib song. I promise it won’t end well.


NGREDIENTS: 

  • 1 cup vital wheat gluten

  • 3/4 cups vegetable broth

  • 2 tablespoons nutritional yeast

  • 1 teaspoon minced garlic

  • 2 teaspoons smoked paprika

  • 2 teaspoons onion powder

  • 1/2 teaspoon salt

  • 2 tablespoons nut butter (I use almond butter)

  • 1 tablespoon coconut aminos

  • 1 - 2 cups BBQ sauce


COOKING INSTRUCTIONS:

  1. Add all ingredients except for the BBQ sauce in a food processor, and blend until a sort of dough forms. Let the dough mix for about a minute.

  2. If you do not have a food processor, you can combine dry ingredients in a bowl. Mix together the wet ingredients in a separate bowl. Slowly add the wet ingredients to the dry, combining until forming a dough. Kneed the dough for several minutes by hand.

  3. Preheat oven to 350 degrees.

  4. Press dough into an 8x8 baking dish. Score the dough with a sharp knife, cutting only about halfway through the dough (don't cut to far, you want then to hold together through grilling.) 8 lines down, then one through the middle making 16 ribs. This will make it easy for them to pull apart after you grill them.

  5. Bake ribs for 25 minutes

  6. Remove ribs from oven, and let cool enough to handle.

  7. Baste ribs with BBQ sauce, then transfer to a heated grill.

  8. Grill on each side for about 5 minutes, adding more sauce while grilling. You just want to get a little char on them, and some nice grill marks before taking them off of the grill.

  9. Once done pull the ribs apart, and serve with extra BBQ sauce for dipping.

Serves 4.


Seitan Lemon Piccata with Mashed Potatoes

IMG_8205.jpg

The first seitan I ever leaned to make was a basic, simmered seitan.

If you don’t know, then seitan is basically wheat meat made from vital wheat gluten. And as long as you do not have a gluten intolerance, its an excellent source of vegan protein! It is also really inexpensive so an added bonus for sure!

Noting fussy, just make the dough, divide it, simmer it, and its ready to go.

This seitan works well for all kinds of recipes like this piccata. It is pretty versatile and we use it in fajitas, cheese steaks, fry it up to make wings, stir fry, all kinds of things.

The beauty of it is how easy it is, and how well it freezes! If you have ever made dough of any kind, you can make seitan. There are so many methods for making faux meats but this basic method is still my go to.

I often make 2 batches and toss them in the freezer. I quarter each batch so I can thaw smaller portions quickly for fast weeknight dinners.

If you are feeling like make a more traditional vegan chicken piccata you can try making my easy vegan chicken breast. It really is easy, and although you do bake it verses simmering it, it is a very convincing chicken seitan. And it is very, very simple and easy to make. It does contain soy, so if you are soy free the easy basic seitan is probably a better choice.

This piccata is so flavorful and the seitan gets so nice and crispy on the outside. The buttery, lemony, garlicky sauce is perfection and who doesn’t love a glorious creamy pile of mashed potatoes.

So if you have been looking for the perfect vegan piccata, look no further. And I can not encourage you enough to just make a double batch of the seitan so recipes like this are twice as easy and quick when you are ready to make them!


INGREDIENTS:

  • 1 batch seitan (all 4 pieces) or 4 easy vegan chicken breast cut in half length wise for 8 thin breasts.

  • 2 lemons

  • 3 tablespoons capers

  • 2 tablespoons vegan butter, like Earth Balance

  • 3 tablespoons to 1/4 cup olive or grape seed oil (this amount depends on the size of the pan you are using to fry the seitan )

  • 1 cup vegetable broth

  • 3 tablespoons chopped flat leaf parsley

  • 2 teaspoons minced garlic

  • 1/3 cup four

  • 1/3 cup organic corn starch

  • salt and pepper to taste

  • 1/4 cup white wine (optional)


Mashed Potatoes

  • 6 medium russet potatoes

  • 2 tablespoons vegan butter

  • 1/4 cup vegan cream cheese or vegan sour cream

  • 1/4 cup plant based milk (give or take)

  • salt and pepper to taste


COOKING INSTRUCTIONS:

  1. With a very sharp knife, carefully slice all 4 pieces of seitan into cutlets. You should be able to get about 3 cutlets from each piece.

  2. Mix flour and corn starch in a shallow dish, and dredge the cutlets in the mixture. Make sure you fully coat each piece.

  3. Heat oil in a med/large skillet on medium heat. You may need more or less oil depending on the size of your pan. You need just enough oil in the bottom of your pan to quickly fry each side the seitan cutlets.

  4. Once the pan is good and hot, add the cutlets and cook each side a few minutes, or until they begin to brown and get crispy.

  5. Place finished cutlets on a paper-towel-lined plate.

Mashed Potatoes

  1. Peel, dice, and boil potatoes in a large pot while preparing the piccata sauce.

  2. Once potatoes and soft enough to pierce with a fork, drain the water, and return potatoes to the pot you boiled them in.

  3. Mix in cream cheese or sour cream, and butter. Mash with a hand masher, or use an electric hand mixer.

  4. Add enough milk to get the potatoes to the consistency you prefer using 1/4 cup of plant based milk, give or take.

  5. Add salt and pepper to taste.


Piccata sauce

  1. Wipe out the pan you just used for the seitan.

  2. Reheat the pan on medium heat, and add the 2 tablespoons of vegan butter.

  3. Add the garlic, and wine if using. Let the alcohol cook out of the wine for a few minutes, then add the juice from 1 and 1/2 lemons, vegetable broth, capers, half of the parsley, and salt and pepper to taste.

  4. Let sauce simmer for about 5 minutes on low heat.

Prepare you plates by adding mashed potatoes, topping with a few cutlets, and drizzling the piccata sauce over each plate. Garnish with the remaining parsley and a thin lemon slice (using your remaining half a lemon)

Serves 4 - 6.

Quinoa Black Bean Veggie Burger

If you have been on the hunt for a healthy, and hearty homemade veggie burger, I think we have what you have been looking for.  This smokey, flavorful  burger is packed full of veggies, with protein rich quinoa and black beans. This burger will leav…

If you have been on the hunt for a healthy, and hearty homemade veggie burger, I think we have what you have been looking for. This smokey, flavorful burger is packed full of veggies, with protein rich quinoa and black beans. This burger will leave you full, and satisfied with little guilt.. They also freeze really well, so this veggie burger is also great for meal prep! So fire up the grill and give this healthy and delicious burger recipe a try!

INGREDIENTS:

  • 1 cup cooked quinoa

  • 1 cup bread crumbs or panko

  • 1 red bell pepper

  • 1/2 red onion

  • 1 cup carrots

  • 1/2 cup shredded beets

  • 1 and 1/2 cups broccoli

  • 1 can drained and rinsed black beans

  • 1 8 ounce can tomato sauce

  • 1 flax egg

  • 1/2 - 3/4 cups whole wheat flour

  • 1 teaspoon turmeric

  • 1 teaspoon smoked paprika

  • 1 teaspoon minced garlic

  • 1 - 2 teaspoons liquid smoke (optional)

  • 1 teaspoon salt

  • pepper to taste

COOKING INSTRUCTIONS:

  1. Dice veggies and sauté in pan with preferred oil until tender. Rinse and drain beans, and add them to the veggies while sautéing.

  2. Once veggies and beans are done, put them in a food processor or blender and pulse, just to break them down and mix them up a bit.

  3. Mix quinoa, bread crumbs, and tomato sauce in large bowl.

  4. Combine veggies with quinoa and bread crumbs.

  5. Add spices and flax egg and mix until combined.

  6. Add flour a little at a time, just until it has thickened up a bit and you can form burgers.

  7. Form burgers and cook in skillet or grill until cooked through. About 10 minutes or so.

This recipe will make around 10 burgers. These burgers freeze nicely as well, making them a perfect recipe for meal prepping.

Vegan crab puffs

IMG_7389.jpg

These little “crab” puffs are so delicious and addictive that you may not be willing to share. But if you can find it within yourself to let a few go, they will make a perfect party snack, or even a wonderful topping to a light summer salad.

I love to use jackfruit to mimic crab! I use it in our crab cakes, and even vegan crab rangoons. Jackfruit is mild in flavor with a hint of sweetness, so it works perfectly to take on the flavors of the spices in these crab puffs. The texture is also pretty spot on for lump crab meat, so it is the perfect imitator when trying to recreate vegan versions of crab recipes!

These vegan crab puffs are so tasty and so cute, they will not last at a party or even at your dinner table. We also included a recipe for a horseradish aioli that is perfect for dipping these tasty little bites that is beyond delicious!

I also like the crab puffs as a topping for a salad in the summer or just a light dinner on their own, not party required!

So if you are looking for the perfect light summer time bite, give these crab puffs a try! I don’t think you will be sad you did, and you might surprise a few friends who may not ever even guess these puffs were vegan!


INGREDIENTS:

Crab Puffs:

  • 1 can of jackfruit in brine

  • 3 tablespoons vegan mayo

  • 1/4 finely chopped small onion

  • 2 to 3 teaspoons dulse flakes

  • 1/2 cup panko bread crumbs

  • 1 tablespoon lemon juice

  • 1 teaspoon Old Bay seasoning

  • 2 teaspoons dijon mustard

  • 1/8 teaspoon cayenne pepper

Batter:

  • 2 flax eggs

  • 1/4 cup dairy free milk

  • 1/4 cup of beer or club soda

  • 1/2 cup all purpose flour

  • 1 teaspoon Old Bay seasoning

  • 1/2 teaspoon salt

  • 1 teaspoon baking powder


COOKING INSTRUCTIONS:

  1. Drain jackfruit and add pieces to a food processor, pulsing a few times to break up. Be careful not to over process. Just pulse enough to break up the pieces to resemble crab meat.

  2. Mix jackfruit and remaining puff ingredients into bowl until well incorporated. Make sure you can form a ball with the mix that holds together. If the mix seems too wet, add a little more panko. If it seems too dry, add a little more mayo.

  3. Form balls from the mixture with a small cookie scoop or small spoon, and place on a cookie sheet.

  4. Place cookie sheet in the freezer for about 30 minutes so the crab puffs firm up.

  5. Mix all of the ingredients for the batter together in a medium sized bowl.

  6. In a deep skillet, begin heating an inch of oil over medium heat.

  7. While oil is heating, remove crab puffs from the freezer and gently dip one at a time into the batter. You don’t want them falling apart so be careful to just get them coated then remove from the batter.

  8. Work in batches depending on how many will fit in your pan at one time. Coat what will fit and pop the rest back in the freezer.

  9. Fry each batch for about 5 minutes until the they are golden brown all over.

  10. Place cooked puffs on a cooling rack on top of a paper-towel-lined cookie sheet, and keep warm in a 200 degree oven.

  11. Continue coating and frying the remaining puffs, storing finished puffs in the 200 degree oven.

  12. Serve finished puffs with a side of horseradish aioli. (recipe below)


Horseradish Aioli:

  • 1/3 cup vegan mayo

  • 2 teaspoons prepared horseradish

  • 1 teaspoon dijon mustard

  • 1 teaspoon minced garlic

  • 1 scallion finely chopped

  • Juice from 1/2 lemon

  • 1/2 teaspoon salt

Whisk all ingredients together for the aioli, and server on the side with crab puffs.


Beyond Meatball Subs

Beyond Meatball Subs

Beyond meat brand burgers are truly amazing. They really are one of the closet to "meat" substitutes available in stores right now. What I love most about them, is that you can thaw the patties and use them in place of meat in a TON of recipes. Each patty is 1/4 pound so 4 will equal a pound of meat. They are not hard to find, a lot of stores carry them now.

INGREDIENTS:

  • 4 thawed Beyond Beef burgers

  • 1/4 cup panko bread crumbs

  • 1 teaspoon minced garlic

  • 1 teaspoon Italian seasoning (a mix of thyme, sage, basil, marjoram, rosemary, and oregano) if you do not have Italian seasoning feel free to add a combo of any of the listed spices

  • 1 teaspoon tomato paste

  • 1 flax egg

Sauce

  • 1 onion, diced

  • 1 carrot, diced

  • 1 28 ounce can crushed tomatoes

  • 1 small 14.4 oz can diced tomatoes

  • 1/3 red wine (optional)

  • 2 teaspoons crushed garlic

  • 1 teaspoon salt

  • 2 teaspoons Italian seasoning

COOKING INSTRUCTIONS:

Meatballs

  1. Mix thawed burgers, panko bread crumbs, garlic, spices, and flax egg together in a bowl.

  2. Once well combined, form meatballs with a small scoop, or spoon, and place them on a baking pan. You can line the pan with parchment paper for easier clean up.

  3. Bake at 350 degrees for 30 minutes.

Sauce

  1. Sauté onions and carrots in 1 teaspoon of oil, and 1 teaspoon of salt, in a large pot for 5 minutes.

  2. Add the wine, and let it cook for 2 minutes.

  3. Add the remaining ingredients, and let the sauce simmer for 30 minutes.

  4. Add the cooked meatballs, and let simmer in the sauce for 15 minutes.

  5. Use whatever bread you like to make the sandwiches. We typically buy a baguette, and cut it into sections. French bread is often plant based. Just be sure to read the label.
  6. Add the meatballs to the bread, and top with any kind of plant based cheese you like. We prefer Follow Your Heart brand because it tastes good, and also melts.

  7. Place sandwiches on a baking sheet in the oven on 350 until cheese melts.

  8. You can also add some vegan parmesan on top before serving.